How do I use Bitmovin Encoder with Wasabi?
Bitmovin Encoder is validated for use with Wasabi. Bitmovin's video encoding API uses a chunk-based cloud encoding approach to enable content to be delivered at up to 100x real time with high quality.
Prerequisites
Active Wasabi account
Active Bitmovin Encoding subscription
Configuration
The following example uses the Bitmovin dashboard to create the encoding and then connect to Wasabi. You can alternatively use Bitmovin's API directly from an HTTP API client (like Postman).
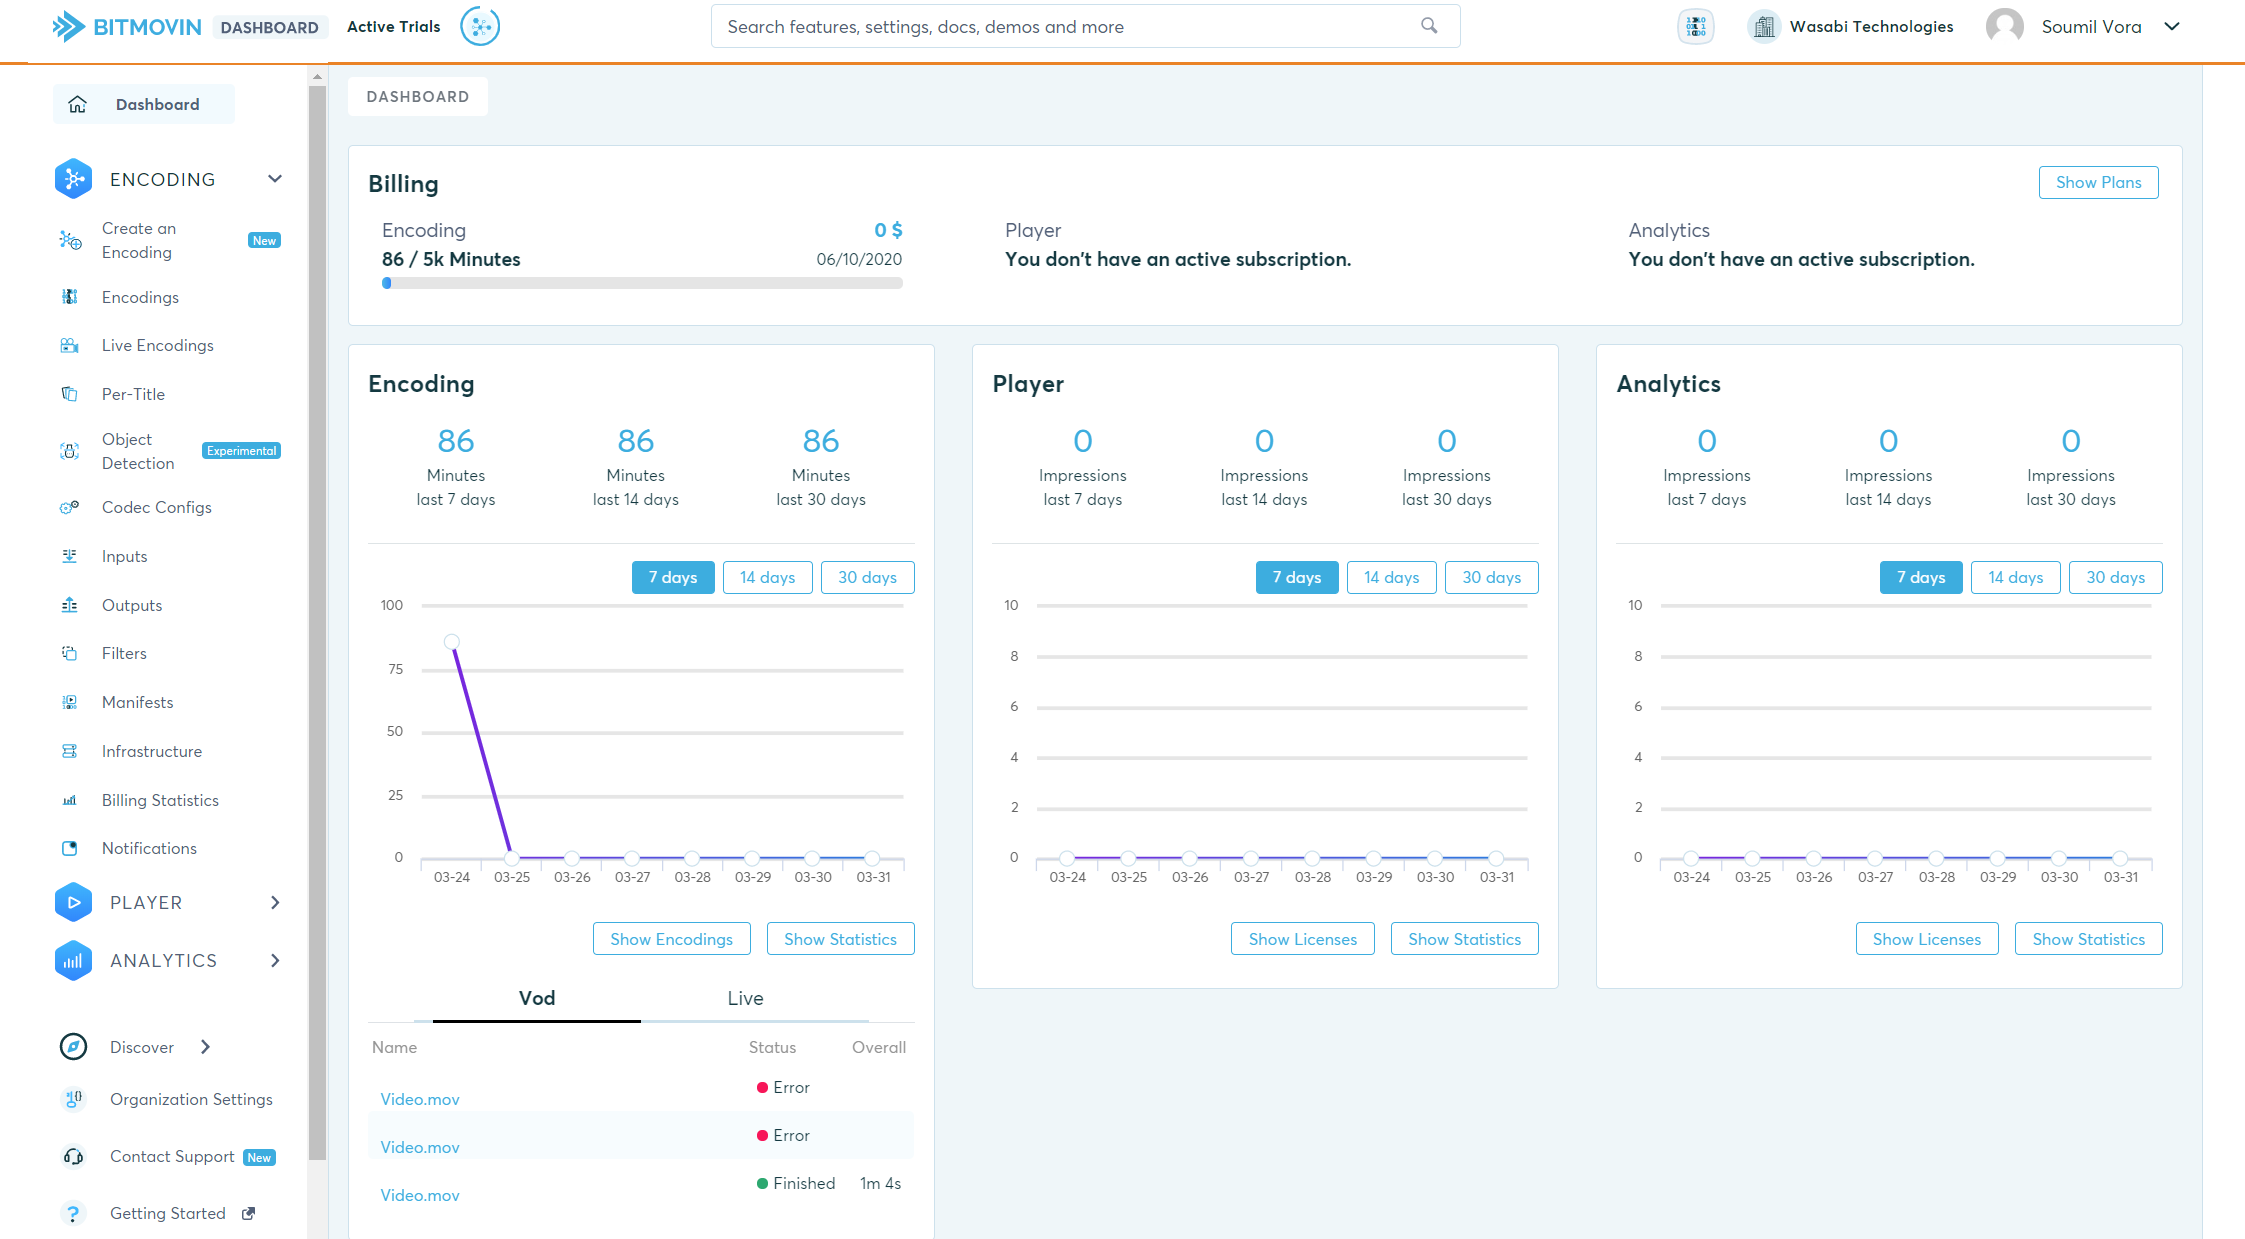
Log in to the Bitmovin Dashboard.
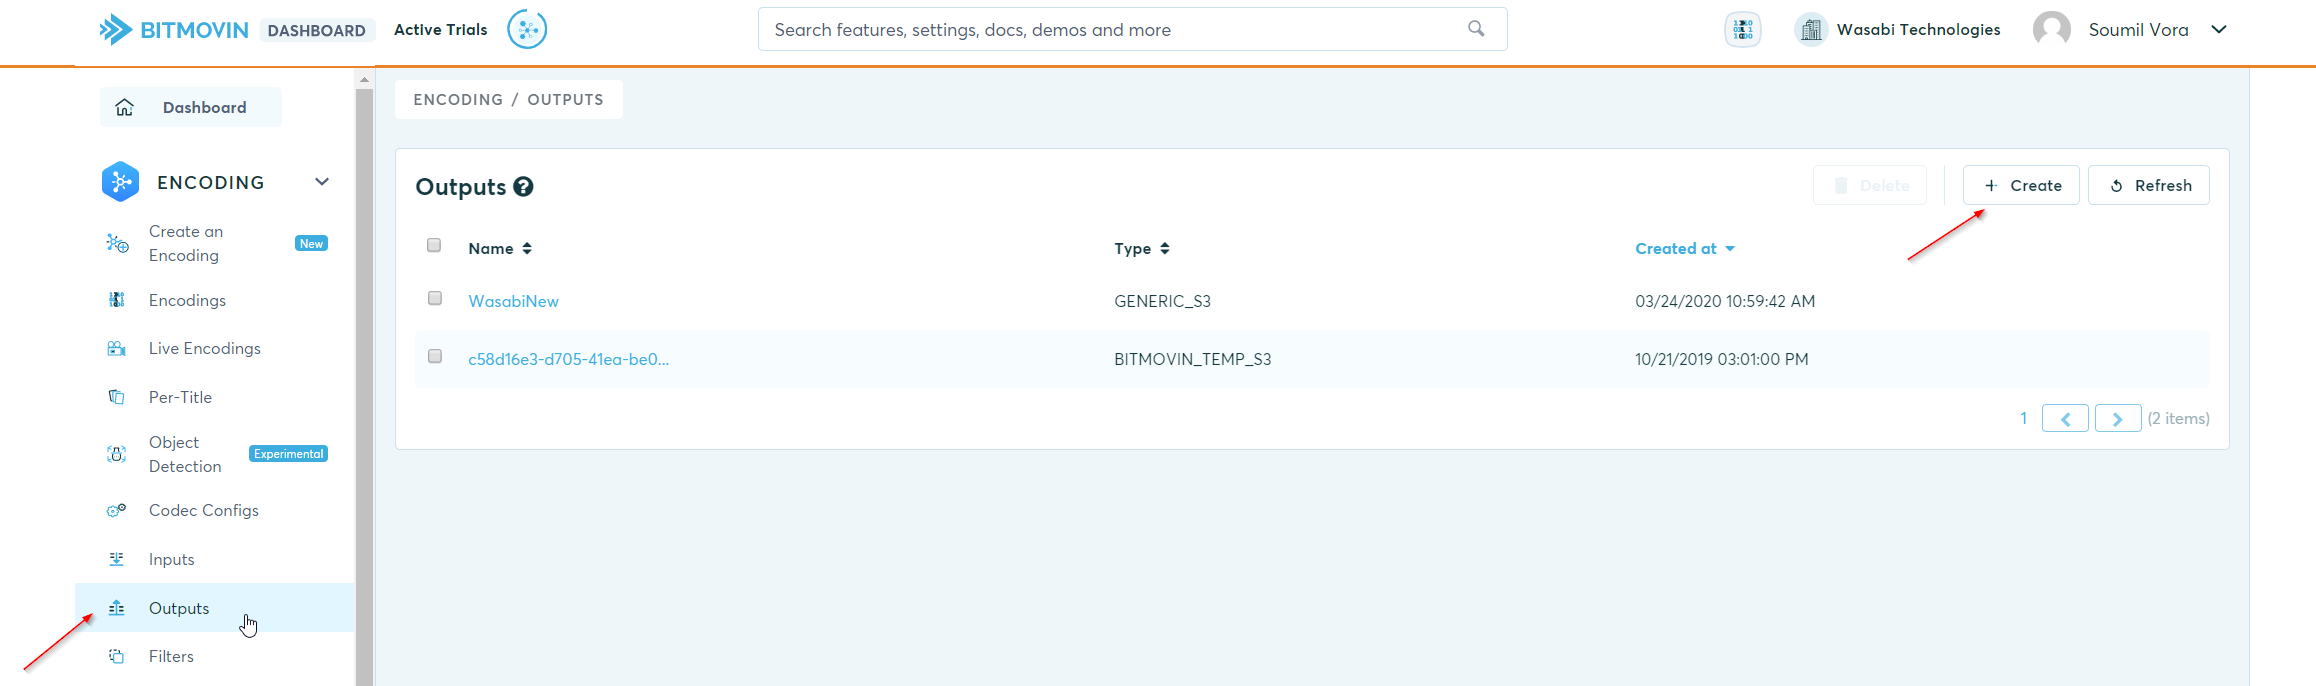
Before creating an encoding, configure and store Wasabi as an output. Click Outputs and then Create, as shown below.
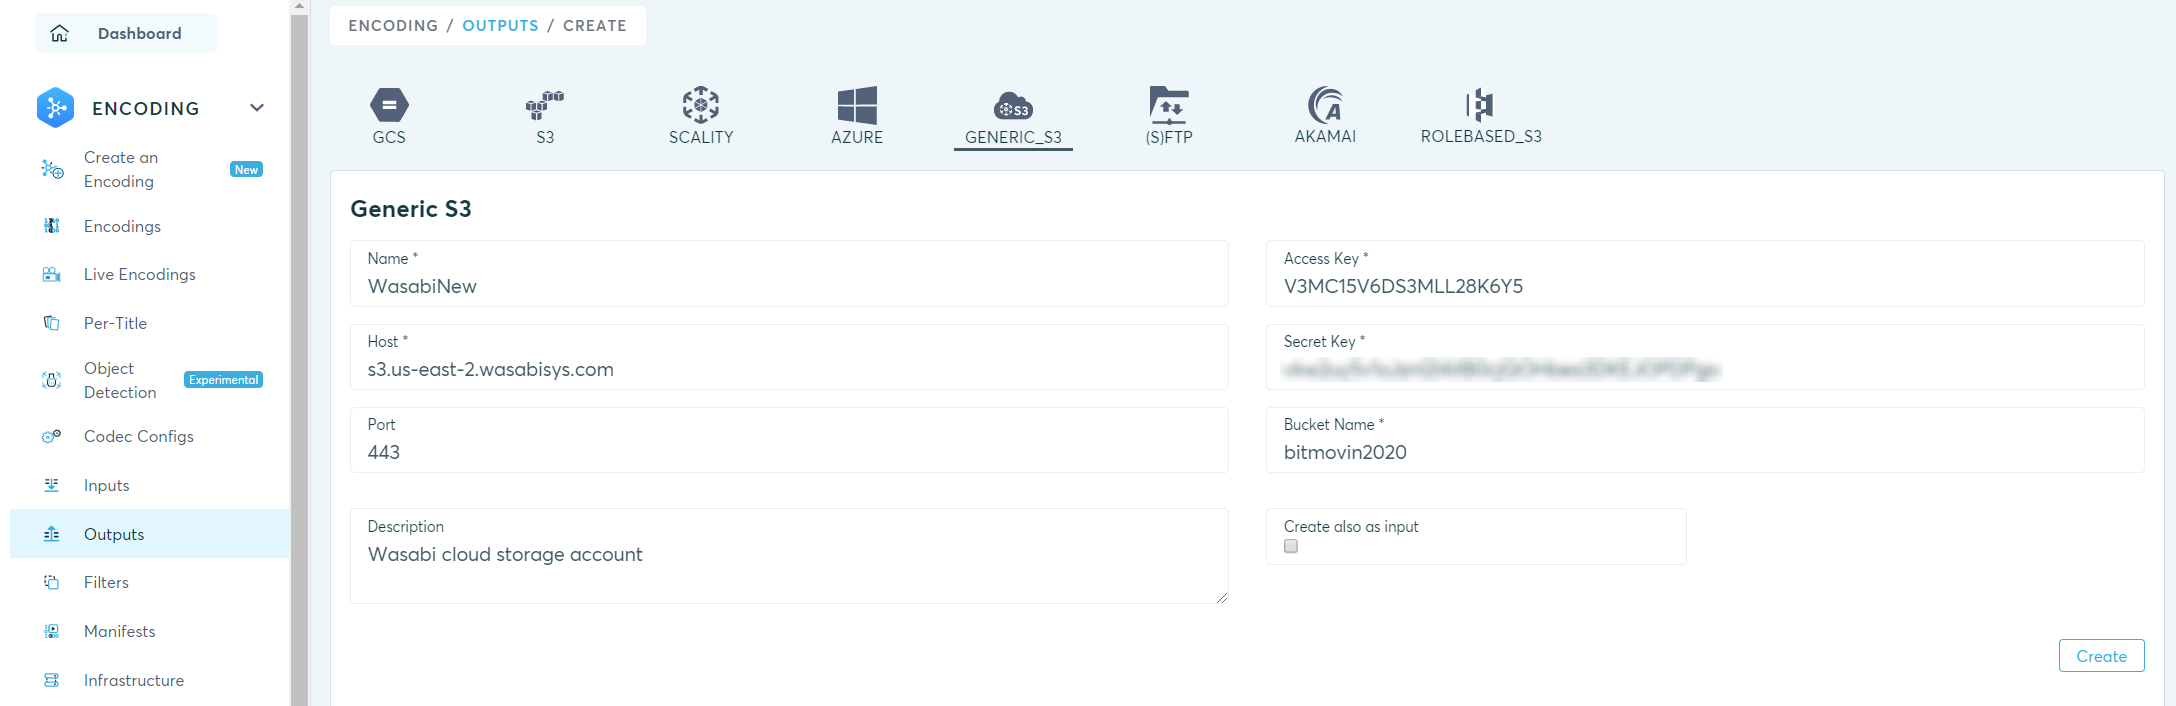
Select Generic_S3 from the Output list and enter the information as shown below. For information on the different Wasabi region URLs, refer to Service URLs for Wasabi's Storage Regions. Click Create.
You can also use Wasabi as an Input. Click on Inputs and then Create, as shown below.
As of today, configuring Wasabi as a Generic_S3 Input causes an error on the Bitmovin encoding process. However, there is a simple workaround which will be explained below.
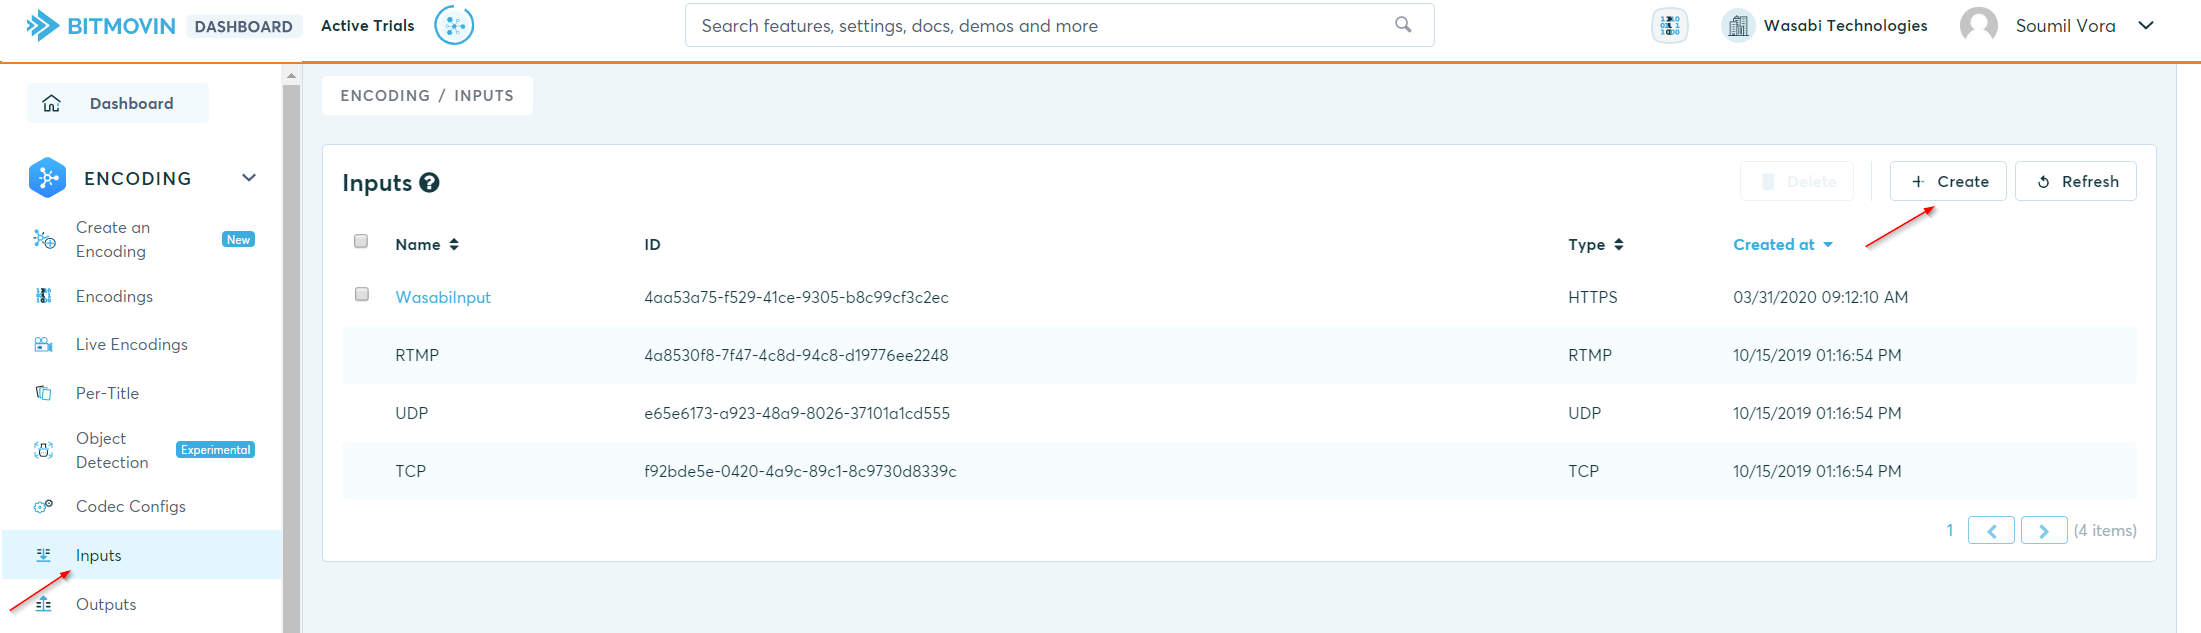
Select HTTP(S) and enter the appropriate Wasabi service URL for your bucket. Click Create.
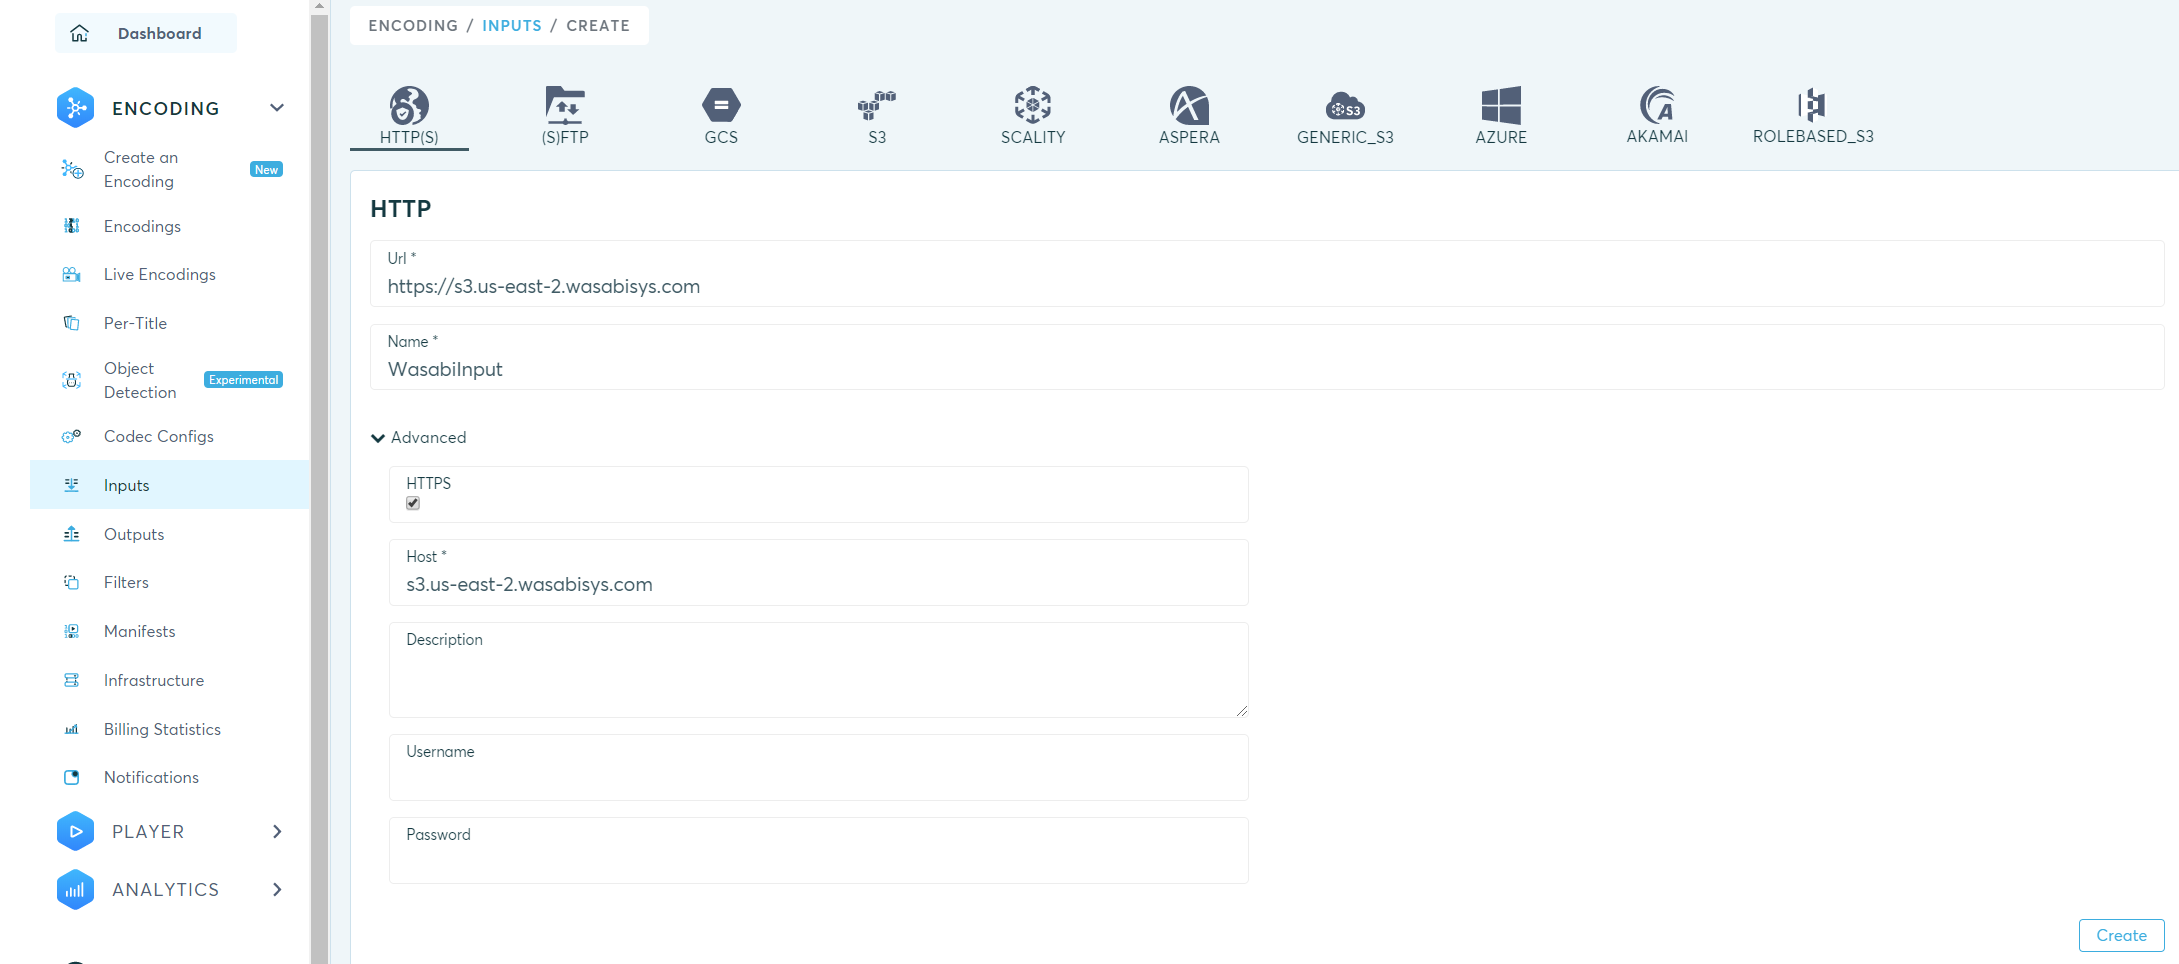
The source file to be encoded will need to be set to Public on your Wasabi bucket. For more detail on how to set folders to Public, review How Can I Make a Bucket or a Folder inside a Bucket Public?.
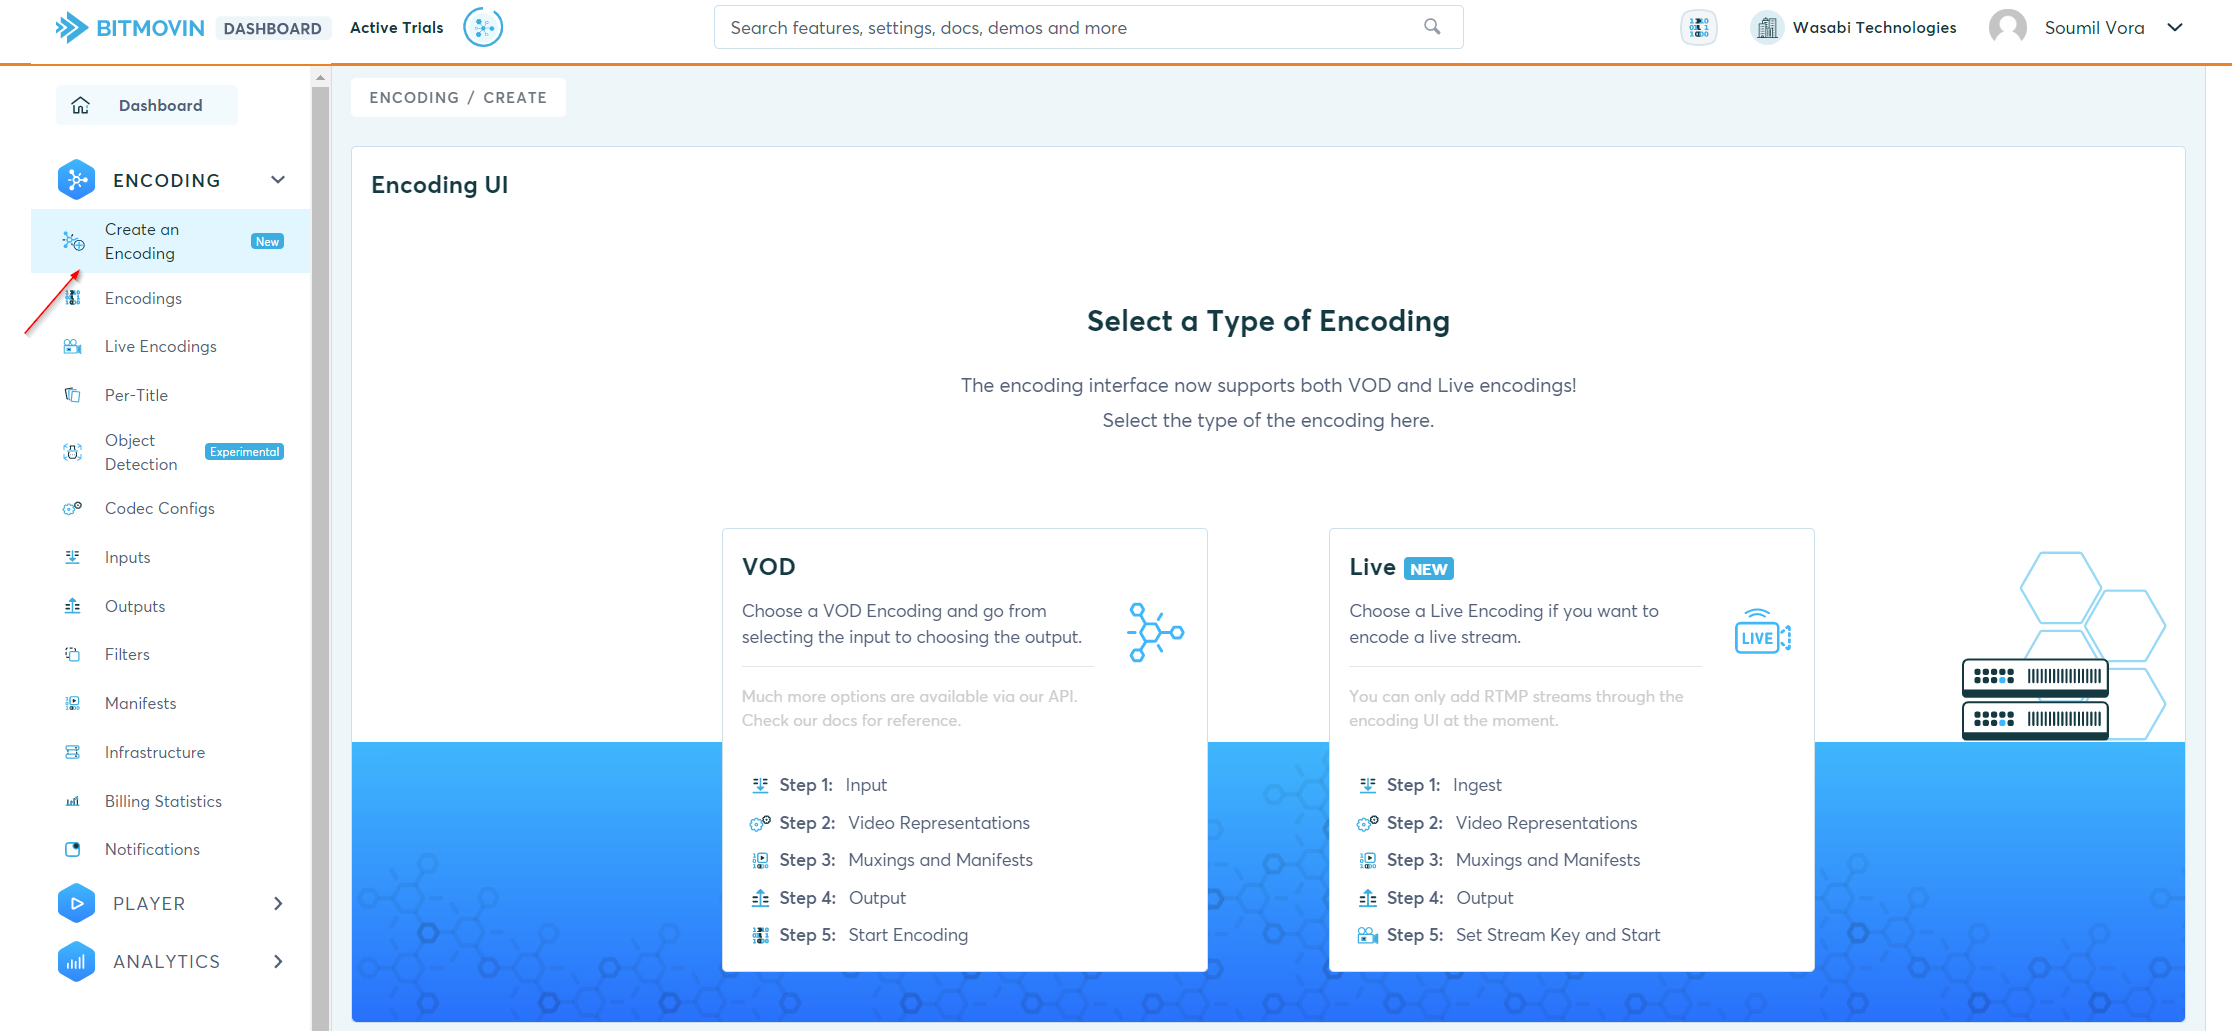
You will now create an encoding. Click Create an Encoding. In this example, we are using the VOD option.
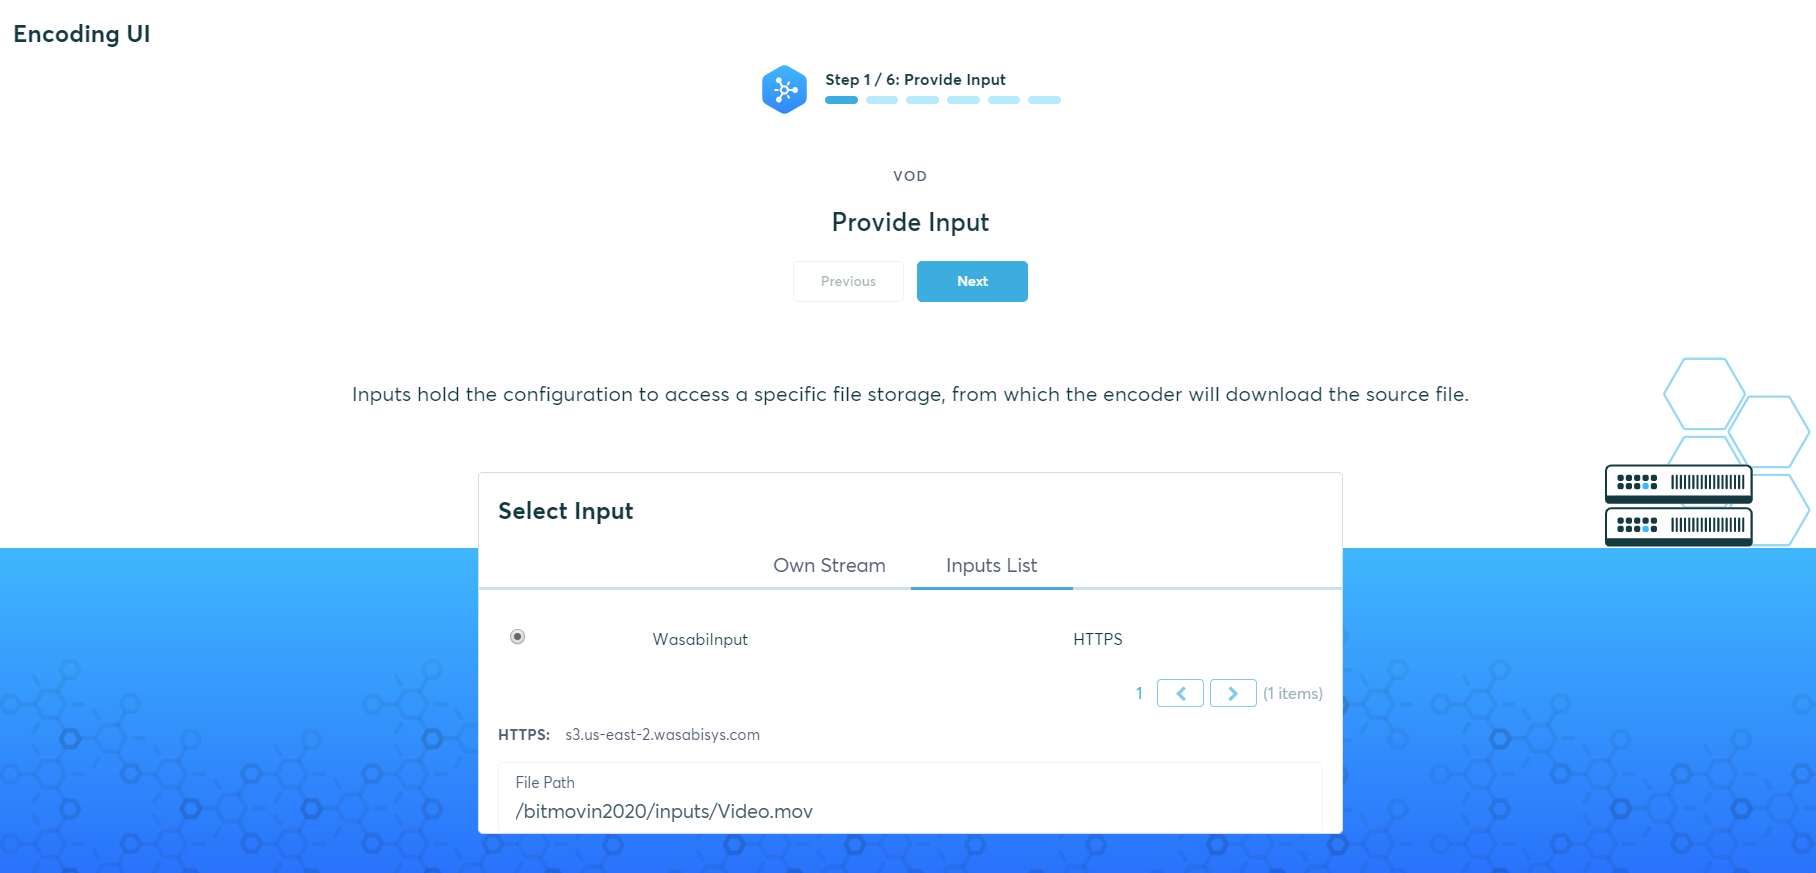
Select the Input created in Step 5. Enter the File path (for example, bucket name/folder/object), as shown below. Click Next.
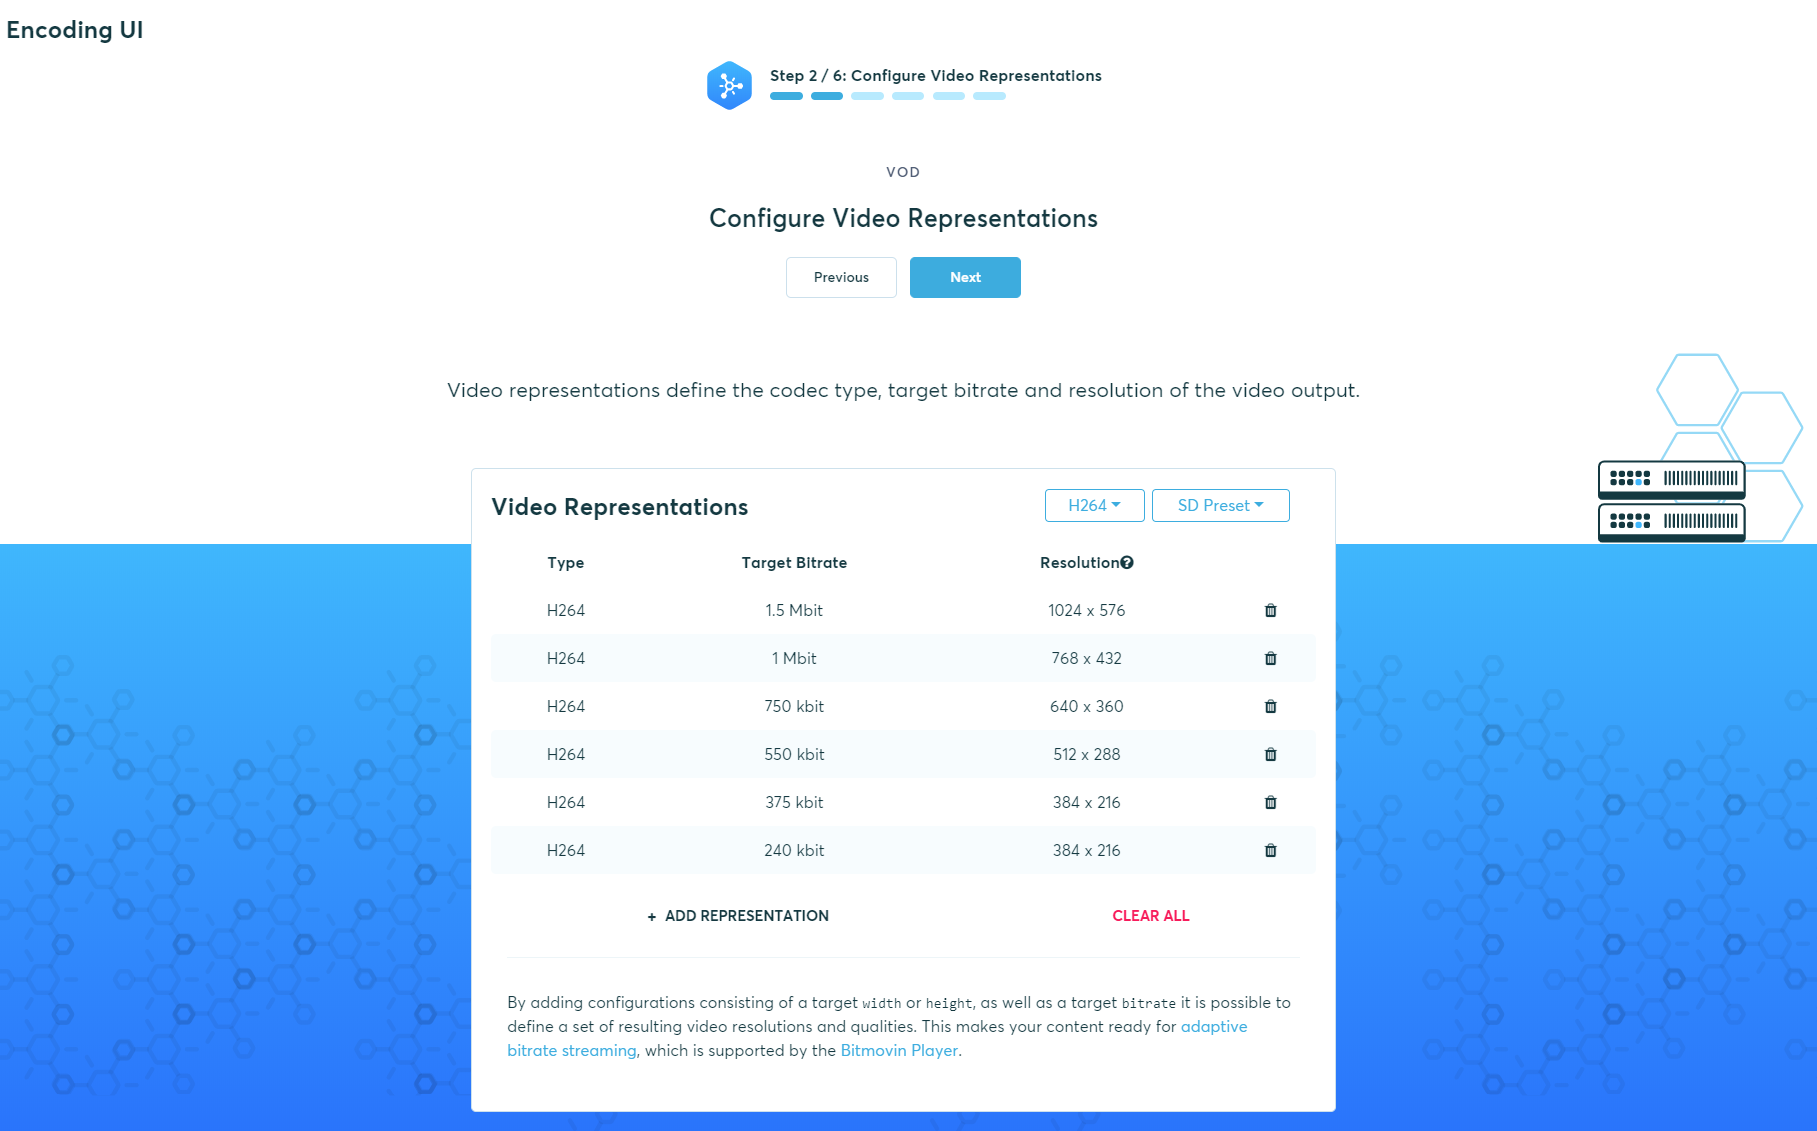
Select the appropriate Video codecs from the drop-down box. Click Next.
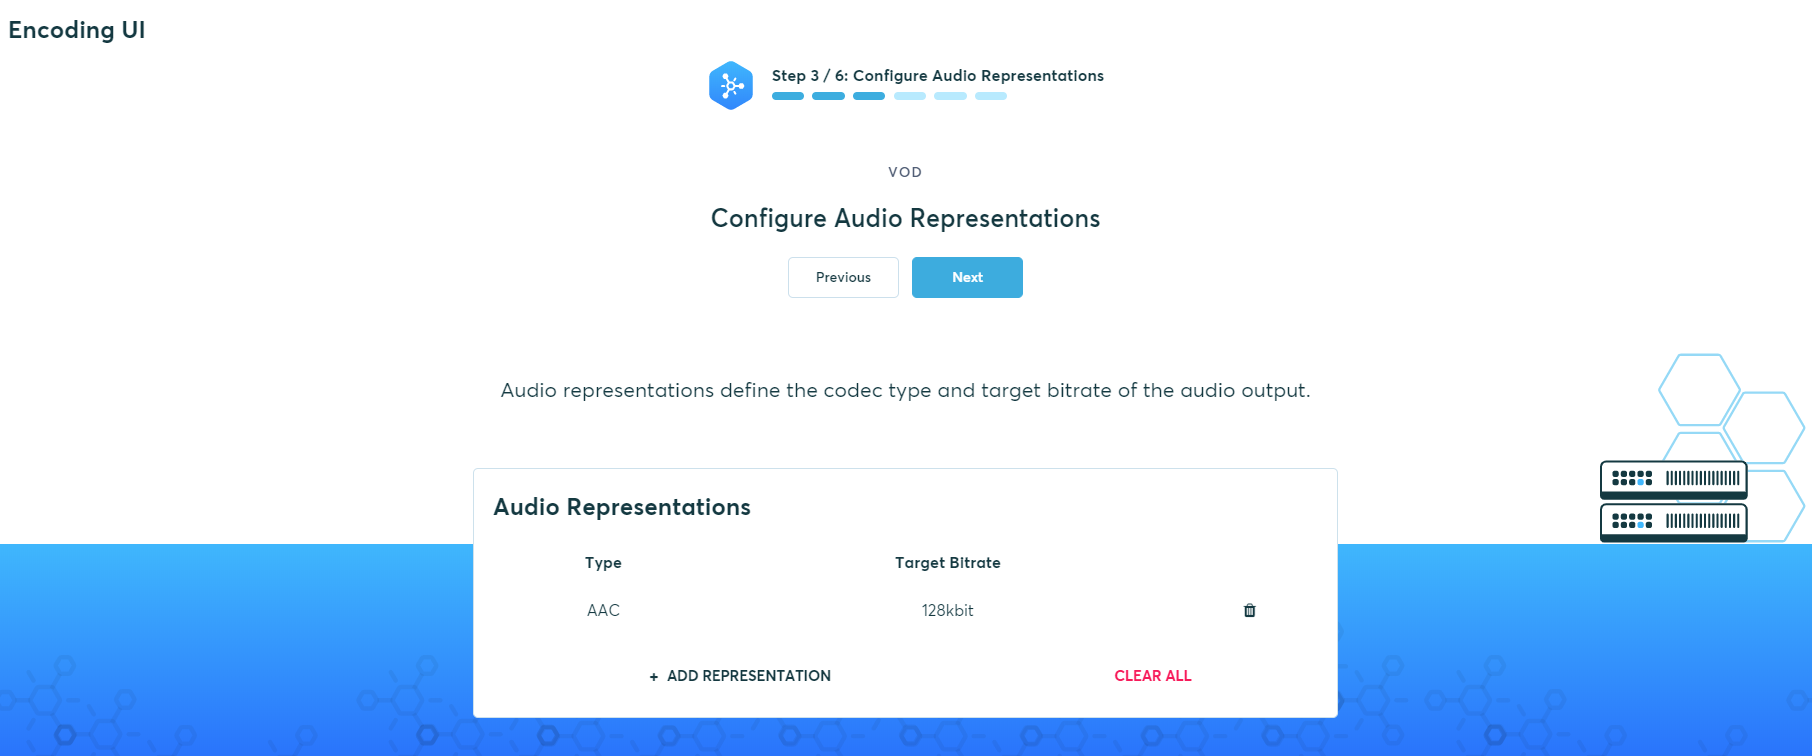
Select the appropriate Audio Representation settings and click Next.
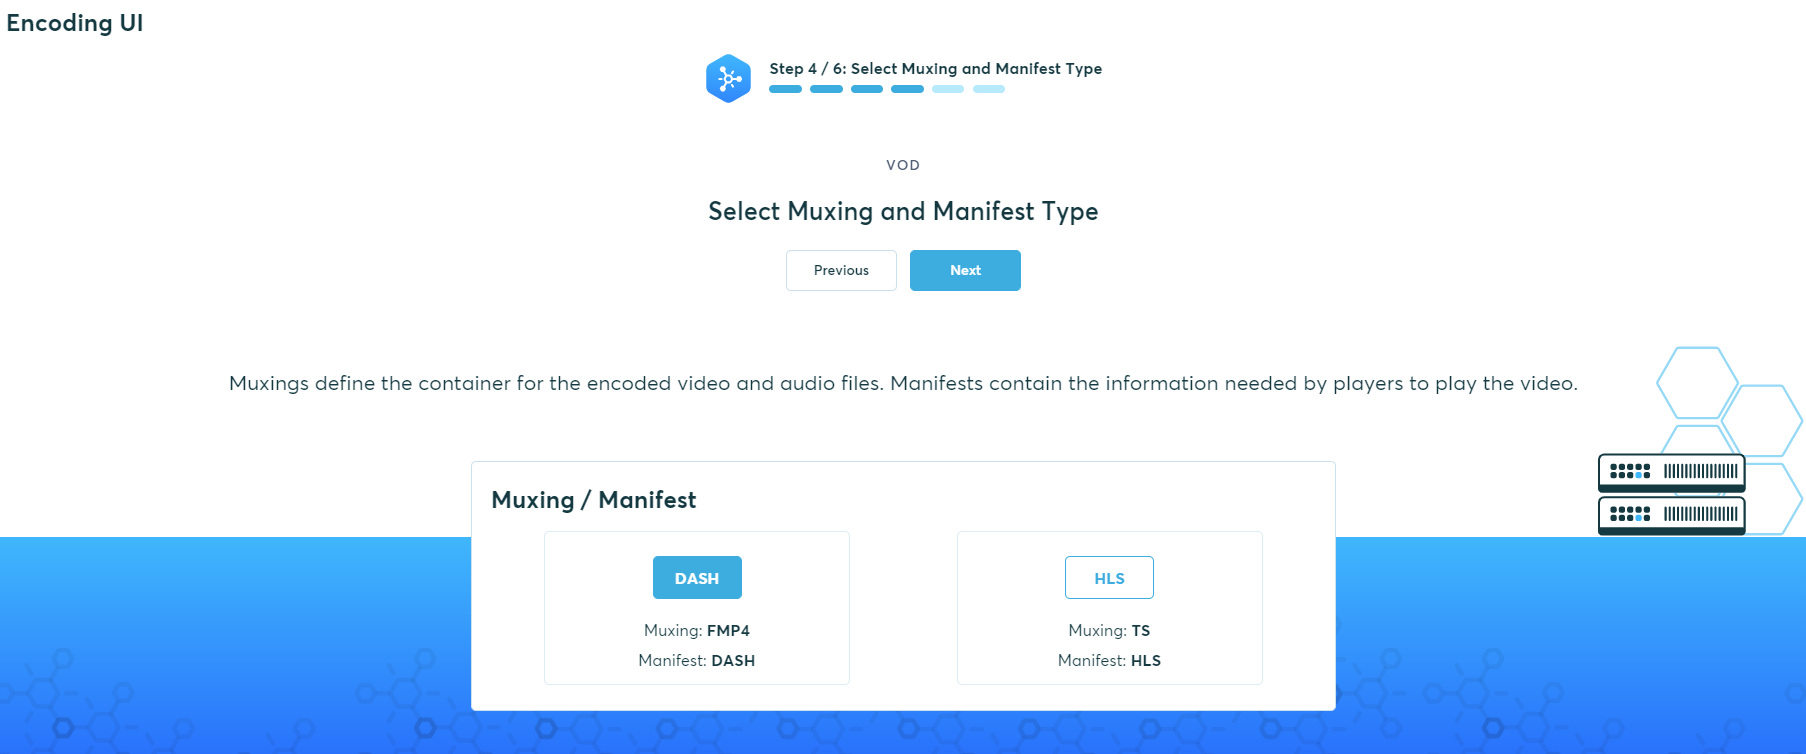
Select the appropriate Muxing and Manifest Type. Click Next.
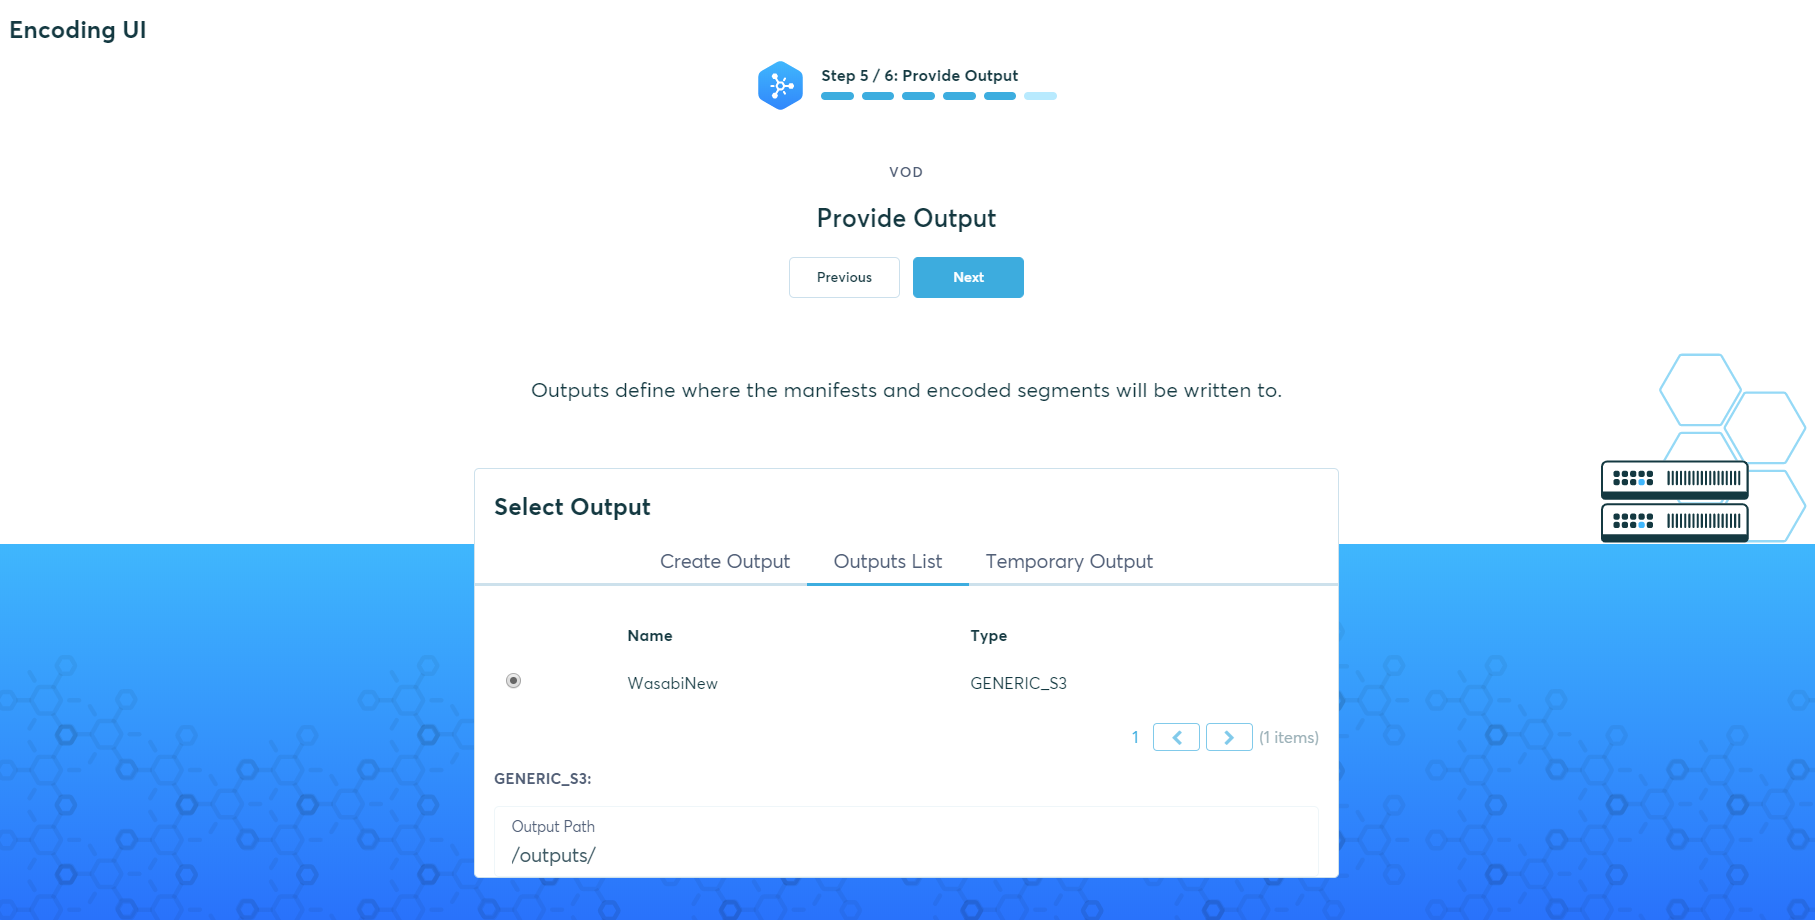
Click Outputs List. Select the output created in Step 3. Enter the Output path (just folder name). Click Next when done.
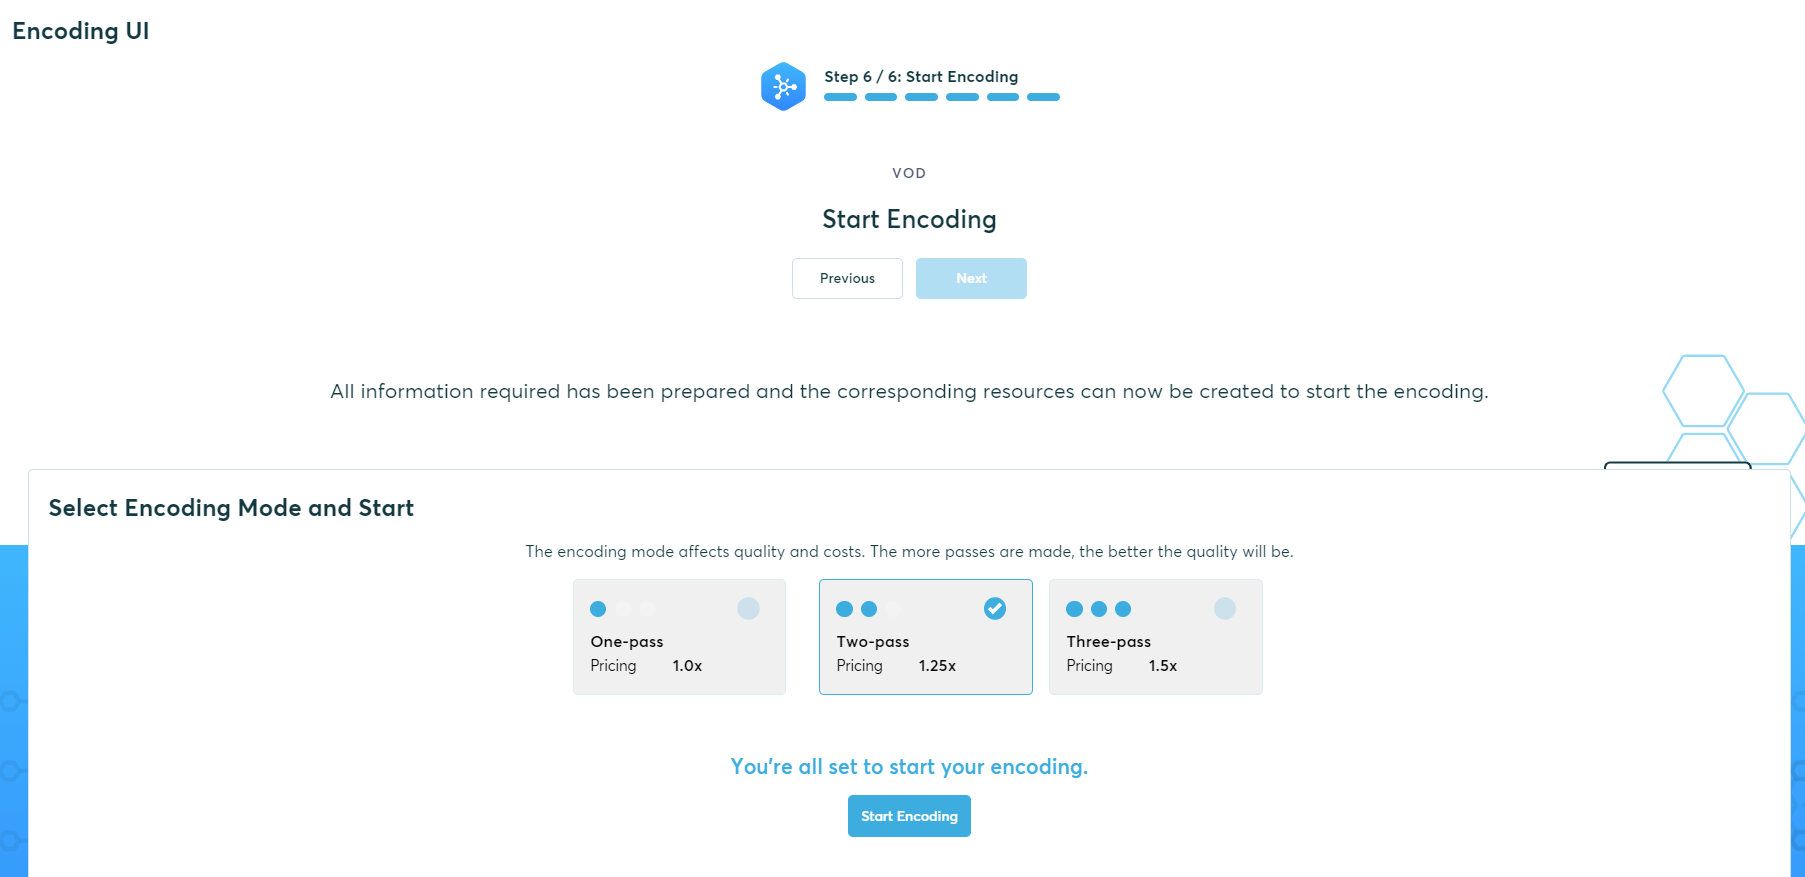
Select the Encoding mode (One-pass, Two-pass, Three-pass) and click Start Encoding.
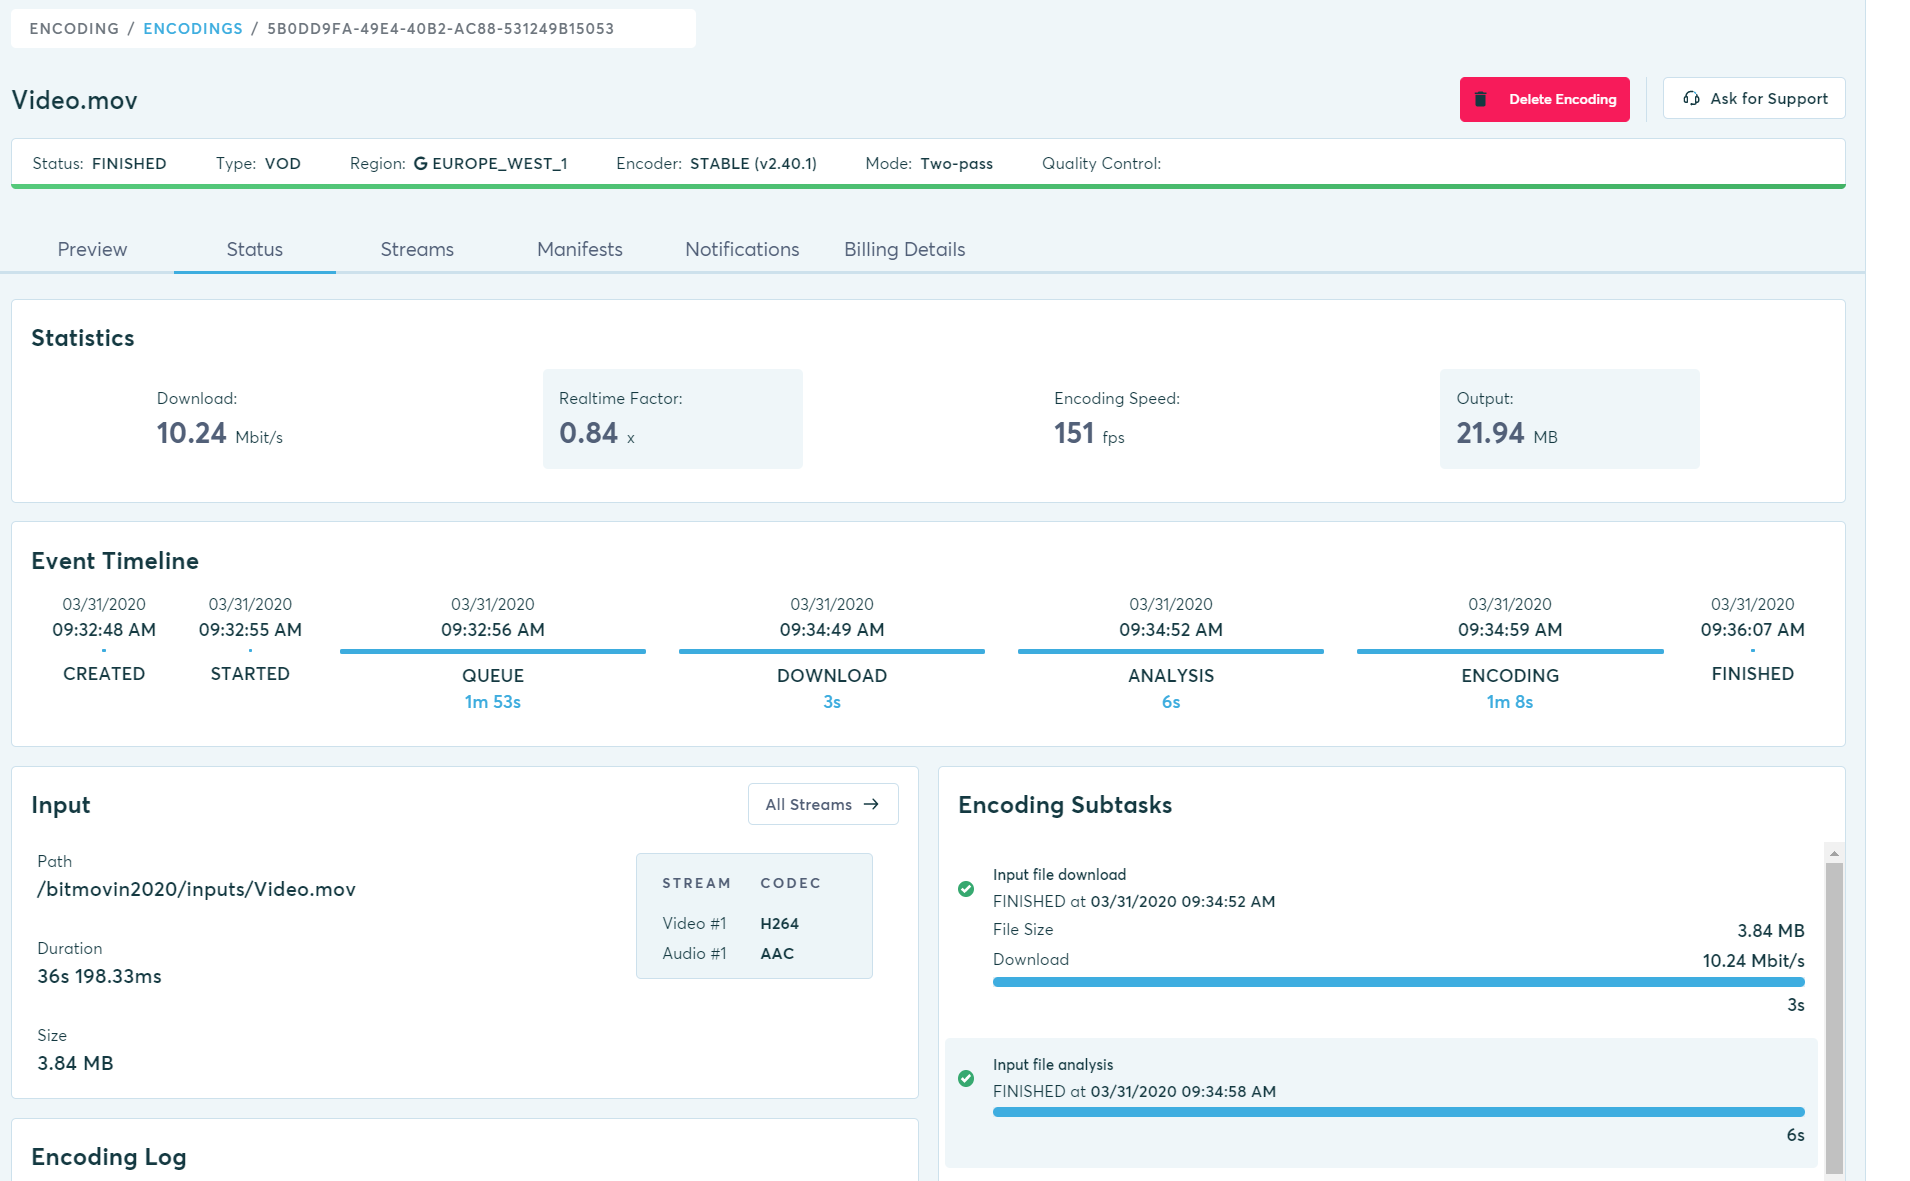
The Bitmovin encoder starts listing the requests it makes as it executes the encoding. You can then click Go to Encoding, as shown below. This will take you to the Status screen to monitor the progress.

Once the encoding successfully completes, the Status screen will report accordingly.
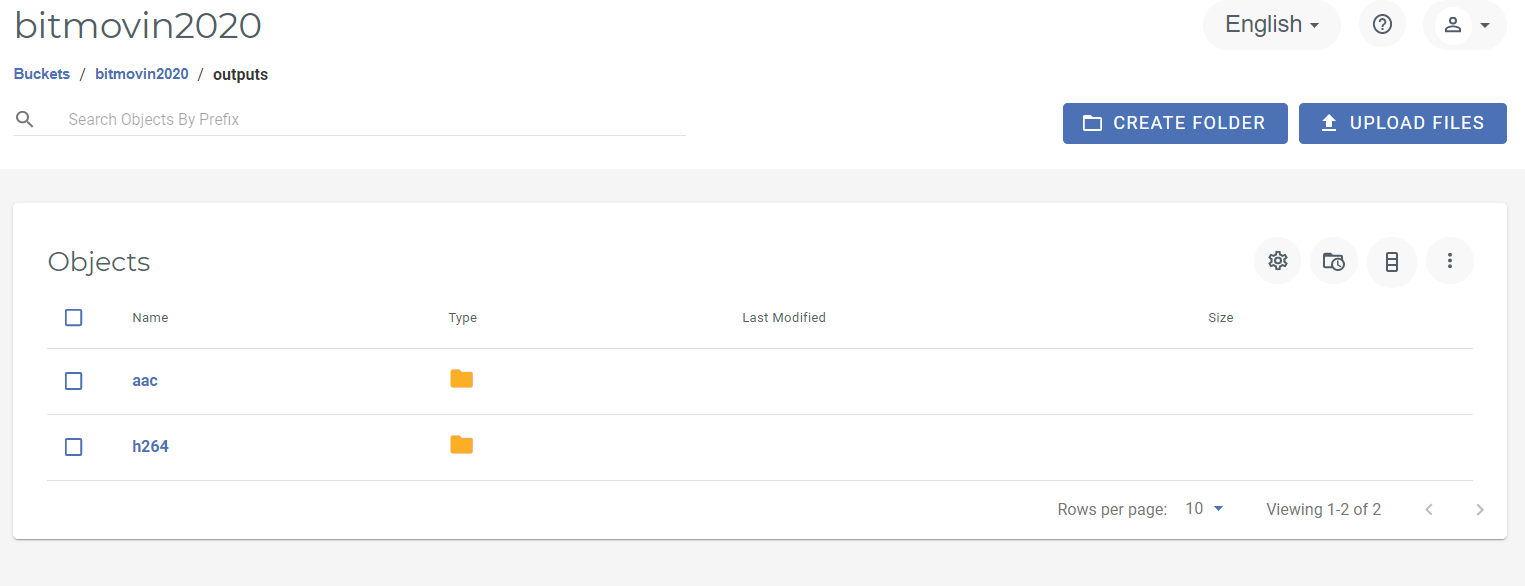
Log in to your Wasabi account to verify that the encoding was stored successfully in your bucket.