How do I use Cloudflare with Wasabi?
Wasabi is validated for use with Cloudflare CDN. To use Cloudflare CDN with Wasabi, follow the instructions below. For more information on the Wasabi - Cloudflare relationship, review Cloudflare’s article on Wasabi.
Cloudflare enables you to add CNAME records so that you can have their traffic routed through the Cloudflare system to provide security and network acceleration.
The following example uses Wasabi's us-east-1 storage region. To use other Wasabi storage regions, use the appropriate Wasabi service URL as described in Service URLs for Wasabi's Storage Regions.
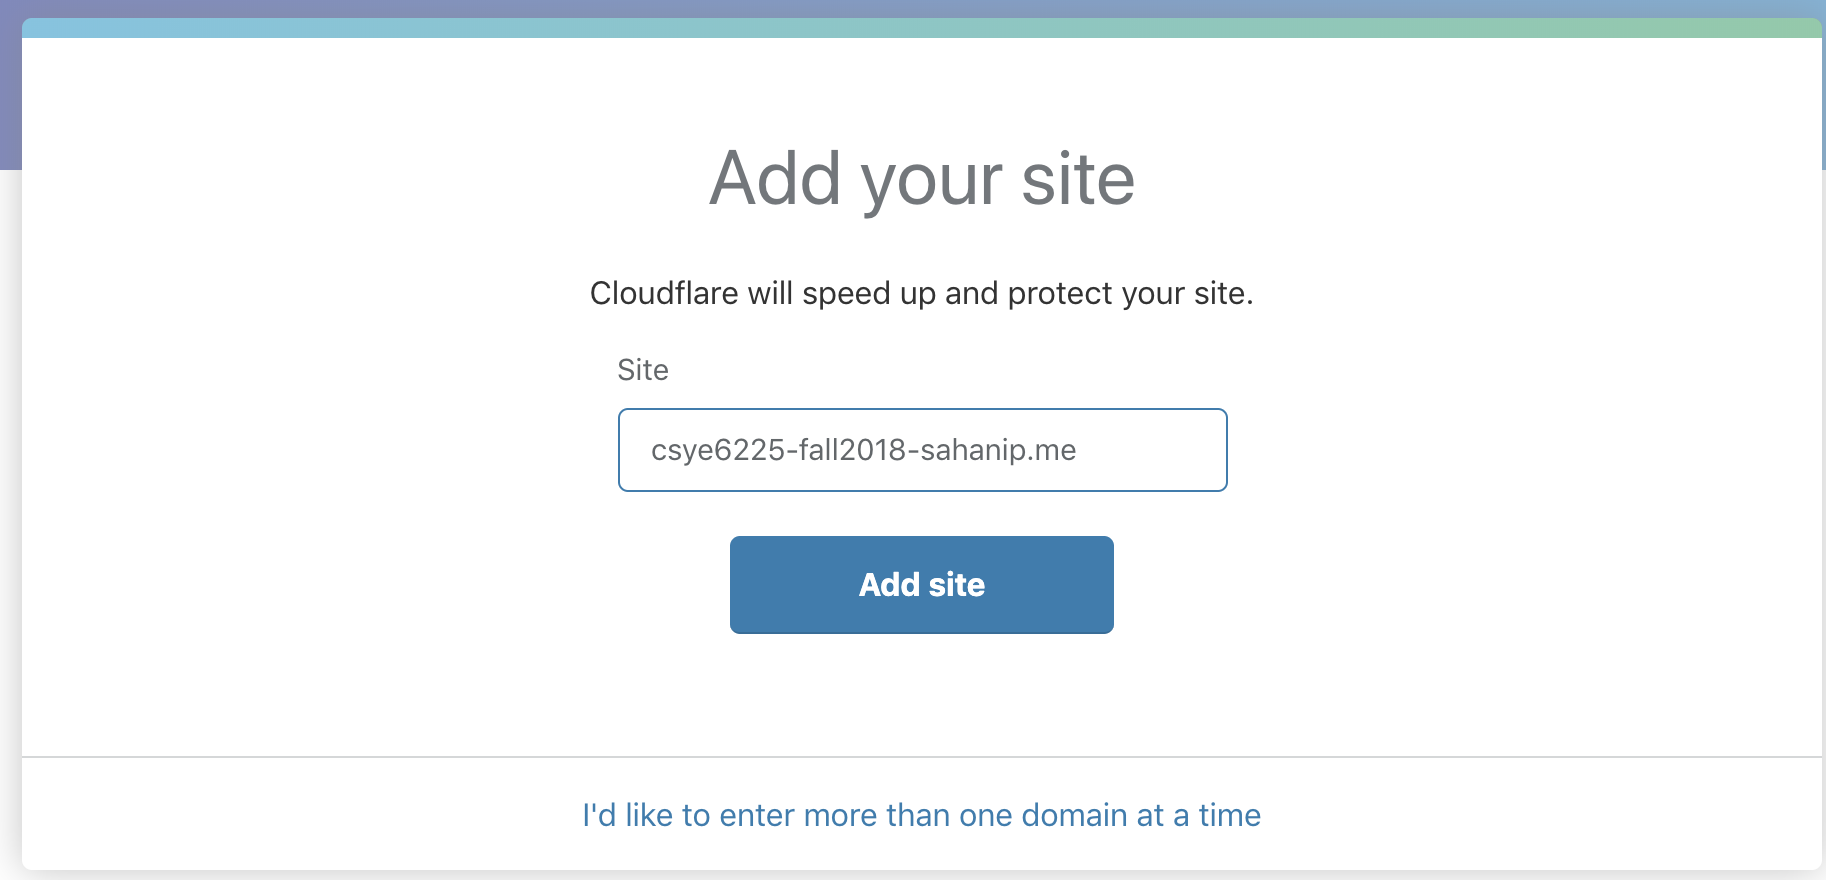
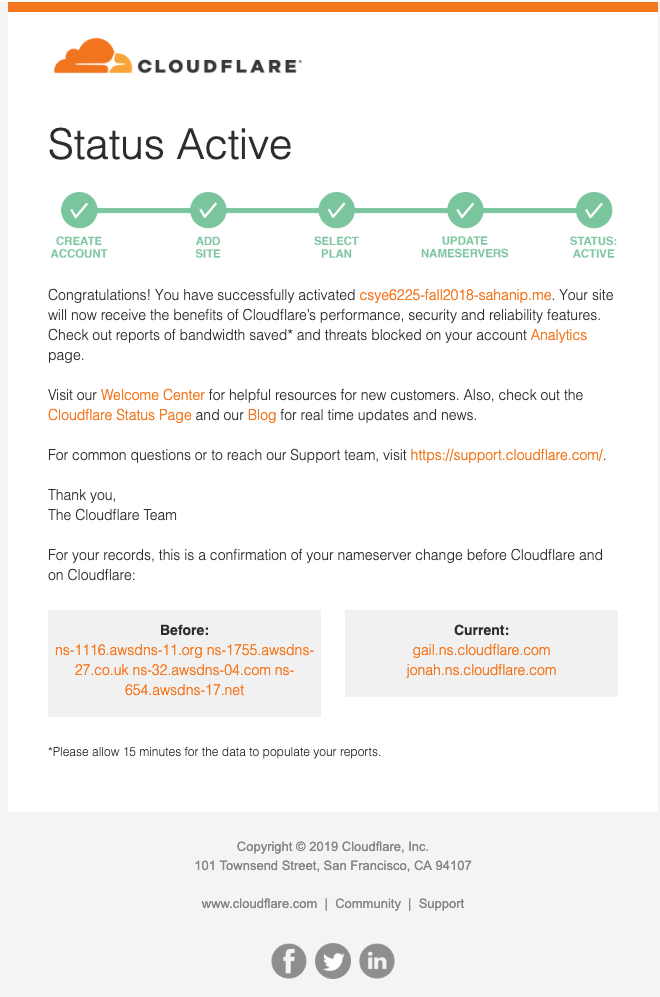
Create an account on Cloudflare and enter the domain name that is owned by you in the Cloudflare screen below and then adding the website. In the example below, "csye6225-fall2018-sahanip.me" is the example website.
It will scan the DNS records for the domain and return the results.
To add a CNAME record, create a bucket on the wasabi console with the same name as that of your website (in this example we are creating a bucket named "csye6225-fall2018-sahanip.me").
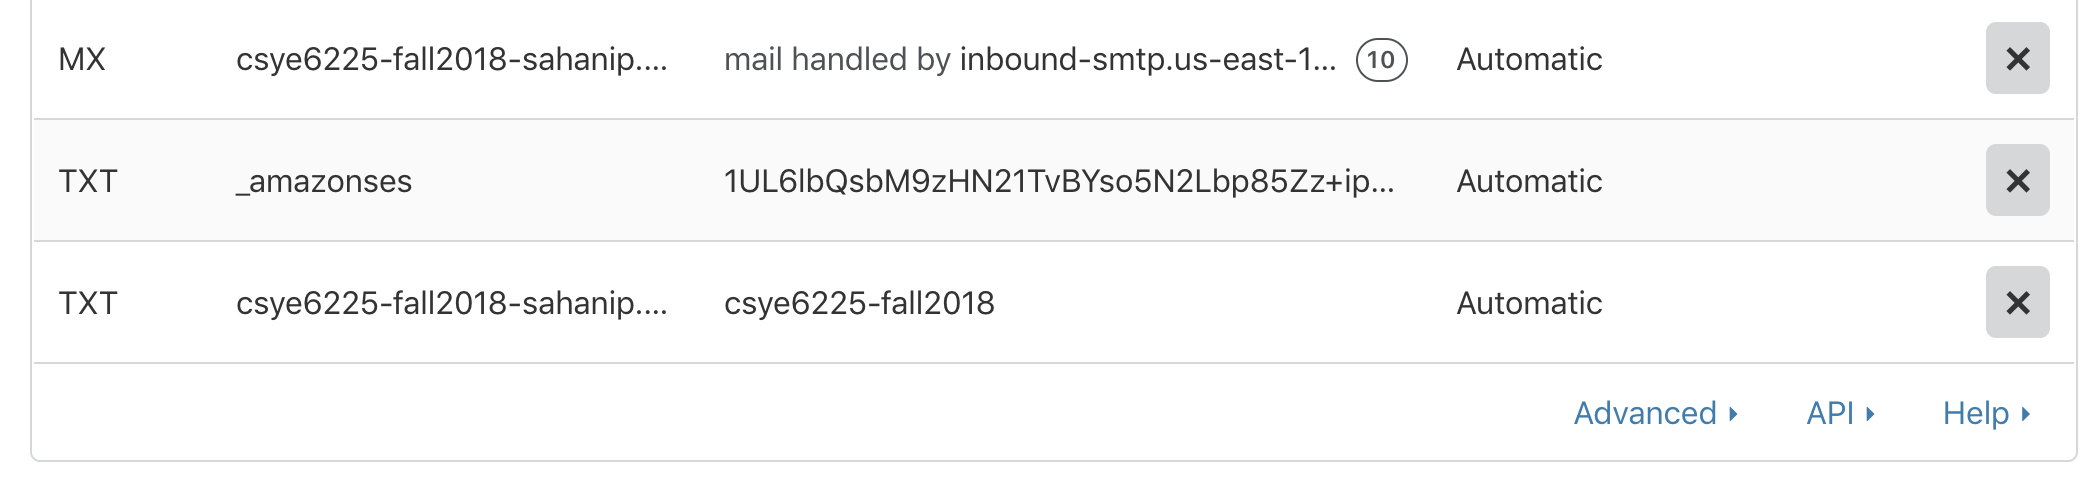
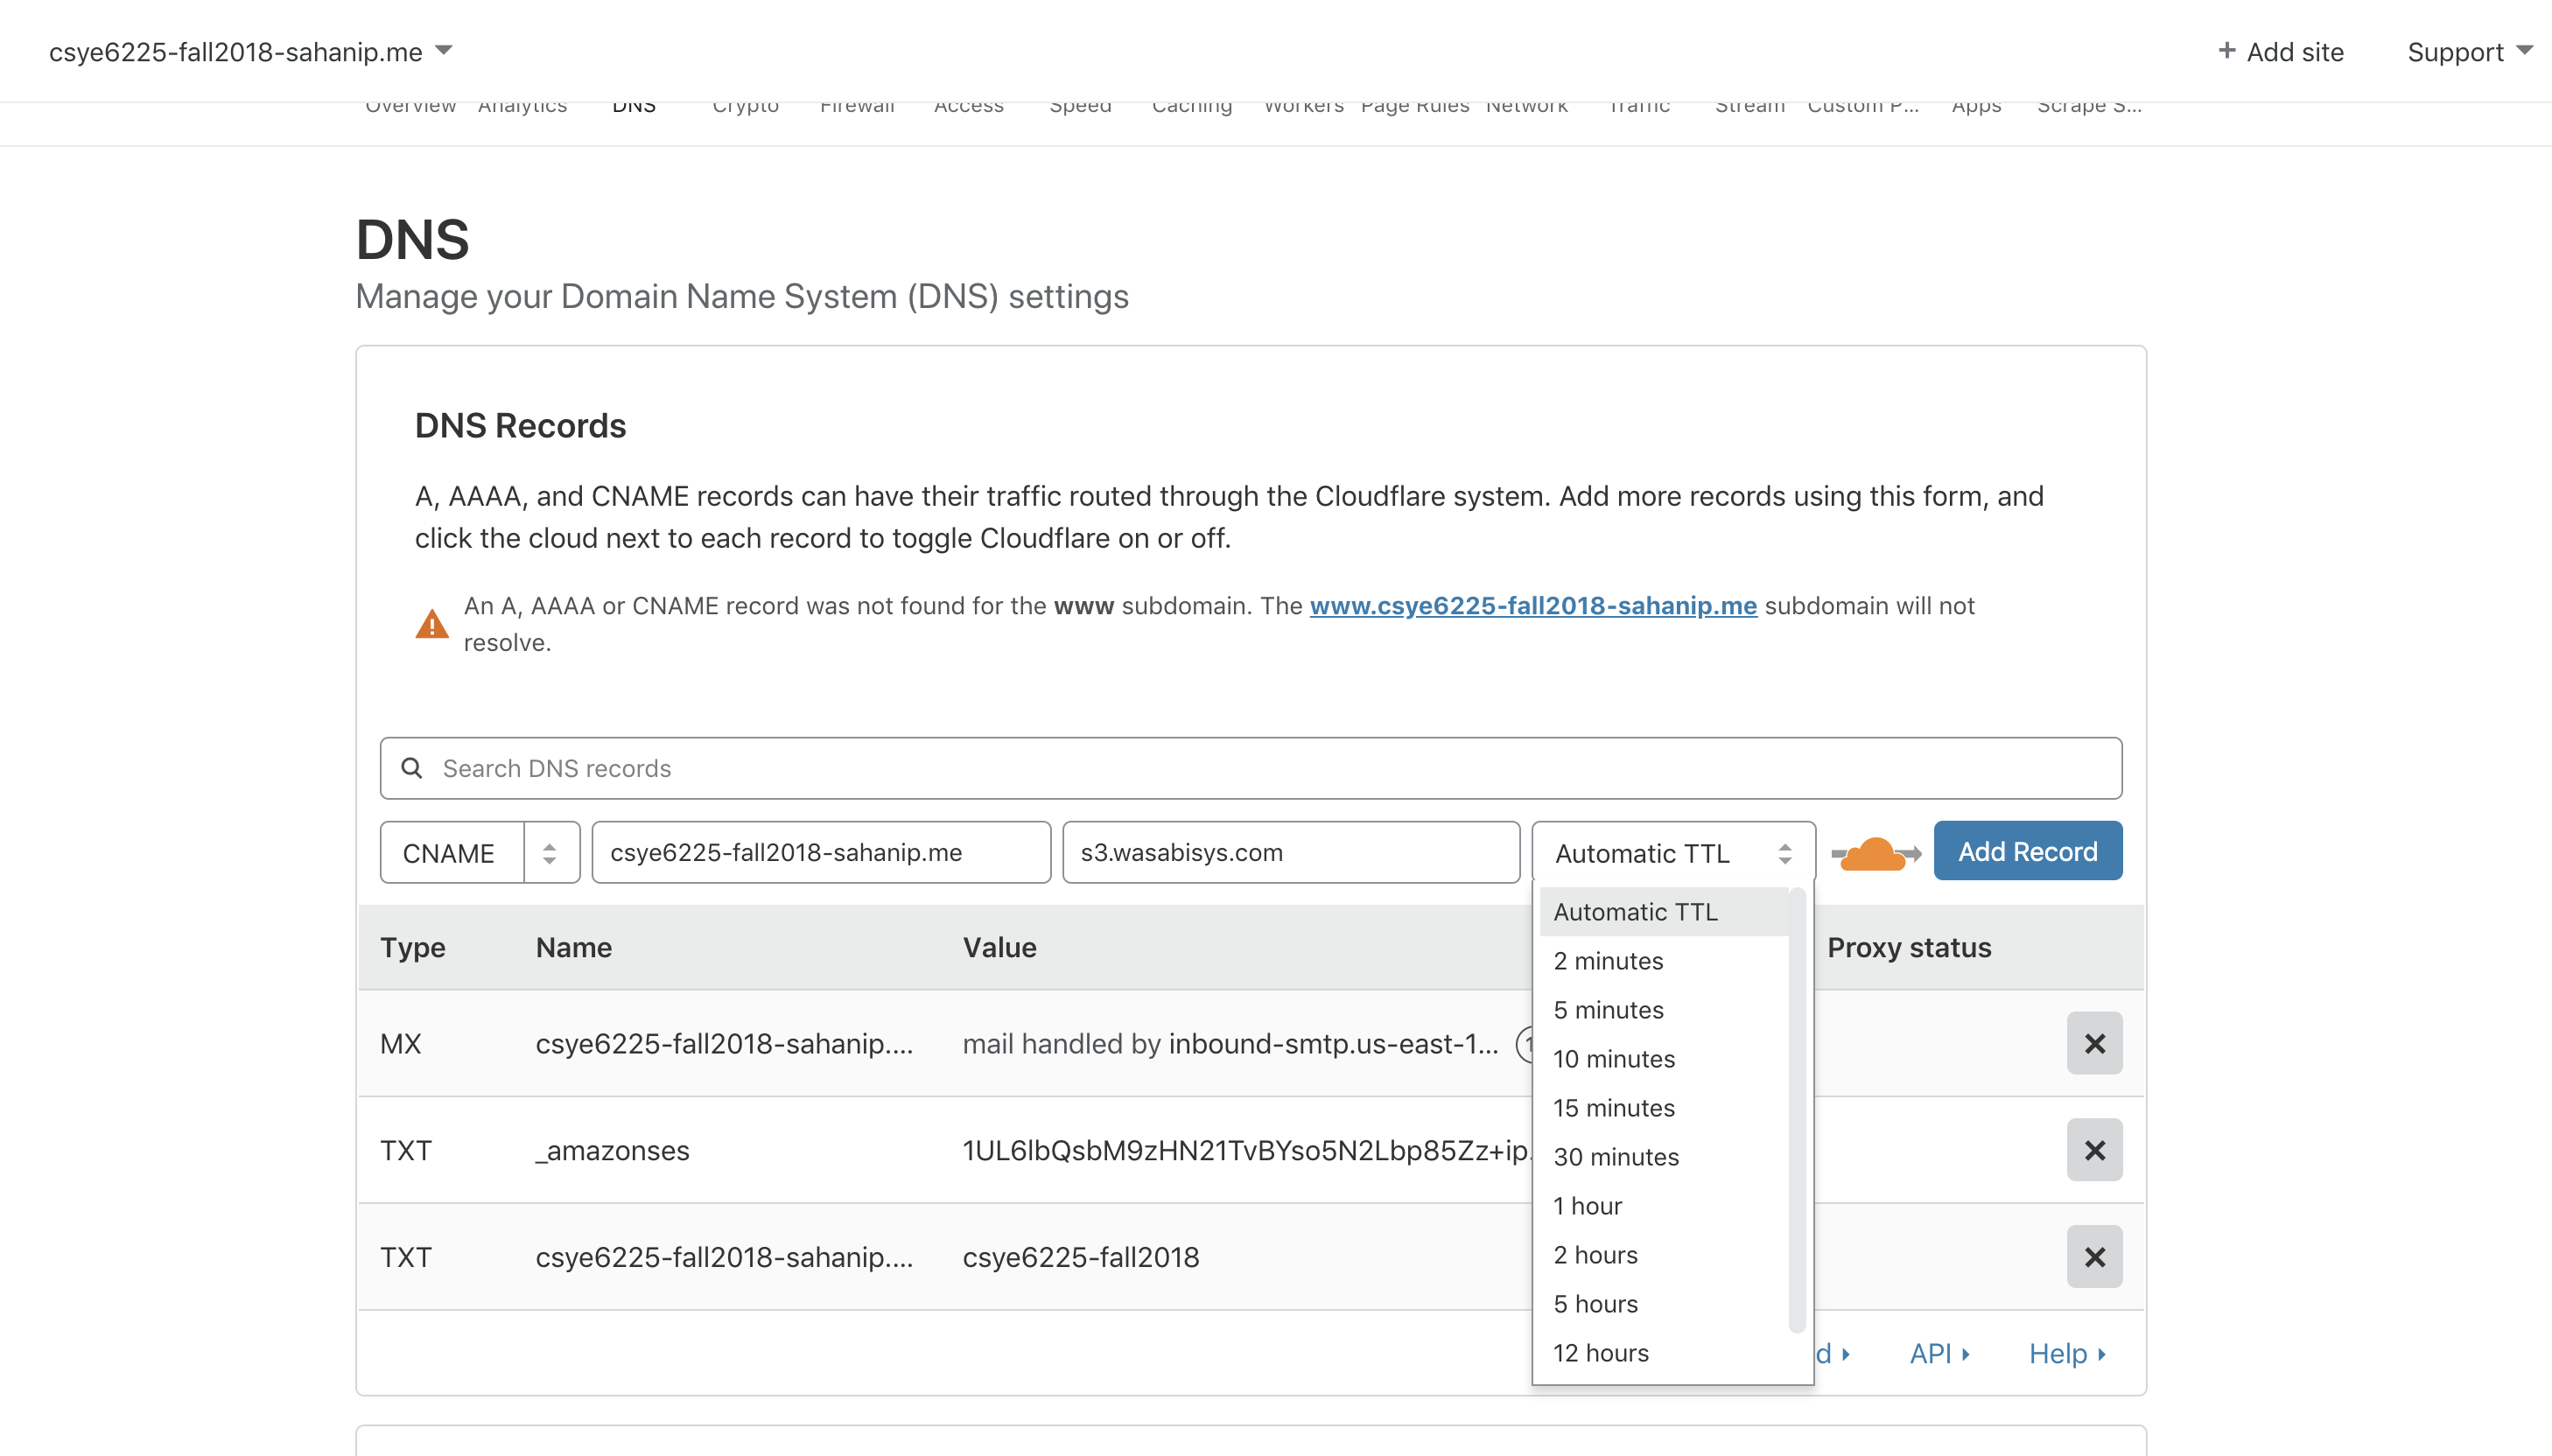
On your Cloudflare account, go to your DNS page and add the CNAME record.
Select type as CNAME, Name will be your domain name (in this example, our domain name is "csye6225-fall2018-sahanip.me"). The value is set to "s3.wasabisys.com" as this bucket is pointing to the server in East Region (refer to screenshot for reference).
You can choose the TTL (Time to Live) value as per your requirement and Cloudflare will cache the content until this value time, and then click Add Record.
The following example uses Wasabi's us-east-1 storage region. To use other Wasabi storage regions, use the appropriate Wasabi service URL as described in Service URLs for Wasabi's Storage Regions.
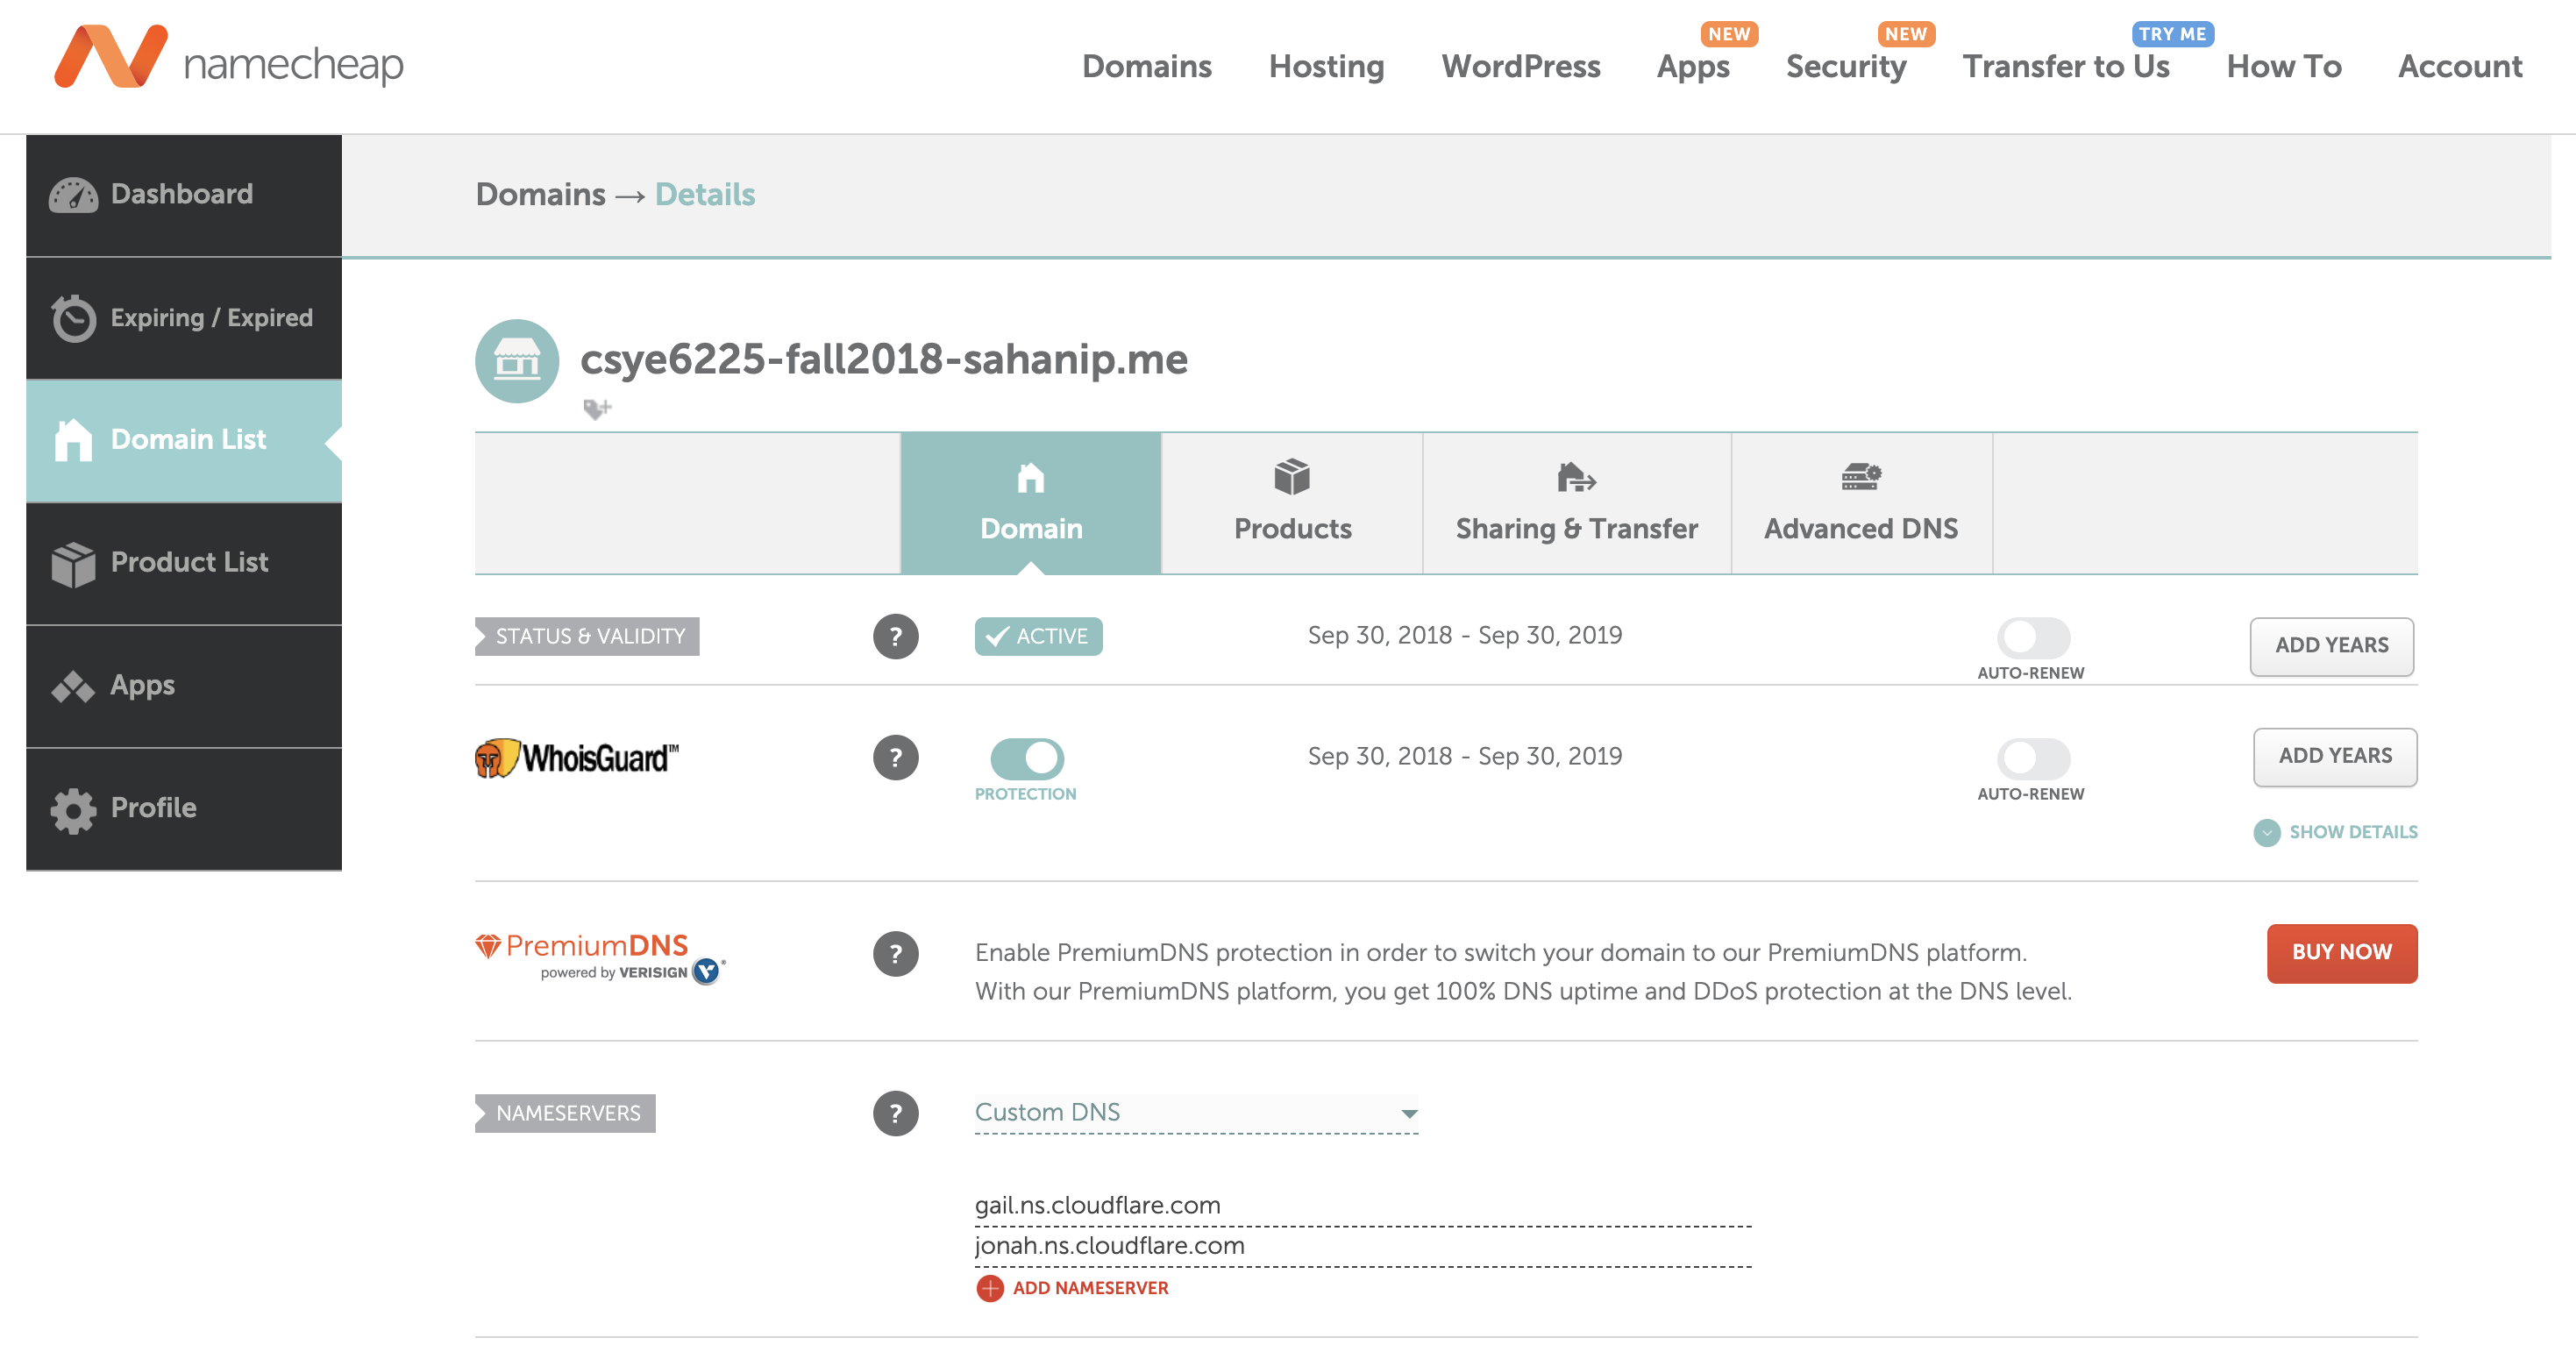
To activate s3.wasabisys.com you must point your nameservers (DNS) to Cloudflare. To start receiving all the speed and security benefits of Cloudflare, change the nameservers configured. To do so, copy both the Nameserver records you get on the Cloudflare on the Change your NameServers page.
Log in to your domain registrar account (such as Namecheap, GoDaddy, or wherever you have registered your domain), edit your Nameservers there, and paste the two records you copied from Cloudflare and remove other records, as shown below.
For more details on how to change your nameservers, refer to Cloudflare’s Setup.
Confirm your changes through the Cloudflare dashboard.
It may take up to 72 hours for the name server information to propagate. In most general cases, it propagates within hours.
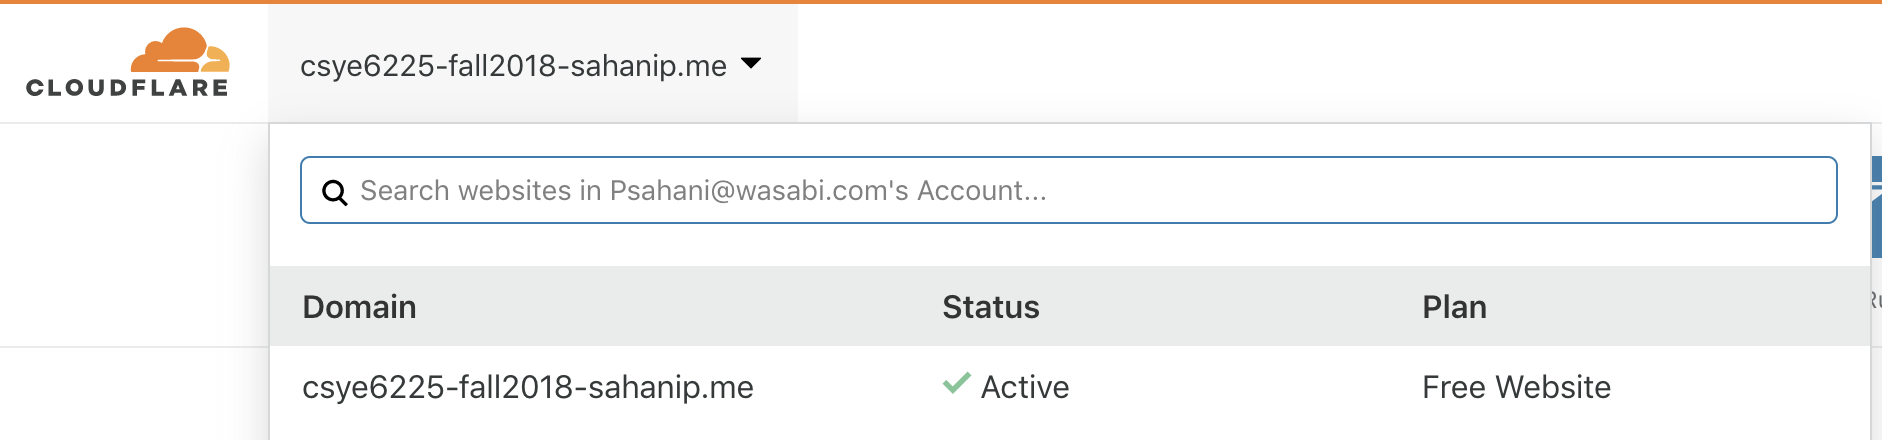
Status: Active indicates your domain is properly set up to run through Cloudflare and you will receive email notification.
On the Cloudflare account, it will show you Active, as shown below.
Status: Pending indicates that your nameserver updates have either not propagated or were not updated correctly
If the issue persists, use whois.net to check your nameserver records and make sure they match the Cloudflare provided records.
Once activated, you can use URLs such as: domain-name/folder-name/object-name to access the objects from the CDN.
To cache contents initially and after every TTL expiry on Cloudflare, you may attach a bucket policy on your desired bucket(s) whose content you need to cache and allow fetching of objects from Cloudflare's proxy IPs only. This will add a secure layer to your design making sure that no one else can access your data. For a list of Cloudflare’s proxy IPs, contact the Cloudflare team.
The instructions to restrict bucket access to specific IP addresses are provided in How to restrict access to a bucket to specific IP address?.
Below is a bucket policy example for this care. Be sure to replace the IPs in the above document with Cloudflare's proxy IPs.
{
"Id": "S3PolicyId1",
"Version": "2012-10-17",
"Statement": [
{
"Sid": "AllowRead",
"Effect": "Allow",
"Principal": {
"AWS": "*"
},
"Action": "s3:GetObject",
"Resource": [
"arn:aws:s3:::bucket-name",
"arn:aws:s3:::bucket-name/*"
]
},
{
"Sid": "IPBasedNarrowFurther",
"Effect": "Deny",
"Principal": {
"AWS": "*"
},
"Action": "s3:GetObject",
"Resource": [
"arn:aws:s3:::bucket-name",
"arn:aws:s3:::bucket-name/*"
],
"Condition": {
"NotIpAddress": {
"aws:SourceIp": "11.22.33.44/32"
}
}
}
]
}
Refrain from using "docs" as a sub-domain because docs.wasabi.com already exists and to keep the docs page in one place, we made it accessible using redirect from either domain of docs.wasabi.com and docs.wasabisys.com.
Do not be concerned about the recommendation to omit periods from the name of your bucket. In this case, using your domain as the bucket, including the period (mydomain.com) is acceptable. The CDN service works with your domain upon certificate validation and hence, for this reason, you will not be seeing certificate errors with your requests.
CONTENT
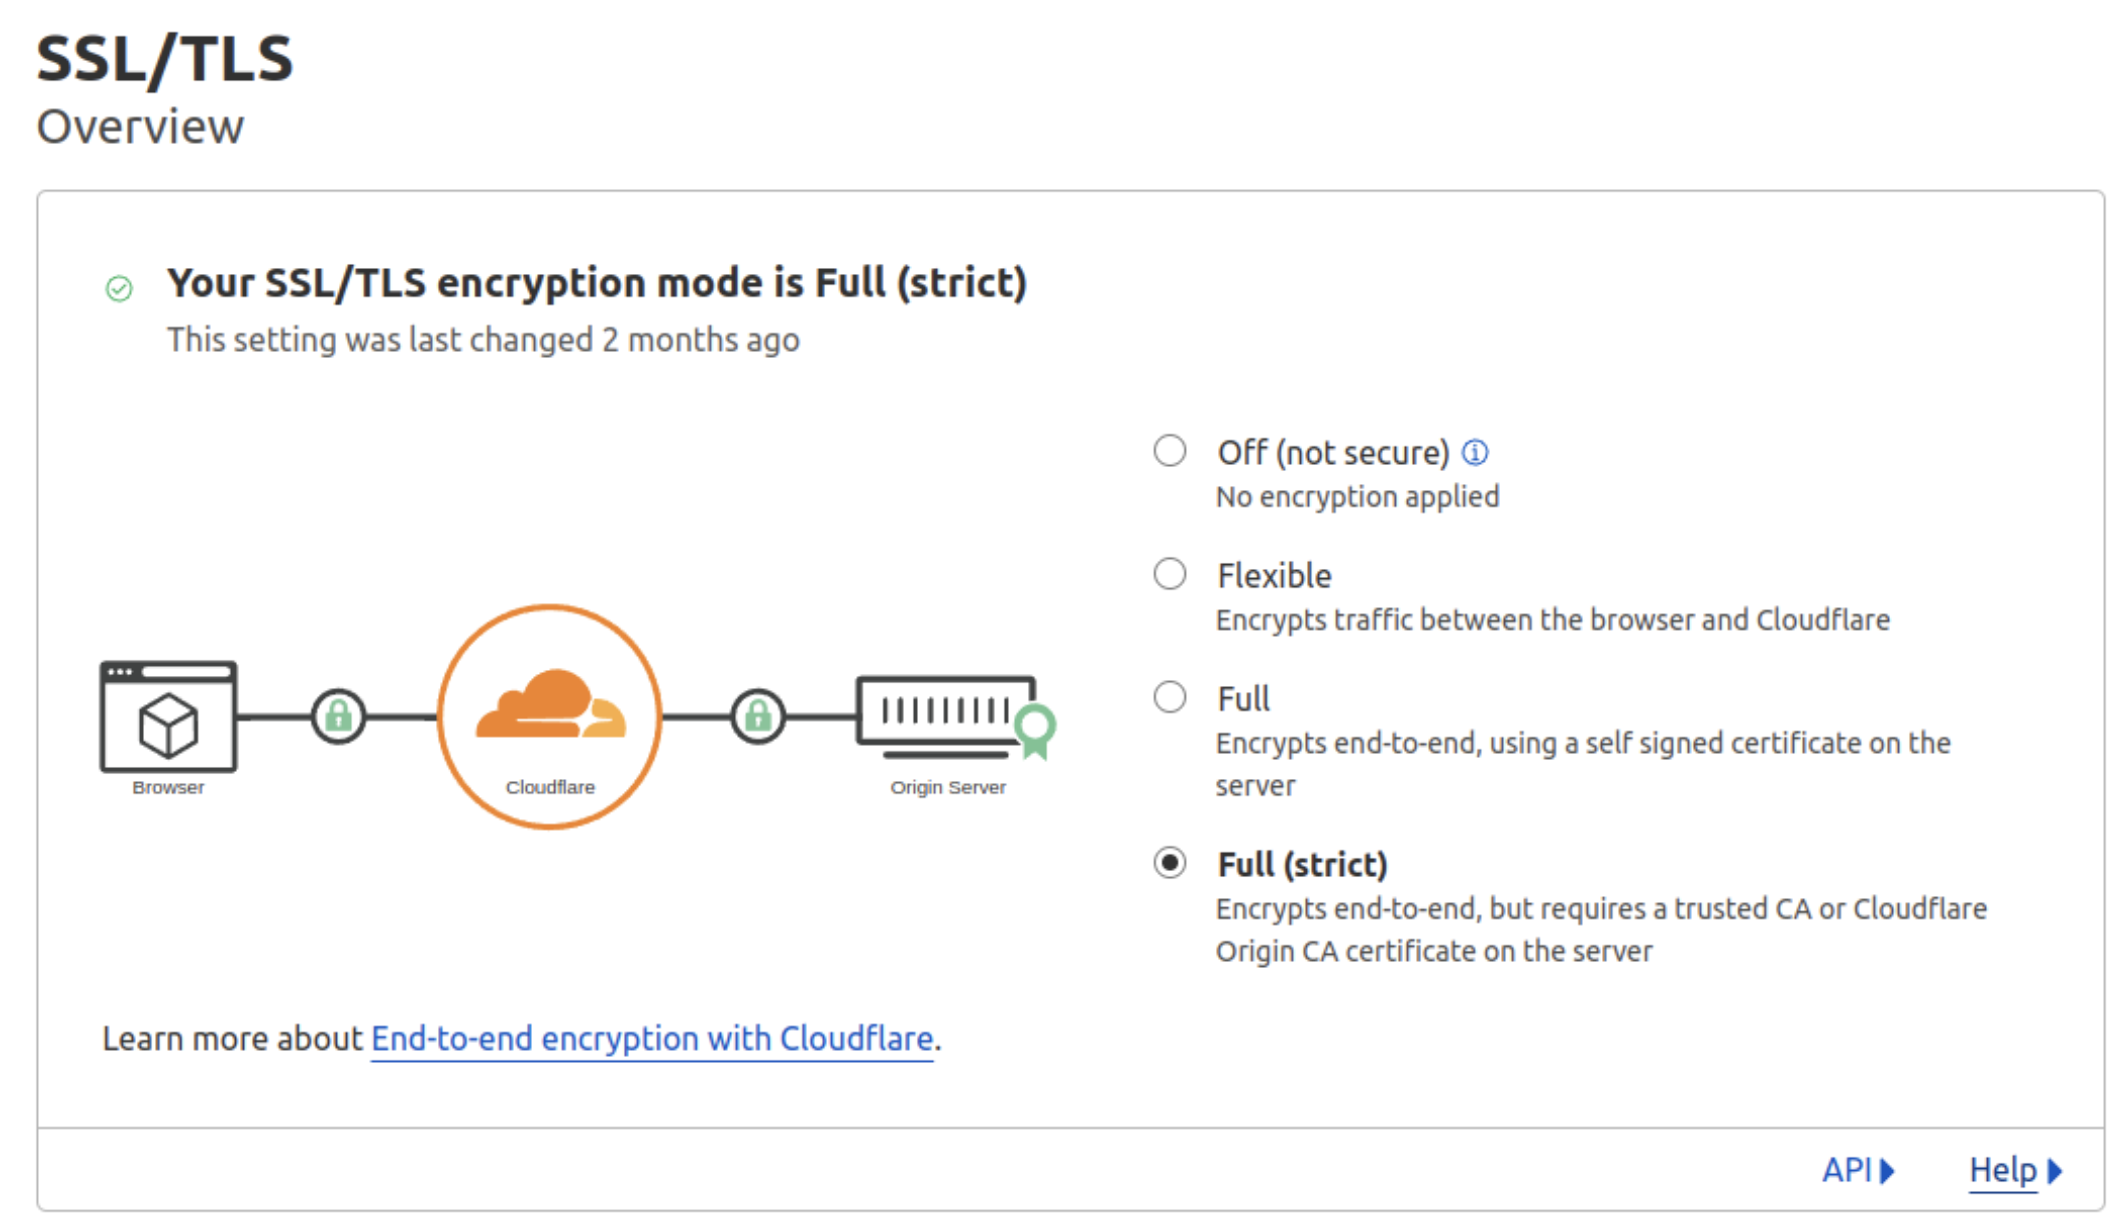
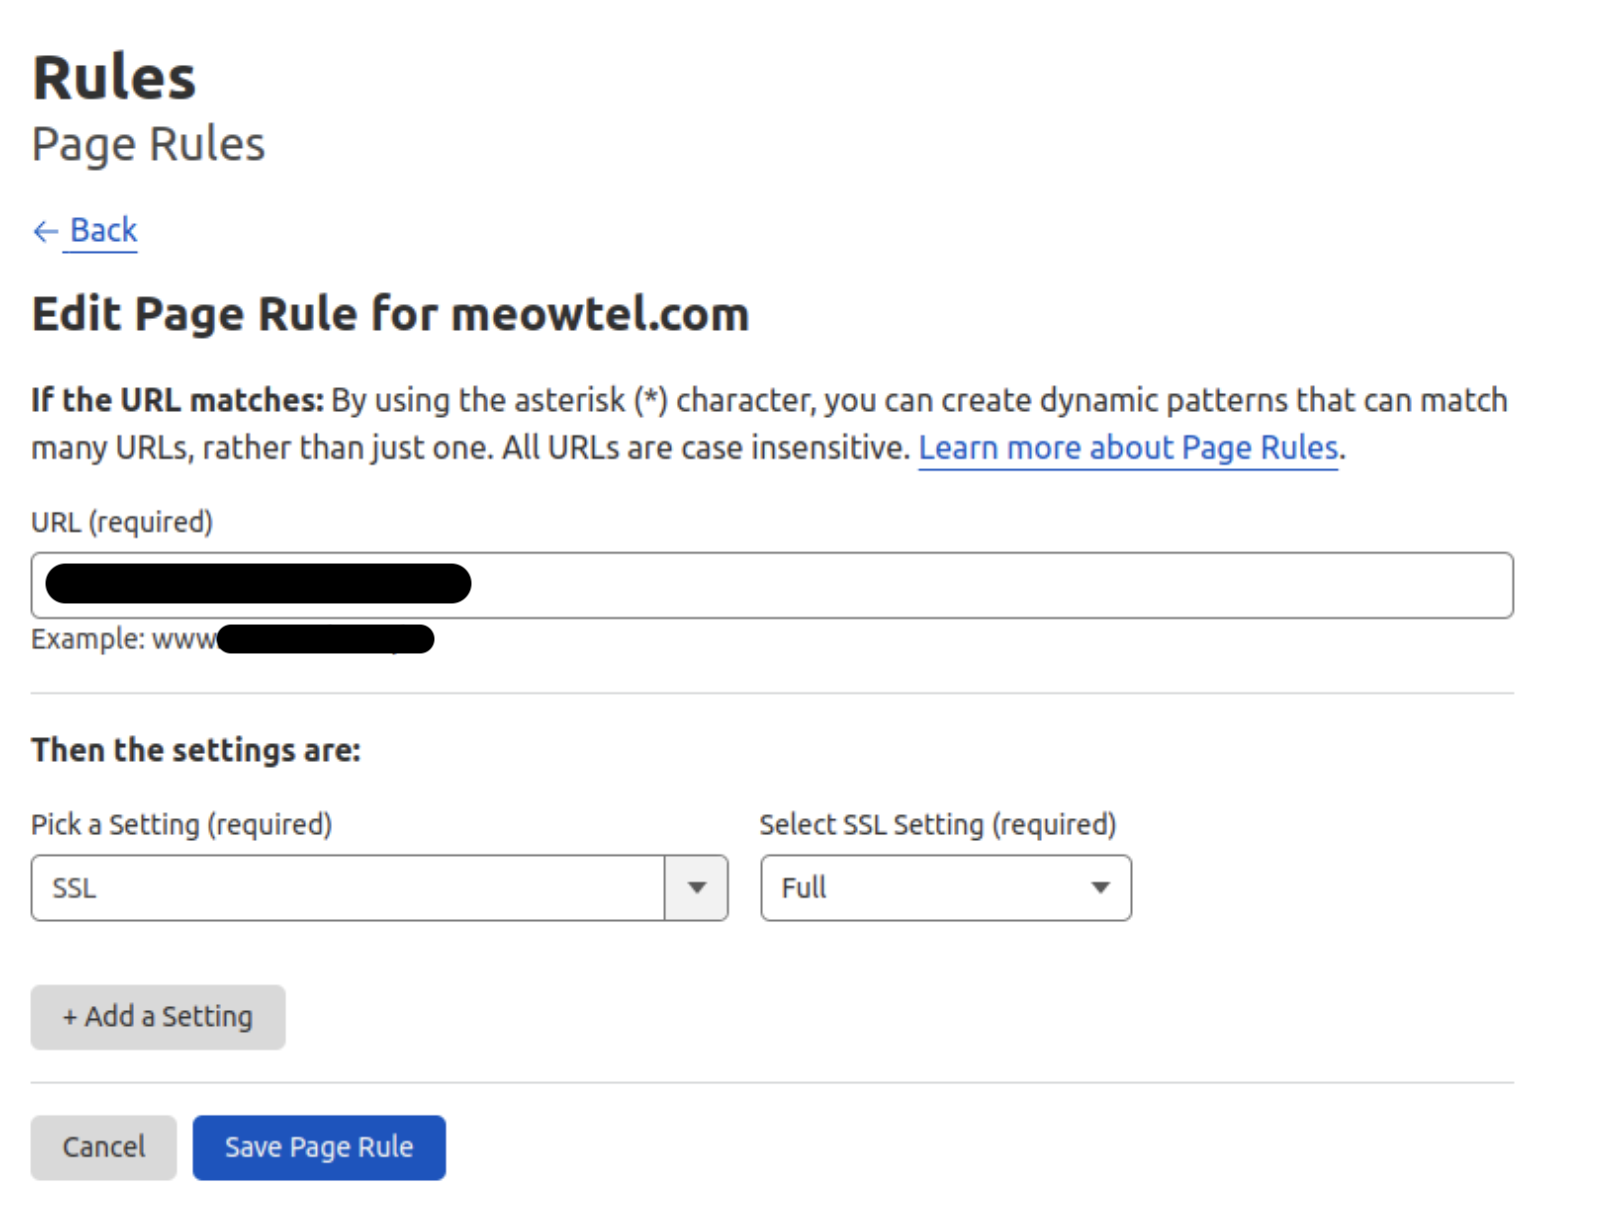
If you are seeing the following SSL warning in Cloudflare, contact the Cloudflare technical team to add Custom Page Rules and ensure that SSL Setting is set to "SSL Full" for Wasabi CNAME.
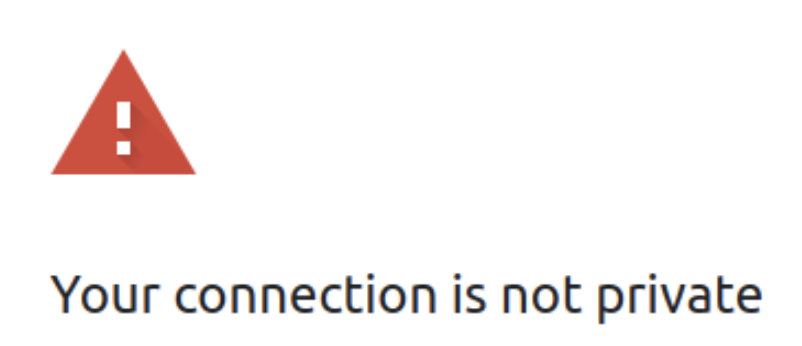
See one example below:
For questions or concerns, contact support@wasabi.com.