How do I use DataIntell with Wasabi?
Wasabi is now validated for use with DataIntell. DataIntell is an analytics software designed to help organizations better understand their data and storage utilization by giving the users the following information: old and unused files, peak usage, duplicate files, or folders, and used space whether it be on-prem or on the cloud. To learn more about the DataIntell - Wasabi solution, please refer to our joint solution brief. To use this product with Wasabi, please follow the instructions below.
Prerequisites
DataIntell Version 1.5.1
Basic DataIntell license
An active Wasabi account
Configuration
1. Log in to your DataIntell instance with an admin user.
2. Navigate to Data Settings..
.png)
3. Click on “Add a new data source”
.png)
4. Choose “Bucket” data source..
.png)
5. Choose the “Wasabi” option from the Cloud provider drop-down list
.png)
6. Choose “Add new credentials” from the Credentials drop-down list.
.png)
7. Provide the following and click “Create credentials”..
- A display name of the Credential
- An access key
- A secret key
Note: This credential can be used to add multiple Wasabi bucket data sources.
.png)
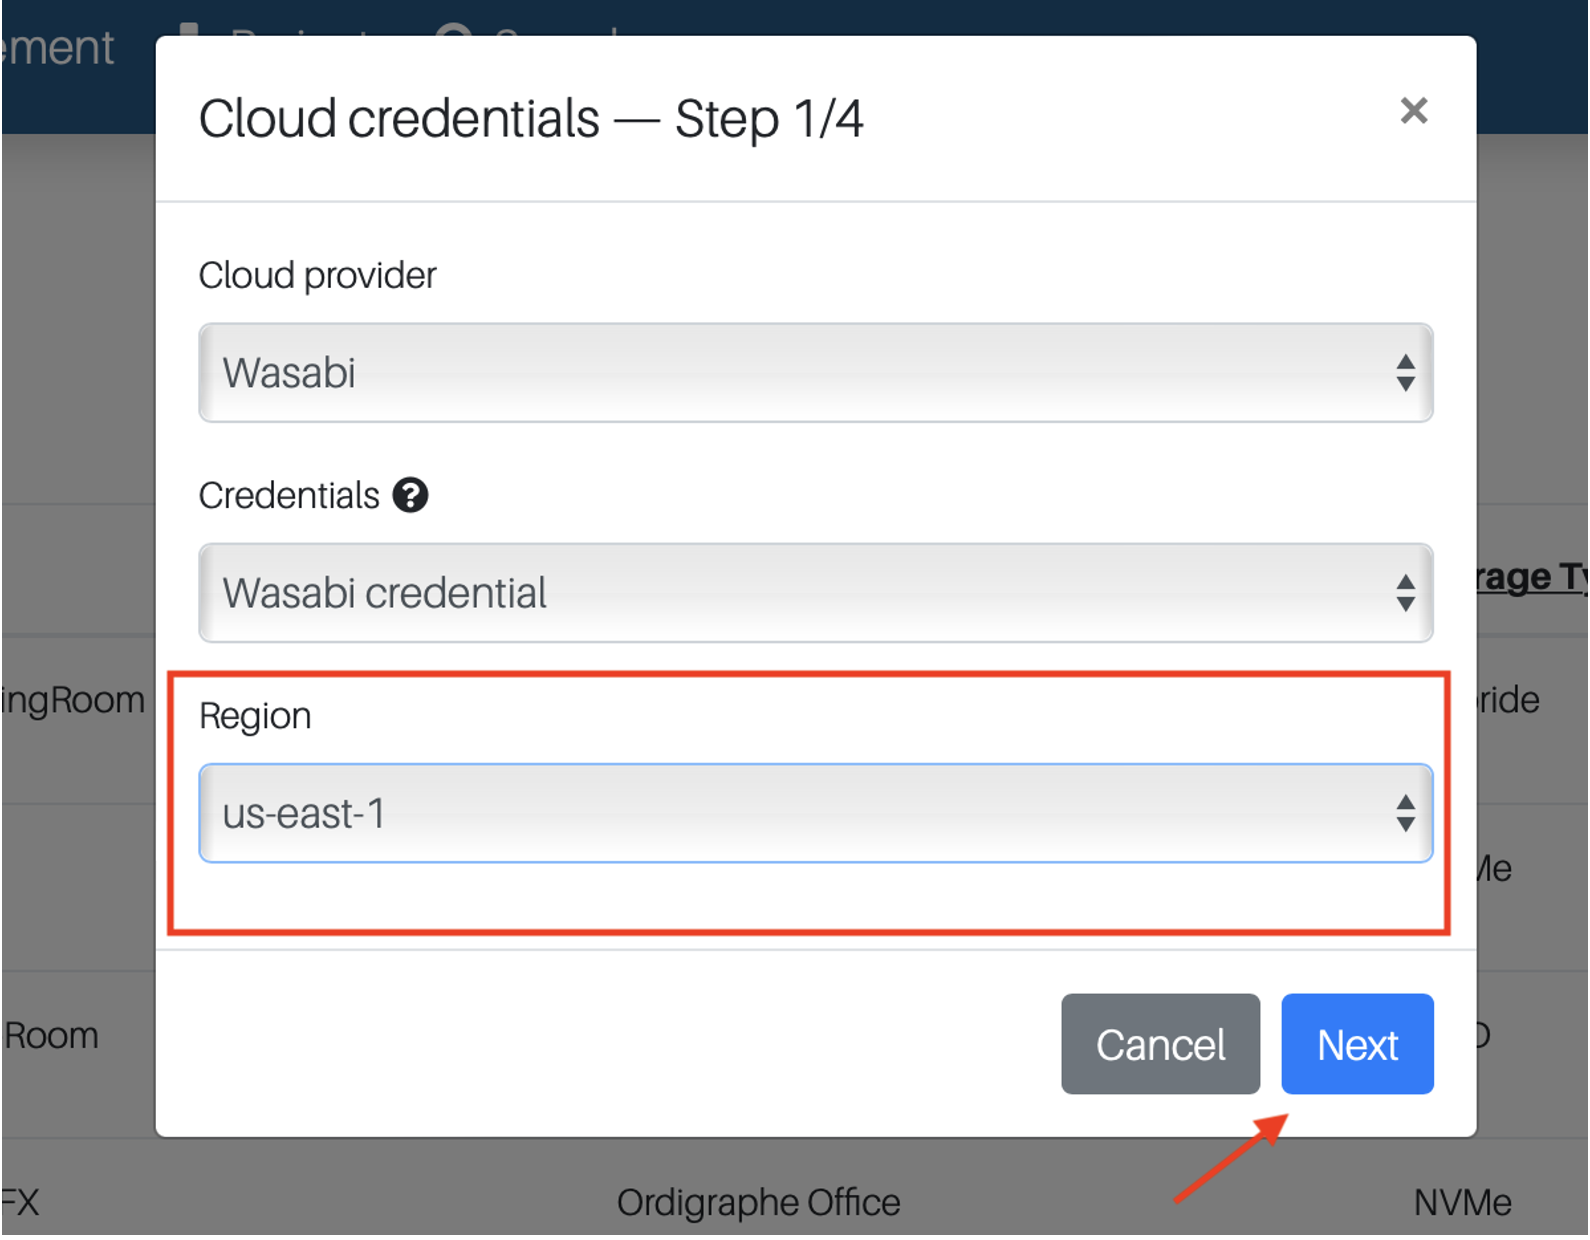
8. Select the region of the bucket you want to scan and click “Next”
9. Select the bucket you want to scan from the drop-down list. You also can change the display name and click “Next.
.png)
10. Select or Create a Storage Price and click “Next” This will be used to estimate your storage cost. The pricing is in GB per Year.
.png)
11. Review your configuration and click “Save”.
.png)
12. To scan the bucket, open the Bucket panel in the Data Settings page and click on “Scan” next to the bucket you want to scan.
.png)