How do I use Laravel with Wasabi?
Laravel is validated for use with Wasabi and to use Laravel. To use this product with Wasabi, please follow the instructions below.
Set up Wasabi account and create bucket as described here.
Create IAM user with appropriate permissions attached to the user for performing required action(s). Policy can be generated using tools such as AWS Policy Generator
Create API keys for your user using the console and save this credential file so you can later use the API keys in the code
Install Composer using the CLI as described here.
Create a new Laravel Project using the following command and you will receive the following output on the terminal once this is successfully created
composer create-project laravel/laravel

Go inside your project using "cd" command and you will see the project files inside
.png)
Now we will need to edit certain files inside this project to make this work with S3 style storage. You can either use any editor to edit the files (e.g vim or nano etc) or make use of IDE to search and edit them easily (e.g atom or visual studio code etc)
Once you have the framework open in an IDE, create a new .php file in resources -> views and name it "fileUpload.blade.php"
Note: We recommend using the same name for test as we have used this name referencing in other files
The hierarchy would look like this:
.png)
Paste the below code in "fileUpload.blade.php"
@extends('layouts.app')

@section('content')
<div class="container">
 <div class="row justify-content-center">
 <div class="col-md-8">
 <div class="card">
 <div class="card-header">File Upload</div>

<div class="card-body">
 <form action="{{ route('upload') }}" method="post" enctype="multipart/form-data">
 @csrf
 <input type="file" name="file" class="form-control">
 <input type="submit" class="btn btn-primary">
 </form>
 </div>
 </div>
 </div>
 </div>
</div>
@endsection
Now go to routes -> "web.php" and replace the file with the following code
Route::get('/', function () {
 return view('fileUpload');
});

Route::post('upload',function(){
 request()->file('file')->store(
 'my-file',
 'Wasabi'
 );

})->name('upload');

Auth::routes();

Route::get('/home', 'HomeController@index')->name('home');
Note: the directory here is "my-file" and your files will be uploaded inside this. We are also passing "Wasabi" as a driver which we will configure later in the filesystems.php to specify our custom-defined driver to pass user input
Go to vendor -> ".env" file and replace with the following code.
NOTE: Make sure to use your correct Access key, Secret Access key, Wasabi bucket region, Wasabi Bucket Name, Wasabi Region URL
APP_NAME=Laravel
APP_ENV=local
APP_KEY=base64:ZBWX+Pgx8ABy8CThdSi9ixRCyQmKQ1iWDsv1TSCMBUM=
APP_DEBUG=true
APP_URL=http://localhost

LOG_CHANNEL=stack

DB_CONNECTION=mysql
DB_HOST=127.0.0.1
DB_PORT=3306
DB_DATABASE=laravel
DB_USERNAME=root
DB_PASSWORD=

BROADCAST_DRIVER=log
CACHE_DRIVER=file
QUEUE_CONNECTION=sync
SESSION_DRIVER=file
SESSION_LIFETIME=120

REDIS_HOST=127.0.0.1
REDIS_PASSWORD=null
REDIS_PORT=6379

MAIL_DRIVER=smtp
MAIL_HOST=smtp.mailtrap.io
MAIL_PORT=2525
MAIL_USERNAME=null
MAIL_PASSWORD=null
MAIL_ENCRYPTION=null

AWS_ACCESS_KEY_ID=
AWS_SECRET_ACCESS_KEY=
AWS_DEFAULT_REGION=us-east-1
AWS_BUCKET=

PUSHER_APP_ID=
PUSHER_APP_KEY=
PUSHER_APP_SECRET=
PUSHER_APP_CLUSTER=mt1

MIX_PUSHER_APP_KEY="${PUSHER_APP_KEY}"
MIX_PUSHER_APP_CLUSTER="${PUSHER_APP_CLUSTER}"


WAS_ACCESS_KEY_ID=XXXXXXXXXXXXXXXXXXXX
WAS_SECRET_ACCESS_KEY=XXXXXXXXXXXXXXXXXXXXXXXXXXXXXXXXXXXXXXX
WAS_DEFAULT_REGION=us-east-1
WAS_BUCKET=Bucket-Name
WAS_URL=s3.wasabisys.com
Note that this example discusses the use of Wasabi's us-east-1 storage region. To use other Wasabi storage regions, please use the appropriate Wasabi service URL as described in this article.
Now you need to create a new driver as s3 has amazonaws.com hardcoded in the library. Go to config -> "filesystems.php" and replace with the following code
return [

'default' => env('FILESYSTEM_DRIVER', 'local'),

'cloud' => env('FILESYSTEM_CLOUD', 's3'),

'disks' => [

'local' => [
 'driver' => 'local',
 'root' => storage_path('app'),
 ],

'public' => [
 'driver' => 'local',
 'root' => storage_path('app/public'),
 'url' => env('APP_URL').'/storage',
 'visibility' => 'public',
 ],


 'Wasabi' => [
 'driver' => 's3',
 'key' => env('WAS_ACCESS_KEY_ID'),
 'secret' => env('WAS_SECRET_ACCESS_KEY'),
 'region' => env('WAS_DEFAULT_REGION'),
 'bucket' => env('WAS_BUCKET'),
 'endpoint' => 'https://s3.wasabisys.com'
 ],

],

];
As Wasabi/S3 driver is not the default driver for uploading in Laravel, we need a Composer Package to make this work. You can get this package on Laravel website as shown below

Now on the CLI, go inside your Laravel project and type the following two commands:
php artisan make:authcomposer require league/flysystem-aws-s3-v3Output:
.png)
Run your code using the following command and the server will start listening on port 8000
php artisan serveOutput:
.png)
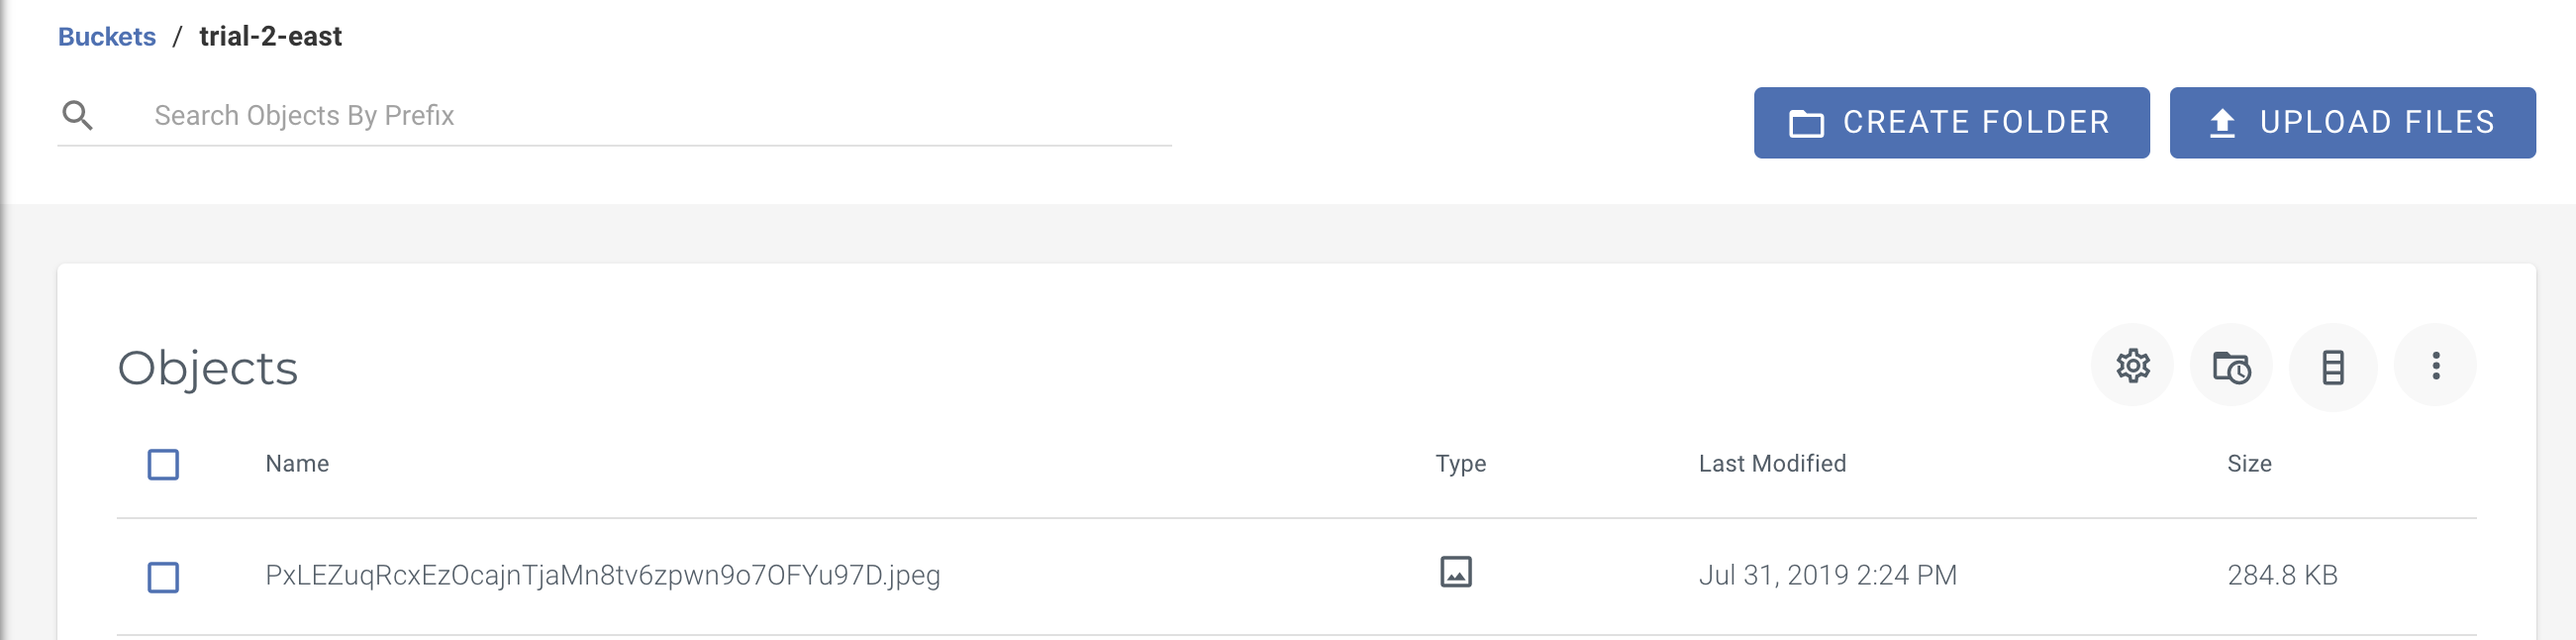
On the browser, type http://127.0.0.1:8000 and you will be prompted to upload files to your Wasabi Bucket and once submitted, your files will be visible inside bucket
.png)