When sub-users are defined in the Wasabi account, you can use either identity-based (IAM) or resource-based policies to restrict bucket access. Identity-based policies, as described in this article, are assigned to groups or users, whereas resource-based policies are applied to resources (buckets).
If your company has numerous users, you may want to automate the entire process of creating users, buckets, policies, groups, and delegated user access. Refer to Automating Infrastructure Design for Wasabi.
You may want to separate users at the bucket level so that each sub-user has their own bucket and, while a sub-user can access their own bucket, they cannot access the buckets of other sub-users. You would define this in an identity-based policy. At a high level, the steps to do so are:
Create or log in to your Wasabi Root account.
Create a storage bucket for each sub-user.
Create sub-user(s).
Create an IAM policy that limits the access of each sub-user to just their storage bucket.
Attach the IAM policy to the sub-user.
The example in this article uses a company account with two sub-users:
panjack
stonecold
To separate a bucket for sub-user panjack:
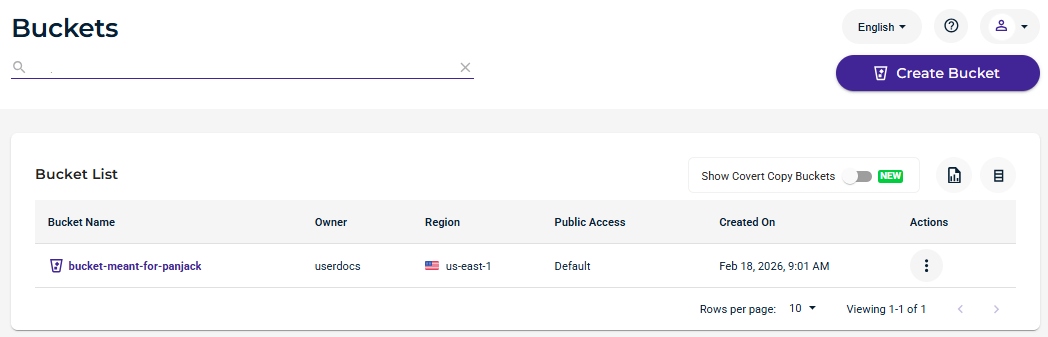
Create a bucket called bucket-meant-for-panjack. In Wasabi Console:
Click Buckets.
Click Create Bucket.
Create the bucket called bucket-meant-for-panjack.
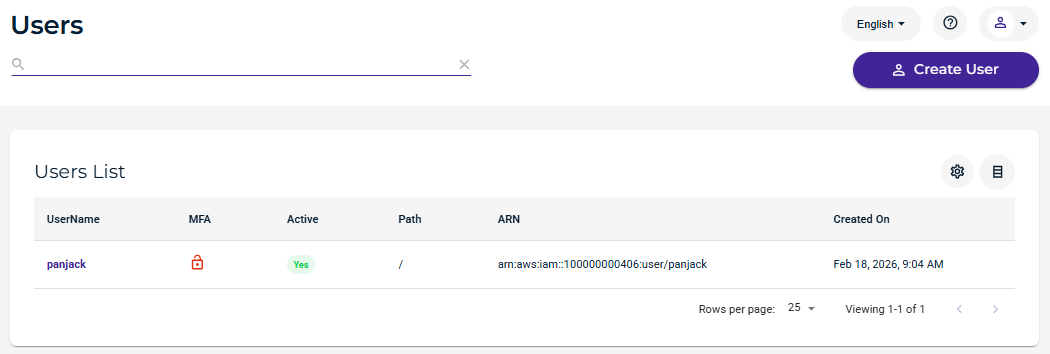
Create a sub-user called panjack. In Wasabi Console:
Click Users.
Click Create User.
Create a sub-user called panjack.
Create an IAM policy that limits sub-user panjack access to bucket bucket-meant-for-panjack. In Wasabi Console:
Click Policies.
Click Create Policy.
Create the policy with the code shown below.
The policy must include the ListAllMyBuckets action. This gives the sub-user permission to perform any bucket/object operations through the Console. The sub-user will be able to list all the buckets when logged in to the Console; however, the sub-user will have access to content only from the bucket for which the sub-user has access permission.
{
                "Version": "2012-10-17",
                "Statement": [
                {
                "Effect": "Allow",
                "Action": "s3:ListAllMyBuckets",
                "Resource": "arn:aws:s3:::*"
                },
                {
                "Effect": "Allow",
                "Action": "s3:*",
                "Resource": [
                "arn:aws:s3:::bucket-meant-for-panjack",
                "arn:aws:s3:::bucket-meant-for-panjack/*"
                ]
                }
                ]
                }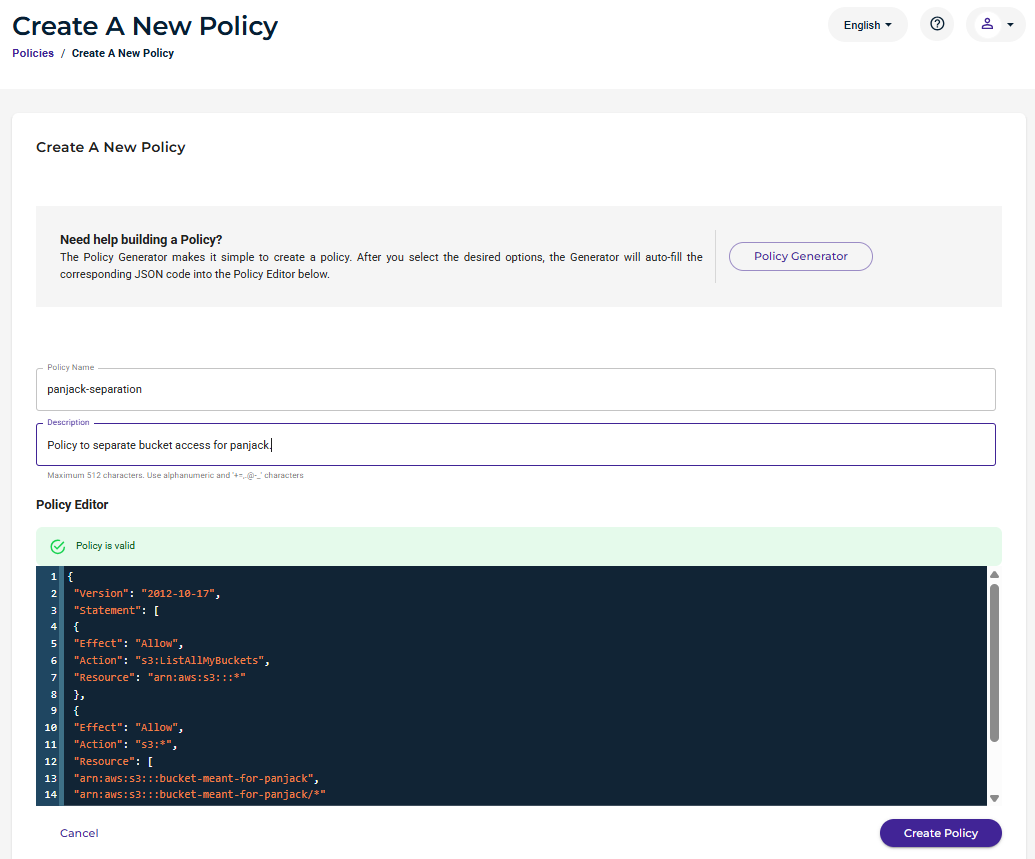
Attach the policy to sub-user panjack. In Wasabi Console:
Click Users.
Locate and click on the sub-user (panjack in this example).
Click Policies to open the settings.
Attach the policy to the sub-user.
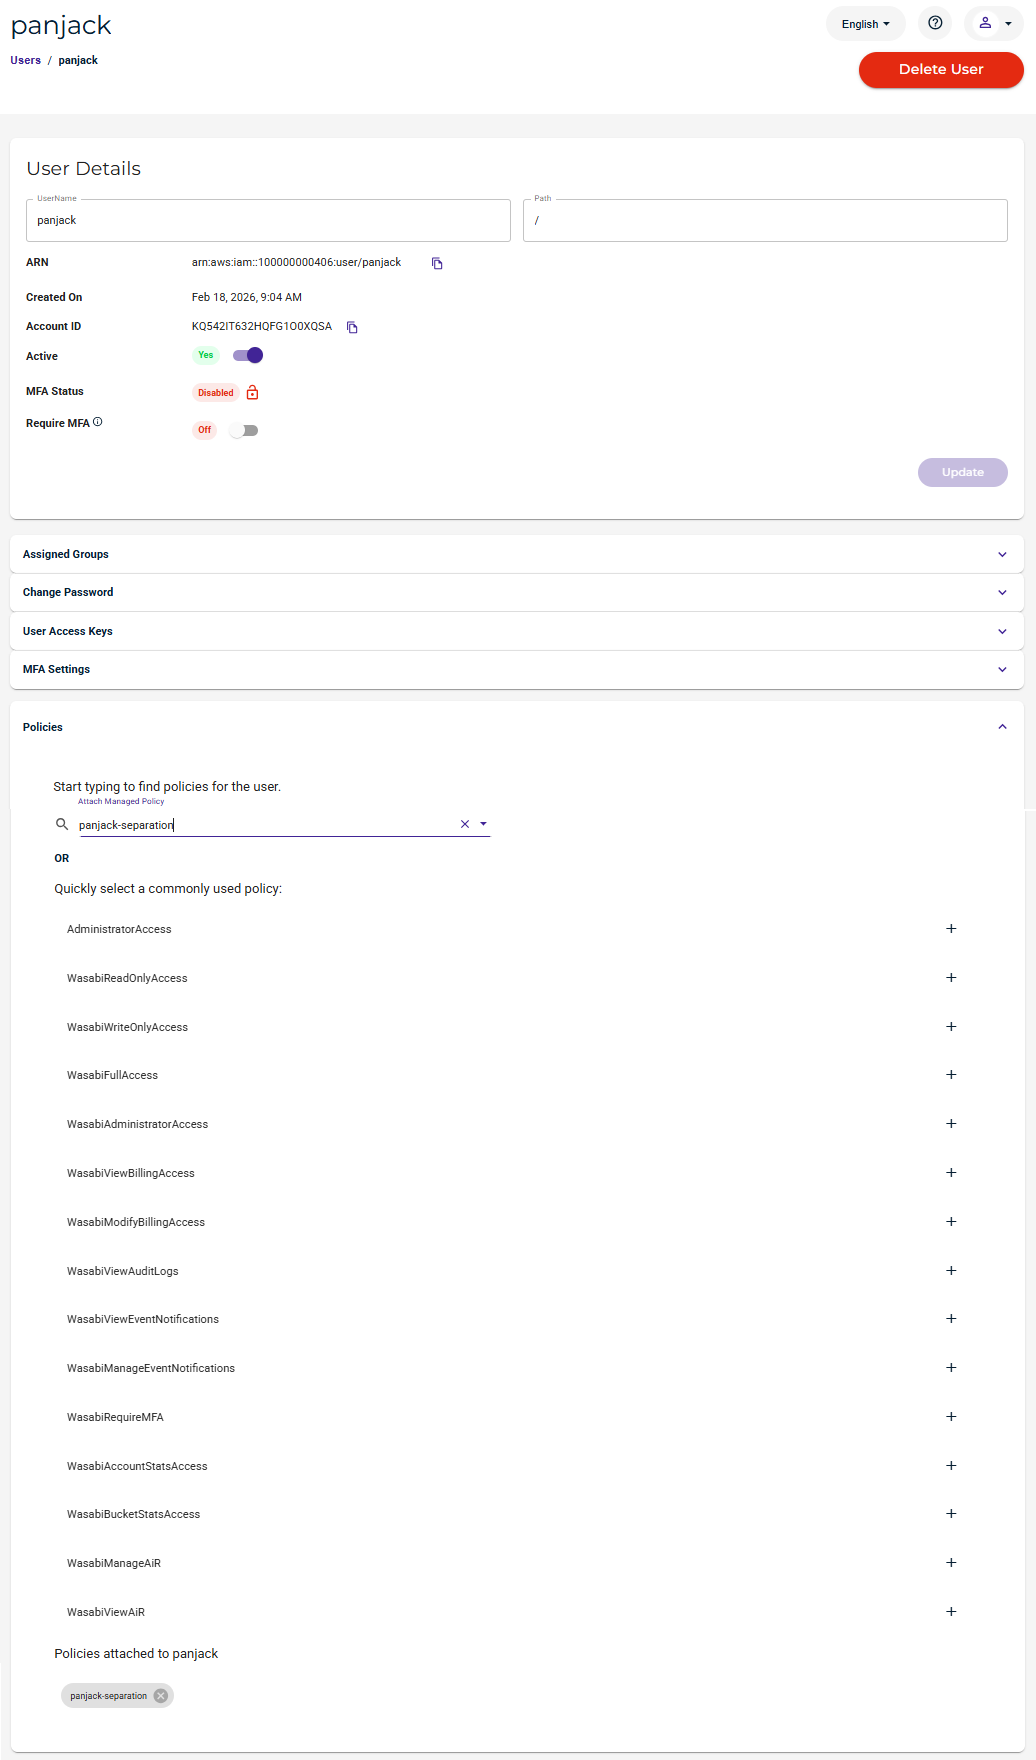
The sub-user panjack will have access to their own bucket ONLY.
Repeat the steps above for sub-user stonecold.
Create a bucket called bucket-meant-for-stonecold.
Create sub-user stonecold.
Create an IAM policy with the appropriate bucket for this sub-user:
{
                        "Version": "2012-10-17",
                        "Statement": [
                        {
                        "Effect": "Allow",
                        "Action": "s3:ListAllMyBuckets",
                        "Resource": "arn:aws:s3:::*"
                        },
                        {
                        "Effect": "Allow",
                        "Action": "s3:*",
                        "Resource": [
                        "arn:aws:s3:::bucket-meant-for-stonecold",
                        "arn:aws:s3:::bucket-meant-for-stonecold/*"
                        ]
                        }
                        ]
                        }
Attach the policy to sub-user stonecold.