The Inventory feature makes it easy to gather an inventory list/manifest of your bucket contents. You simply create a configuration for a bucket and indicate that you want report generation daily or weekly. Wasabi will automatically place a manifest of the current bucket as a CSV file in the destination (target) bucket you specify.
Defining a New Inventory for a Bucket
On the Buckets list, click
 for the desired bucket.
Click Settings.
Click the Inventory tab.
Click Create New Configuration. The Inventory Configuration panel is displayed.
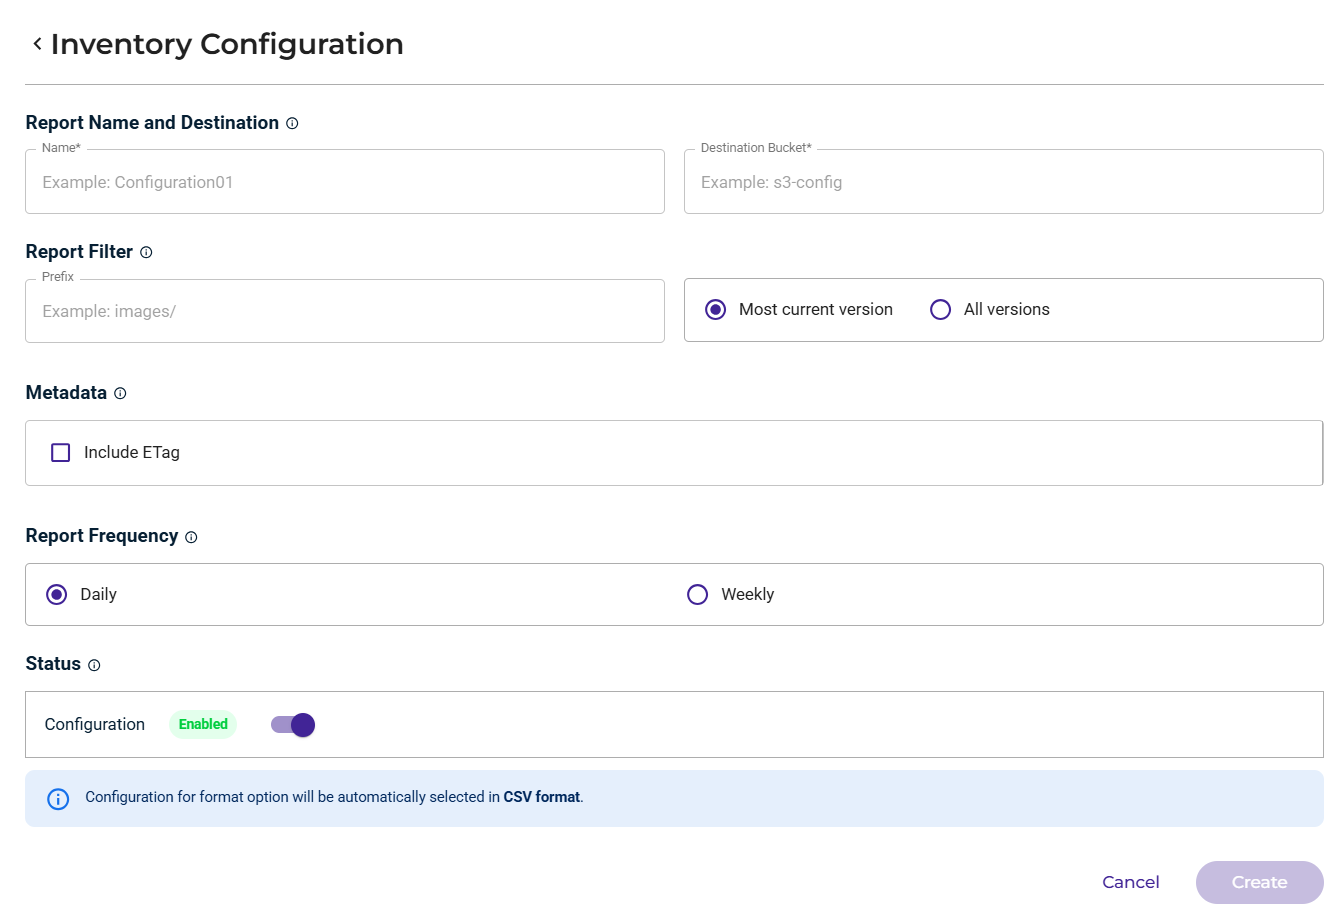
In the Report Name and Destination area, enter a name for the inventory report. The name can contain only letters, numbers, underscores, periods, and dashes.
Click in the Destination Bucket box and select a bucket into which the report will be placed.
Optionally, you can enter a Prefix to define how you want to filter the objects in the report.
Specify that you want to collect either the Most current version or All versions.
Optionally, you can specify additional metadata fields for the objects in the report. To do so, select the Include ETag option.
Indicate how often the report will be generated: Daily or Weekly.
By default, the configuration status is enabled. When enabled, the report will begin to be generated (after you save the configuration) at the frequency you define (daily or weekly).
Click Create.
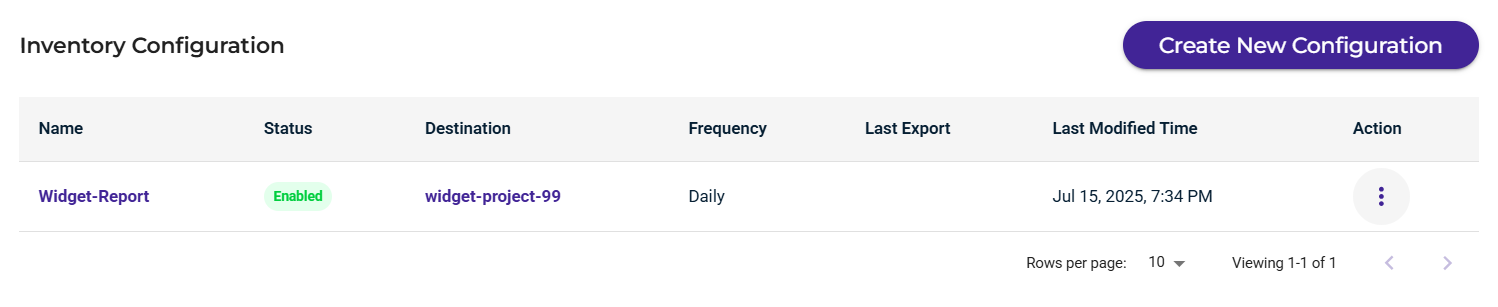
When you create a configuration, it is displayed in an Inventory Configuration list. For example:
Editing a Configuration
In the Actions column, click
for the desired bucket.Select Edit.
Adjust the configuration.
Click Save Changes.
Deleting a Configuration
In the Actions column, click
for the desired bucket.Select Delete.
When asked to confirm the deletion, click Delete.