Perform a DR With XProtect
- 03 Feb 2025
- 2 Minutes to read
- Print
- PDF
Perform a DR With XProtect
- Updated on 03 Feb 2025
- 2 Minutes to read
- Print
- PDF
Article summary
Did you find this summary helpful?
Thank you for your feedback
How do I perform a DR with XProtect and the WSC?
WSC allows you to enable the DR of your recording drive. When the DR option is enabled, WSC can recover from a recording storage or archive failure. When XProtect detects the failure, WSC will display a warning message. It is critical to follow the step-by-step instructions provided.
Recovering a Failed Recording Driver After the Disaster
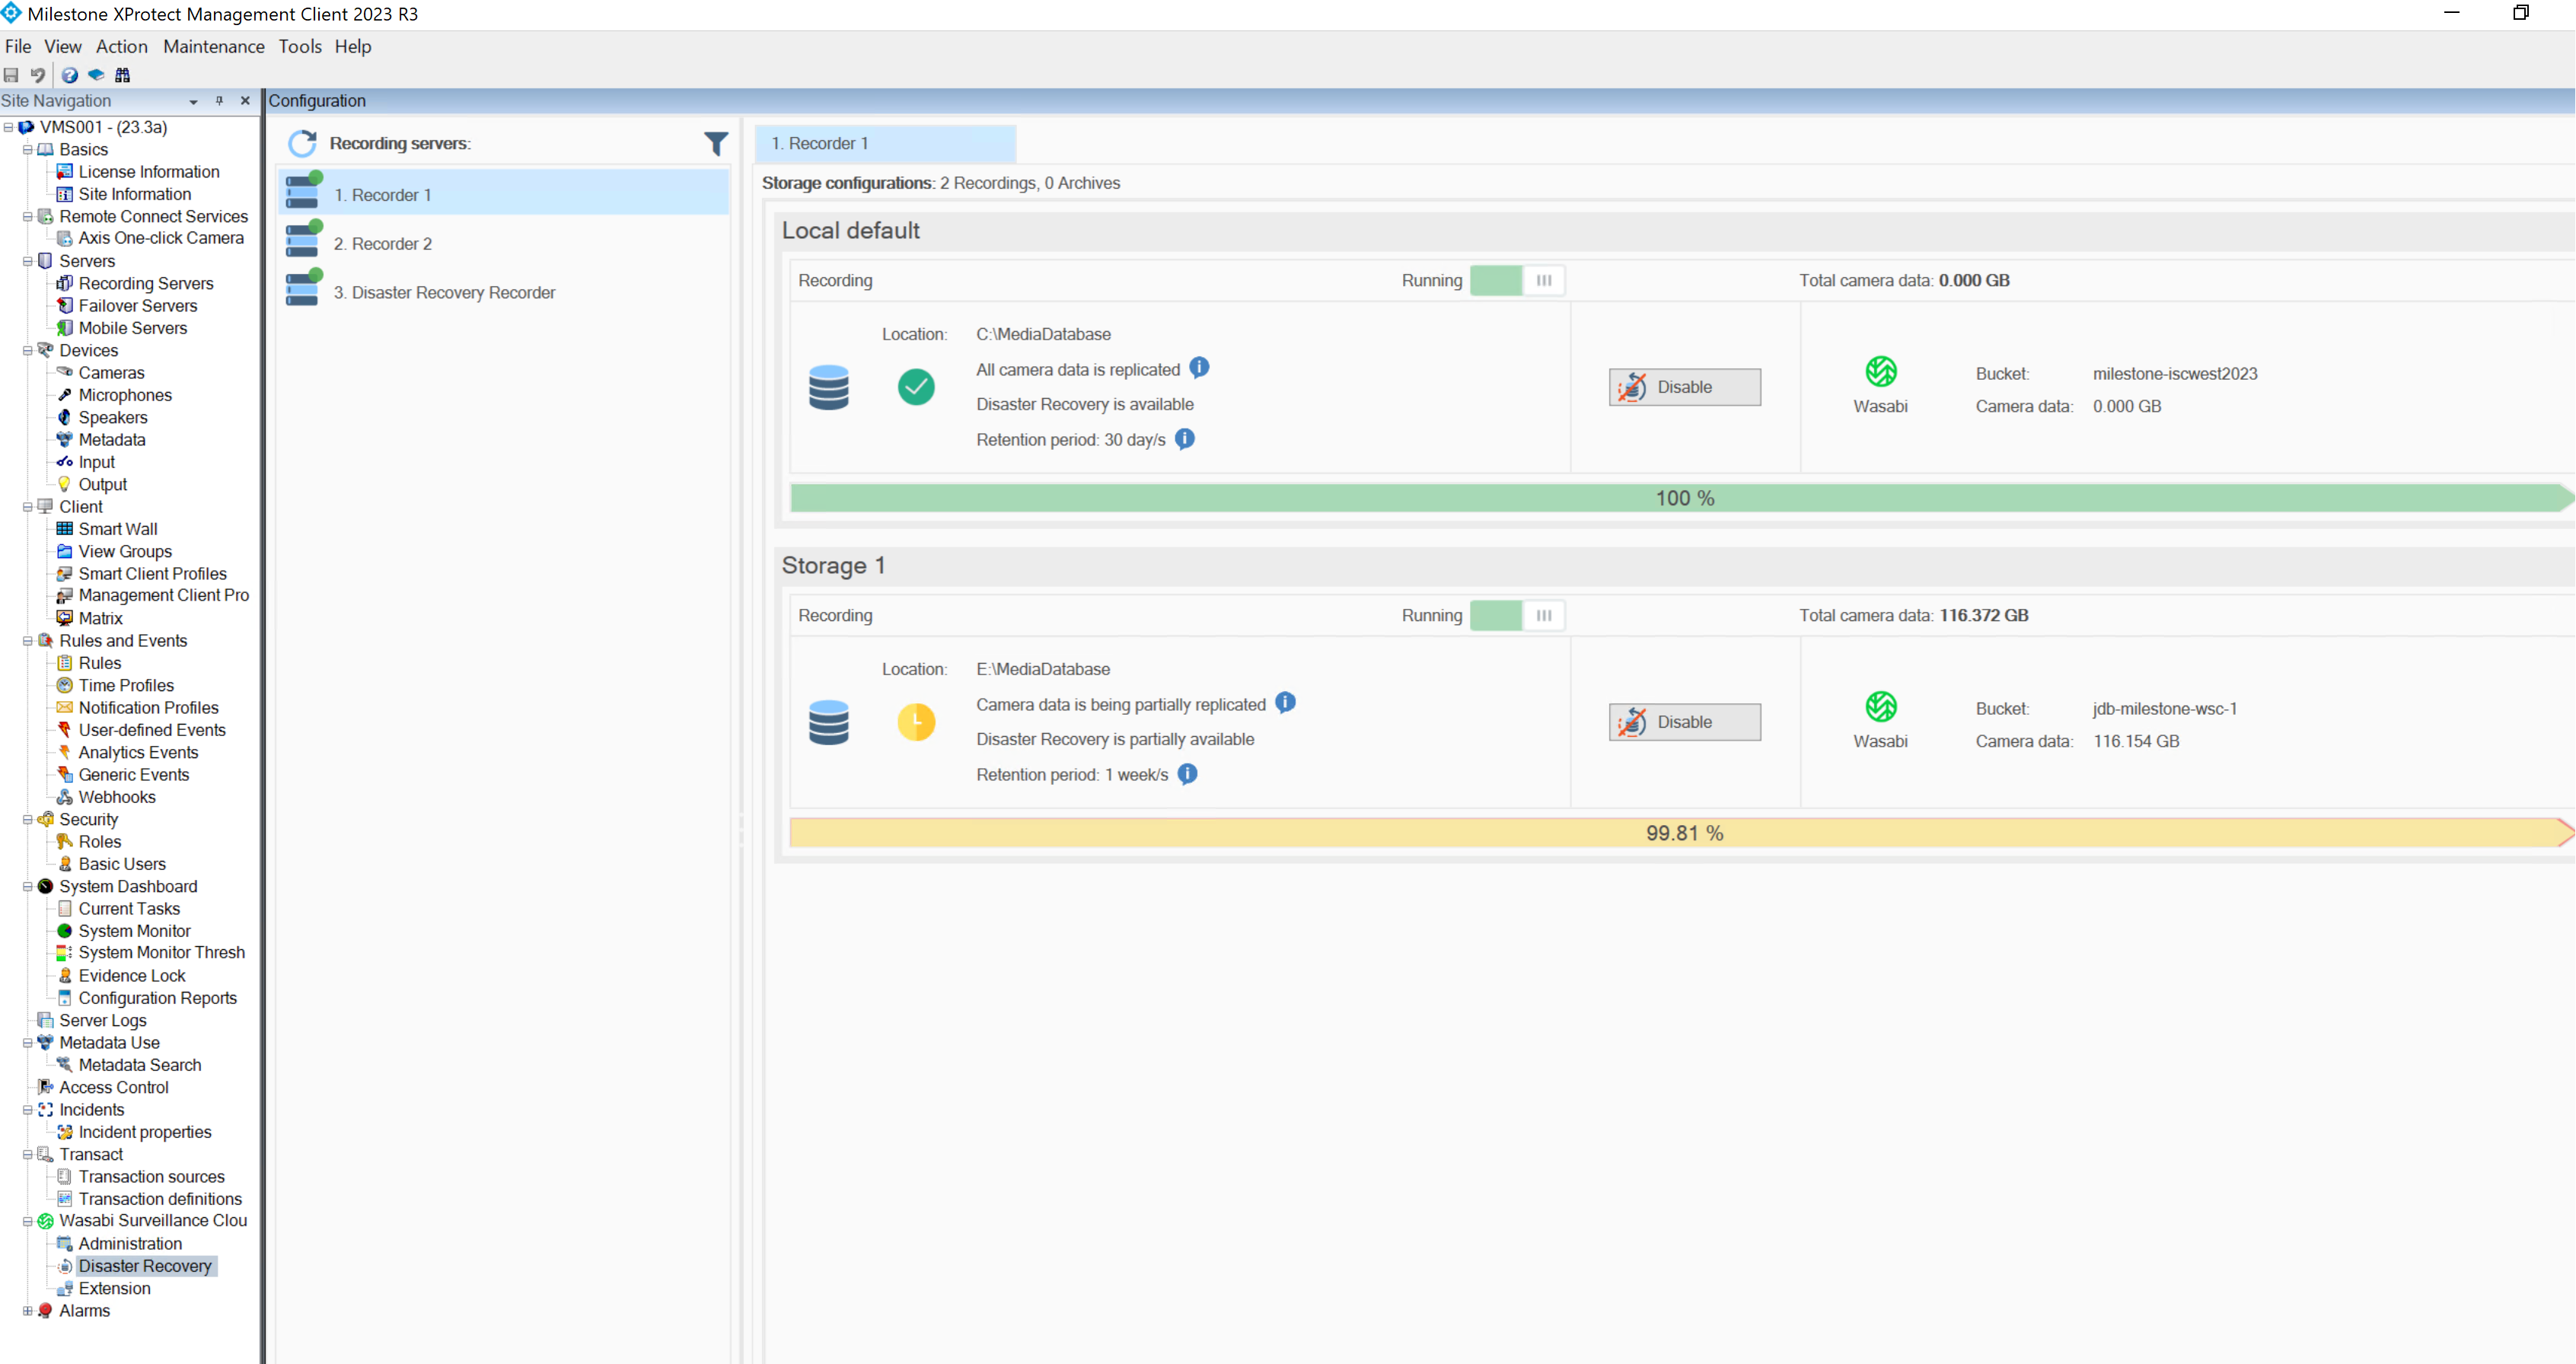
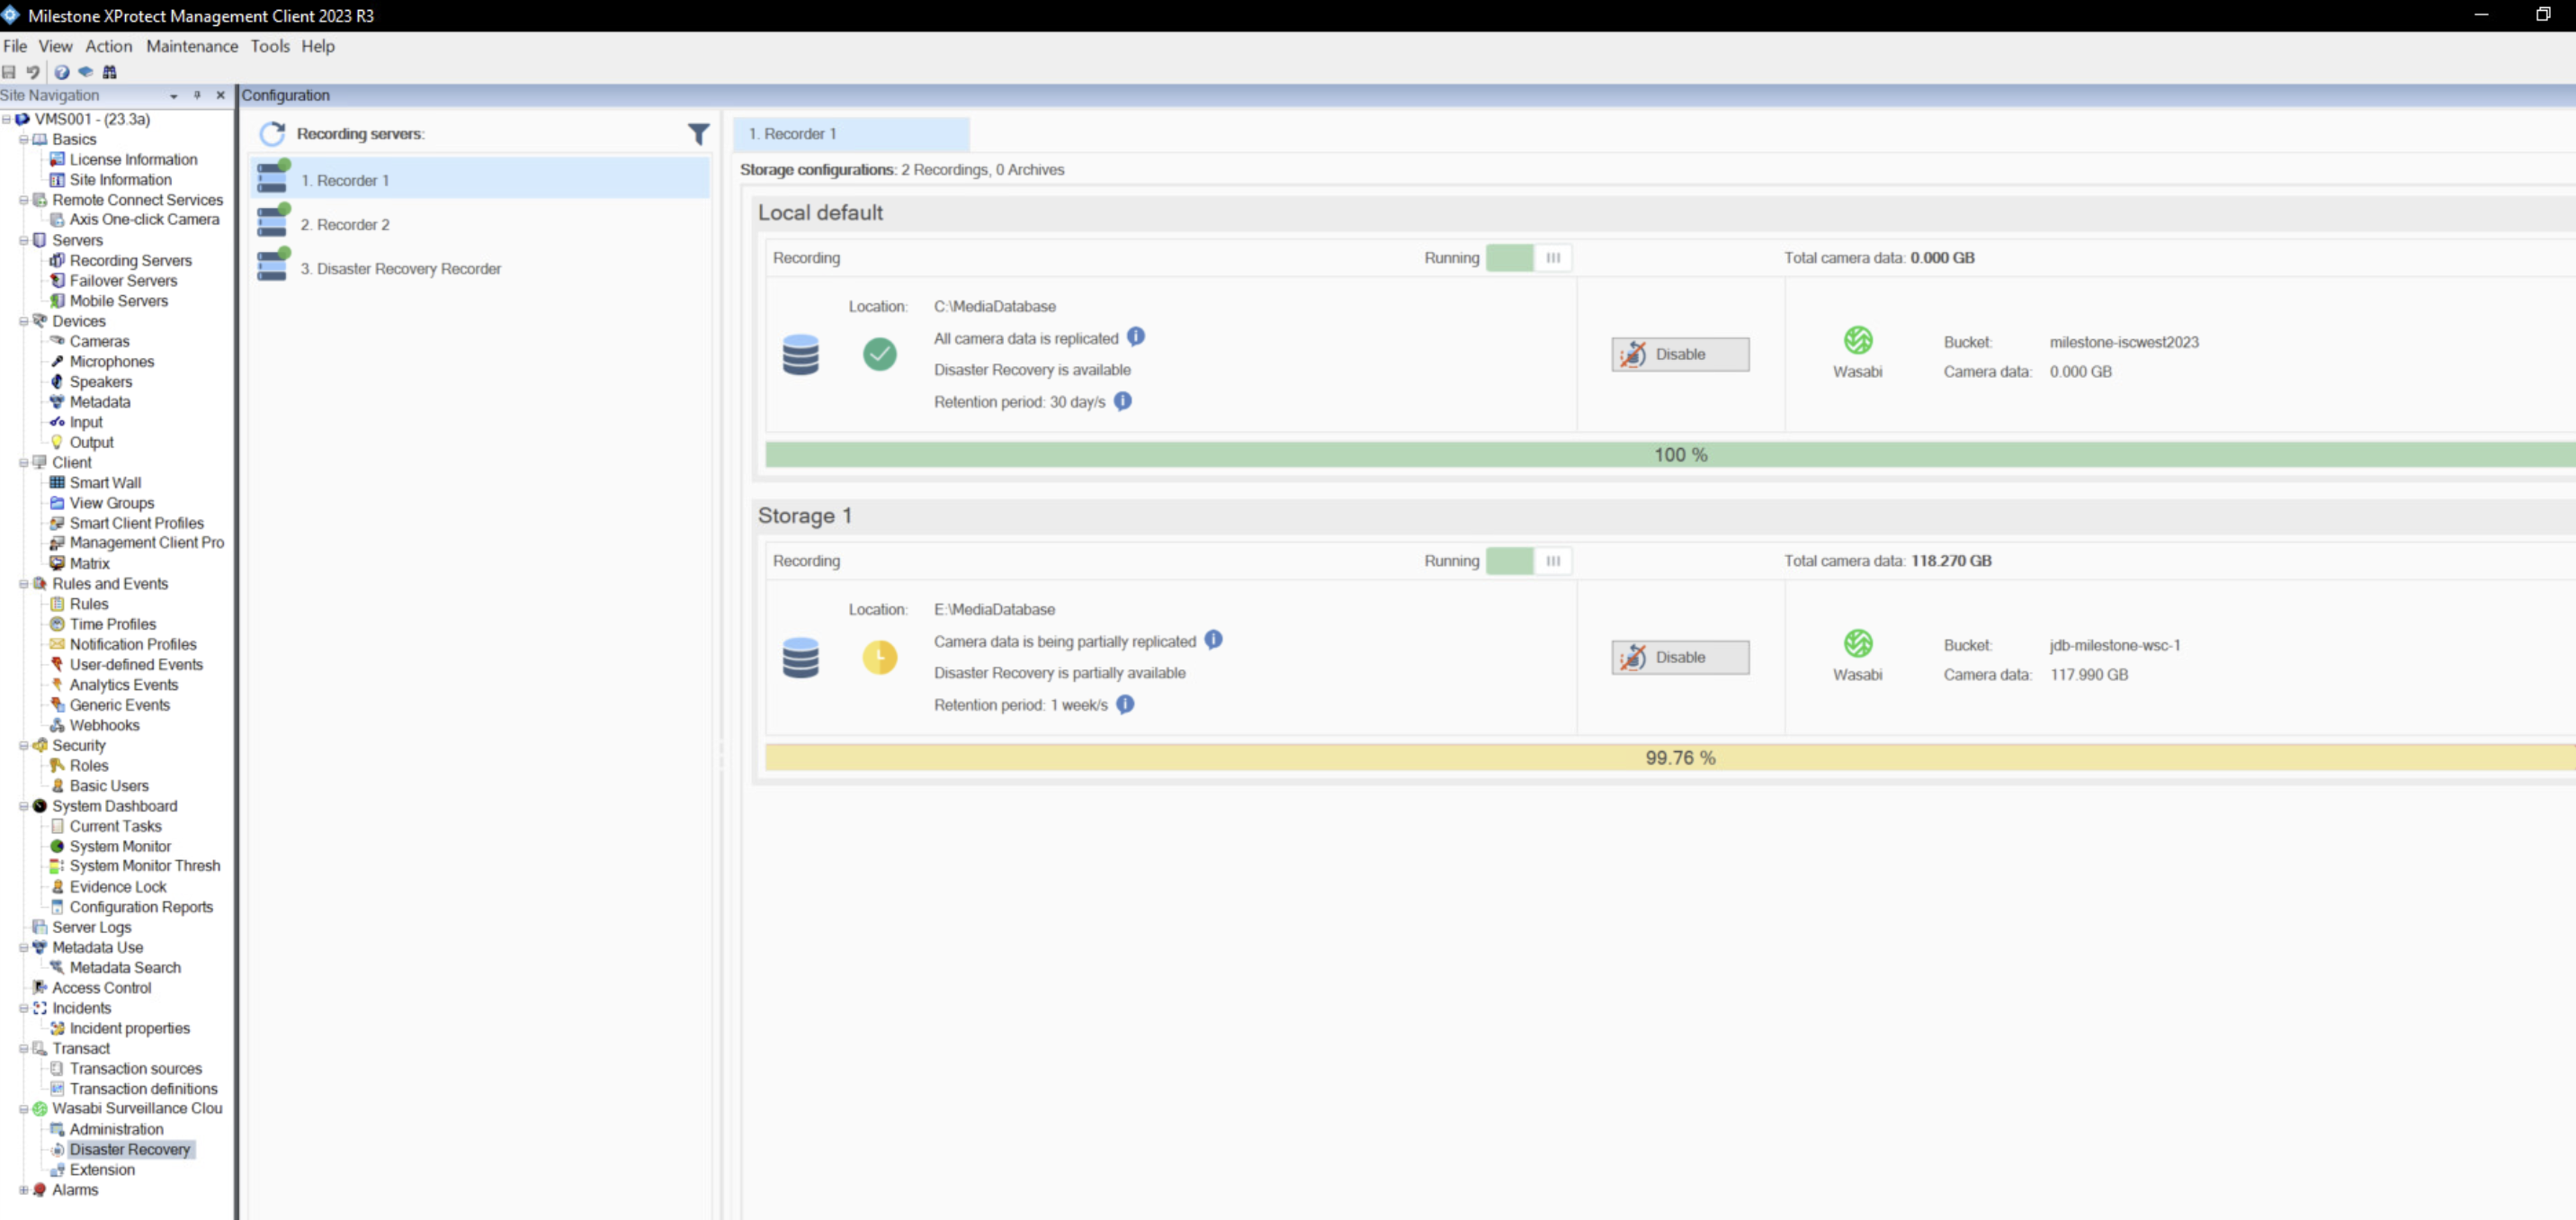
- When all servers are Online OR Healthy, green status icons are displayed. For example:
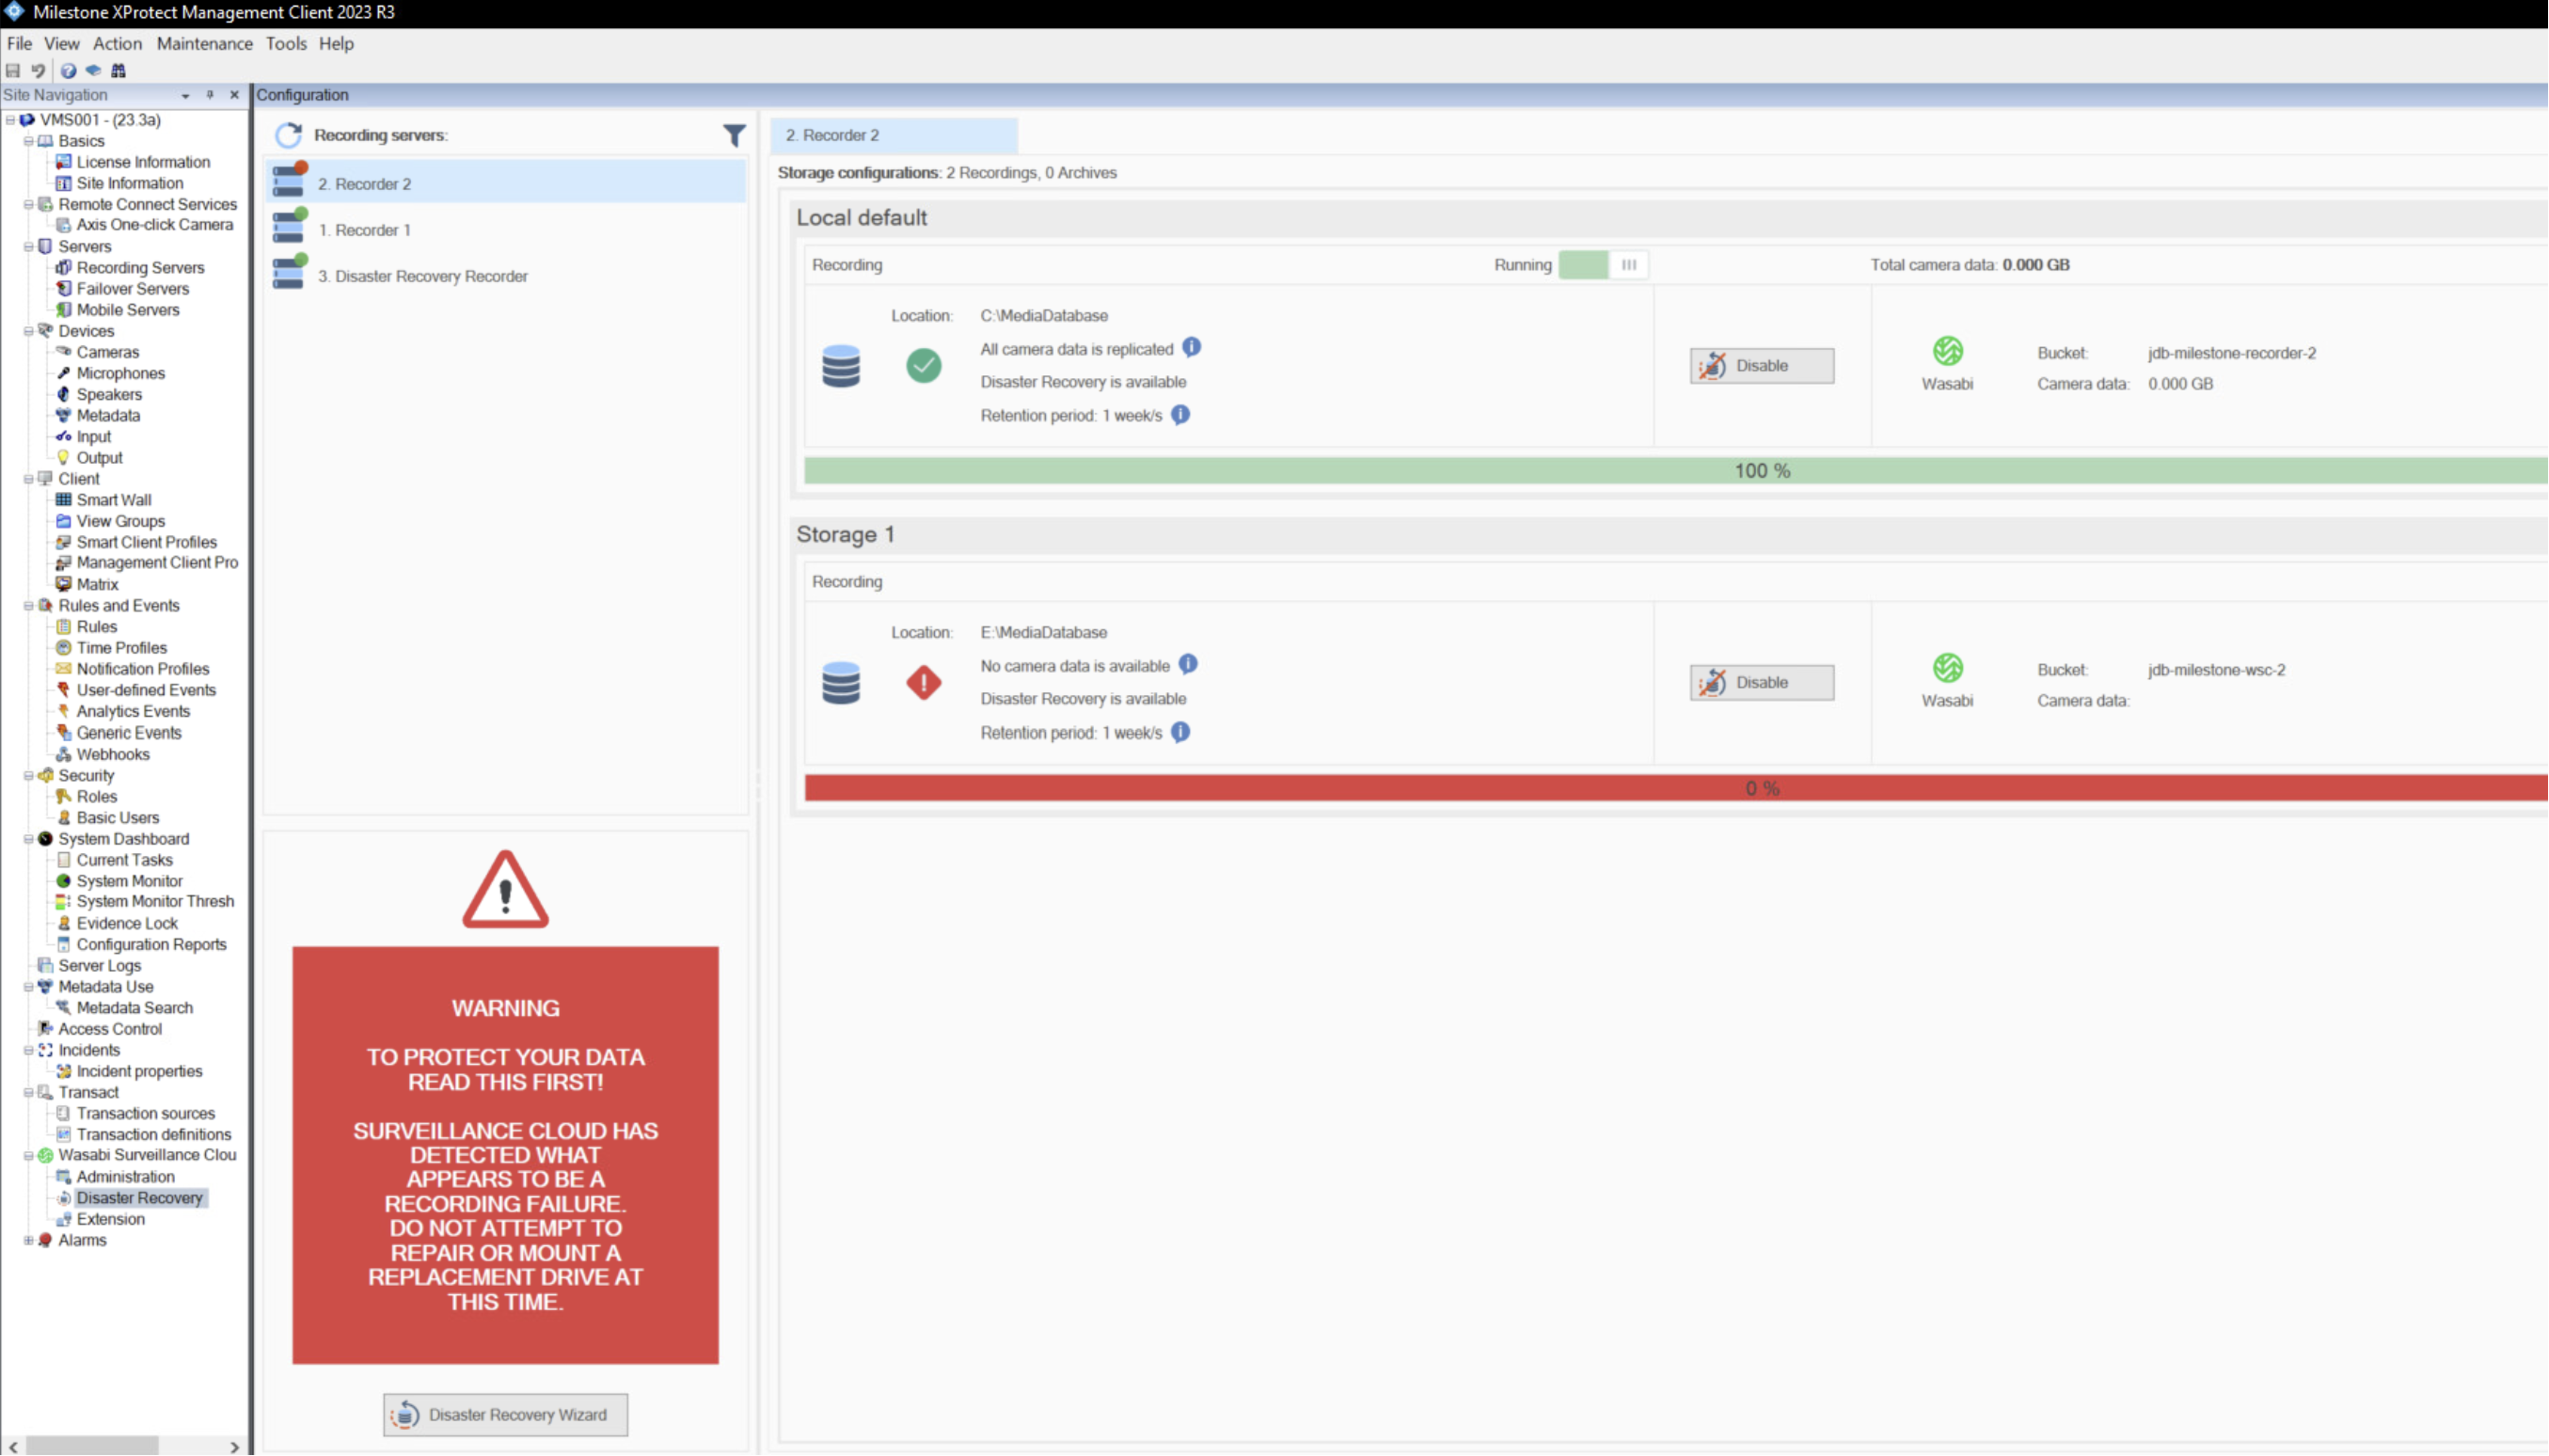
- Once WSC recognizes that a recording drive has failed, it will automatically alert of a Disaster Recovery scenario.
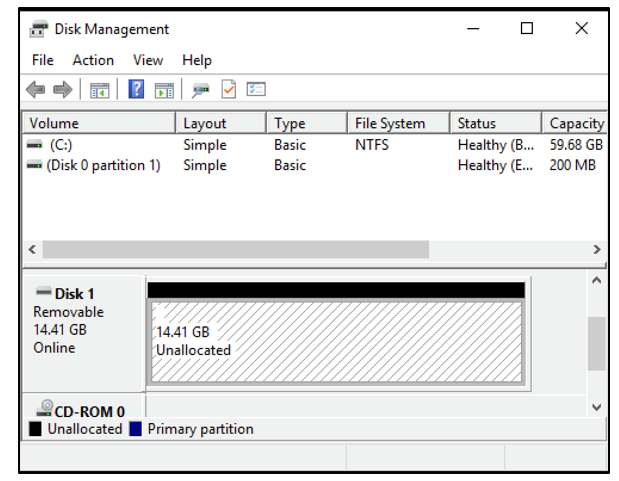
- Connect a replacement drive to the recording server, but do NOT mount it. To be safe, the replacement drive should NOT be formatted (or you should FIRST STOP the recording server PRIOR to connecting a formatted drive).
- Click Disaster Recovery Wizard to begin the recovery process. Click Next.
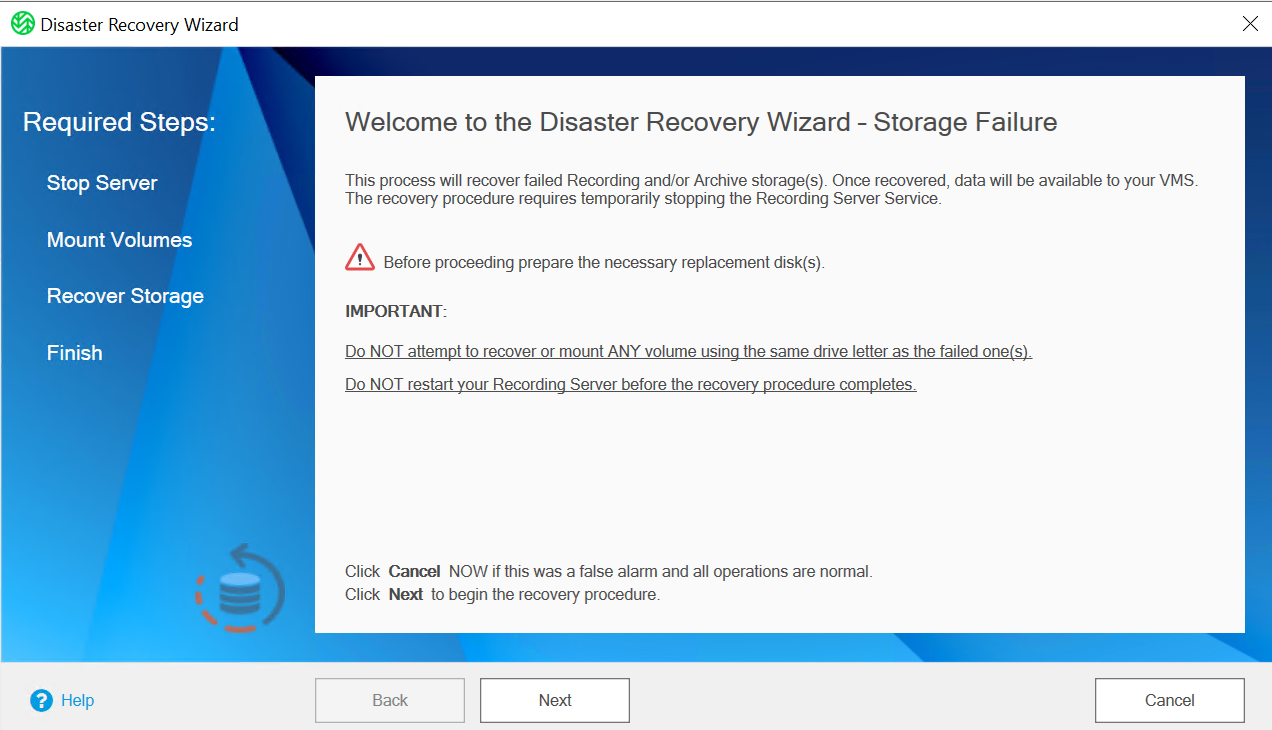
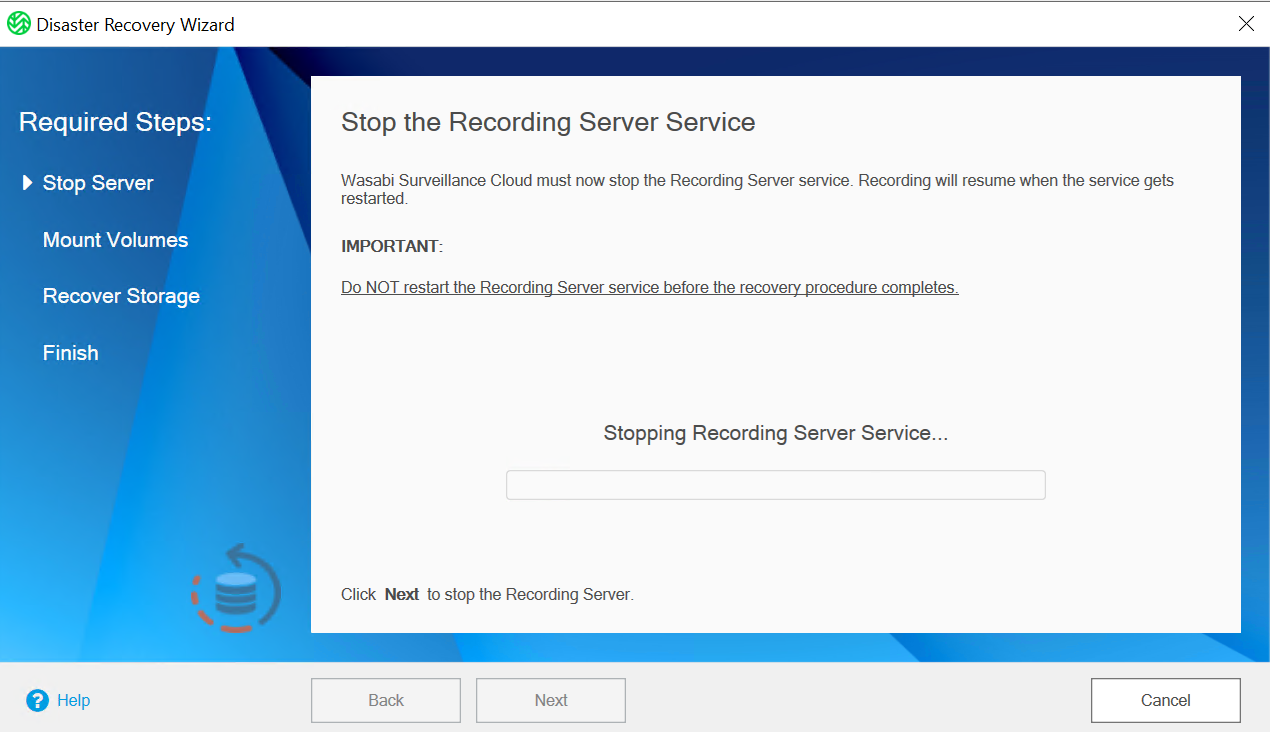
- The Wizard will first stop the recording server (if it is not already). Click Next.
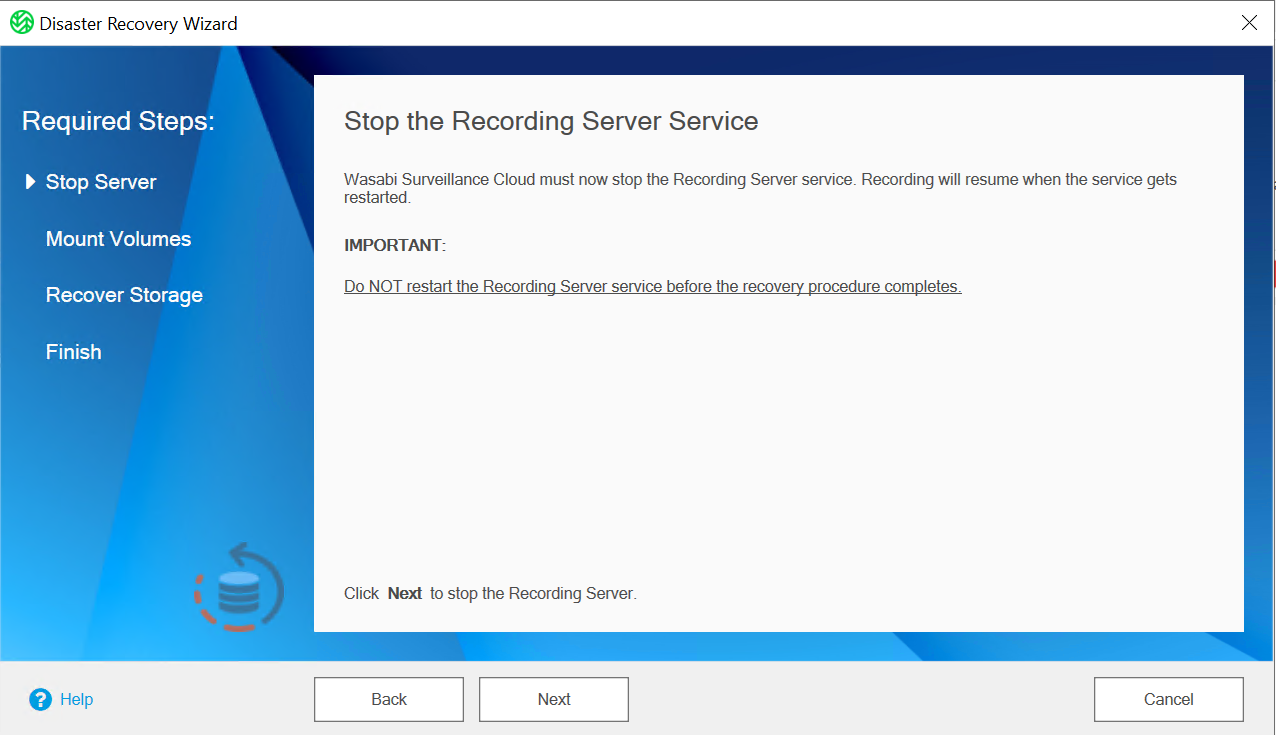
The service will be stopped.
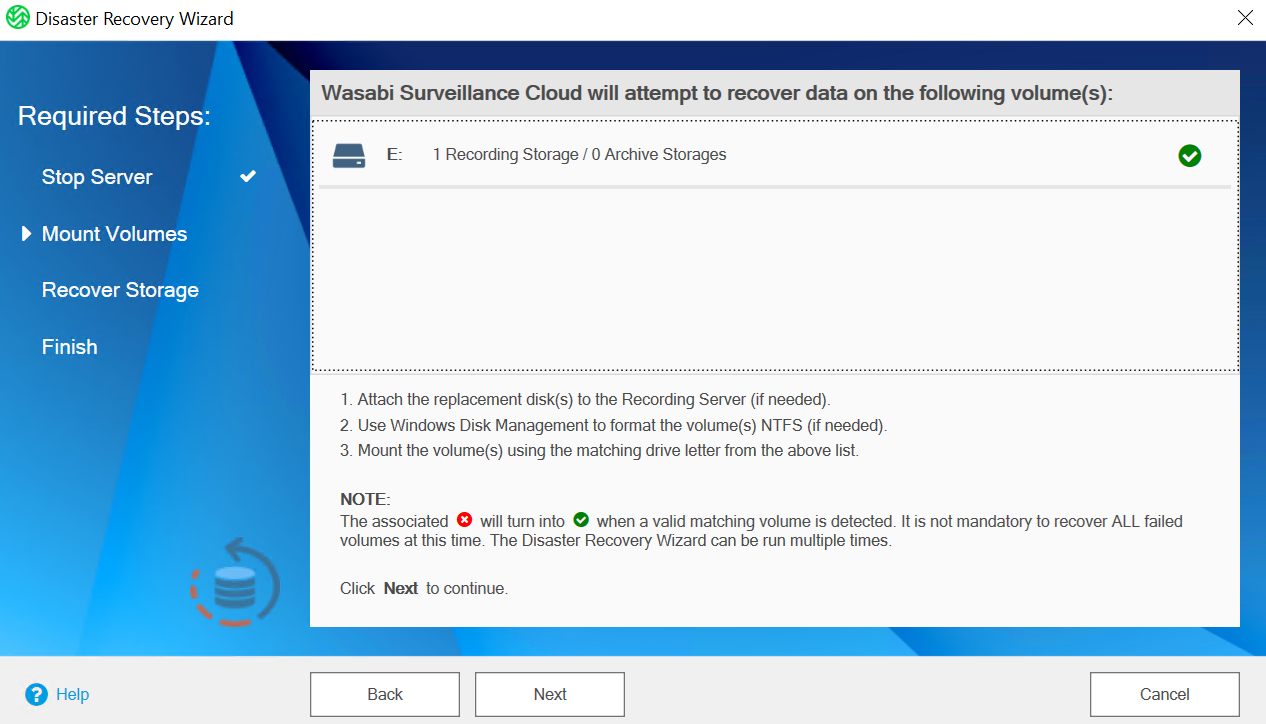
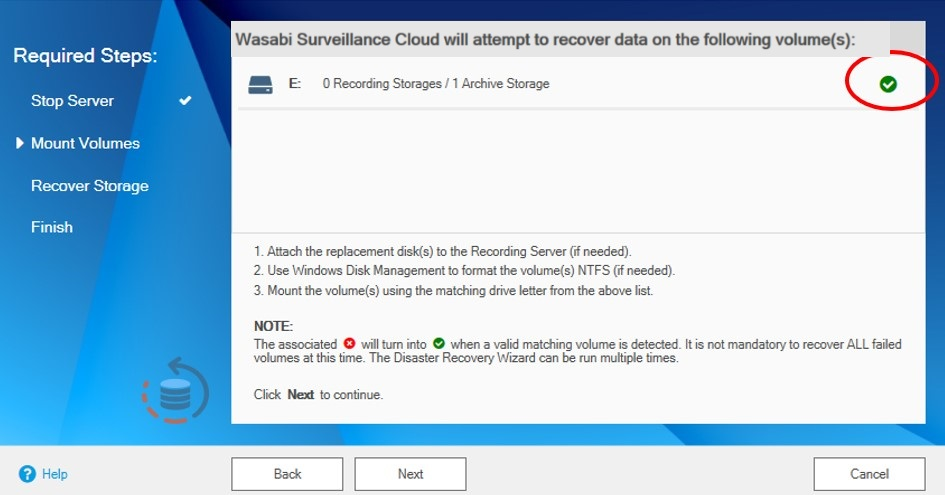
- It is time to format and assign the original drive letter to the replacement drive (in this example, the failed drive letter was E:).

- Install and partition your new drive and be sure to format it to use the same volume letter as the previous failed drive.


When the replacement volume is detected with the proper drive letter, the surveillance bridge displays a green checkmark:
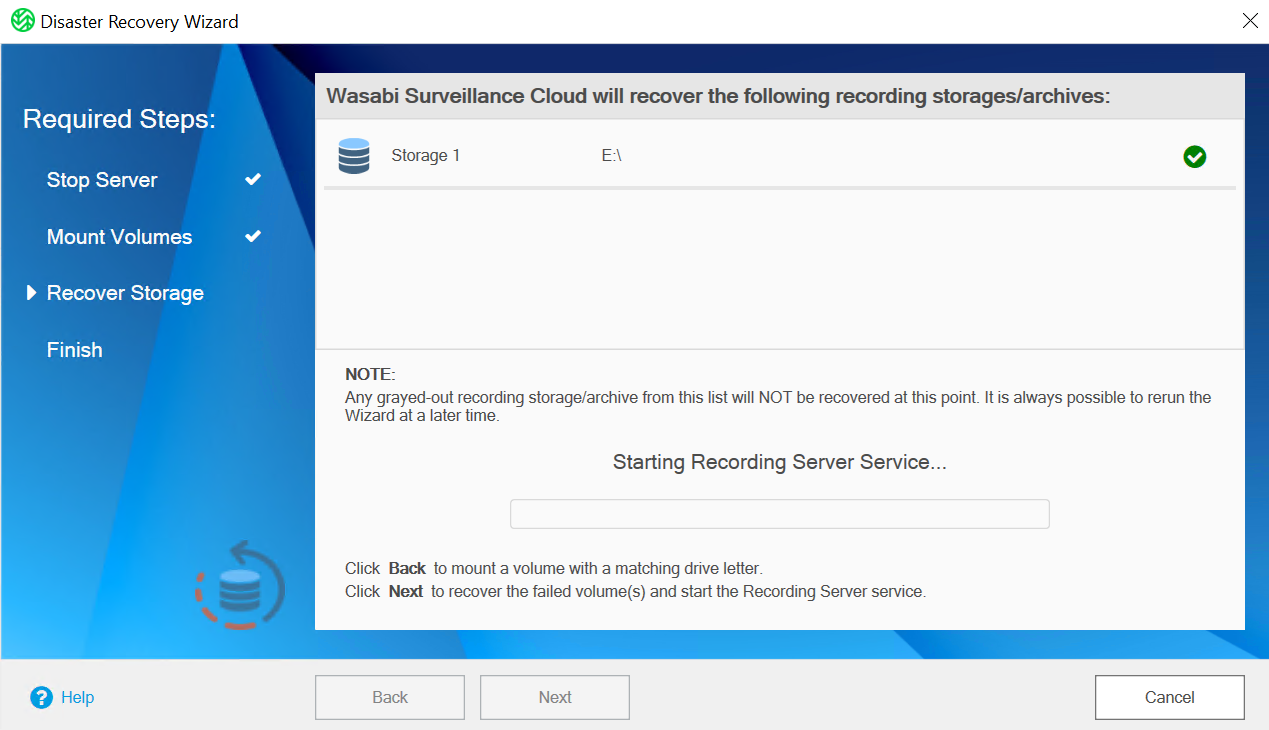
- WSC will ask for confirmation. Click Next.
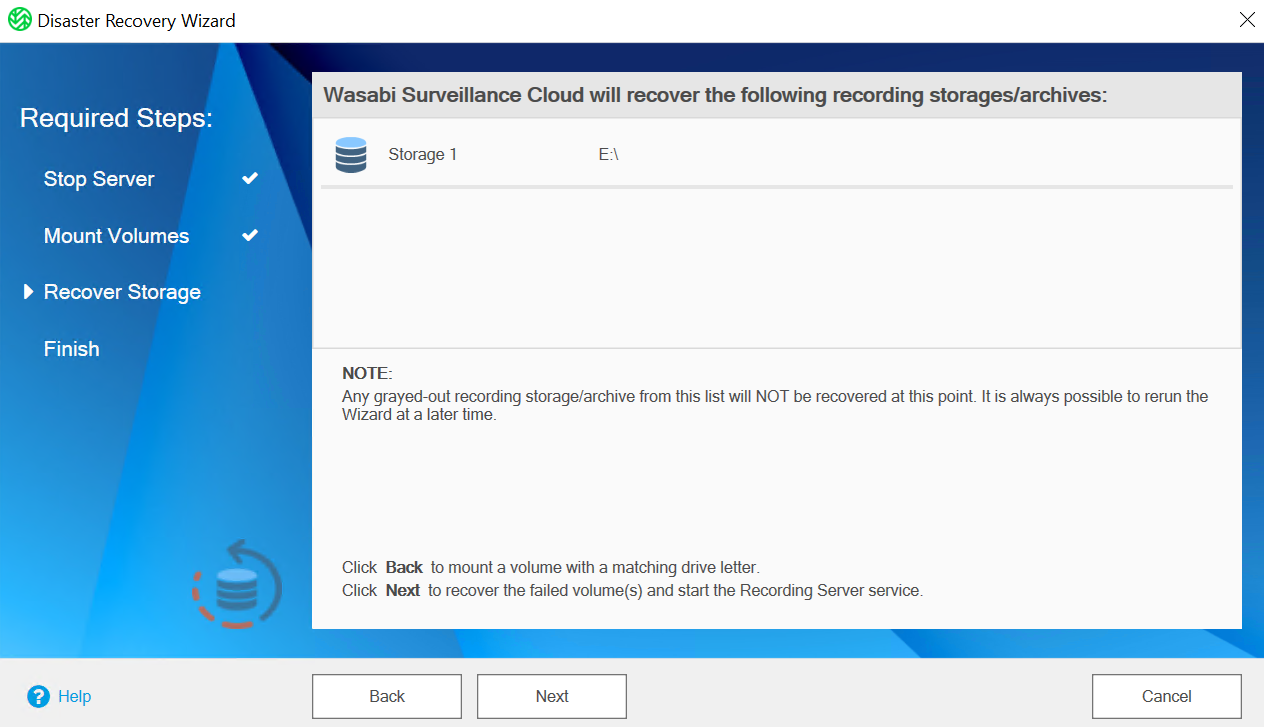
WSC will restart the services.
- The Wizard is complete and you can click Finish.
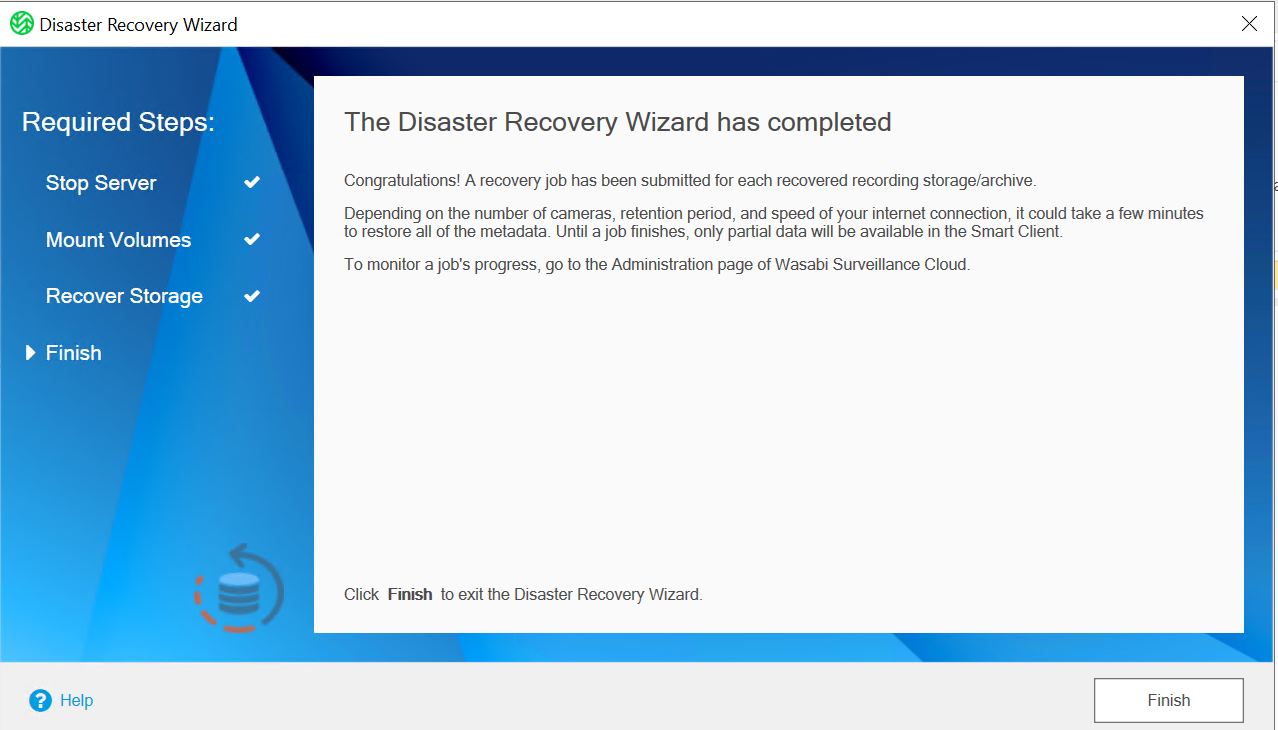


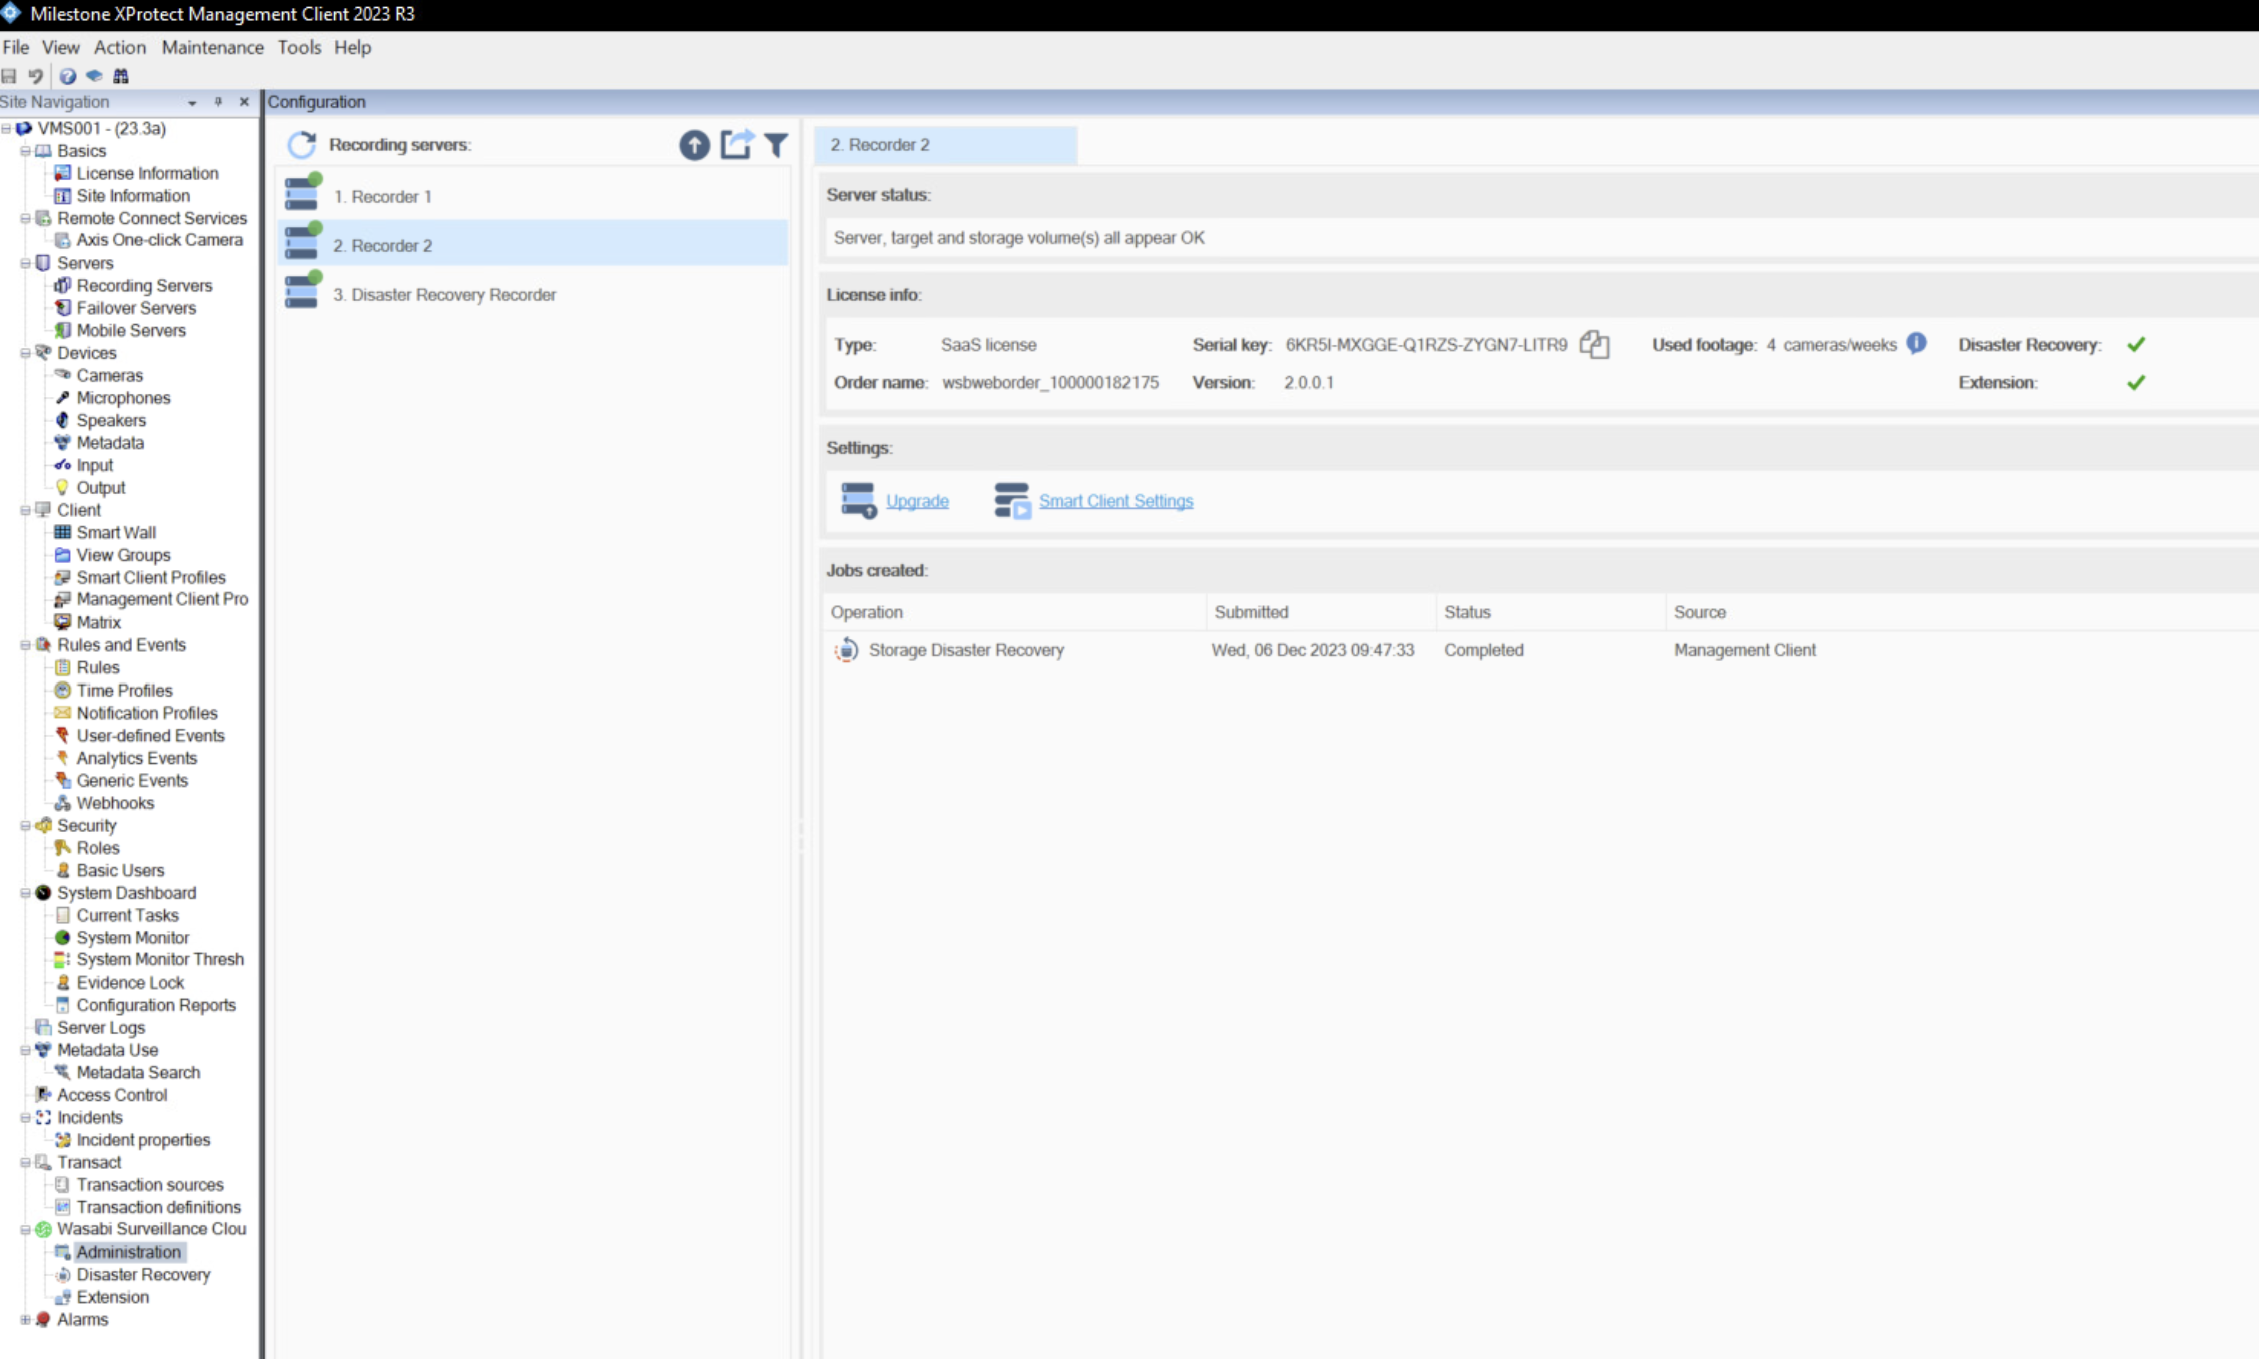
You can view the restore job in the Administration tab under the Recording server that had the failed recording drive.
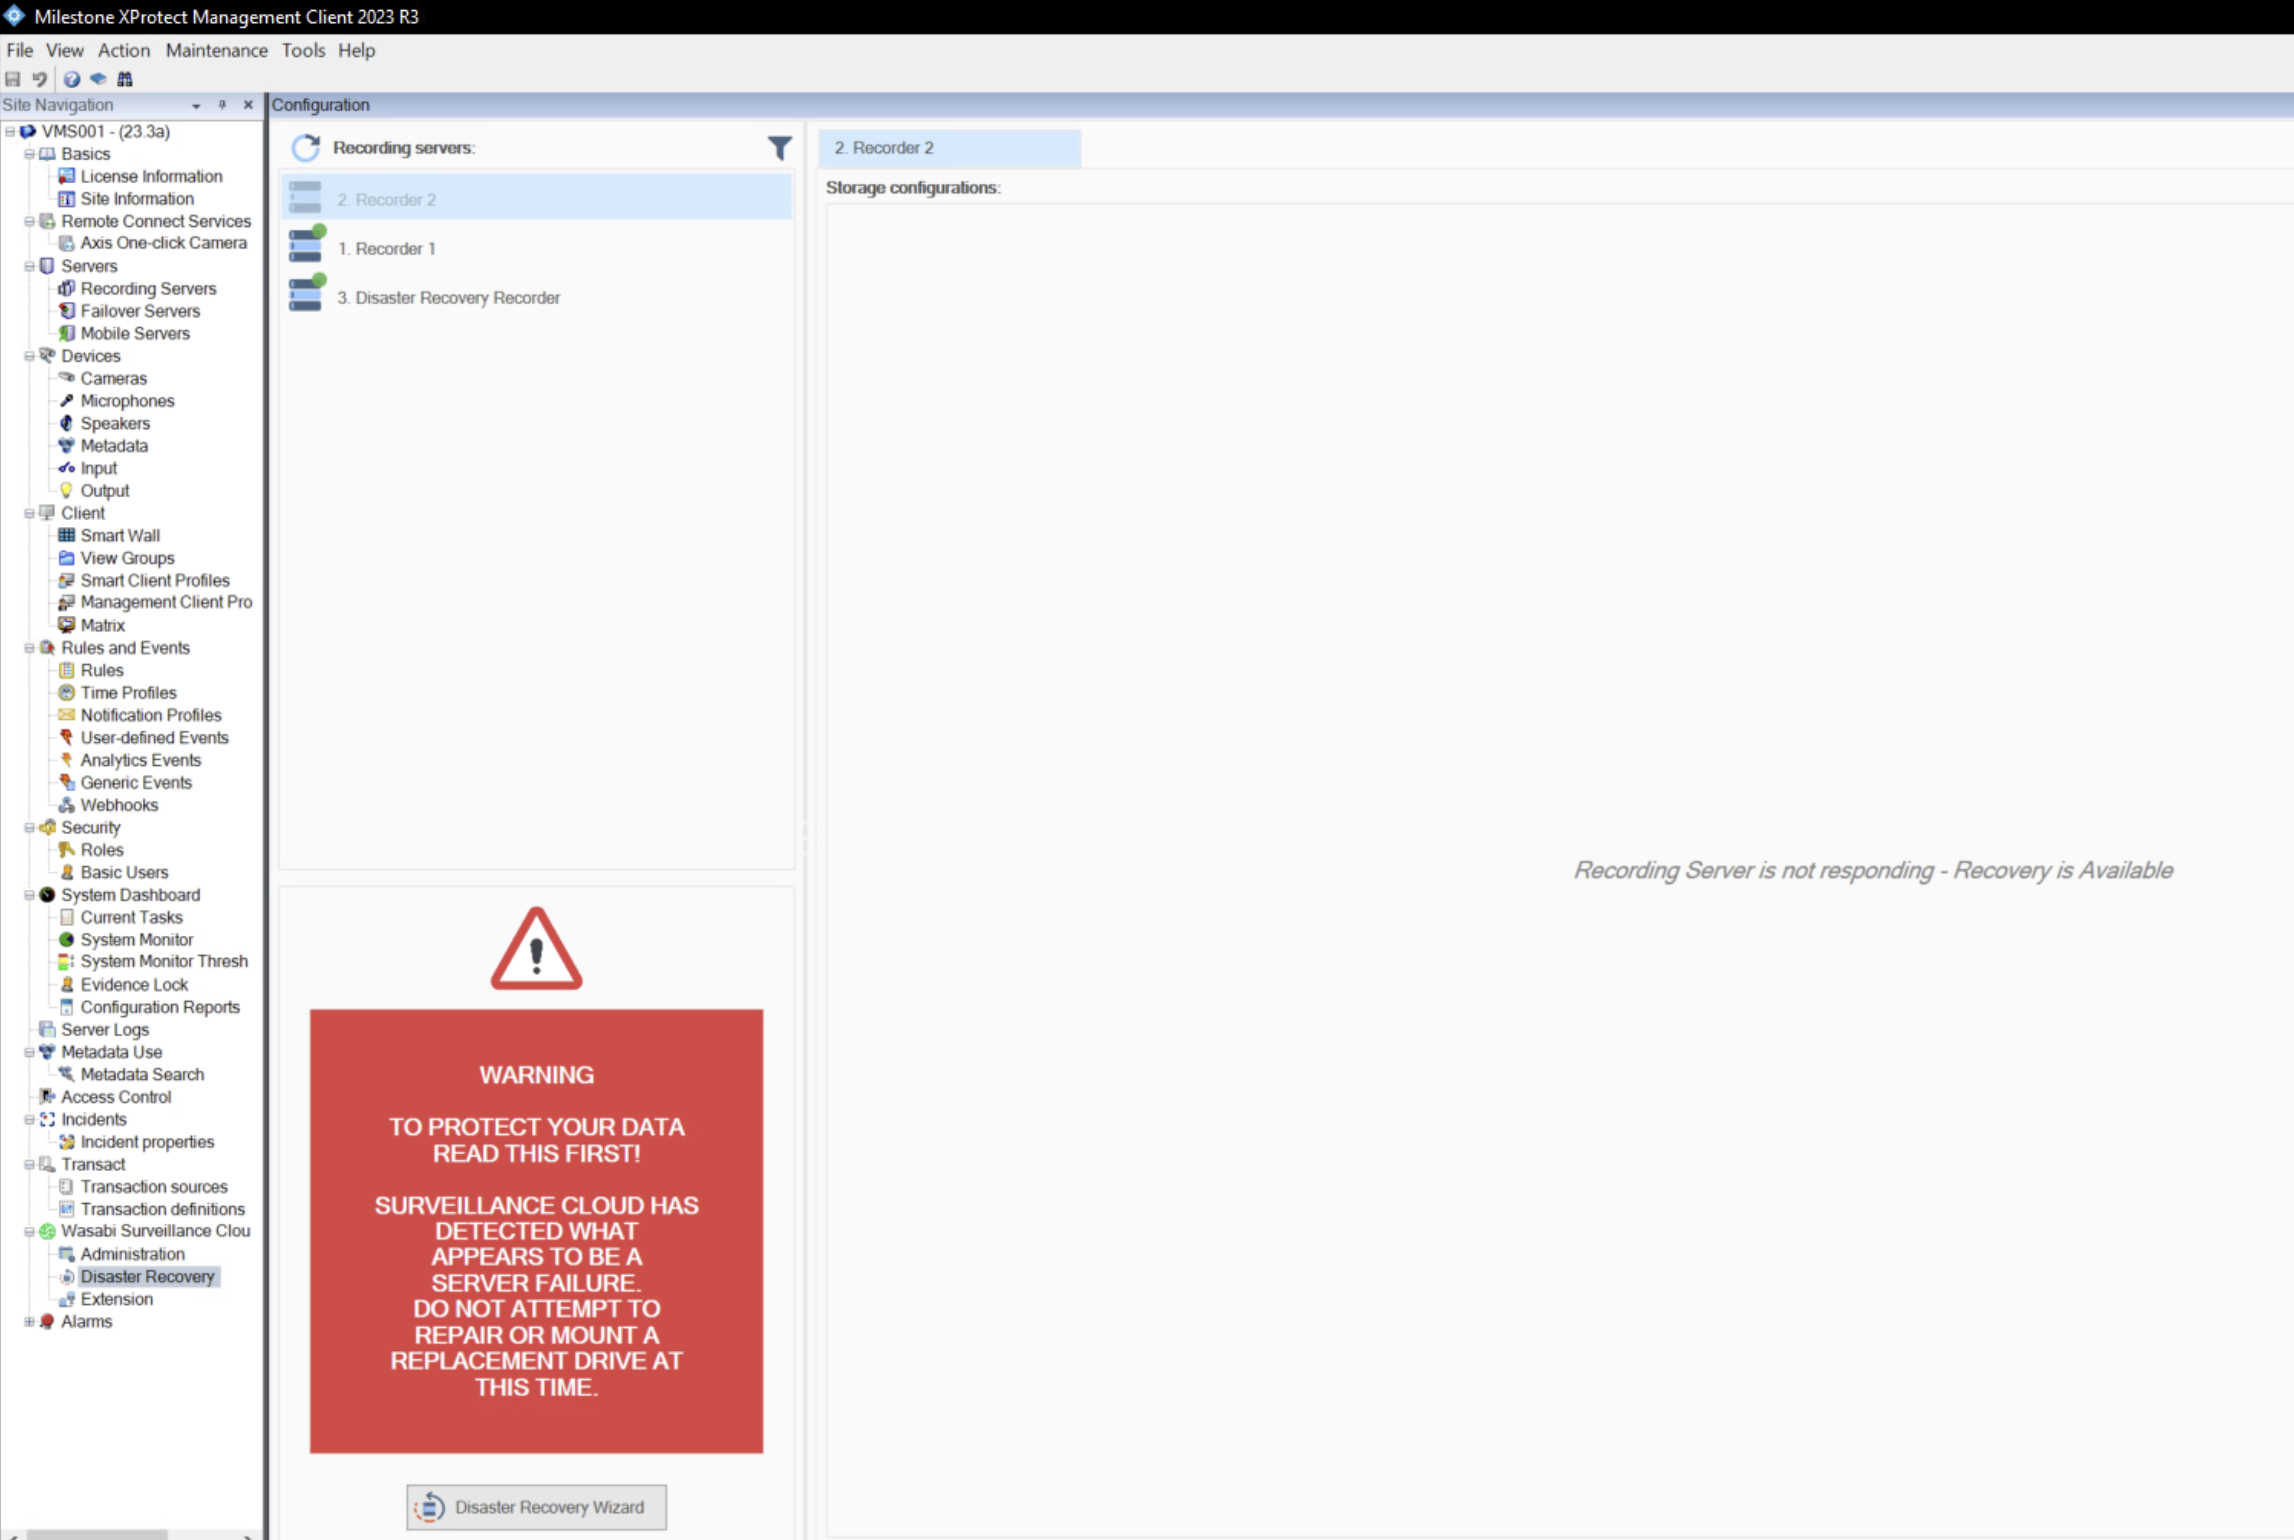
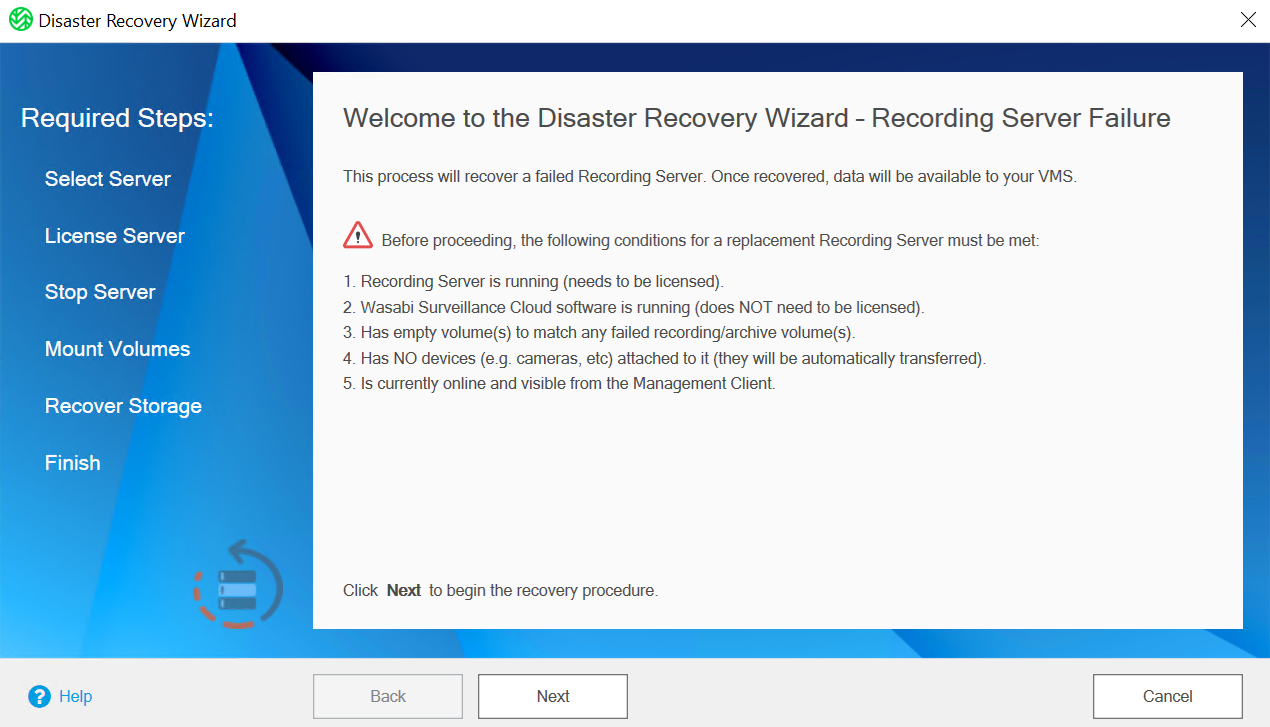
Recovering a Failed Recording Server After the Disaster
When the Disaster Recovery option is enabled, WSC can recover from a recording server failure. When XProtect detects the failure, WSC will display a warning message. It is critical to follow the step-by-step instructions provided.
- Green status icons are displayed for all the servers that are online and healthy:
Click Disaster Recovery Wizard to engage the recovery procedure.
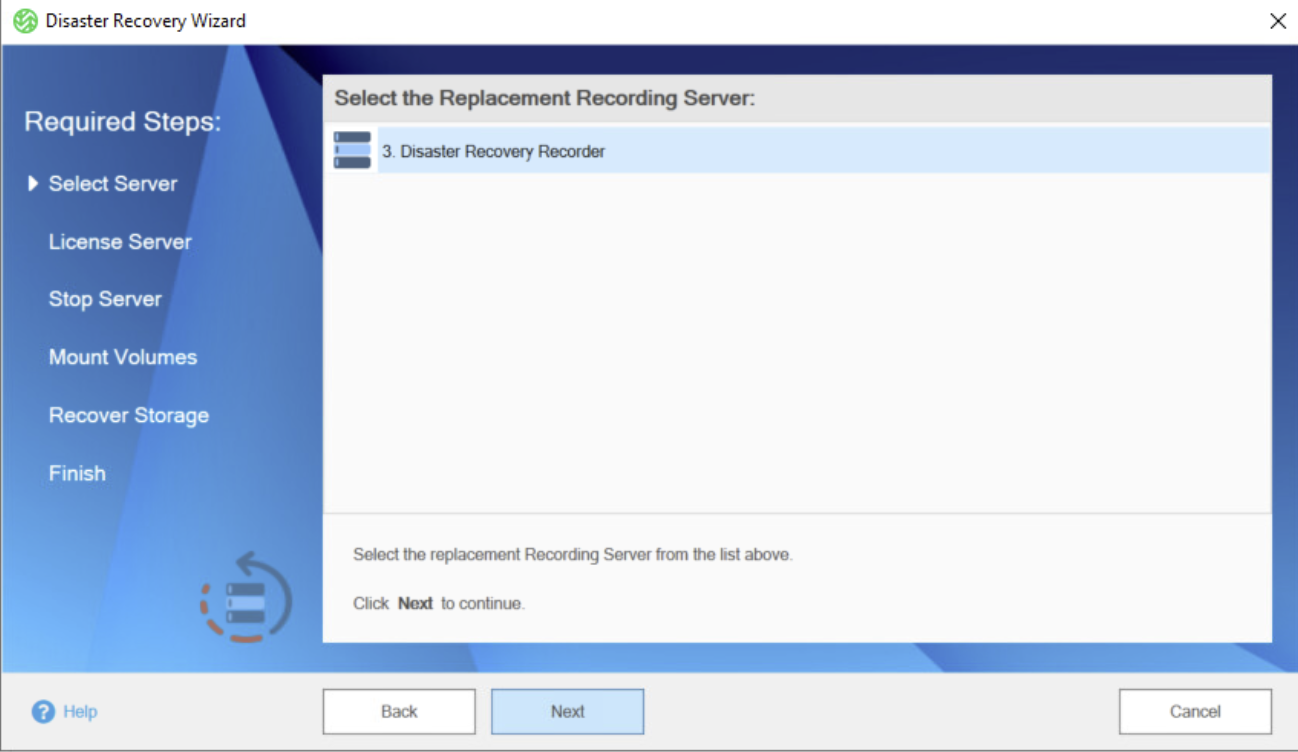
- Make sure the replacement recording server is ready and available:
- WSC automatically lists the available replacement servers. Select one and click Next.
- Activate the WSC license on the replacement server.

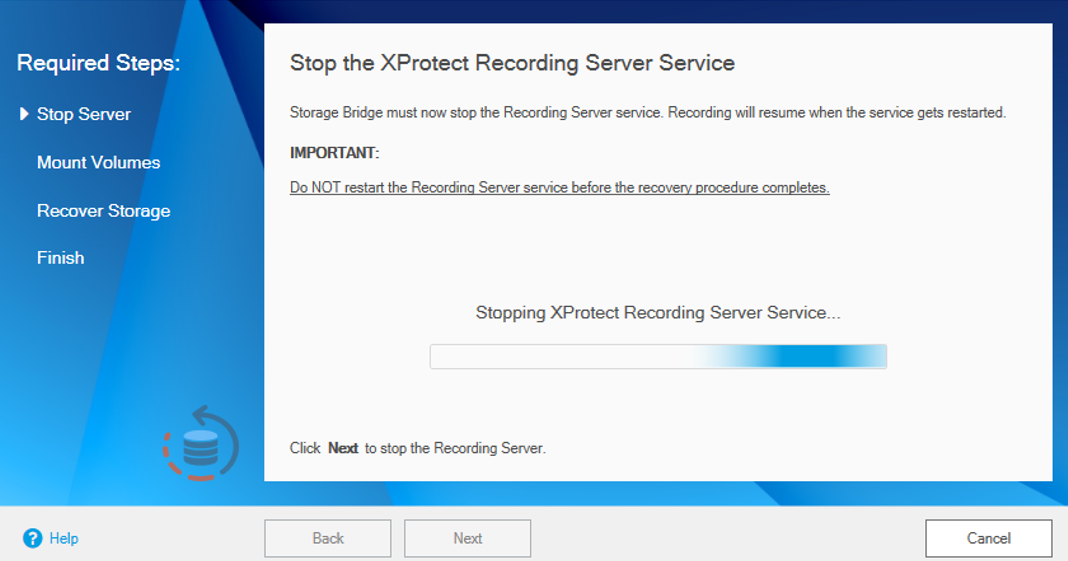
The Wizard will stop the replacement recording server.
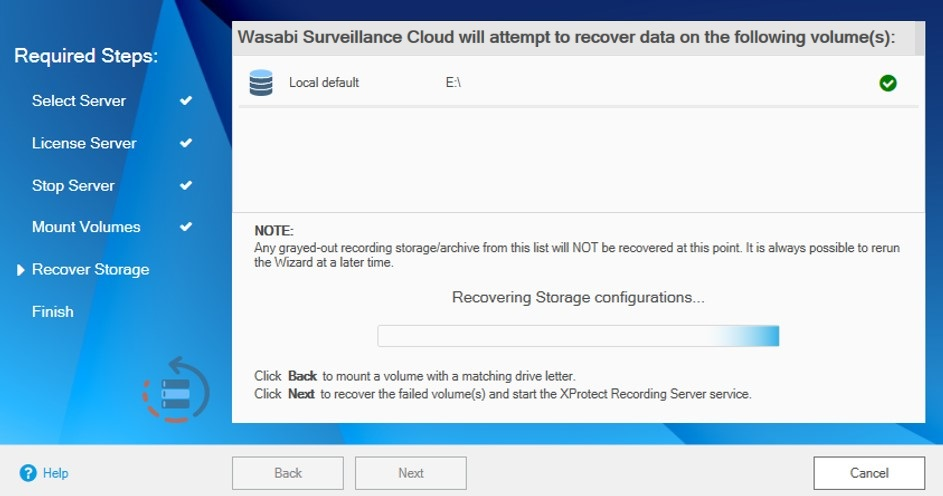
- It is necessary to format and assign the same drive letter to the replacement drive (in this example, the original drive letter was E: ).
- Make sure you create a new disk and format it to have the same volume letter.
When the replacement volume is detected with the proper drive letter, WSC displays a green checkmark:
- Click on Next and the recovery will begin.
- The Wizard has completed. Click Finish.
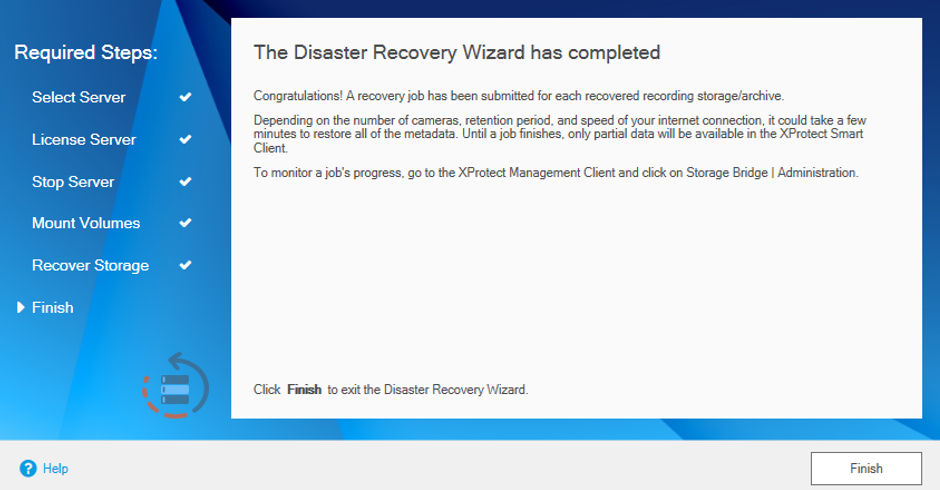
- You can now verify the recovery completed by clicking the Administration tab and selecting the recording server that you recovered to. Then you will see the Job Completion tab.