The Versioning feature allows you to preserve, retrieve, and restore every version of every object stored in the same Wasabi bucket. Versioning offers an additional level of protection by providing a means of recovery if you accidentally overwrite or delete objects. With versioning, you can easily recover from unintended user actions and application failures. You can also use versioning for data retention and archiving.
When bucket versioning is enabled, every version of every object in the bucket will be stored. You can then retrieve and restore any version of an object in the bucket. This provides protection against inadvertent removal of an object (such as by overwriting or expiration). You can enable bucket versioning:
While creating a bucket, as described below.
After a bucket has been created (that is, for an existing bucket displayed in the Buckets list), as described in Bucket Settings: Versioning
Use versioning cautiously because when versioning is enabled, different versions of all the objects in the bucket are saved and added to your total data storage costs. This means the costs could be very high, eventually, as versions are stored. For additional information, refer to Wasabi Pricing.
Once you enable versioning for a bucket, Wasabi preserves existing objects any time you perform a PUT, POST, COPY, or DELETE operation on them. By default, GET requests will retrieve the most recently written version. Older versions of an overwritten or deleted object can be retrieved by specifying a version in the request.
Creating a Bucket With Versioning
By default, the option to set the bucket versioning feature is suspended (not enabled). To enable bucket versioning:
Complete the Bucket Name section for creating a new bucket by entering a bucket name and selecting a region for storage. Click Next.
In the Set Properties section, slide to enable the Bucket Versioning toggle:

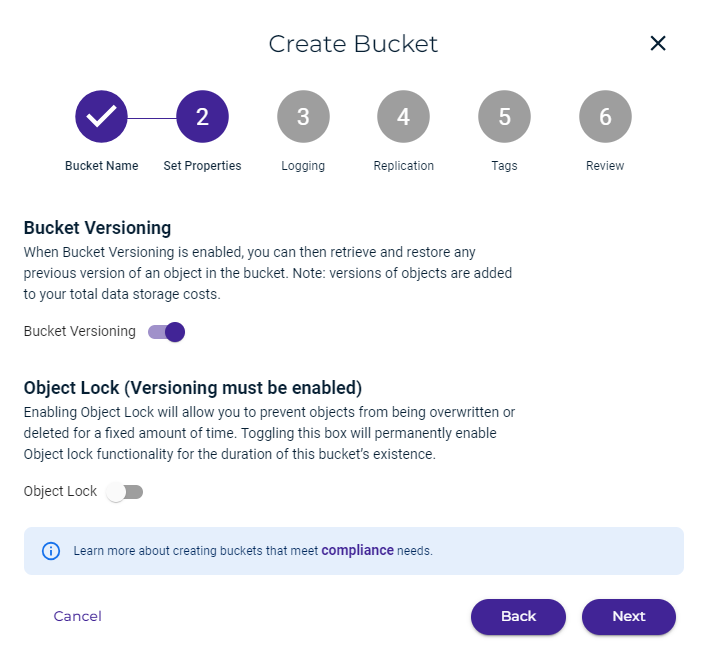
Set Object Lock, if appropriate.
Click Next.
Optionally, set Logging, Replication, and Tags. Or, click Next until you reach the Review panel, as shown below.
The bucket settings and properties are displayed for your review. You can click Back if you need to change any information. Otherwise, click Create Bucket to accept the information and create the bucket.
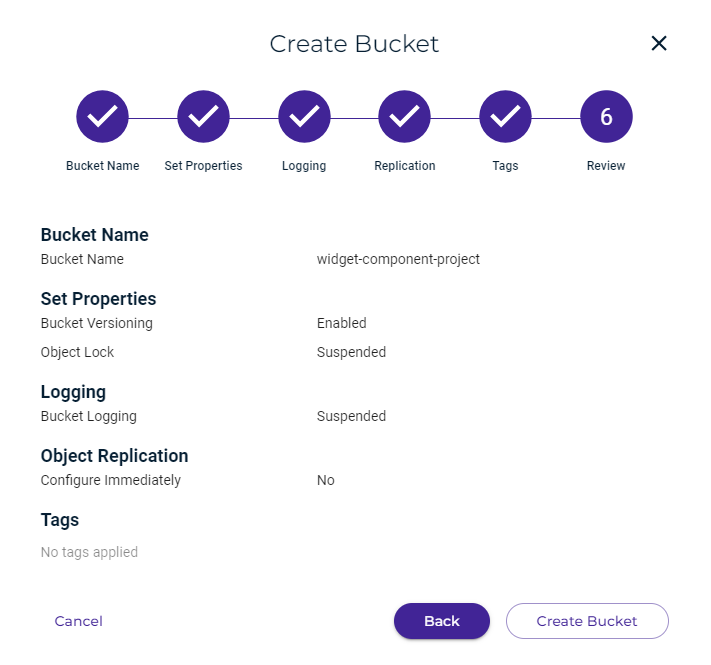
A message displayed at the top of your screen indicates that the bucket was created successfully.
Enabling or Disabling Versioning for an Existing Bucket
Refer to Bucket Settings: Versioning for more information about bucket settings and versioning.