How do I use Wasabi Object Replication with Unitrends Backup?
Unitrends has been validated for use with Wasabi. For additional info on how Wasabi works with Unitrends, please visit this solution page.
This article describes the procedure to use Wasabi Object Replication to replicate objects from one region to another within the same continent. This can be used to recover from natural disasters or other events in a region.
Prerequisites
- Unitrends Backup installed and licensed. This solution was tested with version 10.8.7.
- Active Wasabi Cloud Storage account.
- Active Backup Copy Job pointing to a Wasabi "source" bucket. The objects in this source bucket will be replicated to a destination bucket in another region
- Existing backups reside in a non-Object-Locked (non-immutable) source bucket. Unitrends does not support Object Locked buckets.
High-Level Steps
Follow the high-level steps below to implement Object Replication from a source bucket to a destination bucket in another region with Unitrends Backup. These are detailed further in the sections below.
- Sign up for notifications to be sent to your account email address.
- Create a Wasabi "destination" bucket where the source bucket will be replicated to.
- Configure an object replication job.
- In the case of a disaster, a Unitrends backup copy target pointing to the destination bucket may be created and the backup copy job(s) repointed to this new target.
Sign Up for Object Replication Notifications
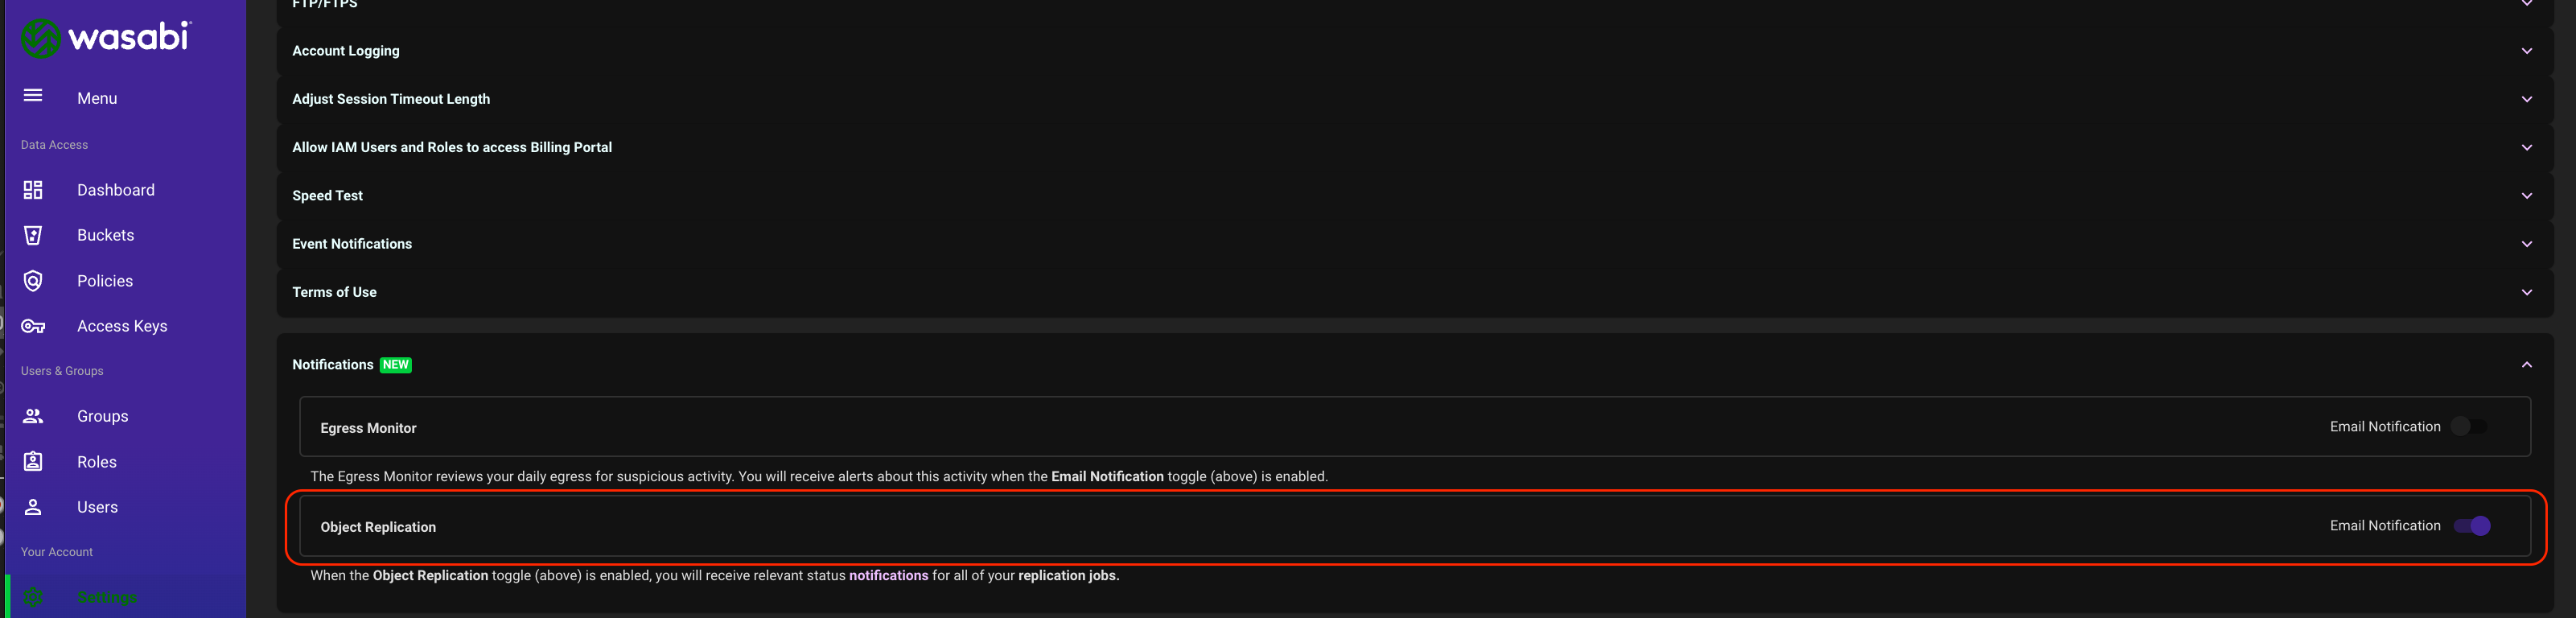
Signing up for notifications will allow you to receive information about any object replication failures.
- Login to the Wasabi Console.
- Navigate to Settings, then click on Notifications.
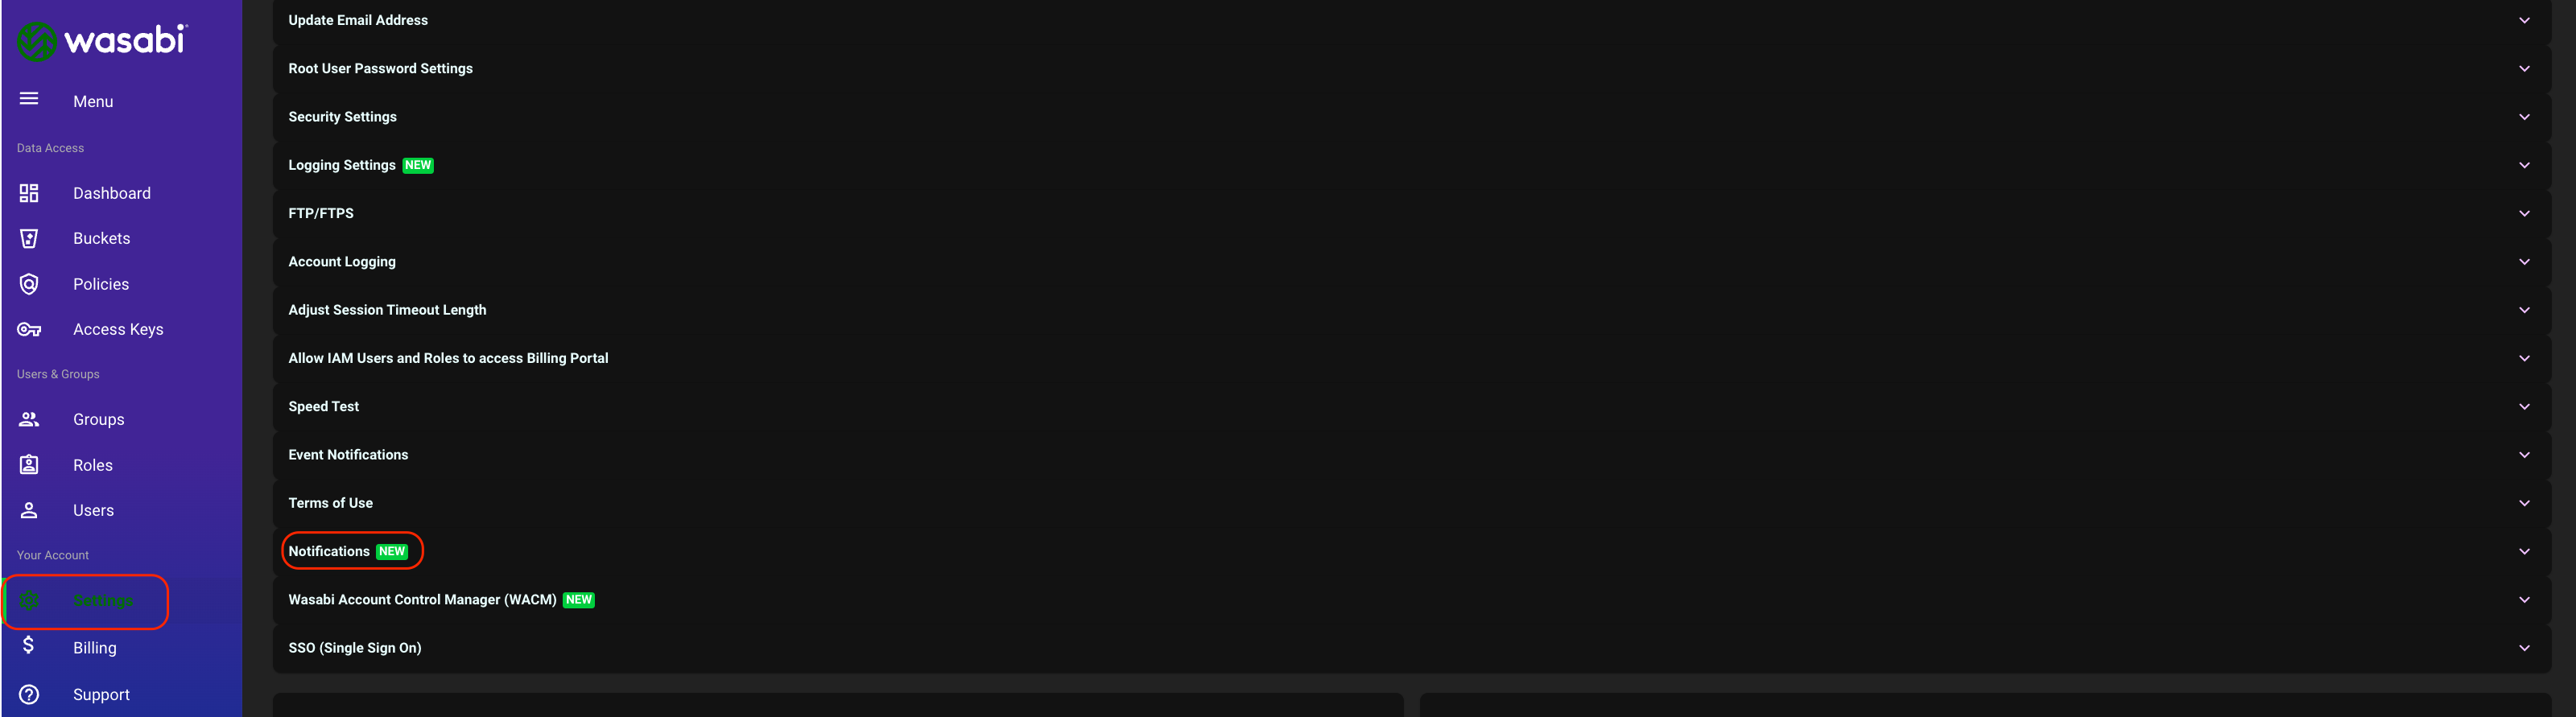
- Enable email notifications.
Create the Wasabi Destination Bucket
The "destination" bucket is the bucket that the "source" bucket will replicate to.
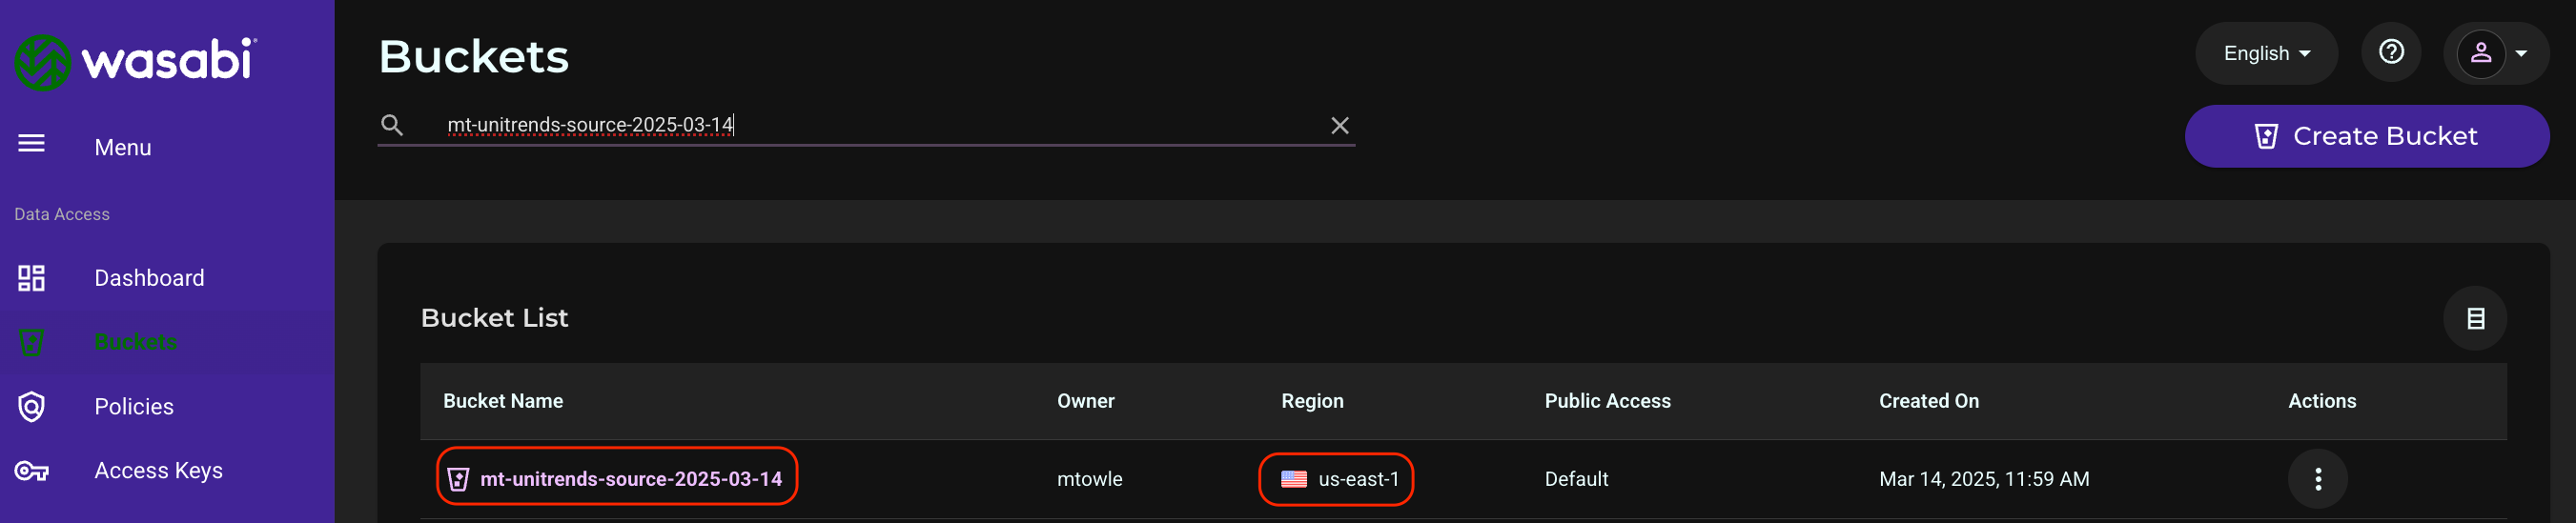
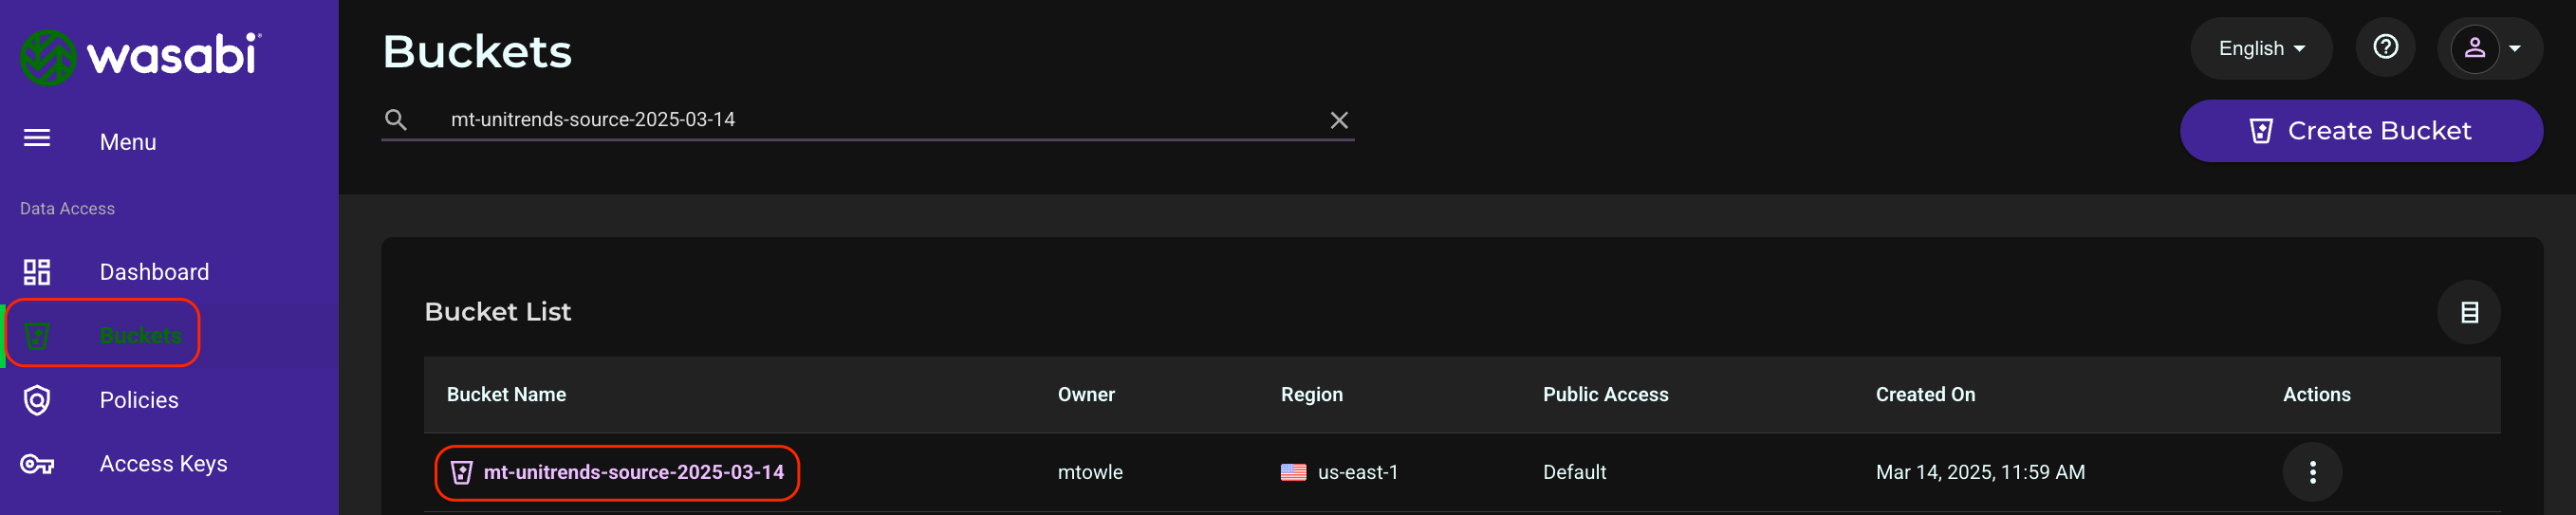
- Navigate to Buckets and note the name and region of the source bucket that Unitrends is currently backing up to. In this example we are using a bucket in the us-east-1 region.
- Choose the region within the same continent for the destination bucket.This configuration example discusses the use of Wasabi's us-east-1 storage region for the source and us-west-1 for the destination. For a list of regions, see Available Storage Regions.
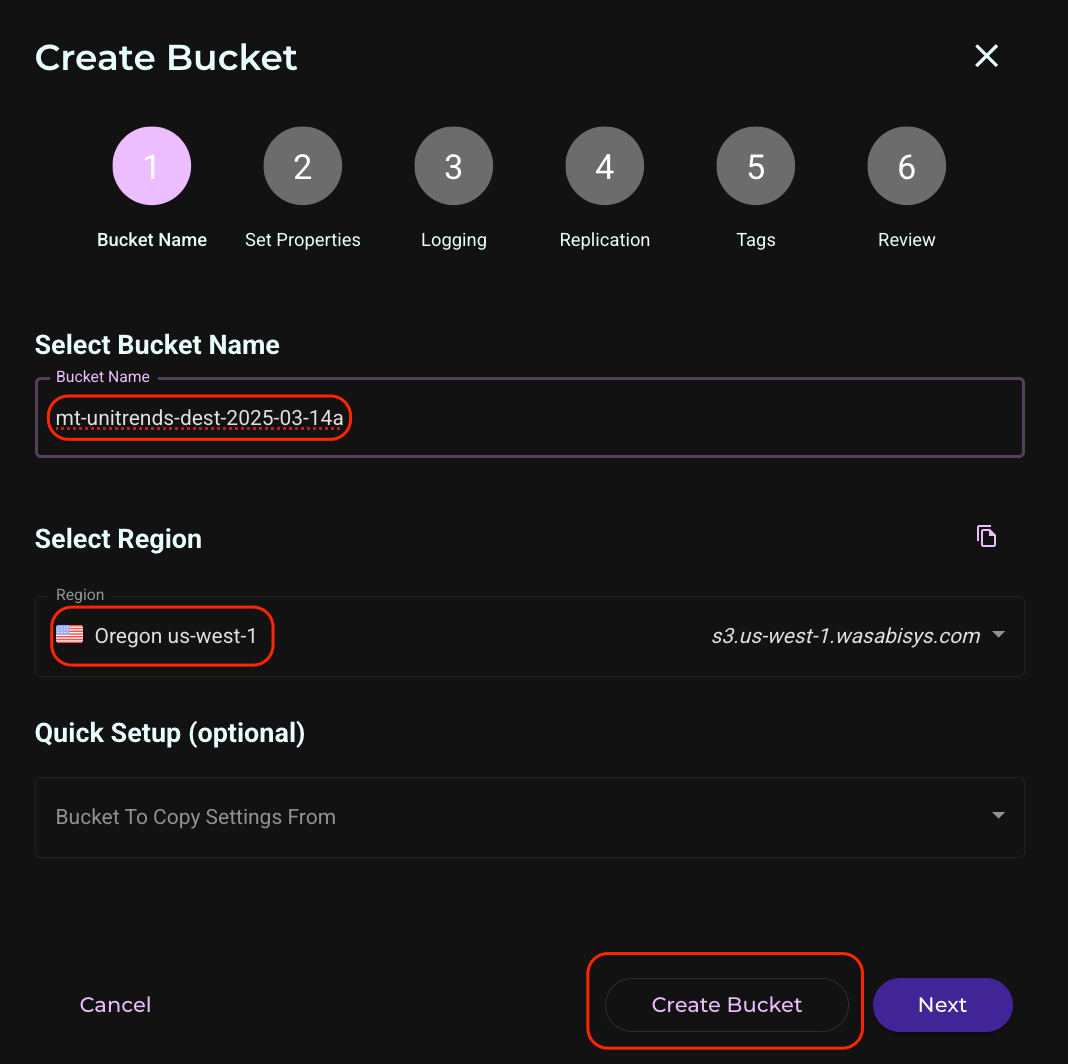
- Navigate to Buckets, then click Create Bucket.
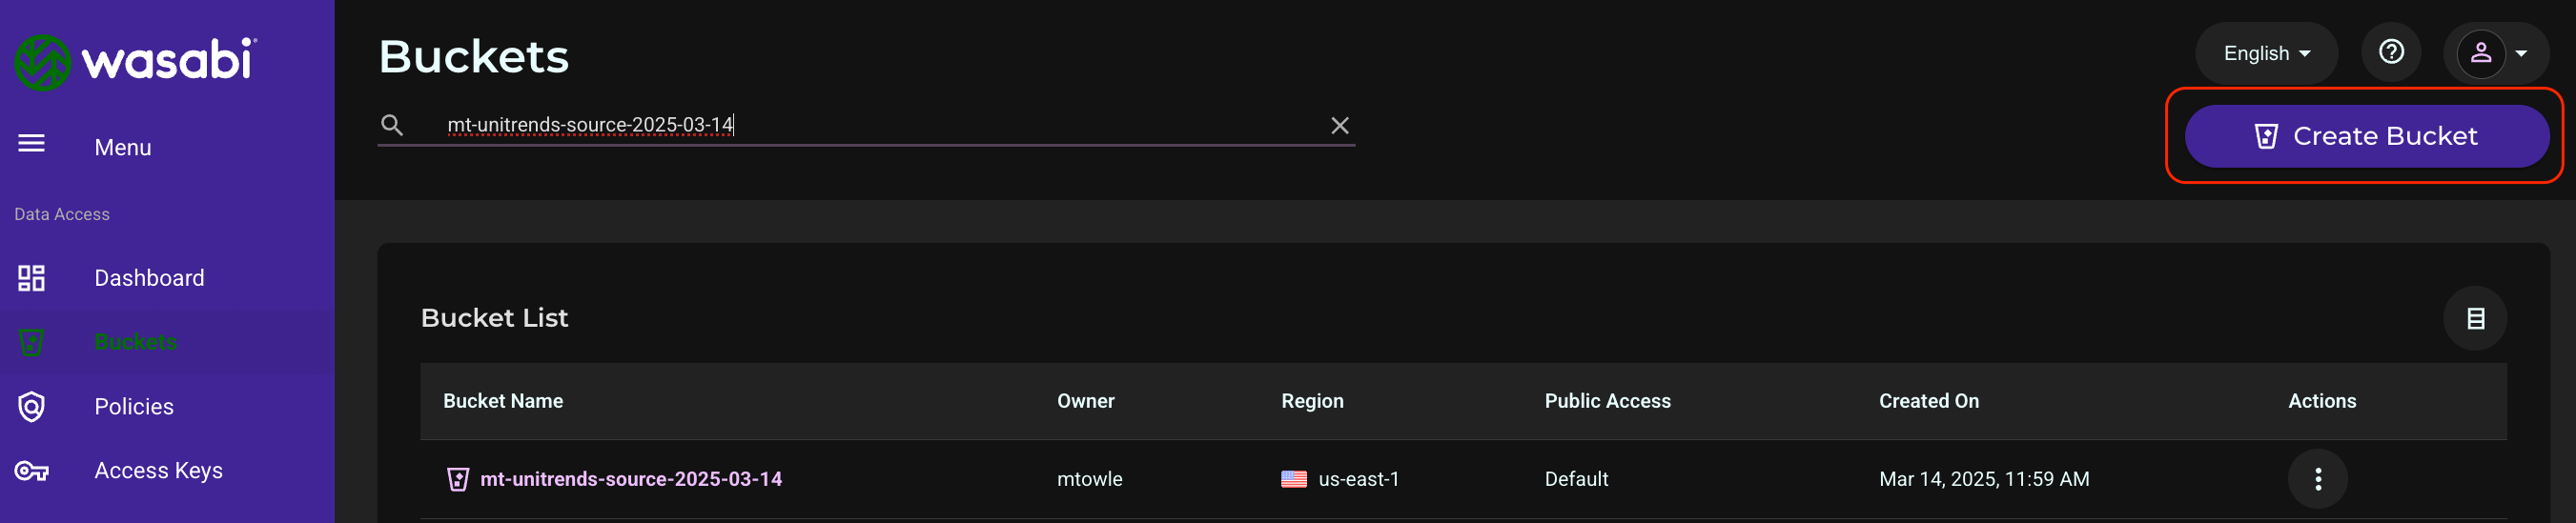
- Enter the destination bucket name, select the region for the bucket, and click Create Bucket.
Create an Object Replication Job
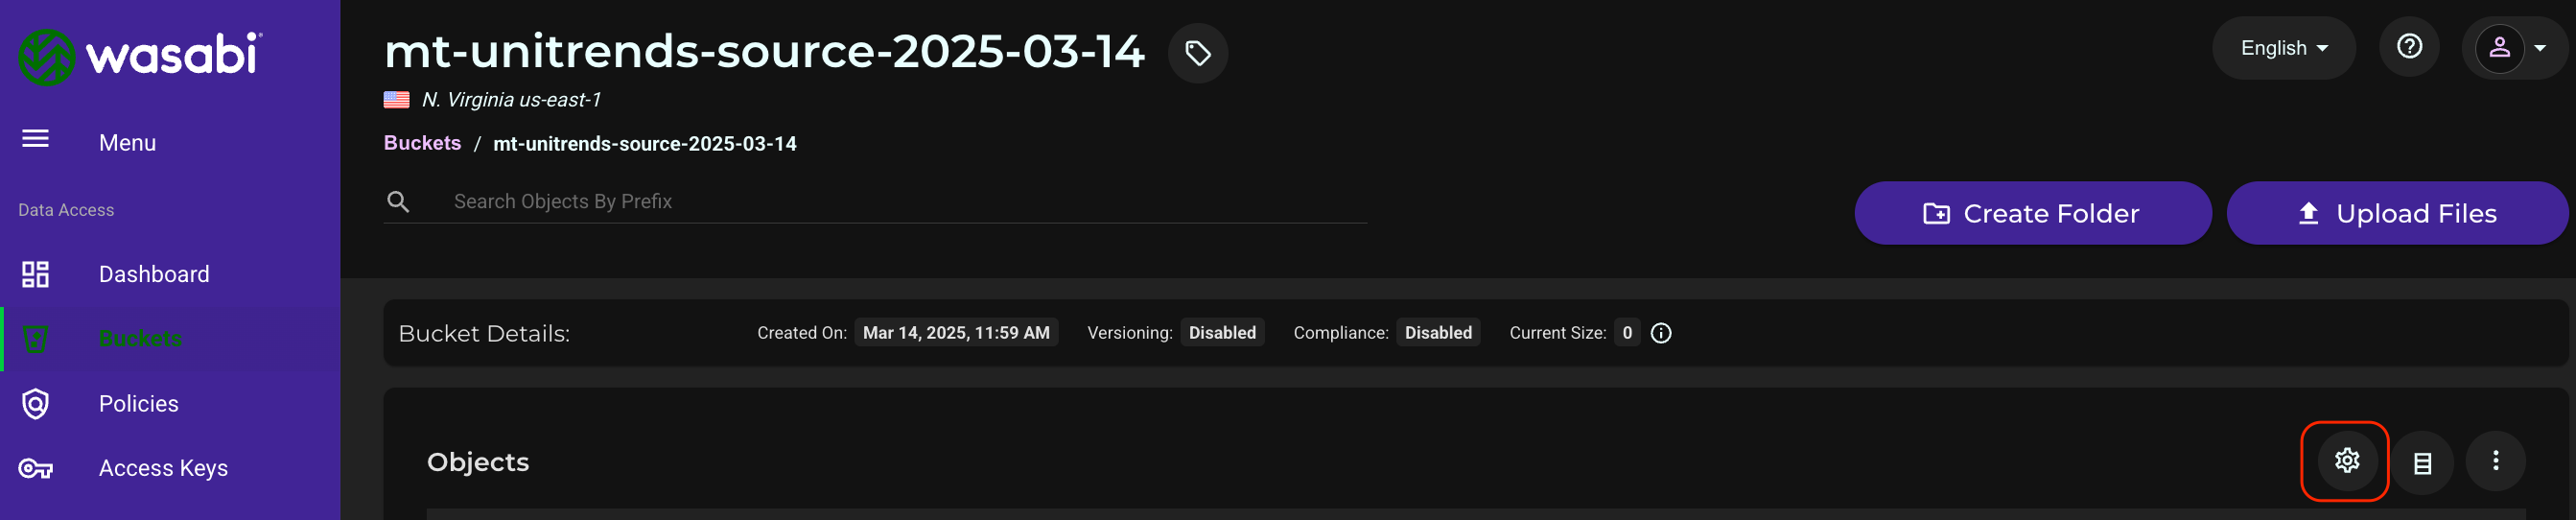
- Navigate to Buckets and click the name of the SOURCE bucket.
- Click the Settings gear wheel on the right side of the screen.
- Click the Object Replication tab, then click Create Replication Job.

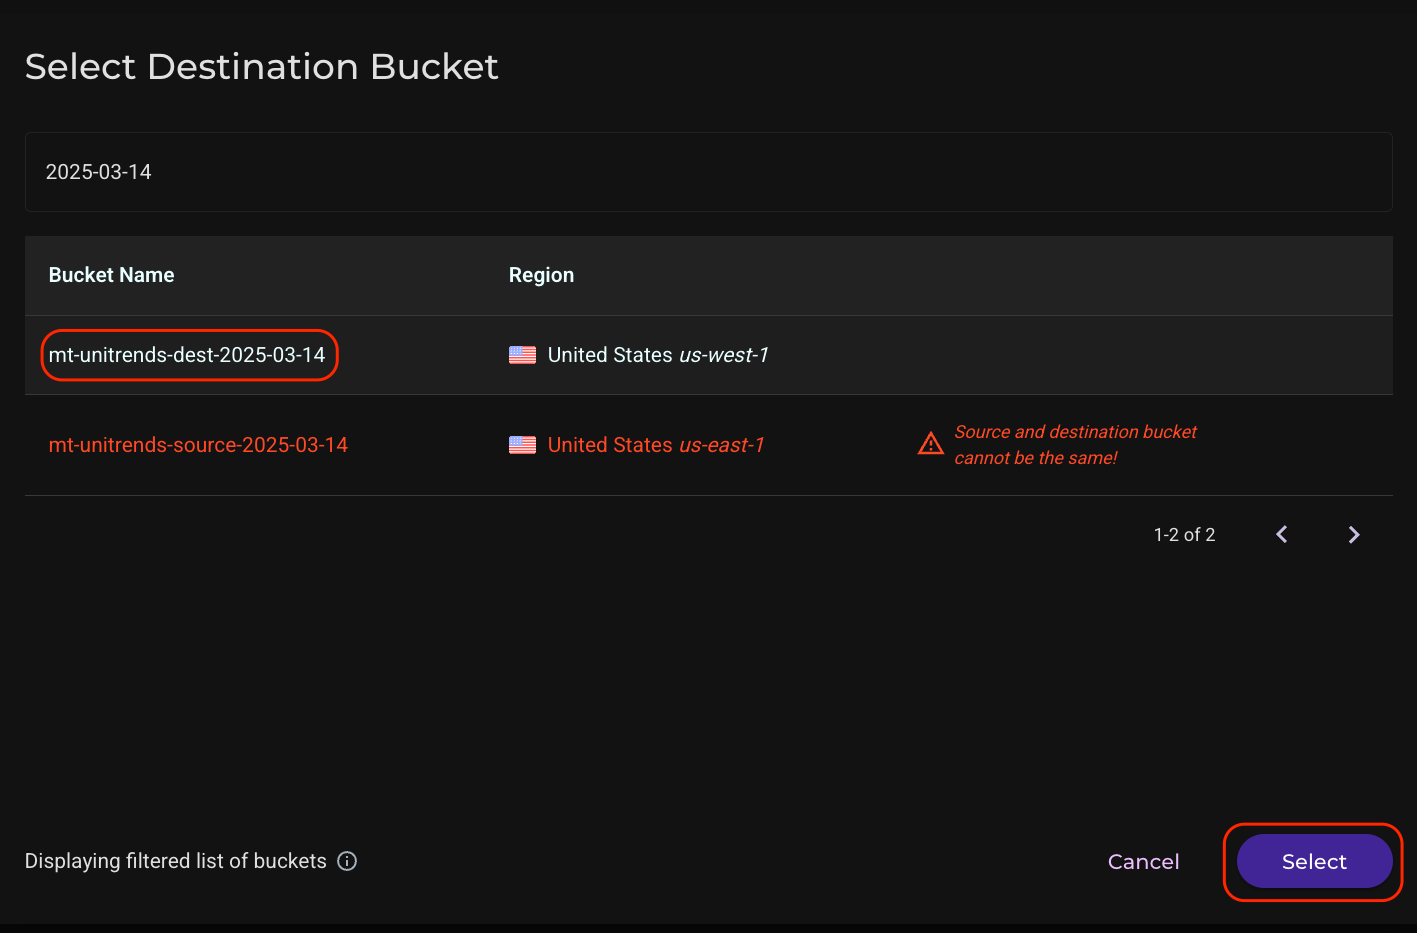
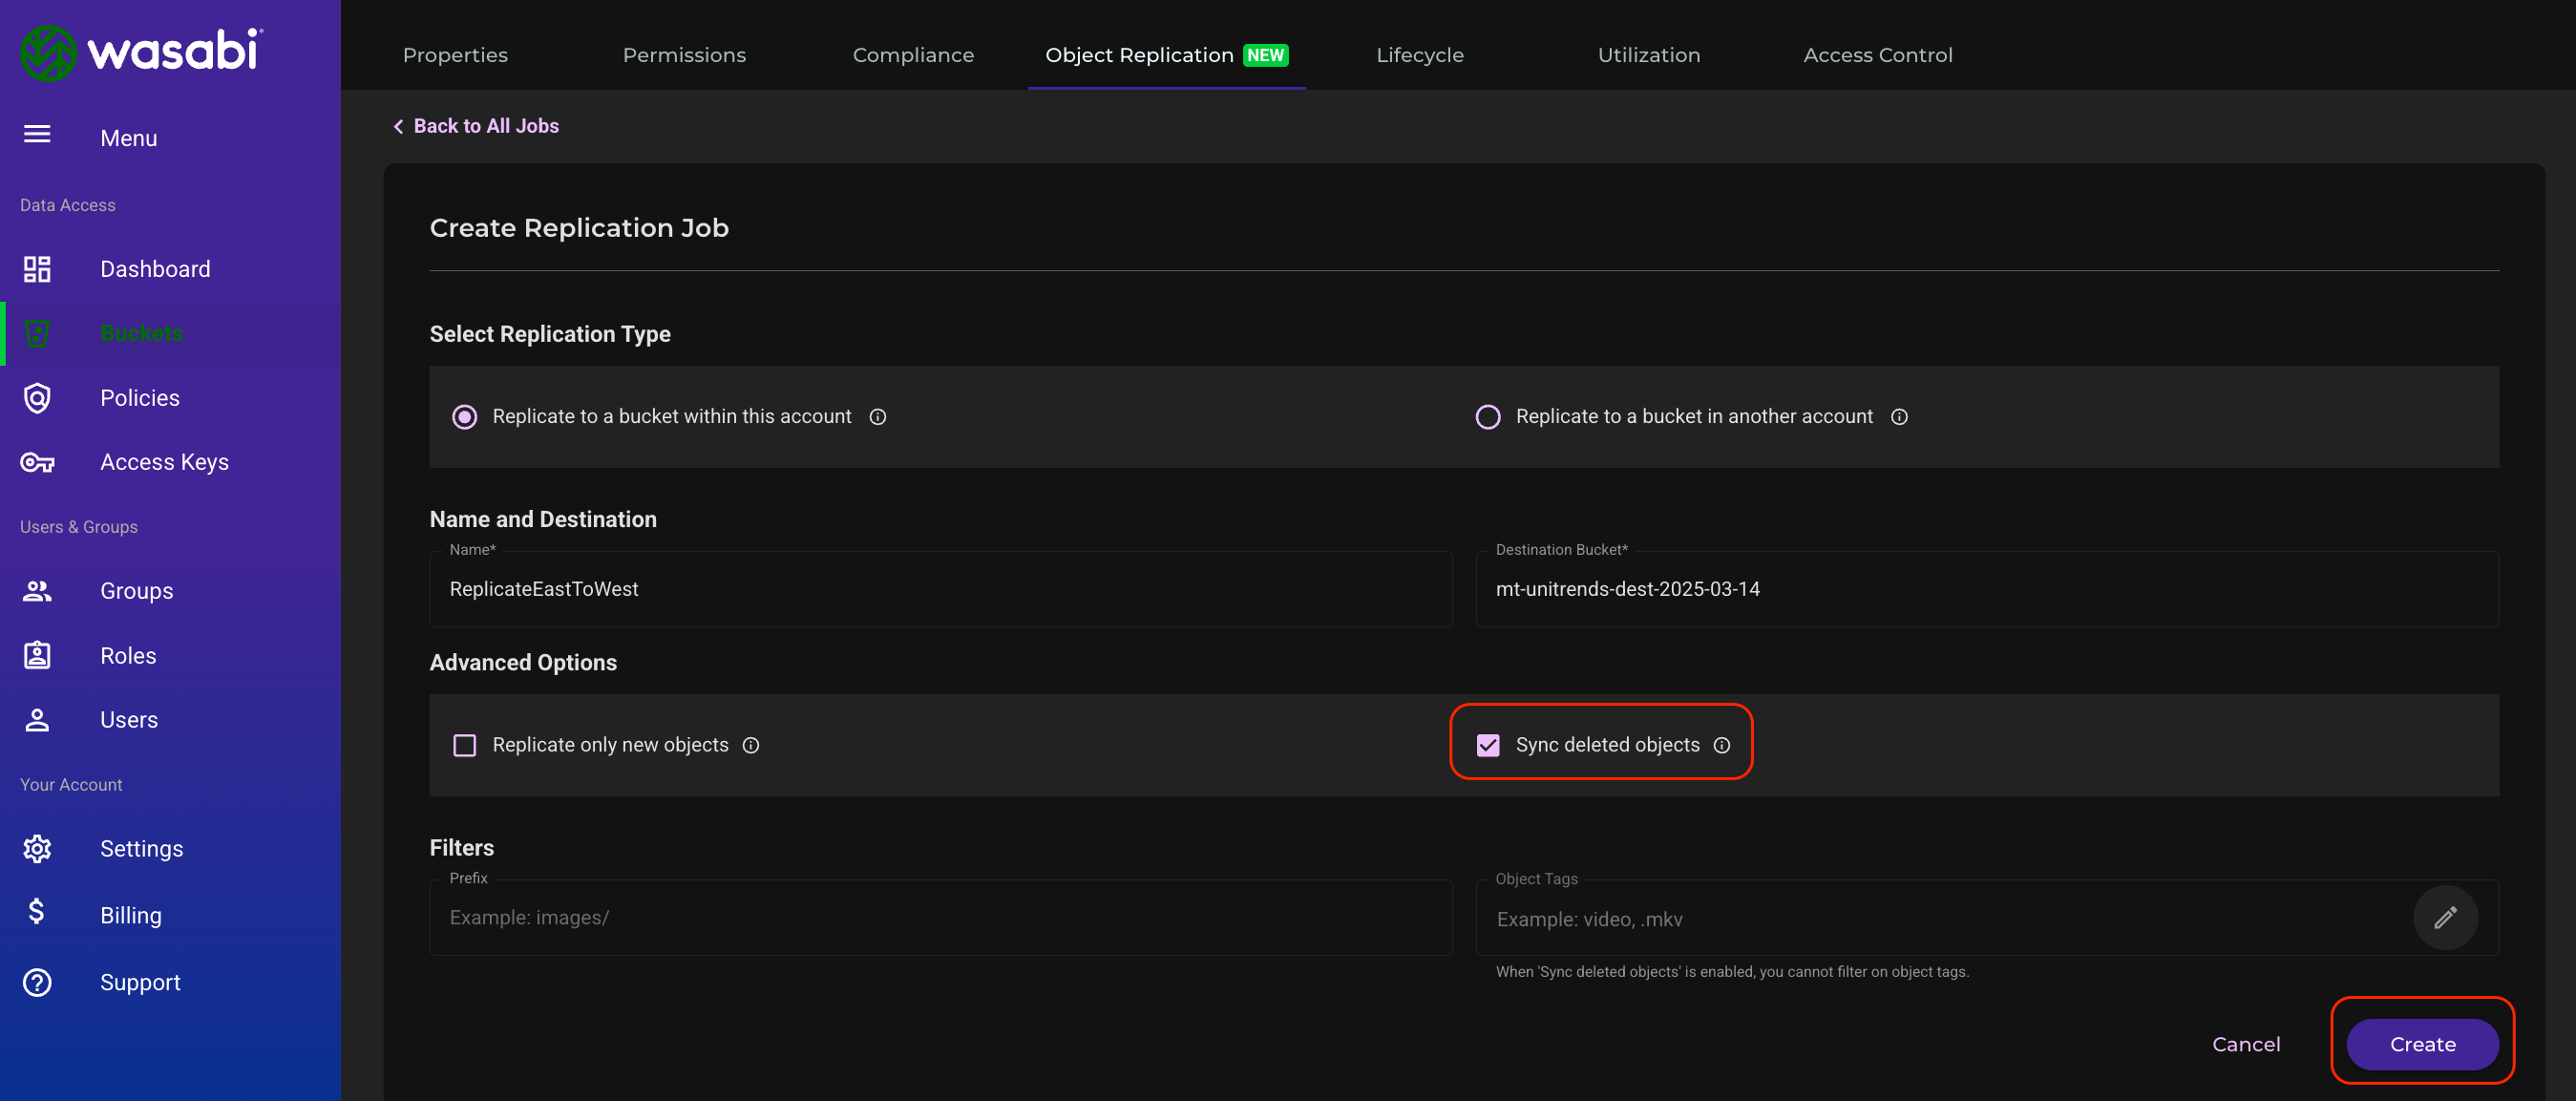
- Select the Replication Type. For this example we are selecting "Replicate to a bucket within this account." Give the job a name, and click in the Destination Bucket text field.
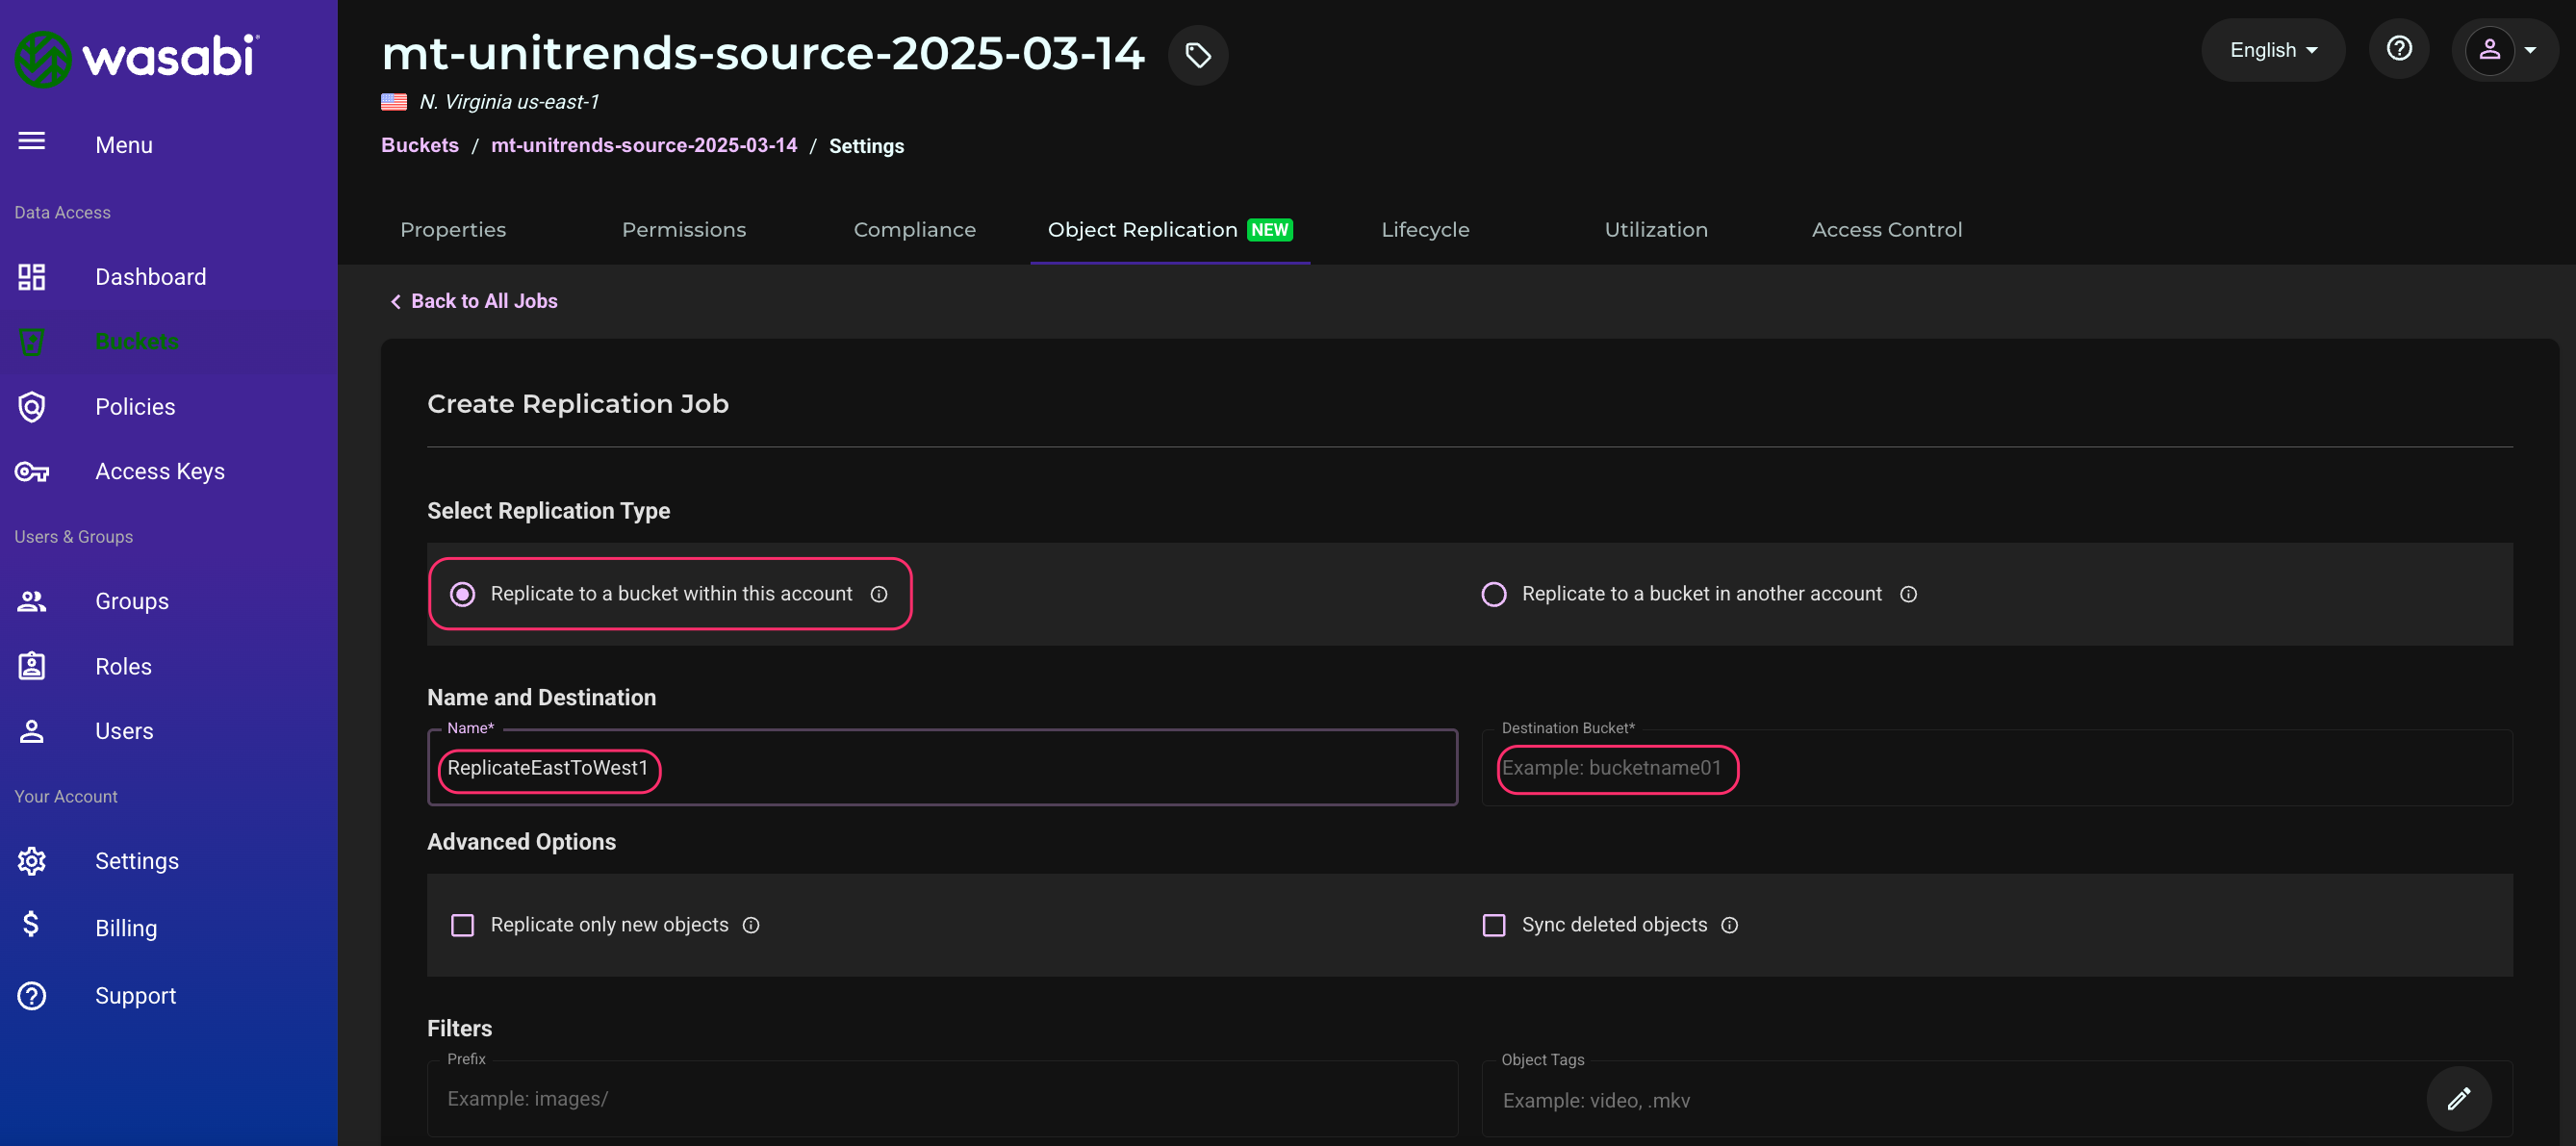
- Click on the name of the destination bucket from the list, then click Select.
- Click the checkbox next to "Sync Deleted Objects." This allows Unitrends to control the backup lifecycle of the source bucket, and older backups that Unitrends deletes from the source bucket will also be deleted from the destination bucket. Then click Create.
- The objects in the source bucket will now begin to replicate to the destination. There is no ETA for completion as this depends on many factors, such as the number of objects, frequency of backups, etc.
Appendix A - In case of a Disaster
In the case of a disaster that affects your source bucket, proceed with this section.
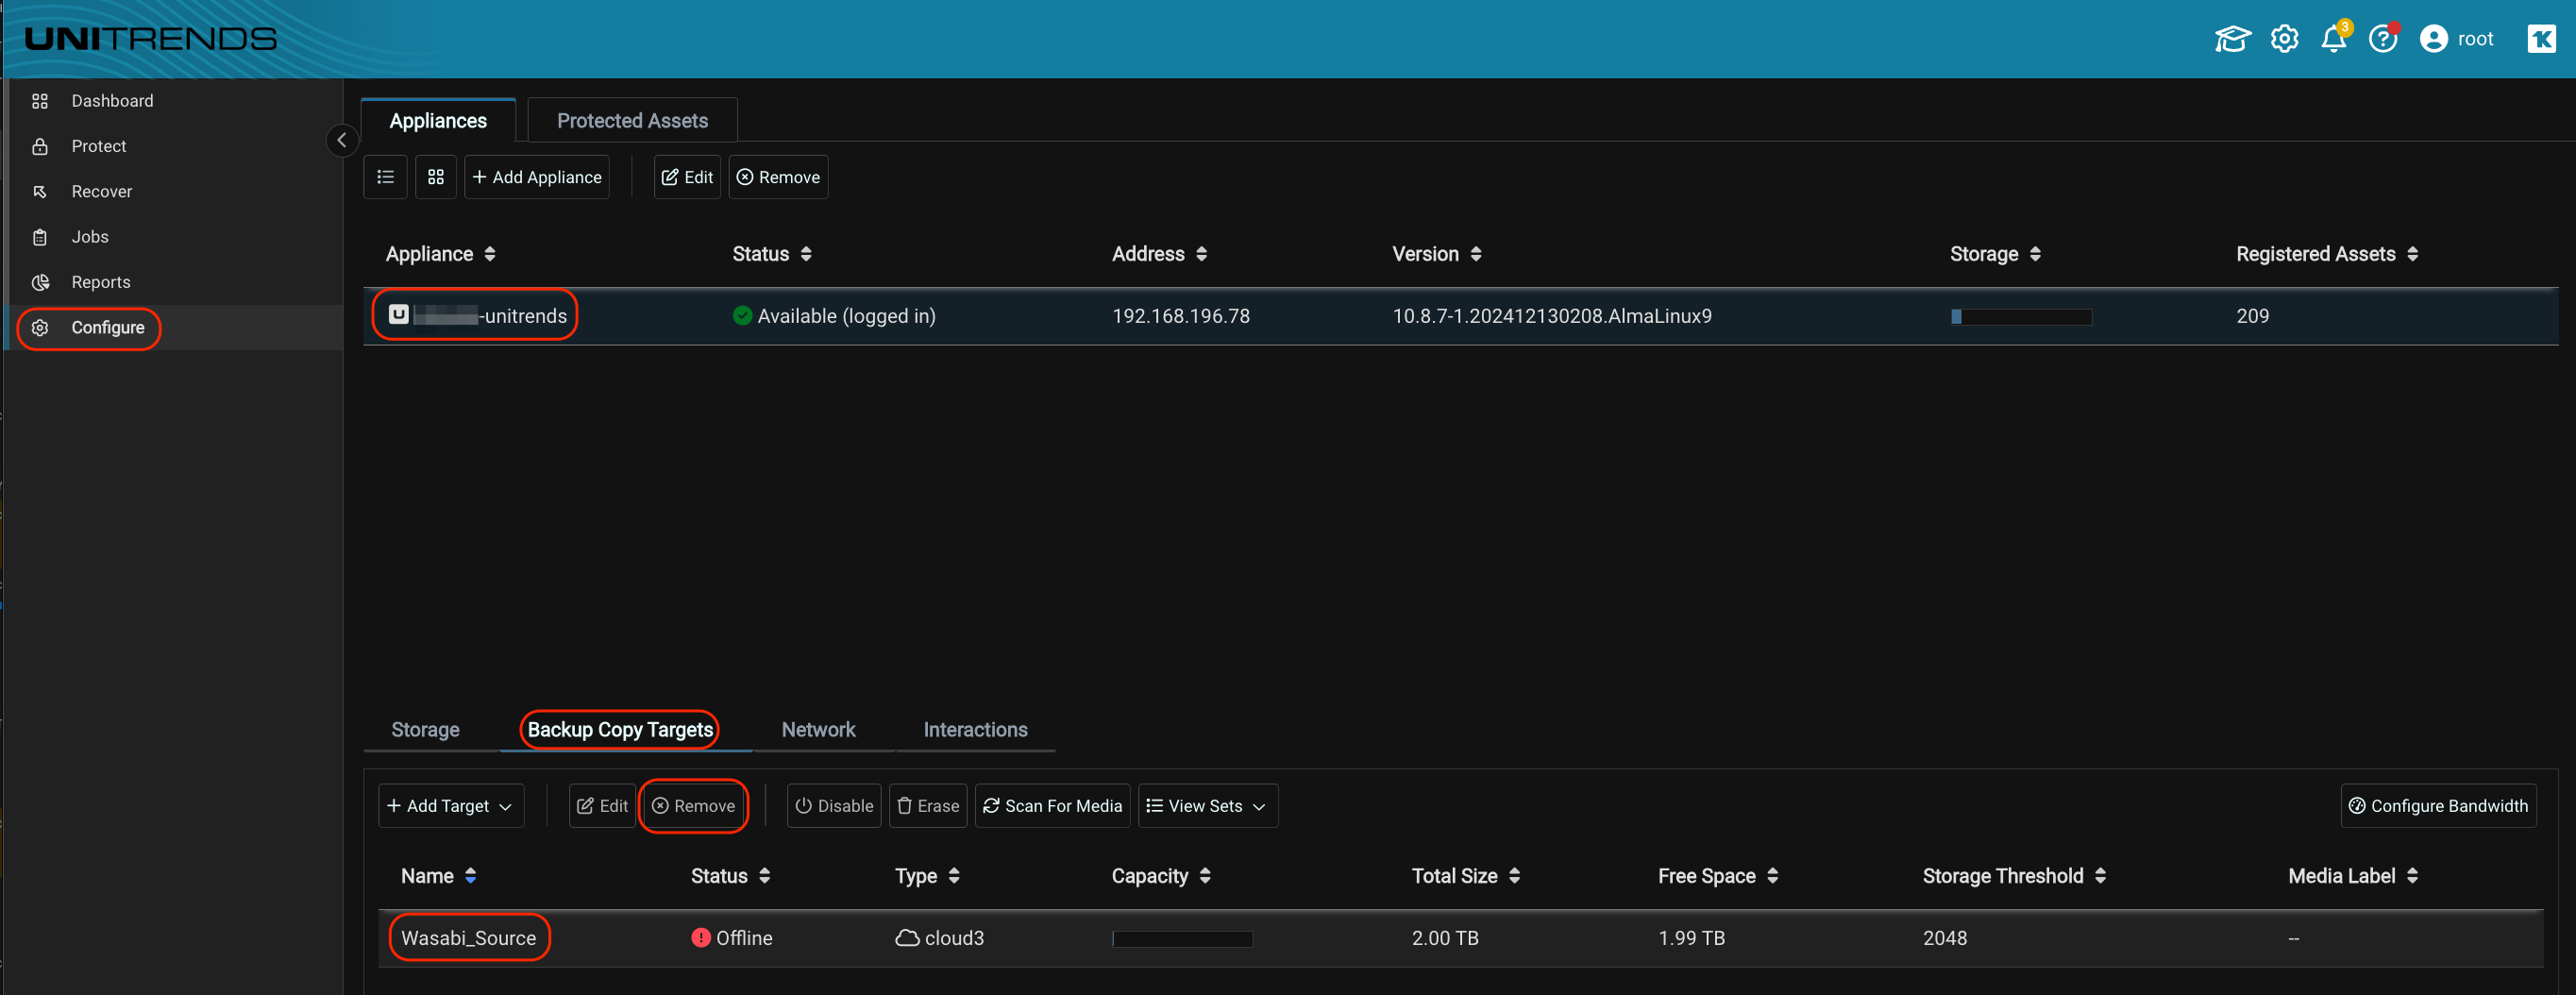
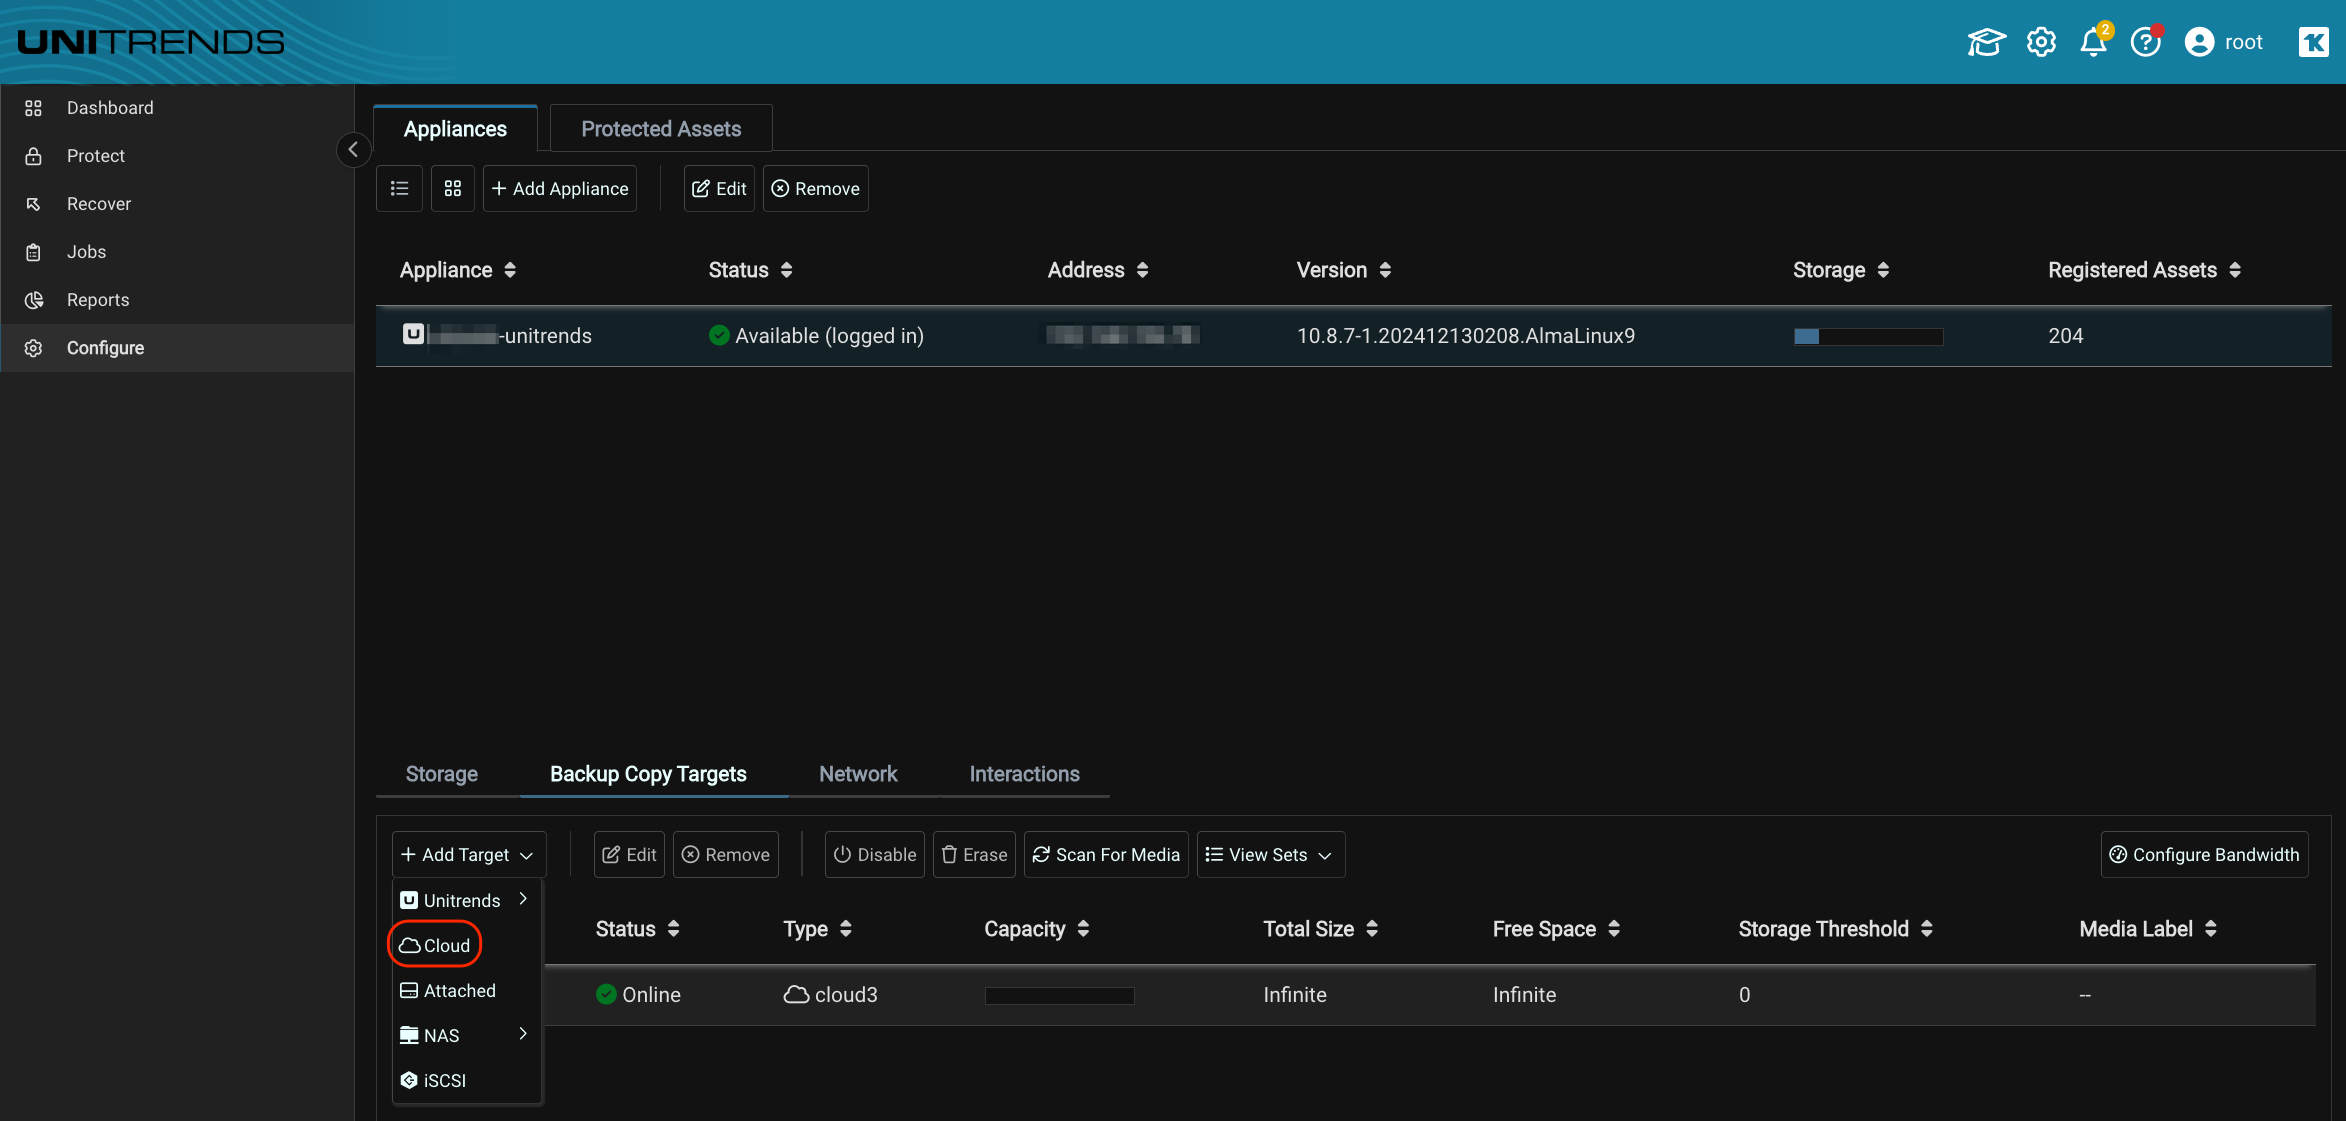
- Navigate to Configure > Appliances and select your Unitrends appliance. Click Backup Copy Targets. Select the existing Wasabi source backup copy target and click Remove.
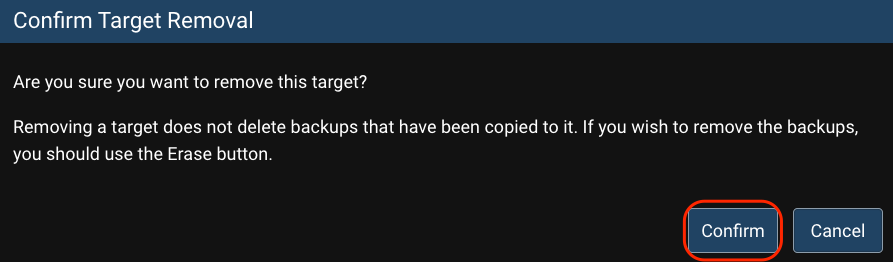
- Confirm the target removal by clicking Confirm.
- Expand the Add Target dropdown menu and select Cloud from the list of options.
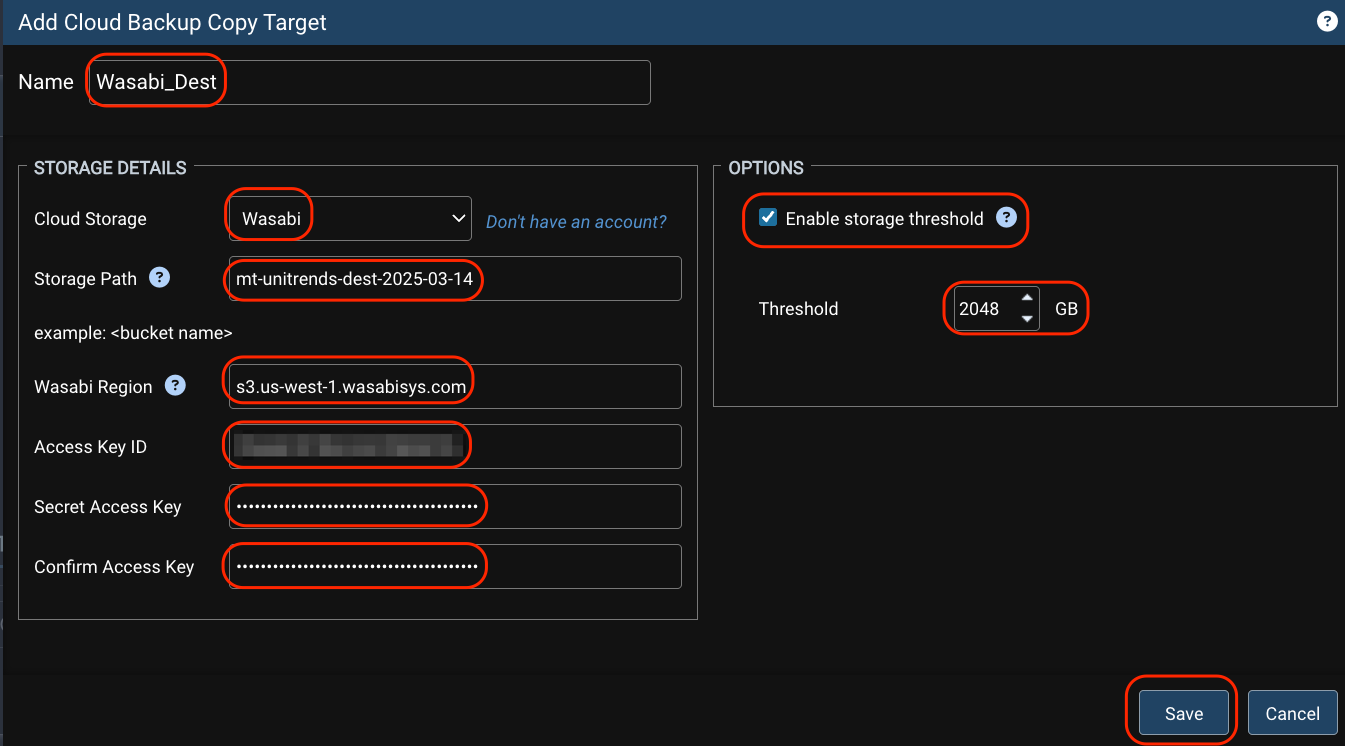
In the Add Cloud Backup Copy Target window, provide a name for the target.
Under the Storage Details section, choose Wasabi as the Cloud Storage target and enter the following details then click Save.Storage Path - Wasabi destination bucket name
Wasabi Region - Service URL of the Wasabi region your destination bucket Is located in.
Note: This config example discusses the use of Wasabi's us-west-1 storage region. To use other Wasabi storage regions, please use the appropriate Wasabi service URL as described in this article.Access Key ID
Secret Access Key
Under Options, select the checkbox next to “Enable storage threshold.” Set the Threshold to be an appropriate value for your organization. This will set the maximum amount of Wasabi storage your backups will consume. In this example, 2 TB (2048 GB) was configured. Ensure this value is high enough to contain all your existing backups with extra room for growth.
IMPORTANT: This storage threshold must be set if you wish to limit the amount of Wasabi storage Unitrends backups will utilize. Otherwise, Unitrends will believe your Wasabi bucket has infinite space. From Unitrends documentation: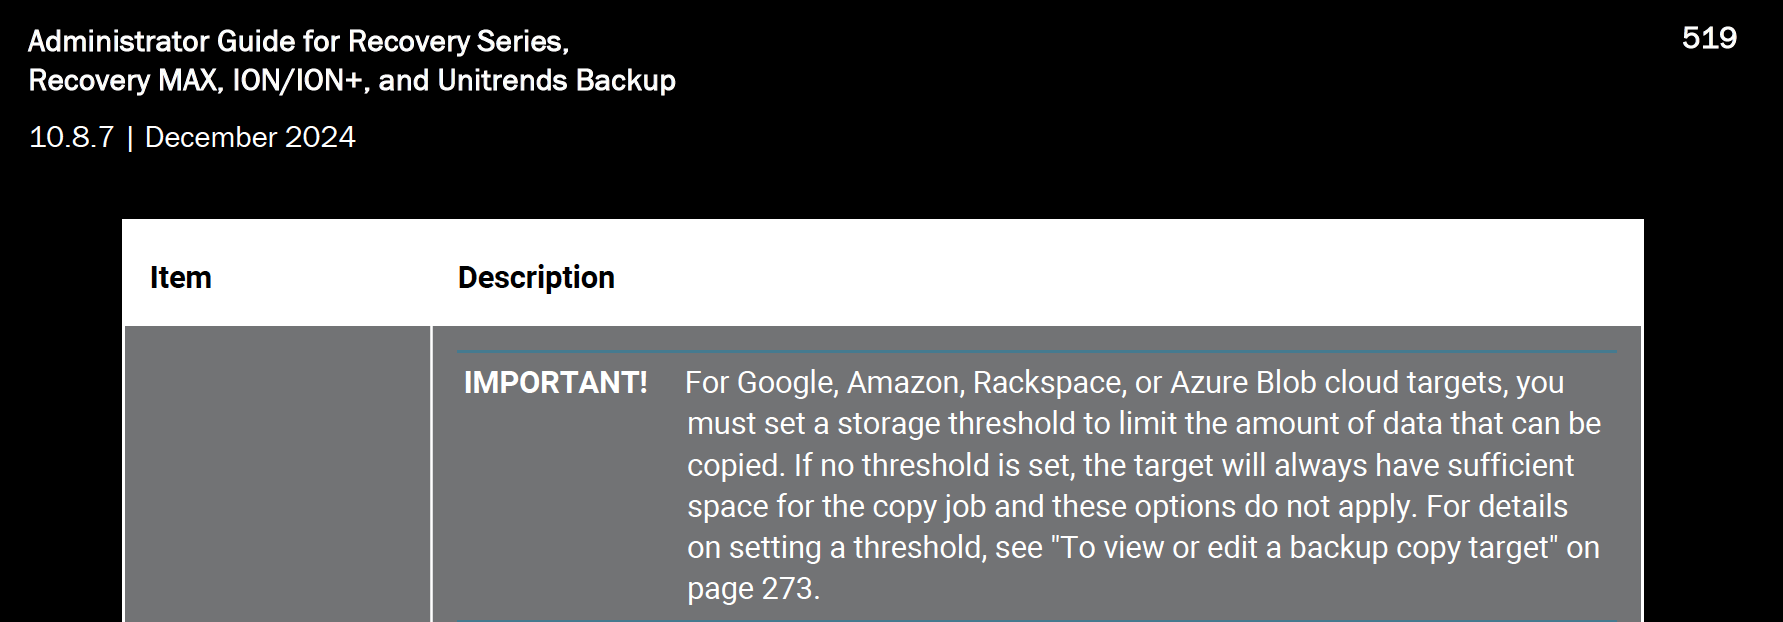
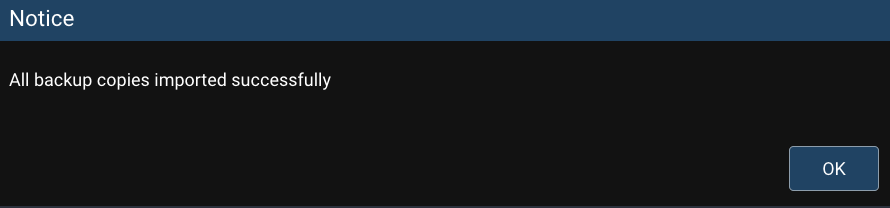
- Click OK after all backup copies have been successfully imported.
- Navigate to Jobs > Job Manager, then select the Backup Copy Job pointing to the Wasabi source bucket and click Edit.

- Click Next.
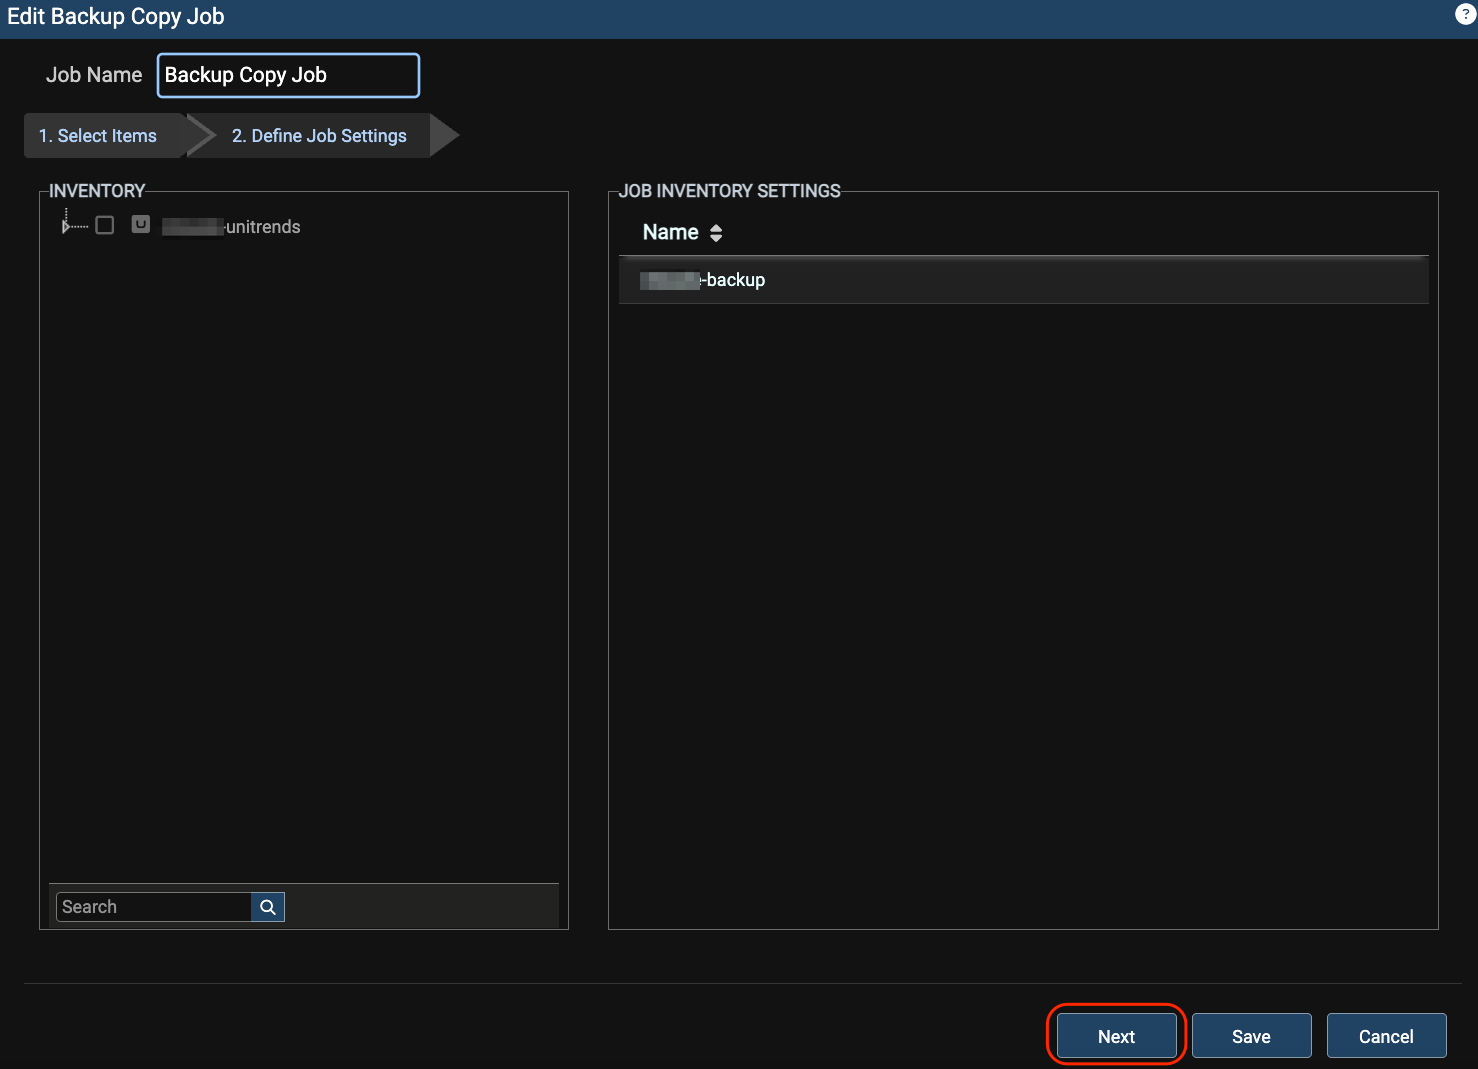
- Change the Backup Copy Target to your Wasabi destination backup copy target and click Save.

- Perform the following steps to view backup copies in your Wasabi destination bucket.
a. Navigate to the Recover tab.
b. Click Backup Catalog.
c. In the Filter Backup section of the screen on the right, click on Backup Copy (Cold).
d. Click Filter.
e. Select a backup copy.
f. Hover your mouse over the backup name to verify it is stored in your Wasabi destination bucket.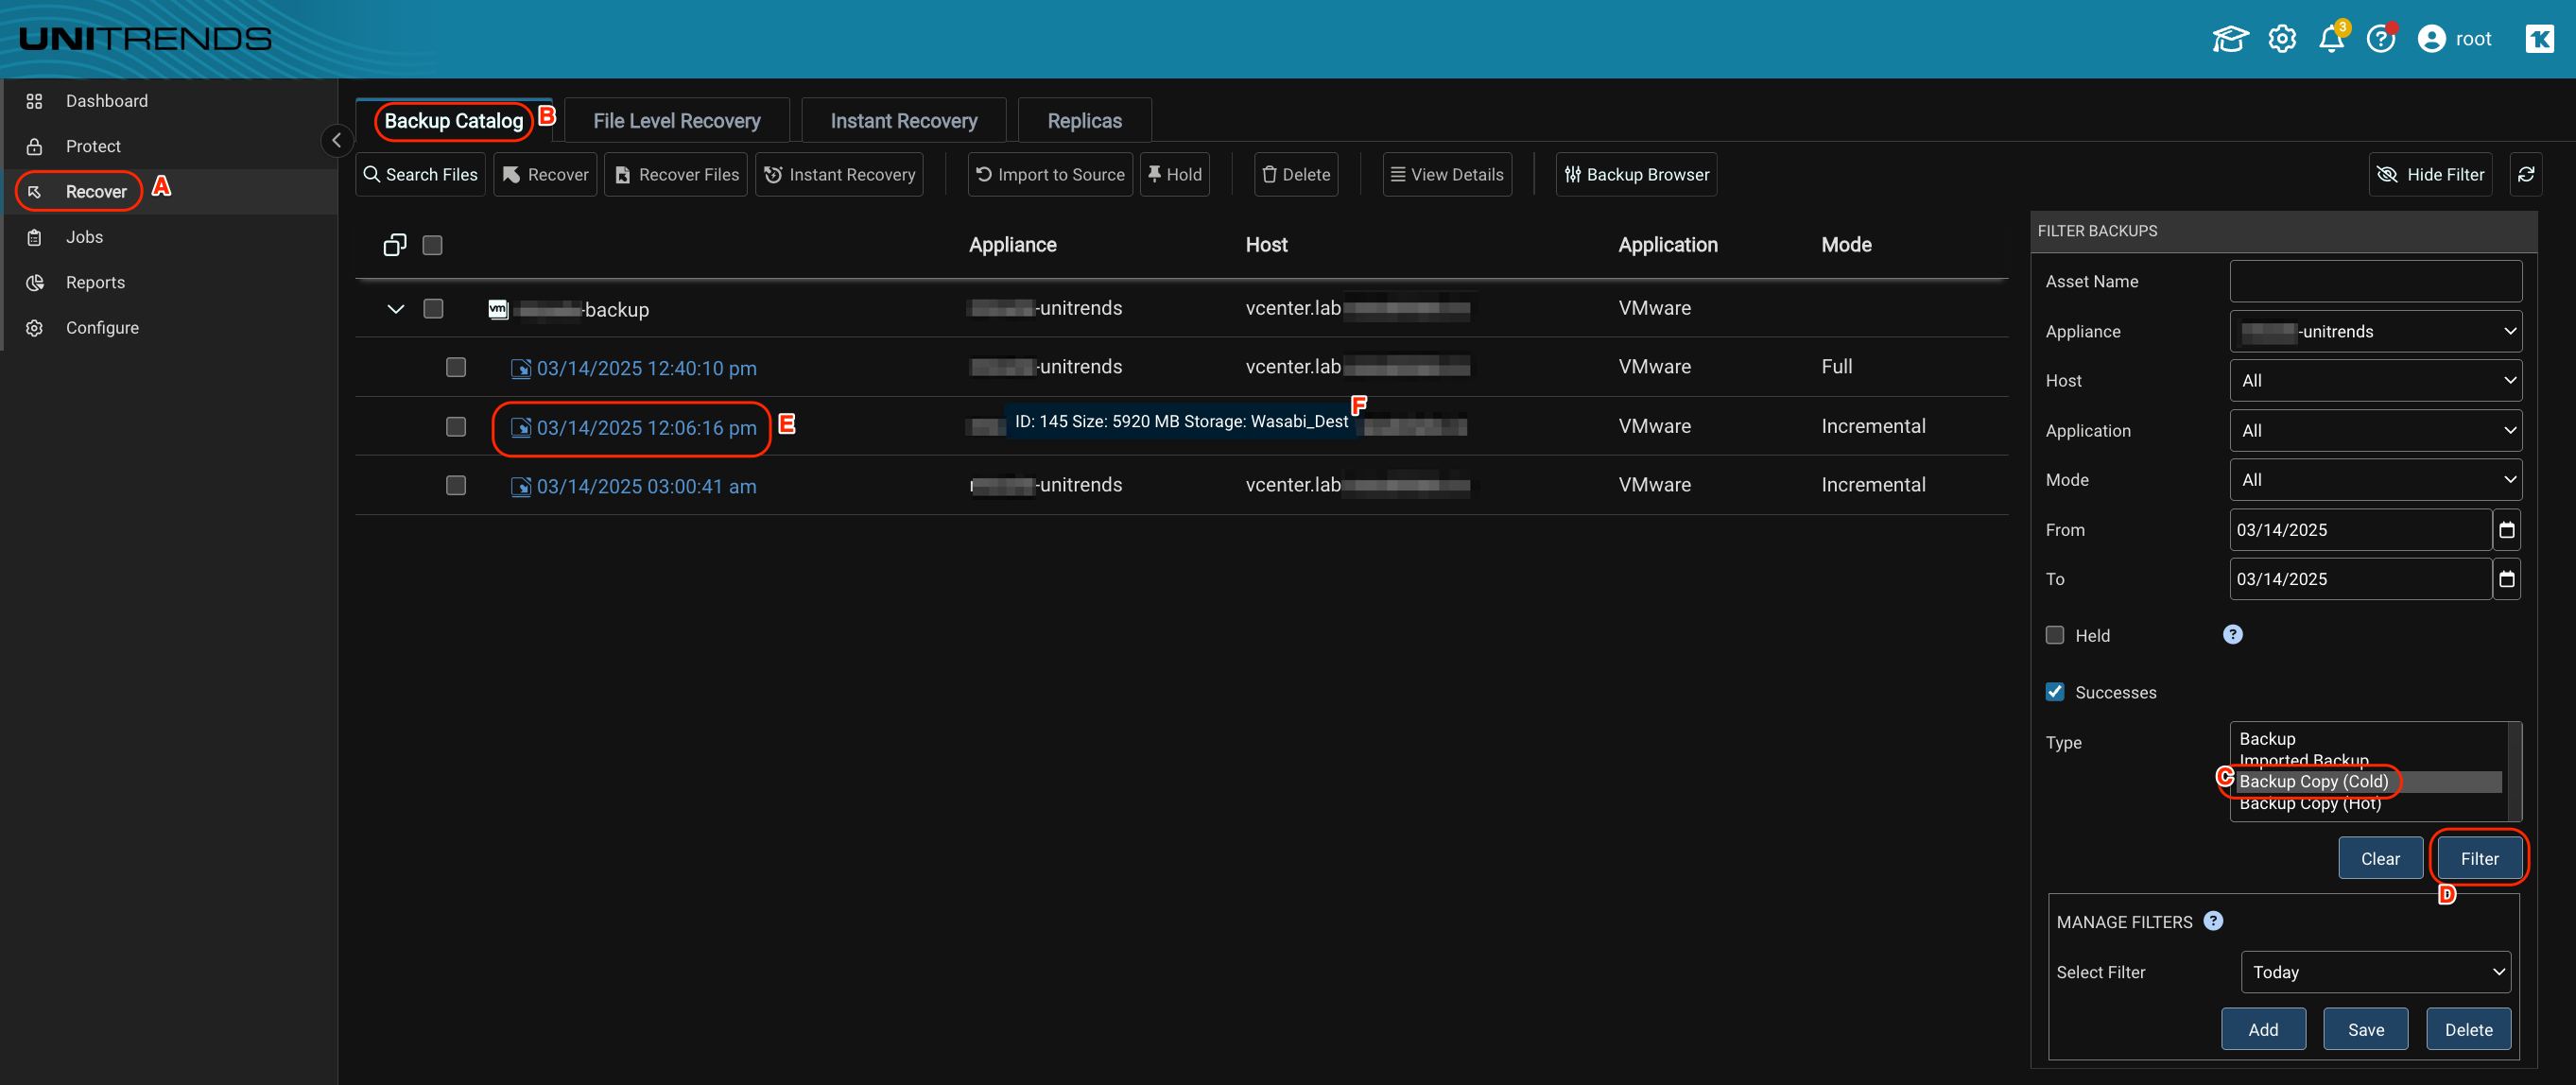
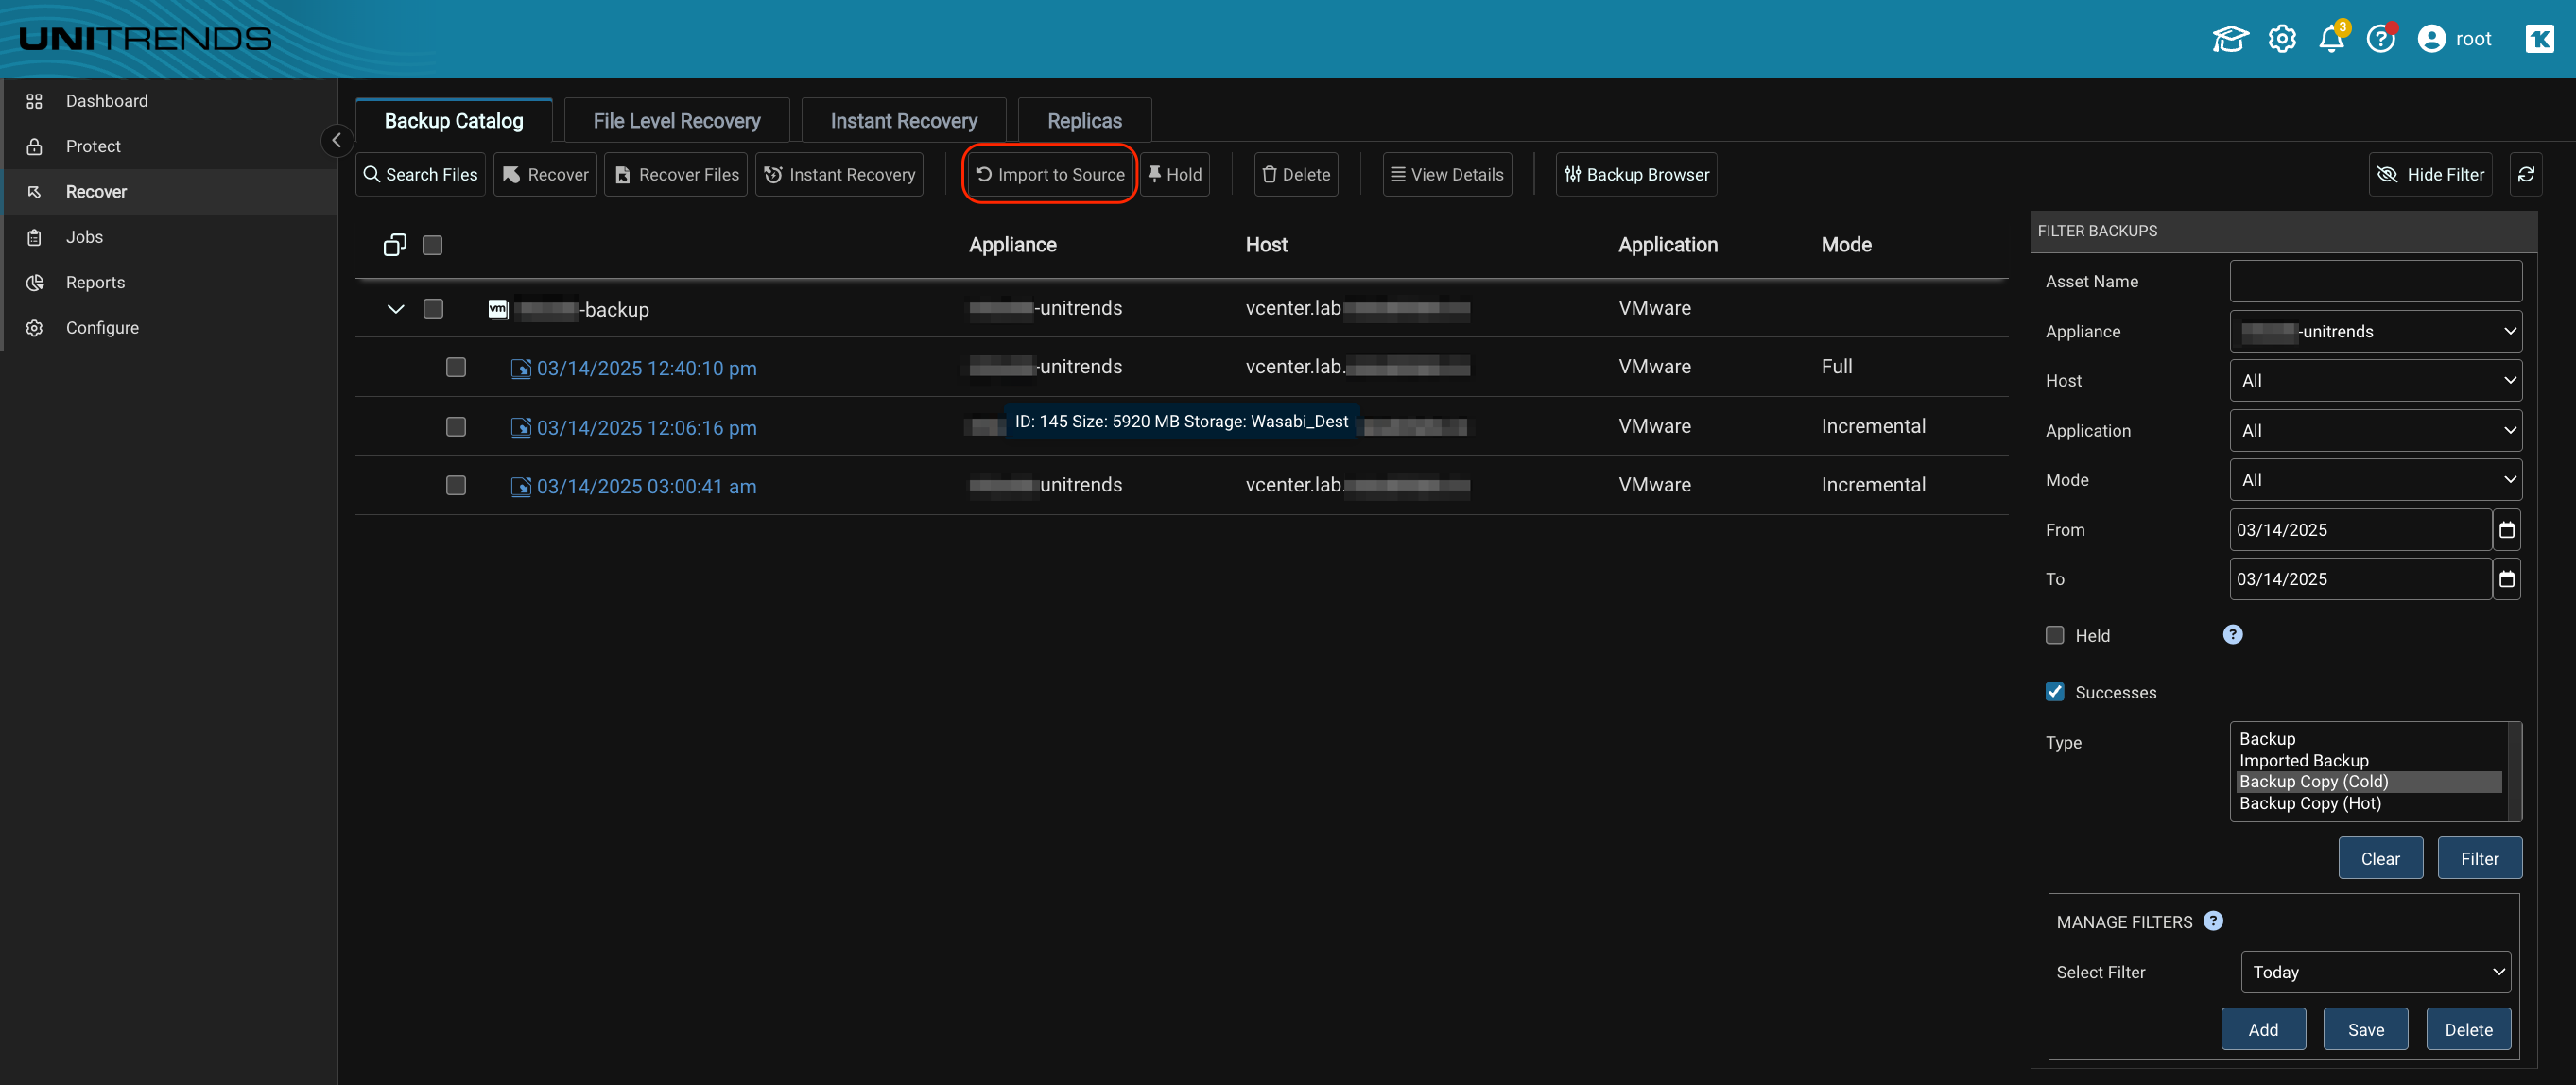
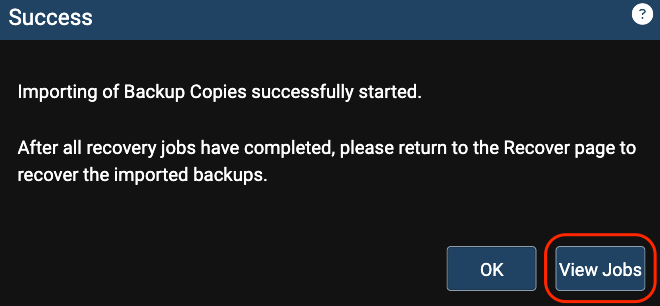
- If a recovery is required, click Import to Source.
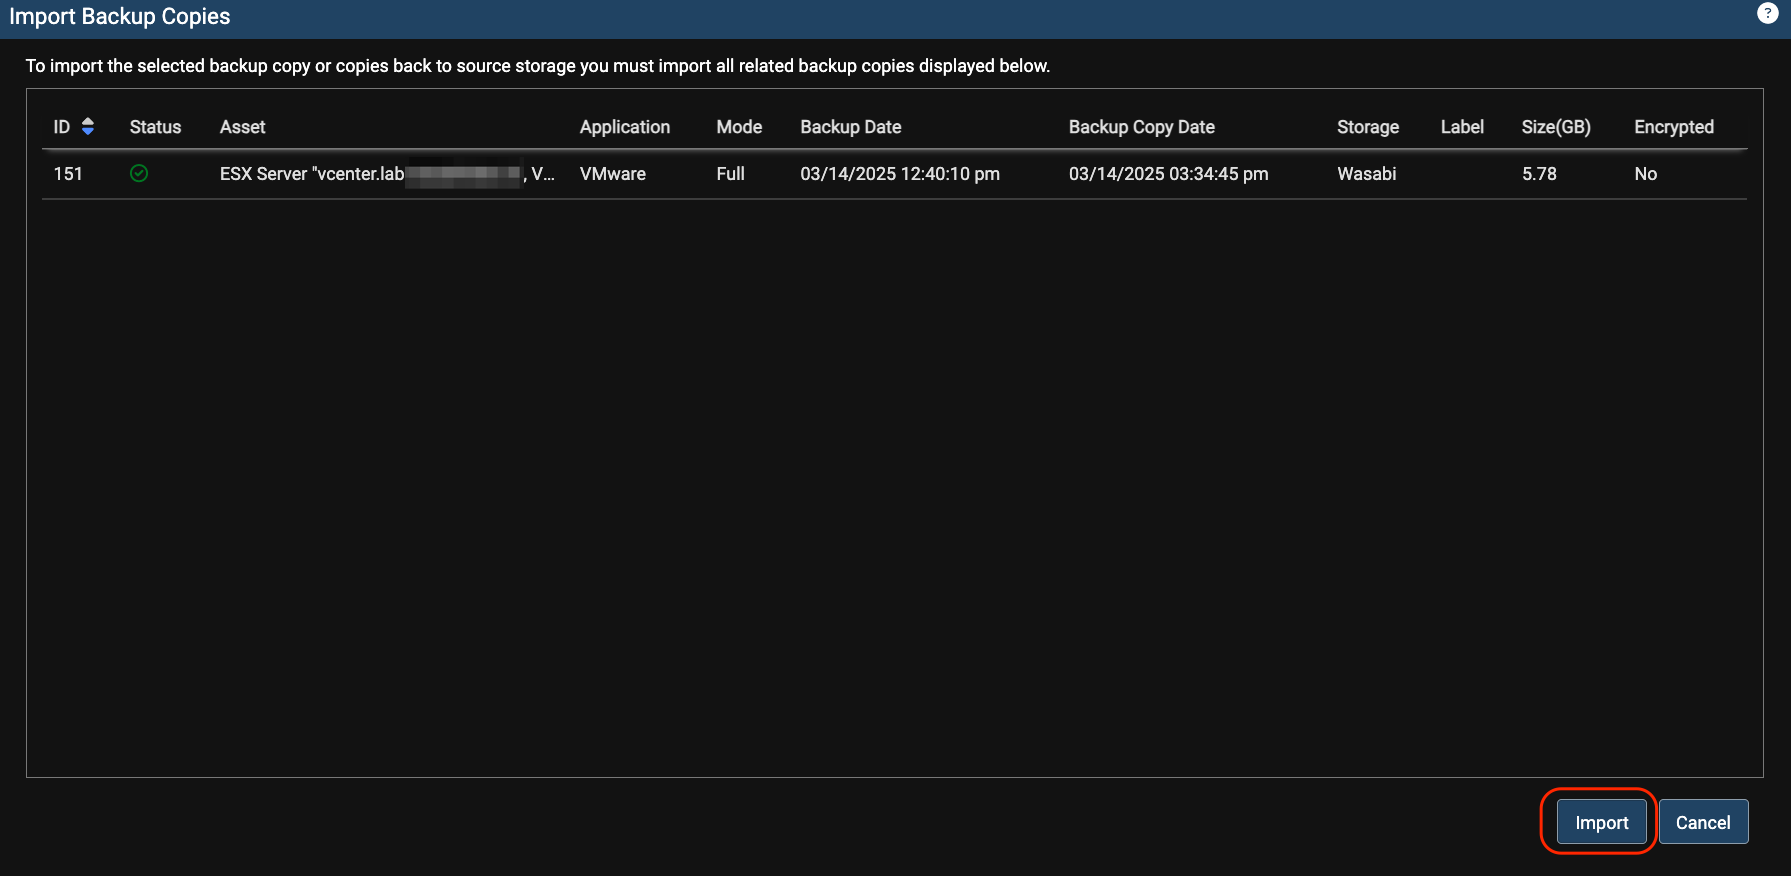
- Click Import.
- Click View Jobs.
- When the job shows a status of success, proceed to the next step.

- Perform the following steps to recover from the imported backup.
a. Navigate to the Recover tab.
b. Click Backup Catalog.
c. In the Filter Backup section of the screen on the right, click on Imported Backup.
d. Click Filter.
e. Click on the backup you wish to perform a recovery from.
f. Click Recover.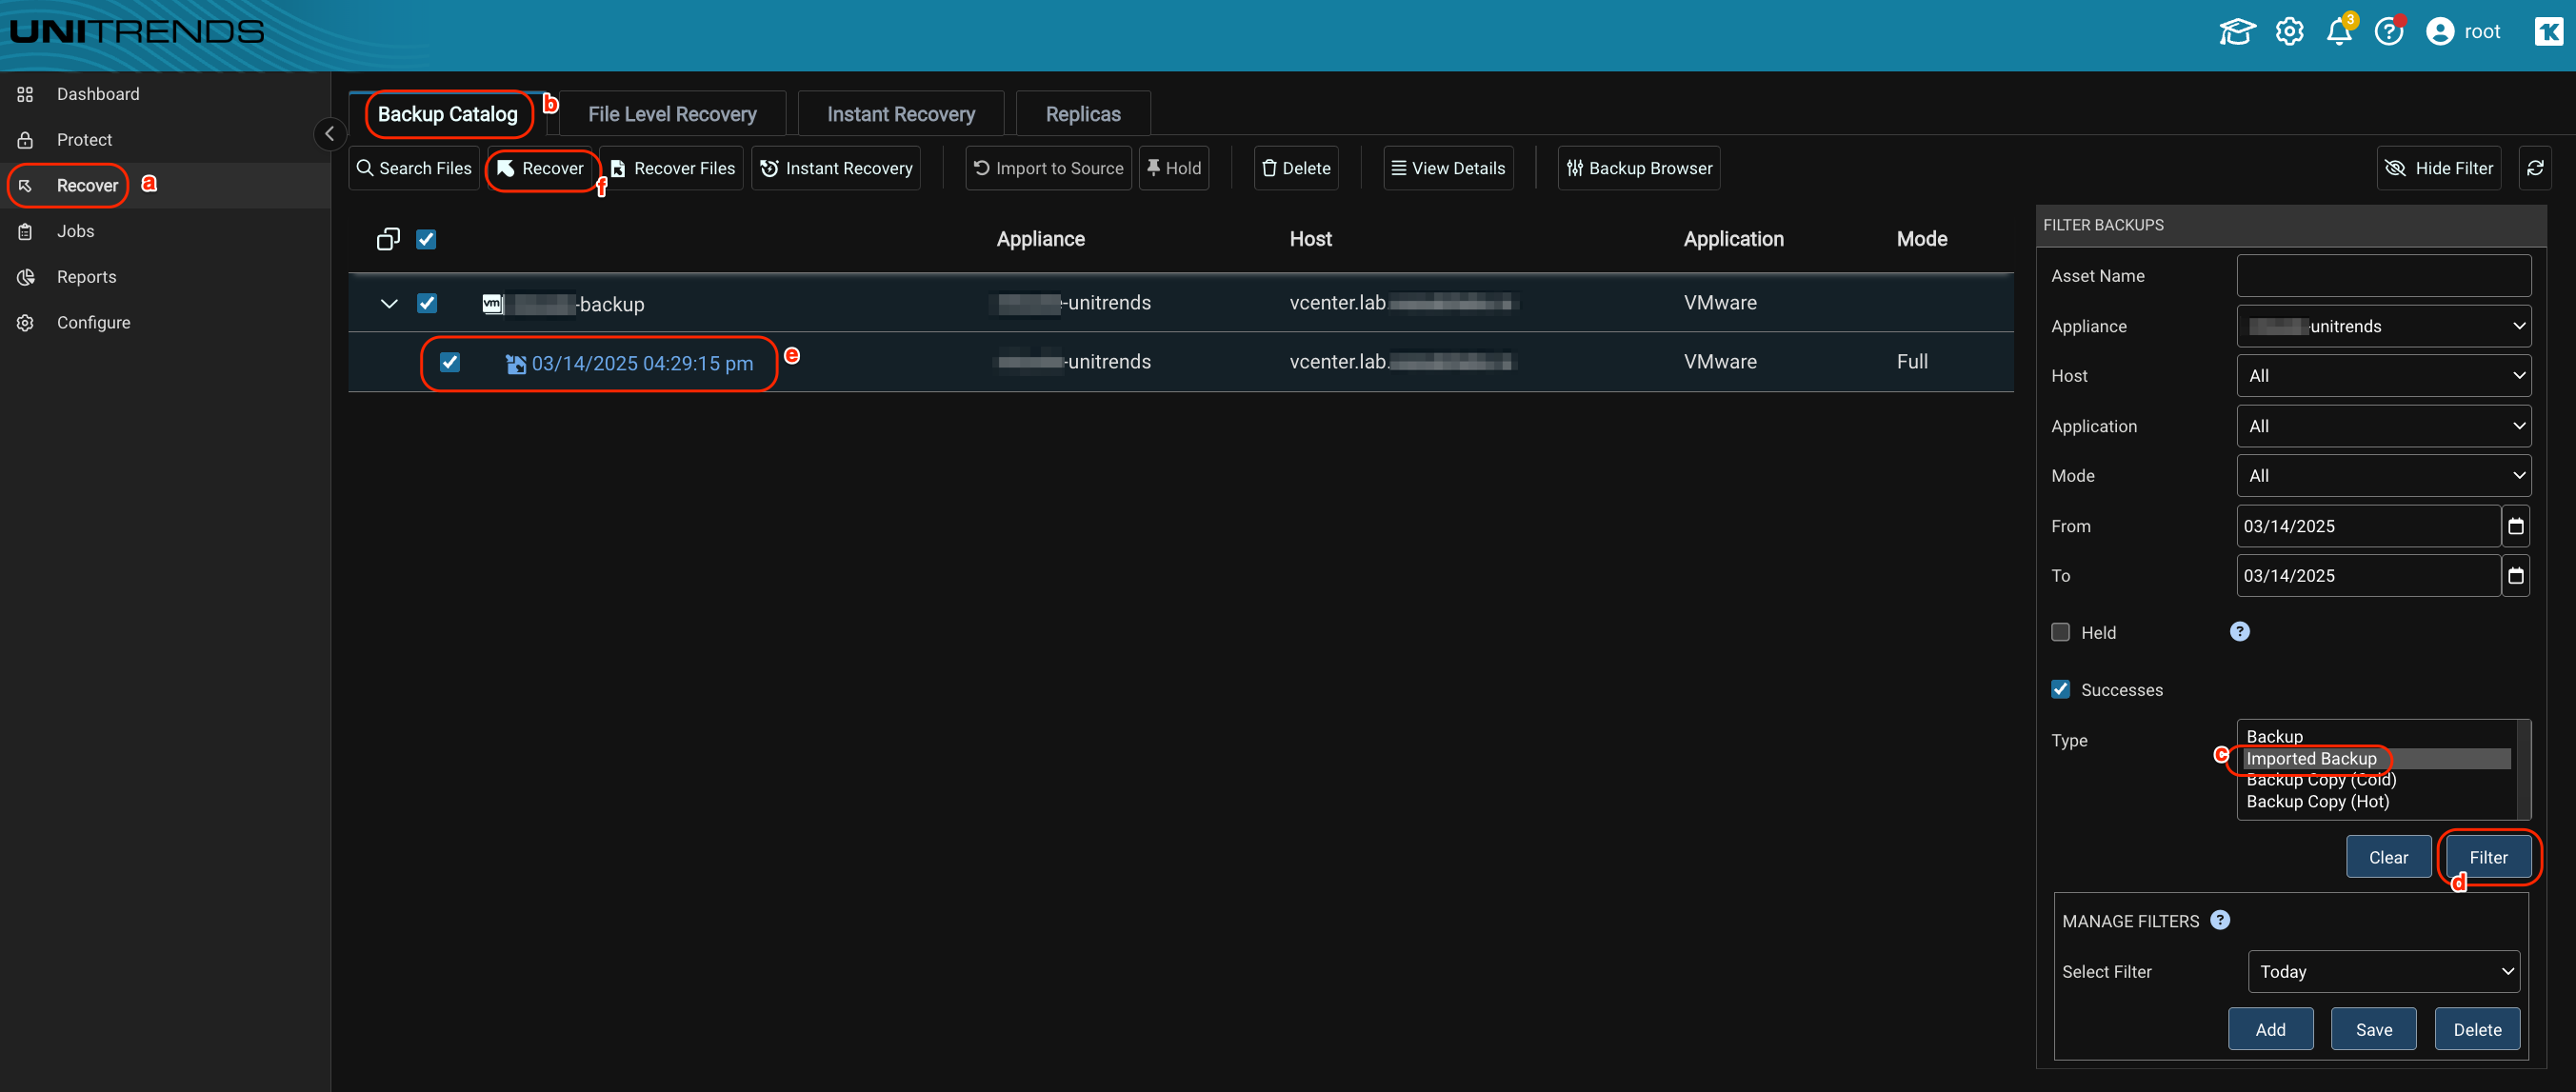
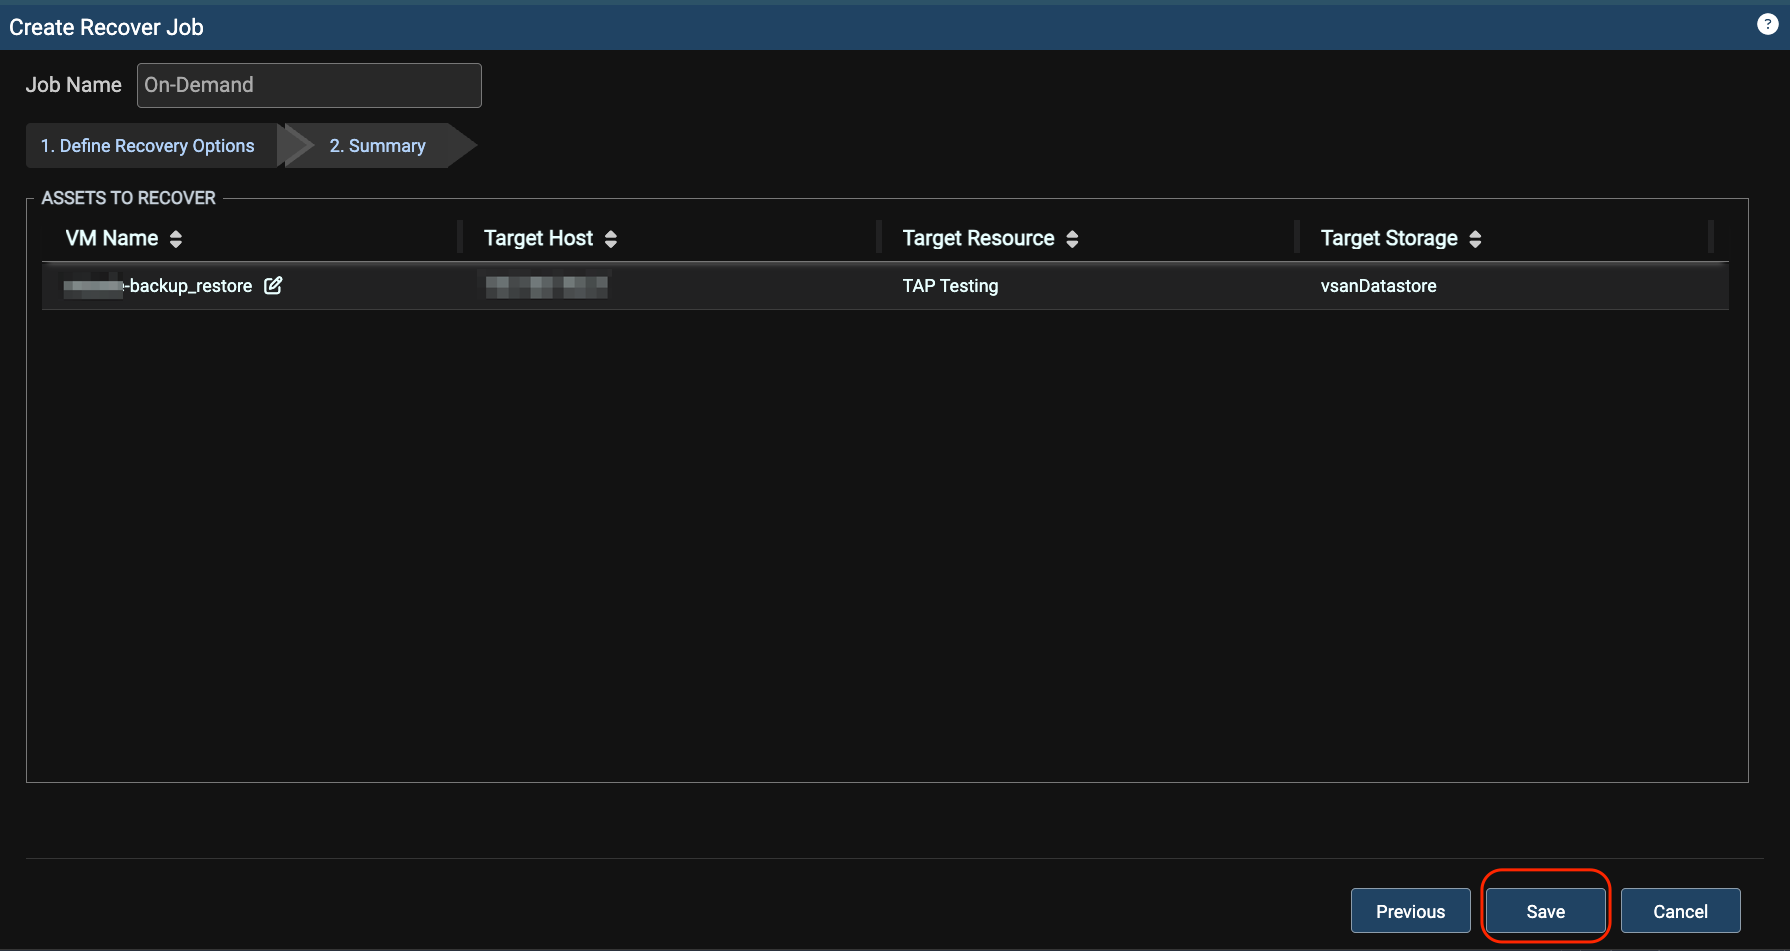
- Modify the Recovery Options as needed and click Next.

- Click Save
- Click OK.
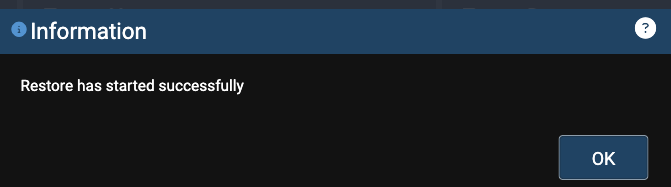
- Verify the restore completes successfully under Jobs > Active Jobs,