Objectives
1—Access Wasabi With Dell ObjectScale.
2—Create a bucket for Wasabi With Dell ObjectScale.
3—Create a new user and attach a policy for Wasabi With Dell ObjectScale.
There are a number of service URLs that you may need when using Wasabi. They are listed in Wasabi With Dell ObjectScale Service URL Endpoints.
Your Welcome email (titled “Your Wasabi With Dell ObjectScale Account is Activated”) includes your service URL, which you will need in this procedure. You will use either of these:
http://s3.[region]-dell-obs.wasabisys.com:9020
https://s3.[region]-dell-obs.wasabisys.com:9021
Using Postman, you can send a request to one of these endpoints. When you create a new request and click Send, the API response returns directly in Postman. To organize and group your requests for easier access, create your first Postman collection.
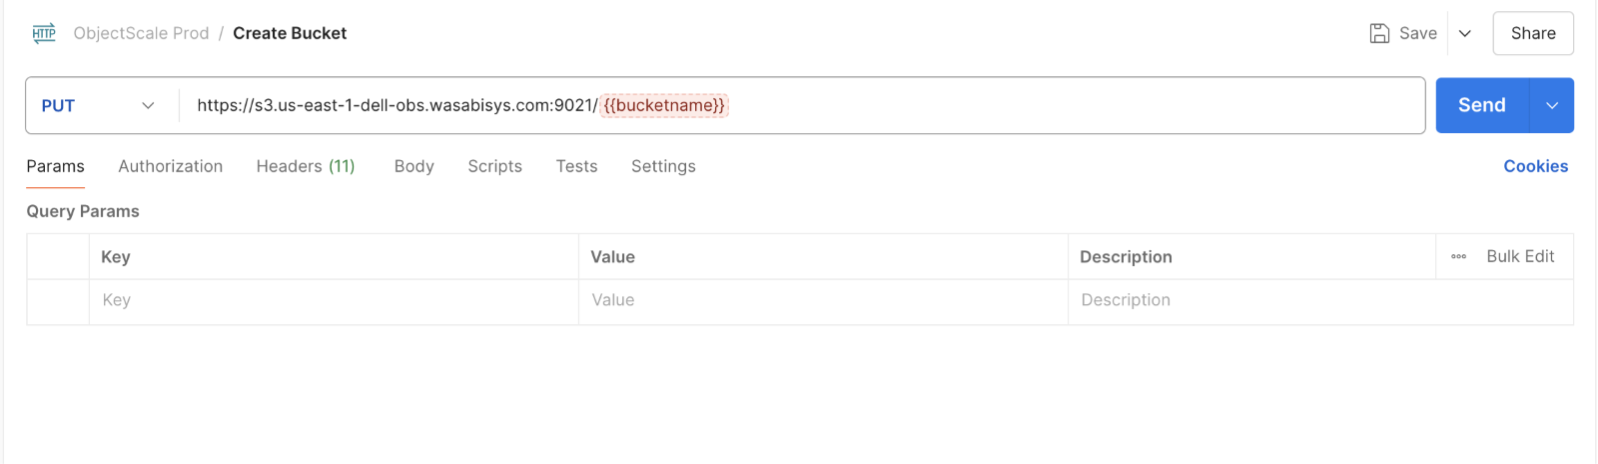
Add a new request and assign a name, for example, Create Bucket.
Configure the following:
Method—PUT
URL—https://s3.us-east-1-dell-obs.wasabisys.com:9021/{{bucketname}}
Bucket Name—The desired bucket name, replacing {{bucketname}} in the URL path
Be sure to click Save.
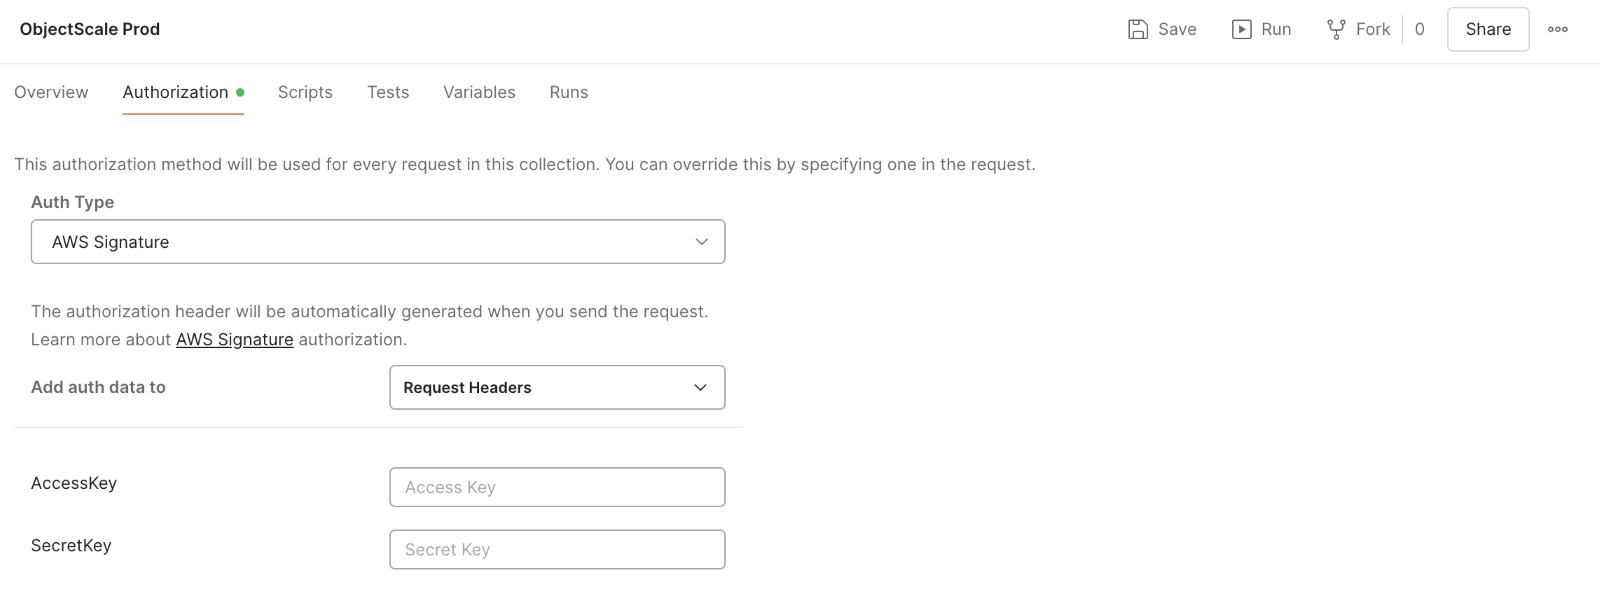
On the Authorization tab, configure:
Auth Type—AWS Signature
Add auth data to—Request Headers
AccessKey and SecretKey—The IAM access credentials that you created above
Be sure to click Save.
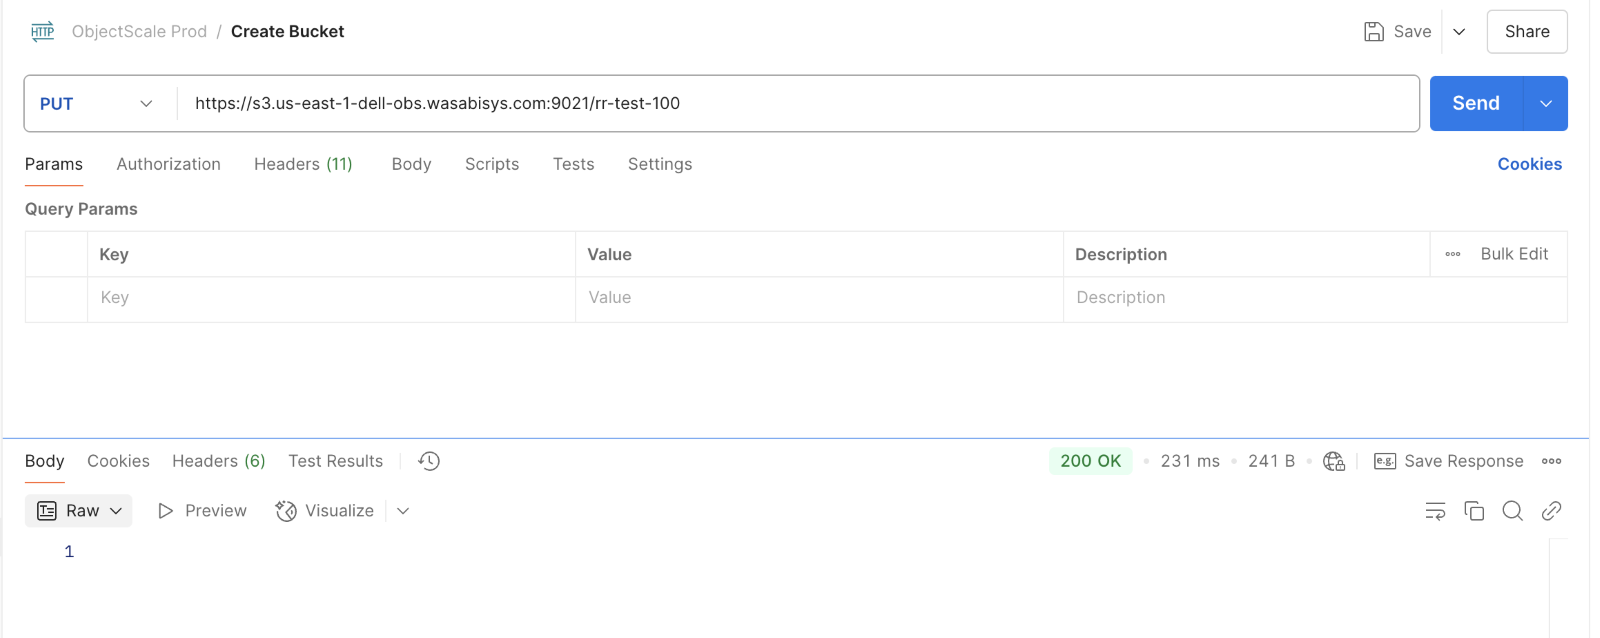
Click Send to submit the request to create your bucket. You will receive a 200 response, indicating the bucket was created successfully.
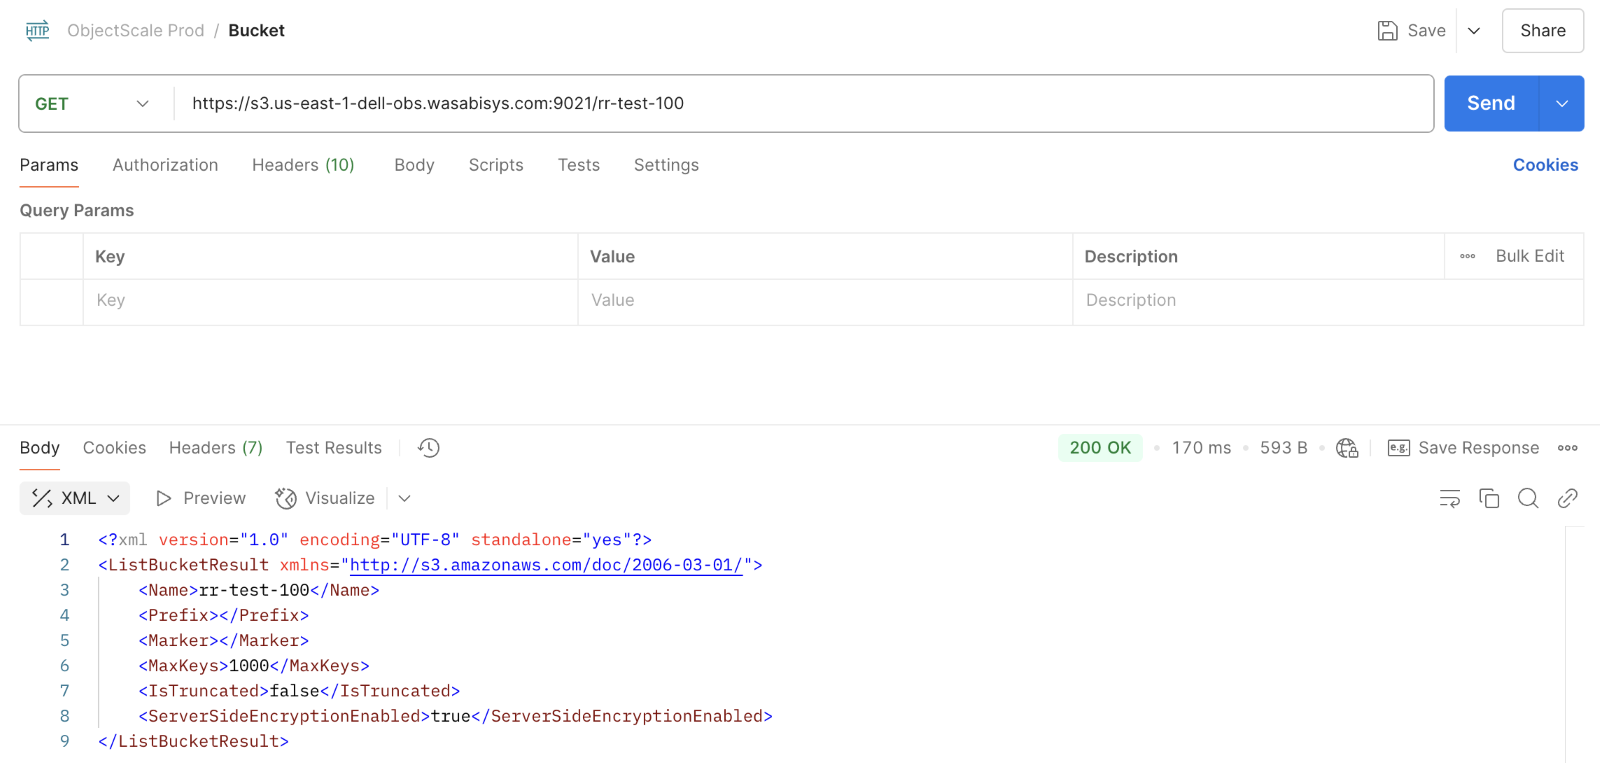
To validate, create a new request to get the bucket details:
Method—GET
URL—https://s3.us-east-1-dell-obs.wasabisys.com:9021/{{bucketname}}
Be sure to click Save.
Click Send to submit the request to get your bucket. You will receive a 200-response along with the details of the bucket.
Objectives Met!
1—Access Wasabi With Dell ObjectScale.
2—Create a bucket for Wasabi With Dell ObjectScale.
3—Create a new user and attach a policy for Wasabi With Dell ObjectScale.