IBM's Aspera High-Speed Transfer Server (HST Server) is validated for use with Wasabi. IBM Aspera is a data transfer solution that quickly moves data across hybrid cloud environments, regardless of network conditions. To use this product with Wasabi, follow the instructions in this article.
Requirements
IBM Aspera High Speed Transfer Server
IBM Aspera Desktop Client
An account on Wasabi cloud storage.
As part of Wasabi’s validation testing of this solution, we installed the IBM Aspera HST Server on a Linux distribution instance located close to one of our storage data centers. For more information on the steps to perform the installation, refer to the link here.
There are several sections to configuring this solution. Follow the steps below to configure the IBM Aspera HST Server with your Wasabi storage.
HST Server Configuration
Aspera clients connect to HST Server by authenticating as a system user that is configured in the application. The user can also belong to a group that is configured in the application. Users and groups can be set up in the HST Server GUI. The HST Server uses system accounts to authenticate connections from Aspera clients. The system users must be added and configured as Aspera transfer users before clients can browse the server file system or run FASP transfers to and from the server. When creating transfer users, you can also specify user-specific settings, such as transfer bandwidth, docroot, and file handling.
Launch the HST Server as root. Run the following command:
# asperascp
Click Configuration.

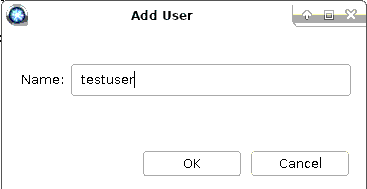
Select the Users tab. Add a system user by clicking the + icon. Enter the appropriate name. Click OK.
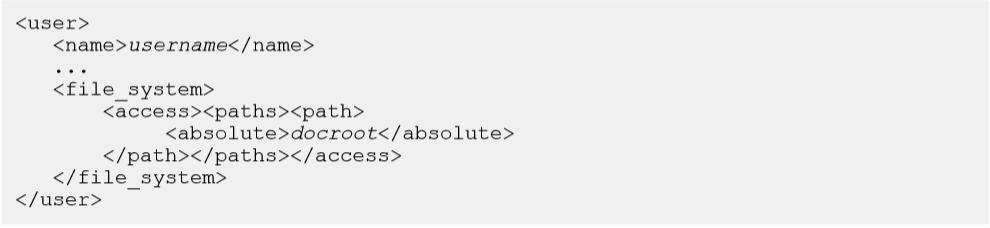
The Absolute Path, or docroot, is the area of the file system that is accessible to an Aspera transfer user. The default empty value enables access to the entire file system. You can set a single global docroot and then further restrict access to the file system by group or individual users. Docroot paths require specific formatting depending on where the transfer server's storage is located.
Docroot paths may be set to cloud or on-premises object storage in the HST Server GUI or by editing aspera.conf using asconfigurator. To set the docroot for a user with asconfigurator, run the following command:
# asconfigurator -x "set_user_data;user_name,username;absolute,docroot"
where username would be 'testuser' and docroot should be s3://:@s3.wasabisys.com/
[root@asperaCentOS ~]# asconfigurator -x "set_user_data;user_name,testuser;absolute,s3://S08WOGC5C38C2M4PN0IX:tTNJDYU42Iihzt7Mroubep@s3.wasabisys.com/asperabucket/"
success
user_name: testuserThe docroot can also be configured manually by adding the following text to /opt/aspera/etc/ aspera.conf:
After editing aspera.conf, you must restart asperanoded:
# systemctl restart asperanoded
IBM Aspera Desktop Client Configuration
Launch the Desktop Client and click Connections on the right.

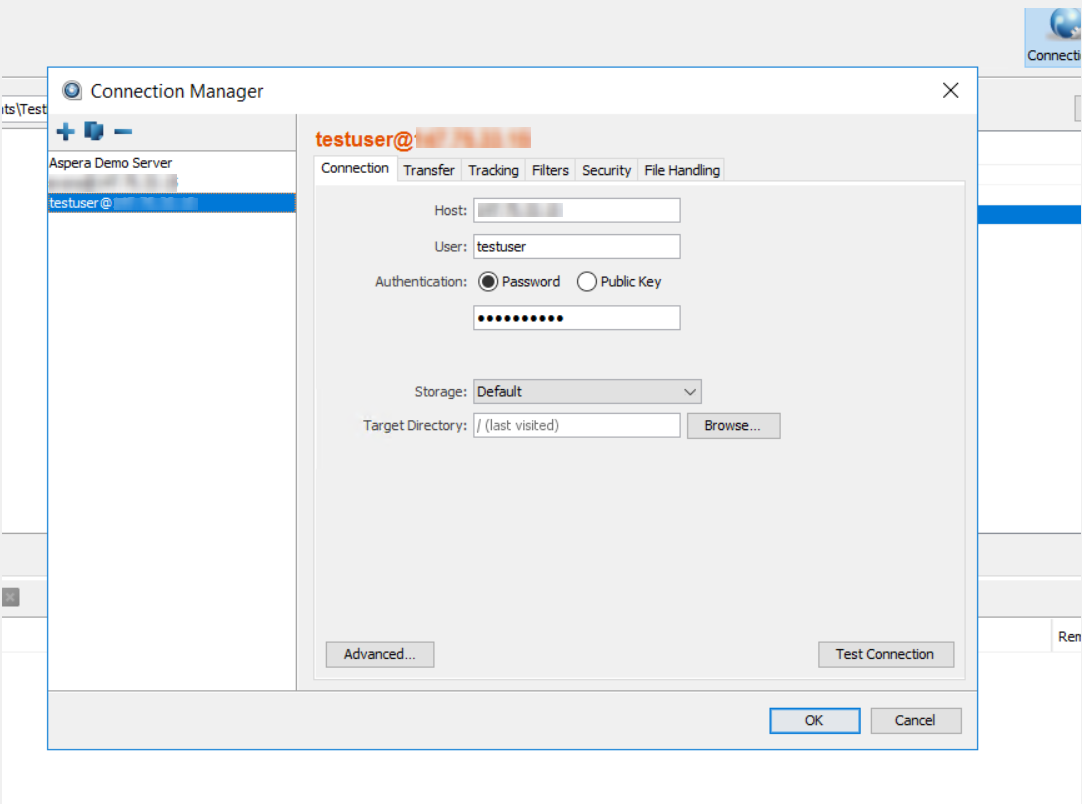
On the Connection Manager screen, click the + icon to add a new connection. Configure the host field with your HST Server IP address or hostname and add the user credentials. Click Test Connection to confirm connectivity. Click OK when done.
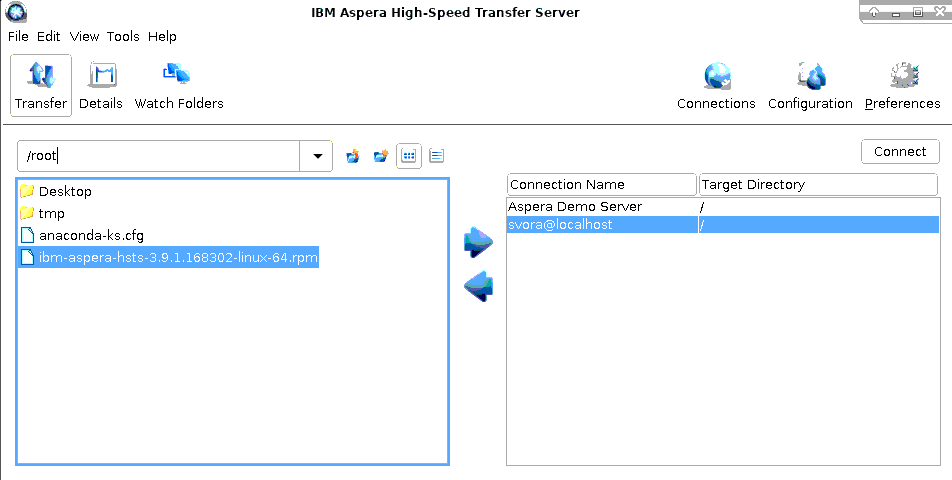
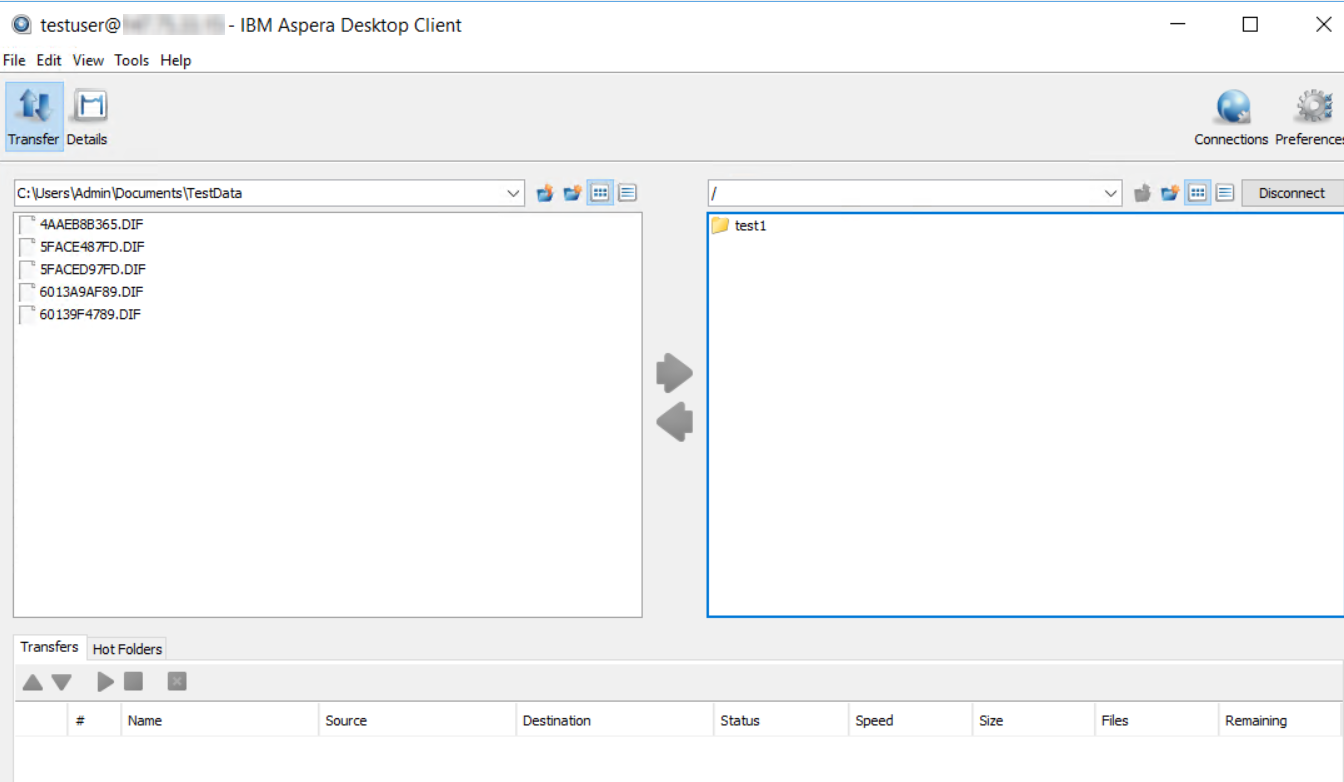
Select the connection and click Connect. The client will now try to connect to the HST Server and retrieve the files and folders from the respective Wasabi bucket, as shown below.
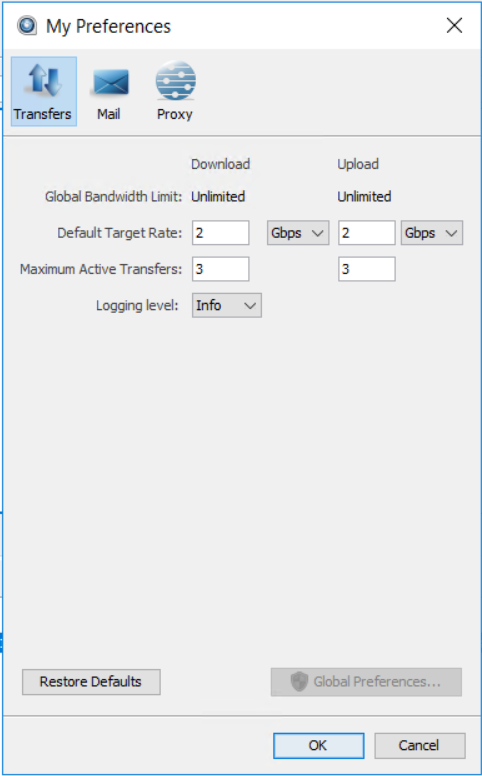
Click Preferences and set the Default Target Rate for Download and Upload speed limits to the appropriate speeds (units available: Kbps, Mbps, and Gbps). Typically, this should be set to the line-rate connection speed to achieve the fastest throughput. Click OK when done.
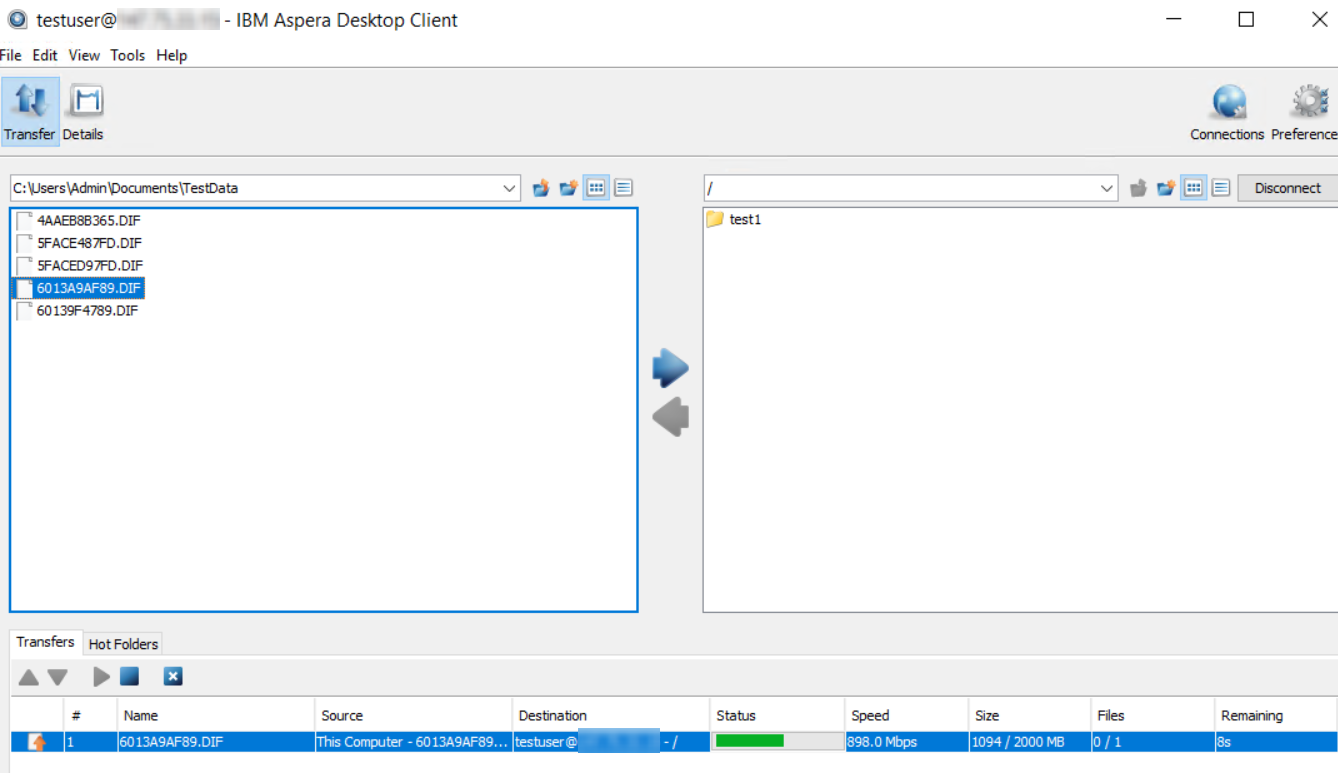
At this point, you can begin transferring files between your local storage and Wasabi using the Aspera HST Server.
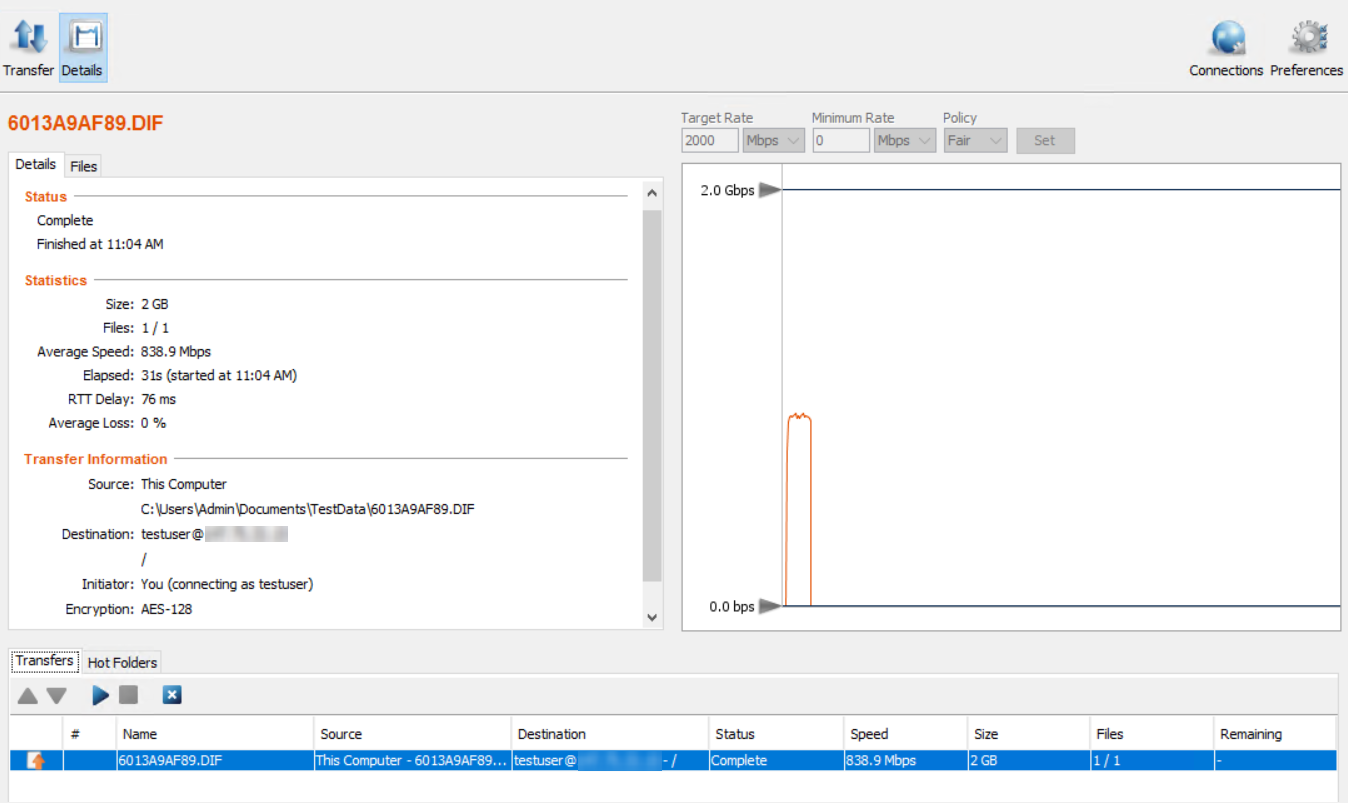
Click Details to view the transfer status information once the transfer completes.
Alternate Configuration
In the above configuration example we configure the user's S3 credentials on the HST Server itself. However, you can set only the S3 permissions for the user on HST Server and let the user's S3 credentials be stored on the Aspera Desktop Client.
HST Server configuration
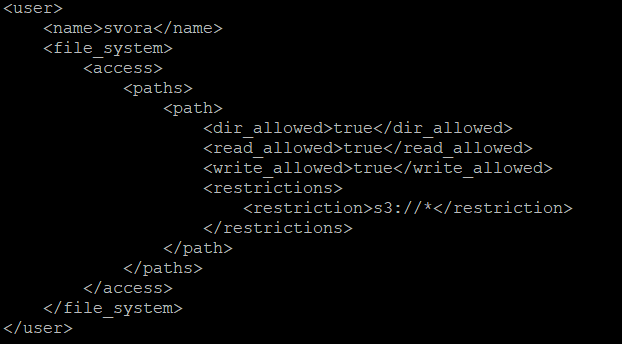
For a user 'svora' the aspera.conf configuration below will enable S3 permissions (read, write, and so on). You can still limit the user's control through IAM policies configured on your Wasabi account. For more information, review Separation of User Access.
IBM Aspera Desktop Client Configuration
On the Desktop Client, configure the Connection with Storage set to Amazon S3, access key, and secret access key as shown below. Click Browse to have the client populate the buckets, then select the appropriate bucket.

Click Advanced to enter the appropriate Wasabi region service URL. Review Service URLs for Wasabi's Storage Regions for information on the different Wasabi region URLs. Click OK when done.

Click OK on the Connection Manager to save the settings.
At this point, you can use the connection to transfer files via HST Server and keep the S3 credentials stored on the client rather than on the HST Server.