Wasabi has been validated for use with Arctera Enterprise Vault (previously Veritas Enterprise Vault) as a Secondary S3 migrator. For more information, refer to the Enterprise Vault Compatibility Charts. Follow the steps outlined below to configure Wasabi as a cloud storage target.
Note: The data restoration process is handled by your specific backup software application. As there are many potential variables that will affect your unique environment, it is strongly recommended that you seek the guidance of your backup software’s technical support team in the event that you encounter difficulty or have application-specific inquiries.
Requirements
Arctera Enterprise Vault software version - 12.X or 14
Arctera Enterprise Vault software installed and configured
An active Wasabi account.
To configure Wasabi as the primary storage, refer to Wasabi as Primary Storage With Arctera Enterprise Vault.
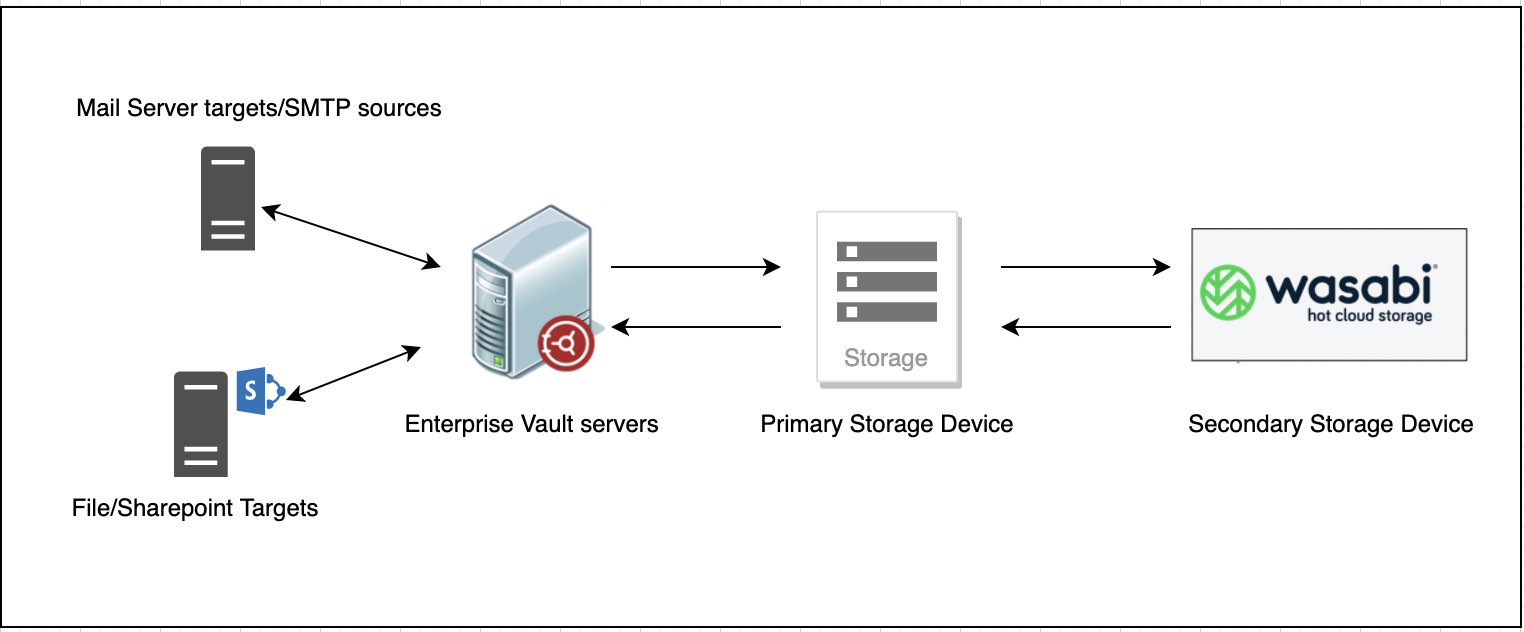
Reference Architecture
Launch the Enterprise Vault Administration Console.
.png)
Navigate to the required partition in the Vault Store Group. Right-click and select Properties.
.png)
The Vault Store Partition Properties window is displayed.
.png)
Navigate to the Migrations tab.
.png)
Check the Migrate files check box. Click OK on the warning window.
.png)
Select Wasabi Hot Cloud Storage (S3) from the Migrator dropdown menu. Click Apply.
.png)
Note: For Enterprise Vault 12.X deployments, if "Wasabi Hot Cloud Storage (S3)" is not available in the dropdown menu, follow the steps outlined my.cohesity.com/s/login to enable it.
Select Yes in the warning window that appears.
.png)
Click OK in the next window that asks you to restart the Enterprise Vault Storage Services.
.png)
Navigate to the Advanced tab and populate the fields below with the required details to access your Wasabi account.
Service hostname— s3.us-east-1.wasabisys.com
Access Key ID—Access Key
Secret Key ID—Secret Key
Supported regions—us-east-1, us-east-1, s3.us-east-1.wasabisys.com
Bucket name—Name of the target bucket
Bucket region—us-east-1
.png)
Click Apply.
Note: This config example uses Wasabi’s us-east-1 storage region. To use other Wasabi storage regions, use the appropriate Wasabi service URL as described in Service URLs for Wasabi’s Storage Regions.
Click Test to test the connection to the Wasabi account. A Migration Configuration Test is successful if a window is displayed and if the connection is established. Click OK.
.png)
Restart the Enterprise Vault Storage Service.
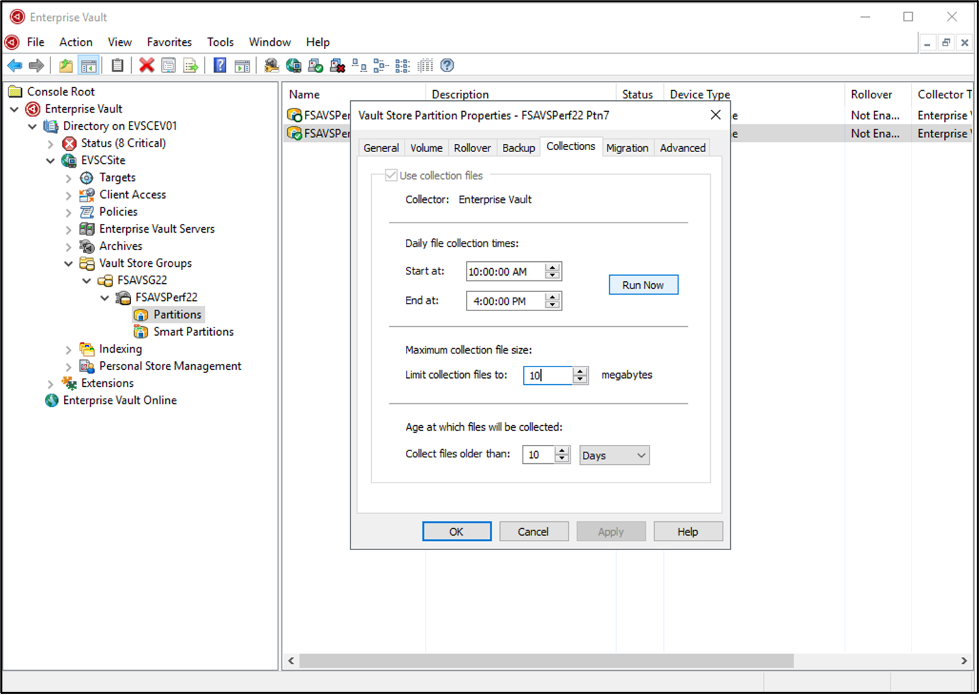
Wasabi is now configured as the secondary storage target for the migrations. To migrate files to Wasabi, navigate to the Collections tab and click Run Now.