AvePoint Cloud Backup for Microsoft 365 helps ensure business continuity against service outages, ransomware attacks, user errors, configuration errors, and more. This article describes how to use Wasabi Hot Cloud Storage with AvePoint Cloud Backup for Microsoft 365.
Requirements
Active Wasabi Cloud Storage account.
Wasabi bucket (see 2—Working With Buckets and Objects).
Access to the Wasabi Console as the account root user or a user with sufficient permissions to create a new user.
AvePoint Bring Your Own Storage (BYOS) subscription.
AvePoint Online Services portal access.
Configuring Wasabi
Log in to the Wasabi Console as the account root user.
Configure a policy for an “avepoint” user (that will be created in the next step) using the following policy. Change YOUR_WASABI_BUCKET_NAME to your own Wasabi bucket name. (See Creating a Policy for instructions on how to create a policy.)
{
  "Version": "2012-10-17",
  "Statement": [
    {
      "Effect": "Allow",
      "Action": "s3:ListAllMyBuckets",
      "Resource": "arn:aws:s3:::*"
    },
    {
      "Effect": "Allow",
      "Action": "s3:*",
      "Resource": [
        "arn:aws:s3:::YOUR_WASABI_BUCKET_NAME",
        "arn:aws:s3:::YOUR_WASABI_BUCKET_NAME/*"
      ]
    }
  ]
}
Create an AvePoint user and attach the previously created policy to it. Use the following settings for the user. For more information, see Creating a User.
Allow programmatic-only access, not console access.
Do not require Multi-Factor Authentication (MFA).
It is not necessary to assign the user to a group.
Save the access and secret keys in a secure location.
Configuring AvePoint
Log in to the AvePoint Online Services portal.
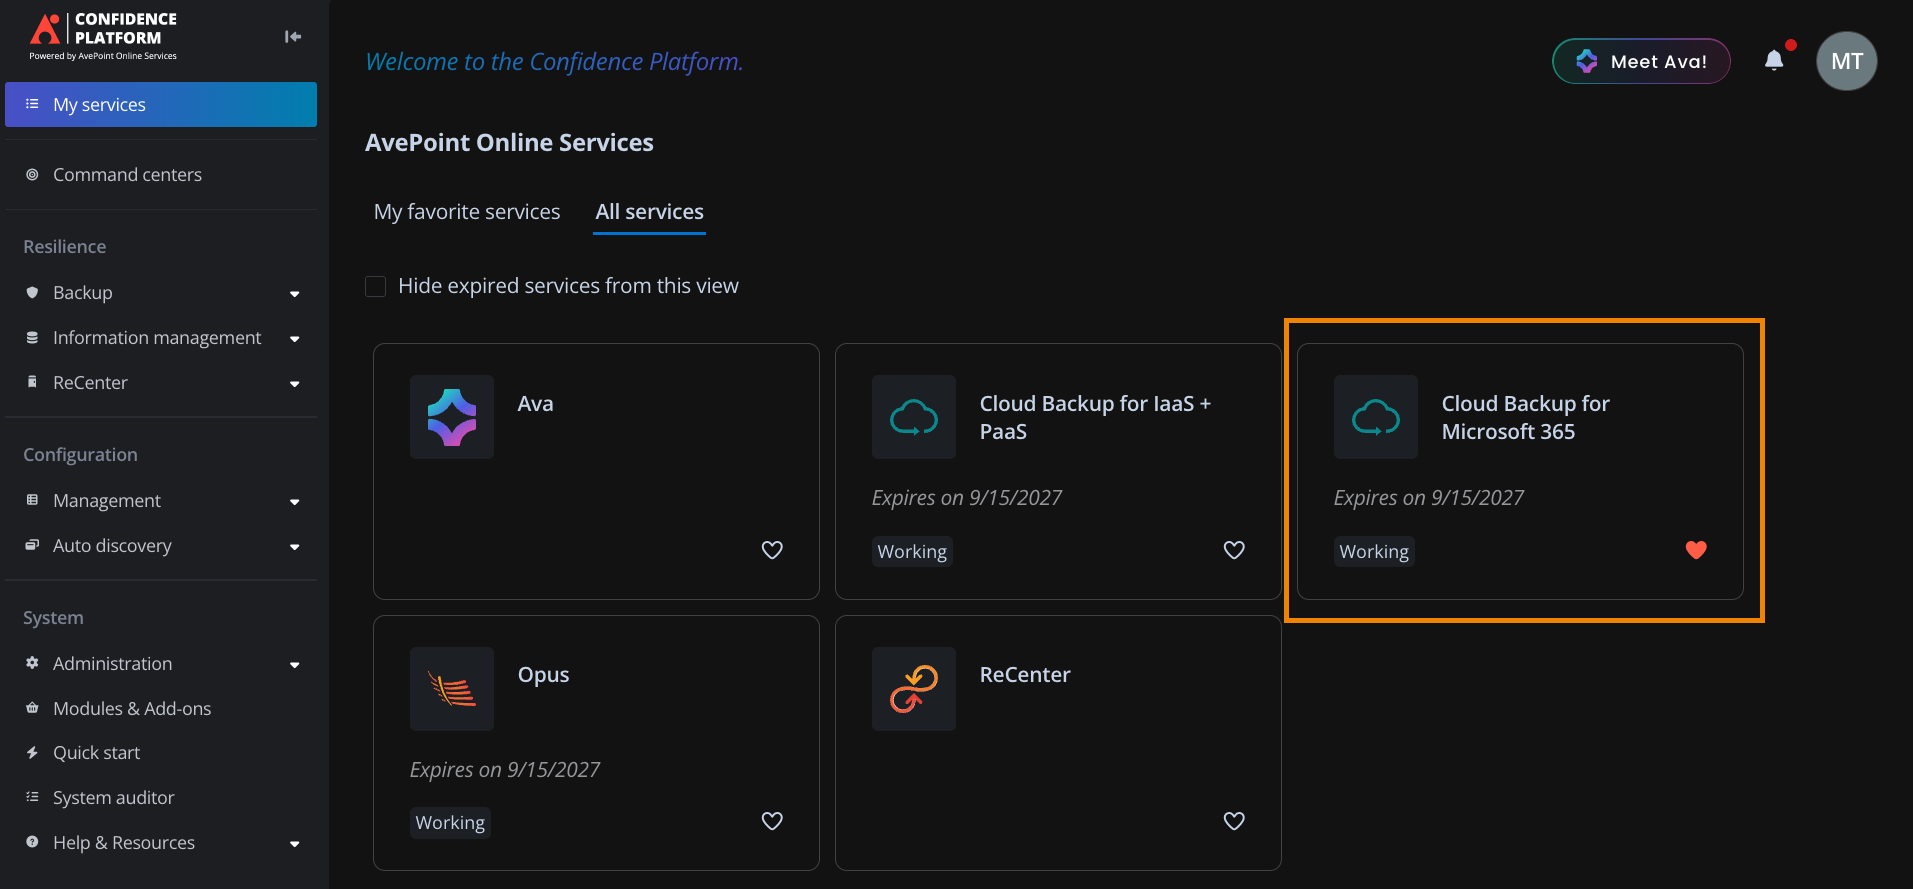
Select the Cloud Backup for Microsoft 365 tile.
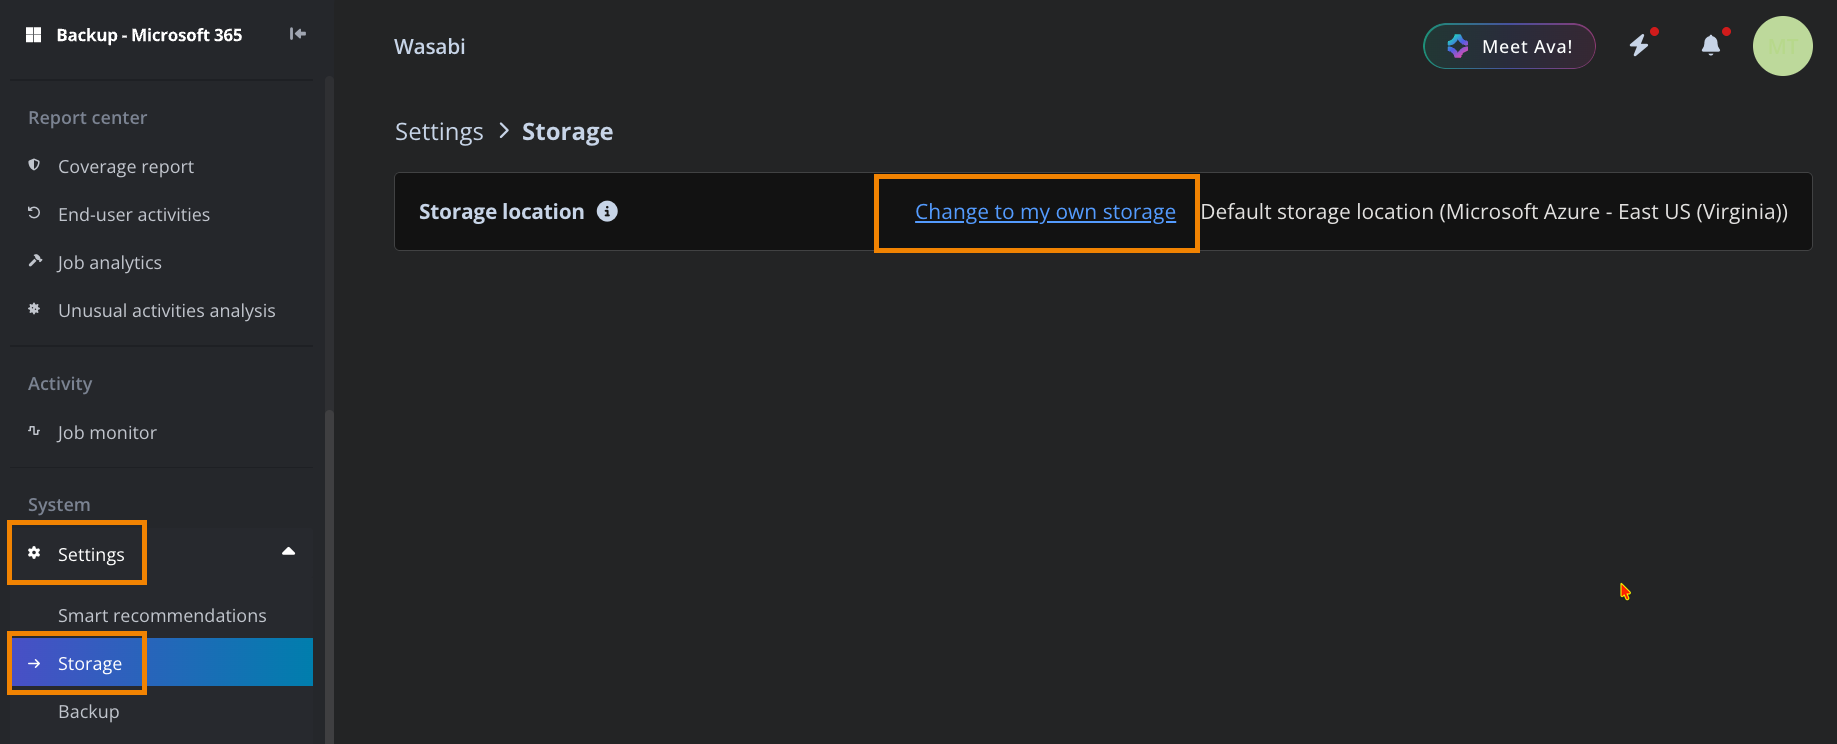
Click Settings.
Select Storage.
Click Change to my own storage.
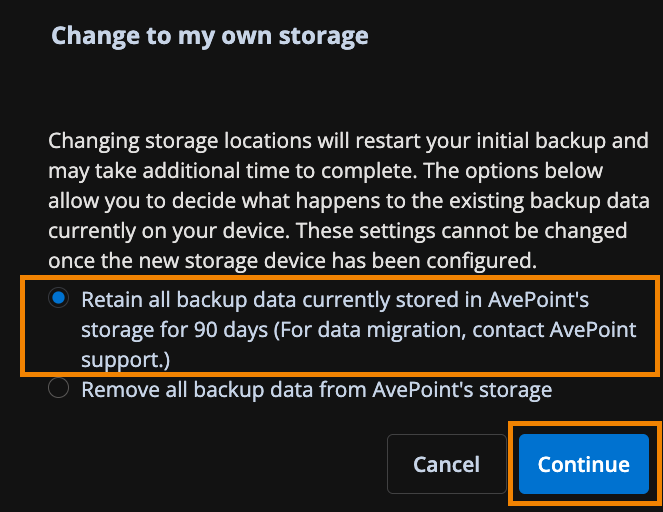
Wasabi recommends that you select Retain all backup data currently stored in AvePoint’s storage for 90 days.
Click Continue.
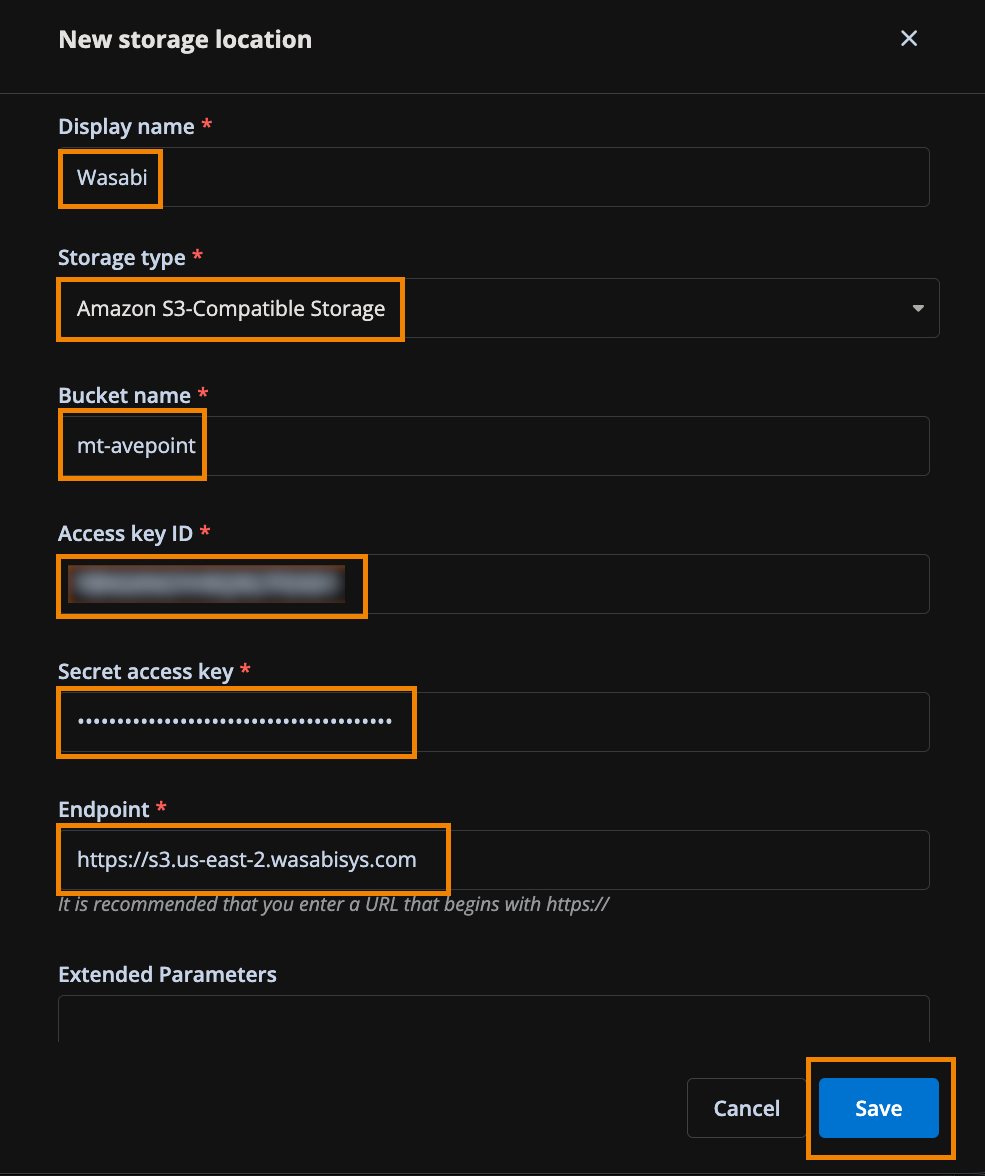
Configure Wasabi as the new storage location by providing the following information.
Display name.
Select Amazon S3-Compatible Storage from the drop-down.
Your Wasabi bucket name.
Your Wasabi access and secret keys were created above.
The endpoint URL for your bucket. (The URL must be prepended with “https://” as shown in the example below.)
This configuration example uses Wasabi’s us-east-2 storage region. To use another Wasabi storage region, use the appropriate URL for your bucket region as described in Service URLs for Wasabi’s Storage Regions.
Click OK.
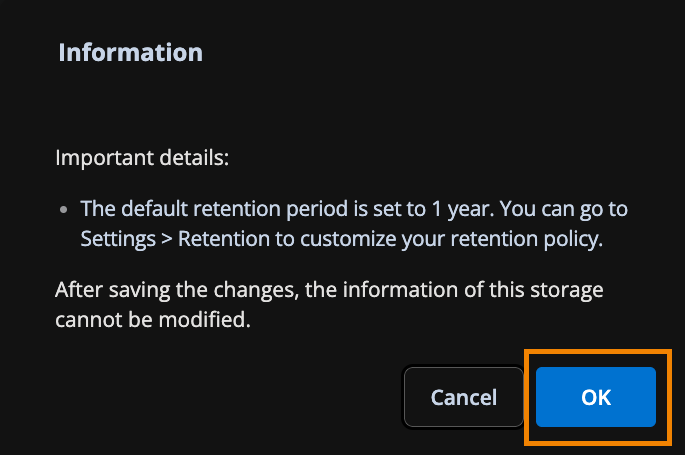
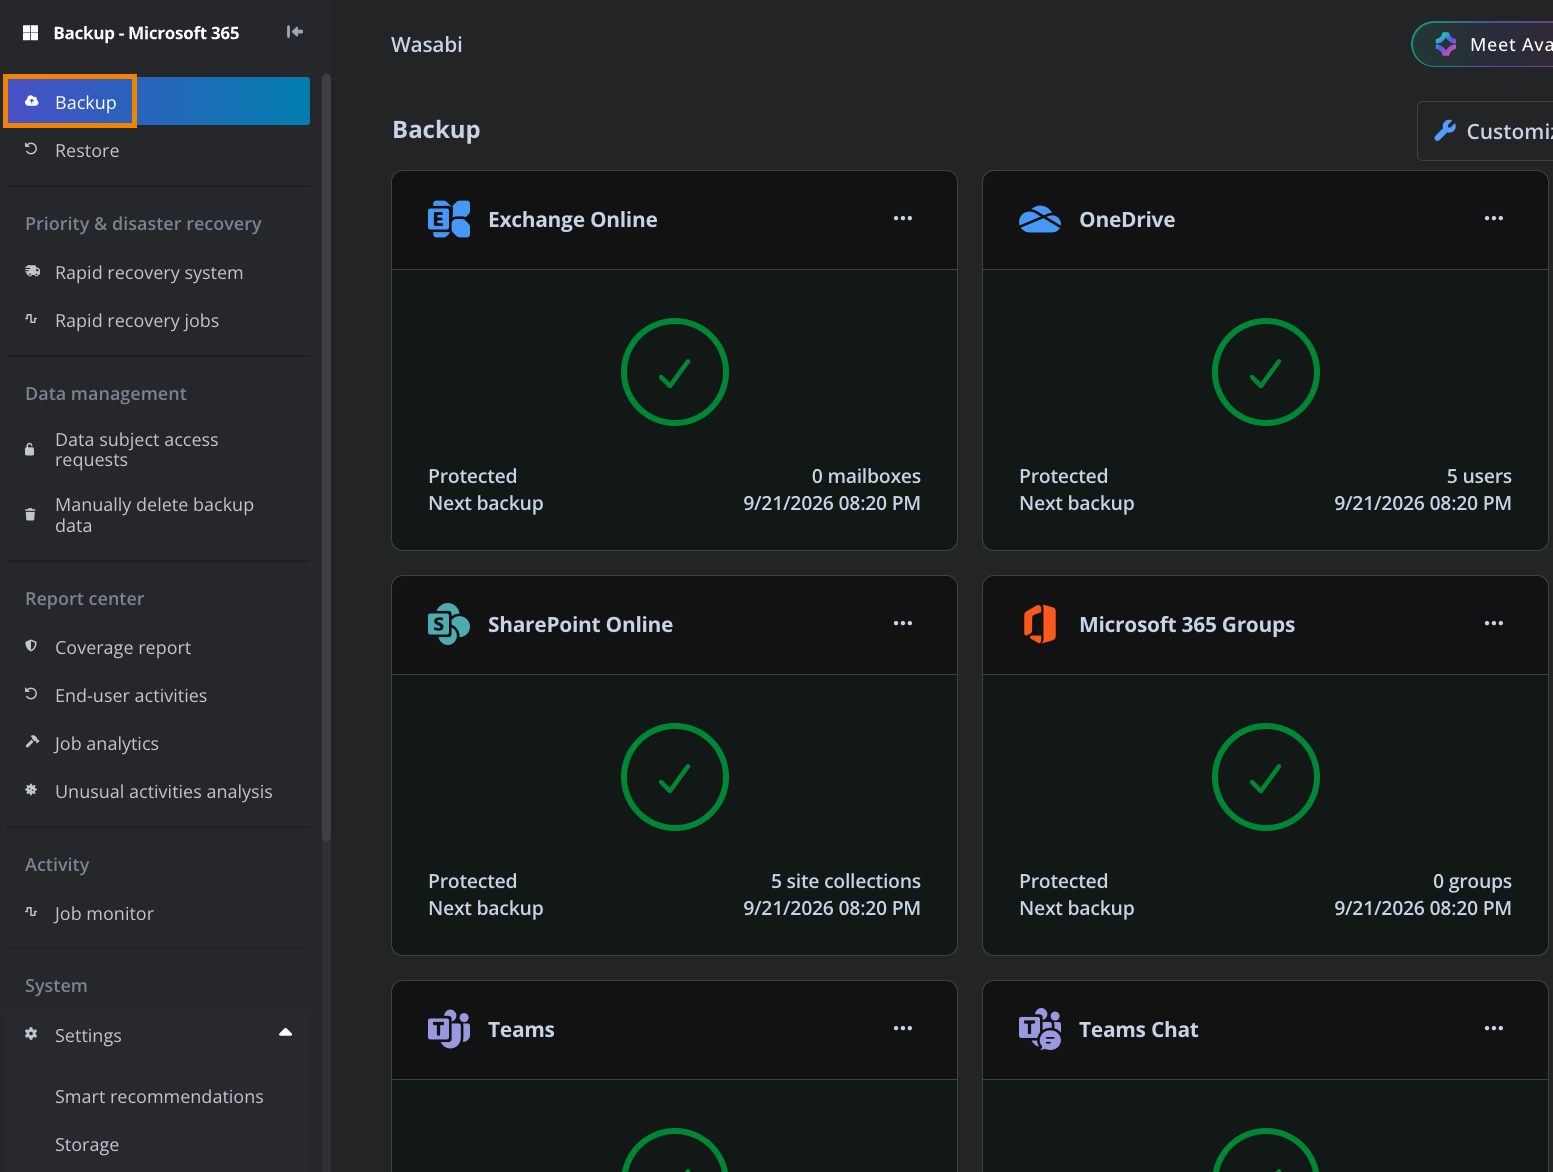
Under Backup, you will see all Microsoft services that are protected. The next backup date and time will be shown for each service. After a backup has been saved to Wasabi, proceed to the next section.
Verifying Data in Wasabi
Log in to the Wasabi Console(console.wasabisys.com).
Click Buckets.
Select the name of your bucket.
.png)
Verify that the backup data is being stored in your bucket.
.png)
Performing a Test Restore
Log in to the AvePoint Online Services portal.
Select the Cloud Backup for Microsoft 365 tile.
Click Restore.
Select the service from which to perform a restore.
.png)
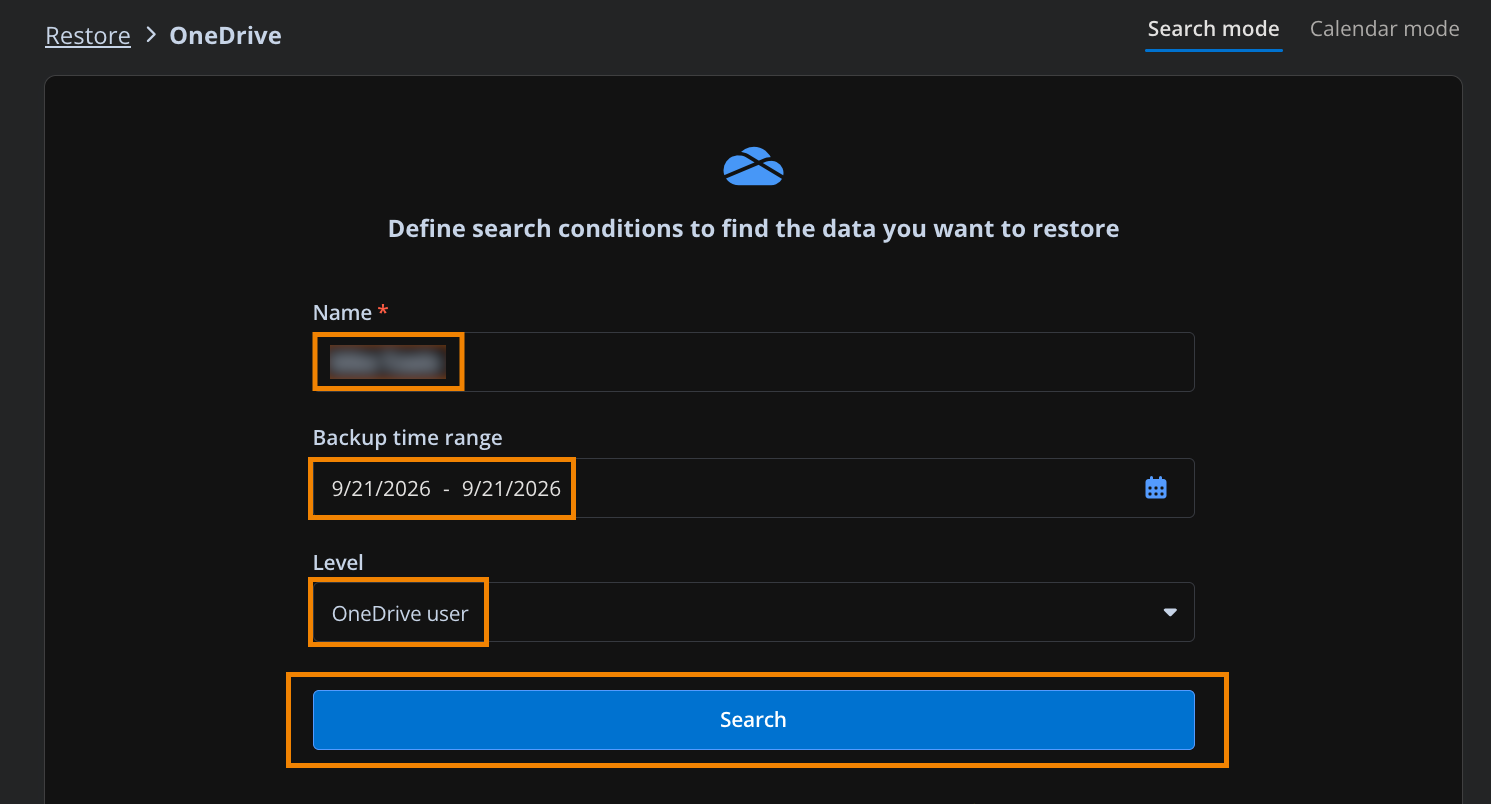
Enter the name or email address of the account to restore. Select the backup time range (be sure that it is one stored in Wasabi) and the level to restore.
Click Search.
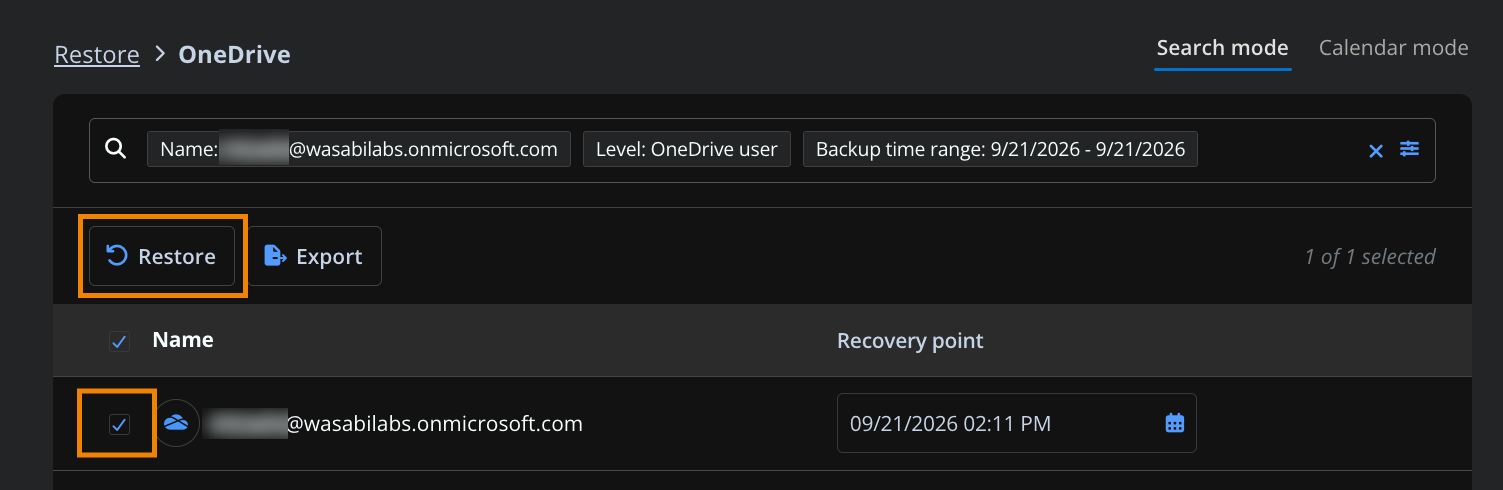
Click the checkbox next to the user being restored.
Click Restore.
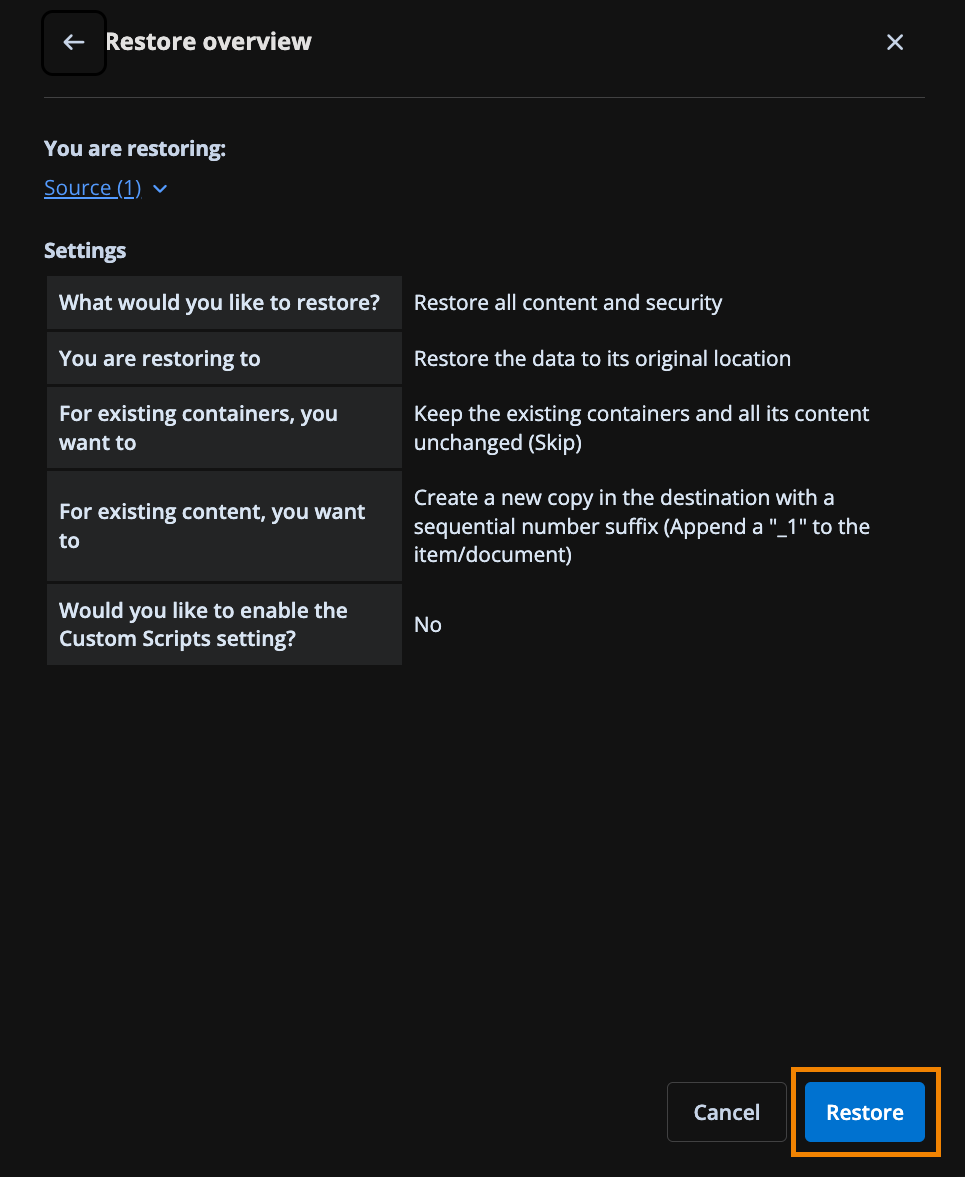
Select the appropriate options for restoring data and handling conflicts. Click Next.
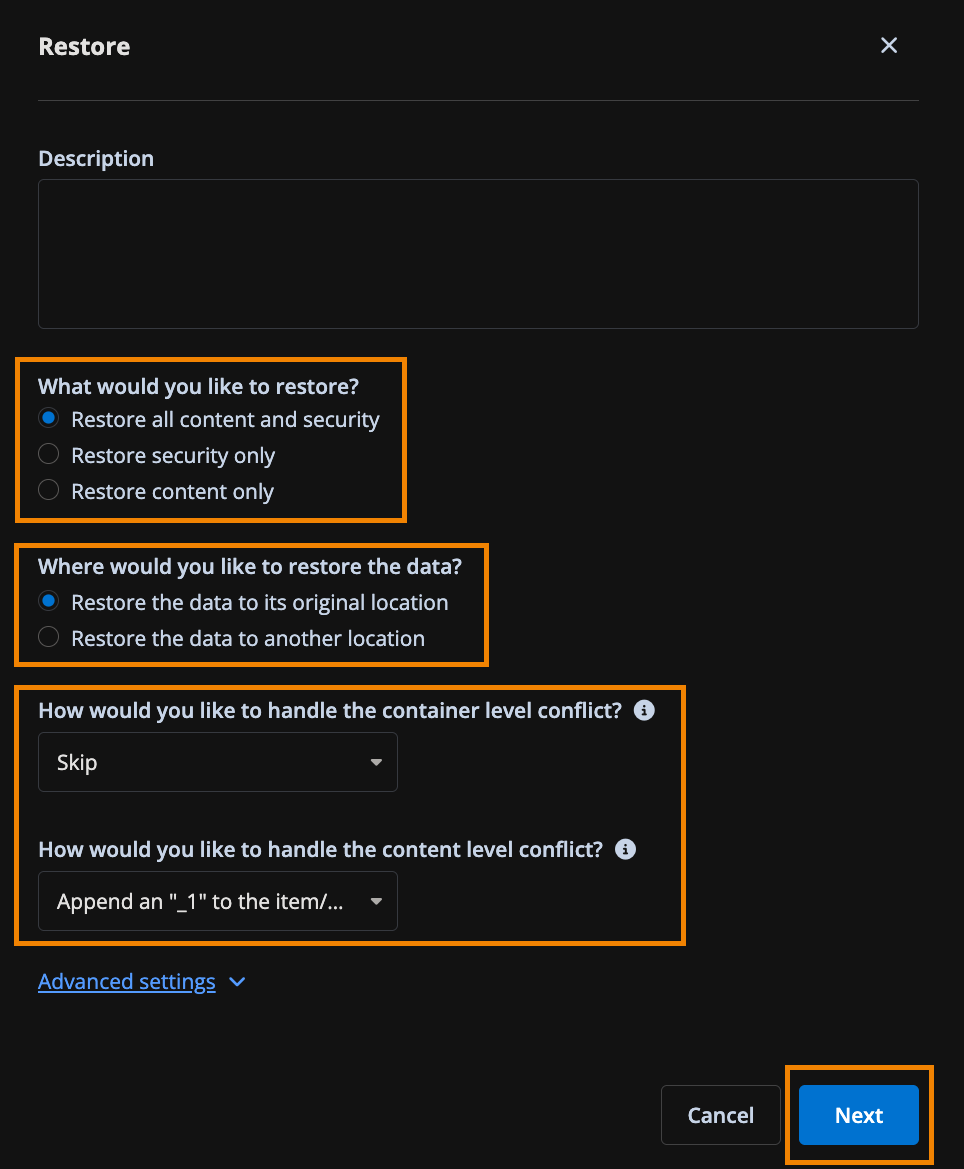
Click Restore.
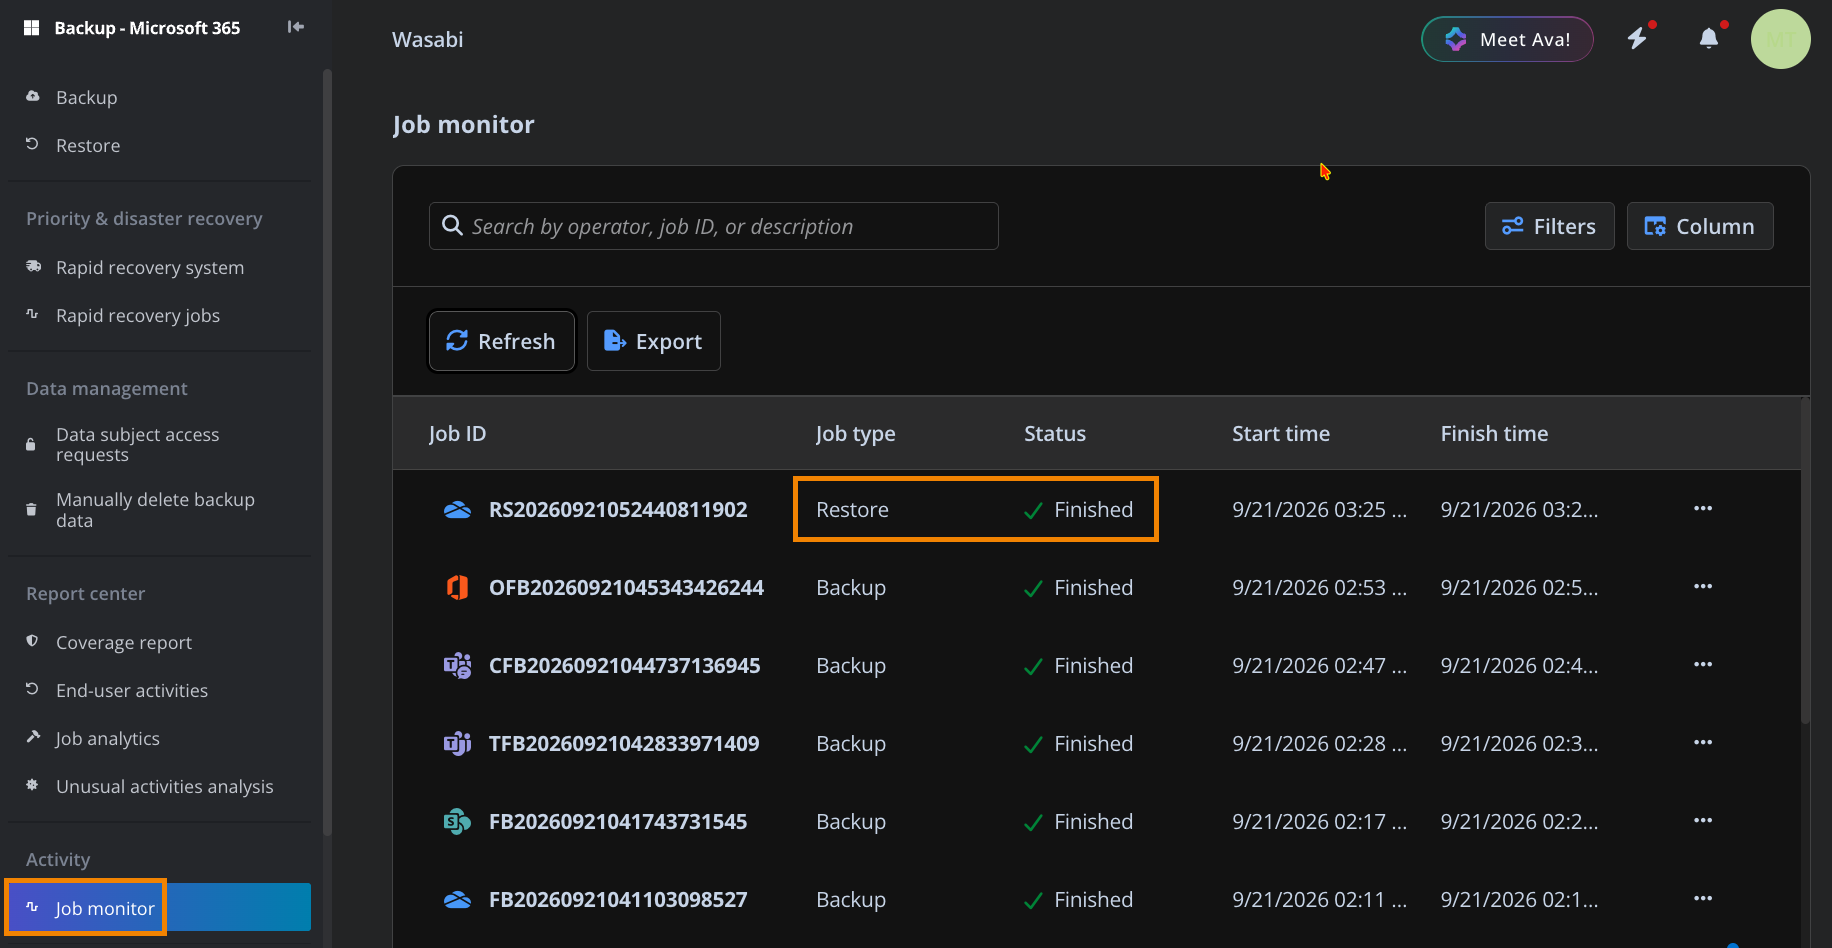
Click Job monitor. You can click the Refresh button to update the list of jobs and status. Verify you eventually see the Restore job with a status of Finished with a green checkmark next to it.
Verify that your data has been restored.