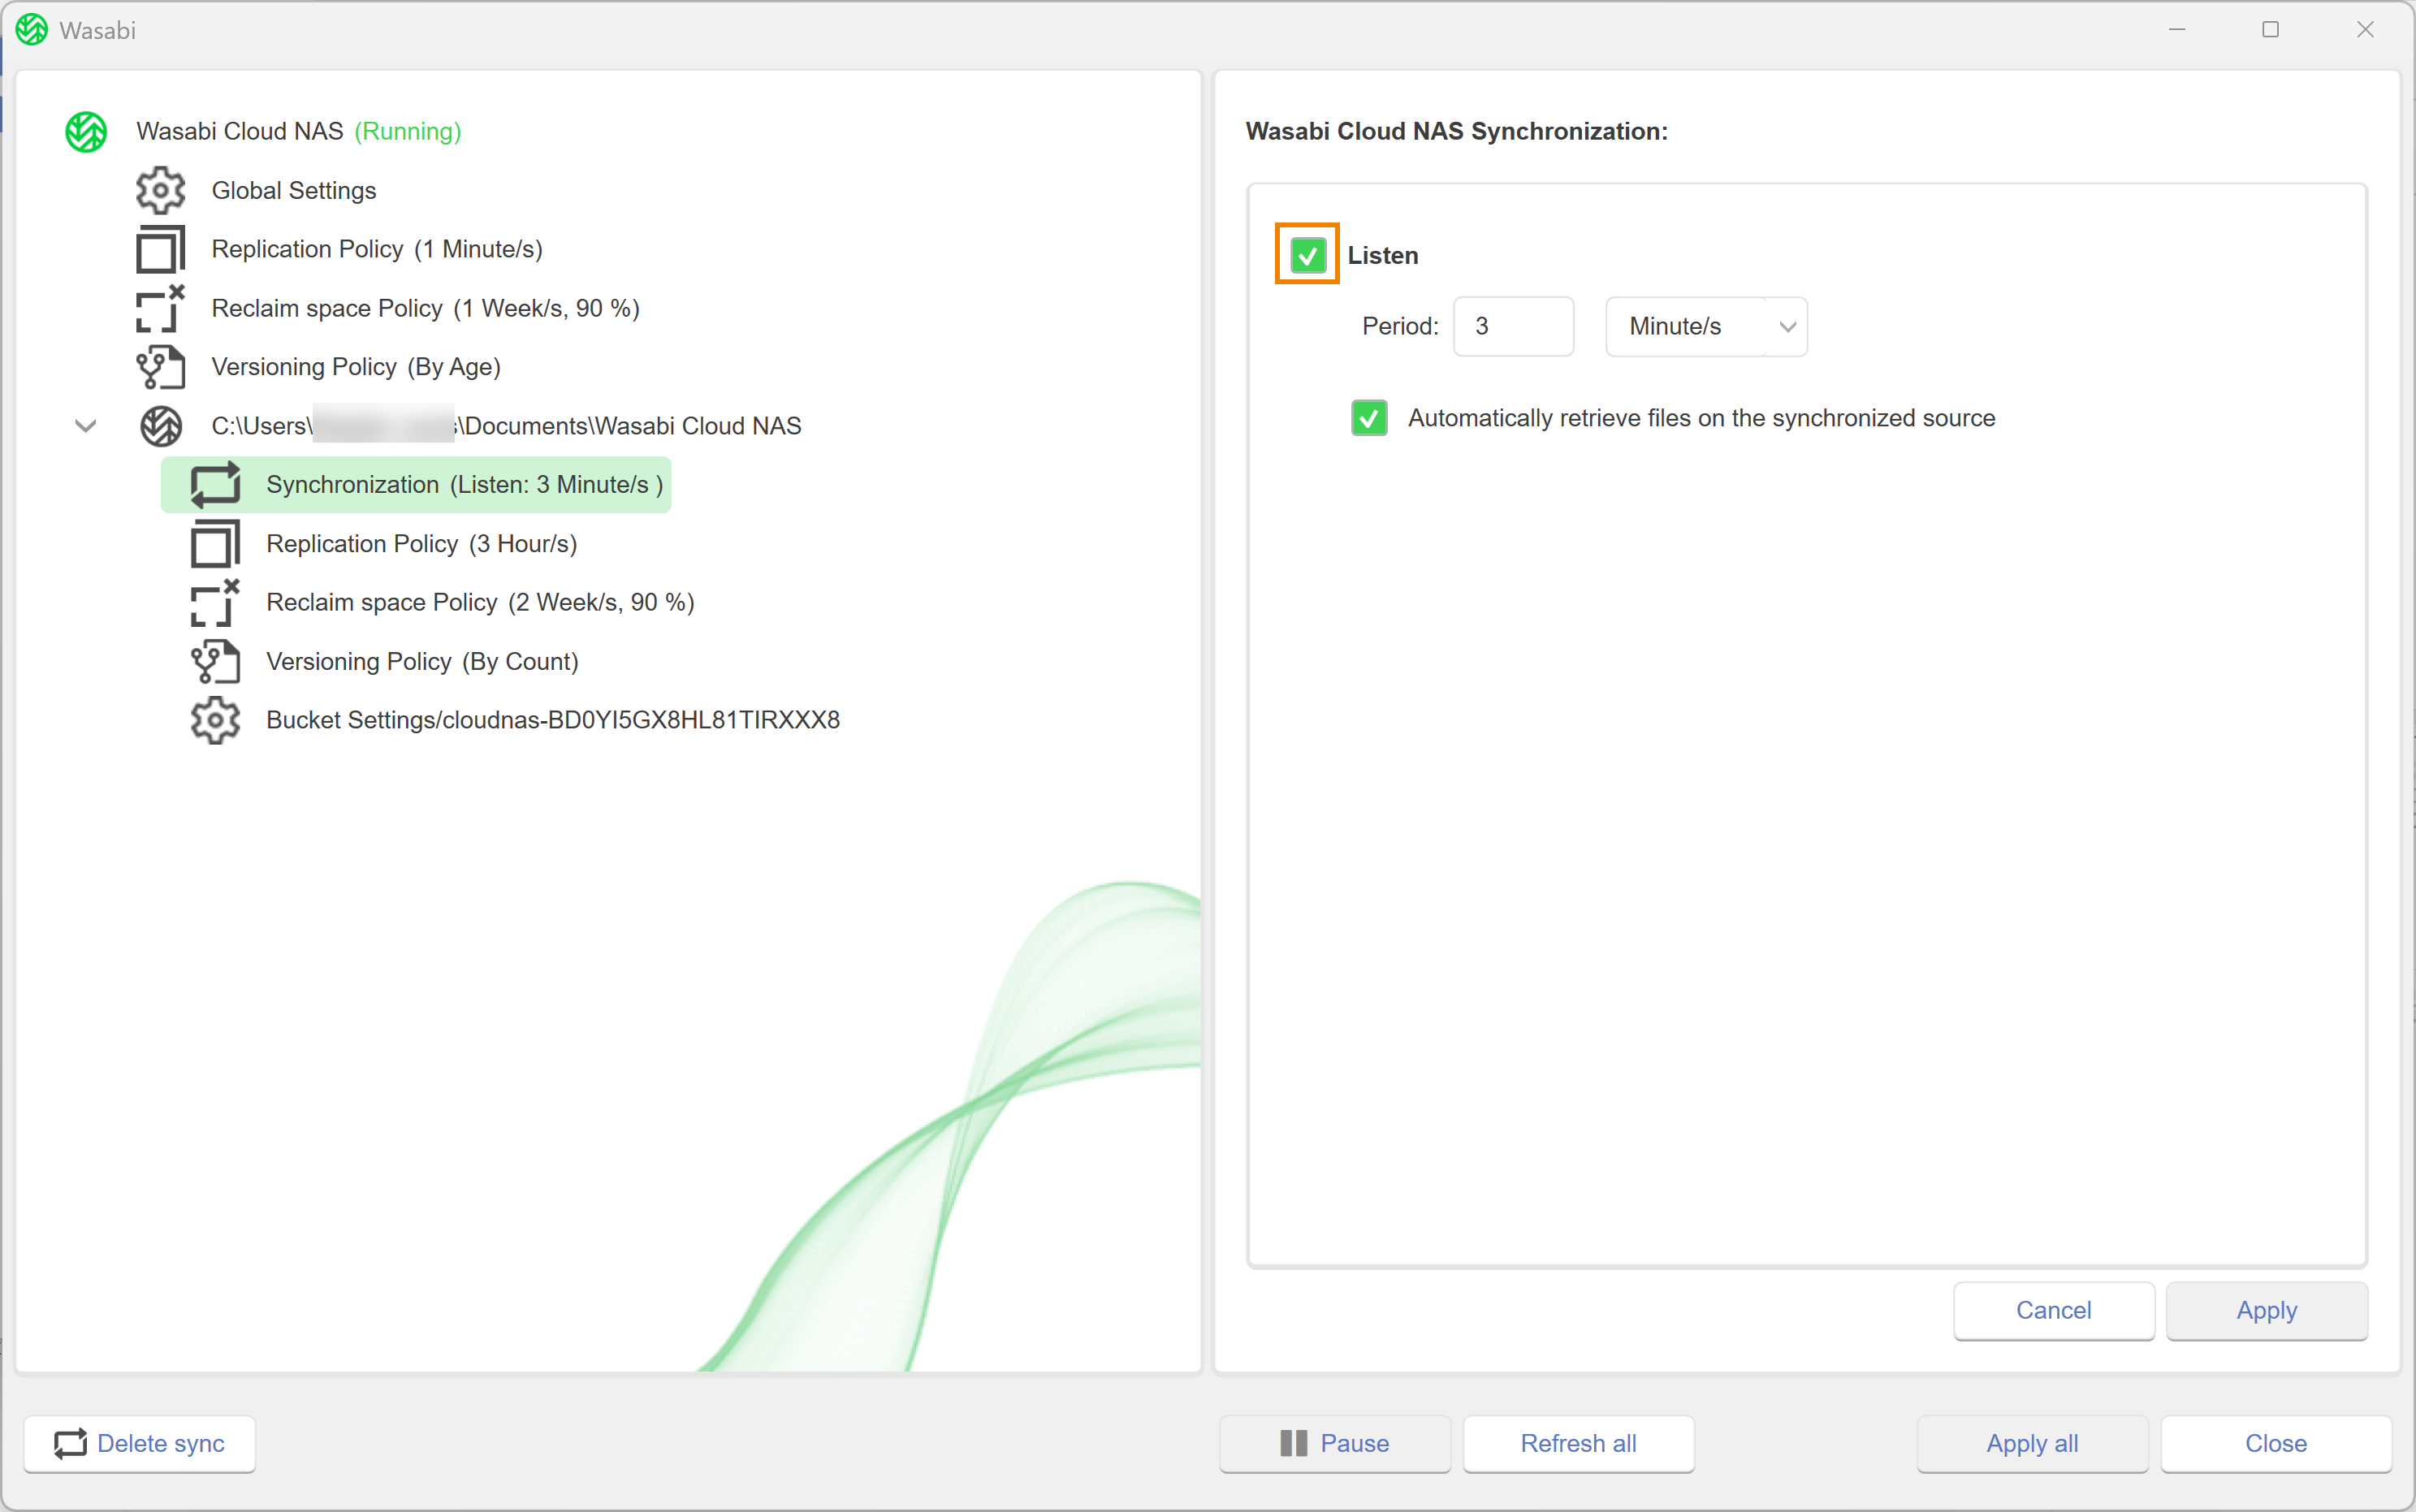
An Active Sync (Synchronization) policy enables you to synchronize the contents of two or more sources (each on separate computers) with a common bucket. Sources send and retrieve notifications when data is replicated, modified, deleted, or new data is created on another source. When configuring Active Sync, you will set two parameters:
Period—Time interval in which a source sends and retrieves notifications from other sources about changes to its content on the bucket. The smaller the interval, the faster the changes are synchronized on different sources.
Automatically retrieve files on the synchronized source—WCN begins retrieving newly replicated data immediately after the synchronization process completes. If disabled, newly created files from other sources appear as nearline stub files that you can retrieve either on-demand or manually.
To ensure proper synchronization of all contents, Wasabi recommends that you set up WCN operation mode parameters on all sources such that a file on the bucket is not deleted when it is retrieved from any of the sources. It is advisable not to delete the file from the bucket if it is deleted from any of the sources. Otherwise, other sources may fail to retrieve the respective file (even if retrieve mode and delete mode are set to keep the replica). The best practice is to set delete mode to keep the replica on all the synchronized sources. For more information, refer to Configuring File Delete Mode.
Select the source.
Click Add sync.
For the Period, set the time interval in which the computer sends and receives notifications. Enter a number in the type field.
Click the drop-down to select a unit.
Optionally, check Automatically retrieve files on the synchronized source.
Click Apply.
A message will notify you that the changes were applied. Click OK.
Editing an Active Sync Policy
Select the source with the assigned policy.
Click Synchronization.
Modify the parameters, as needed.
Click Apply.
A message will notify you that the changes were applied. Click OK.
Disabling an Active Sync Policy
Disabling the Active Sync policy configures the computer to only send notifications about changes to the contents on its source side and does not permit it to synchronize its source contents with changes from other sources and vice versa.
Select the source.
Click Synchronization.
Click the checkbox to disable Listen.
Click Apply.
A message will notify you that the changes were applied. Click OK.
Deleting an Active Sync Policy
Select the source.
Click Delete sync.
A message will request that you confirm the deletion. Click Yes.
Synchronization Policy and Metadata
When an Active Sync policy is added to a bucket with compliance mode enabled, WCN will automatically create a new bucket just for the synchronization metadata. This bucket will not be listed in the configuration user interface, but will be present on the account with a name in the following format:
{actual_bucket}-wcn-sync
For example: