OpenID Connect
Log in to your Okta account.
Create a new Web Application with the following considerations:
Sign-in URL is the Callback URL
Enable the Implicit token (with both checkboxes) and Authorization Code
Discovery URL = tenant URL + .well-known/openid-configuration
Client ID and Client Secret we get from Application > General in Okta
Add the Groups claim filter with filter matches regex and value:
(Control Account|Governance( Plus)?|Channel Account) (Admin|Staff( \(Lite\))?|Viewer)|Read Only|Download Only|Full Access( Limited)?|Administrator|Root
Directory > People is where you can create a new user.
Directory > Groups is where you need to add the groups that are linked to the user roles.
Go to the Application and assign the groups/users to the application.
Finish configuring the SSO in WACM/CCC.
Log in as an SSO user. To include your organization's name in the login URL, configure SSO settings where "orgname" is your organization name, for example:
WACM: https://wacm.wasabisys.com/en/wasabi/auth/login?organization=orgname
CCC: yourconsole.poweredbywasabi.com/login?organization=orgname
OIDC Configuration Example
Discovery Endpoint:
        [Discovery Endpoint here]

        Client ID:
        [Client ID here]

        Client Secret:
        [Client Secret here]
SAML
Log in to your Okta account.
On the left side menu, click Applications.
Click the Create App Integration button.
Choose SAML 2.0, and click Next.
Enter the App name and click Next.
Single sign-on URL is the Callback URL you can get from WACM/CCC SSO configuration settings. To include your organization's name in the login URL, configure SSO settings where "orgname" is your organization name, for example:
WACM: https://wacm.wasabisys.com/en/wasabi/auth/login?organization=orgname
CCC: yourconsole.poweredbywasabi.com/login?organization=orgname
Audience URI (SP Entity ID) is the Audience URL you can get from WACM/CCC SSO configuration settings.
Click Show Advanced Settings.
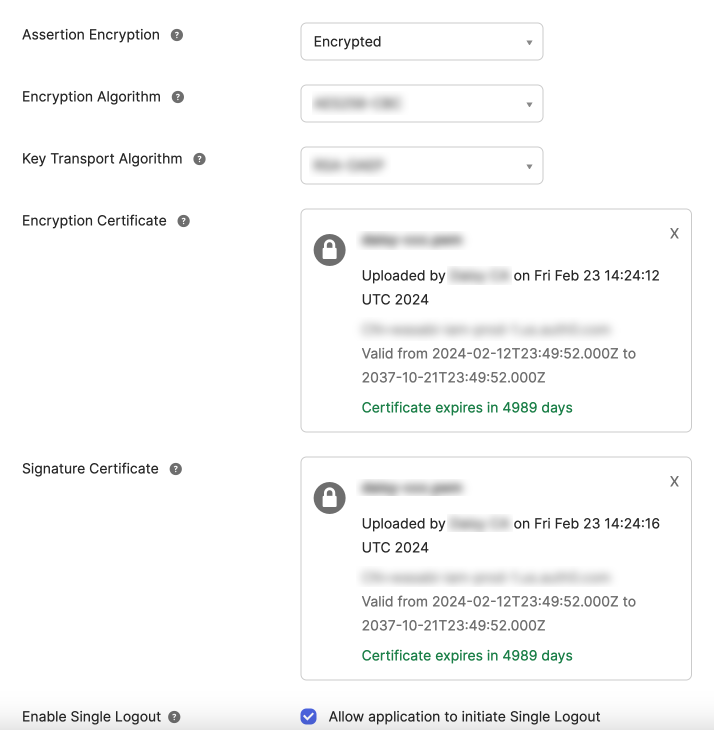
On Assertion Encryption, choose Encrypted.
On WACM/CCC, download the Metadata.
Open the file and save the X509Certificate to a different .pem file. (Usually, the content is the same for the two certificates.)
Encryption Certificate—Upload the file that you created from the <KeyDescriptor use="encryption"> key.
Signature Certificate—Upload the file that you created from the <KeyDescriptor use="signing"> key.
On Okta, upload both certificates in Encryption Certificate and Signature Certificate.
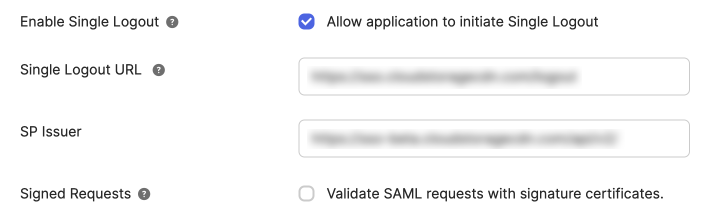
On Enable Single Logout, enable Allow application to initiate Single Logout.
Get the Single Logout URL from the metadata file. It is inside the XML element SingleLogoutService. For CCC, it looks like this: https://sso.cloudstoragecdn.com/logout
The SP Issuer should be the Audience URL.
Scroll down to the Attribute Statements section and add the attributes that are specified in the metadata file.

Scroll down to the Group Attribute Statements and add the groups attribute. Choose Matches regex and add this string:
(Control Account|Governance( Plus)?|Channel Account) (Admin|Staff( \(Lite\))?|Viewer)|Read Only|Download Only|Full Access( Limited)?|Administrator|RootClick Next.
On App type, choose whichever option you like.
Click Finish.
At this point, your SAML Application is configured in Okta. Navigate to the Sign On tab and click View SAML setup instructions.
Copy the Identity Provider Single Sign-On URL and paste it as the Sign In URL in WACM/CCC.
Copy the Identity Provider Single Logout URL and paste it as the Sign Out URL in WACM/CCC.
Download the X.509 Certificate and upload it on WACM/CCC.
On WACM/CCC, click Save Connection.
Your connection is created successfully!
Creating New SSO Users for WACM/CCC
On Okta, click Directory > Groups.
Click the Add group button.
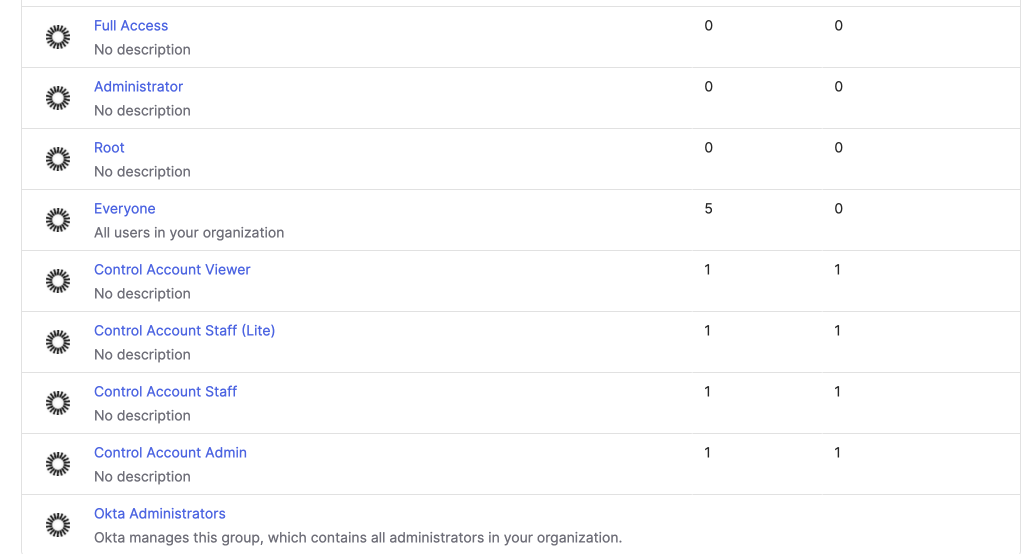
Enter the group name and save it. Group names should match the user/member roles in WACM/CCC. The image below shows CCC member roles and WACM Control Account roles. Role names are different if you are using a Governance or Channel account. You can view all available roles in your WACM Account under My Profile > Account > SSO.
Note: If your IdP does not support spaces in the group names, you may use hyphenated names in place of the spaces.
After adding all the groups, click Directory > People.
Click Add Person.
Enter the person's first name, last name, and username. Choose the Group/Role. Set the password. Then, click Save.
Go to the Application and assign the groups/users to the application.
Open a new session in WACM/CCC and try to sign in with that SSO user/member.
SAML Configuration Example
Login URL:
        [Login URL here]

        Logout URL:
        [Logout URL here]

        Cert file:
        [Cert file here]