Configuring a Global Versioning Policy
By default, the global versioning policy is configured to delete all versions of the same file from the bucket that are older than one week, regardless of the number of versions. The global policy governs all source-target pairs. To define certain parameters for a specific source, you can overwrite the global versioning policy by assigning a specific versioning policy to a source.
Any modifications made to versioning and compliance settings sync between the WCN software and the WCN storage account (Wasabi Console). To ensure that updates take effect in the WCN software, users are required to refresh the WCN software by clicking Refresh all following any modifications made in the Wasabi Console.
Before configuring a versioning policy, be sure that:
Versioning is enabled on the bucket (see Versioning: Enabling/Disabling).
Keep replica versions is enabled (see Versioning: Enabling/Disabling).
Click Wasabi Cloud NAS.
Click Add policy.
Click Versioning.
Versioning is greyed out if you have not enabled Keep replica versions in the global settings.
Click OK.
Configure one of the following parameters.
By Age—Specify how old a version must be for WCN to delete the version from the bucket
By Count—Specify the maximum number of versions to be kept on the bucket. When this number is exceeded, WCN deletes any version of the same file above the limit, starting with the oldest ones.
To configure By Age, enter a number in the Delete versions older than type field.
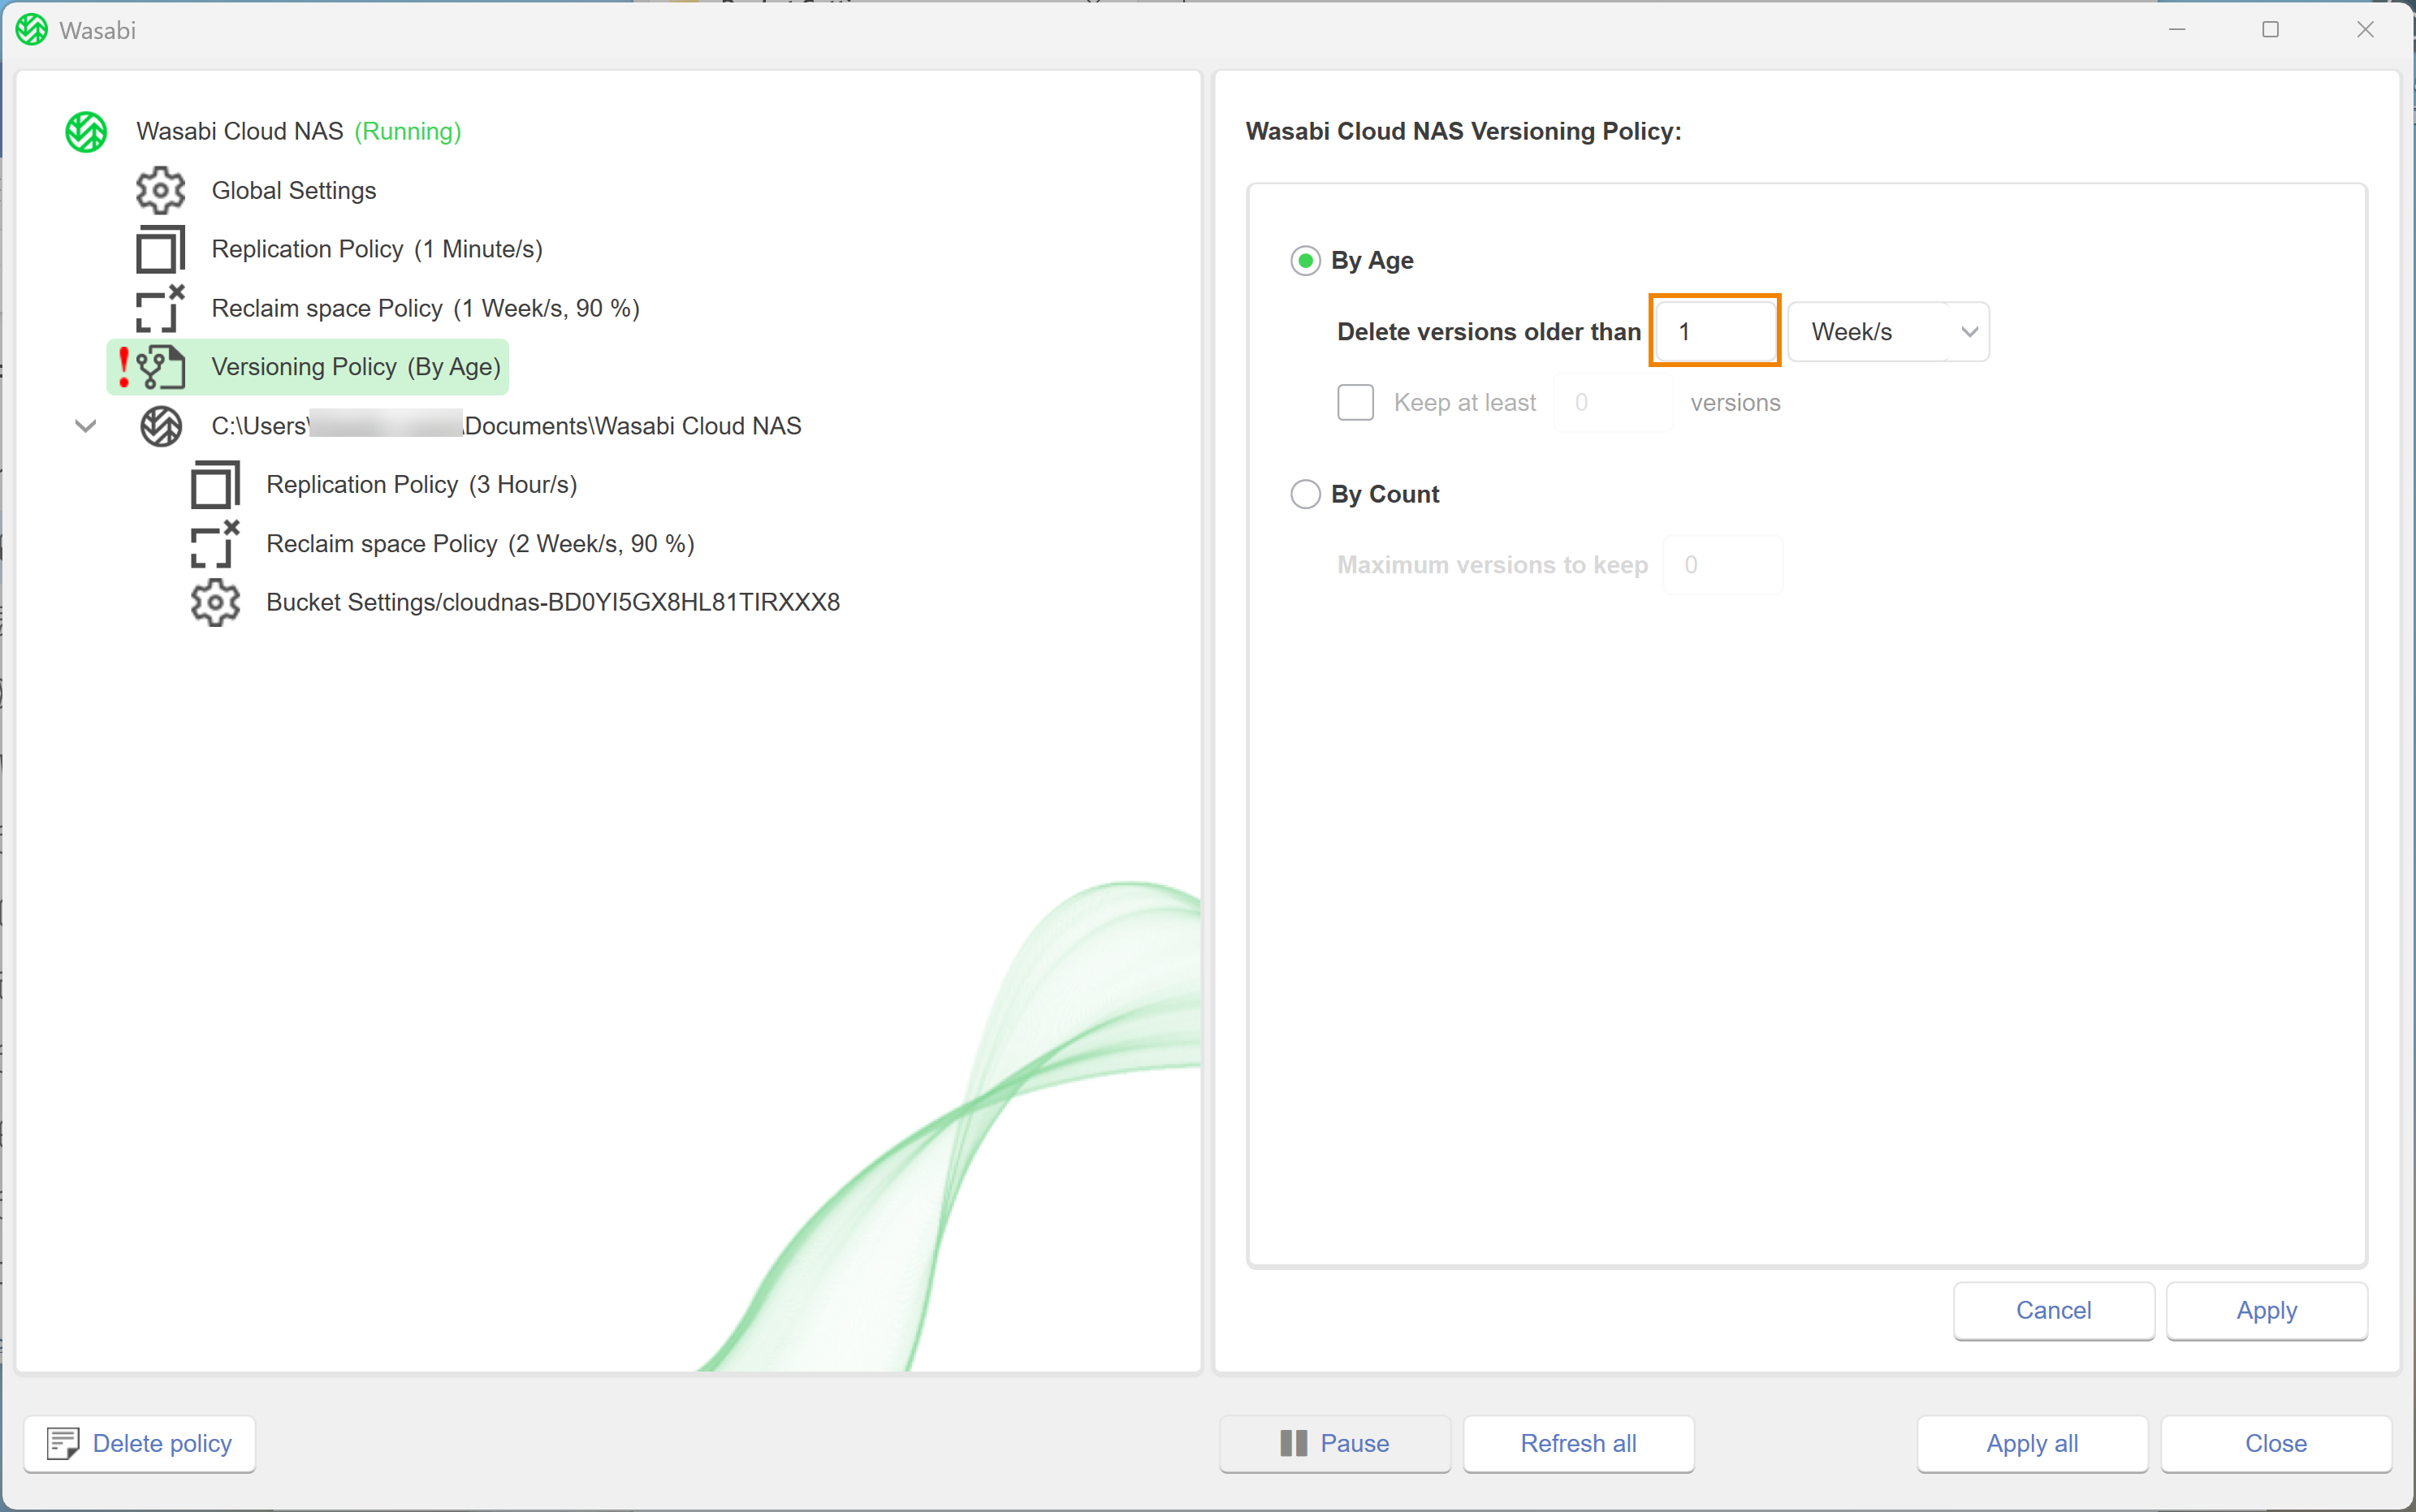
Click the drop-down to select a unit.
The Keep at least setting enables you to specify the maximum number of file versions kept on the bucket. When the value is exceeded, the configured By Age rule is triggered. If left unchecked, the By Age rule is applied regardless of the number of versions on the bucket. To enable the setting, click the checkbox to Keep at least.
Enter a number in the type field.
Optionally, to configure by count, click By Count.
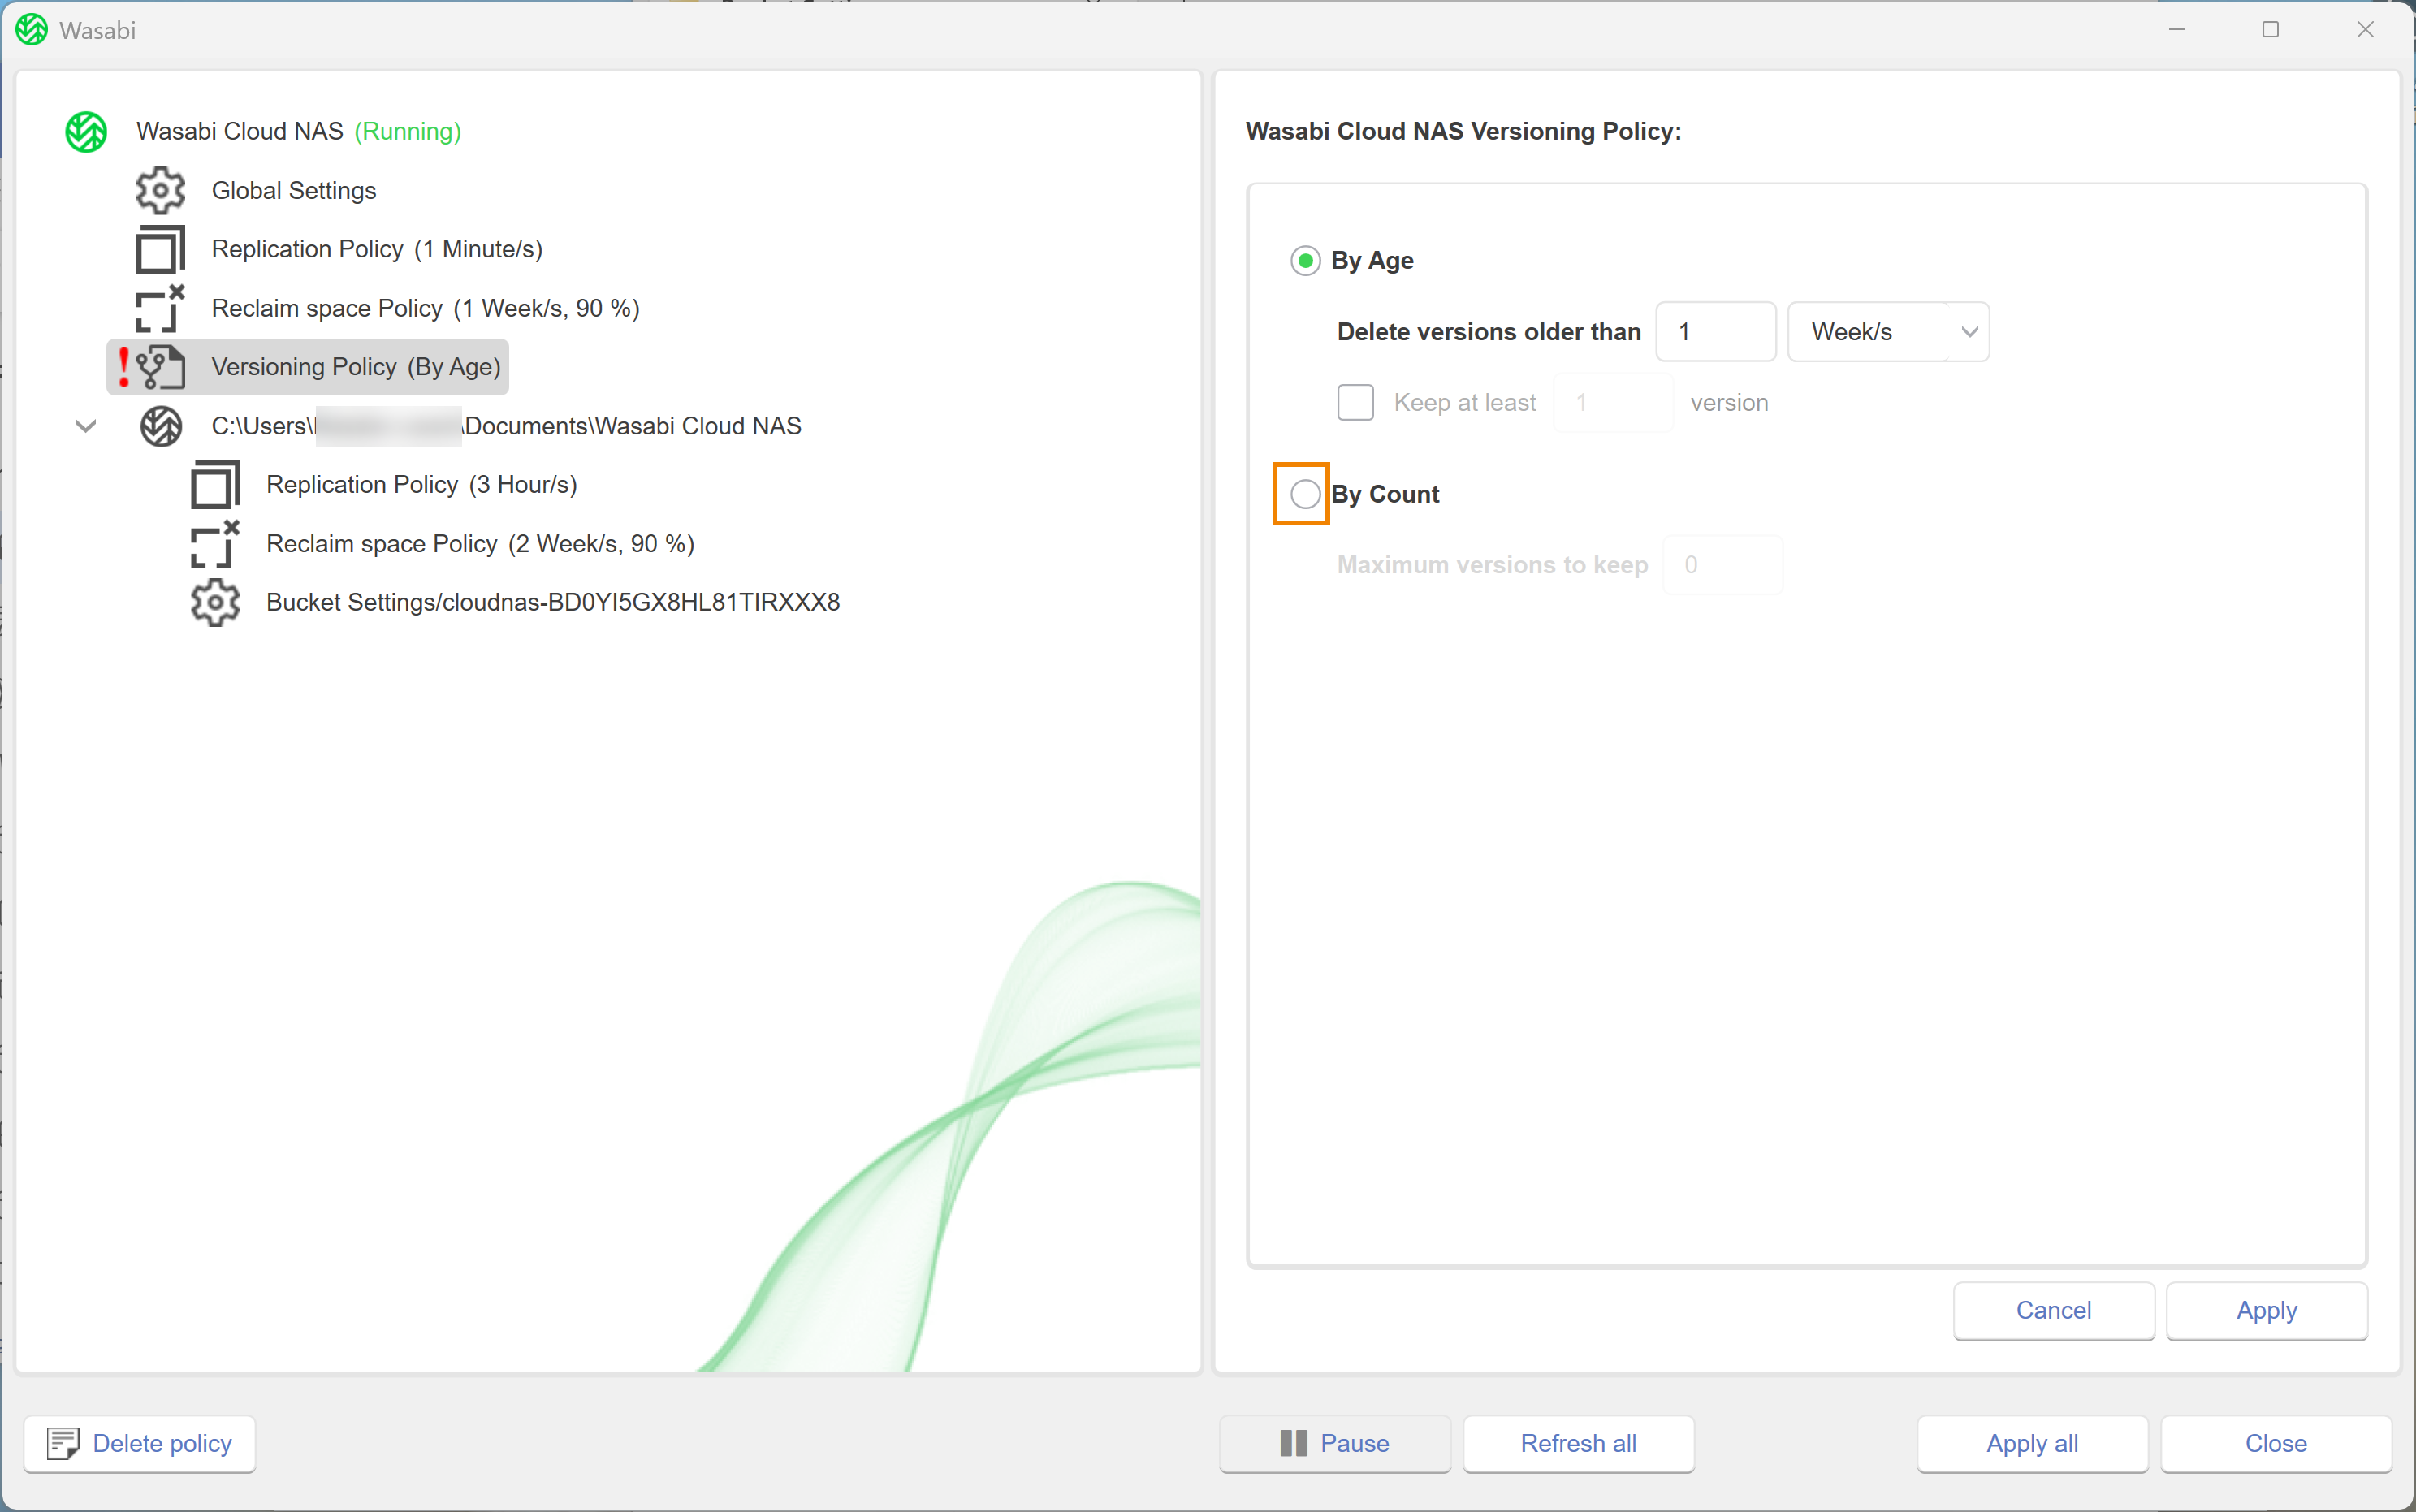
Enter a number in the type field.
Click Apply.
When applying changes to settings and policies in the WCN client, a red exclamation mark indicates that changes have been applied but not saved. When making changes on one screen, click Apply to save the changes. If you have unsaved changes on more than one screen, click Apply All.
A message will request that you verify that versioning is enabled on the bucket. Click Confirm.
A message will confirm that the policy was successfully applied. Click OK.
Overwriting a Global Versioning Policy
Select the source.
Click Add policy.
In the Policy Type dialog, click Versioning.
Click OK.
Versioning policy is greyed if you have not enabled the Keep replica versions setting in the WCN.
Configure the parameters, as needed. For more information, refer to Steps 5-14 above in Configuring a Global Versioning Policy.
Click Apply.
A message will request that you verify that versioning is enabled on the bucket. Click Confirm.
A message will confirm that the policy was successfully applied. Click OK.
Editing a Versioning Policy
Click Versioning Policy.
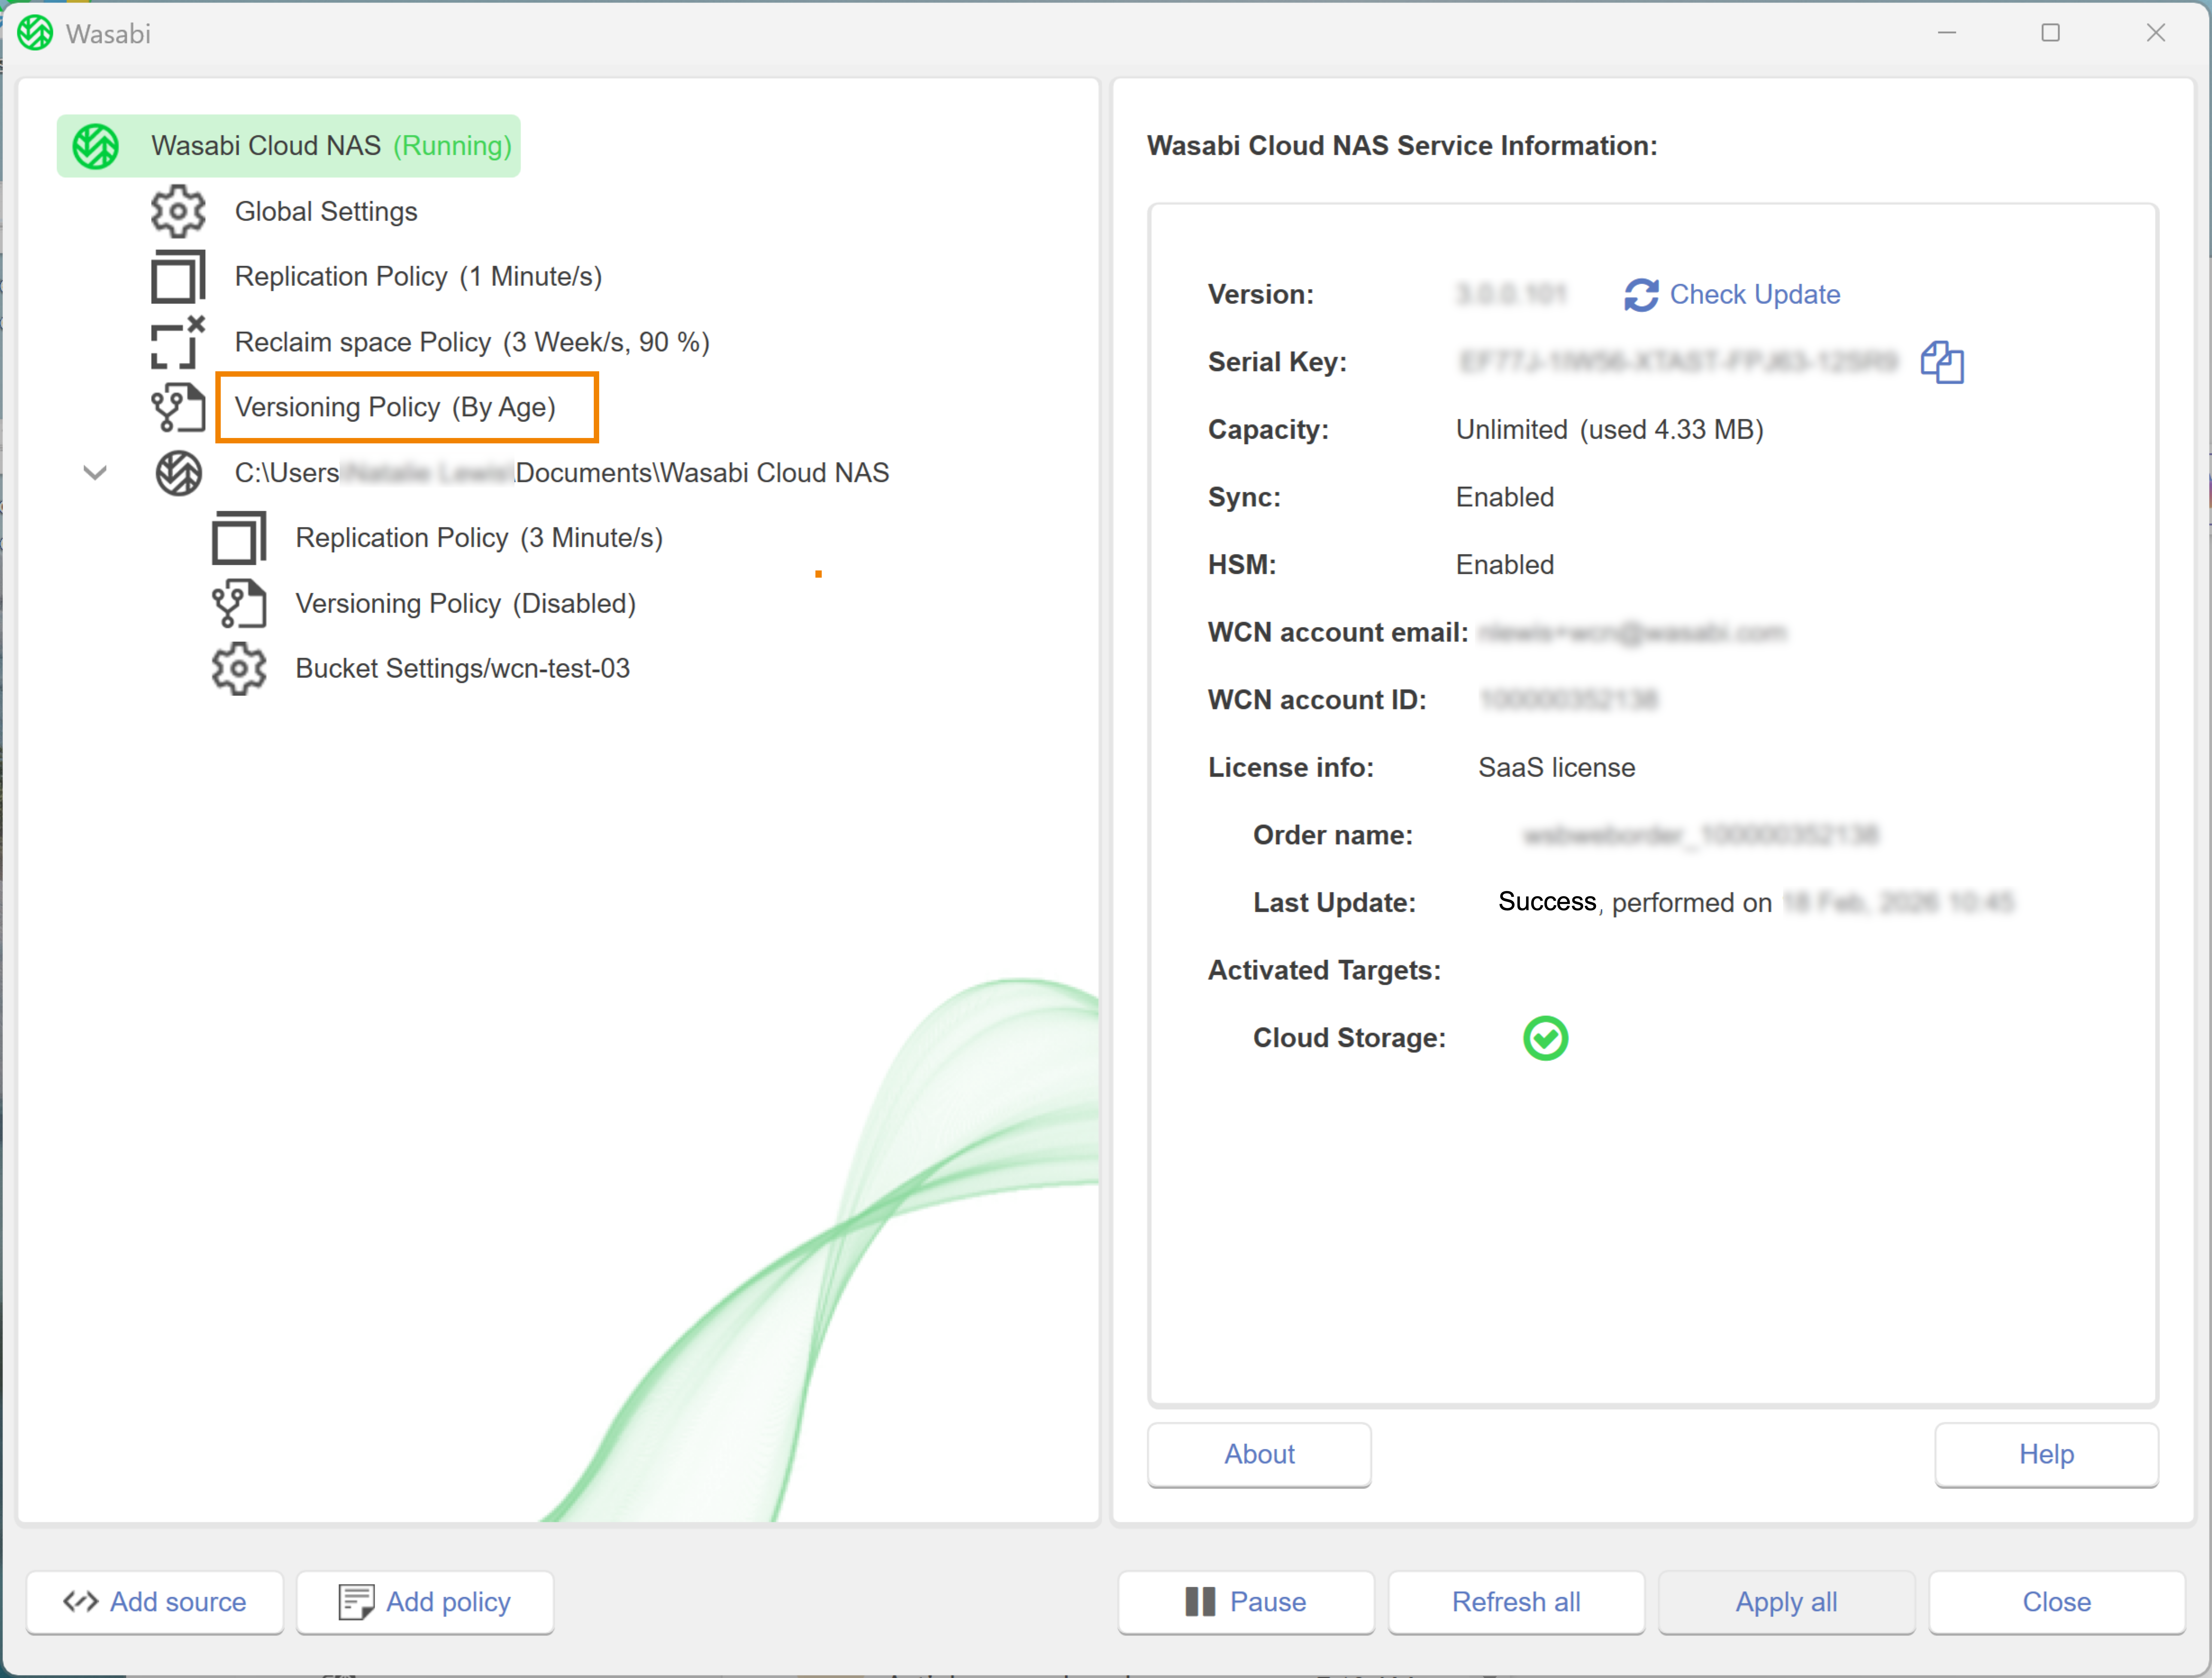
Optionally, you can edit a versioning policy for a specific source. Under the selected source, click Versioning Policy.
Modify the parameters, as needed.
Click Apply.
A message will request that you verify that versioning is enabled on the bucket. Click Confirm.
A message will confirm that the policy was successfully applied. Click OK.
Disabling a Versioning Policy for a Source
When you disable a versioning policy assigned to a specific source, WCN will apply the global versioning policy to that source-target pair.
Navigate to the source with the versioning policy assigned.
Under the selected source, click Versioning Policy.
Click the Enabled checkbox to disable the policy.
Click Apply.
A message will confirm that the policy was successfully applied. Click OK.
Deleting a Versioning Policy
You can either delete a global versioning policy or a versioning policy for a specific source. To do so:
Click Versioning Policy.
Click Delete policy.