Requesting a New Control Account
In the WACM Account Governance feature, requesting a new Control Account requires Wasabi Support. Contact Wasabi Support to request the creation of a new control account.
Inviting an MSP/VAR to Use WACM
As a Governance user, you can invite a Managed Service Provider/Value-Added Reseller to join WACM. To do so, you must first request a new Control Account from Wasabi Support. Once a new control account is created and this process is completed, you can invite the MSP/VAR to the WACM platform by creating a new control account user by following these steps:
Click the Control Accounts tab.

The Control Accounts page is displayed.
Select or search for the new control account from the list.

The Account page for the new control account is displayed. For example:
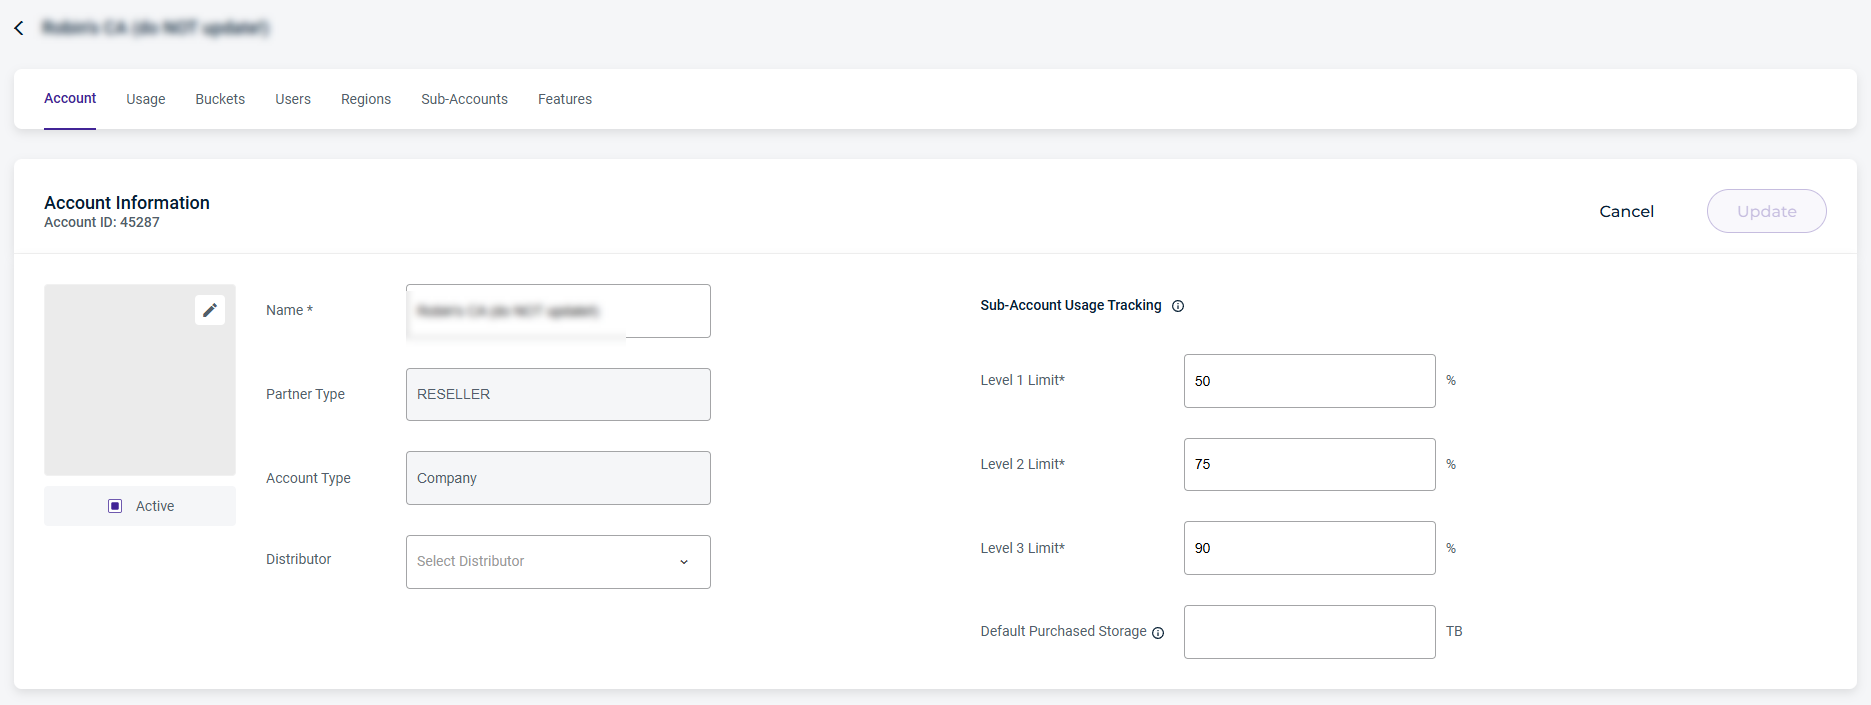
Click the Users tab to create a user for the new control account.

The Users page is displayed. For example:

Click Create to create a new user.
Enter the new user's first and last name, email address, username, and the appropriate role (selected from the drop-down). For example:
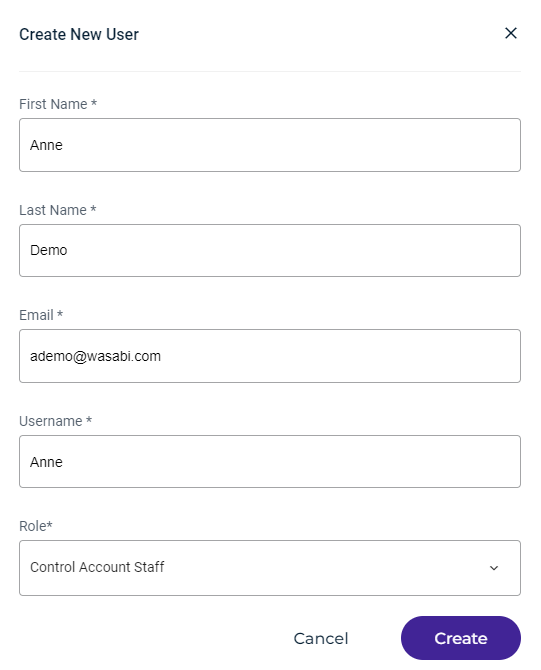
Set up the first user as an Admin, so that they may populate their account with other control account users, as appropriate.
Click Create.
Once the user is created, the information is reflected on the Users page under the Control Account.

Unlinking a Deleted Control Account
On the Control Accounts page, select the deleted account from the Status column. You can search the account name or use the Filter By drop-down to select the Show Deleted Accounts option.
Scroll across the page to view the Status column on the Control Accounts page.
Click the 3 dot menu to display options. For example:
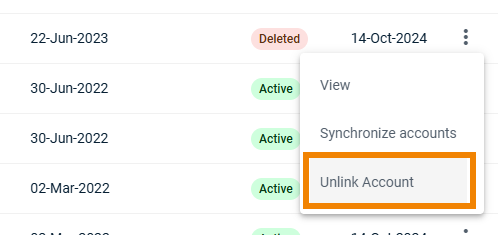
Click Unlink Account to remove the account.
Hide/Show Control Account Sub-Invoices
Governance Admin and Staff users can hide/show control account sub-invoices that include Wasabi Pay-Go pricing in their sub-accounts.
To hide sub-invoices for a new Control Account, you must request this option from your sales rep during the quoting process.
To hide/show the sub-invoices for existing Control Accounts, follow these steps:
Select Control Accounts from the main menu. The Control Accounts page is displayed and lists all control accounts.

Select the control account for which to hide/show invoices from the list. The Account page is displayed. For information on generating an API key, see Authentication With WACM Connect.
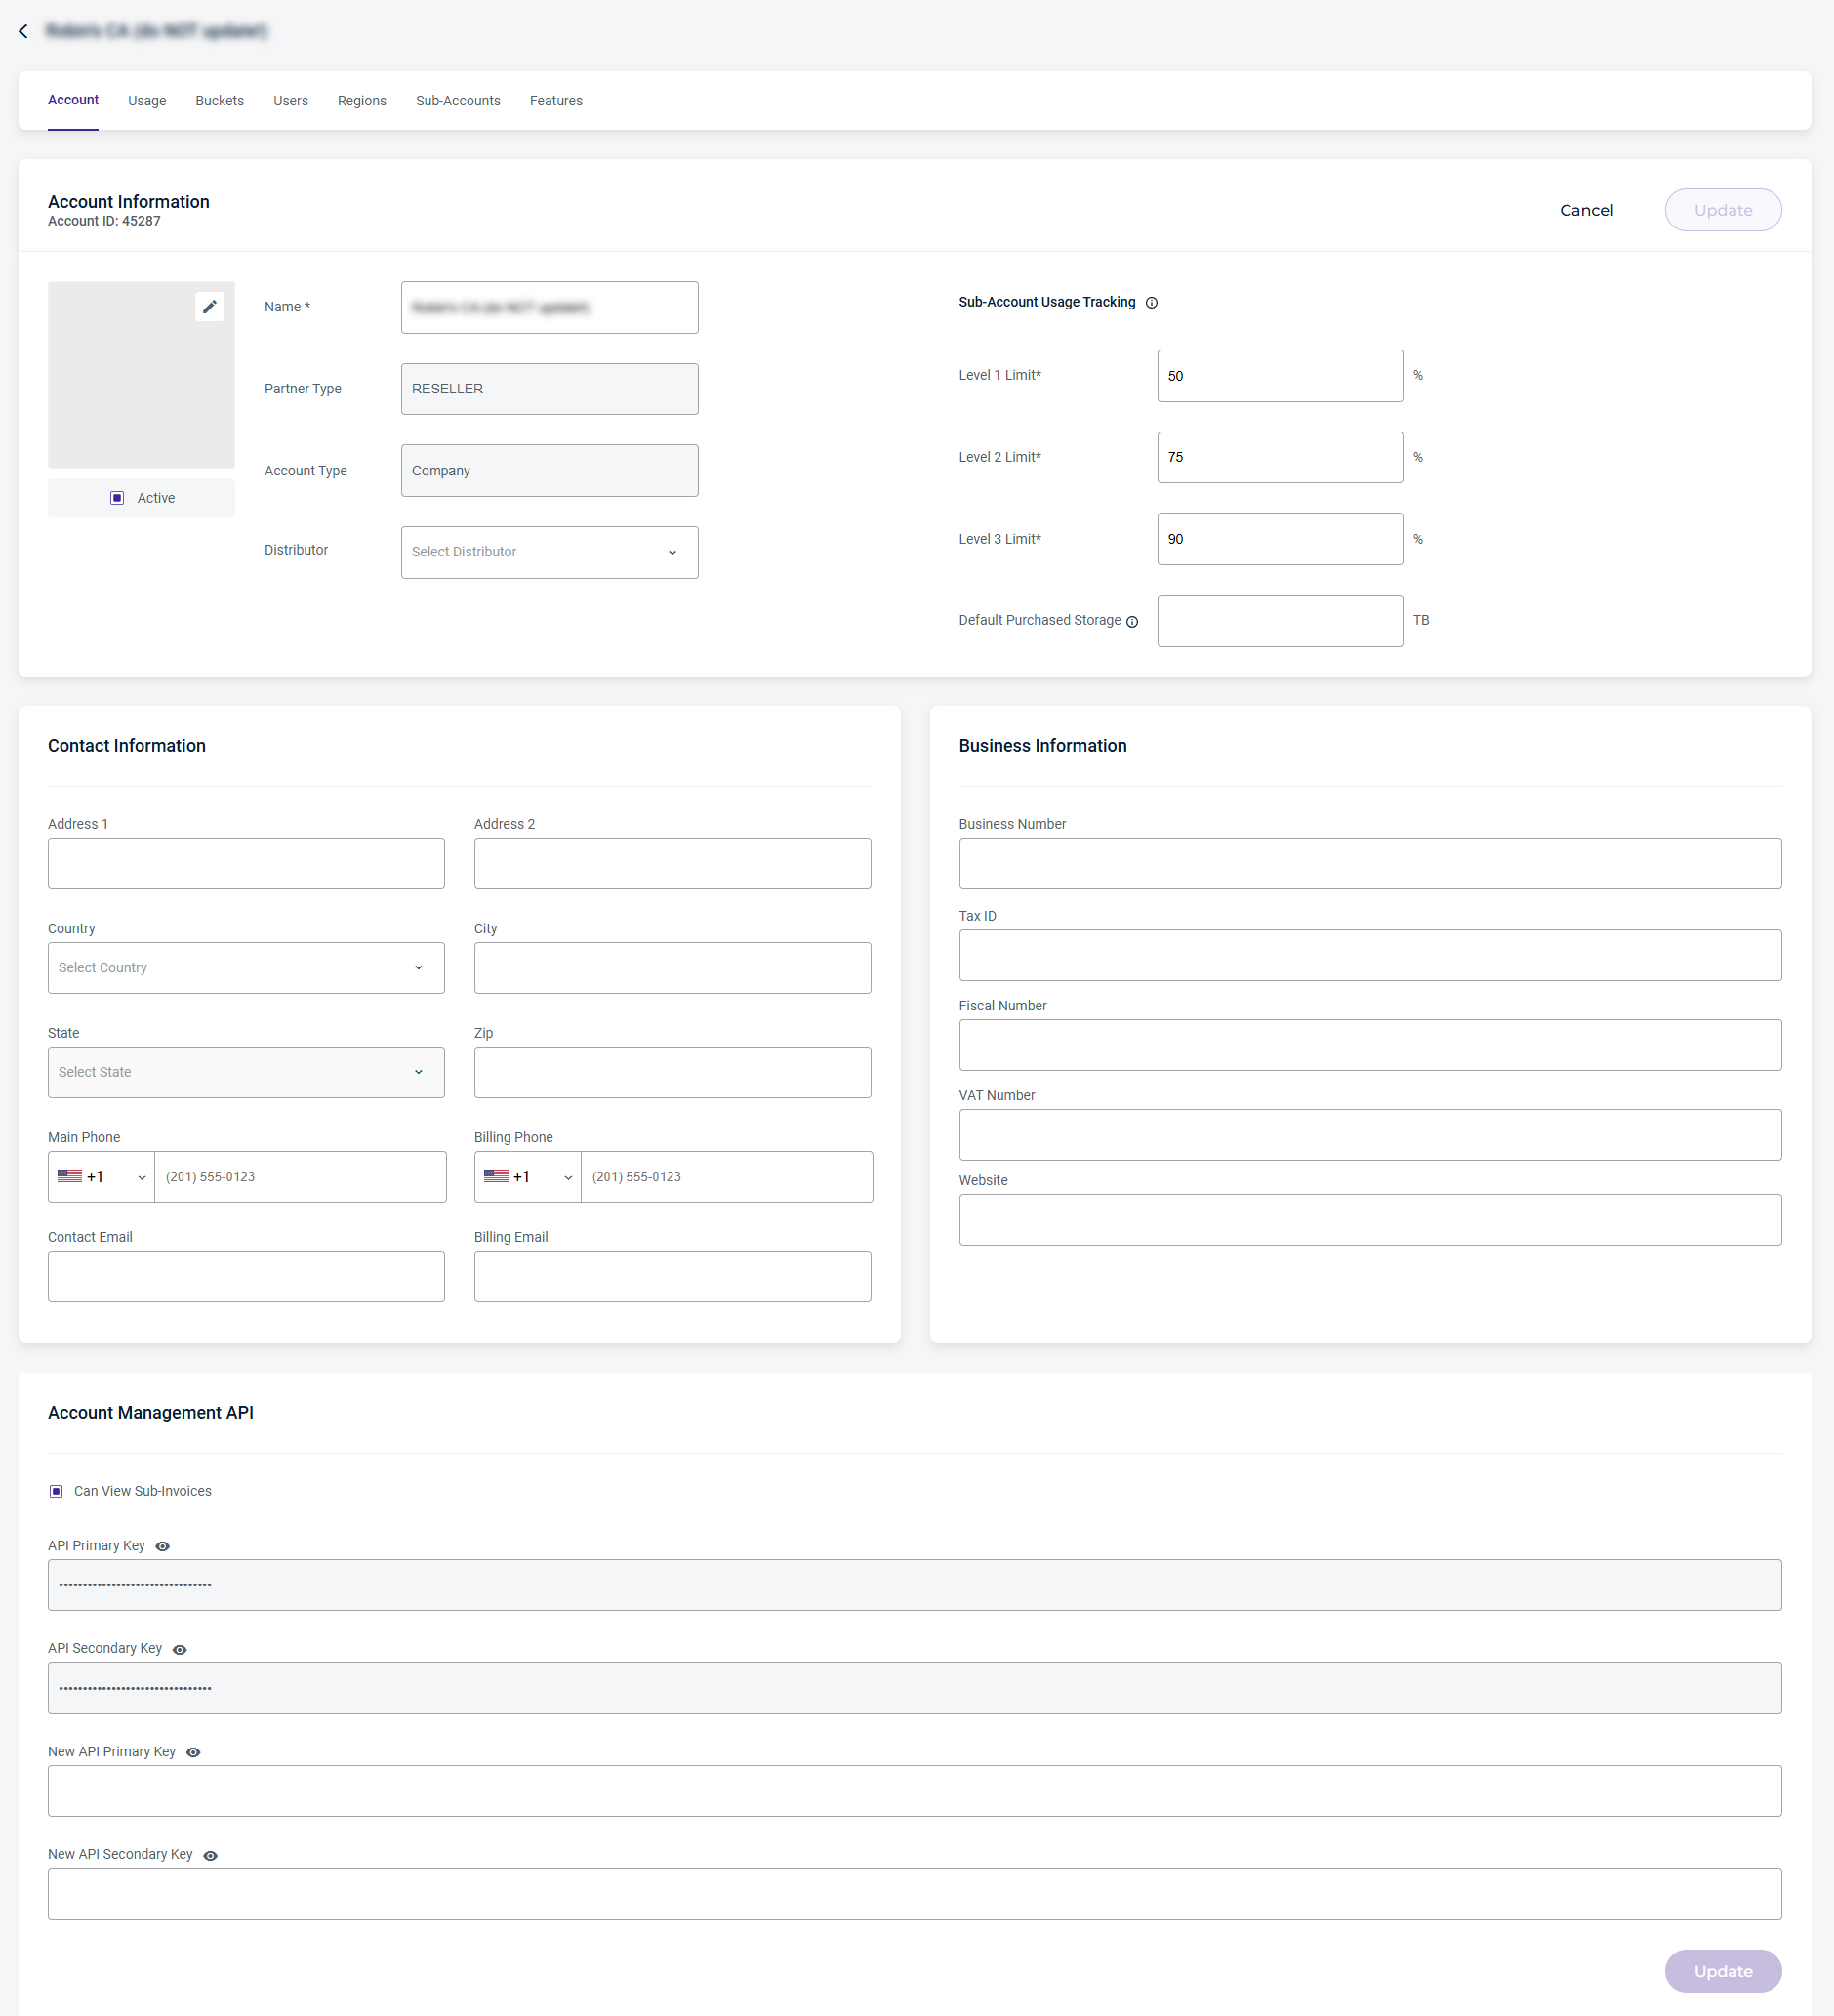
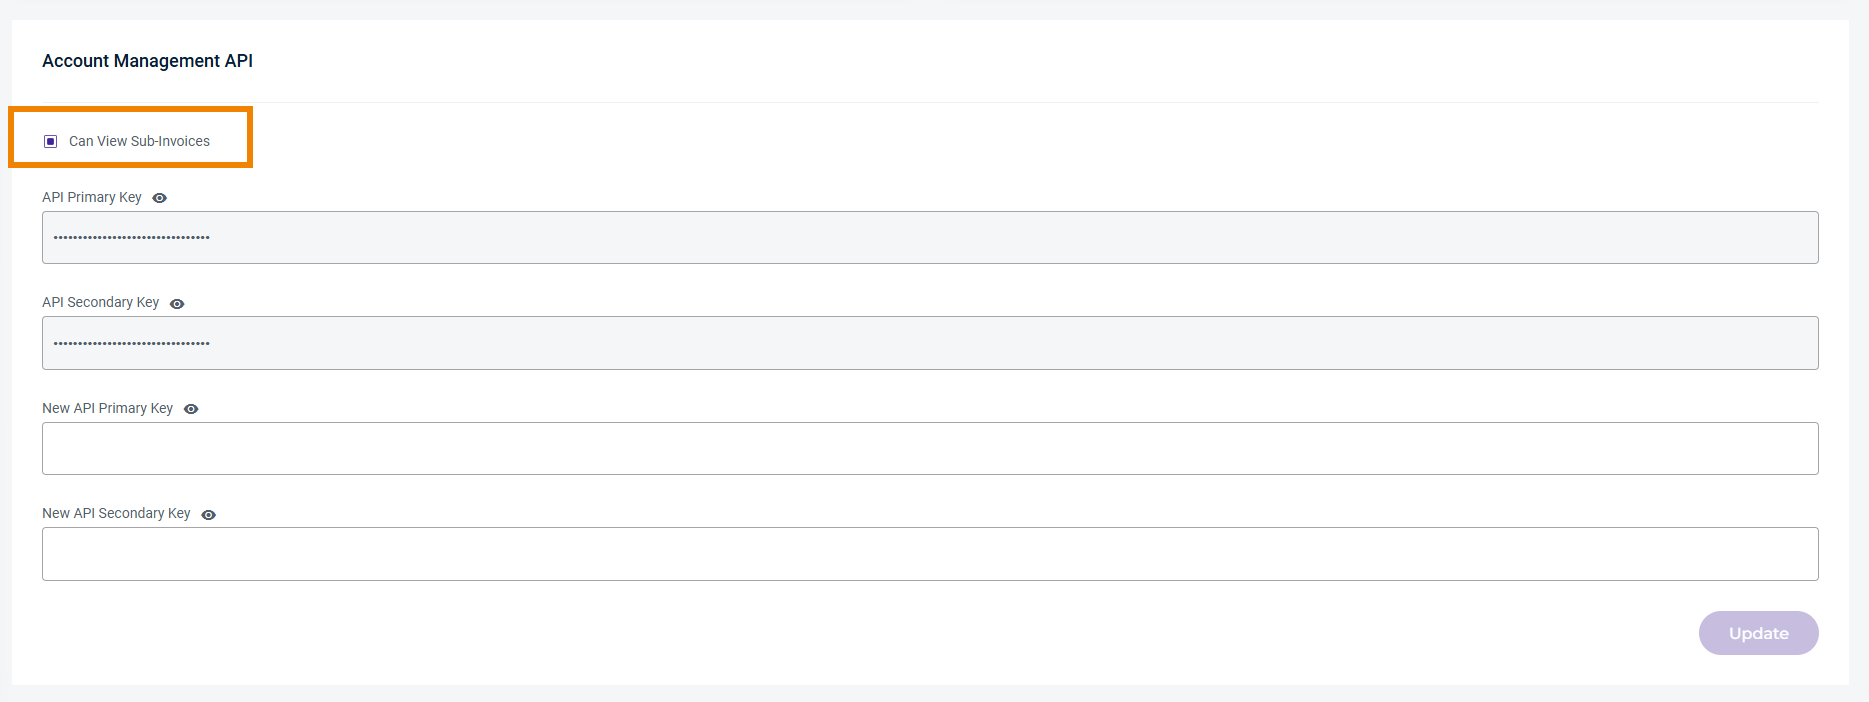
Scroll down to the Account Management API section to the Can View Sub-Invoices option. The default is to show (not hide) the Invoices tab on the Sub-Accounts page.
Sub-invoices across all sub-accounts are rolled up into a single invoice that is charged to the Control Account.
To hide the Invoices tab for a sub-account on the Sub-Accounts page, deselect the Can View Sub-Invoices option on the Control Accounts page in the Account Management API section of the control account. The Sub-Account page will not display the Invoices tab.

To show the Invoices tab for a sub-account on the Sub-Accounts page, select the Can View Sub-Invoices option on the Control Accounts page in the Account Management API section. The Sub-Account page will display the Invoices tab.

More Information
For more information, see What set of Knowledge Articles would a Governance user share with an MSP/VAR partner to manage their users?