Wasabi is a member of Veeam's cloud partner ecosystem. We have worked closely with Veeam to offer both a seamless implementation and a smooth transition to cloud storage. Veeam with Wasabi Solution Overview provides more information on the Wasabi-Veeam partnership and solutions.
Veeam's Backup and Replication software version 13 provides direct to Wasabi object storage functionality for backup and backup copy jobs. This article details the steps to create a backup copy job to write backups to Wasabi.
The data restoration process is handled by your specific backup software application. As there are many potential variables that will affect your unique environment, Wasabi strongly recommends that you seek the guidance of your backup software's technical support team in the event that you encounter difficulty or have application-specific inquiries.
If you are going to leverage immutable Veeam backup copies, follow the steps in Object Lock: Enabling. Enabling bucket versioning only is not a proper configuration for immutable Veeam backup copies and can cause problems. If you are simply going to use regular Veeam backup copies with Wasabi buckets, bucket versioning is not required.
Prerequisites
Active Wasabi Storage account.
Wasabi bucket created and the access and secret keys available.
Veeam Backup and Replication version 13 software installed and licensed. This solution was most recently tested with v13.0.1. For other major release versions, refer to Veeam With Wasabi.
A valid Veeam license that supports capabilities for object storage.
Completed backup jobs.
Since the Veeam web user interface (UI) does not yet support creating object storage repositories, you must use the Veeam Windows client. If you’re using the Veeam Software Appliance, this is downloadable from your Veeam Software Appliance login page by clicking “Download Windows-based backup console for full experience” as shown in the following screenshot.
One Linux-based virtual machine (VM) runs the Veeam Software Appliance, and another Windows-based VM (or any Windows computer) runs the client software.
.png)
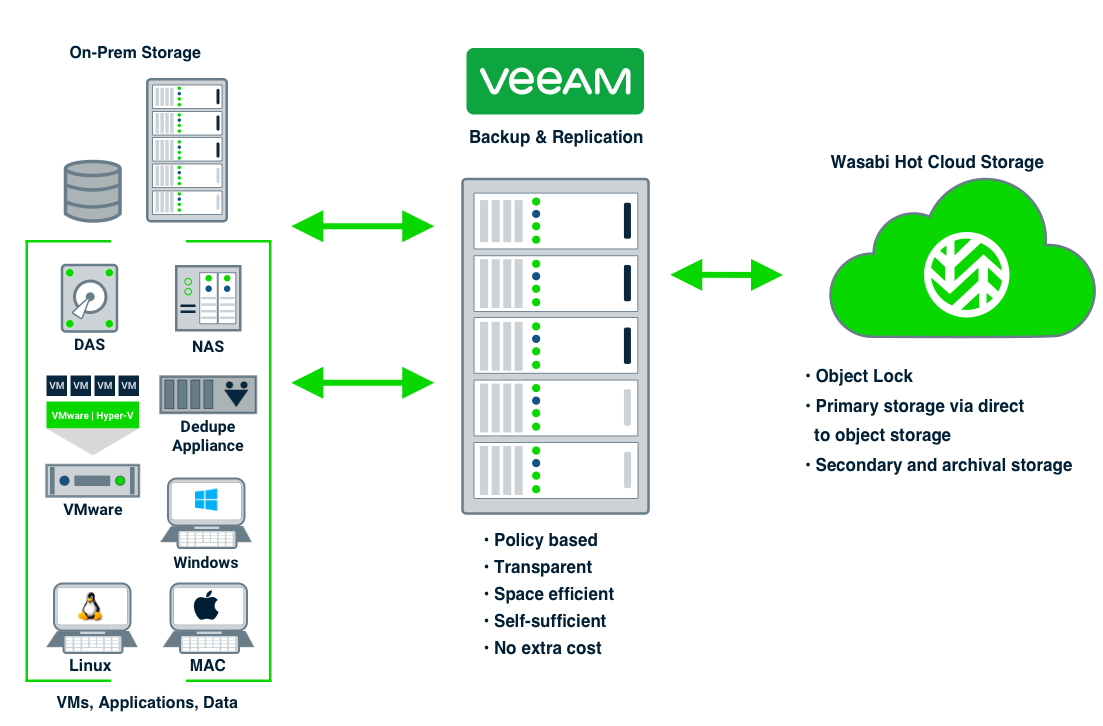
Architecture Diagram
Creating Wasabi as an Object Repository
In Veeam version 13, Veeam Backup and Replication software can directly back up to Wasabi cloud object storage. You will need to have already created a Wasabi bucket for this repository. See Creating a Bucket for details. You will also need the Access key and the Secret key to access the Wasabi bucket. Details about Access and Secret keys can be found in Creating a New Access Key.
Follow the steps below to add Wasabi as an object storage repository in Veeam.
On the Backup Infrastructure tab, click Backup Repositories. Click Add Repository to open the Add Backup Repository wizard.

Click Object storage to select the type of backup repository.

Click Additional Providers.

Click Wasabi Cloud Storage under Additional Providers.

Enter a Name and optionally a Description for the object storage repository. Click Next.

Input the Region. Click Add to input the Access and Secret keys.
This configuration example discusses the use of Wasabi's us-east-1 storage region. Use the region your bucket is located in. For a list of regions, see Available Storage Regions.

Input your Wasabi Access key and Secret key credentials. Click OK.

Click Next to continue.

Click Browse beside the Bucket field to choose an existing Wasabi bucket. TClick Browse beside the Folder field. Create a new folder by clicking New Folder in the folder window. Enter a name for the folder, then click OK. Click Next.
Limit object storage consumption: Defines a soft limit that can be exceeded temporarily for your object storage consumption. Provide the value in TB or PB.
Immutable Backups: To create immutable backups, click the checkbox next to Make recent backups immutable (recommended). By default, the minimum immutability period is the entire retention period, and you may click the link to change it if desired.
.png)
In the Mount Server tab, keep the default values. Click Next.

In the Review tab, click Apply.

In the Apply tab, click Next.

Review the Summary. Click Finish to create the Wasabi repository.

To view the newly created Object repository, click Backup Repositories in the Backup Infrastructure tab.

Creating a Backup Copy Job
From the Home tab, click Jobs, then Backup Copy, and finally Image-level Backup to create a new backup copy job.
.png)

Input a name for the job and click Next. By default, Veeam sets the copy mode to Immediate copy.
- Immediate copy: Mirrors all new restore points created by the backup job.
- Periodic copy: Mirrors only the latest restore point within the backup copy interval.
For more details on immediate and periodic copy settings, refer to Veeam's documentation.

Click Add and then From Jobs to select which backup job to copy from.

Select the backup job you want to copy, then click OK.
.png)
Once the backup job has been selected, click Next.

Select the Wasabi storage repository as the backup repository. Set your retention period and optionally GFS backups to retain. Click Next.
- Retention policy. How many days of backups, or restore points, you wish to keep in your Backup Copy Job.
- Keep certain full backups longer for archival purposes. Retain additional GFS (Grandfather/Father/Son) backups above and beyond the configured Retention Policy. This allows you to store Weekly, Monthly, and Yearly full backups in addition to the days/restore points.

Leave the default value of Direct for Data Transfer. Click Next.

Set up your schedule for the Backup Copy Job. Click Apply.
Any time. Runs the job any time during any day.
During the following time periods only. Allows you to schedule the Backup Copy Job to run only during the selected timeframes.

On the Summary page, check Enable the job when I click Finish to run the job immediately. Click Finish.

Review the status of the newly created job by clicking Jobs, then Backup Copy from the Home tab and selecting the Backup copy job.

Once the job completes, confirm the backup data in your Wasabi bucket by going to the Wasabi Console, clicking on Buckets, then clicking on the name of your bucket.
.png)
Click on folders in your bucket and verify the data is there.
