Panzura Symphony is a data services platform designed to manage and orchestrate unstructured data across hybrid multi-cloud environments with capabilities that are central to both AI readiness and active archiving. Wasabi has been validated for use with Symphony. Symphony is a data insight, mobility and metadata extraction software solution that provides granular control of on-prem and cloud-based unstructured datasets. To use this product with Wasabi, please follow the instructions below.
Prerequisites
Symphony version 2025.1u1
Active Wasabi Cloud Storage Account
Wasabi Object Lock Enabled Bucket - See our Bucket Creation Guide
Access & Secret Key Pair - See our Access Keys Guide
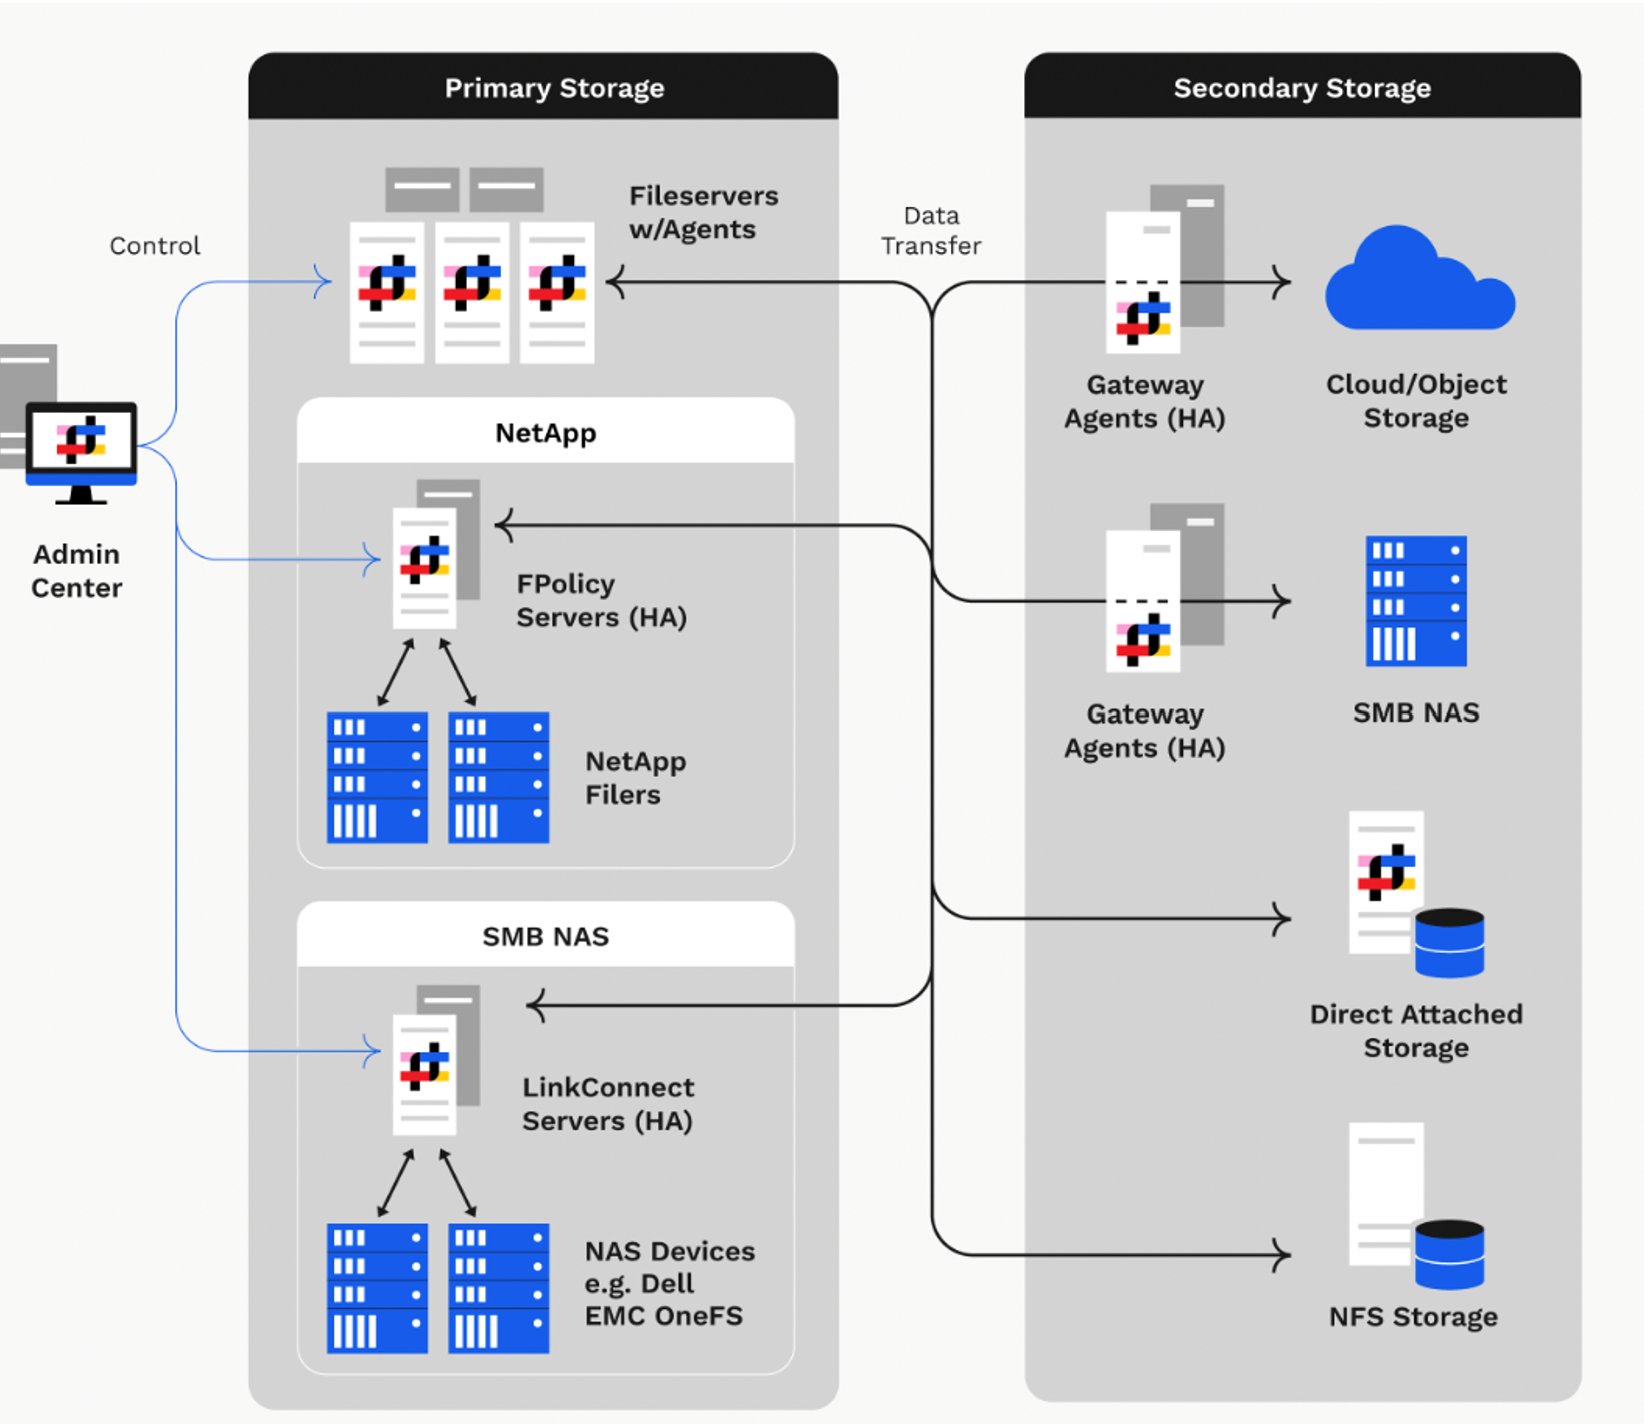
Reference Architecture Diagram

System Overview
Configuration
The steps outlined below are current as of version 2025.1u1 and might change with newer releases. For most recent and up-to-date information, please refer to the Administration Guide that can be found at https://know.panzura.com/symphony/administration-guide.
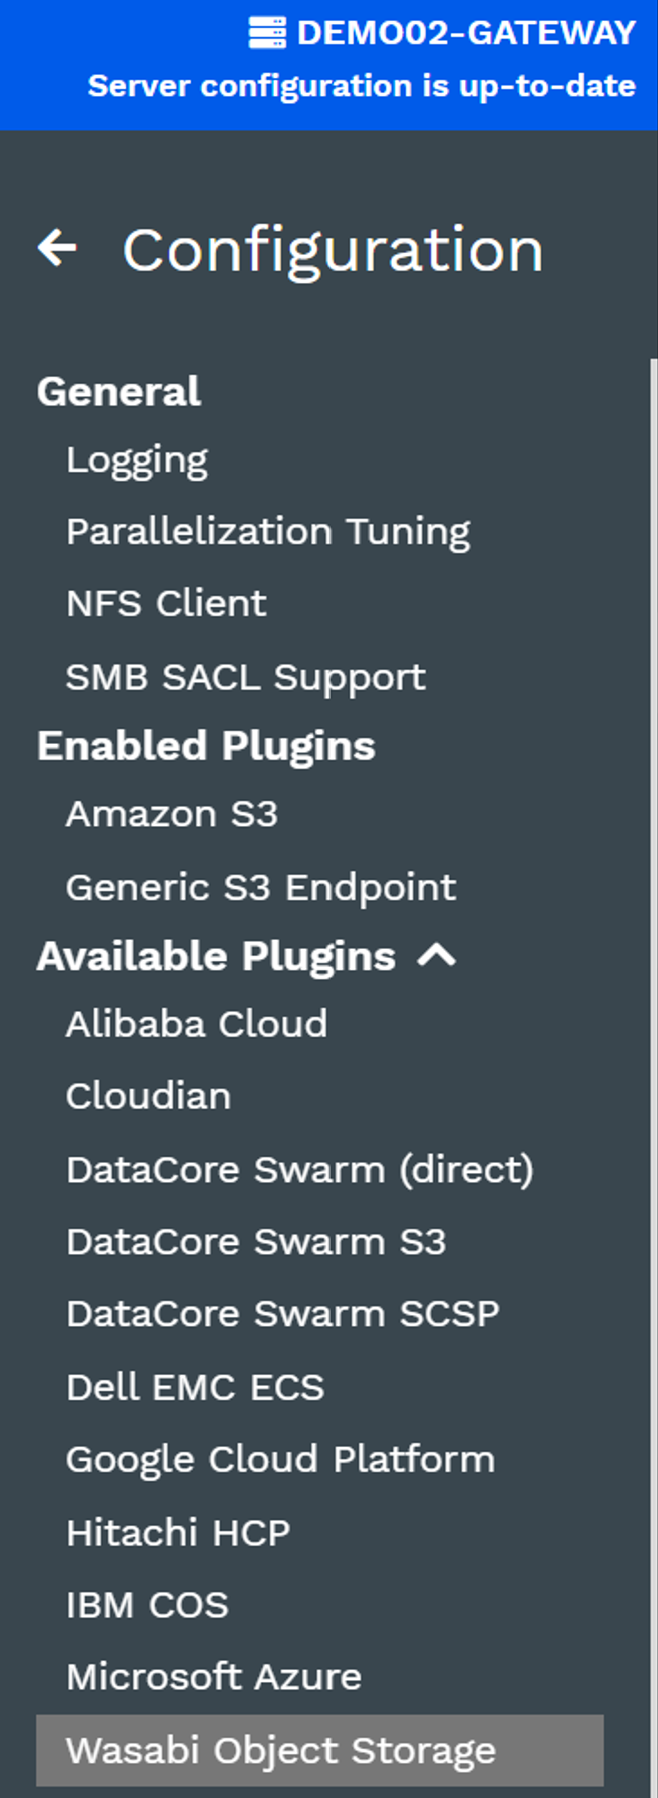
Enable S3 plugin on the gateway
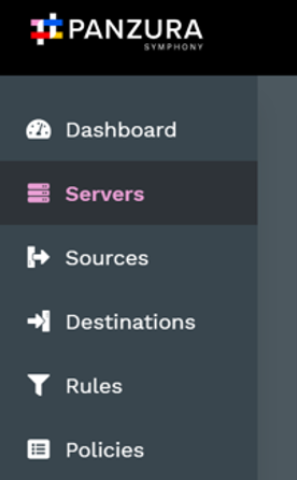
Log in to the Symphony Admin Center. Navigate to the Servers tab and click ![]() to expand the Server Details pane.
to expand the Server Details pane.
Click  (the Configuration icon).

Expand the Available Plugins tab and select Wasabi Object Storage.
Enter the appropriate details in Plugin Configuration and Encryption.
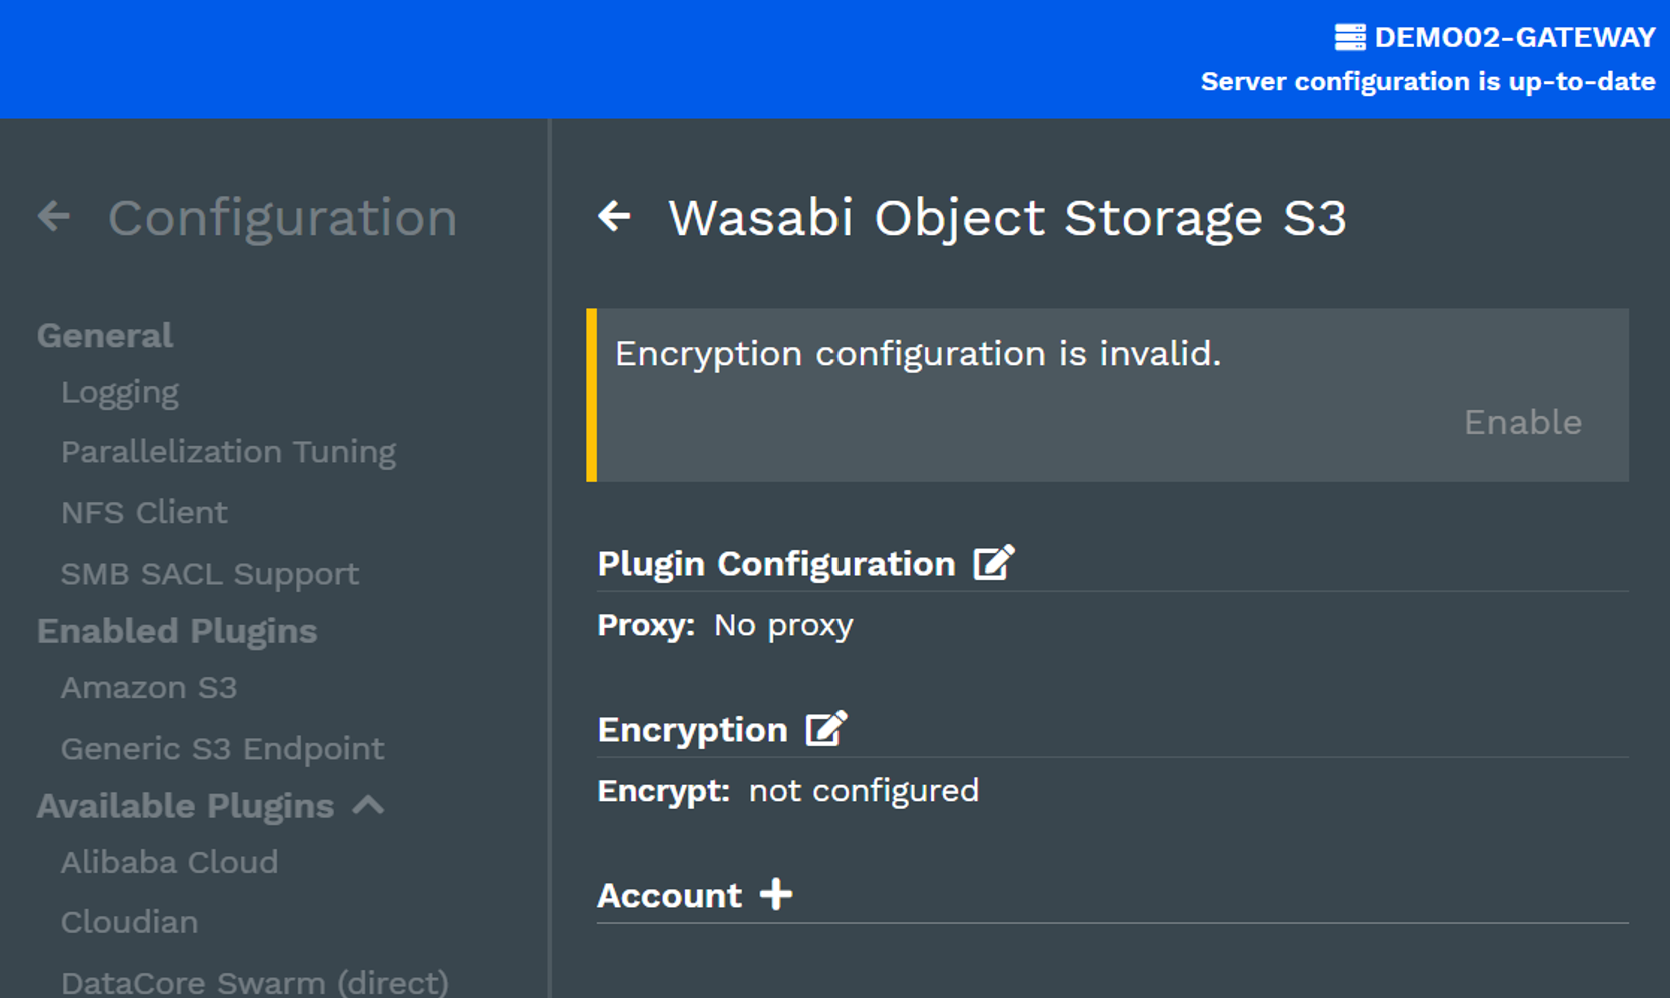
If an outbound Proxy is required, enter it under Plugin configuration.
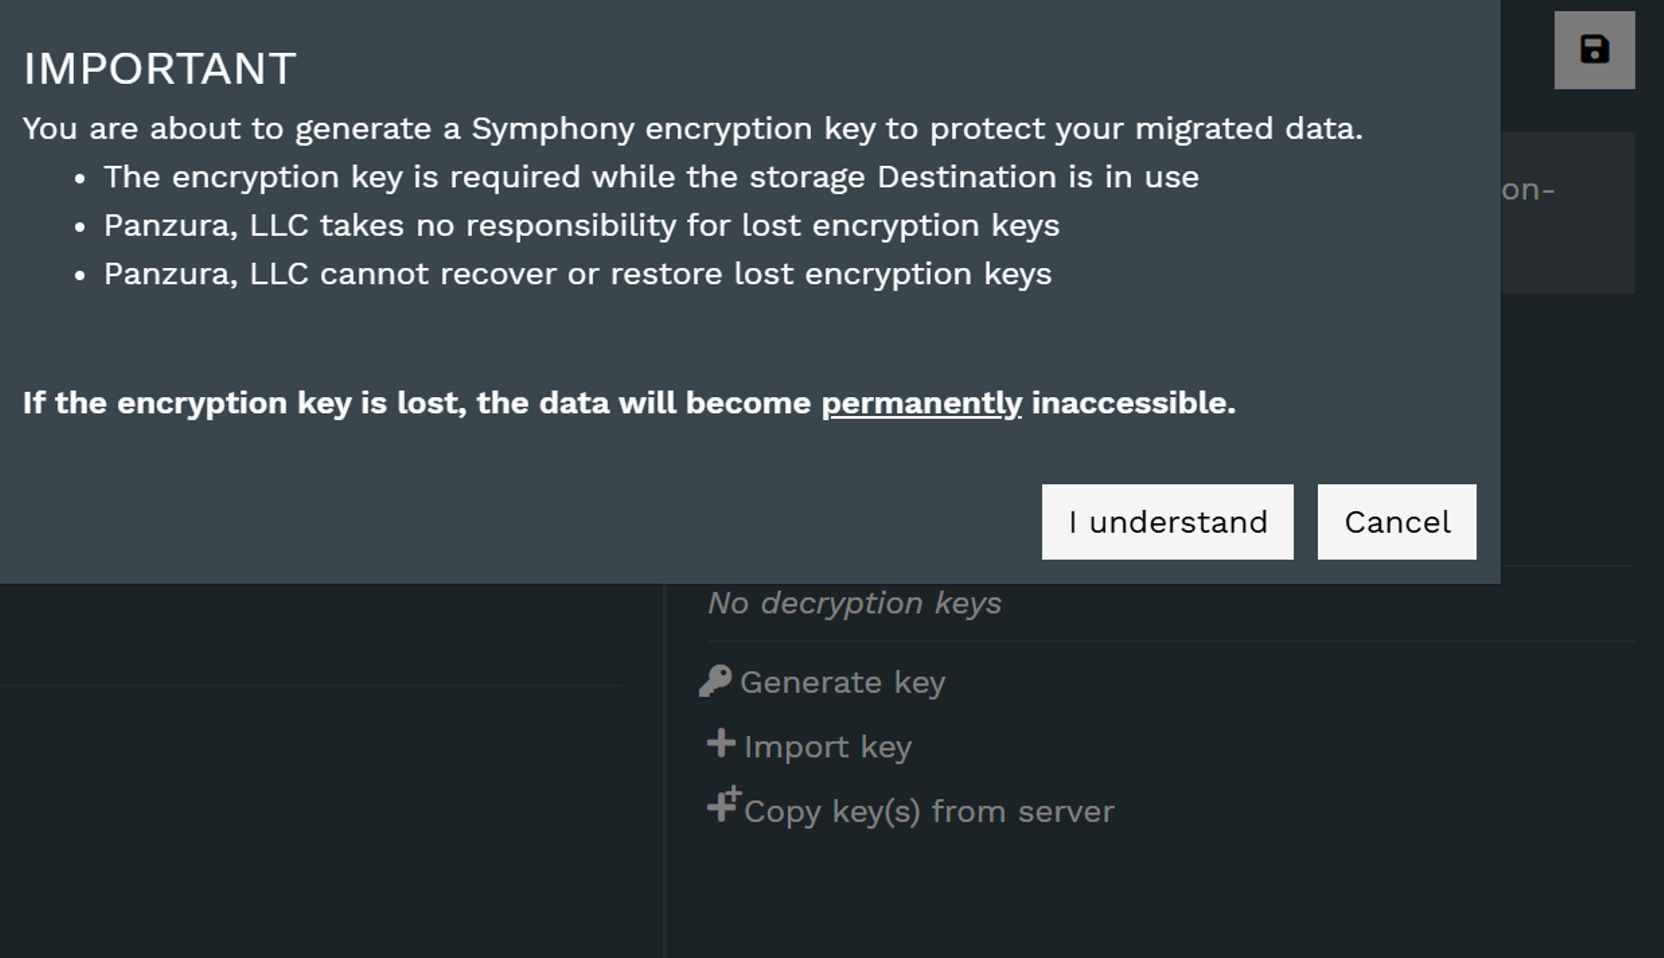
Next, configure Encryption to safeguard your data in the cloud.

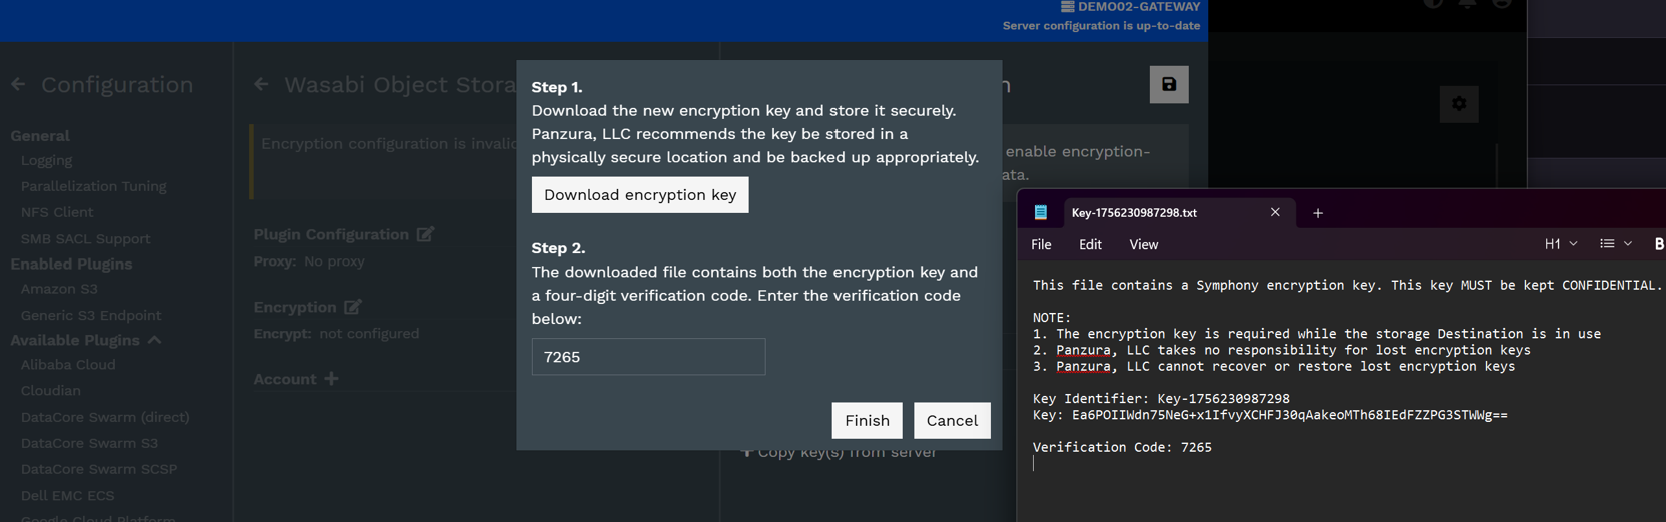
Select Generate Keys and follow the instructions.
It is paramount that the provided Key file is safeguarded. It will be needed if you need to reinstall Symphony. Without it, all data becomes useless. Panzura is unable to provide a decryption key if you lose it!
Copy the Verification Code from the Key-File and click Finish.
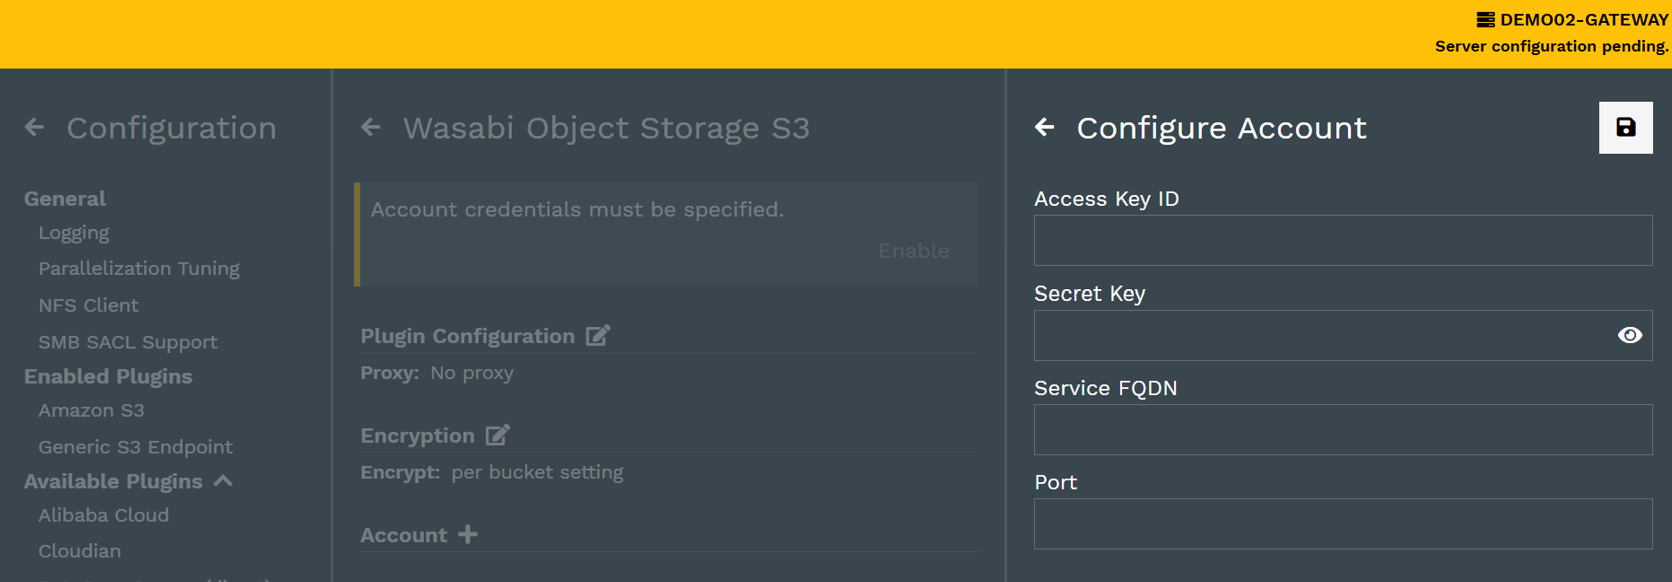
Next, enter the Wasabi connection details under Account:
Access Key ID—Input your Wasabi Access Key
Secret Key—Input your Wasabi Secret Key
Service FQDN—Input the Wasabi Service Region URL where you created your bucket
Port—Set the port to 443
Save the settings by clicking the Save icon. A server restart will be required at this point.
Configure Wasabi as a Destination
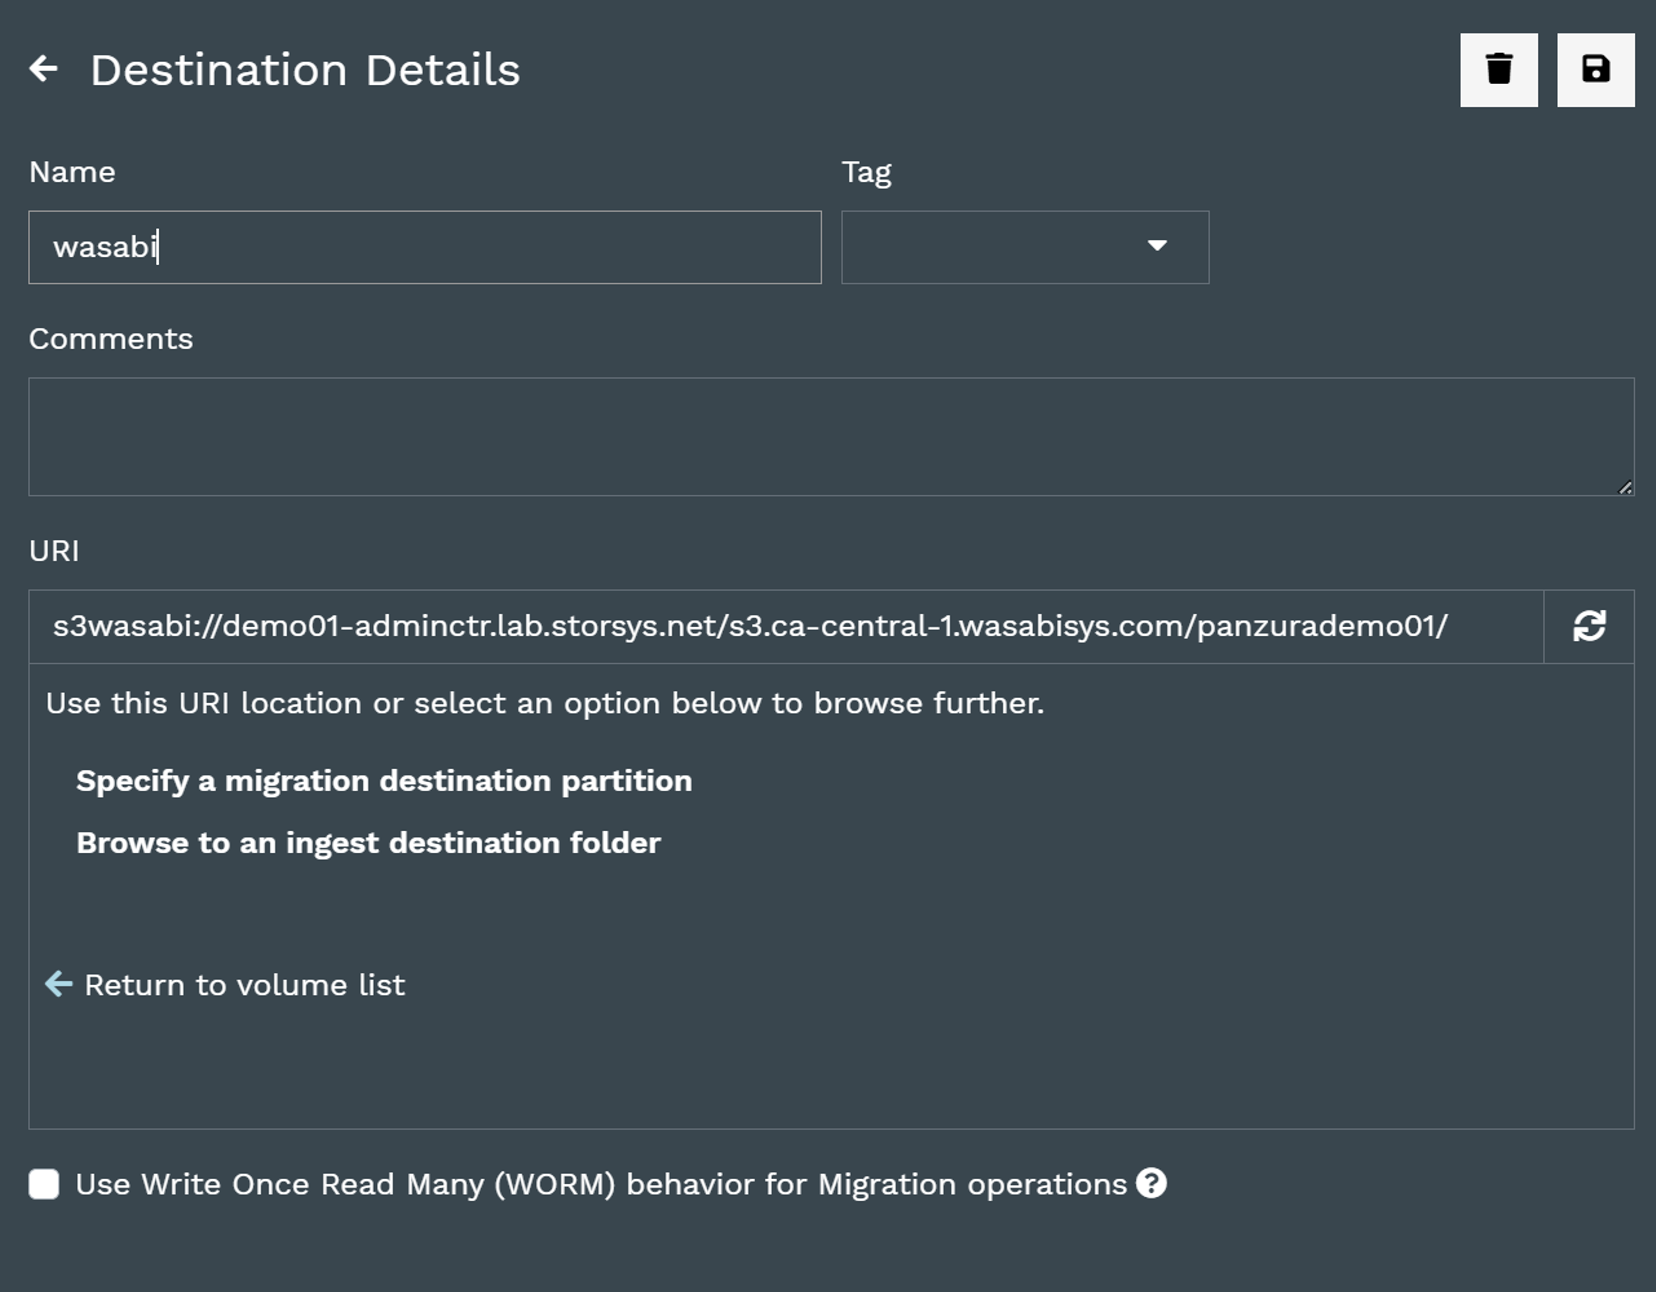
To configure a Wasabi Destination, select the destination tab in Symphony AdminCenter and then then the “+” to add a new Destination.
Enter a name for the Destination and select s3wasabi for the URI.
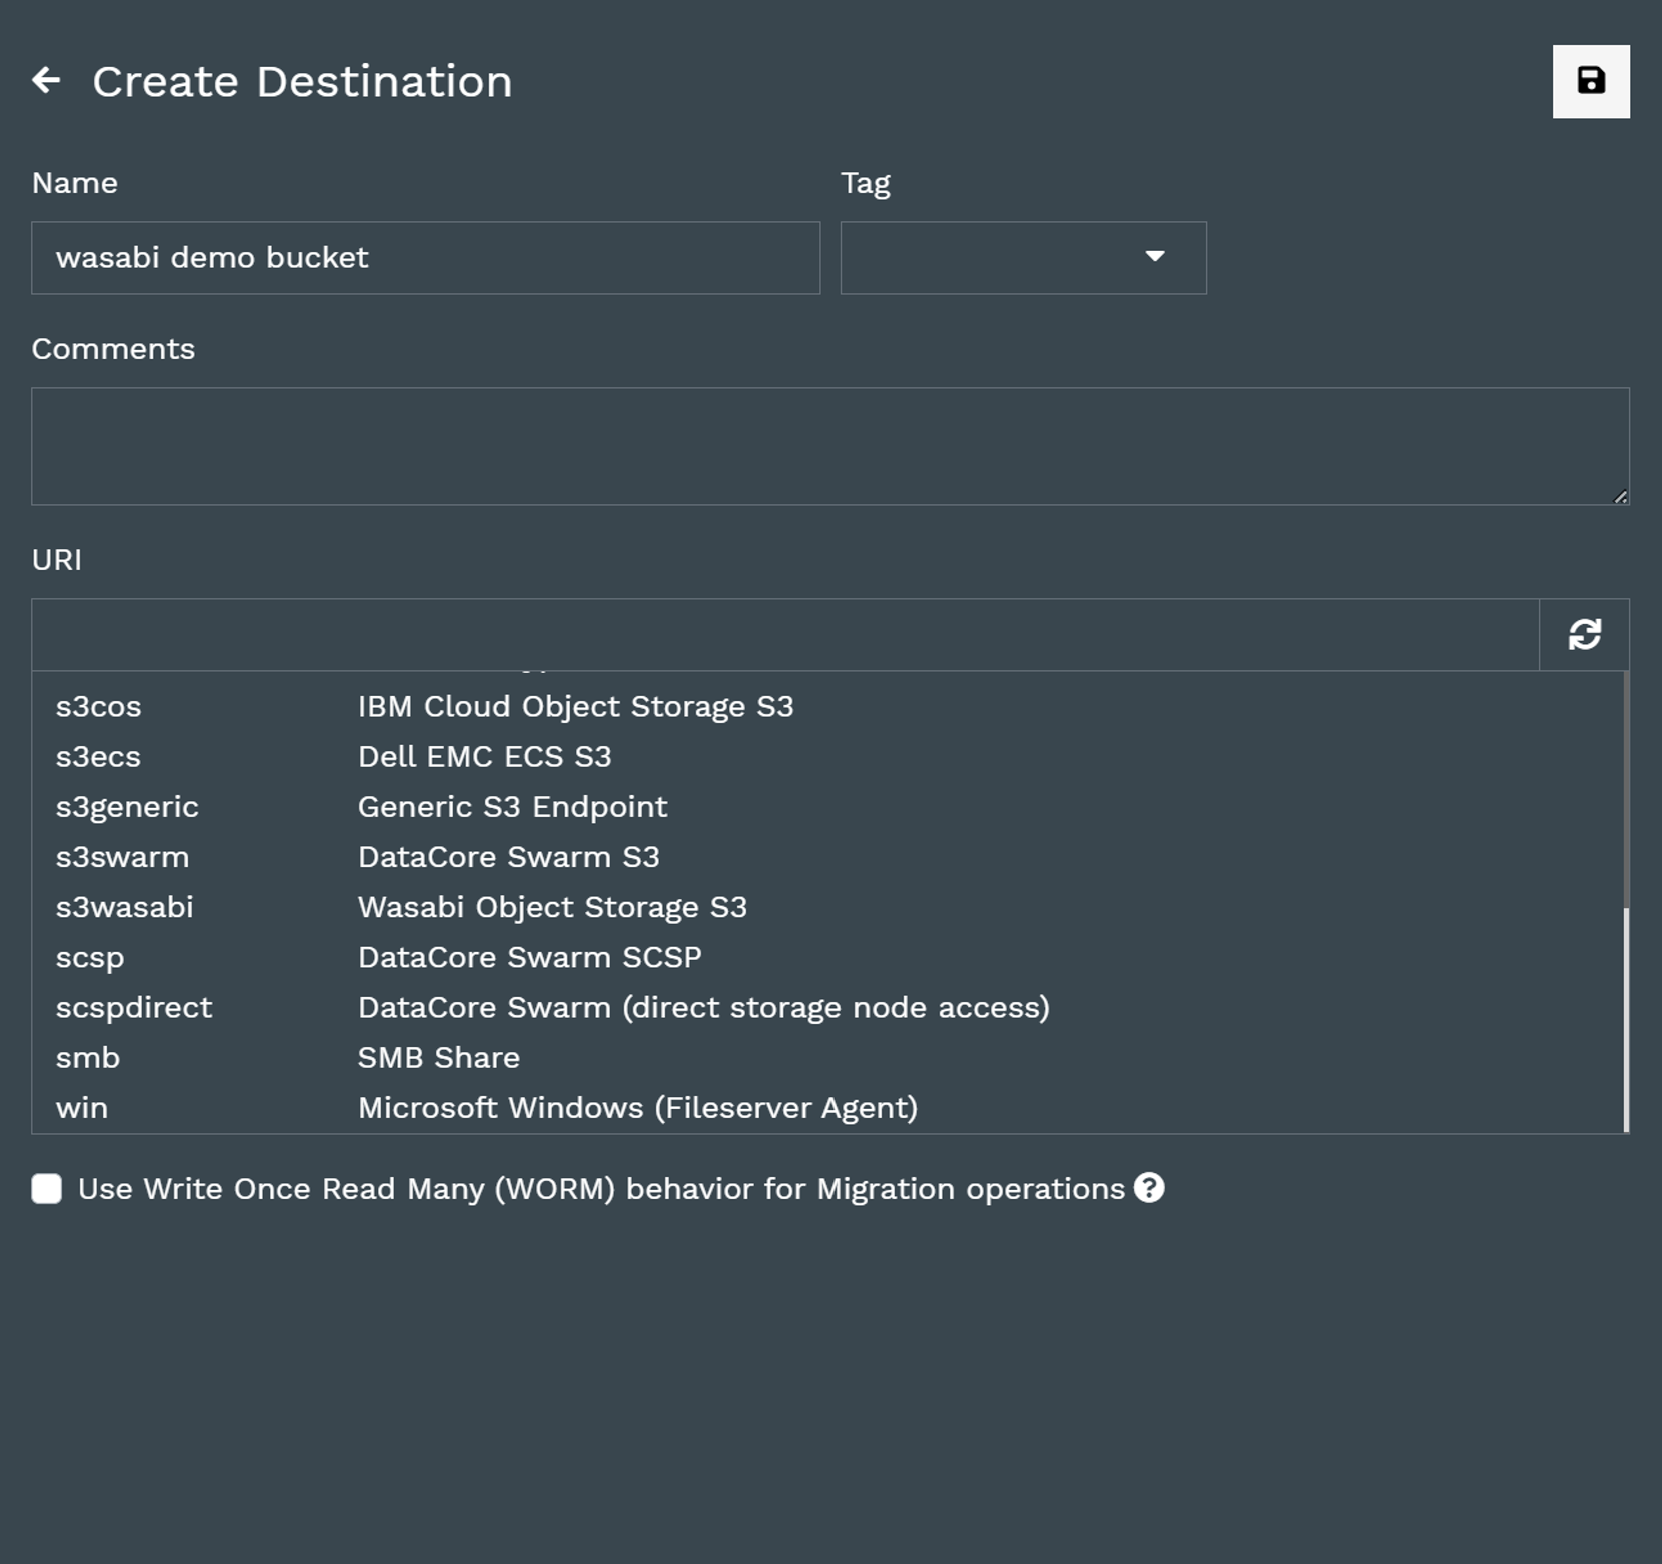
The URI field is populated with s3wasabi:// and needs to be completed with the FQDN of the Gateway Agent with the S3 plugin, the FQDN of the service endpoint, and the desired Wasabi bucket name in the format below
s3wasabi://gatewayagentfqdn//wasabiserviceendpointfqdn/bucketname/
For example:
s3wasabi://mwdemo-ch2.mwdemo.local/s3.eu-central-1.wasabisys.com/mw-sddemo-test/
Save the definition.
Configure a Tiering Operation
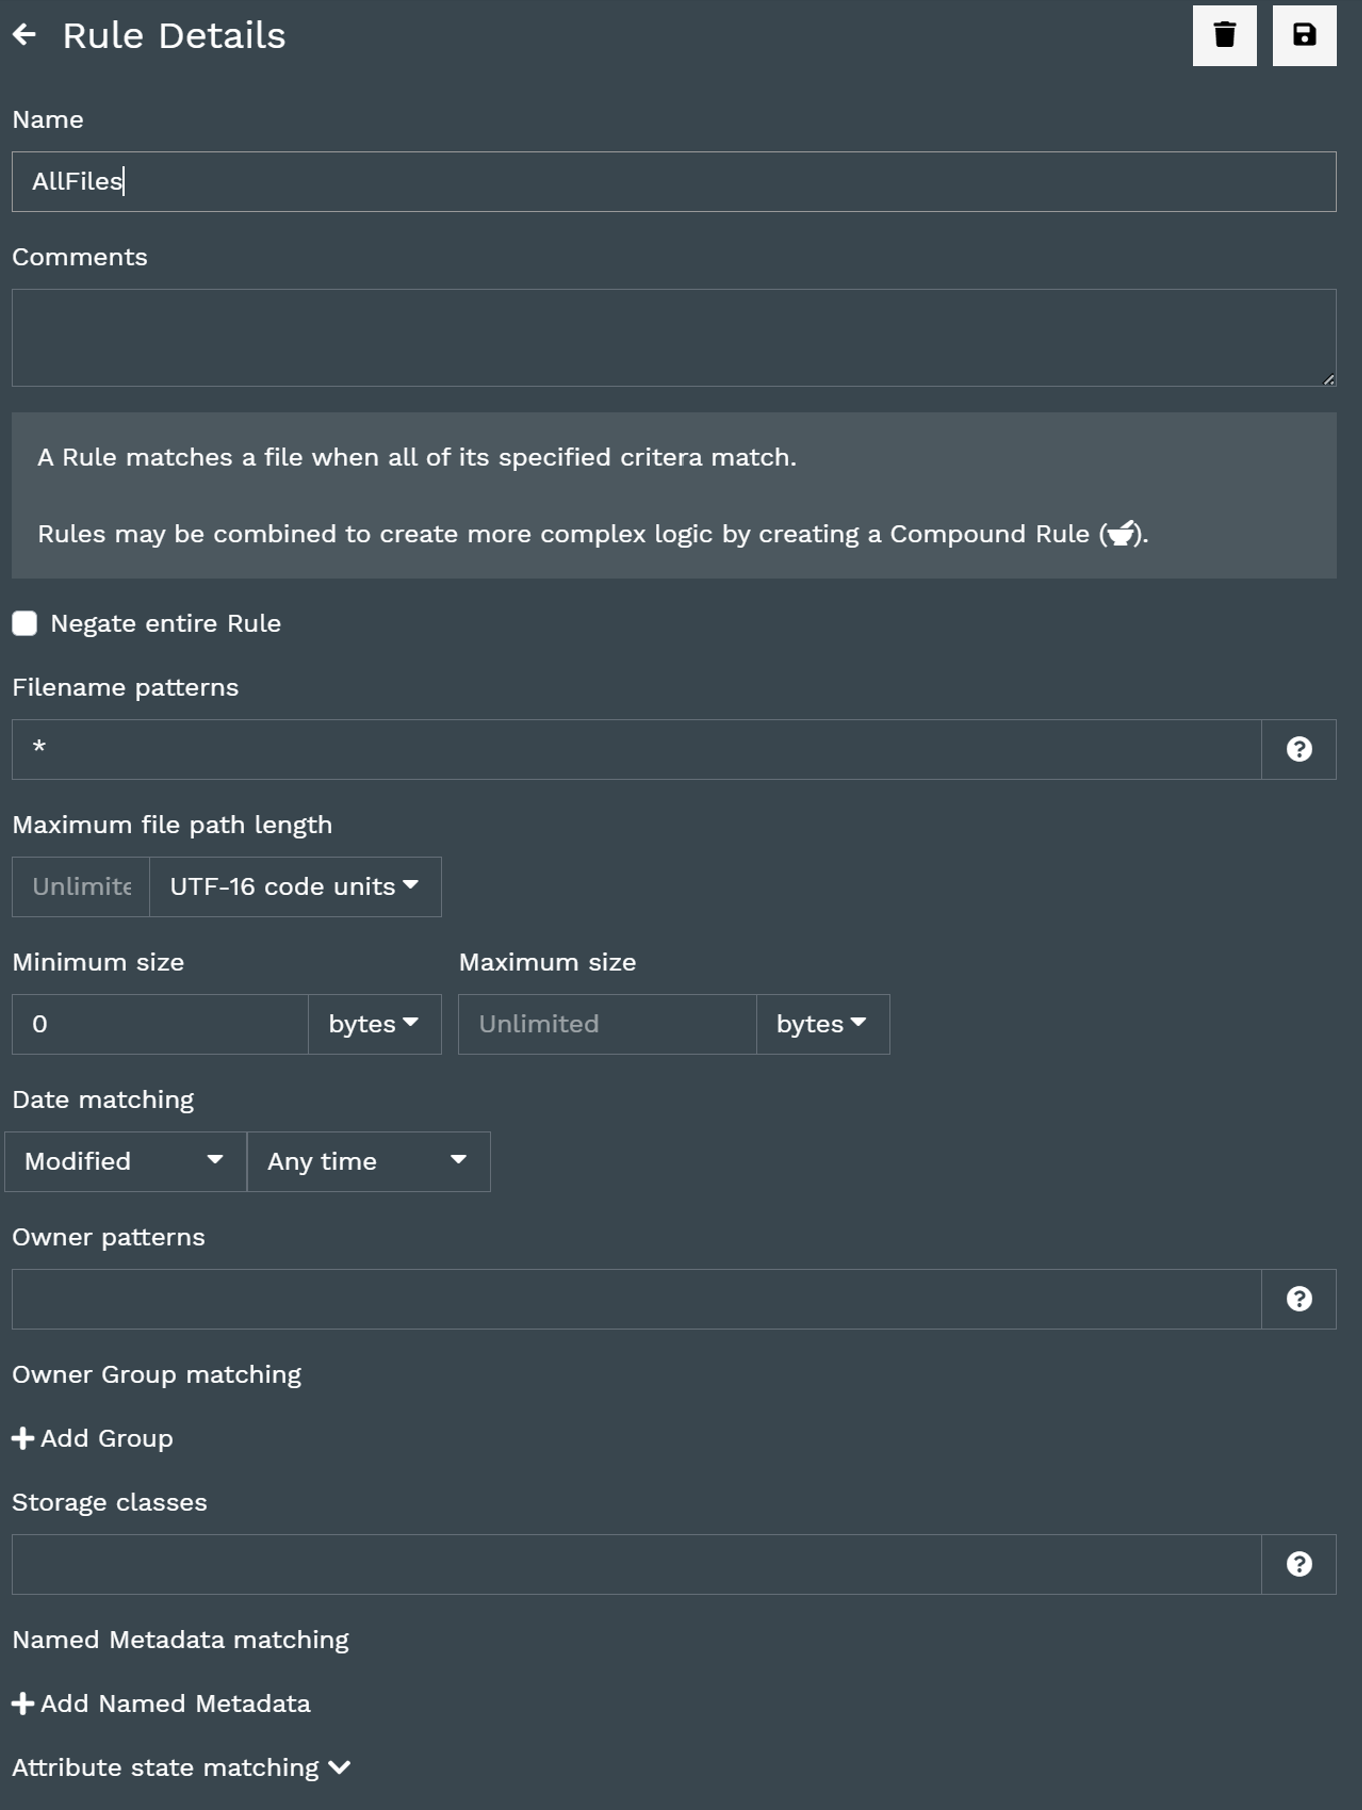
To archive data, you need to specify rules and policies.
To add a rule, select the Rules tab in AdminCenter and then the plus sign to add a new Rule.
Define the set of files you want to manipulate (for example, everything, all files older than 6 months, all pdfs greater than 1GB etc.)
Select the Policies tab and then the + to add a new Policy. Select from the provided list of Operations (most commonly used are migrate and copy).
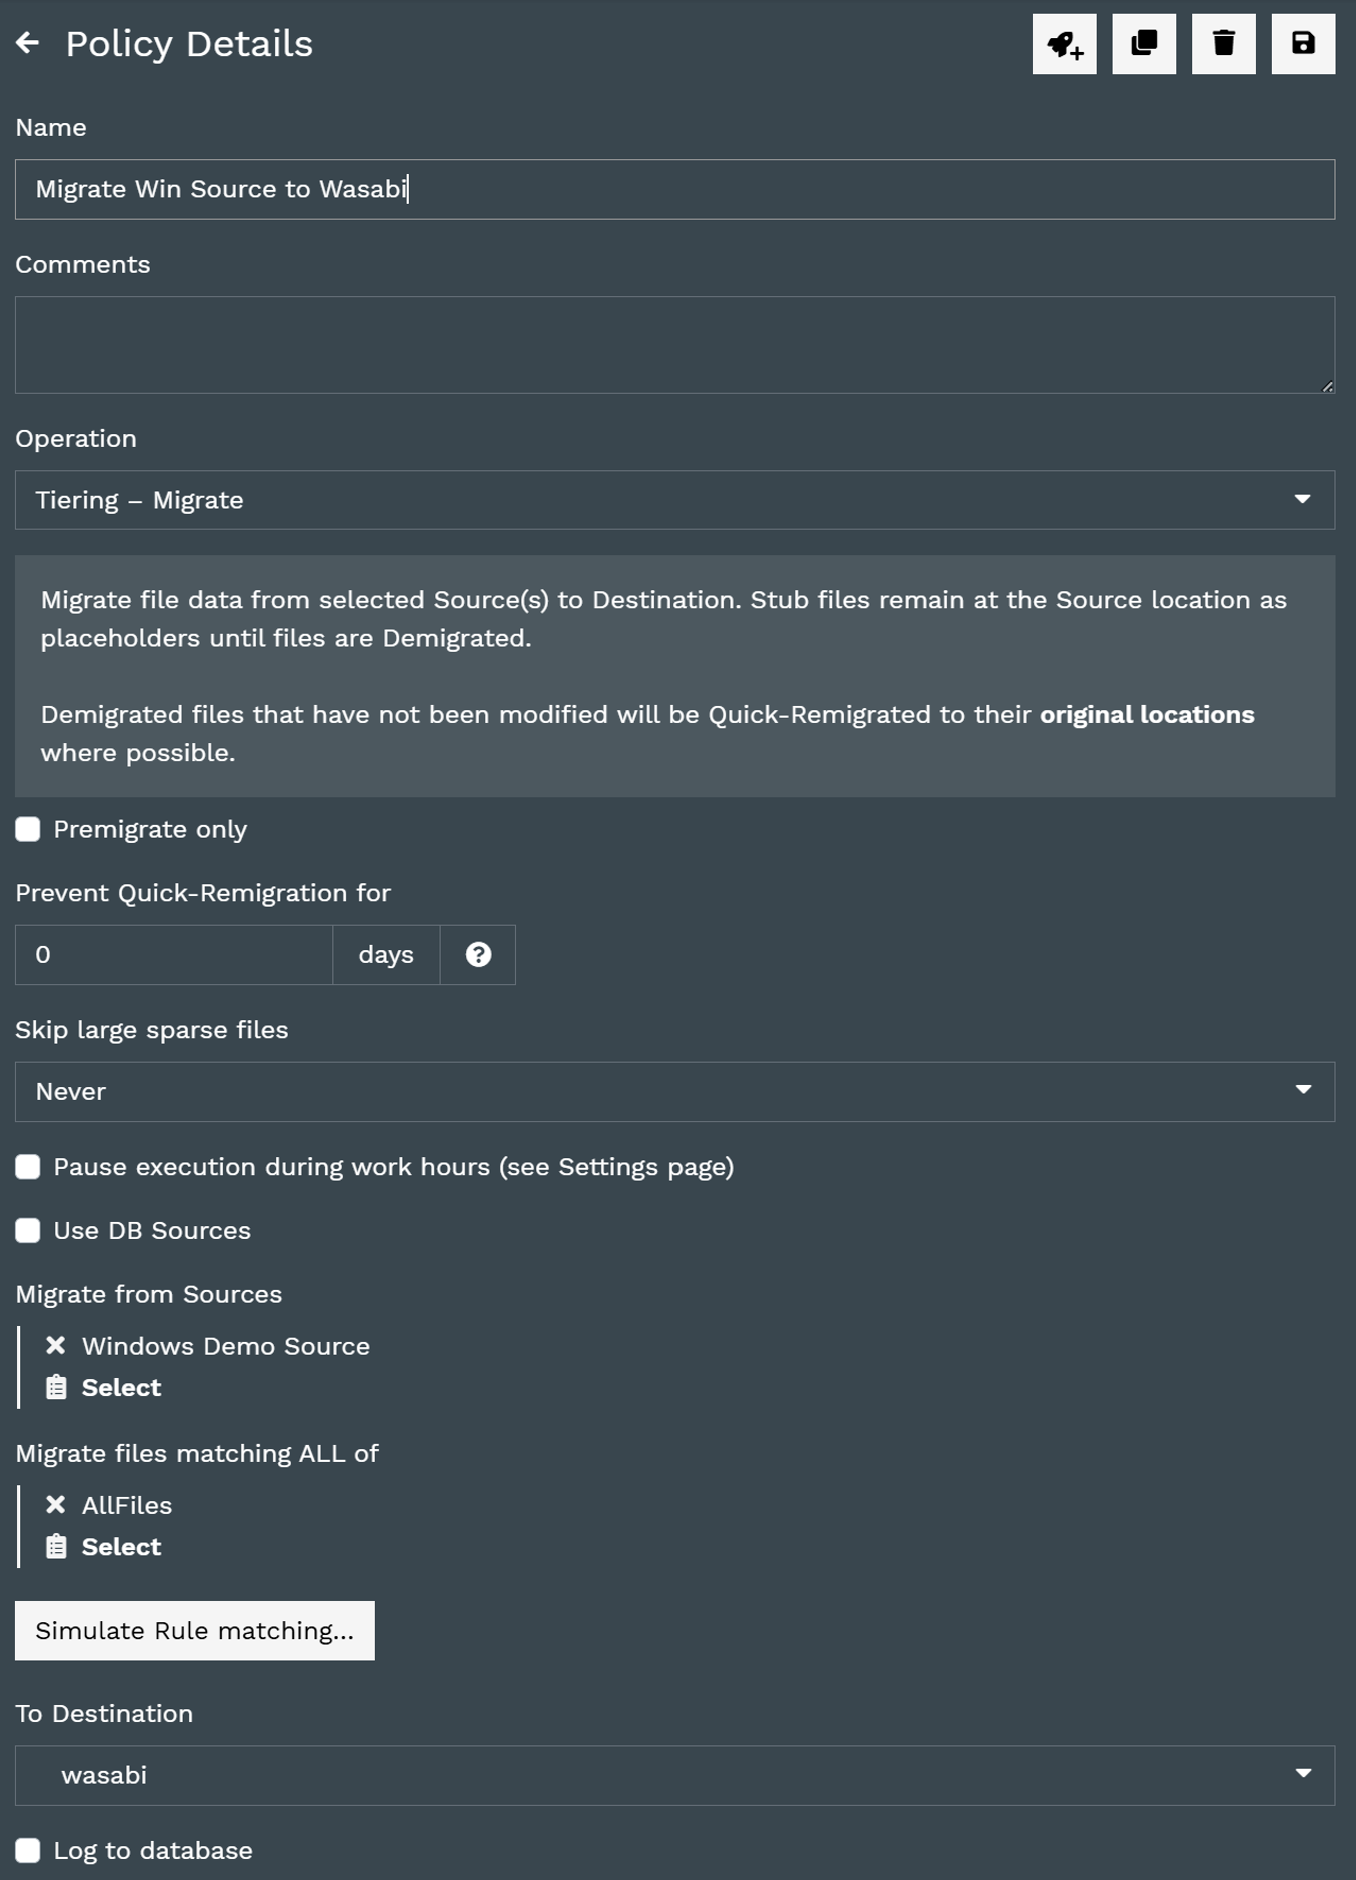
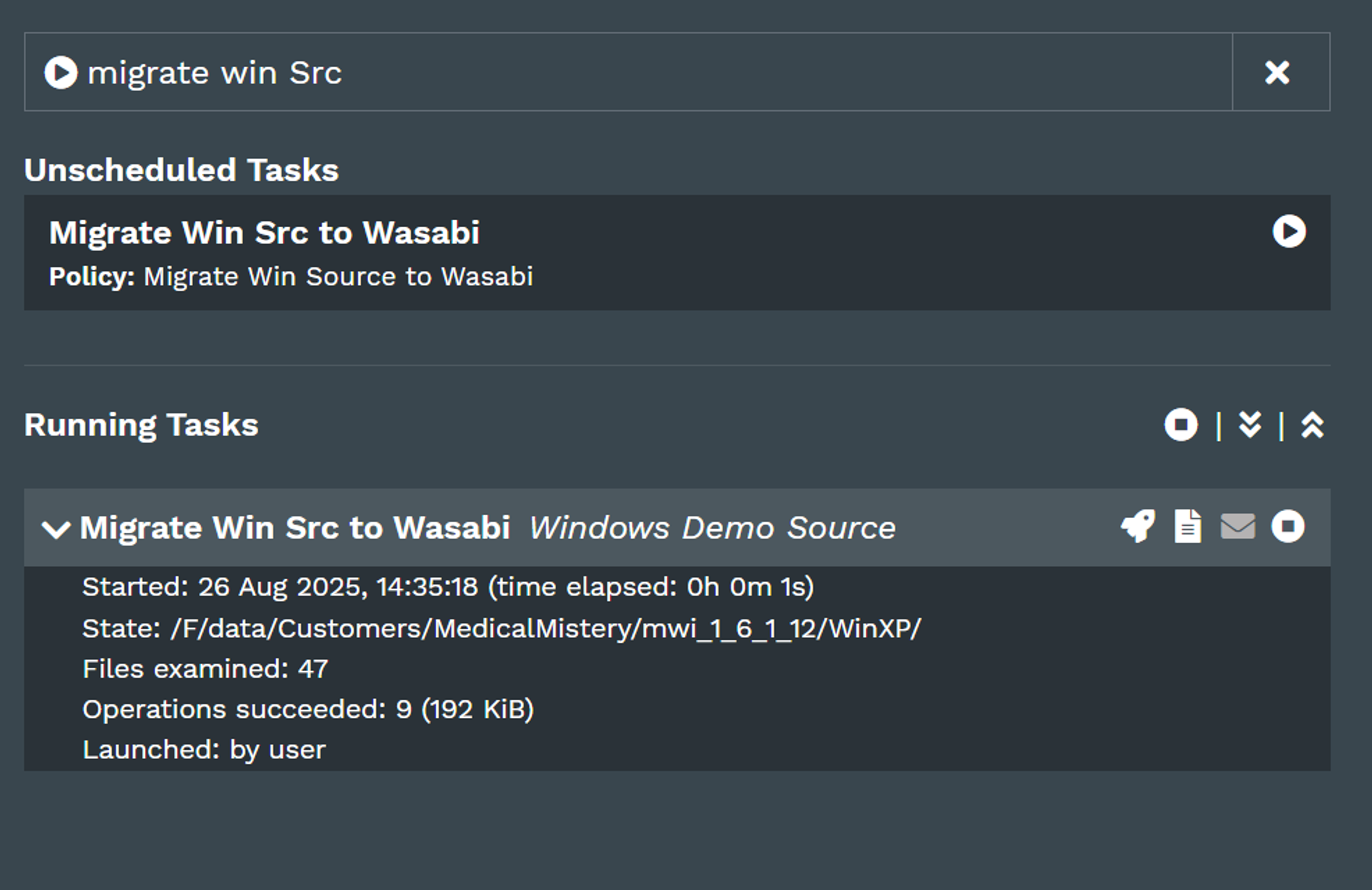
Create a task to execute the Policy at scheduled intervals or ad-hoc.
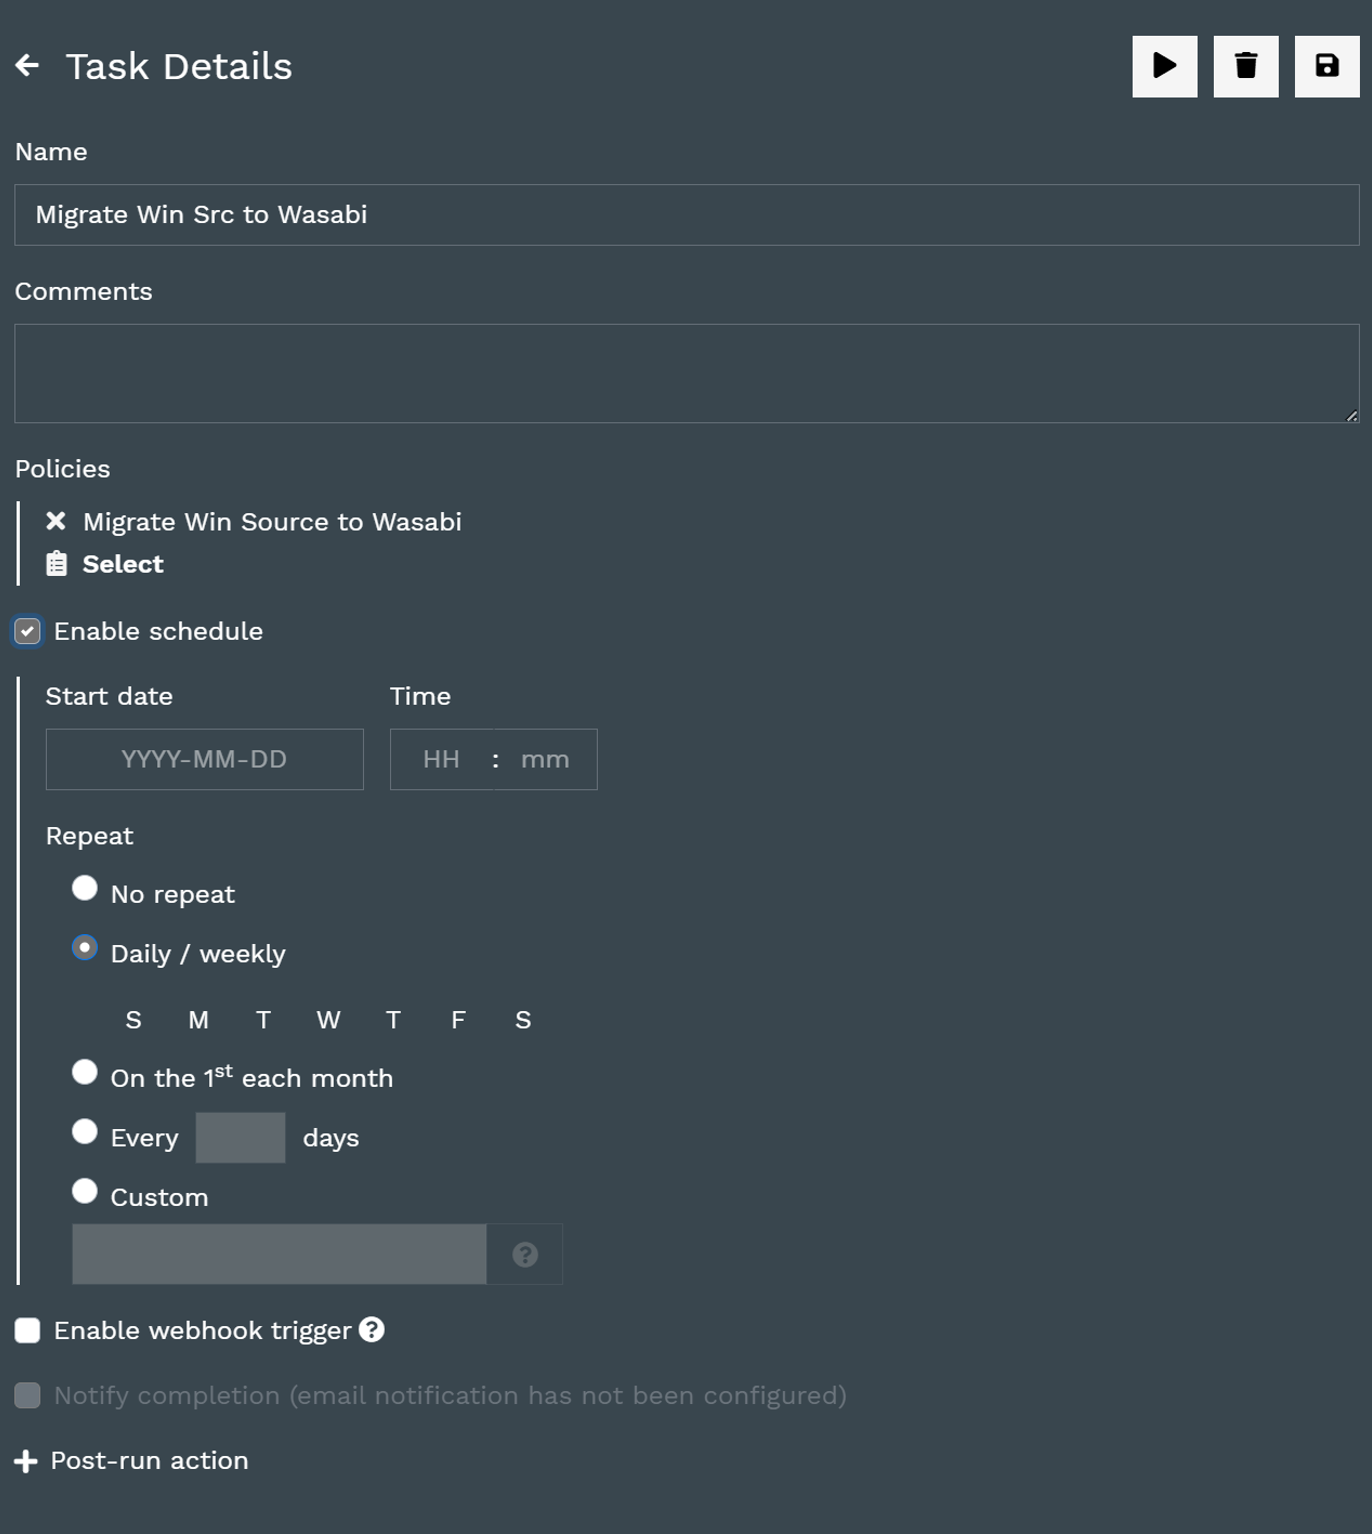
Tasks can be run at scheduled intervals or ad-hoc from the Dashboard in the Running Tasks Widget.
Select the Task and watch your data archive to Wasabi.