Objectives
1—Sign up for Wasabi Cloud Sync Manager and sign in.
2—Enter credentials for cloud migration in WCSM.
3—Enter bucket information for cloud migration in WCSM.
Before Wasabi can initiate a data migration job, specify the source and target (Wasabi) bucket information in the WCSM Portal. Follow the steps below for Entering Source Bucket Information and Entering Target Bucket Information. Once complete, contact your WCSM Support Engineer. Wasabi will begin migration based on an agreed-upon schedule.
Entering Source Bucket Information
Click Storage.
Click Create Storage.
Enter the following information. For more information about each required field, click
 to view the available tooltips.
Name—Provide a unique name for the storage object (for example, AcmeSourceBucket).
Account—Click the drop-down to select your WCSM account.
Scope—Click the drop-down to select the scope (the restricted access and role for a specific account).
Click the drop-down to select the Storage Type (the source where your data resides).
Depending on the selected storage type, the required Authorization information will vary. Provide the appropriate information. Once complete, continue to Step 6.
Specifying Source Information for Wasabi and Amazon S3 (AWS)
Specifying Source Information for Google Cloud Storage (GCP) or Custom S3
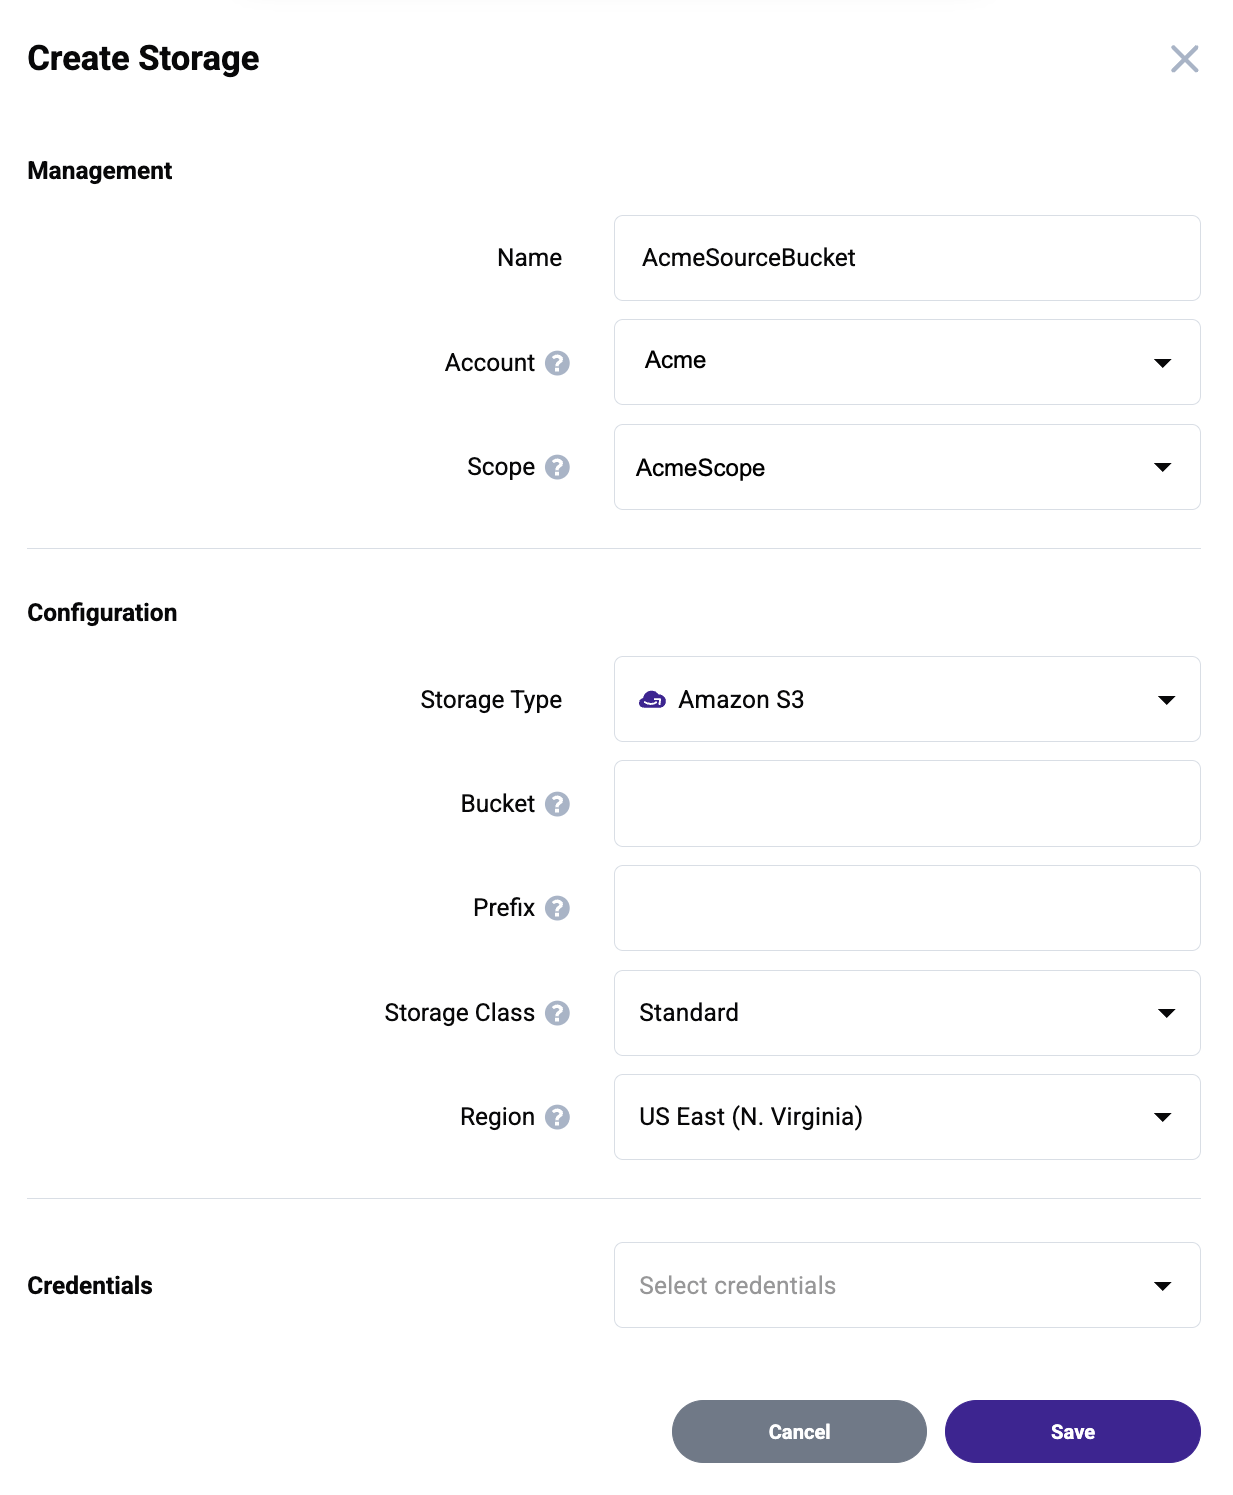
Click the drop-down to select the source bucket credentials (created in 2—Entering Credentials for Cloud Migration in WCSM).
Click Save.
An overview of the newly created source will be displayed.
Specifying Source Information for Wasabi and Amazon S3 (AWS)
Enter the following information for your Wasabi or AWS source.
Bucket—Enter the exact source bucket name. The bucket name must match the bucket name in your cloud storage account.
Prefix—Enter characters to attach to the beginning of each object name that is transferred to the bucket. This prefix will specify which objects are visible.
Storage Class—For AWS users, select the default storage class to be used for all objects transferred to the bucket by the system.
Region—Select the source region.
Specifying Source Information for Azure Blob Storage
Enter the following information for the Azure source.
Storage Account—Enter the name of an existing storage account.
Container—Enter the name of an existing container.
Prefix—Enter characters to attach to the beginning of each object name that is transferred to the bucket. This prefix will specify which objects are visible.
Access Tier—Default access tier used for all objects transferred to the container by the system.
Region—Select the source region.
Specifying Source Information for Google Cloud Storage (GCP) or Custom S3
Enter the following information for the GCP or custom S3 source.
Bucket—Enter the exact source bucket name. The bucket name must match the bucket name in your cloud storage account.
Prefix—Enter characters to attach to the beginning of each object name that is transferred to the bucket. This prefix will specify which objects are visible.
Storage Class—Select the default storage class to be used for all objects transferred to the bucket by the system.
Region—Select the source region.
Region (Country)—For a custom S3 source, select the source country where the data egresses from.
Entering Target Bucket Information
Follow the steps in Entering Source Bucket Information. Be sure to set:
Name—Provide a unique name for the target bucket (for example, AcmeTargetBucket)
Storage Type—Click the drop-down to select Wasabi.
You must specify Wasabi as the target. WCSM does not support migrating data out of Wasabi.
Bucket—Enter the exact target bucket name. The bucket name must match the bucket name in your cloud storage account.
Credentials—Select the target bucket credentials created in Entering Target Bucket Credentials.
You are now ready to establish your migration job. To do so, contact your WCSM Support Engineer.
Objectives Met!
1—Sign up for Wasabi Cloud Sync Manager and sign in.
2—Enter credentials for cloud migration in WCSM.
3—Enter bucket information for cloud migration in WCSM.
You are now ready to explore the Product Guide for Wasabi Cloud Sync Manager (WCSM).