In August 2023, AWS announced that its DataSync file movement and discovery service would support the ability to transfer data to and from AWS to other compatible cloud services, such as Wasabi. While there are many ways to configure AWS DataSync using different source types and agent configurations, for the purposes of this guide, we will be focusing on using an AWS S3 bucket as the source for your data movement, a Wasabi S3 bucket as the destination, and an EC2 instance to host the DataSync agent.
Please note: Migrating data across cloud services will incur separate charges from AWS for using its DataSync service, in addition to any EC2-related and S3 API call charges. It is the customer's responsibility to pay these charges by following this guide. For more information about AWS charges, please review their pricing guide here.
Also note that an on-premise DataSync location to any non-AWS file storage destination (such as Wasabi) is not a supported configuration.
To transfer data between cloud services, we first need to set up and configure a few items in your Wasabi and AWS accounts.
In your Wasabi account, we need to have the following configured:
A Wasabi S3 bucket
An IAM user with permissions to write to your Wasabi bucket
In your AWS account, we need to configure:
A DataSync Agent running on an EC2 instance
A DataSync Task
An AWS S3 bucket
An IAM role configured to work with your DataSync Task and S3 source bucket
Optional: A CloudWatch log group
Configuring your Wasabi account
Create a Wasabi S3 bucket, or use an existing bucket for this transfer. The Wasabi S3 bucket may be in any region, we recommend keeping the Wasabi S3 destination bucket, AWS S3 source bucket, and EC2 instance all within a close geographical distance to minimize latency.

Create an IAM permissions policy so that AWS may transfer data to your Wasabi S3 bucket using S3 authentication. An example policy for a DataSync transfer is shown below. Please be sure to modify the bucket name to reflect the name of your Wasabi S3 bucket:
{
"Version": "2012-10-17",
"Statement": [
{
"Action": [
"s3:GetBucketLocation",
"s3:ListBucket",
"s3:ListBucketMultipartUploads"
],
"Effect": "Allow",
"Resource": "arn:aws:s3:::bucketname"
},
{
"Action": [
"s3:AbortMultipartUpload",
"s3:DeleteObject",
"s3:GetObject",
"s3:ListMultipartUploadParts",
"s3:PutObject"
],
"Effect": "Allow",
"Resource": "arn:aws:s3:::bucketname/*"
}
]
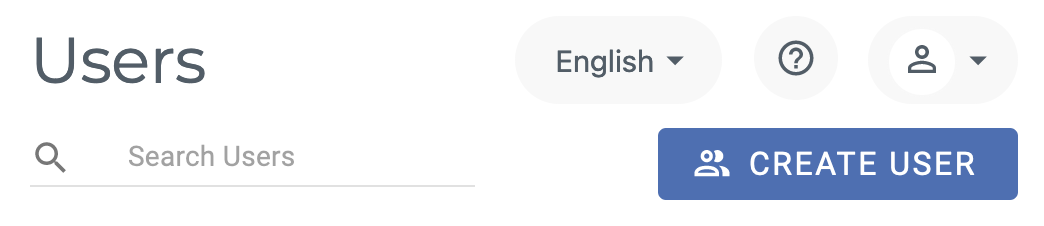
}Assign the policy to your user by going to Users > username > Policies > Search for the policy you just created, and select the policy (which will assign the policy to the user)
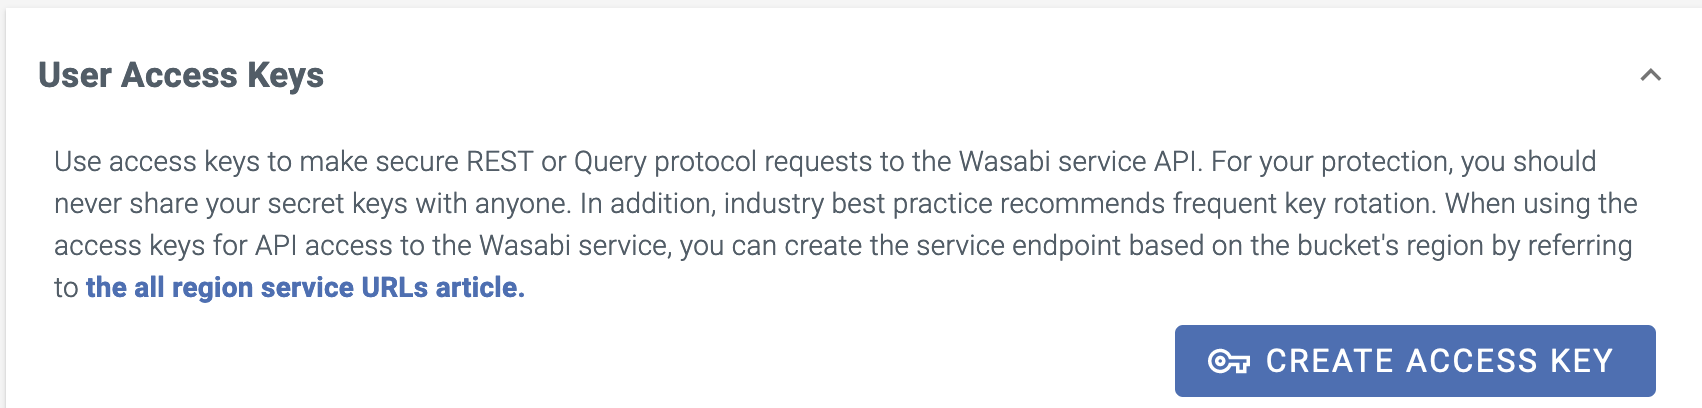
Create an access/secret key pair for the user to use with AWS DataSync
Configuring your AWS account
1. Deploy an EC2 instance
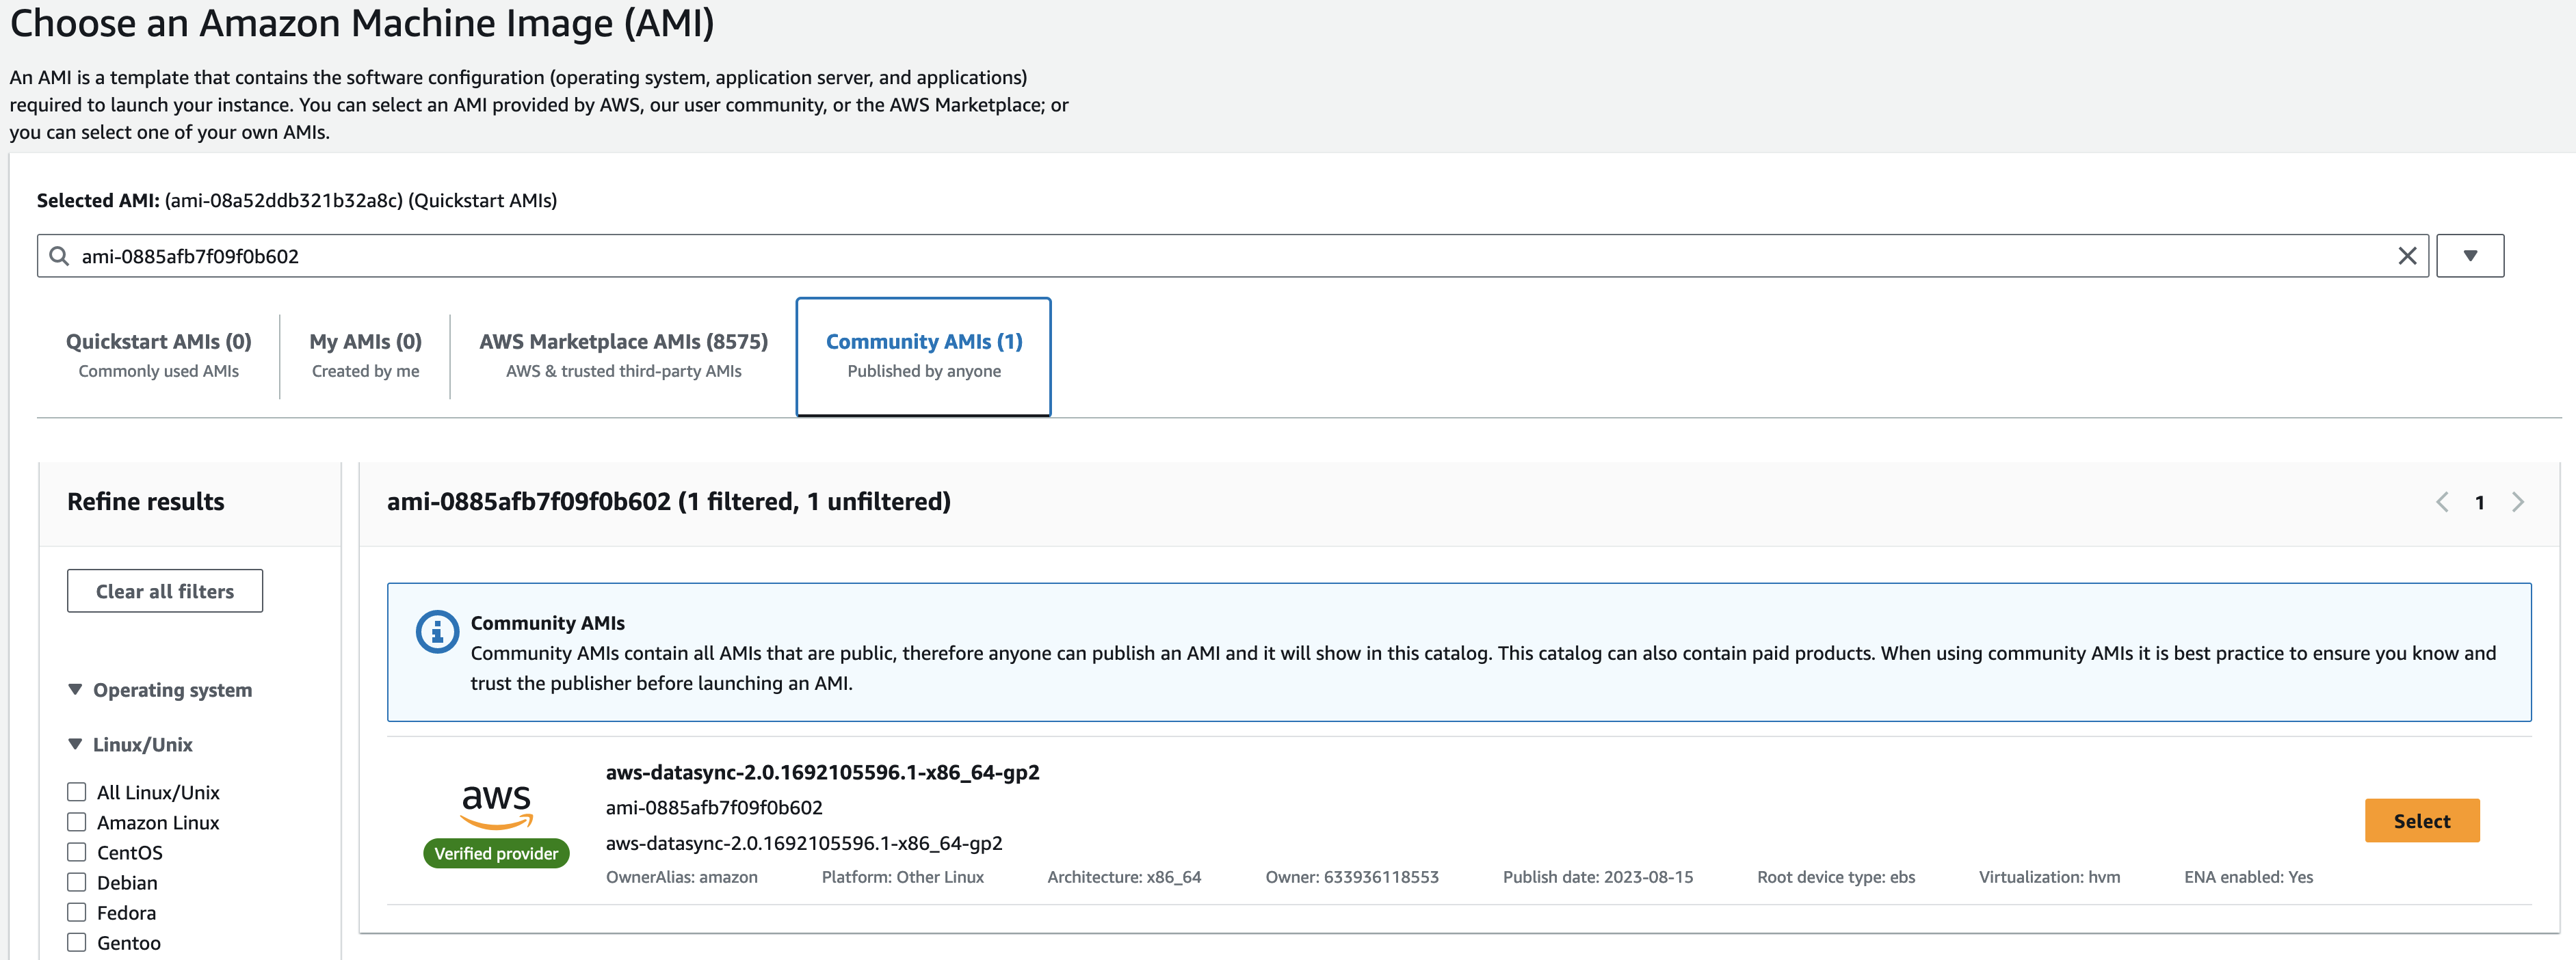
Use a DataSync Amazon Machine Image (AMI) in the region of your choice. For the purposes of this KB, we will be utilizing an AWS S3 bucket and EC2 instance in the us-east-1 region. In order to find the latest AMI for your DataSync agent, run the following AWS CLI command (with your preferred region):
aws ssm get-parameter --name /aws/service/datasync/ami --region regionYou should see an output similar to below:
$ aws ssm get-parameter --name /aws/service/datasync/ami --region us-east-1
{
"Parameter": {
"Name": "/aws/service/datasync/ami",
"Type": "String",
"Value": "ami-0885afb7f09f0b602",
"Version": 84,
"LastModifiedDate": "2023-08-15T08:26:13.979000-07:00",
"ARN": "arn:aws:ssm:us-east-1::parameter/aws/service/datasync/ami",
"DataType": "text"
}
}
From this, we can see that the latest AMI (as of this article) for DataSync in the us-east-1 region is 'ami-0885afb7f09f0b602'. Copy your AMI value to your clipboard.
In the AWS Console, go to Service, then EC2, then Launch Instance.
Name: Optional
AMI: Search for the AMI you just copied. Once you search, go to the Community tab and select the official AWS AMI that you searched for
Instance Type: You may choose any instance type. For larger data sets, we recommend utilizing an instance type with a healthy amount of RAM, vCPUs, and network bandwidth. For the purposes of this guide, I will be selecting the c4.2xlarge type
Key pair: Either select an existing EC2 keypair or choose to create a new one
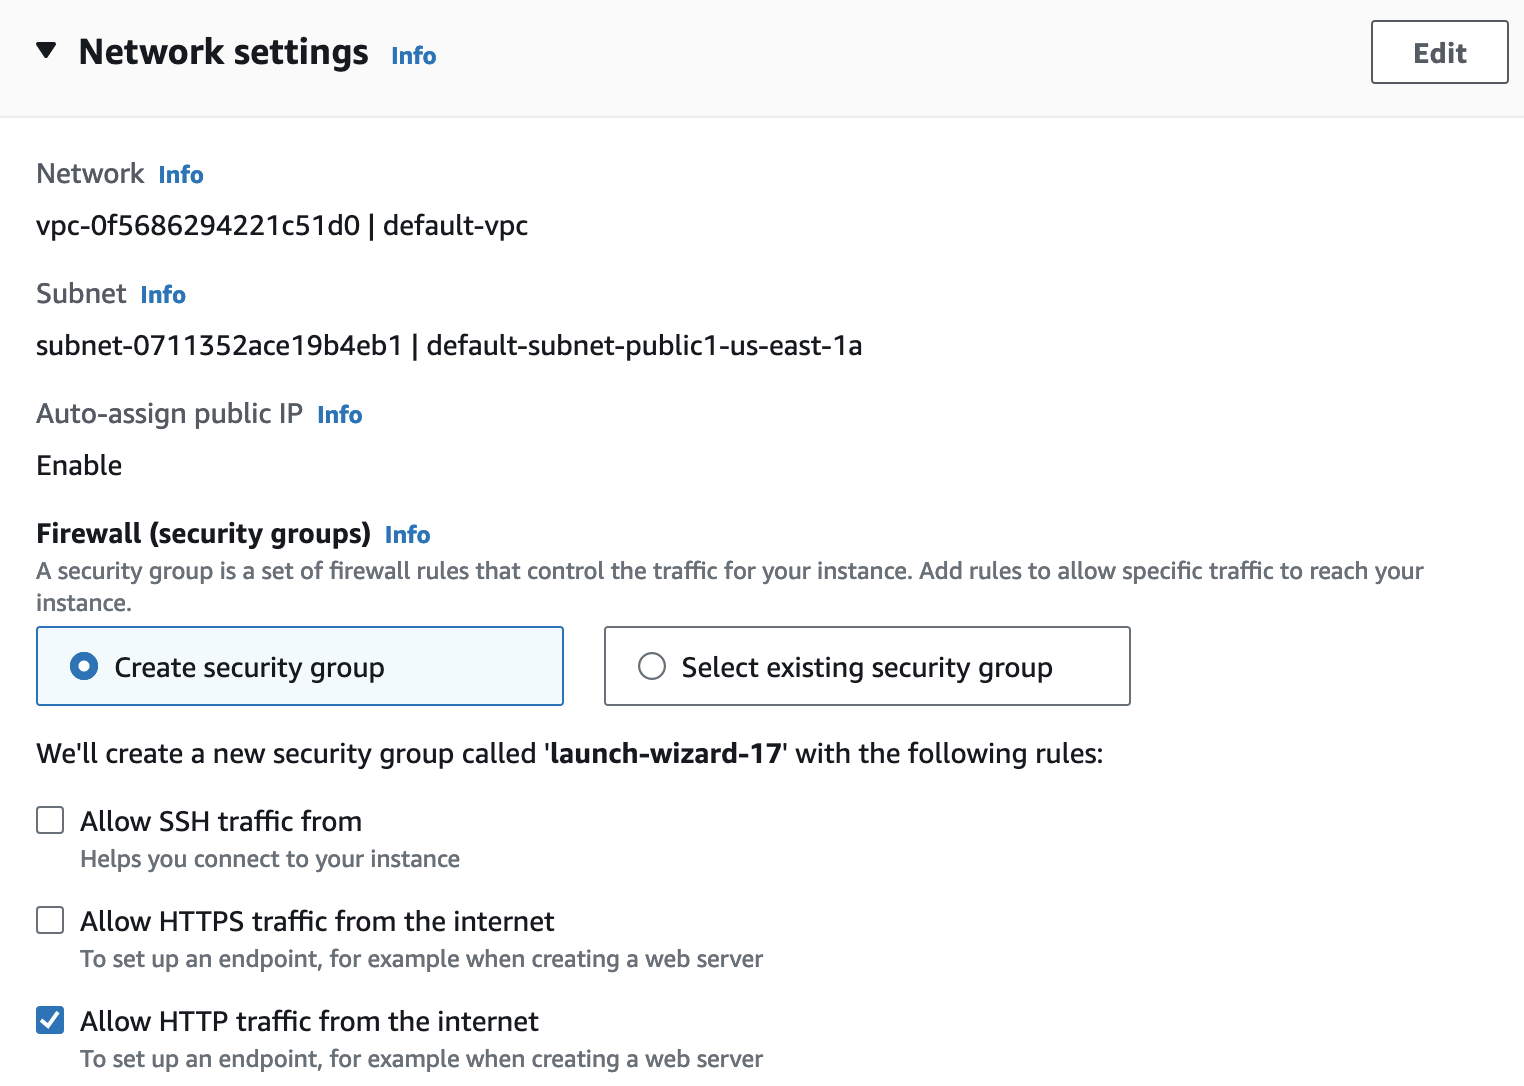
Network settings: For activation, check the box to enable "Allow HTTP traffic from the internet" so the DataSync agent can activate via HTTP on port 80 (Note: While the agent will activate via HTTP, all data transfer will occur via HTTPS). You may also disable SSH access to the instance, as it is self-contained and does not need to be connected to by the user
No more settings need to be adjusted for the DataSync agent EC2 instance. Click "Launch instance" to continue.
Once the EC2 instance is launched, make note of the public IP address of the instance and copy it to your clipboard for Step 2.
2. Deploy your DataSync Agent
Go to DataSync Agents, then Create agent
Deploy agent: Amazon EC2
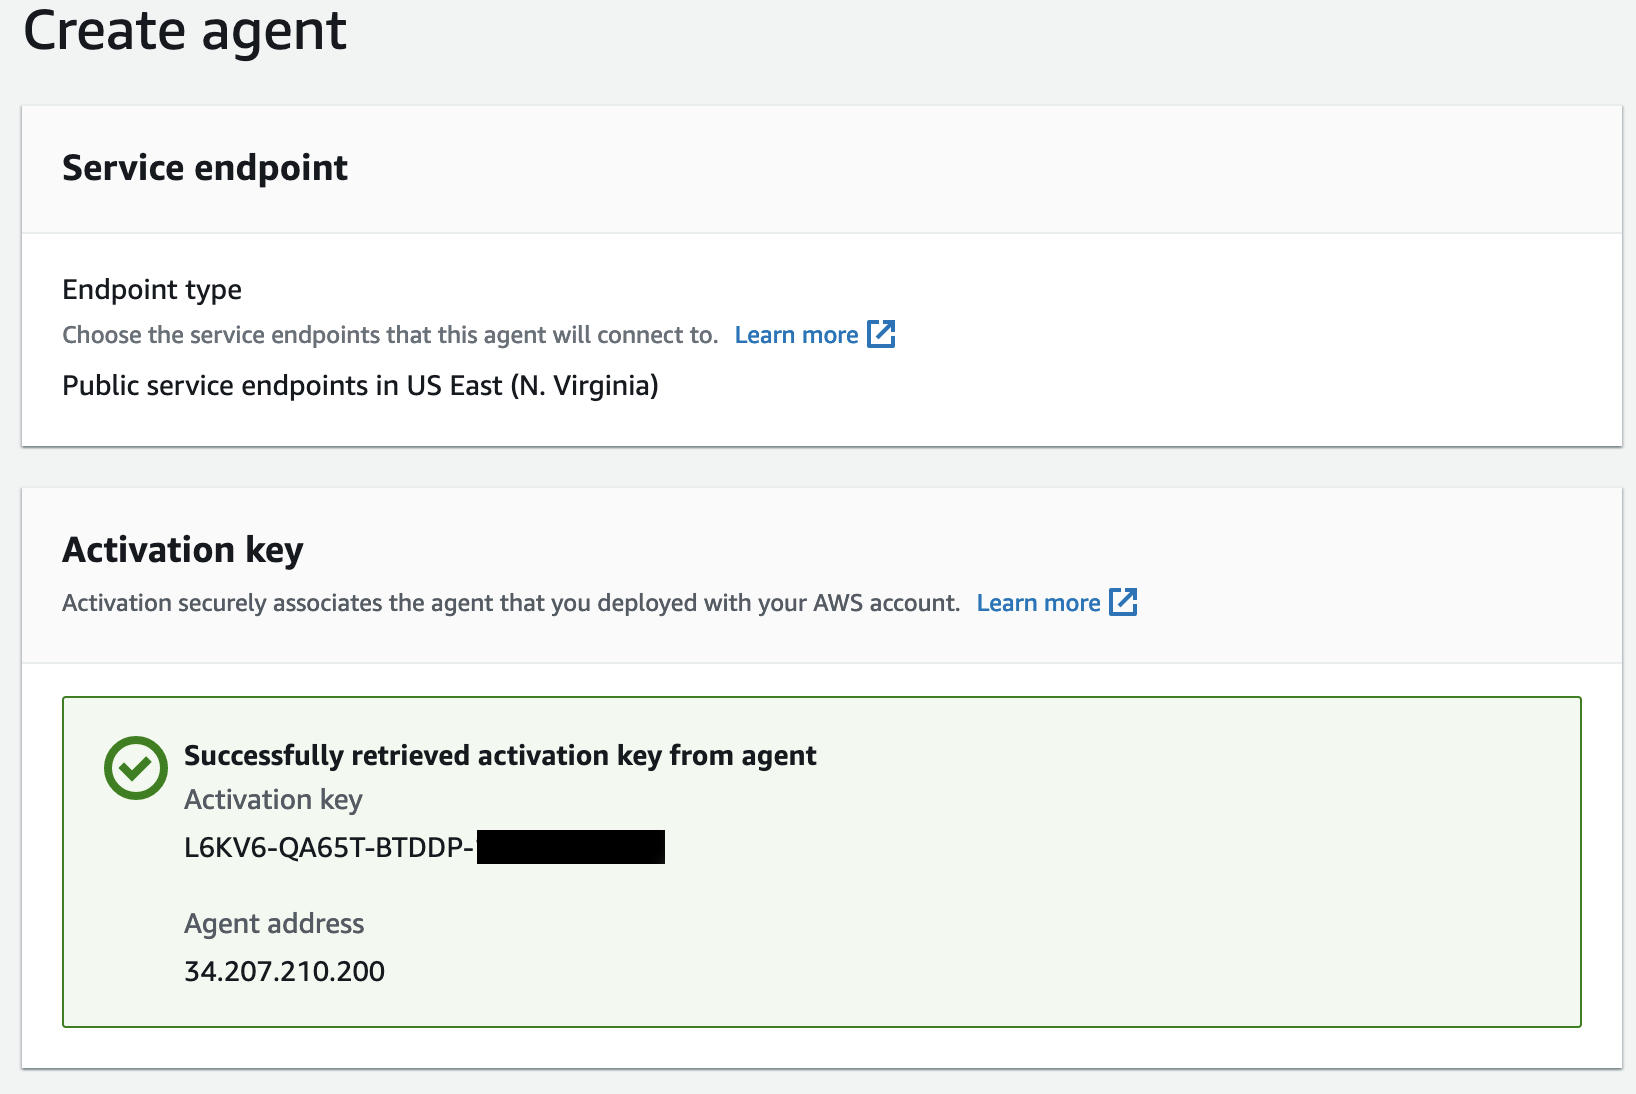
Service endpoint: Public service endpoints in
Activation key: Automatically get the activation key from your agent
Paste the public IP of your EC2 instance into the "Agent address" field and click "Get key"
You should see that the activation was successful, with details of your key and agent address
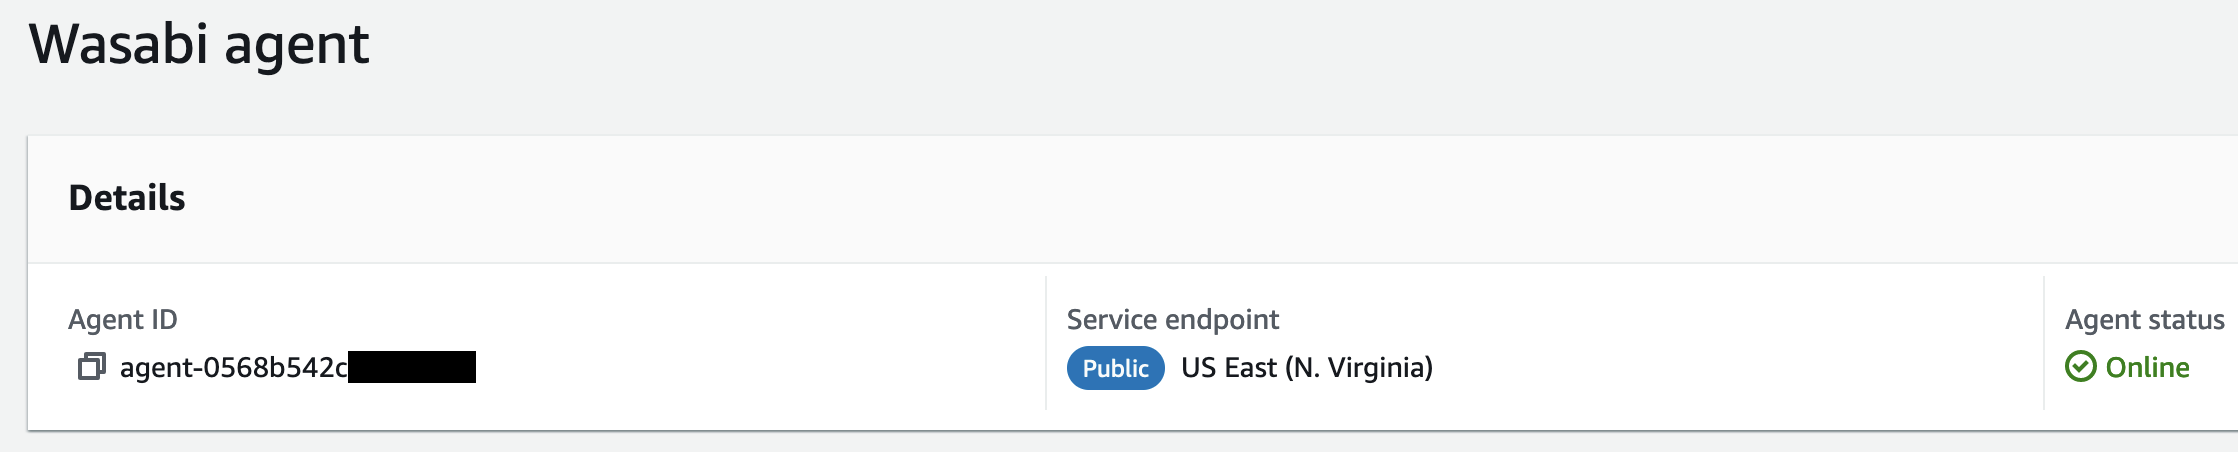
Optionally give your agent a name. Click Create agent.
You should now be brought to a page showing your Agent ID and showing a status of "online"
3. Create a DataSync Task to copy the data
Go to DataSync, then Tasks, then Create task
Configure source location
Source location options: Create a new location
Location type: Amazon S3
Region:
S3 bucket:
Folder: Optional to add a specific prefix you wish to transfer (leave blank for entire bucket)
IAM role: You can choose to either use a preexisting role from your AWS account or have the console autogenerate a new role for you for this specific task (recommended). If you choose to auto-generate a role, it will have the correct permissions and trust policy assigned to allow the DataSync service to assume the role and access the selected source AWS S3 bucket.
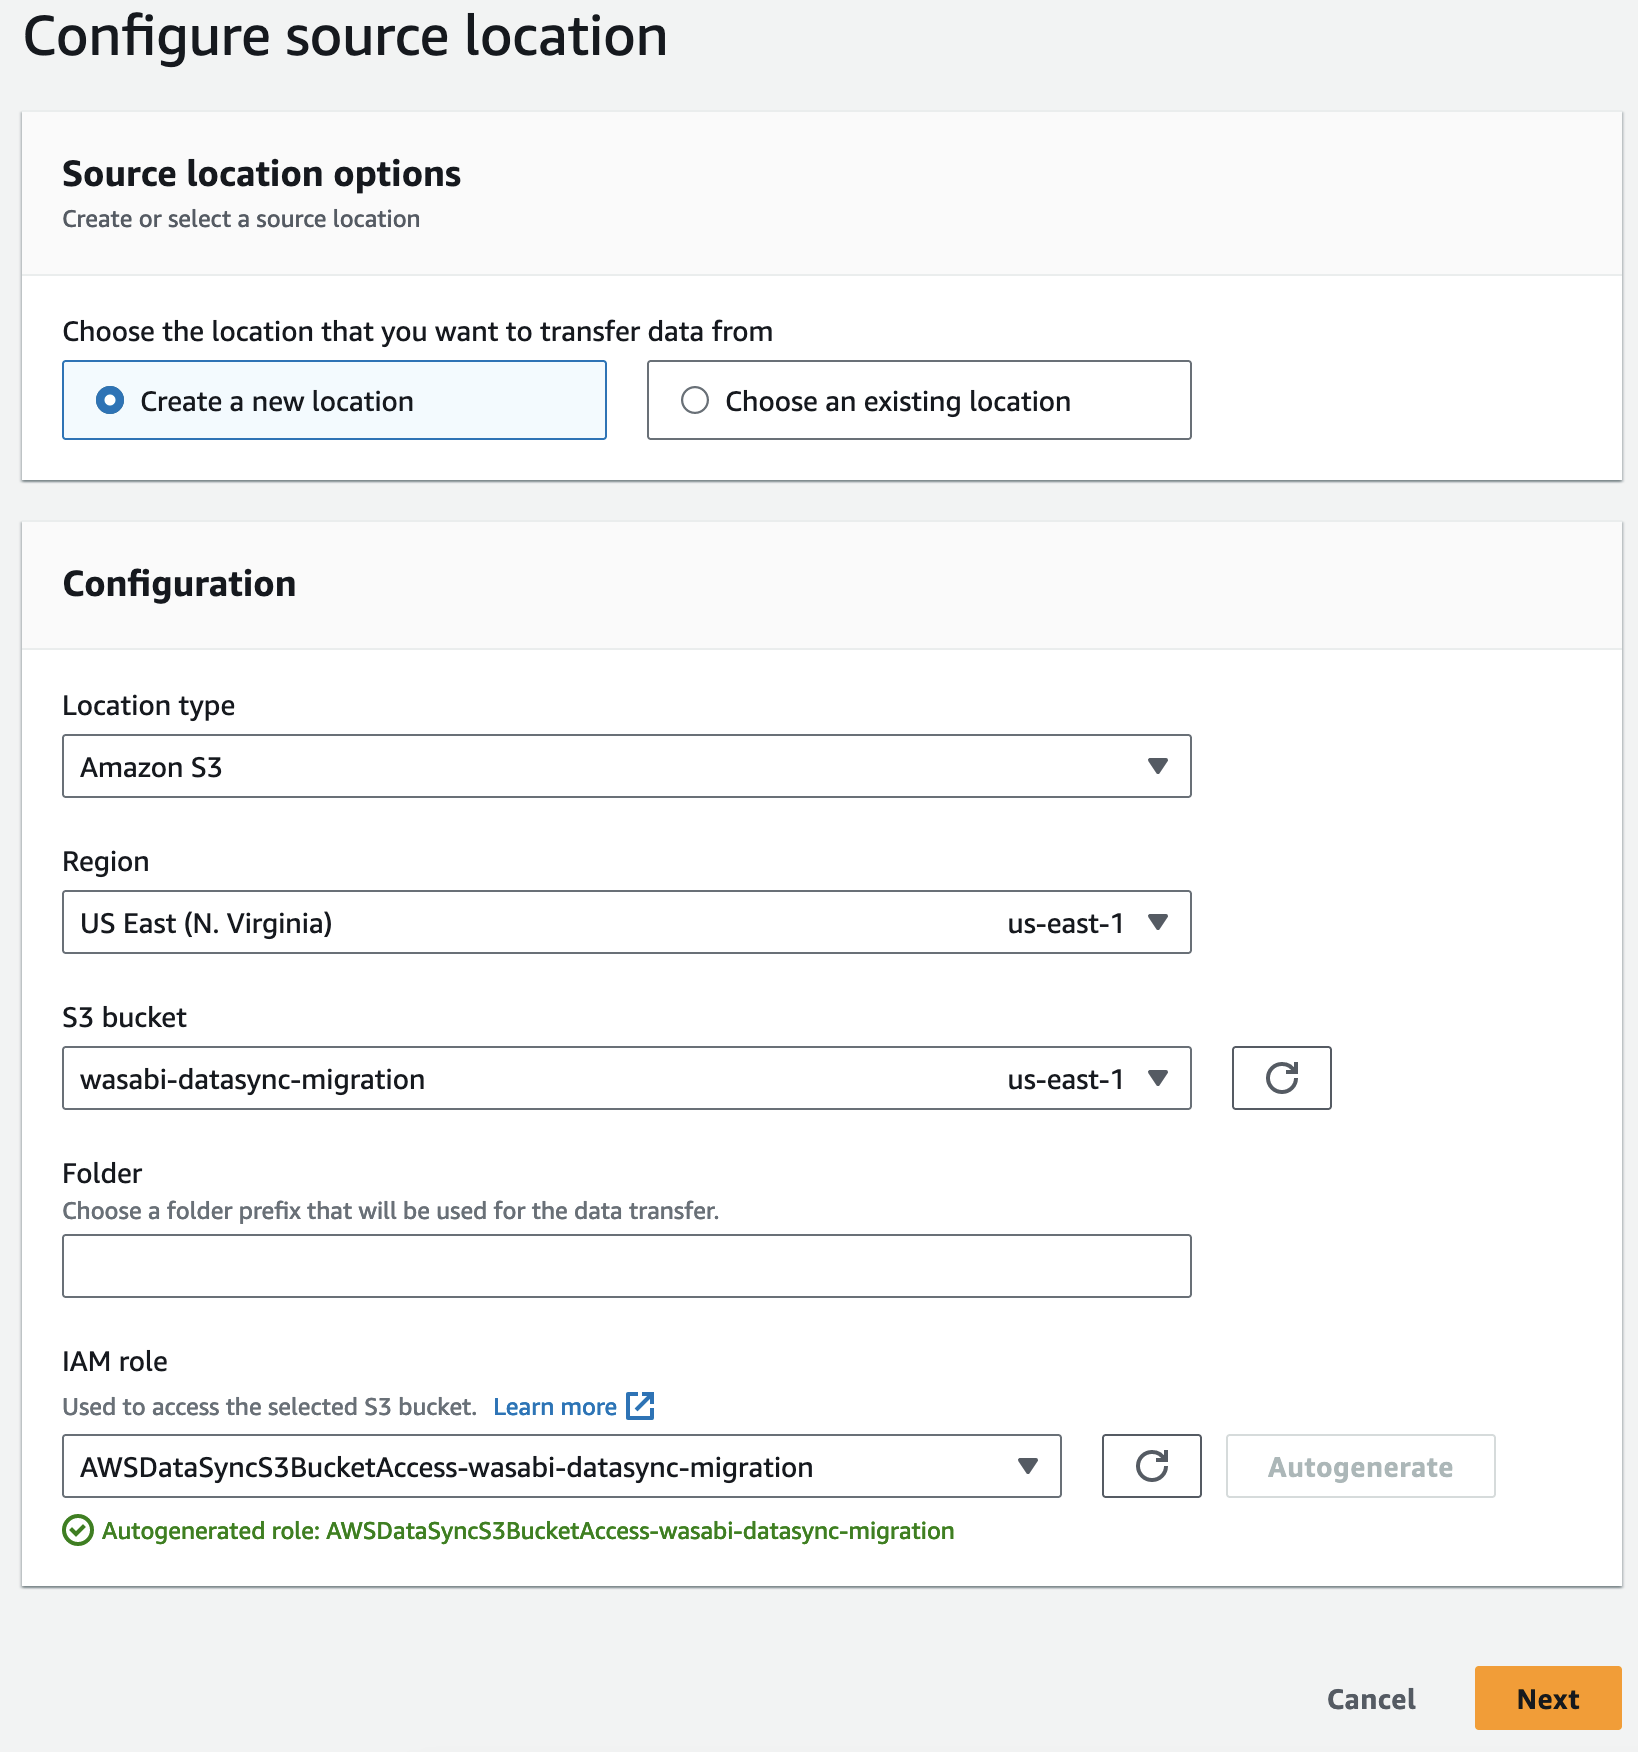
Click Next.
Configure destination location
Create a new location
Location type: Object storage
Agents: Select your agent, which we previously created and activated
Server: The endpoint URL for your Wasabi S3 bucket region
Bucket name: The name of your Wasabi S3 bucket you wish to transfer the data to
Folder: (Optional)
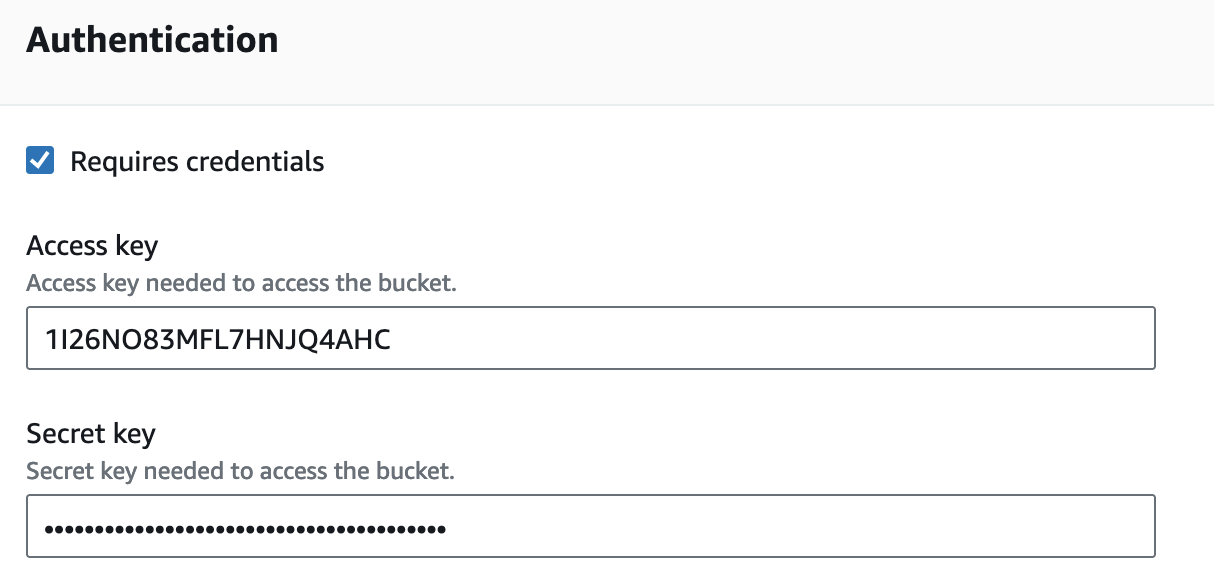
Authentication: Enter the access key and secret key for your Wasabi user that we generated in Step 5 under Configuring your Wasabi account of this KB. This key pair set will be used to authenticate the Wasabi-side requests of this operation.
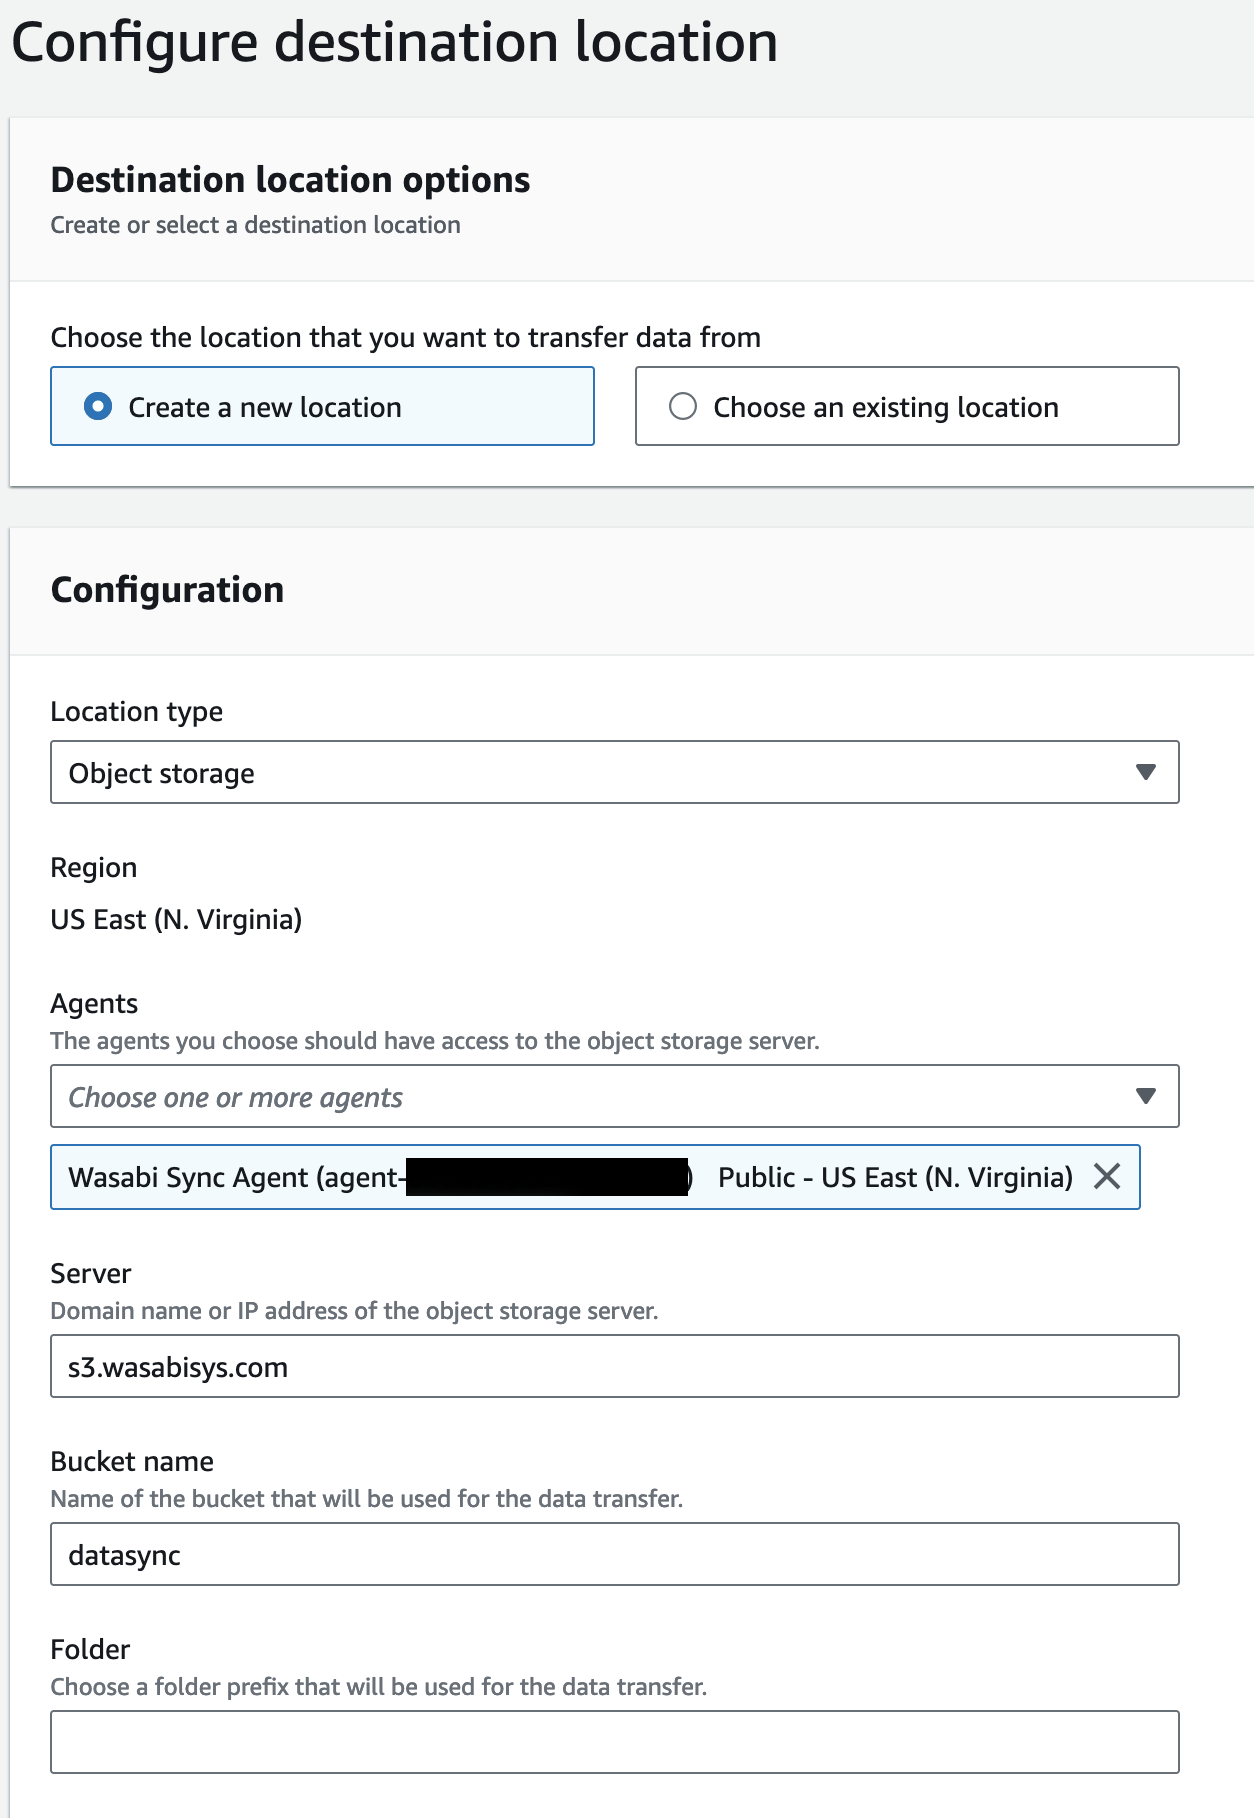
Click Next.
Configure settings
Task name: Give the task a name
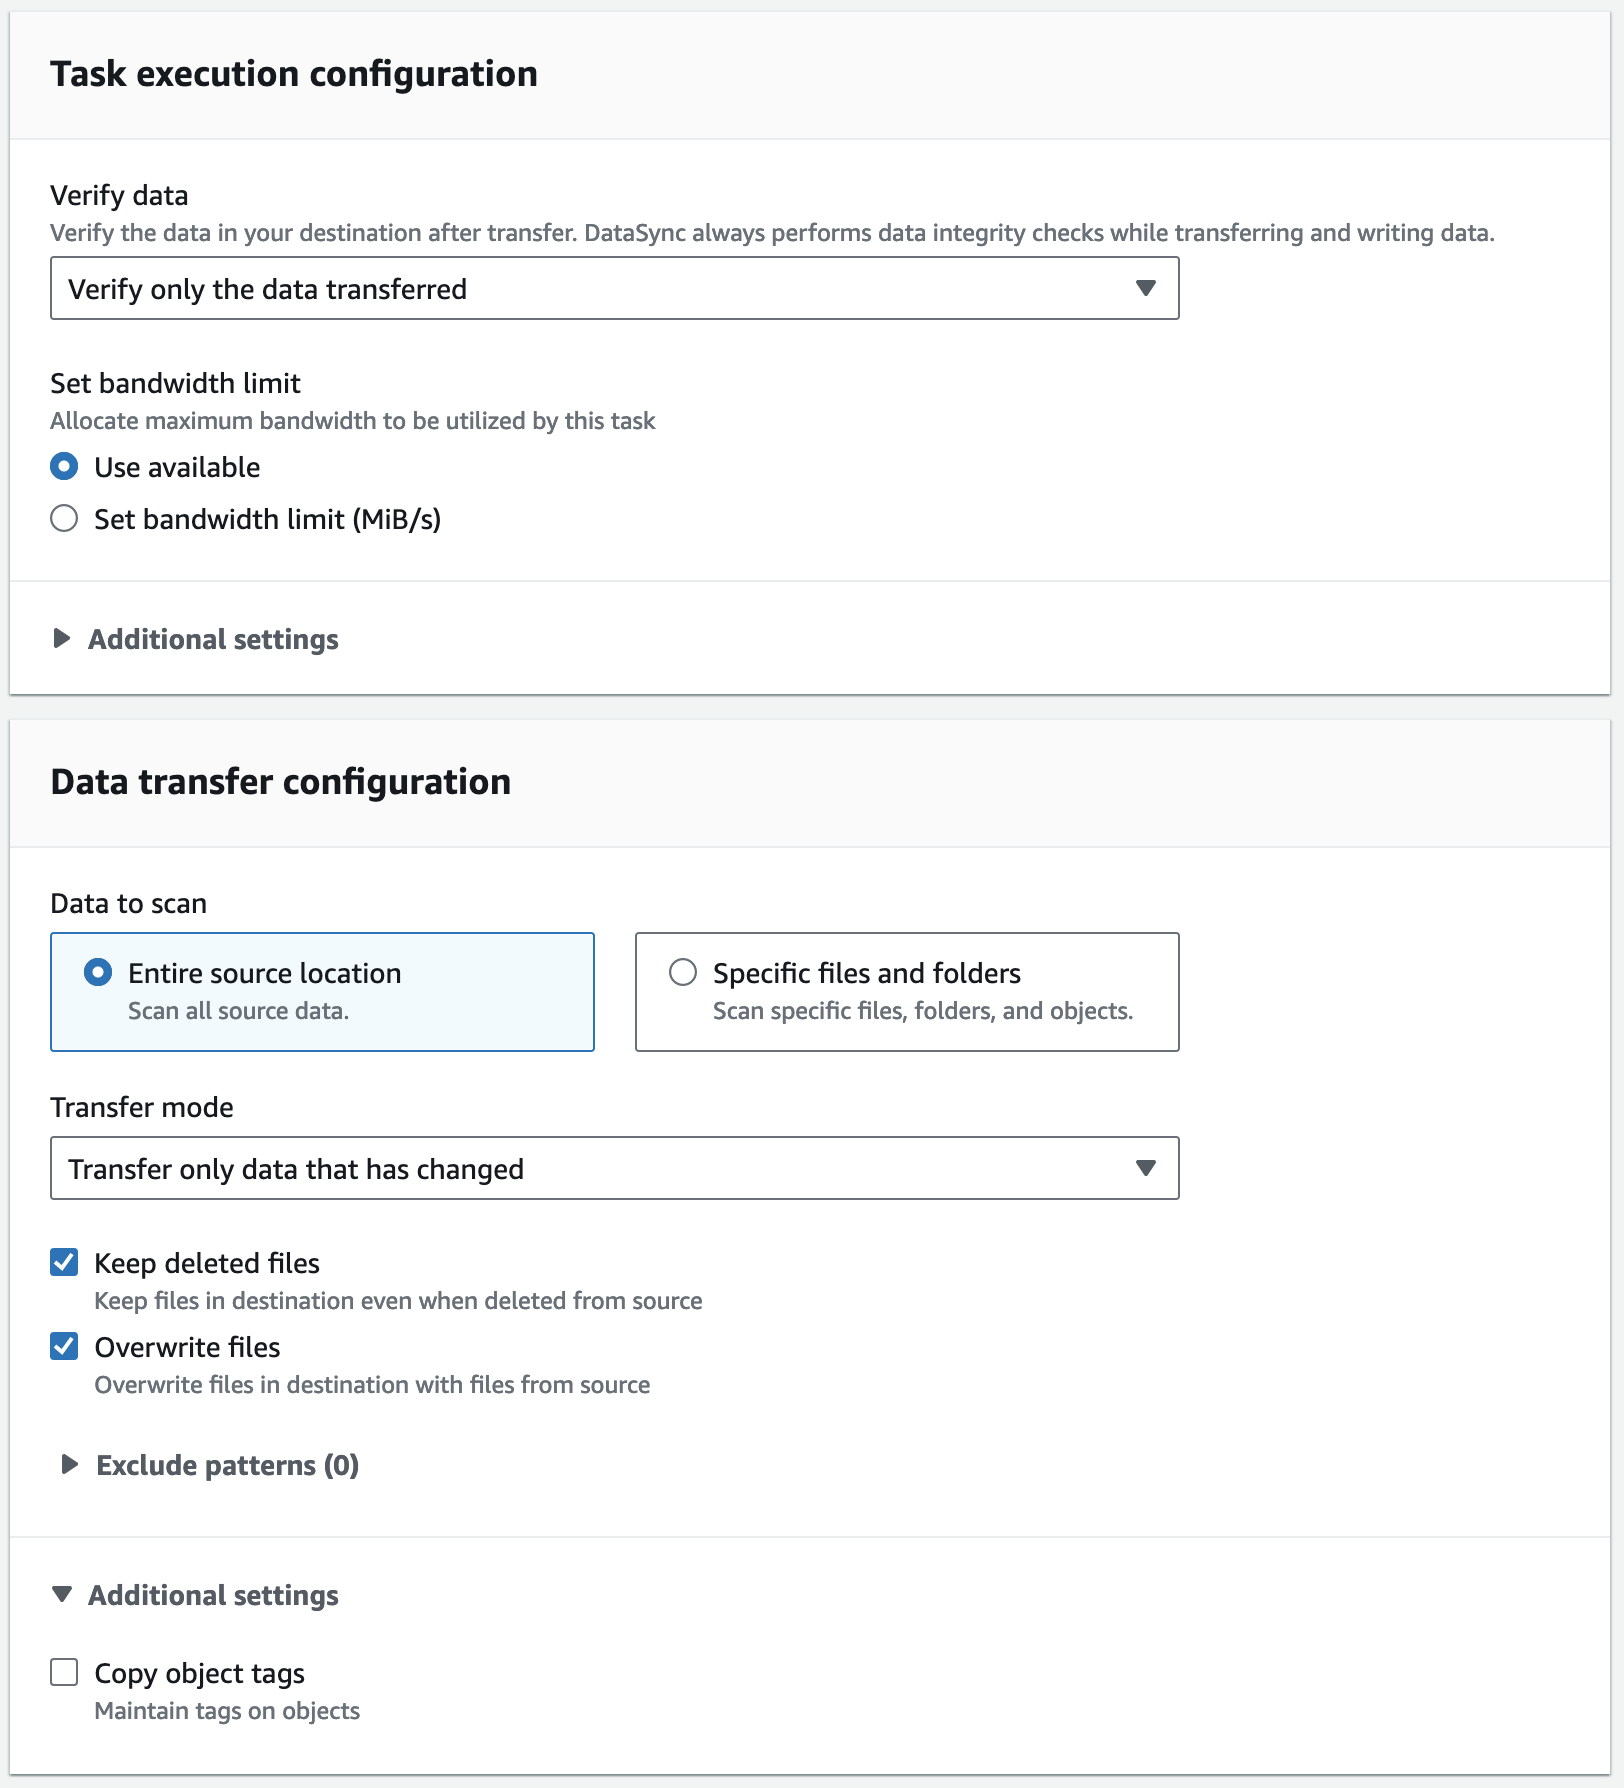
Verify data: Choose whether you want to verify all data, only data transferred, or all data in destination
Set bandwidth limit: Use available
Data transfer configuration: Choose whether to scan all source data or only specific source locations
Transfer mode: Choose whether to transfer only data that has changed (or does not exist in the destination), or all data. If your Wasabi destination bucket does not have any data in it, or contains no data from the S3 bucket, you can select "transfer only data that has changed"
Select whether or not to keep/overwrite files
Additional settings: Click the dropdown for additional setting and uncheck "Copy object tags" as leaving this enabled will cause the verification process to produce an error as Wasabi does currently (as of this article) support object tagging
Schedule: Choose whether to schedule this as an on-going task or not (on demand)
Tags: Do not enable tagging, as Wasabi currently (as of this article) does not support the object tagging feature
Logging: If you wish to capture logs of the DataSync service, you may choose to autogenerate a new logging group for CloudWatch

Click Next.
Review all settings configured. If the task looks as you are expecting, click "Create task"
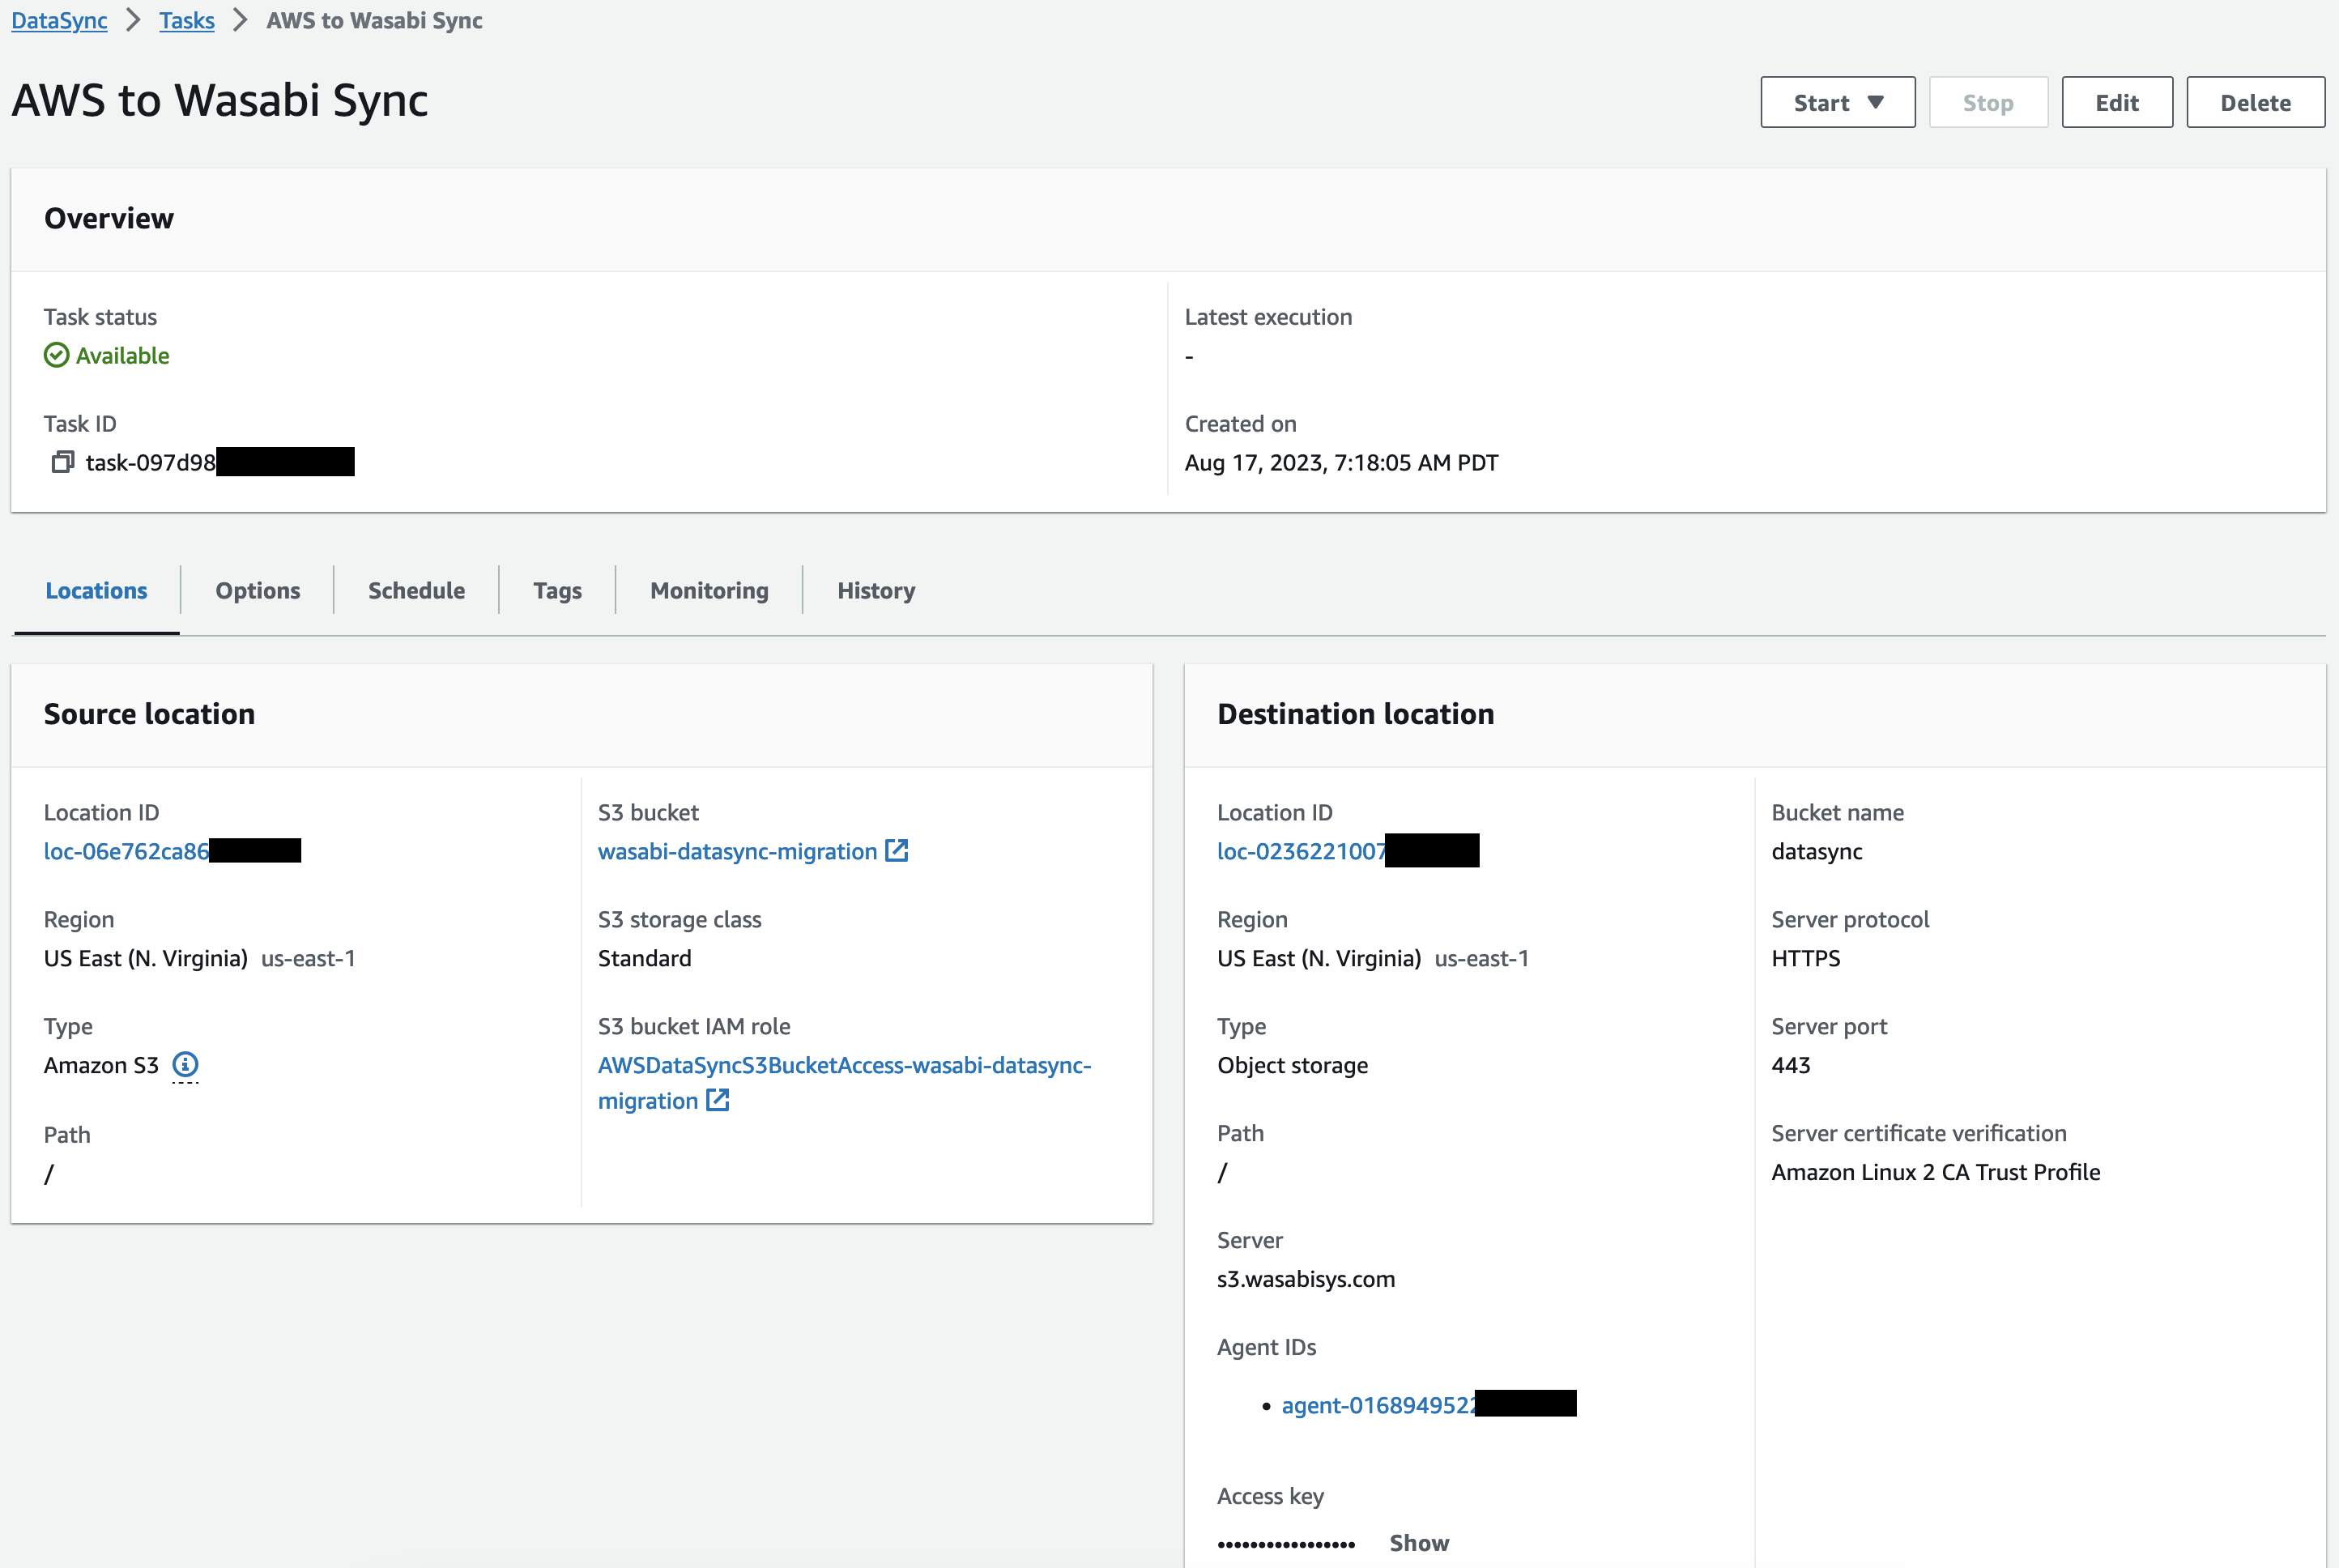
At this point, the task has been created and is ready to be run. If you experienced an error while creating the task, please review the error as described by the AWS console and fix accordingly. Once the task has been created successfully, you will be able to view all of the details of the task, along with the ability to run the task.
4. Run the task
Click Start, then Start with defaults
Once started, the task status will change to "Running...". You can go to DataSync > Task history to view the current status of your DataSync task's execution. The execution status will first start off as "Launching..." before moving to a "Transferring..." state.
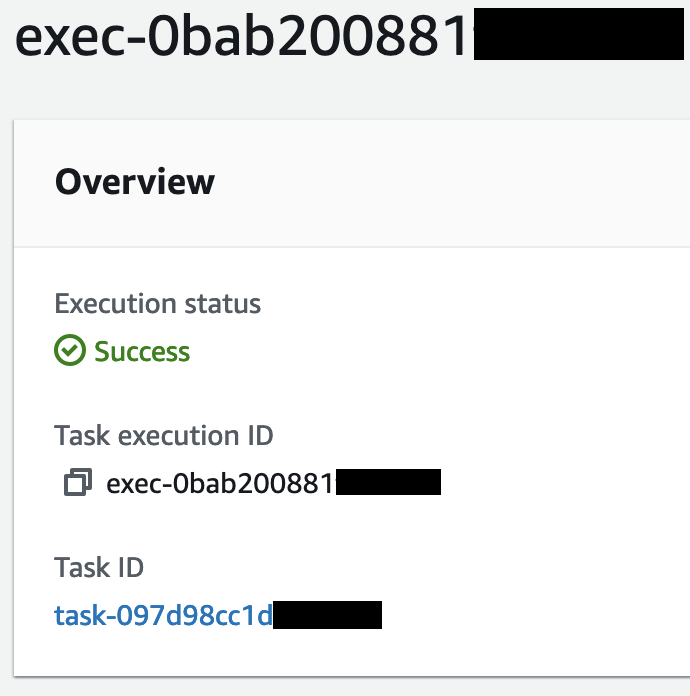
Once execution completes and the task has finished transferring files to your Wasabi S3 bucket, you should see the execution status is "Success" with a green checkmark.
At this point, you can check your Wasabi bucket to verify that all your data was successfully transferred from your AWS S3 bucket.
If your execution status is "Error", please review the error message/logs and adjust your task accordingly.
Final Steps
Now that you have successfully transferred data from your AWS S3 bucket to your Wasabi S3 bucket using AWS DataSync, please ensure that you stop/terminate your DataSync Agent EC2 instance so that you no longer incur any charges for this service.
If you run into any issues following this guide, please reach out to our Support Team at support@wasabi.com