Acronis Cyber Protect Cloud represents an all-in-one cyber protection solution that integrates backup and recovery, disaster recovery, malware prevention, security controls, remote assistance, monitoring, and reporting. Wasabi can now be used as a destination for the Cyber Protect backups.
Requirements
An active Acronis Cyber Protect Cloud account to access Cyber Protection Service.
If you are an Acronis partner, create accounts for your customers.
If you are a customer of an Acronis partner, you will receive the user account from your partner.
Have Cyber Administrator, User, or Company Administrator access.
A Wasabi Cloud Storage account.
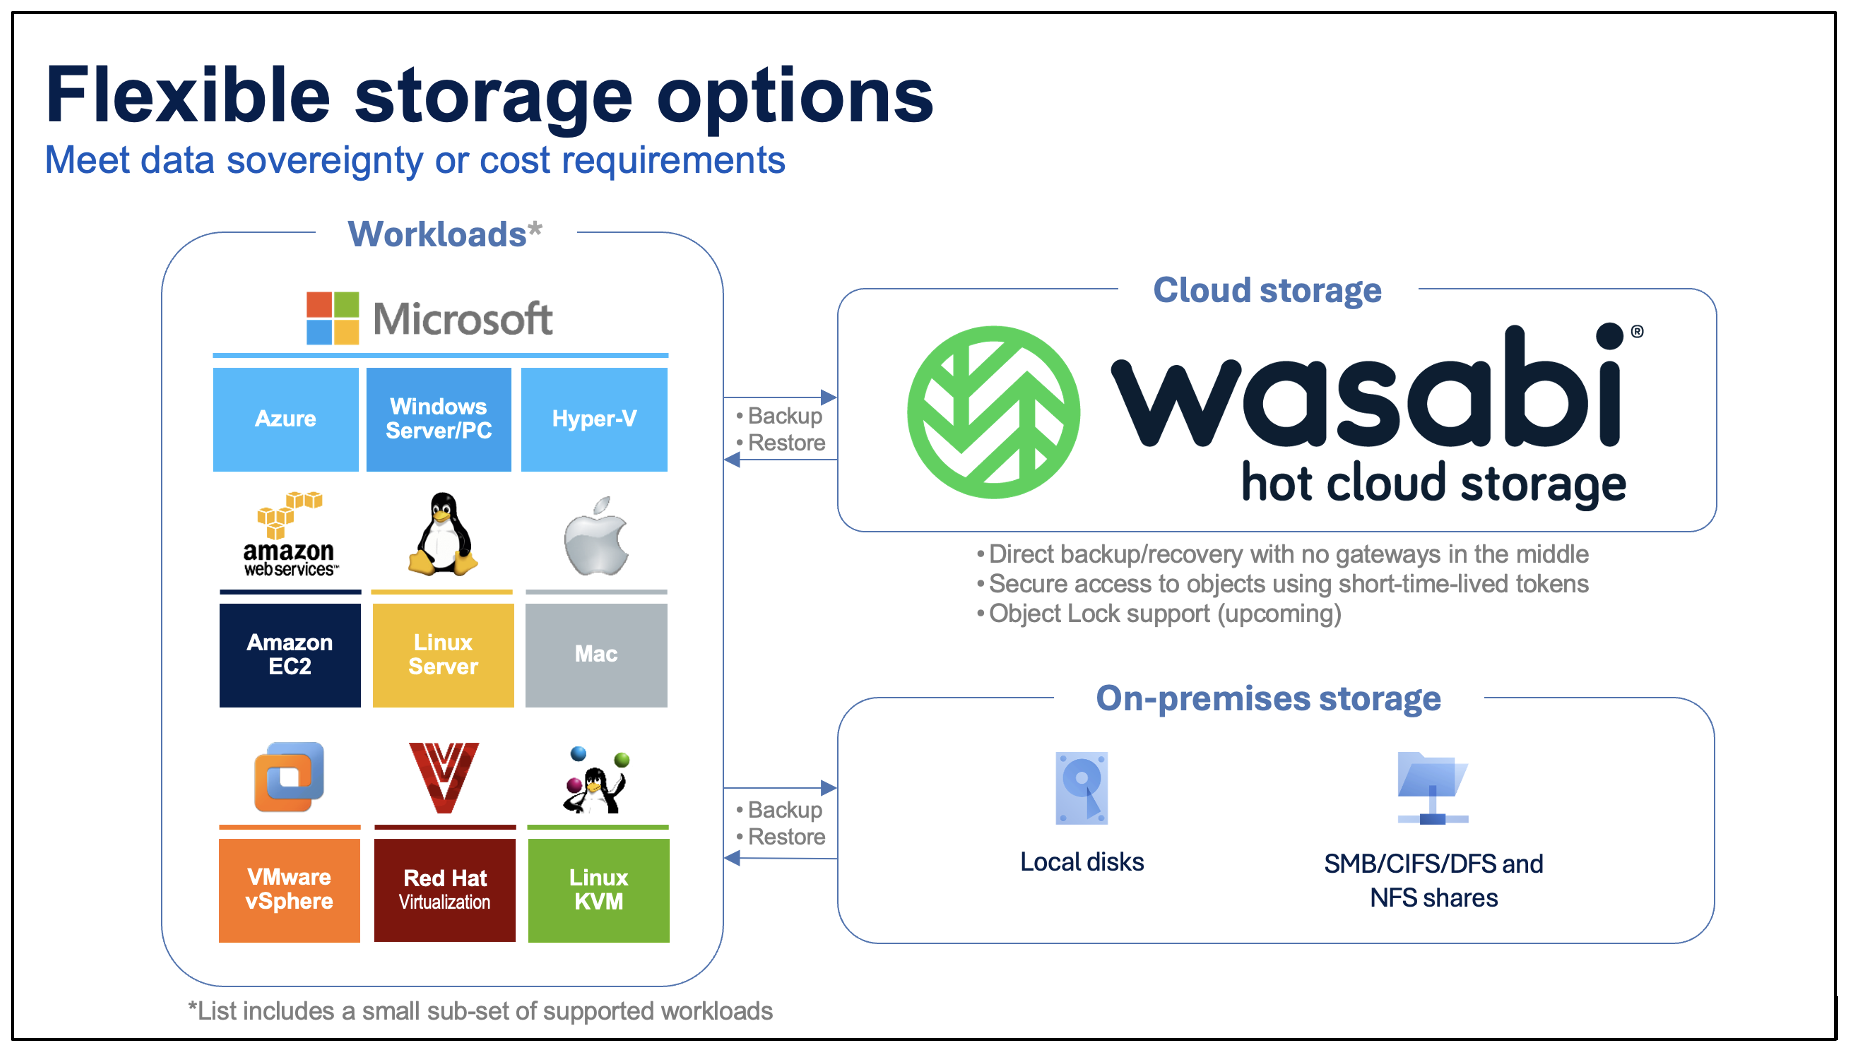
Reference Architecture
Access Requirements Needed to Backup to Wasabi
To define a Wasabi bucket as a backup location, there are a few requirements that need to be considered.
A Wasabi Bucket needs to be created.
A user with relevant policies needs to be created.
For security purposes, root user access keys cannot be used to define a backup location in Acronis. A user with relevant policies should be created. The credentials of this user will be used to define the Backup Location in Acronis.
The sections below outline the steps to fulfill the access requirements needed to create a Wasabi backup location in Acronis.
Bucket Creation
Create a bucket. For more information, review Creating a Bucket.
Policy Permissions
Create a policy with the below permissions. For more information, review Creating a Policy.
This policy gives the user the minimum set of permissions to a wide scope of resources.
In the policy, * indicates all resources.
{
        "Version": "2012-10-17",
        "Statement": [
        {
        "Effect": "Allow",
        "Action": [
        "s3:ListAllMyBuckets",
        "s3:GetBucketLocation",
        "s3:GetBucketObjectLockConfiguration",
        "s3:GetBucketVersioning"
        ],
        "Resource": "*"
        },
        {
        "Effect": "Allow",
        "Action": [
        "s3:ListBucket",
        "s3:ListBucketVersions"
        ],
        "Resource": "*"
        },
        {
        "Effect": "Allow",
        "Action": [
        "iam:CreateRole",
        "iam:AttachRolePolicy",
        "sts:GetCallerIdentity",
        "sts:AssumeRole"
        ],
        "Resource": "*"
        },
        {
        "Effect": "Allow",
        "Action": [
        "s3:PutObject",
        "s3:GetObject",
        "s3:DeleteObject",
        "s3:GetObjectVersion",
        "s3:GetObjectRetention",
        "s3:PutObjectRetention"
        ],
        "Resource": "*"
        }
        ]
}Creating a User
Create a user with programmatic (create API key) access and apply the policy created above to the user. For more detail, refer to Creating a User.
Remember to save the access keys, as they will be needed to define the backup location.
Next, create the backup location in Acronis Cyber Protect console.
Creating a Backup Location in Acronis Cyber Protect Console
To create immutable backups with Wasabi, refer to Using Immutability with Acronis Cyber Protect Cloud.
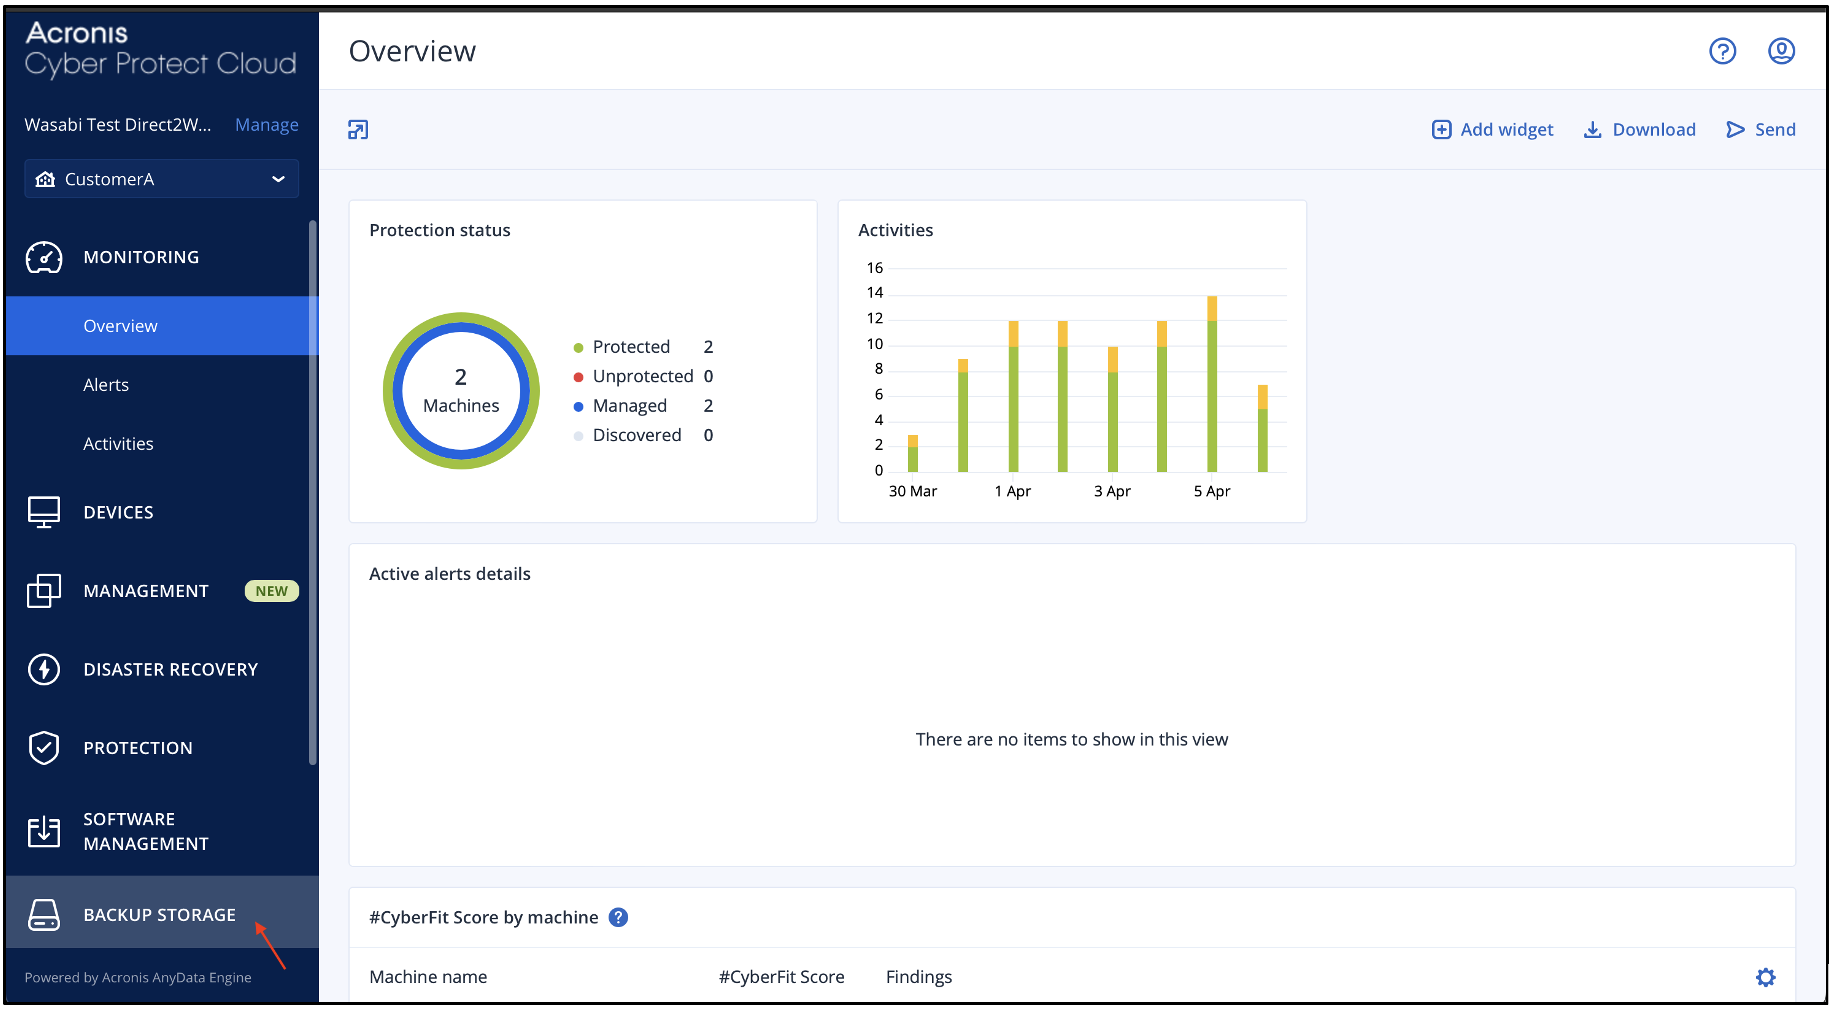
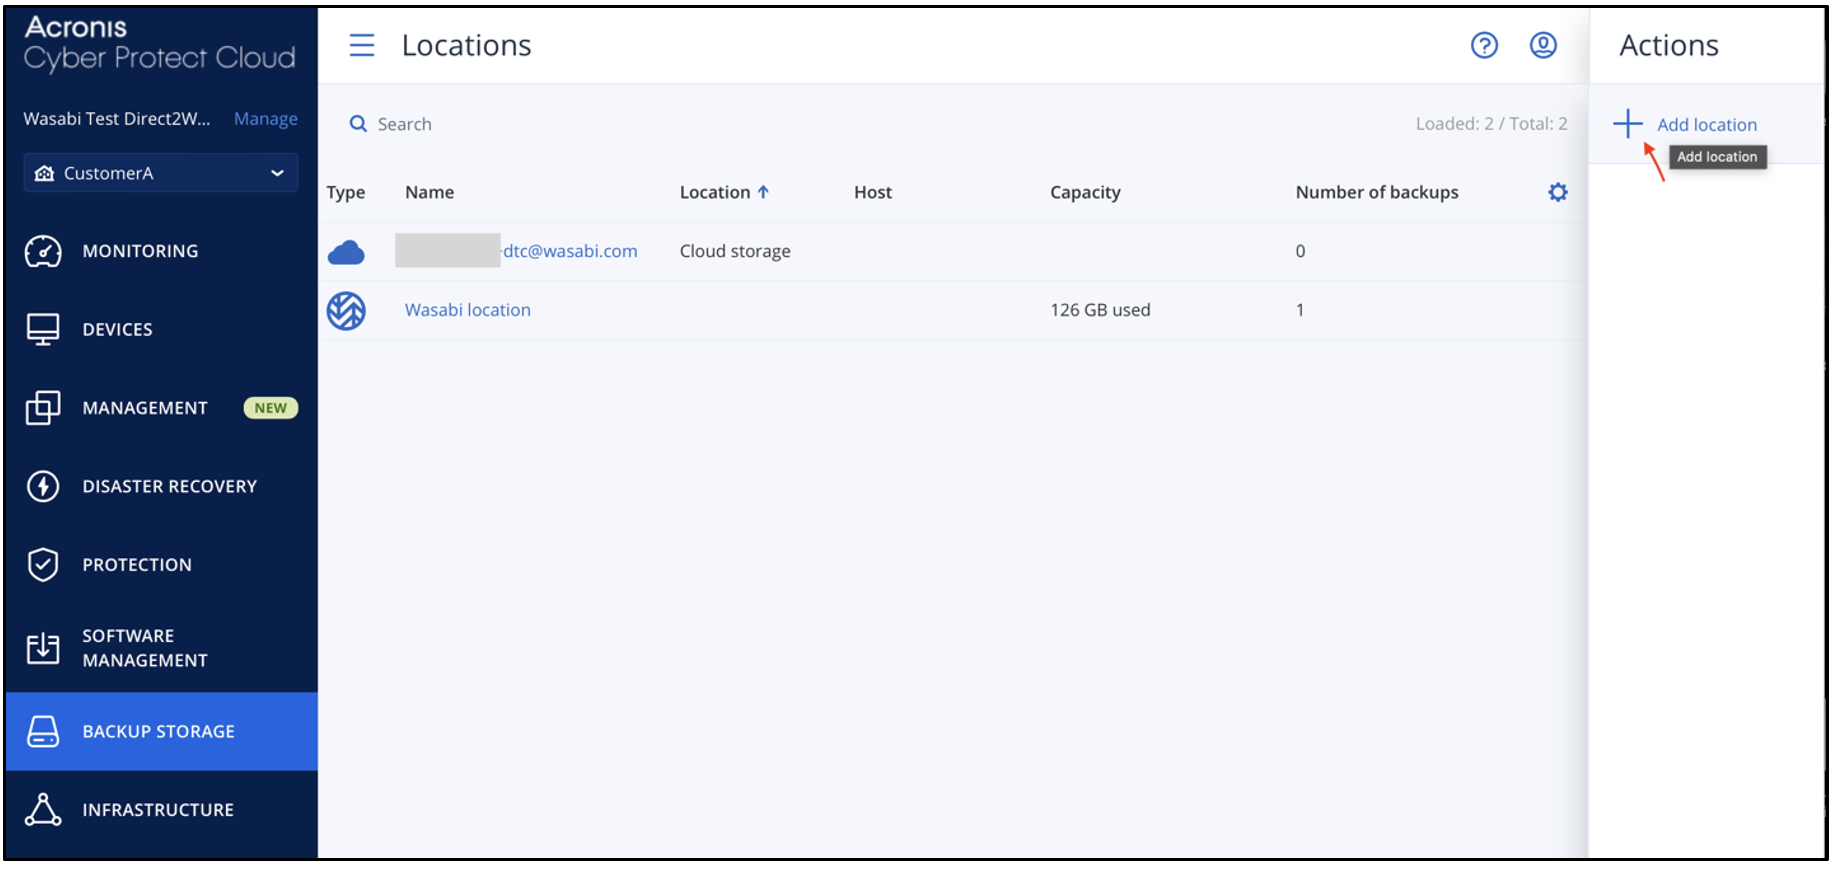
Log in to the Acronis Cyber Protect console. Click Backup Storage.
In the Backup Storage tab, click + Add Location.
Navigate to Public cloud and select S3 compatible from the drop-down menu. Click Connect.
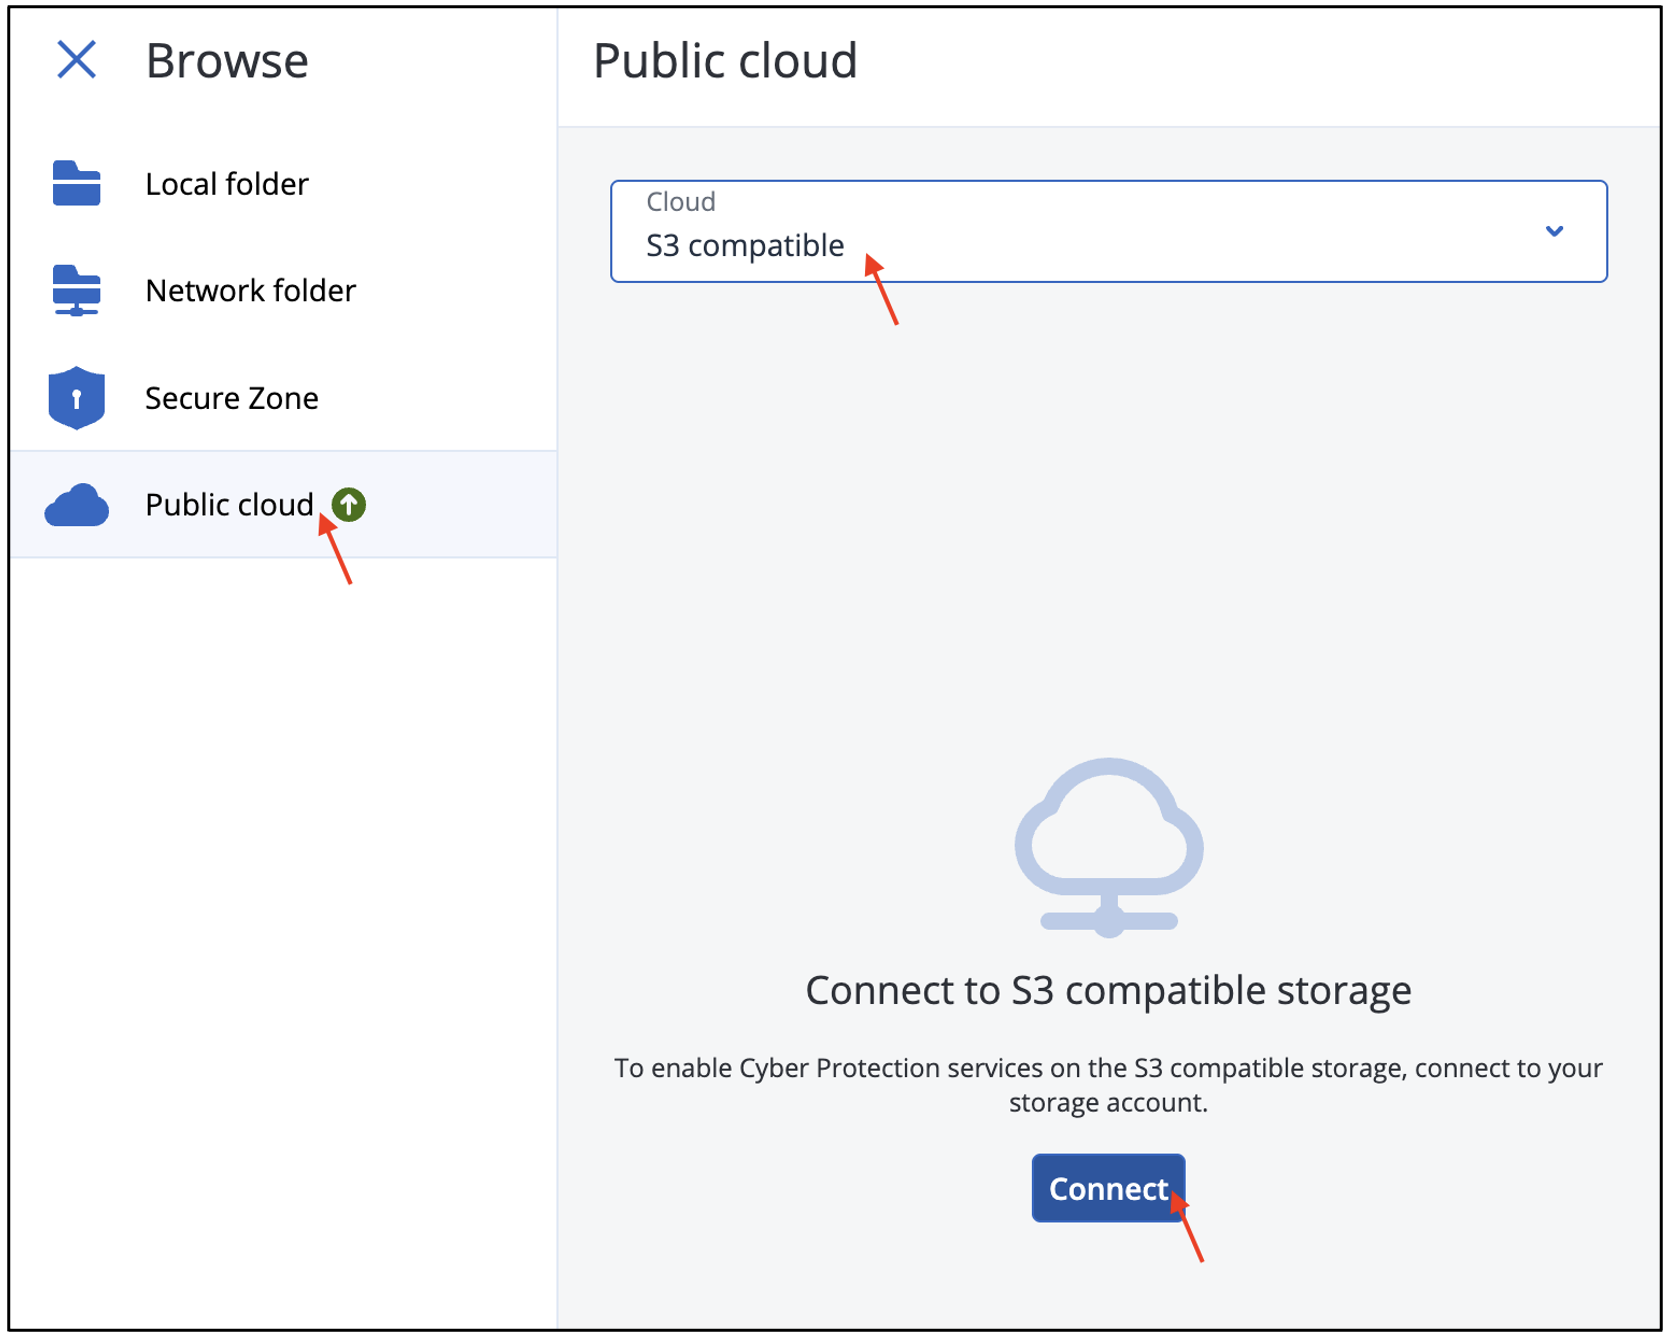
In the S3 compatible connection dialog box, provide the following details and click Connect.
Management agent—Select the desired agent
Endpoint URL—Provide the service URL of the region the bucket is located in
Access key ID—The access key of the Wasabi user created above in Access requirements needed to backup to Wasabi.
Access key secret—The secret access key of the Wasabi user created above in Access requirements needed to backup to Wasabi.
.png)
This configuration example discusses the use of Wasabi's us-central-1 storage region. Use the region your bucket is located in. For a list of regions, see Service URLs for Wasabi's Storage Regions.
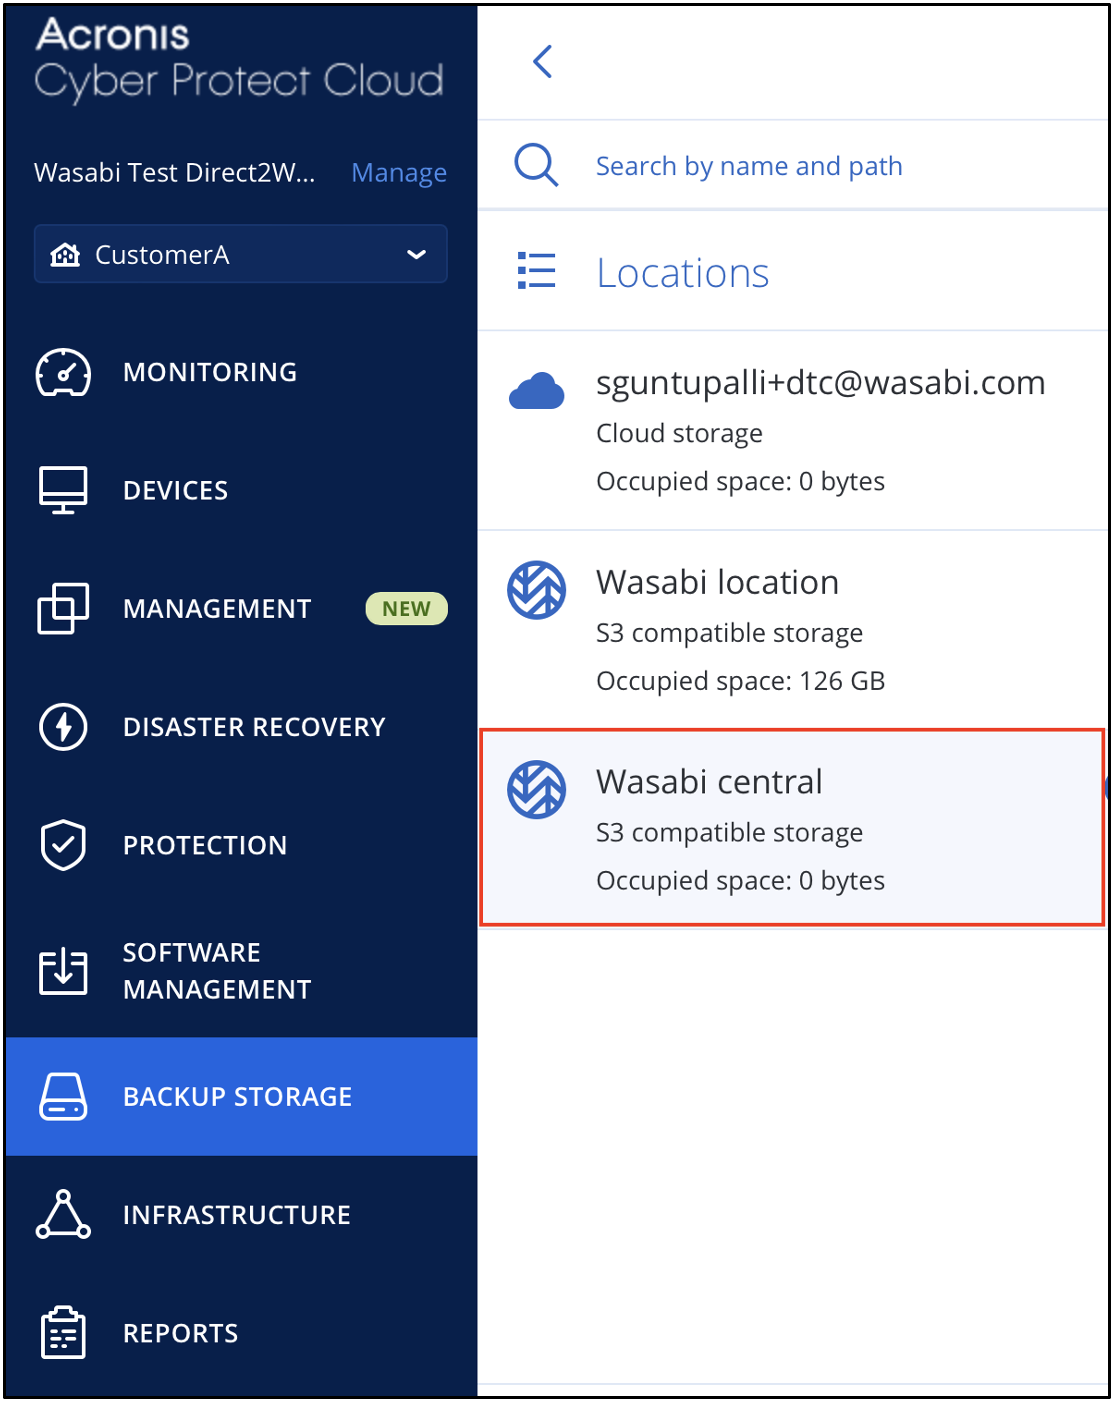
On the next screen, provide a Location name (Wasabi central is used in this example) and select the bucket, created above in Access requirements needed to backup to Wasabi, from the Buckets drop-down menu. You can use the search bar to search for the bucket. Click Add.

The Locations page will display the newly added location.
Next, create a Protection plan with Wasabi storage or edit an existing plan to add Wasabi as the storage destination.
Creating a Protection Plan With a Wasabi Location
Navigate to Devices, then All devices.
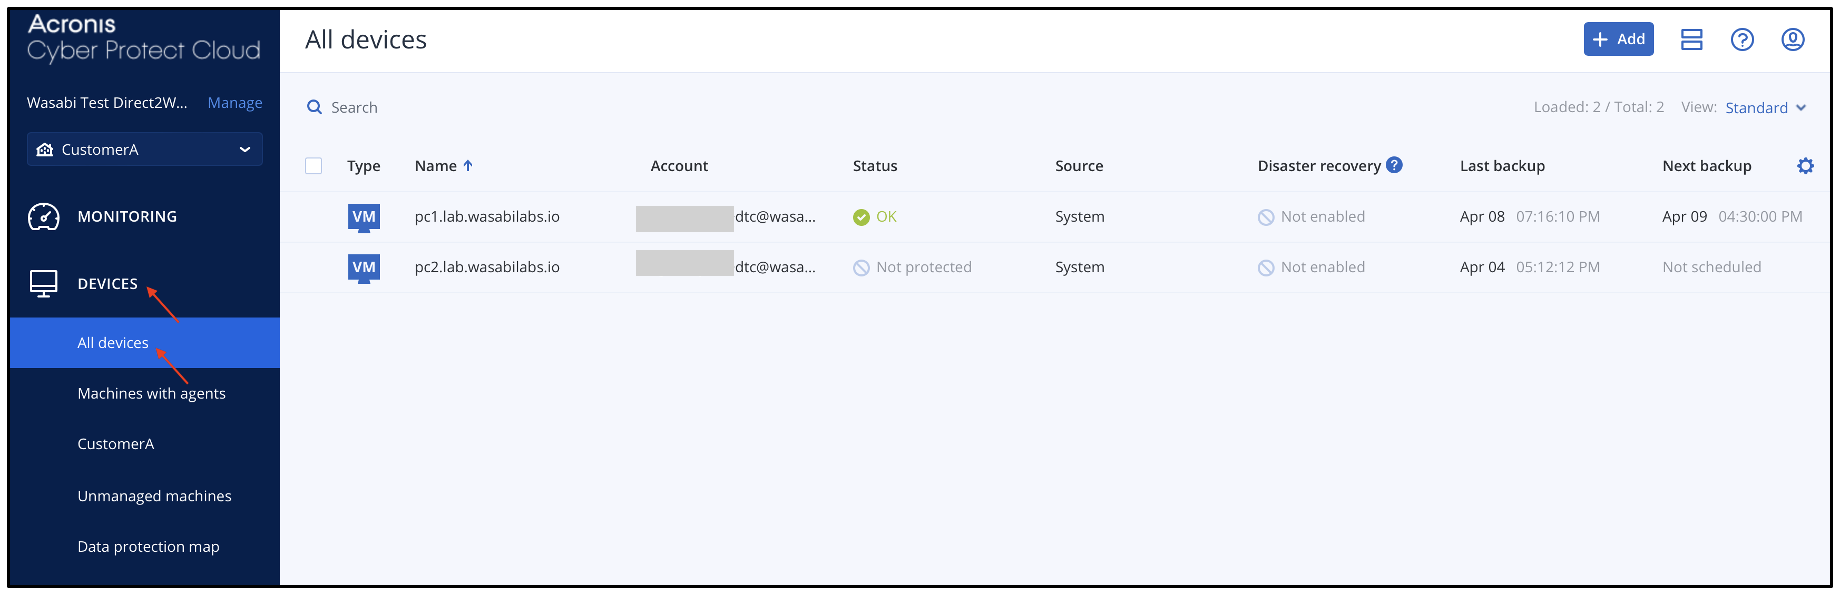
Select the required device. Click Protect.
.png)
Click Create plan to expand the menu. Click Protection.
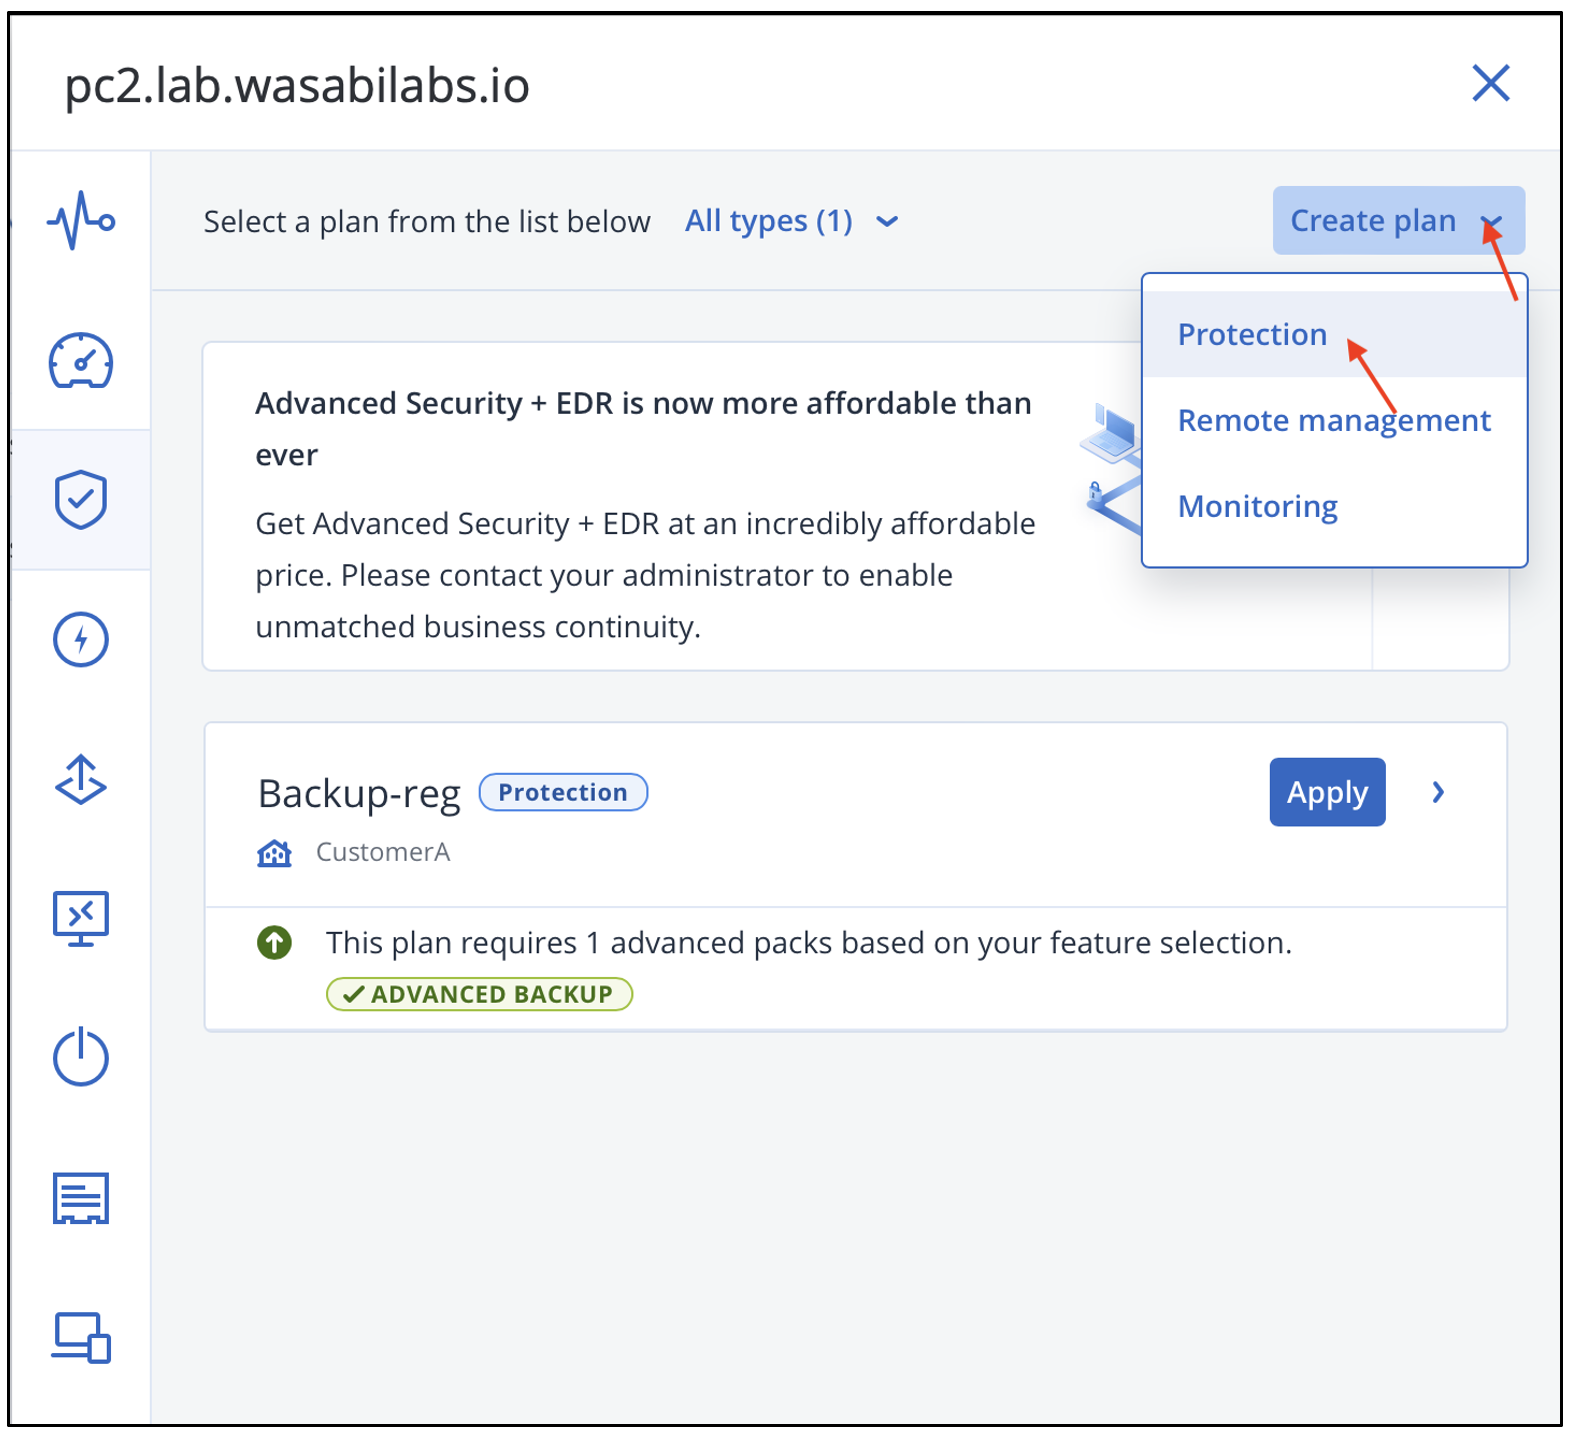
Provide a name for the Backup plan and click Where to backup to configure Wasabi as the backup destination.
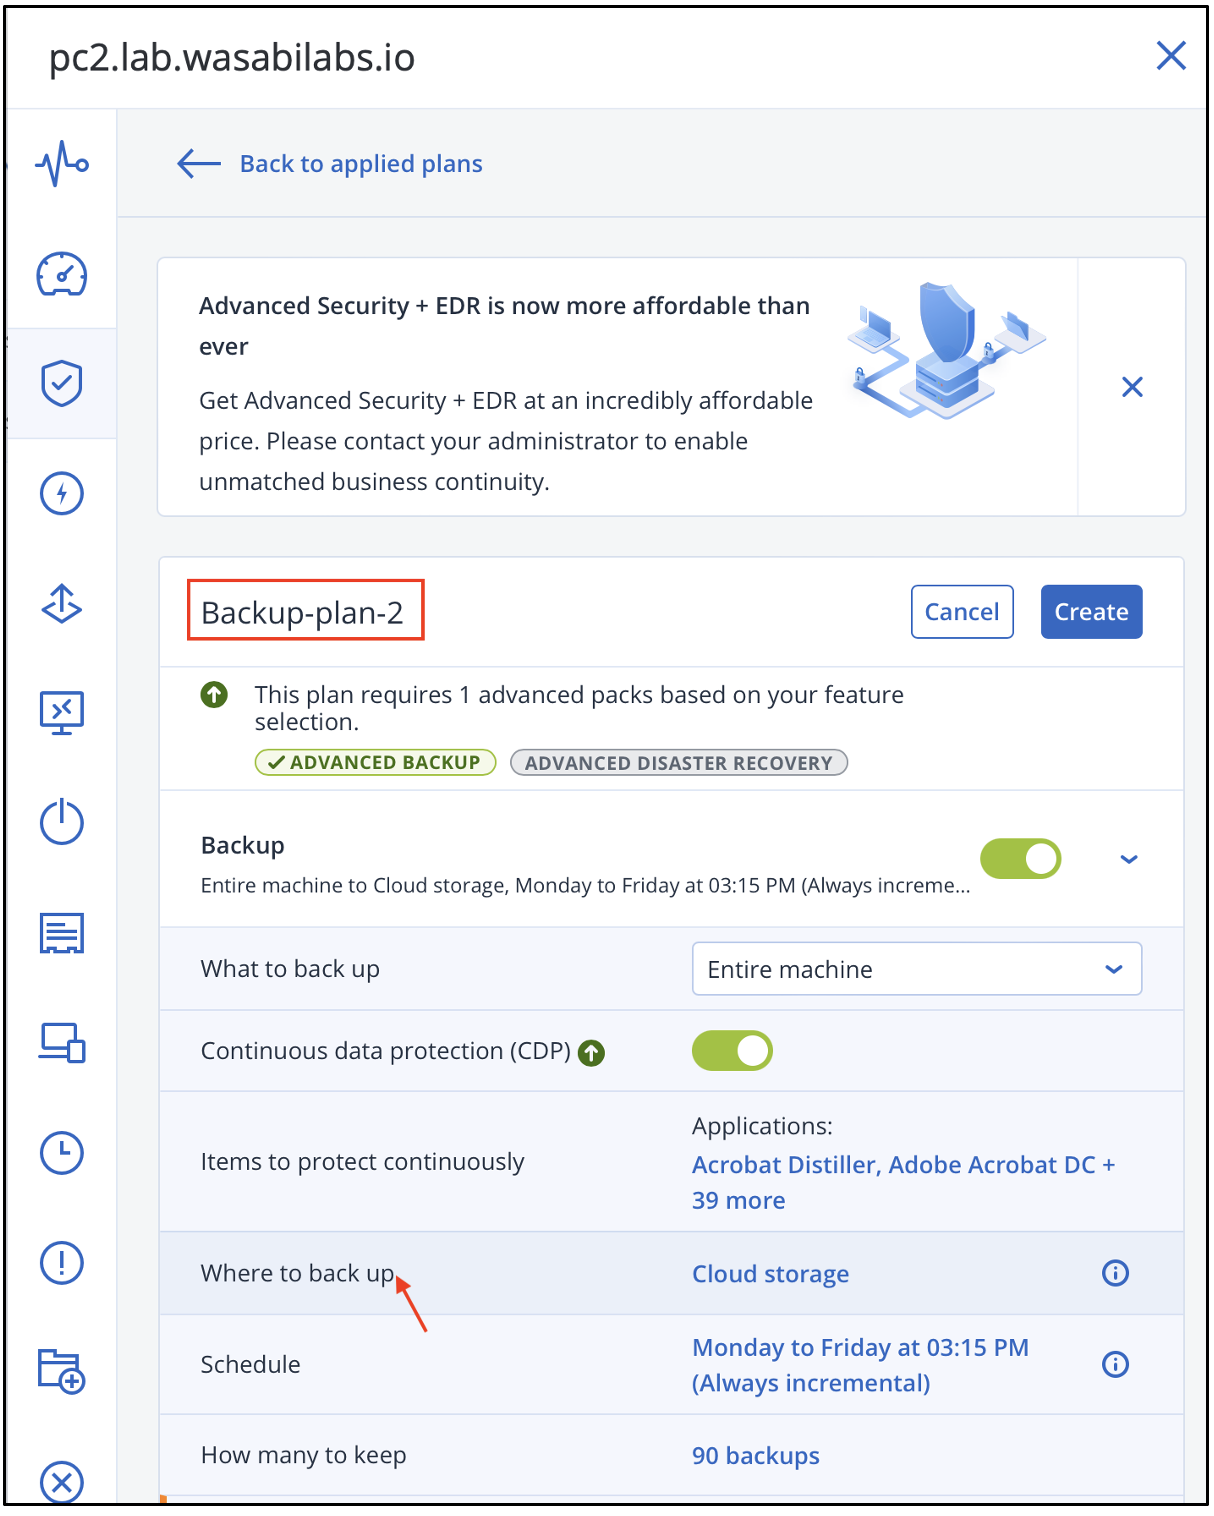
Select the Wasabi location created in Creating a Backup Location in Acronis Cyber Protect Console.
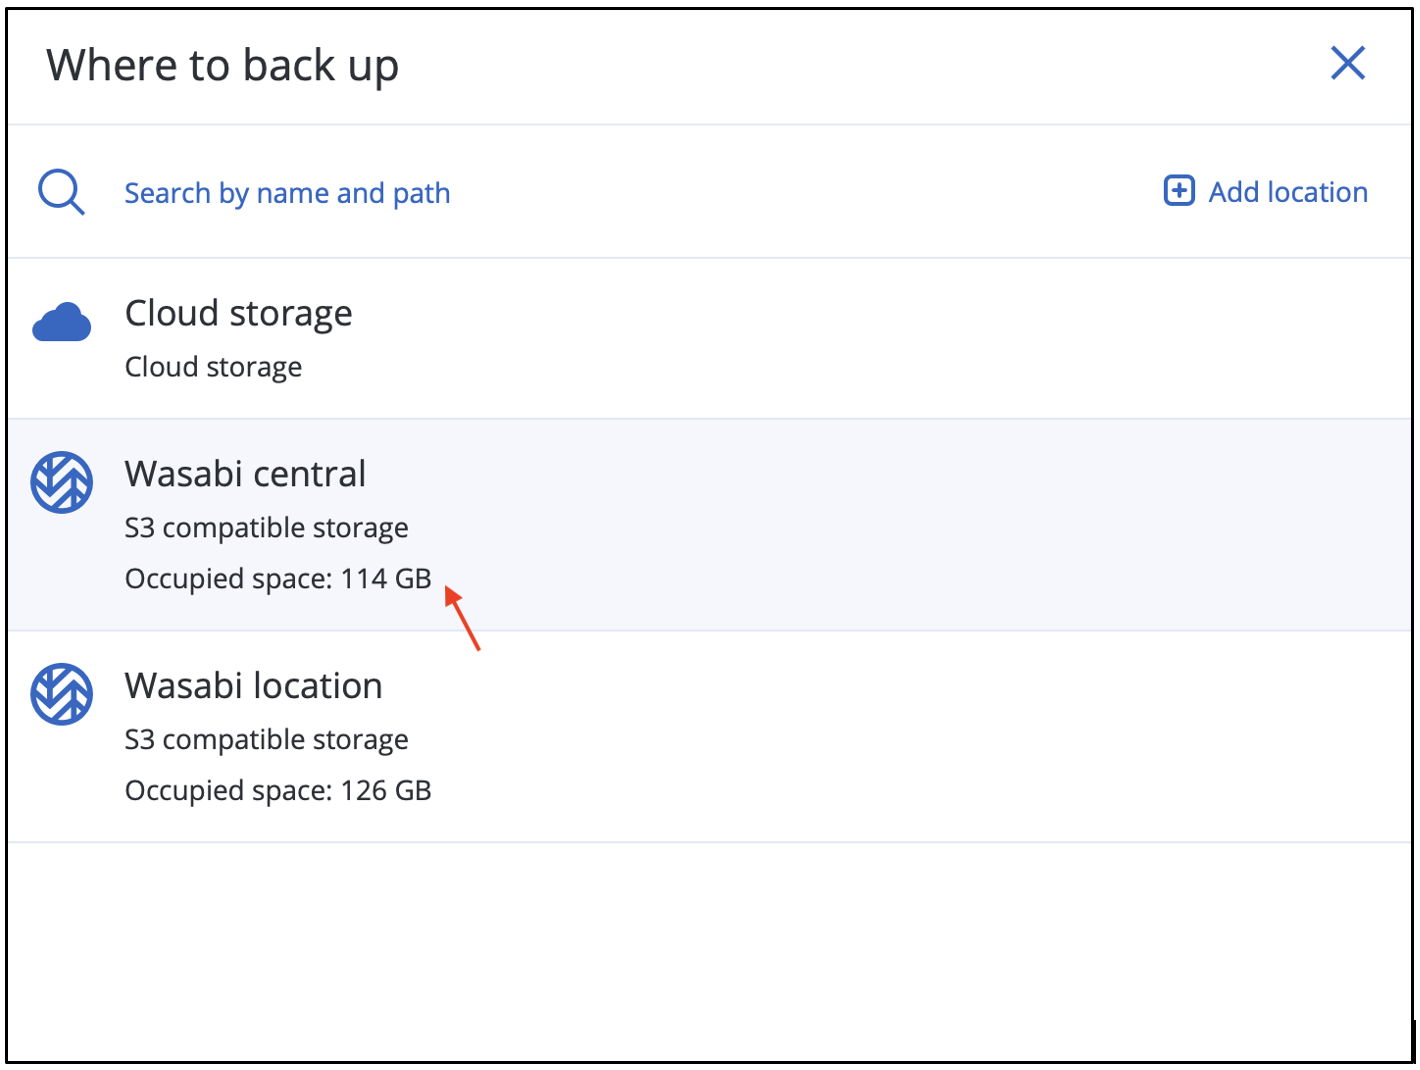
Configure the other fields as desired. Confirm the backup destination is Wasabi storage. Click Create.
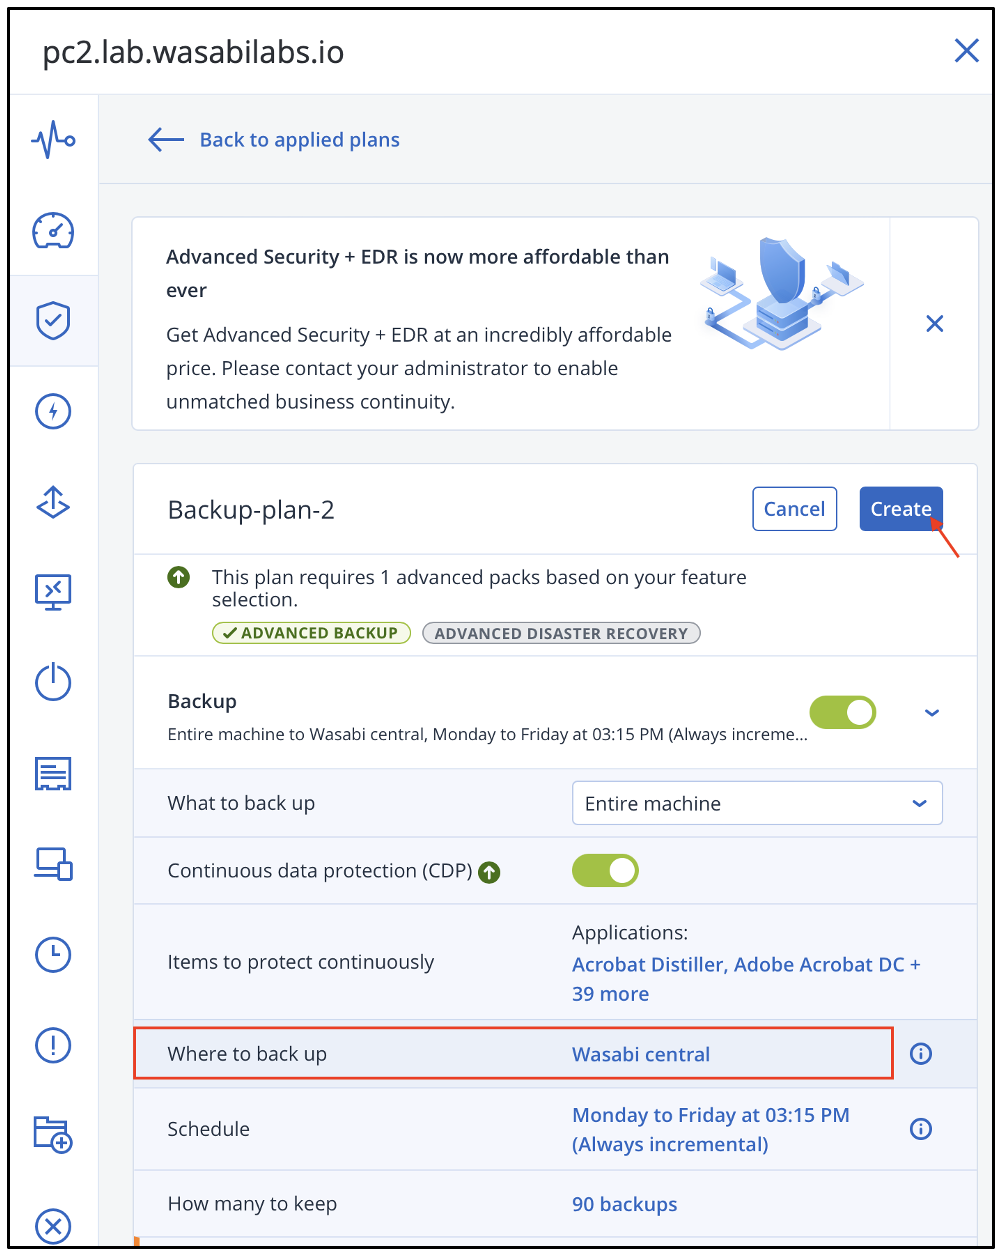
The protection plan with Wasabi storage will be created and assigned to the device.
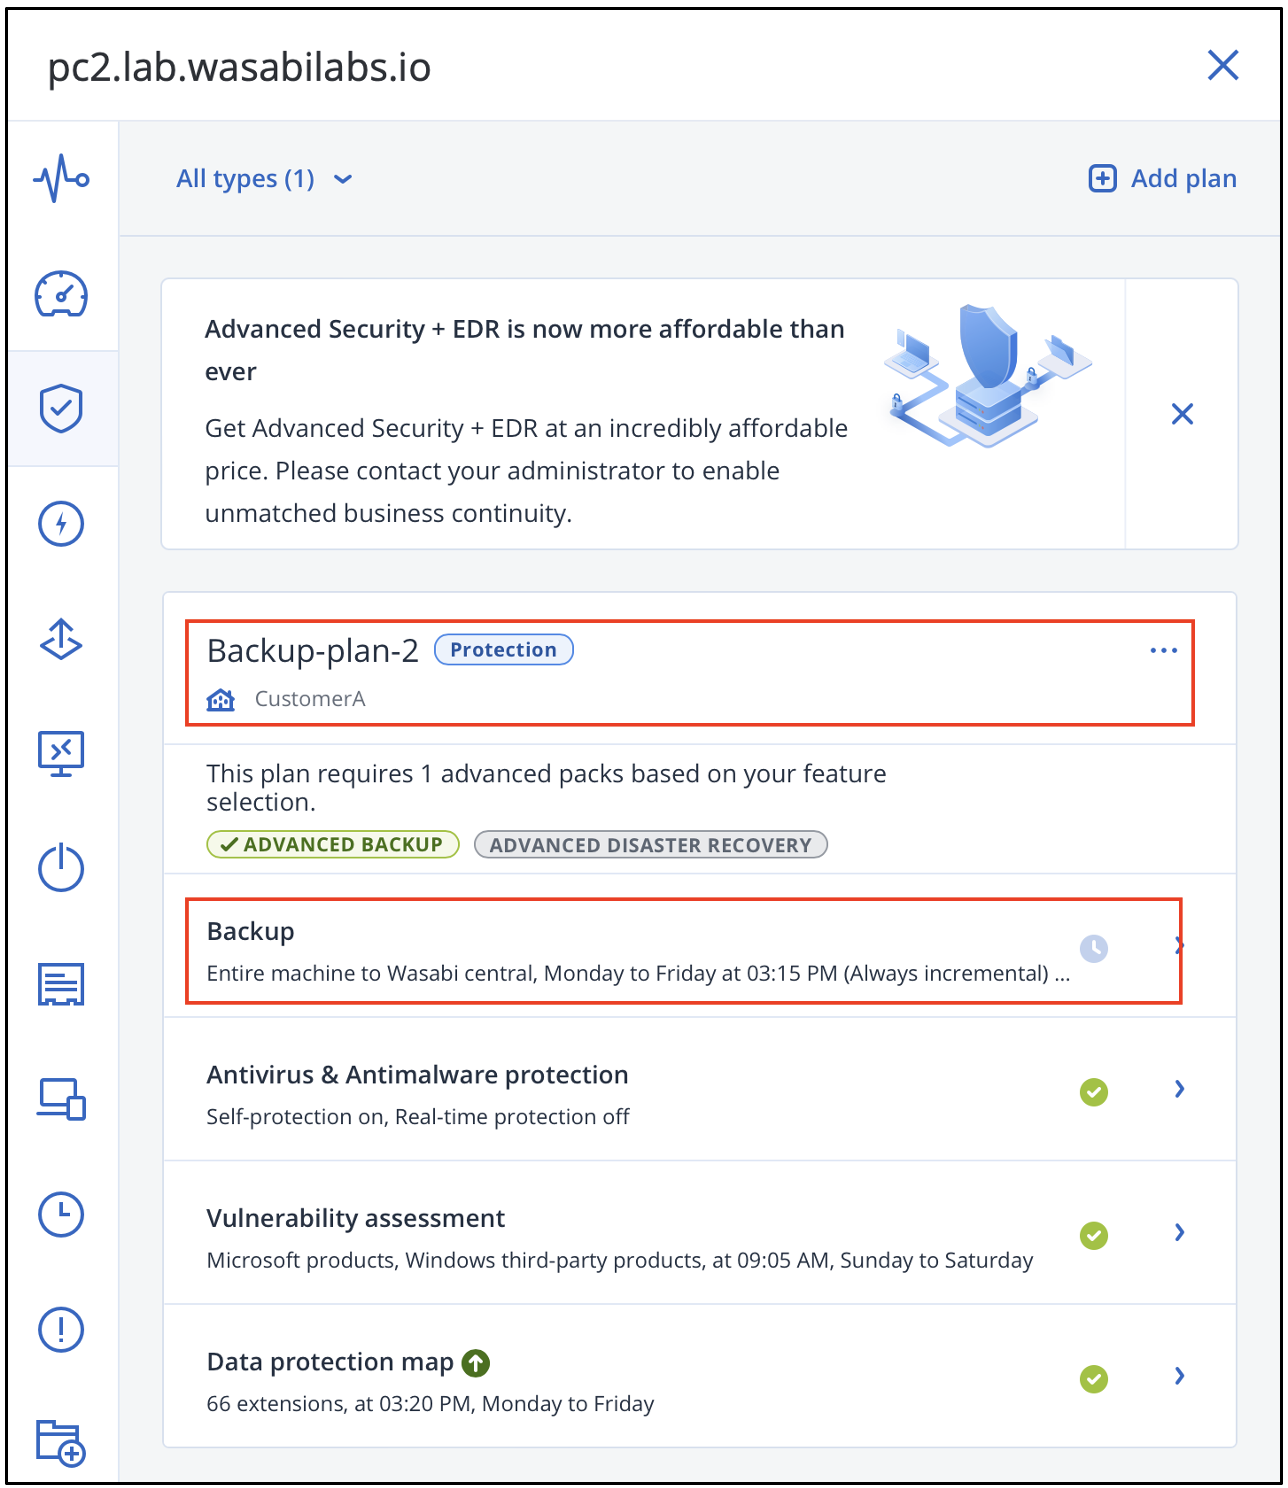
The backups of this device will be stored in Wasabi cloud storage.
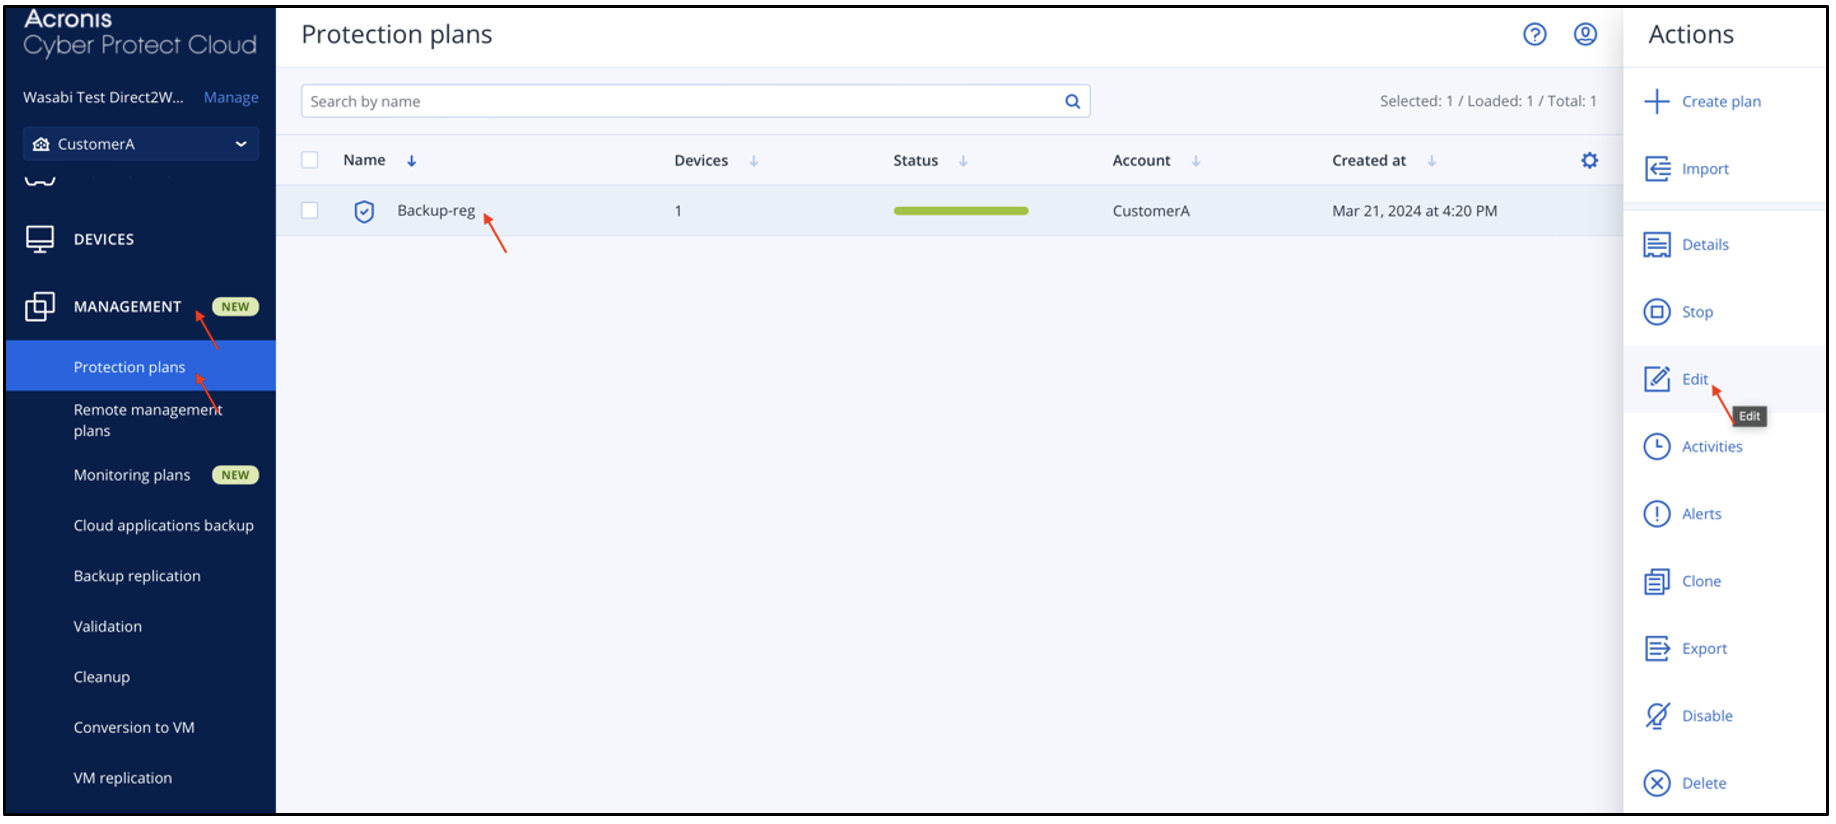
Assigning the Wasabi Location to an Existing Protection Plan
To assign the Wasabi location created earlier to a protection plan, navigate to Management, then select Protection Plans. Select the desired protection plan and click Edit.
In the Details dialog box, click Where to back up.
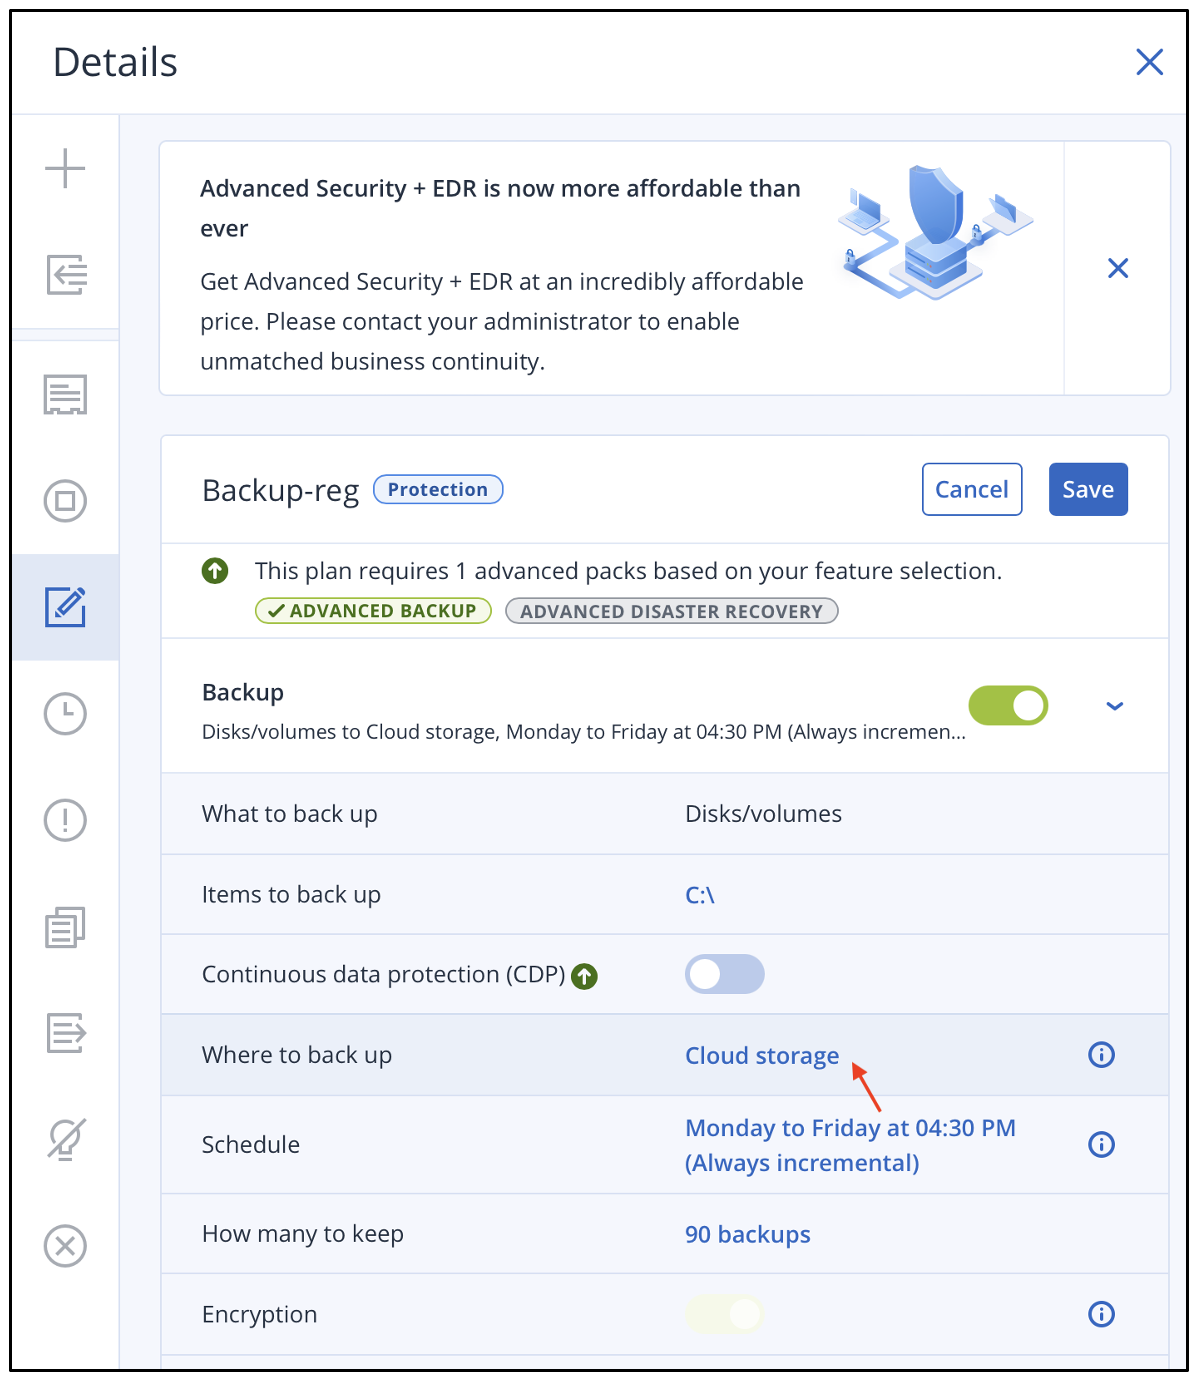
In the Where to back up dialog box, select the Wasabi location created in Creating a Backup Location in Acronis Cyber Protect Console.
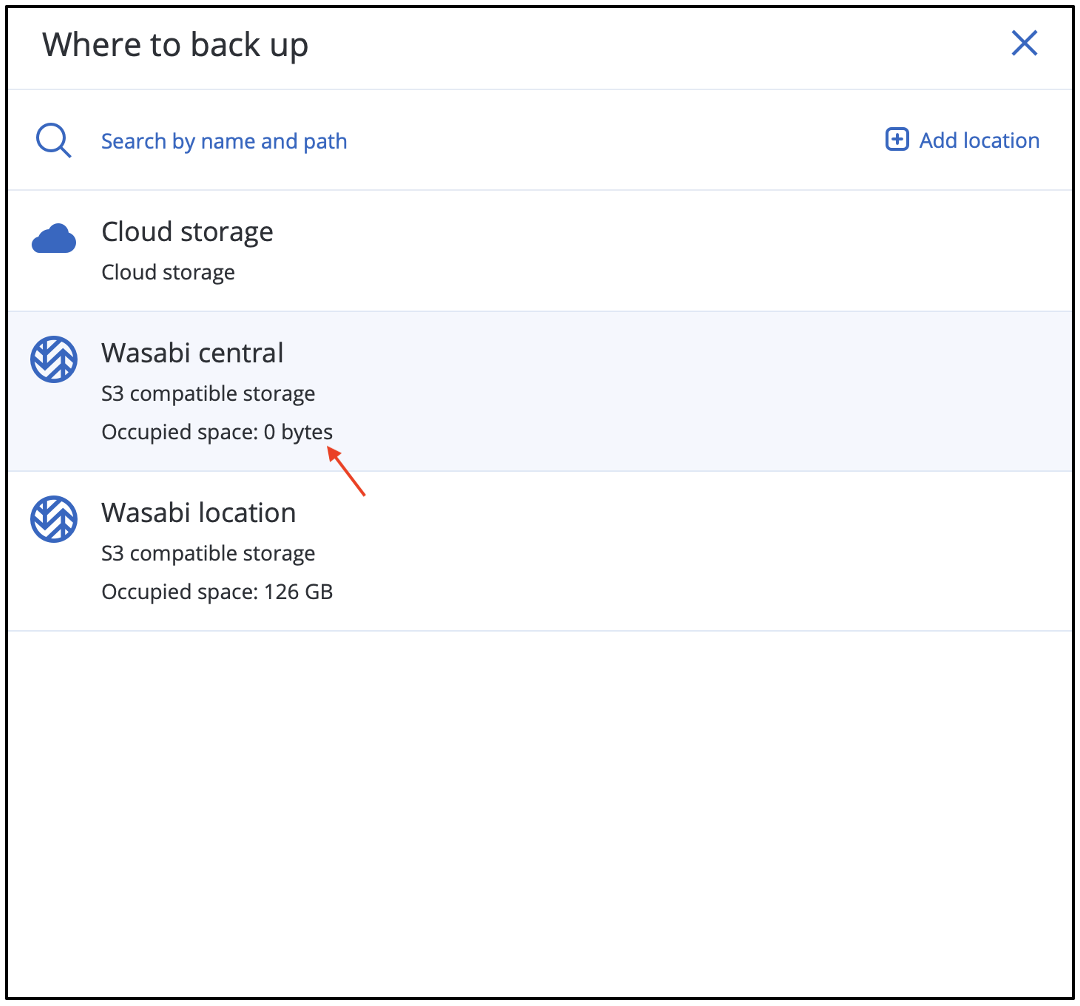
Confirm that the Where to back up field displays the added location. Click Save.
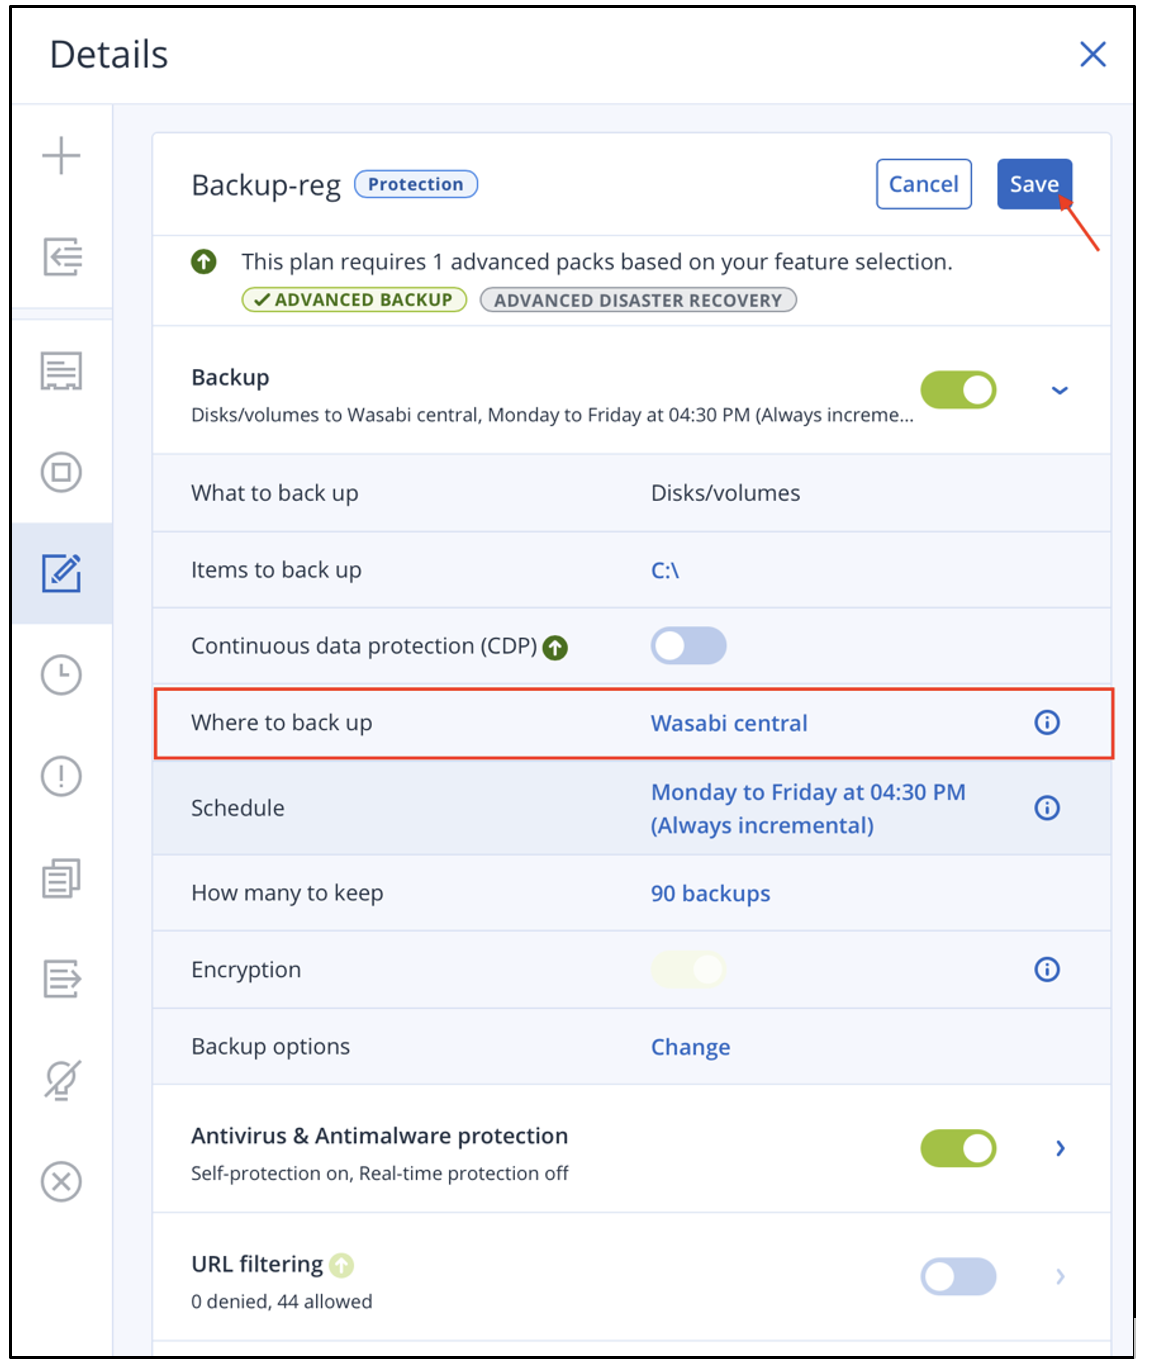
The backups of the devices assigned to this protection plan will be stored in Wasabi cloud storage.