Aparavi is certified for use with Wasabi. The Aparavi Platform finds, automates, governs, and consolidates distributed data, regardless of its location. To use this product with Wasabi, please follow the instructions below
Table of Contents
1. Reference Architecture
2. Requirements
3. Configuration
Reference Architecture

Requirements
Aparavi v.2.X or later
An Aparavi subscription
An active Wasabi account
Configuration
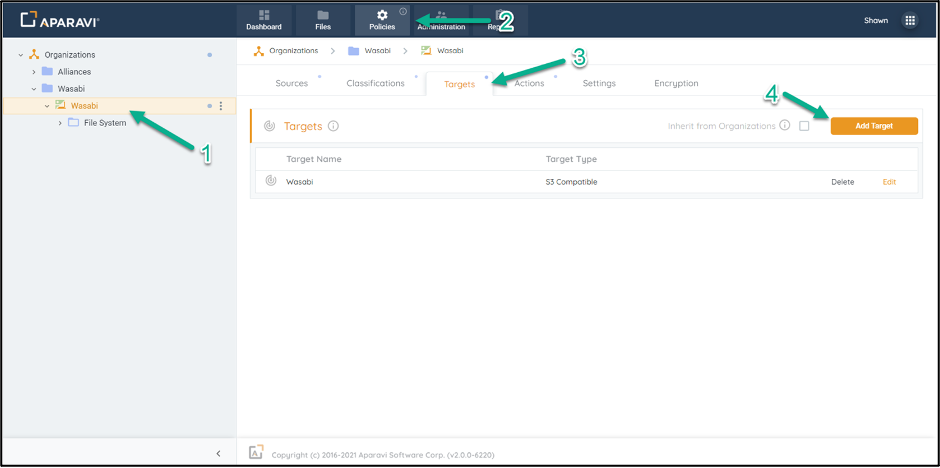
Log in to the Aparavi platform. Click the Collector or Aggregator-Collector component within the Object tree on the left. This is where to add Wasabi as a target.
Select Policies from the top menu bar.
Select the Targets tab under Policies.
Click the Add Target.
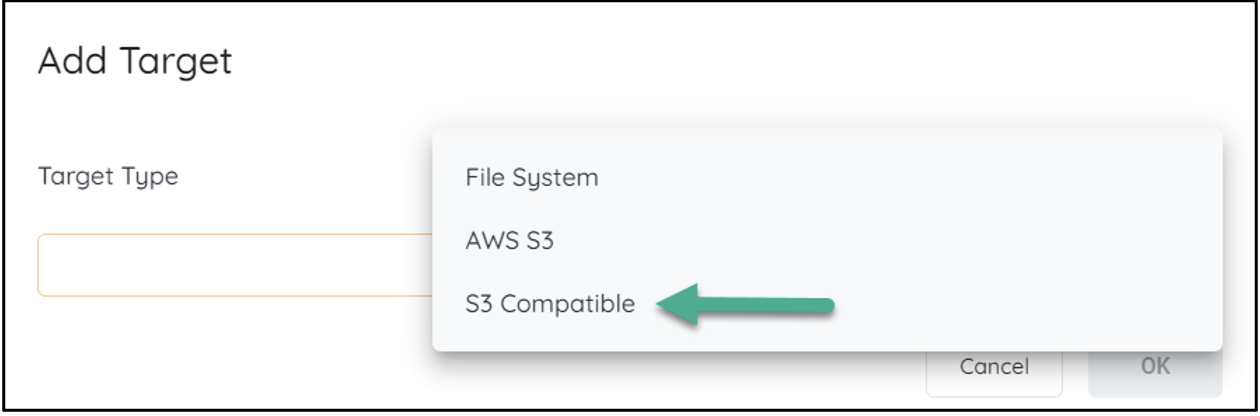
A new model will display. Select S3 Compatible as your Target Type. Click OK.
The S3 Compatible modal will open. Specify all the target settings for your designated Wasabi bucket. You will need to provide a Name for the target to be used on the platform, along with your Parameters. Specify whether to enable SSL, Encryption, or Compression. Optionally, you can enter cost estimations before you click Validate. If validation is successful, Aparavi can access your target bucket. Click OK to finalize. Now you are ready to leverage your newly added Wasabi target.
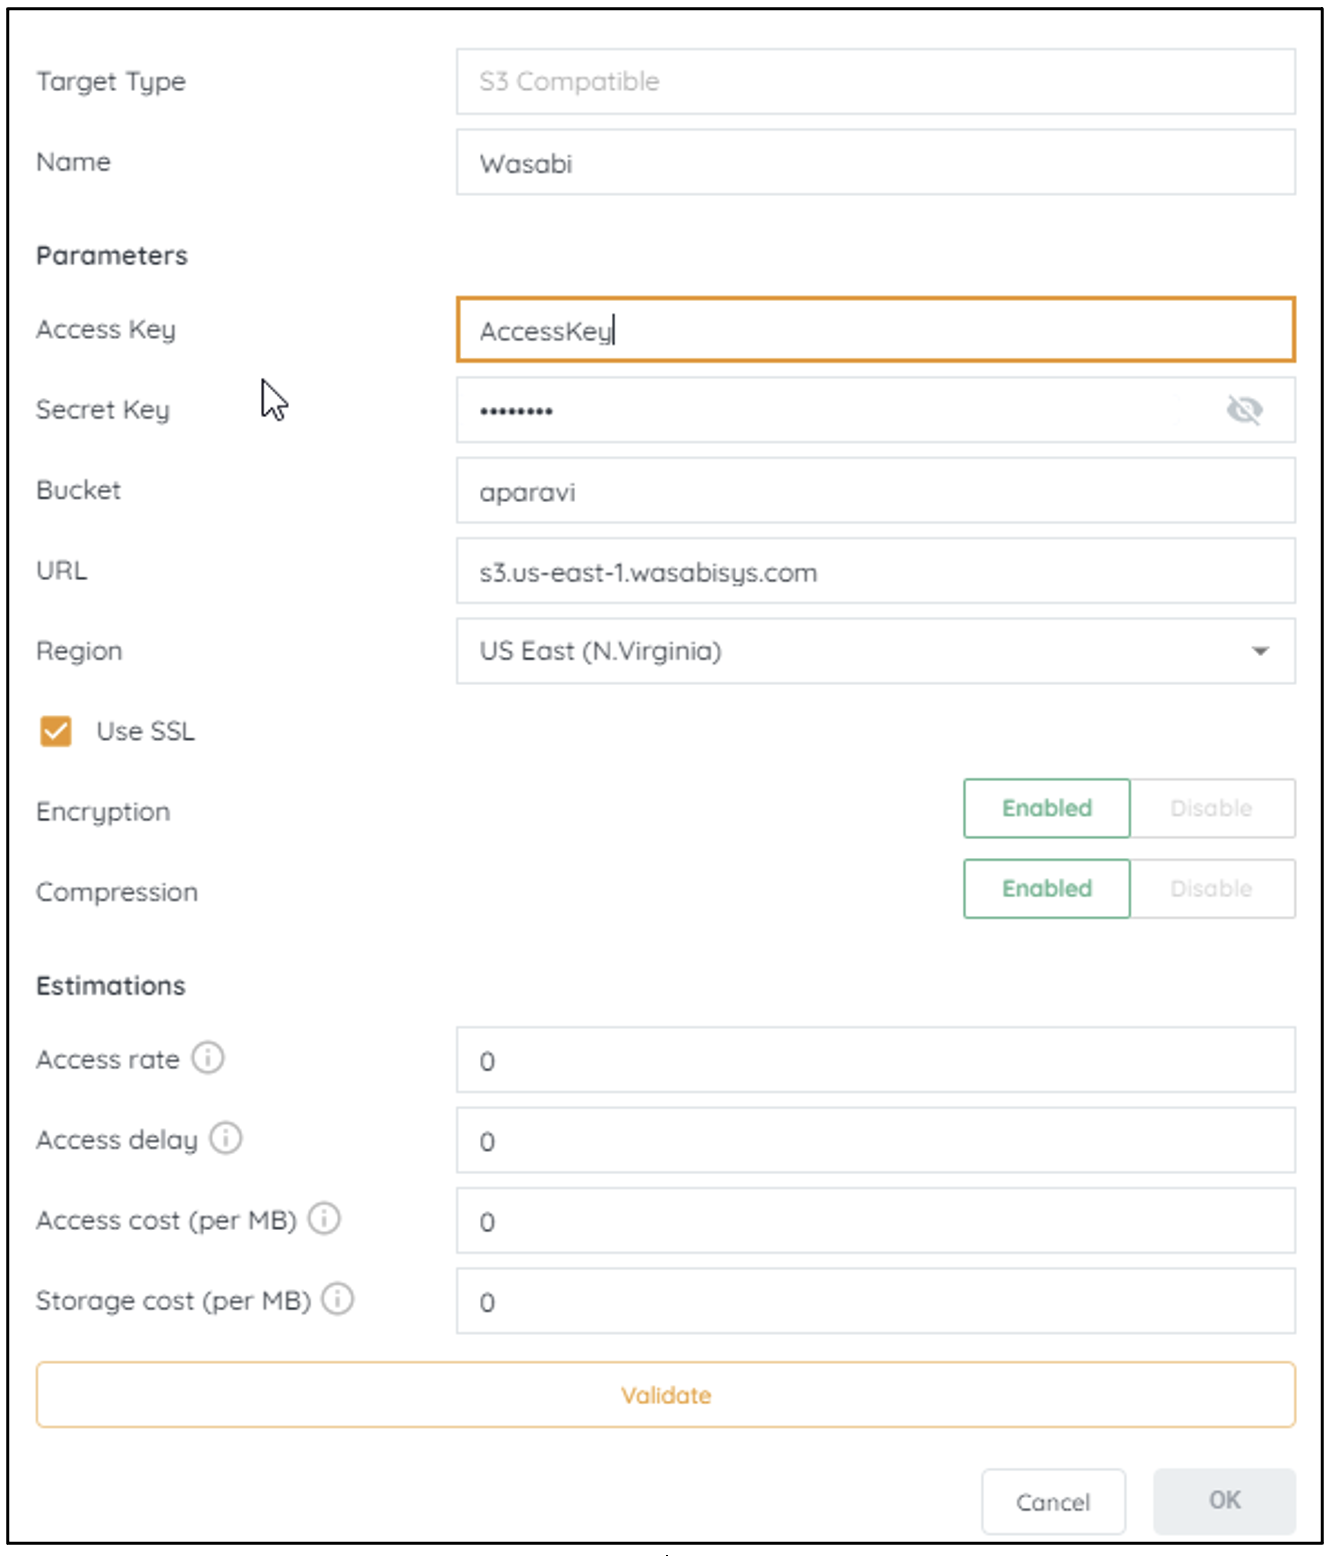
Note: This config example uses Wasabi's us-east-1 storage region. To use other Wasabi storage regions, please use the appropriate Wasabi service URL as described in this article.