Wasabi is validated for use with Arq. Use Arq to automatically back up your files to the cloud, safeguarding your digital privacy. For more information please see the Arq Official Documentation.
Requirements
Wasabi Hot Cloud Storage Account
Wasabi Bucket - See Creating a Bucket
Wasabi Object Locked Bucket (If using Immutability) - See Object Locking
Arq Software Installed (Version 7.39 as of testing)
Arq 7 License - See Arq Pricing FAQ
This configuration example discusses the use of Wasabi's us-east-1 storage region. Use the region your bucket is located in. For a list of regions, see Service URLs for Wasabi's Storage Regions.
Configuring Wasabi Storage Location in Arq - Standard Bucket
Open your Arq backup application.
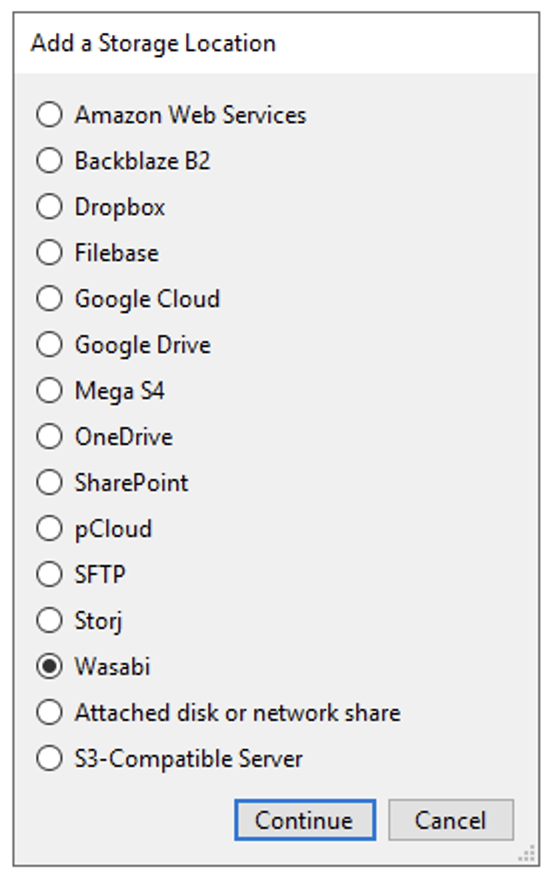
Click File, New Storage Location.
Choose Wasabi from the pop-up menu. Click Continue.

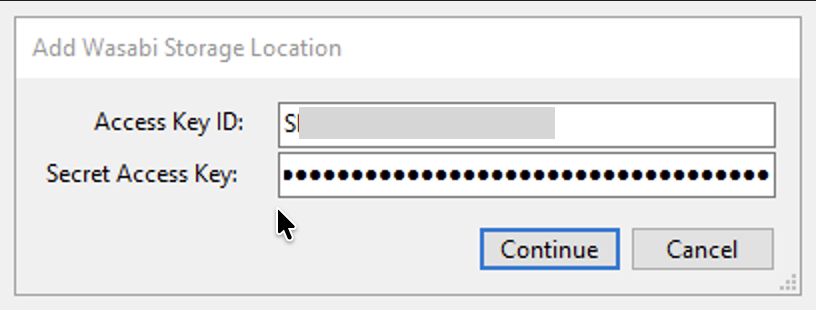
Input your Wasabi Access & Secret key. Click Continue.
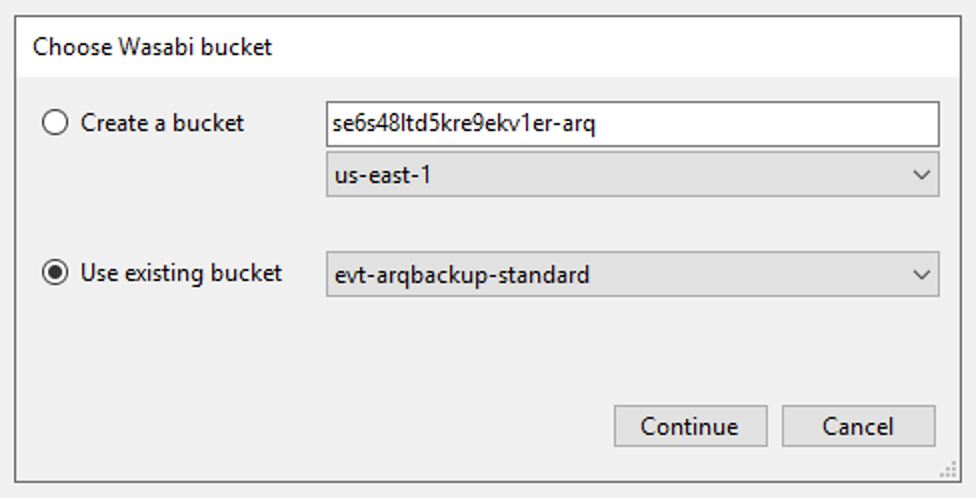
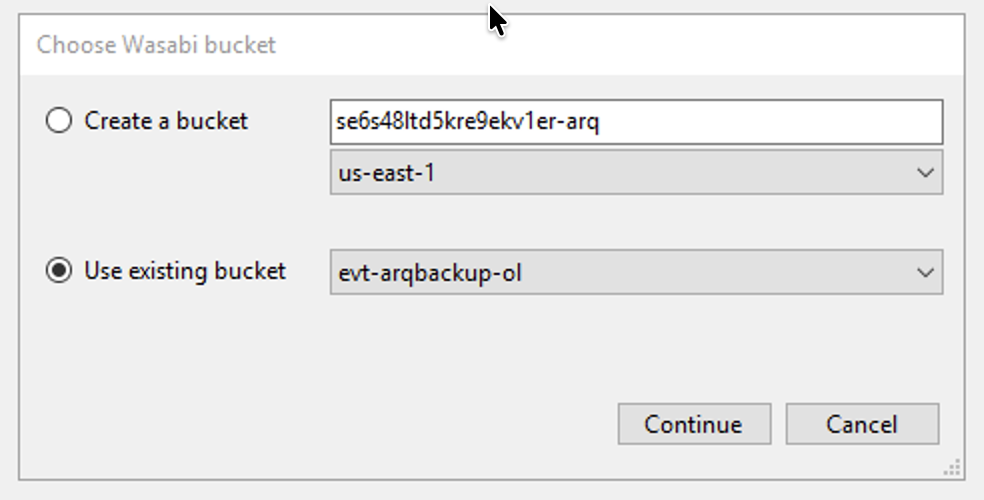
Click the button next to Use existing bucket, choose your Wasabi standard bucket name from the dropdown. Click Continue.
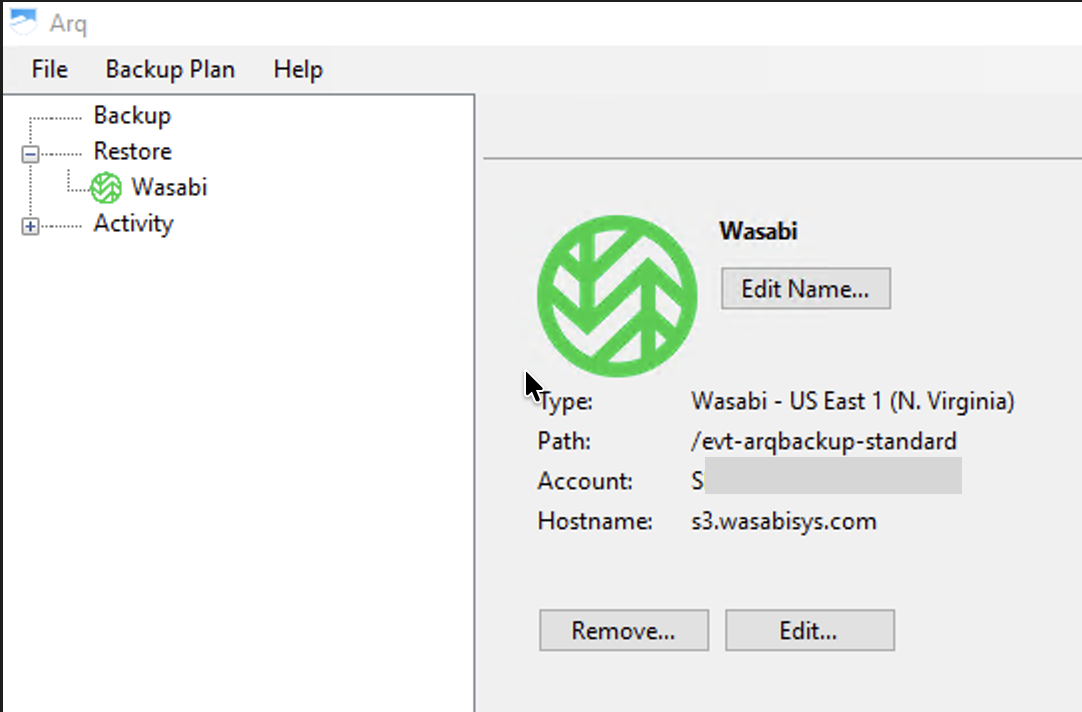
Your Wasabi bucket will now show in the Arq Interface.
Creating a Backup Plan in Arq - Standard Bucket
Open your Arq backup application.
Click File, New Backup Plan.
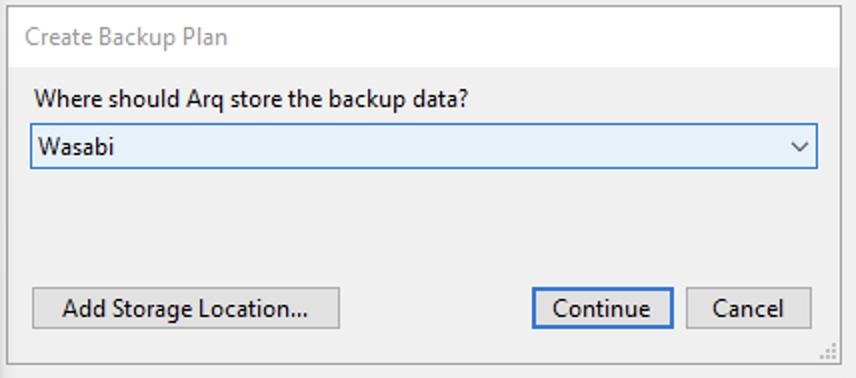
Choose Wasabi from the dropdown. Click Continue.
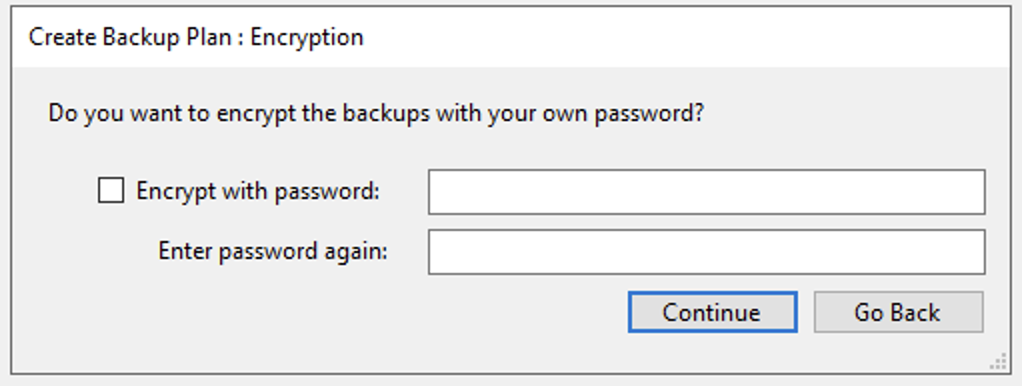
Optionally, encrypt your backup with a password. Click Continue. Please note that you will need this password again to decrypt the data.
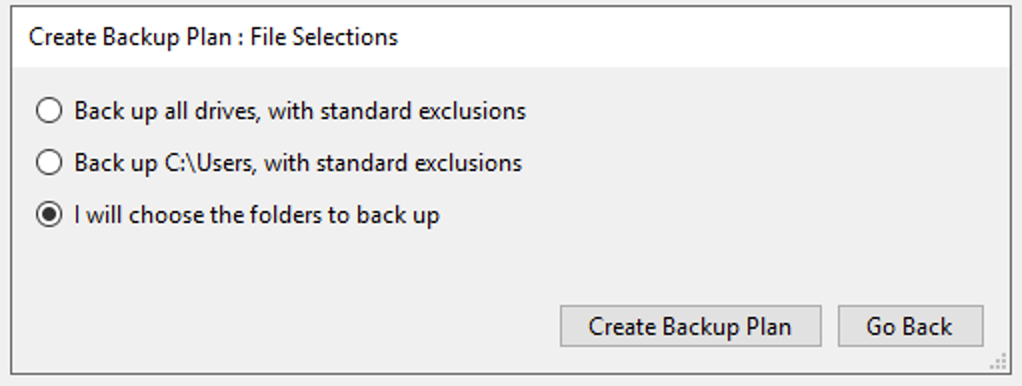
Choose the data to back up. This will depend on your organizational backup strategy. (For this example, we are backing up a folder on a Windows Server.) Click Create Backup Plan.
Add your desired folders. Click Save.
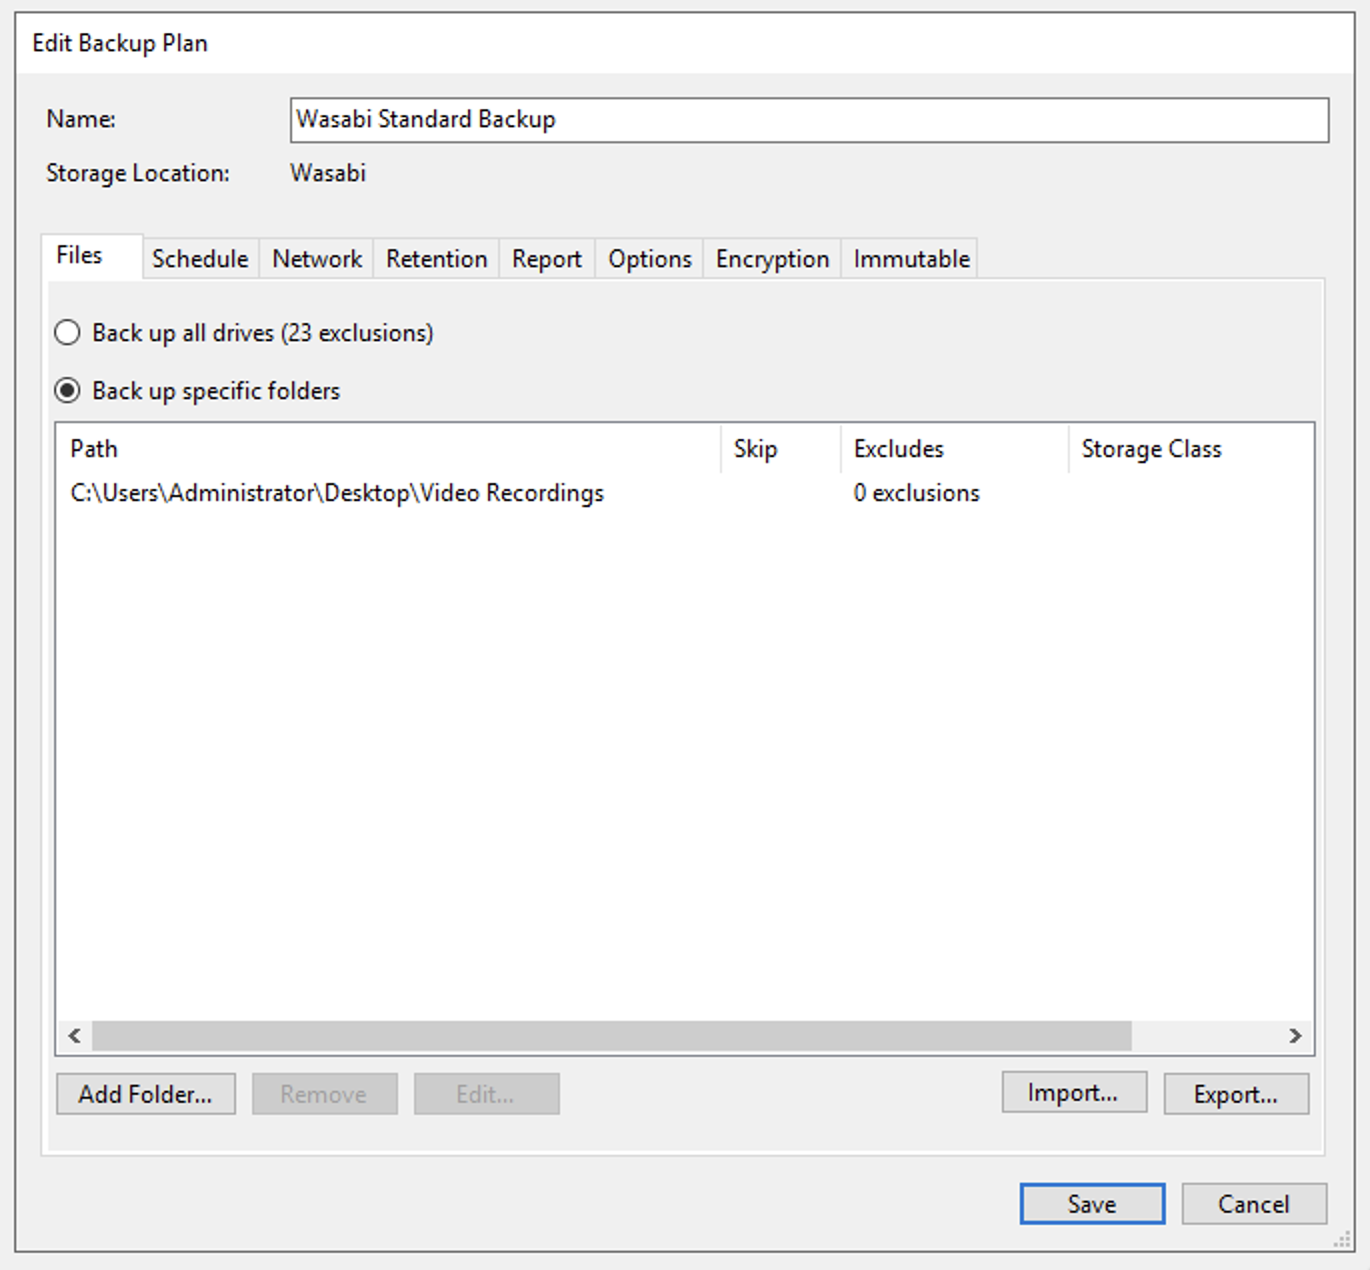
Set a Schedule for your backup operation.
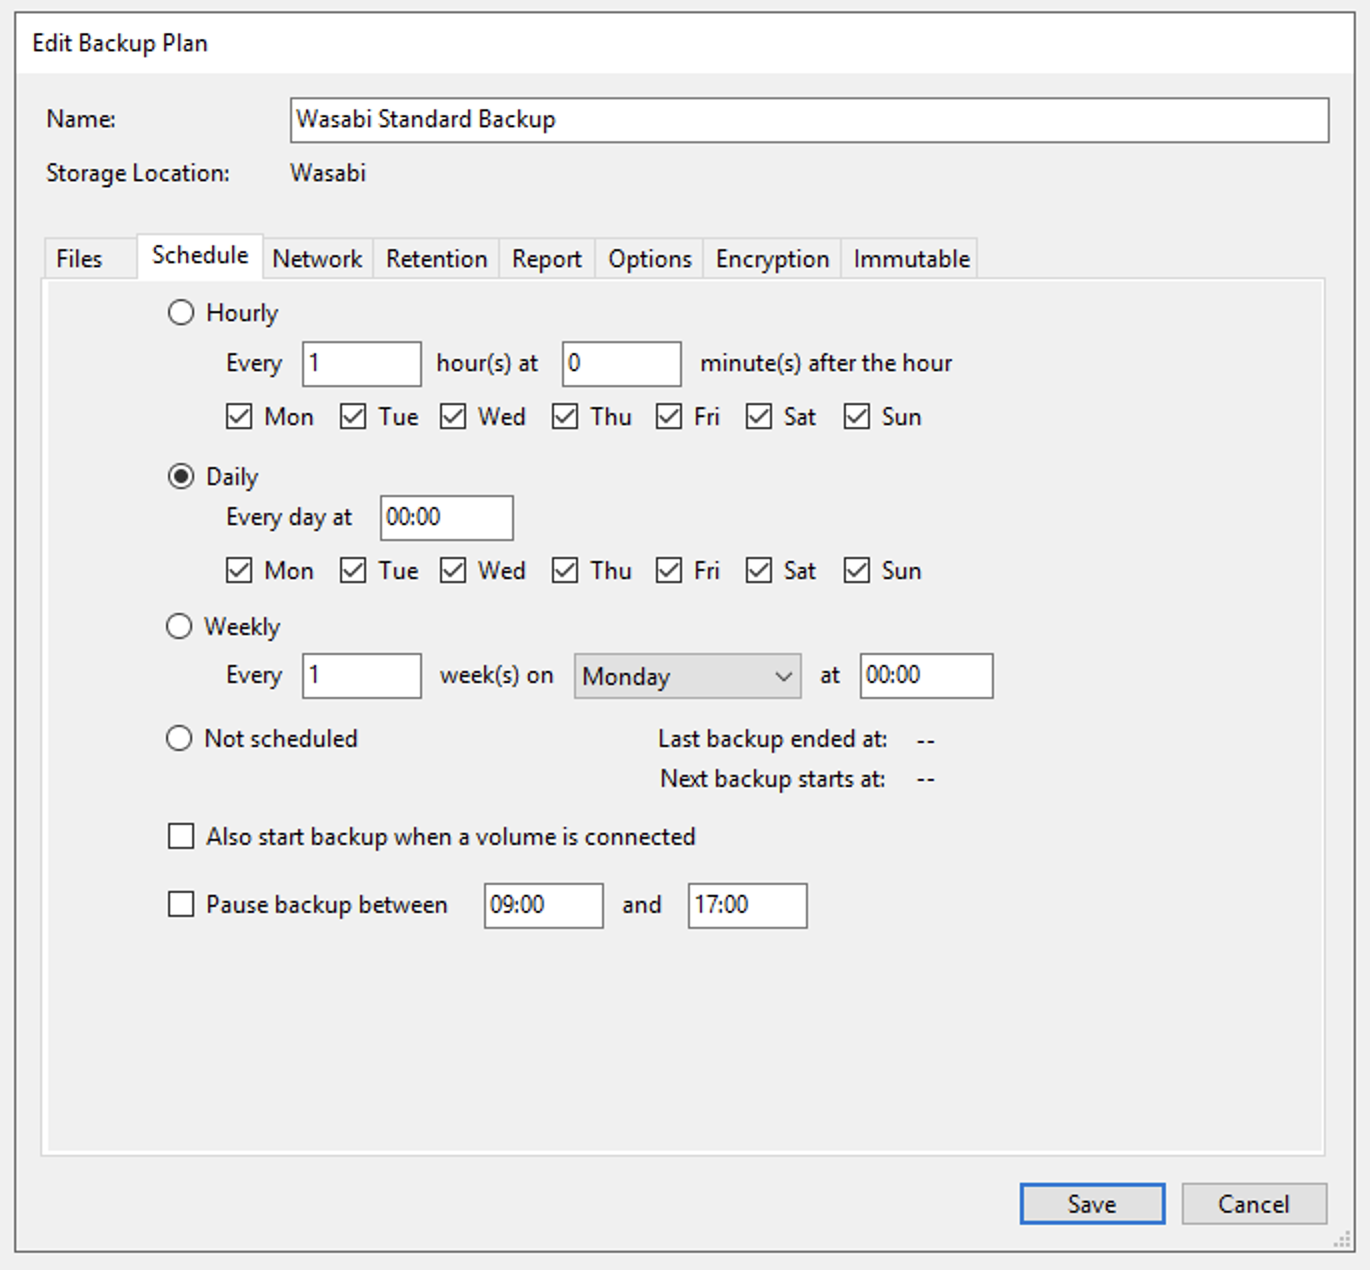
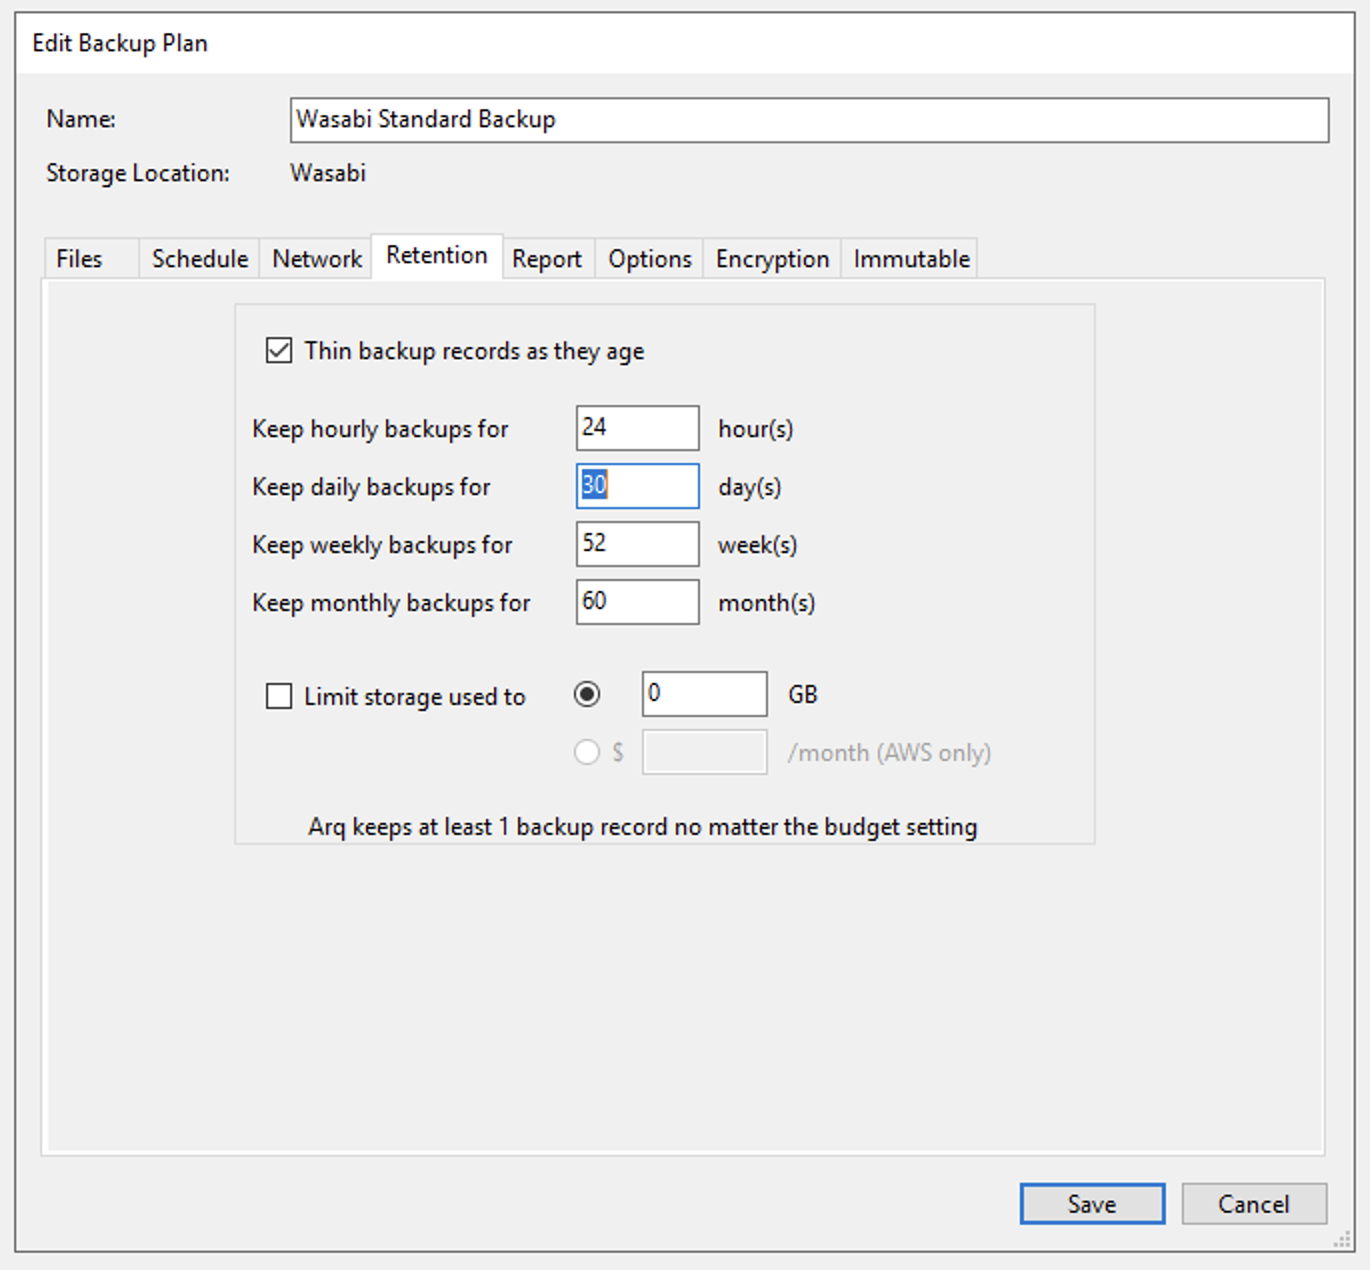
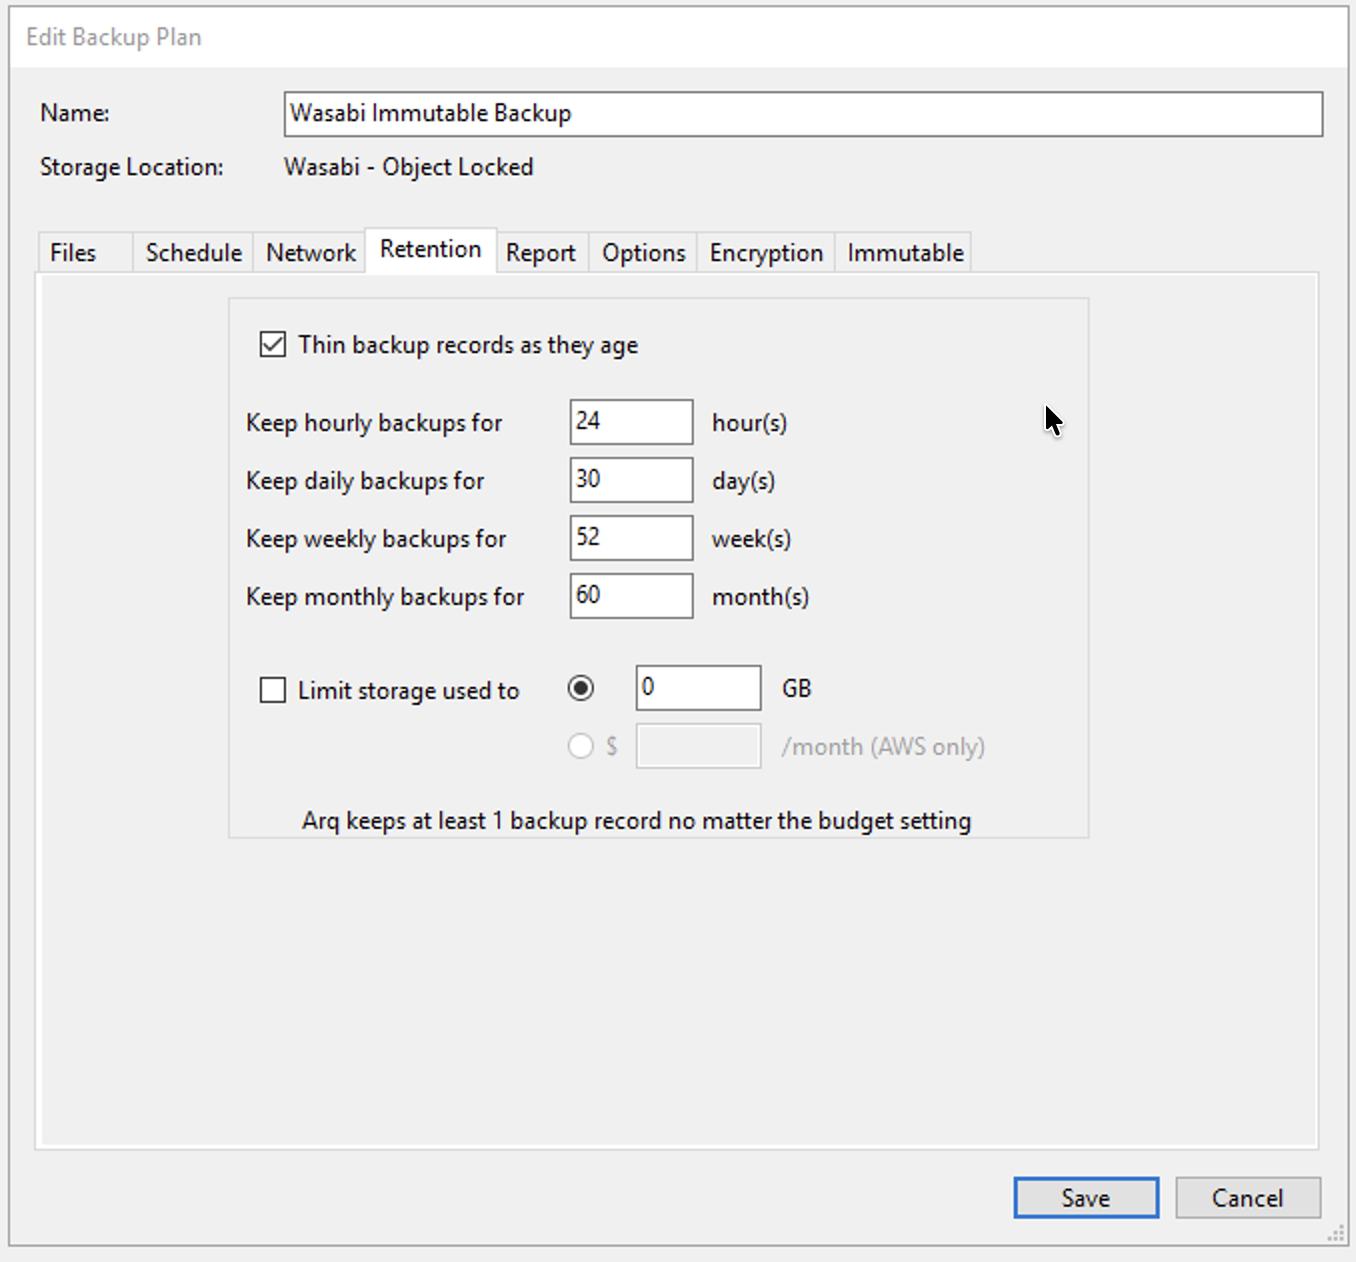
Optionally, set a Retention period for your data, which will delete older backups as they age out.
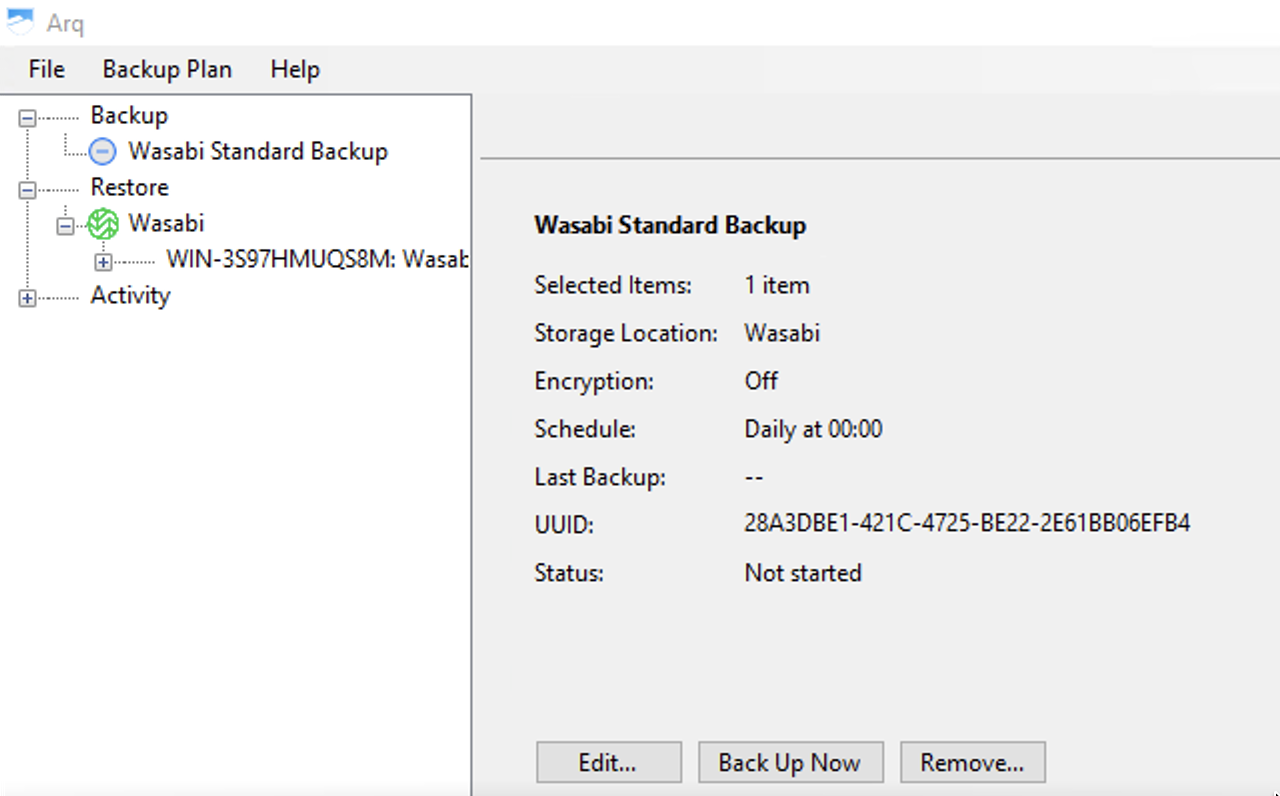
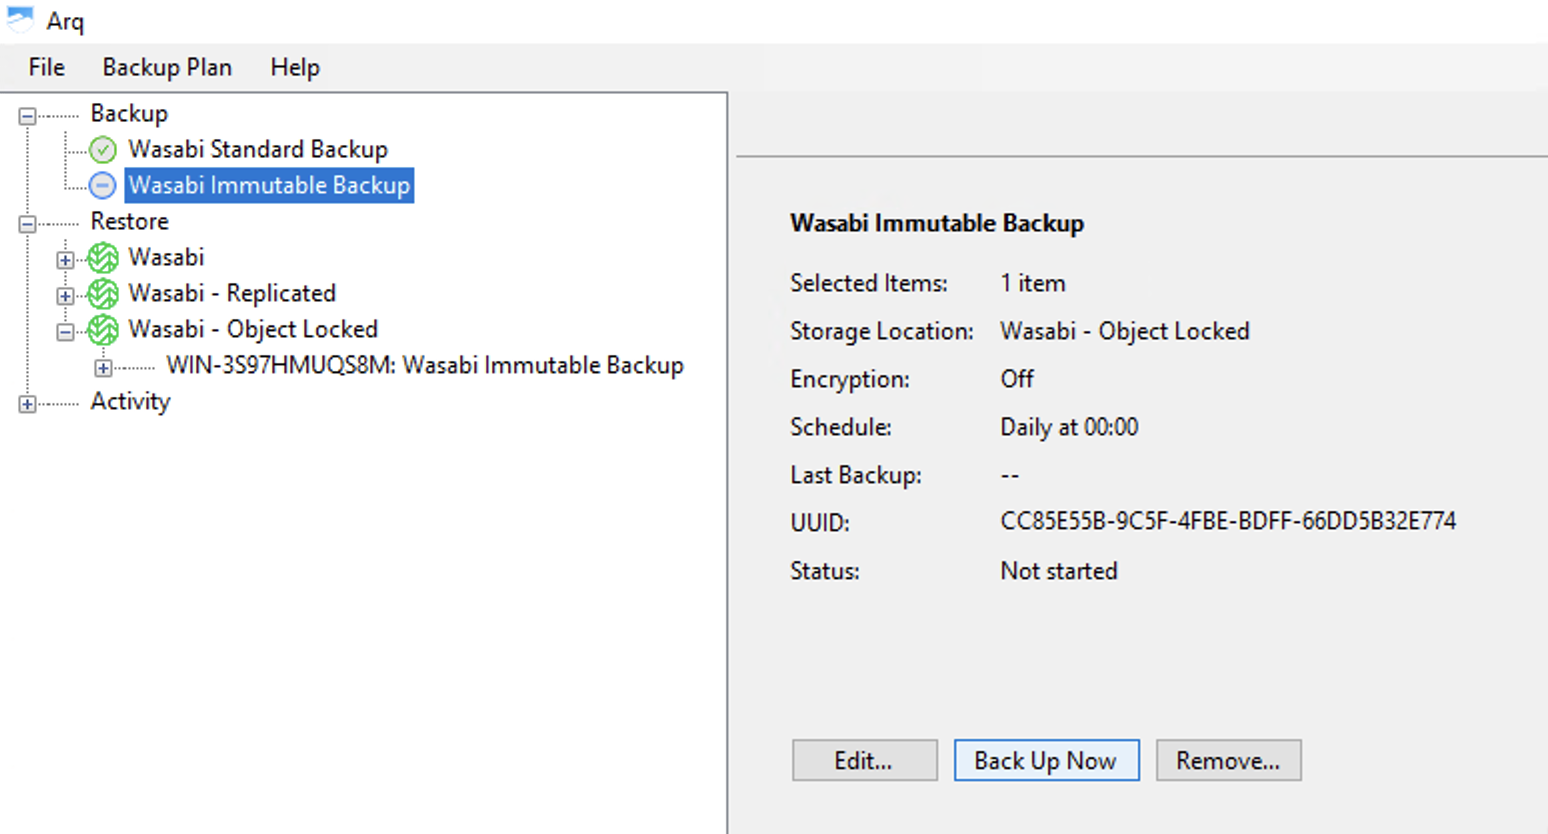
Click Save. Your new Backup Plan will show in the Arq application.
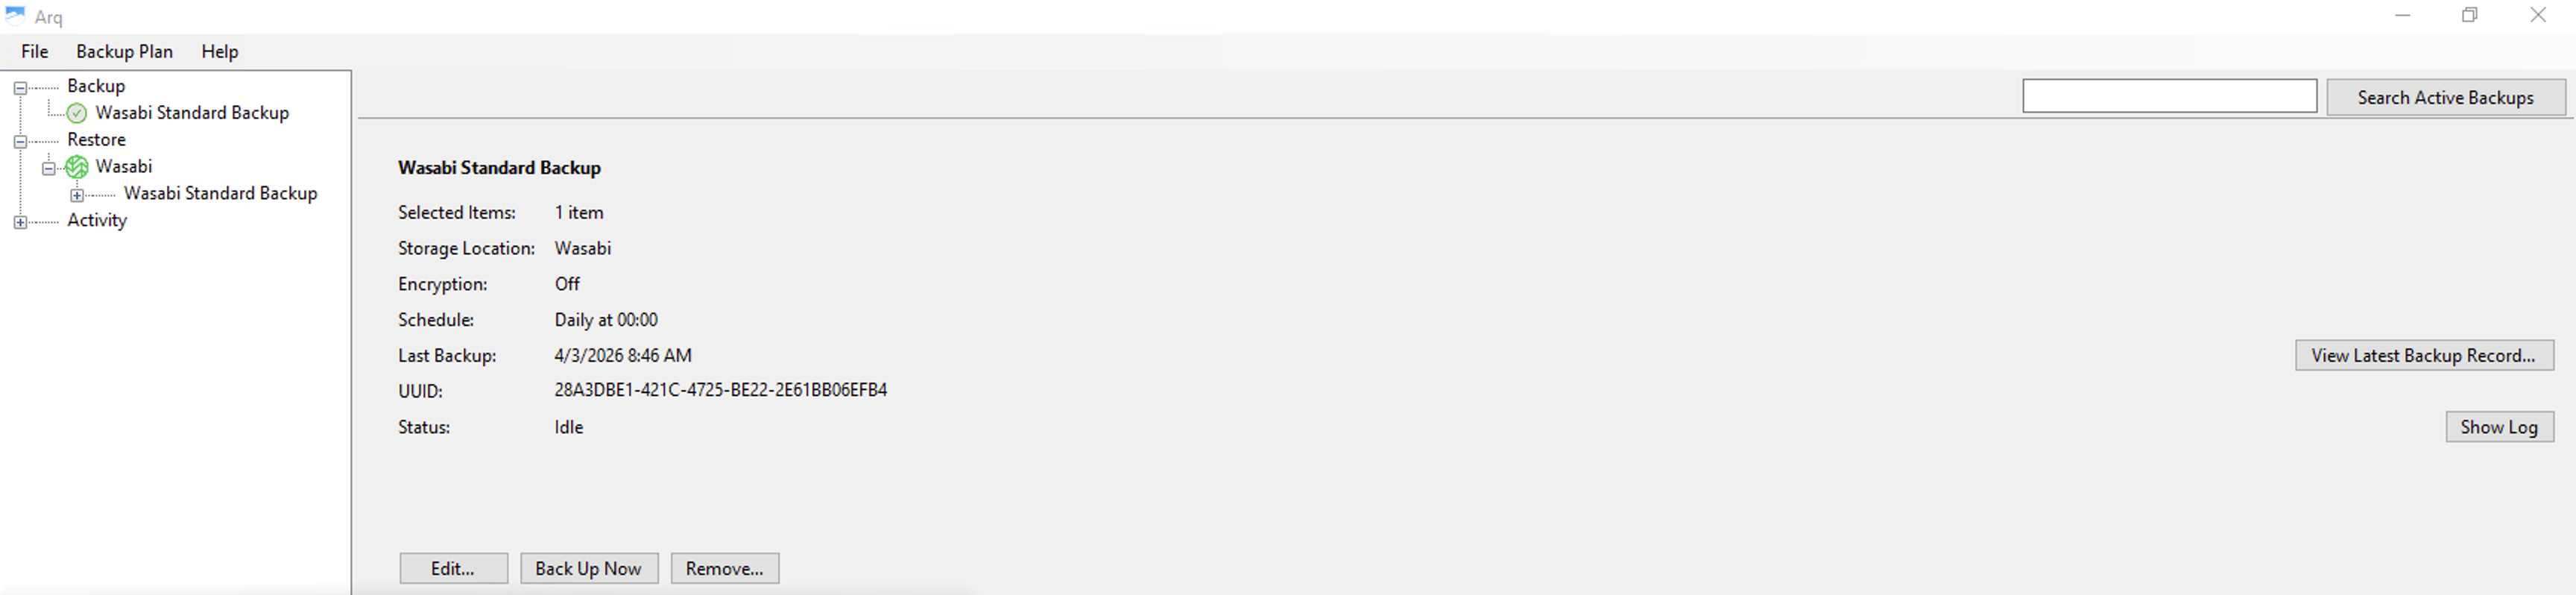
Backing Up Data With Arq - Standard Bucket
Open your Arq backup application.
Click your Backup Plan under the top-level Backup title. Click Back Up Now.

Your backup progress will be displayed in the panel.
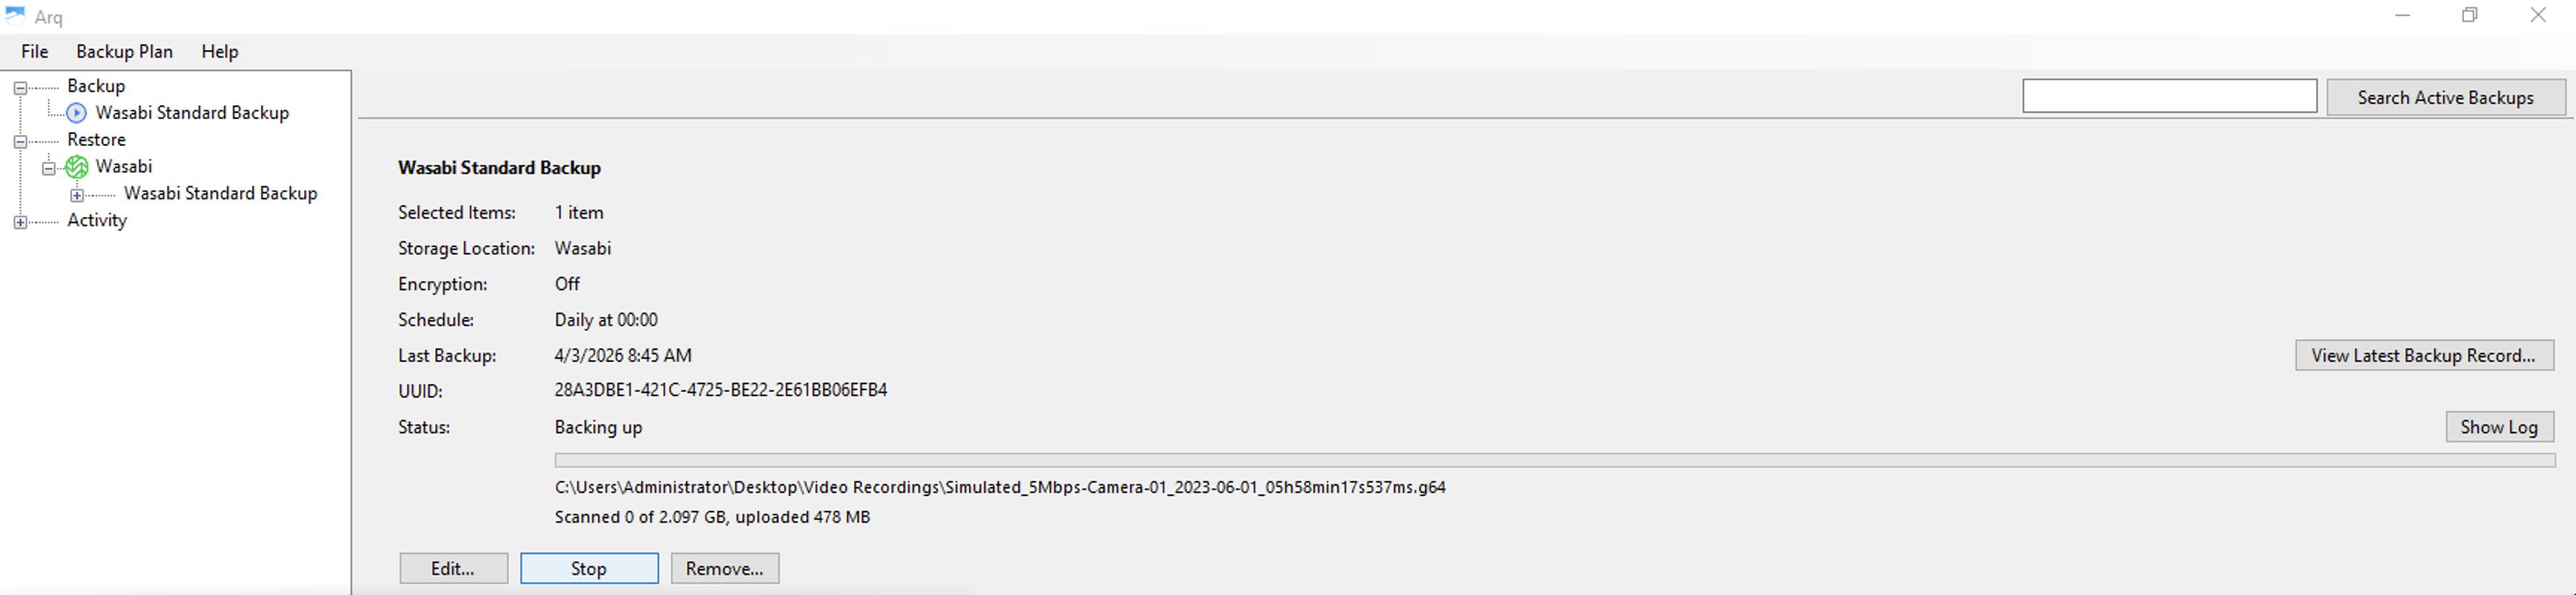
Once the backup completes, the status will return to idle. You can check the backup log by clicking Show Log on the right side of the panel.
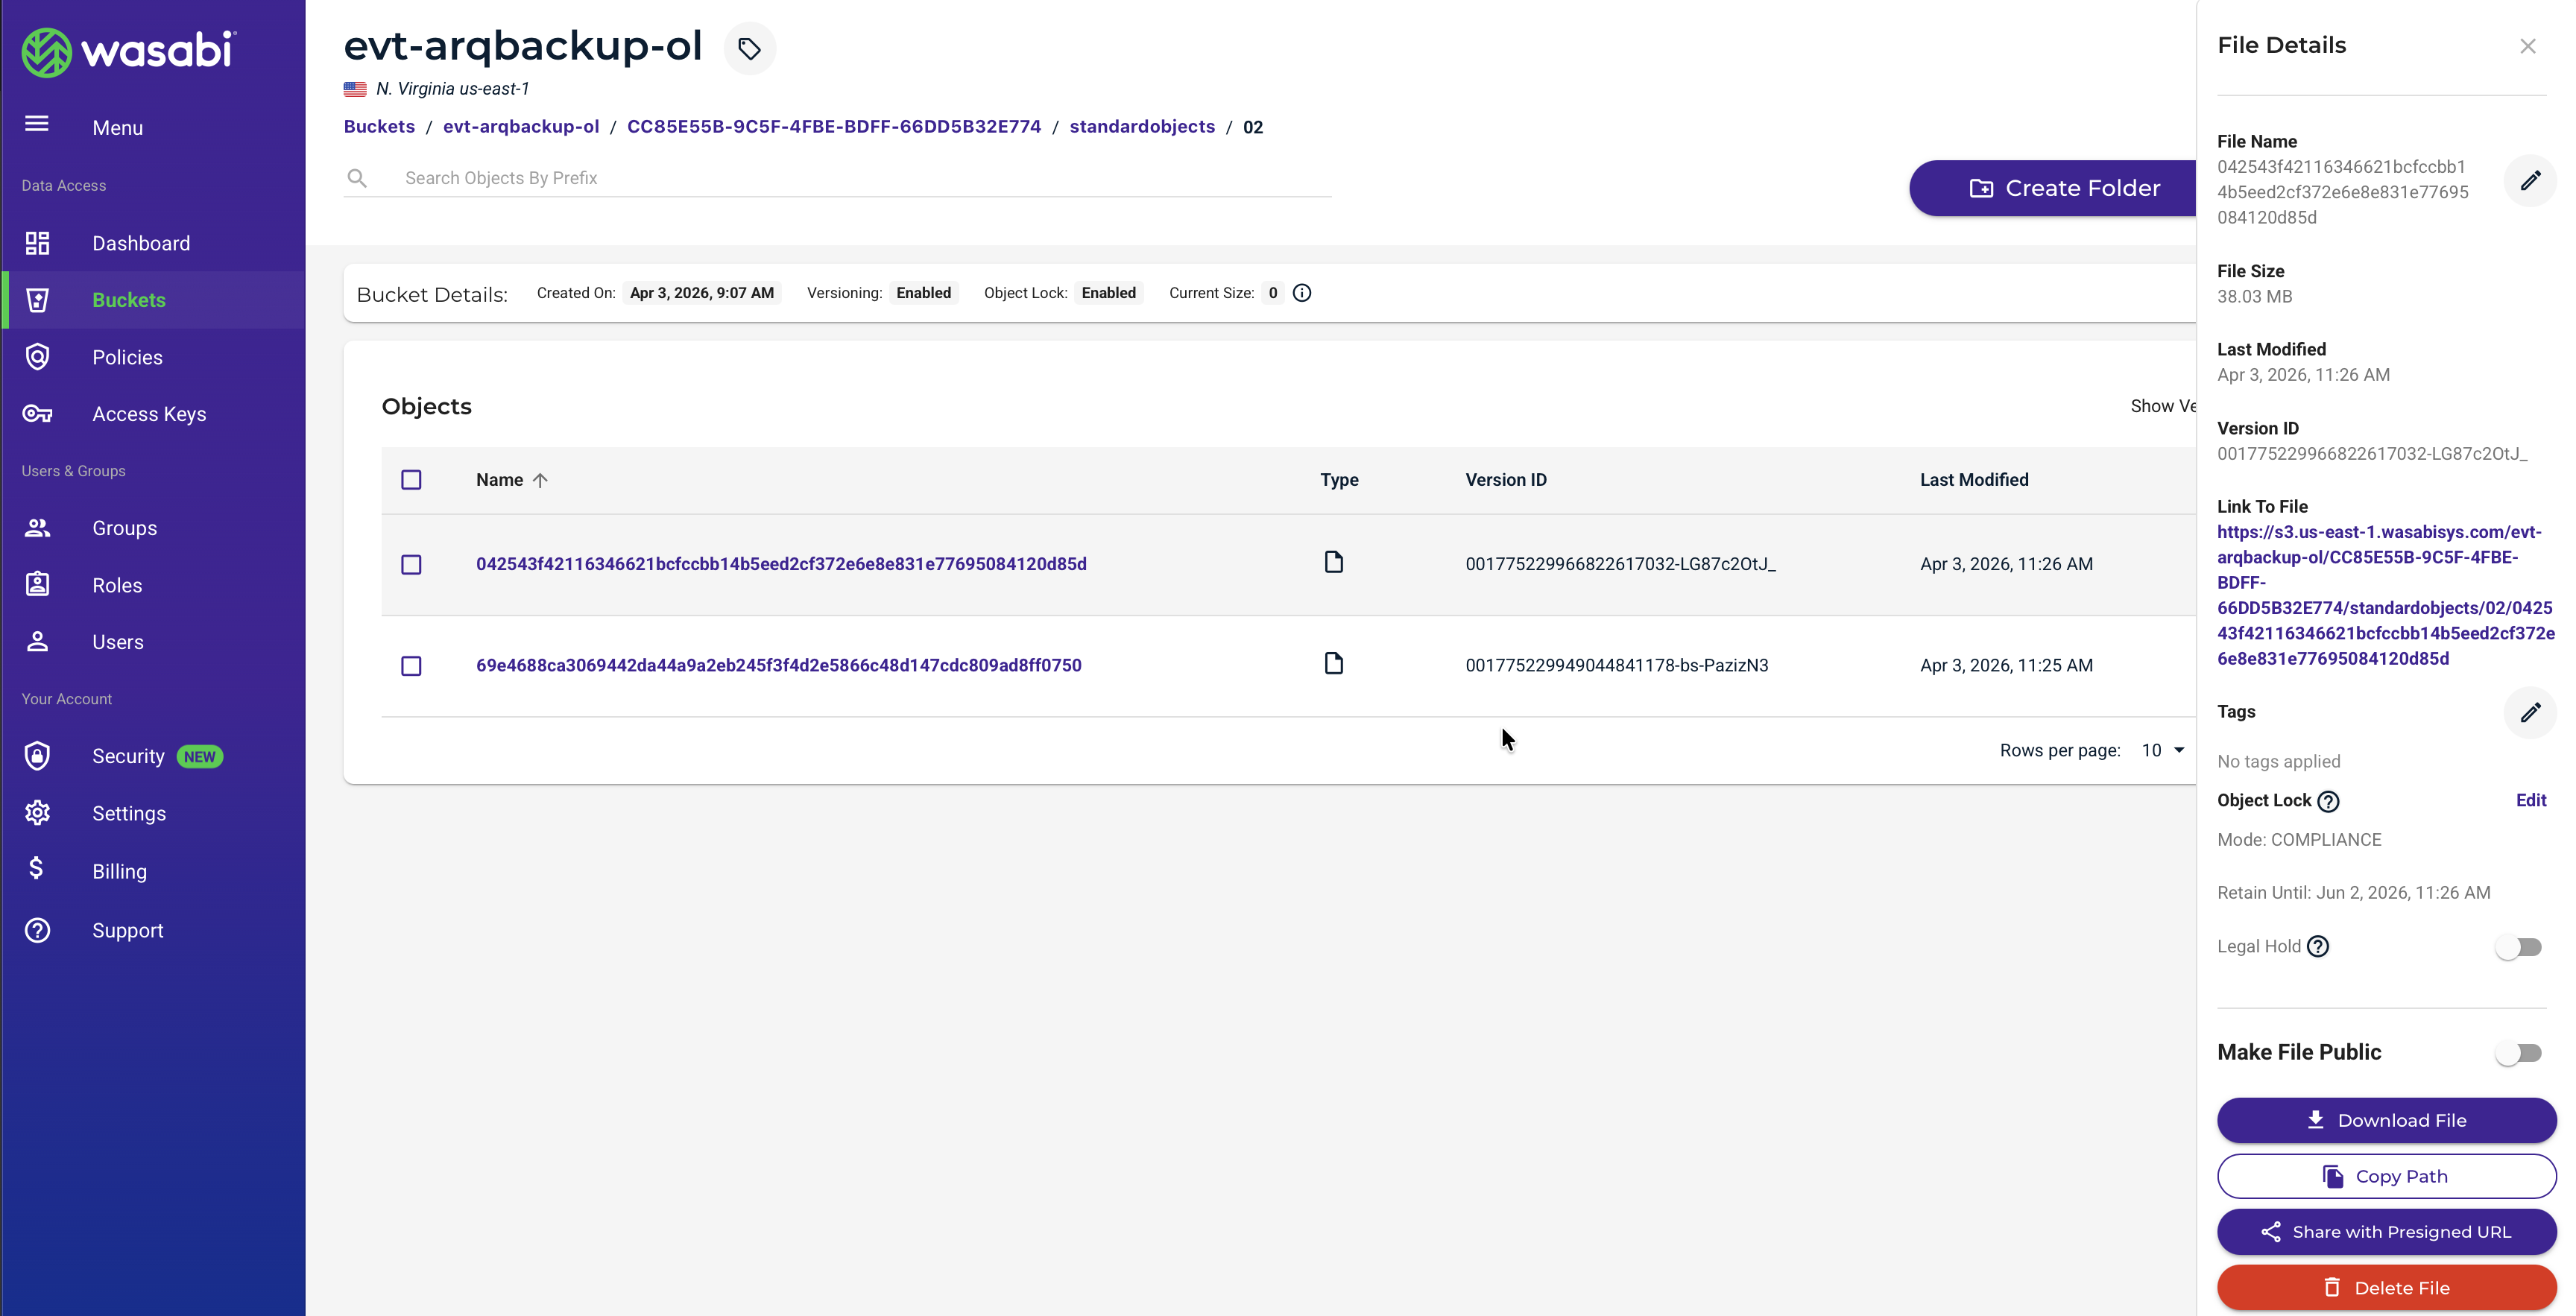
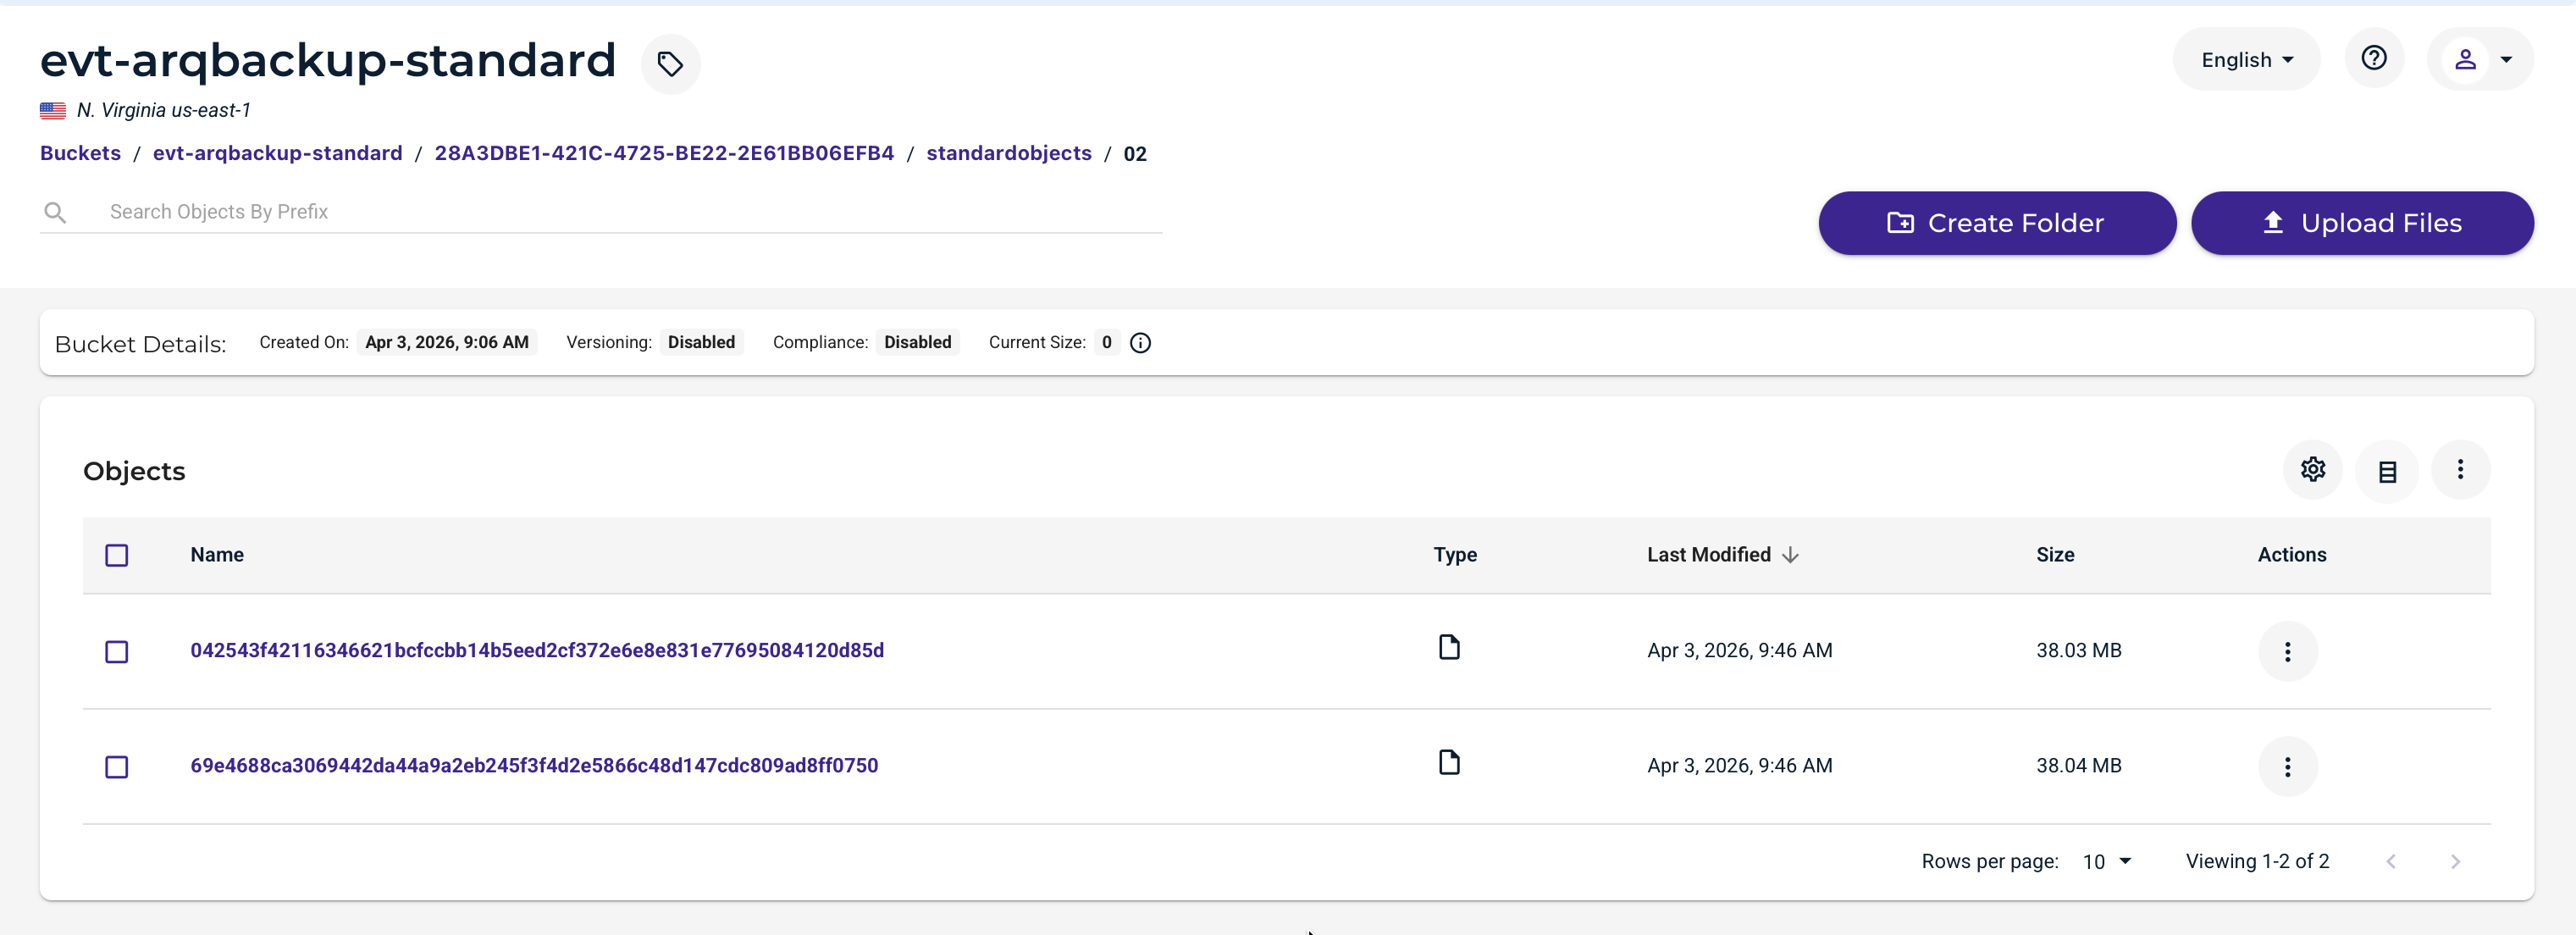
Verifying Data in Wasabi - Standard Bucket
Log in to your Wasabi Storage Console.
Search your bucket associated with Arq. Navigating through the folders in this bucket will show that your data is stored in a proprietary format.
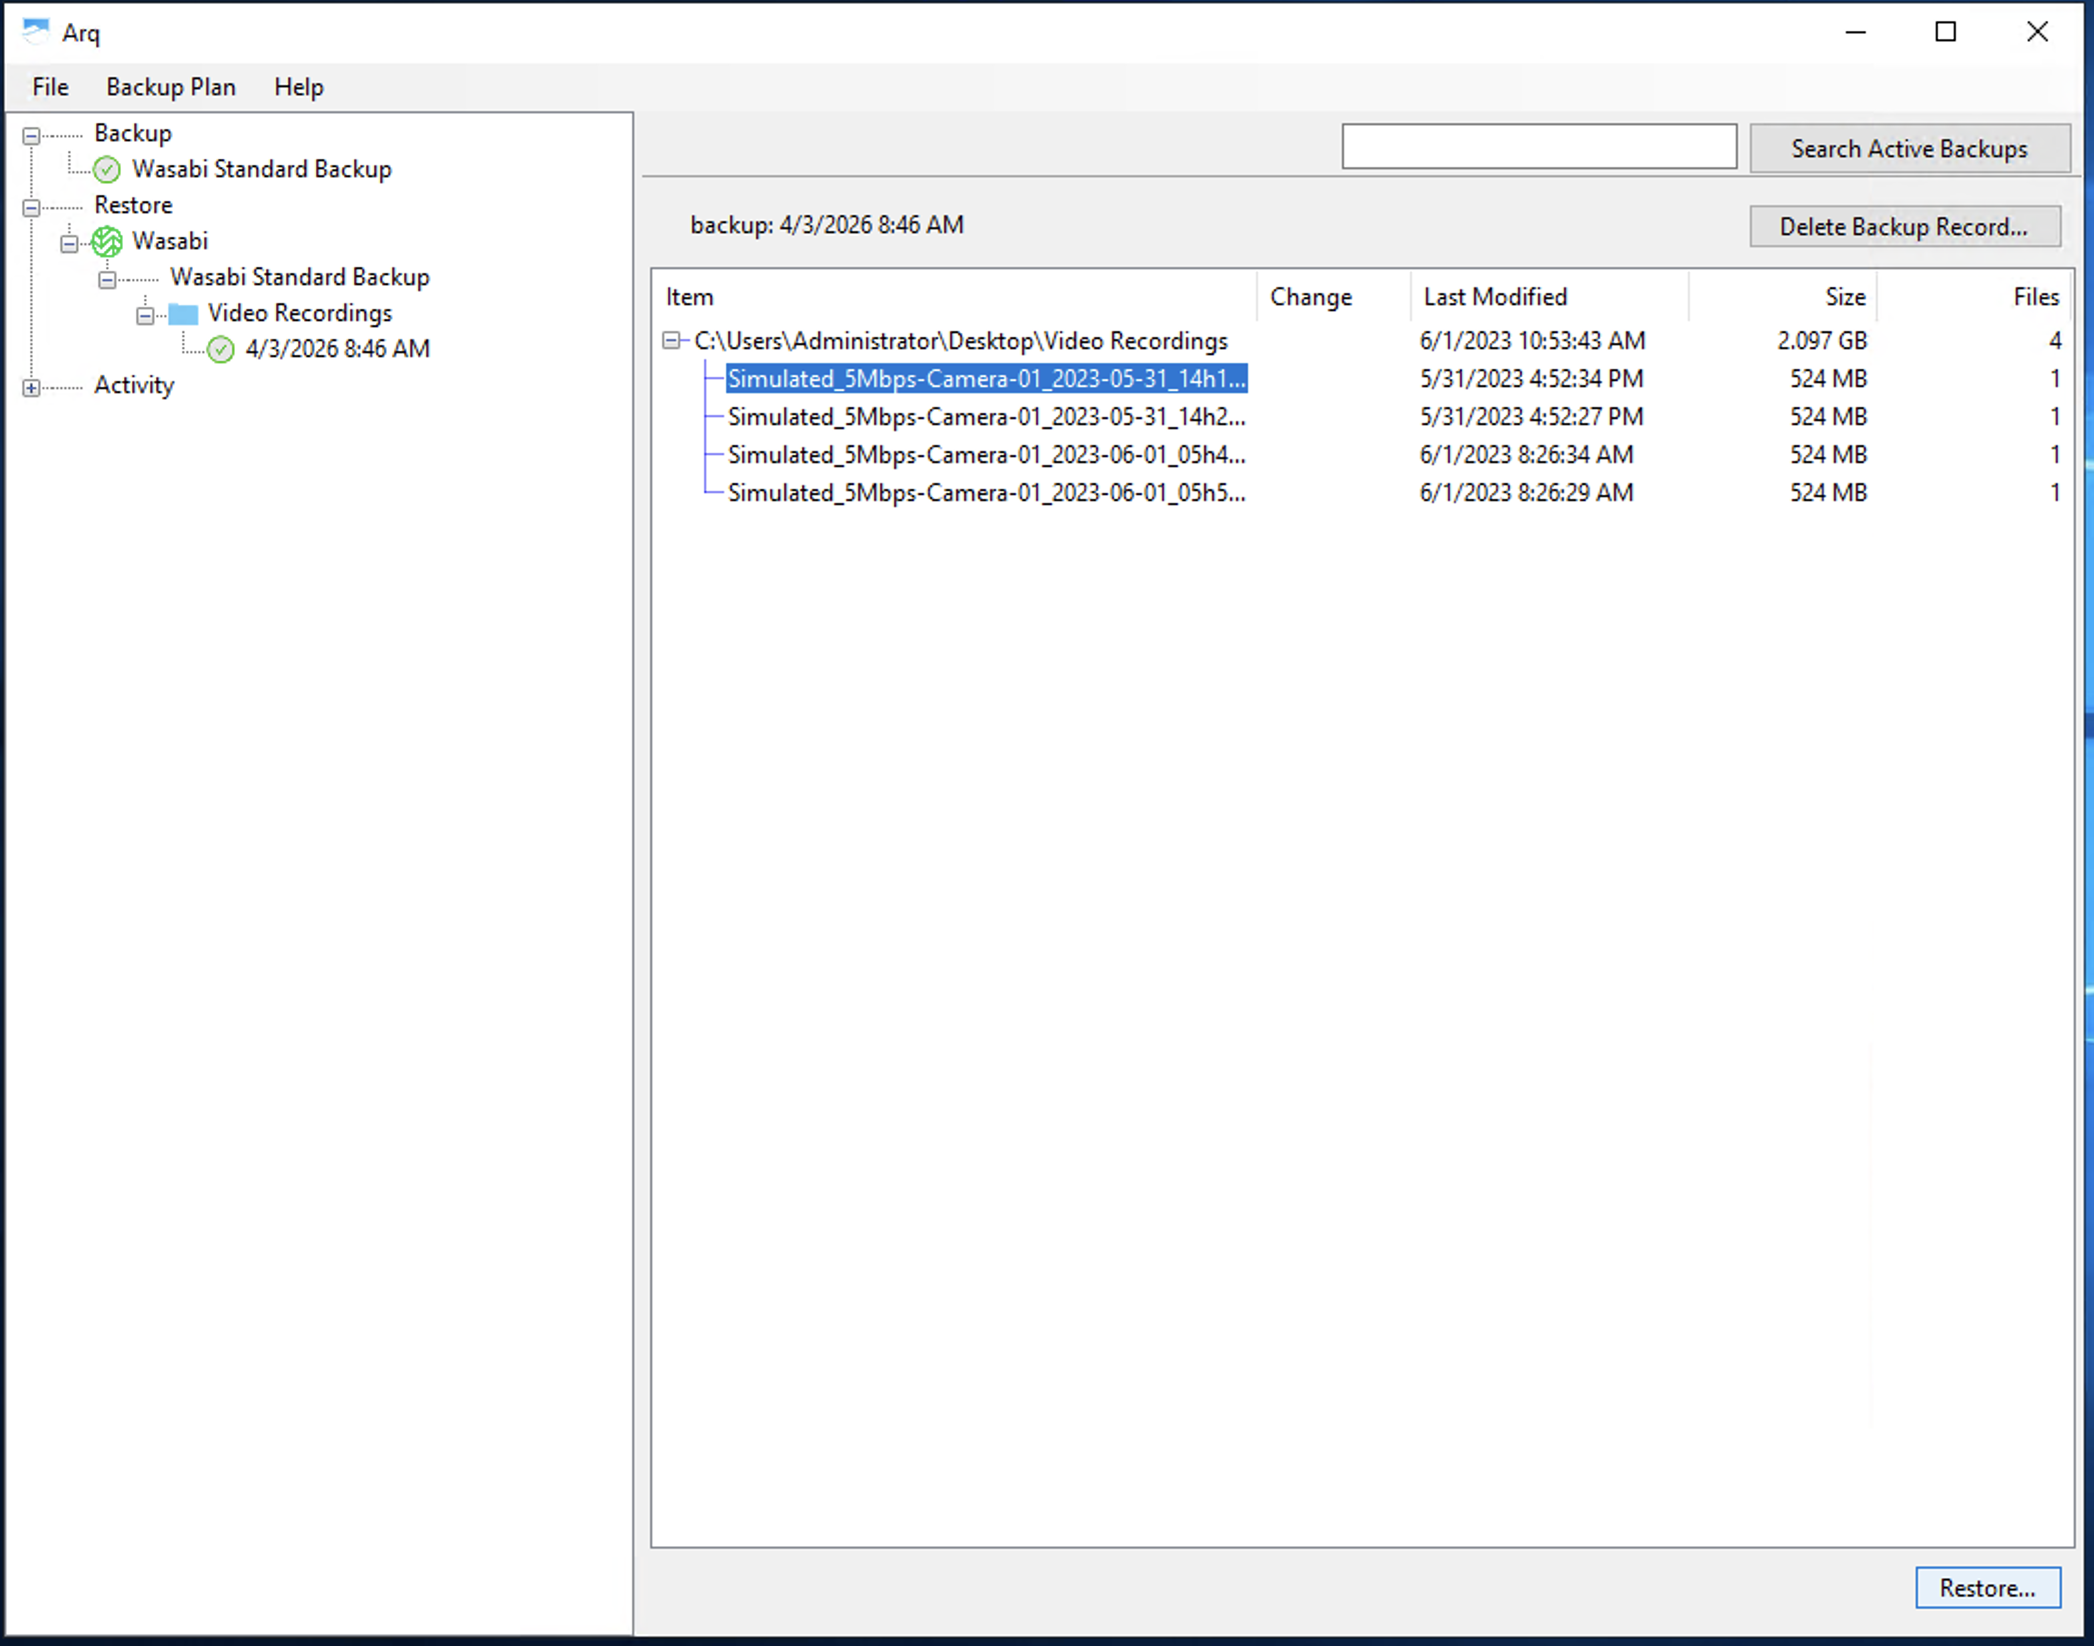
Restoring Data with Arq - Standard Bucket
The data restoration process is handled by your specific backup software application. As there are many, potential variables that will affect your unique environment, Wasabi strongly recommends that you seek the guidance of your backup software's technical support team in the event that you encounter difficulty or have application-specific inquiries.
Open your Arq backup application.
Navigate through the tree under Restore. Select your recent backup.
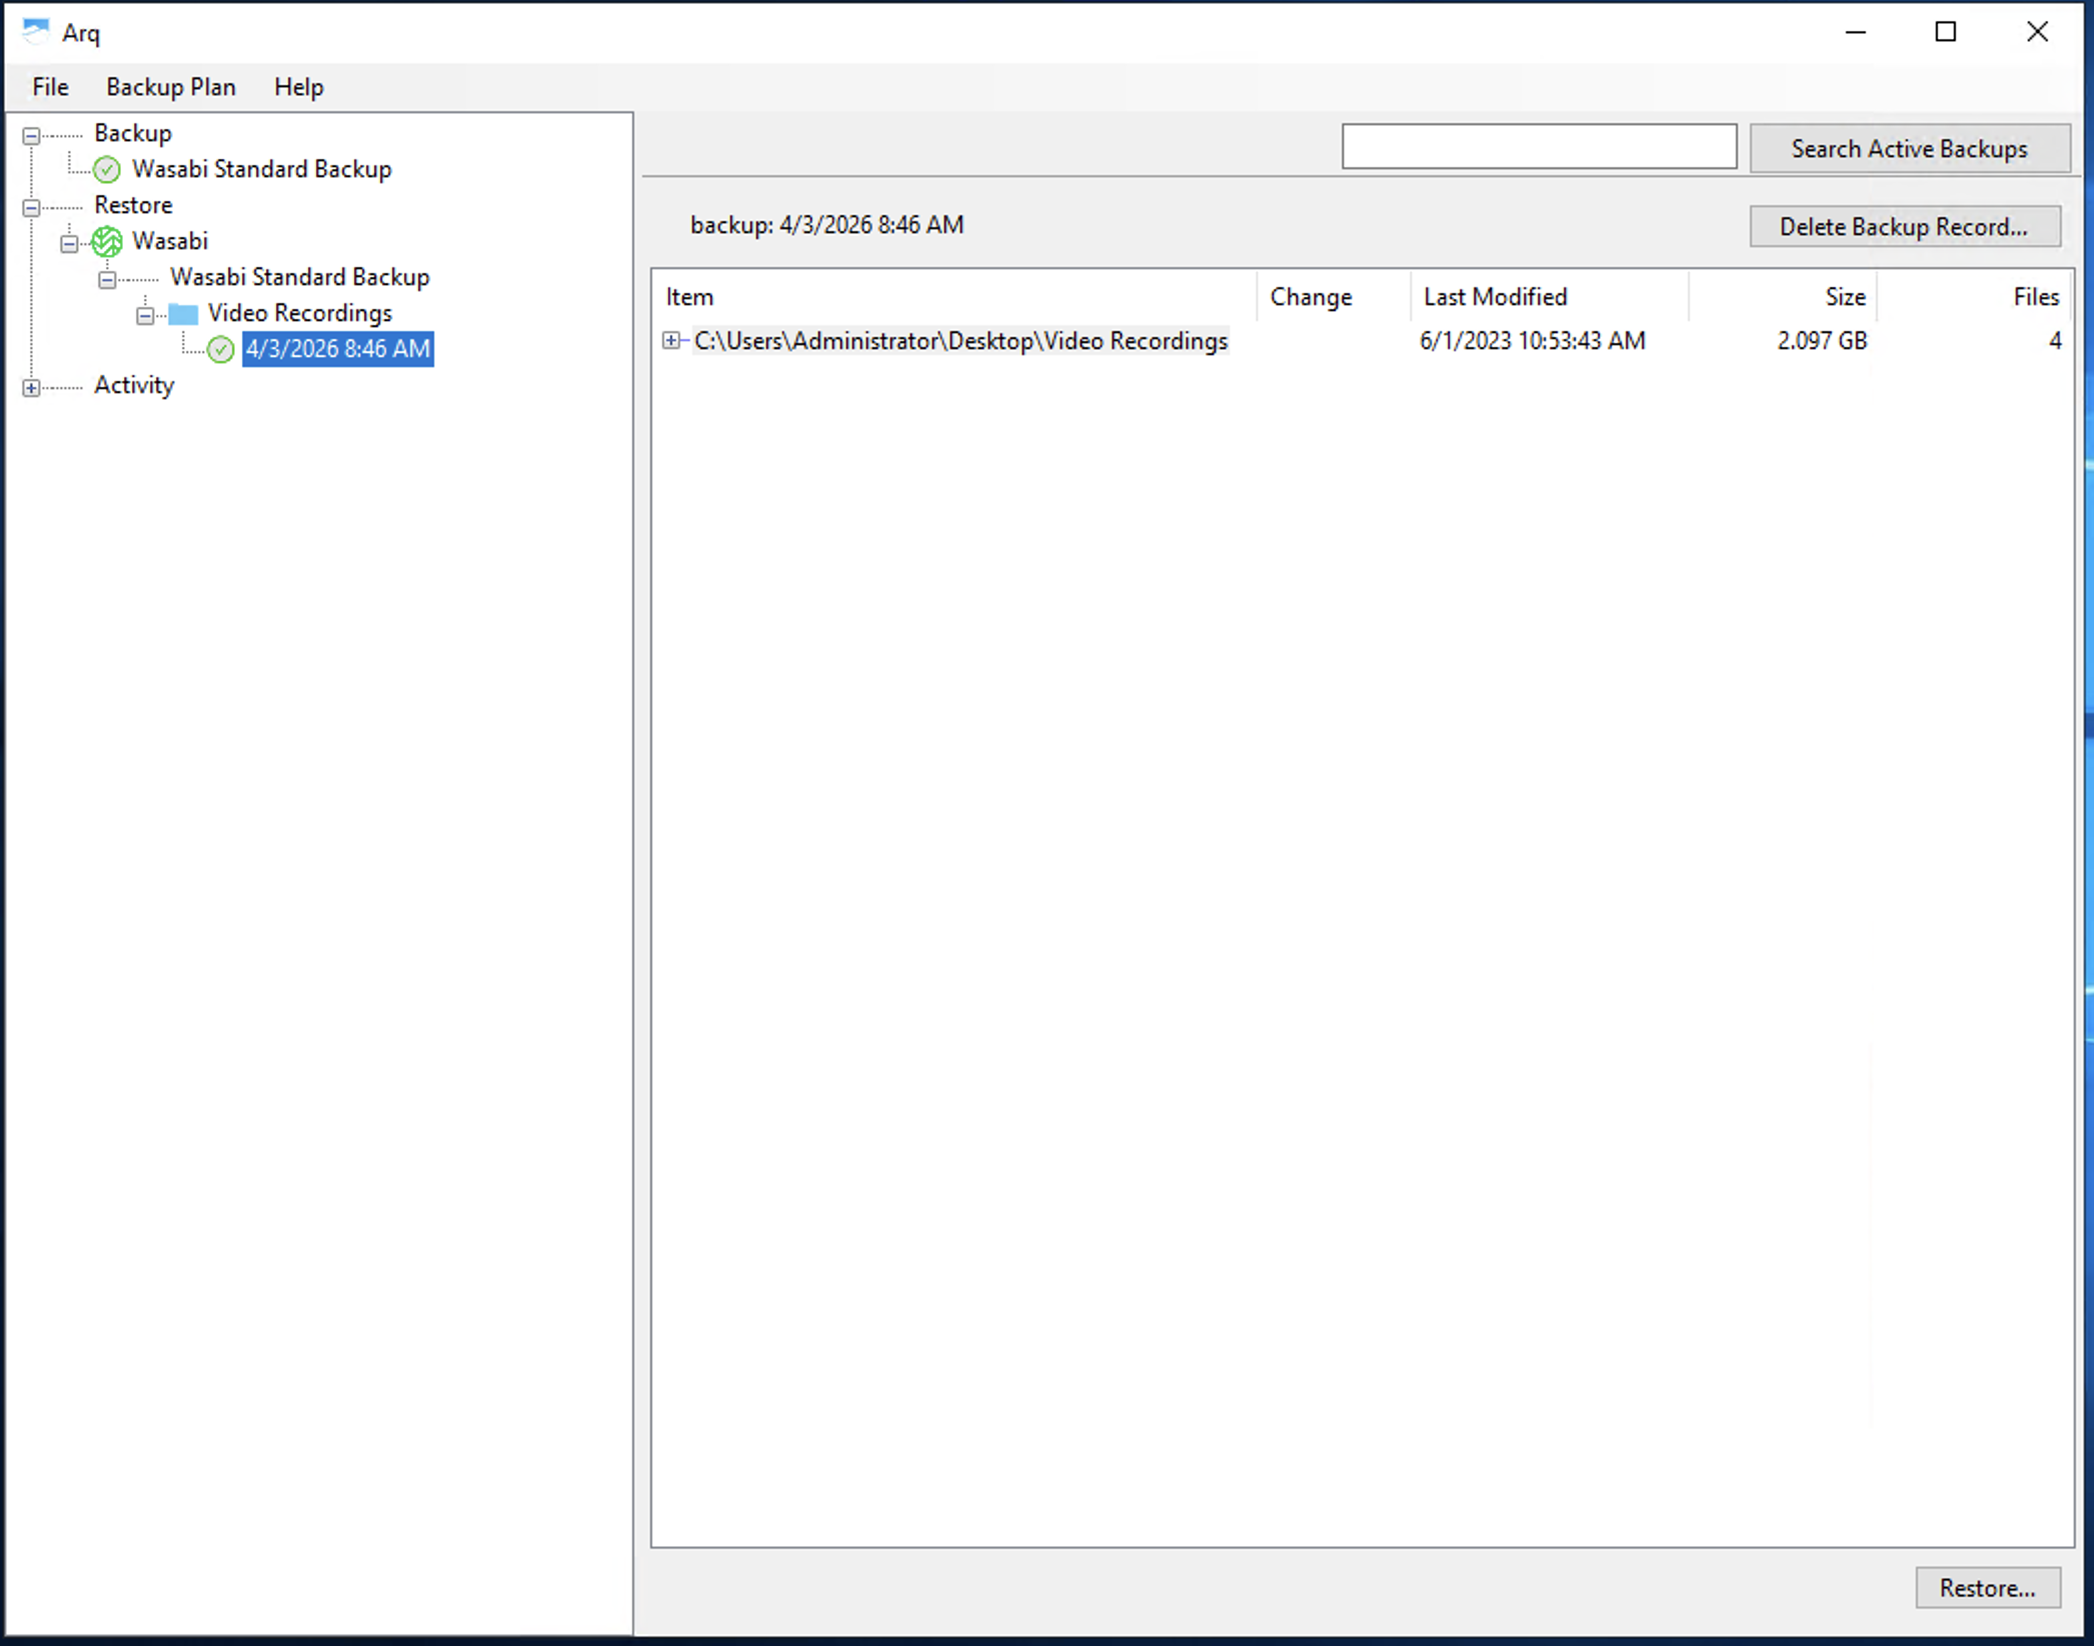
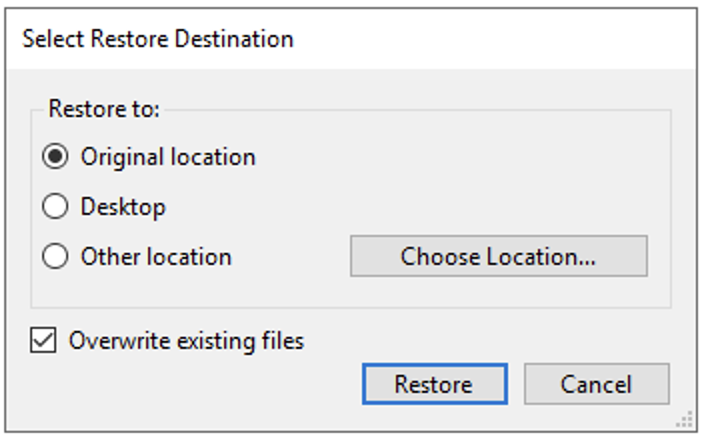
Choose the data you would like to restore on the right pane. Click Restore.
Depending on your use case, choose to overwrite the files in the original location or restore to an alternate location (preserving the original file, if it exists). Click Restore.
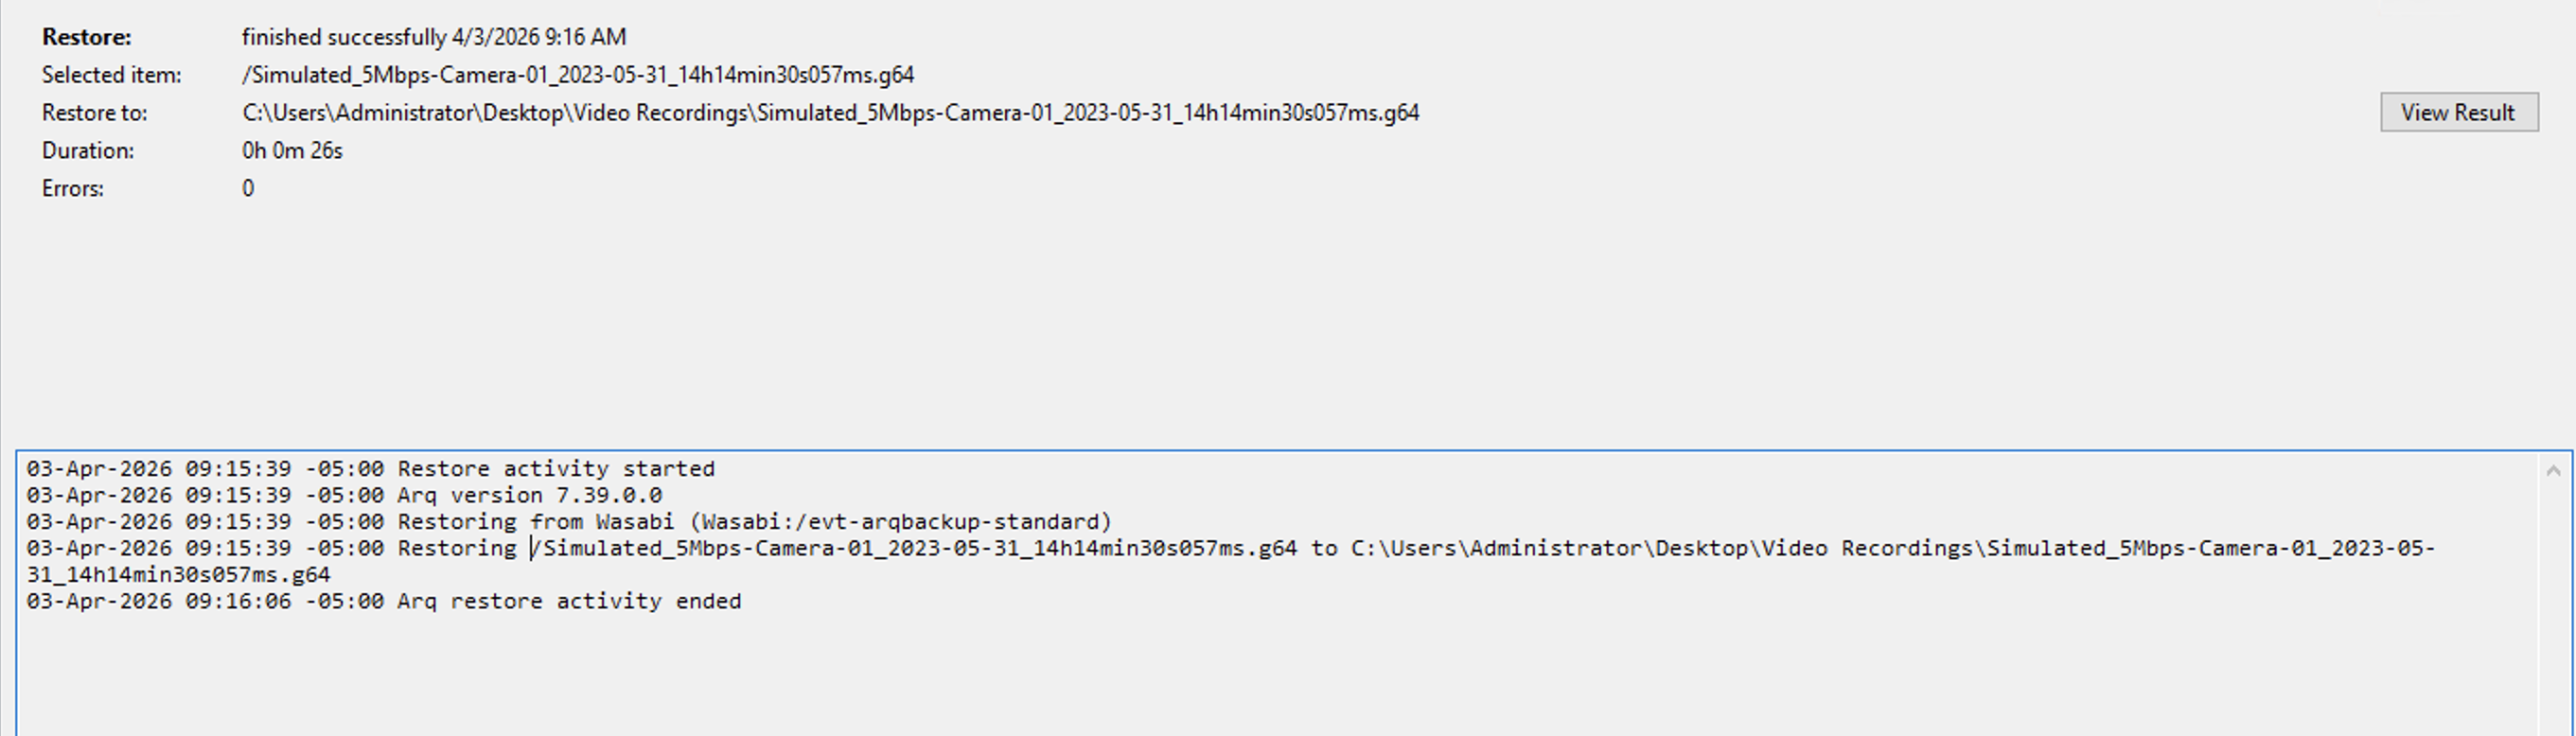
The restore process will show in the Activity section.
Configuring Wasabi Storage Location in Arq With Immutability - Object Locked Bucket
Immutability protects your data from modification or deletion until the immutability period on the object has concluded. This ensures that malware or bad actors cannot change the contents of your backups. Please note that data with Object Locking enabled cannot be deleted by anyone until the immutability period concludes. Be sure to double-check the length of time you require this data to be immutable according to your organizational guidelines.
Create an object-locked Wasabi bucket by referring to Object Locking.
Open your Arq backup application.
Click File - New Storage Location.
Choose Wasabi from the pop-up menu. Click Continue.
Input your Wasabi Access and Secret Access Key. Click Continue.

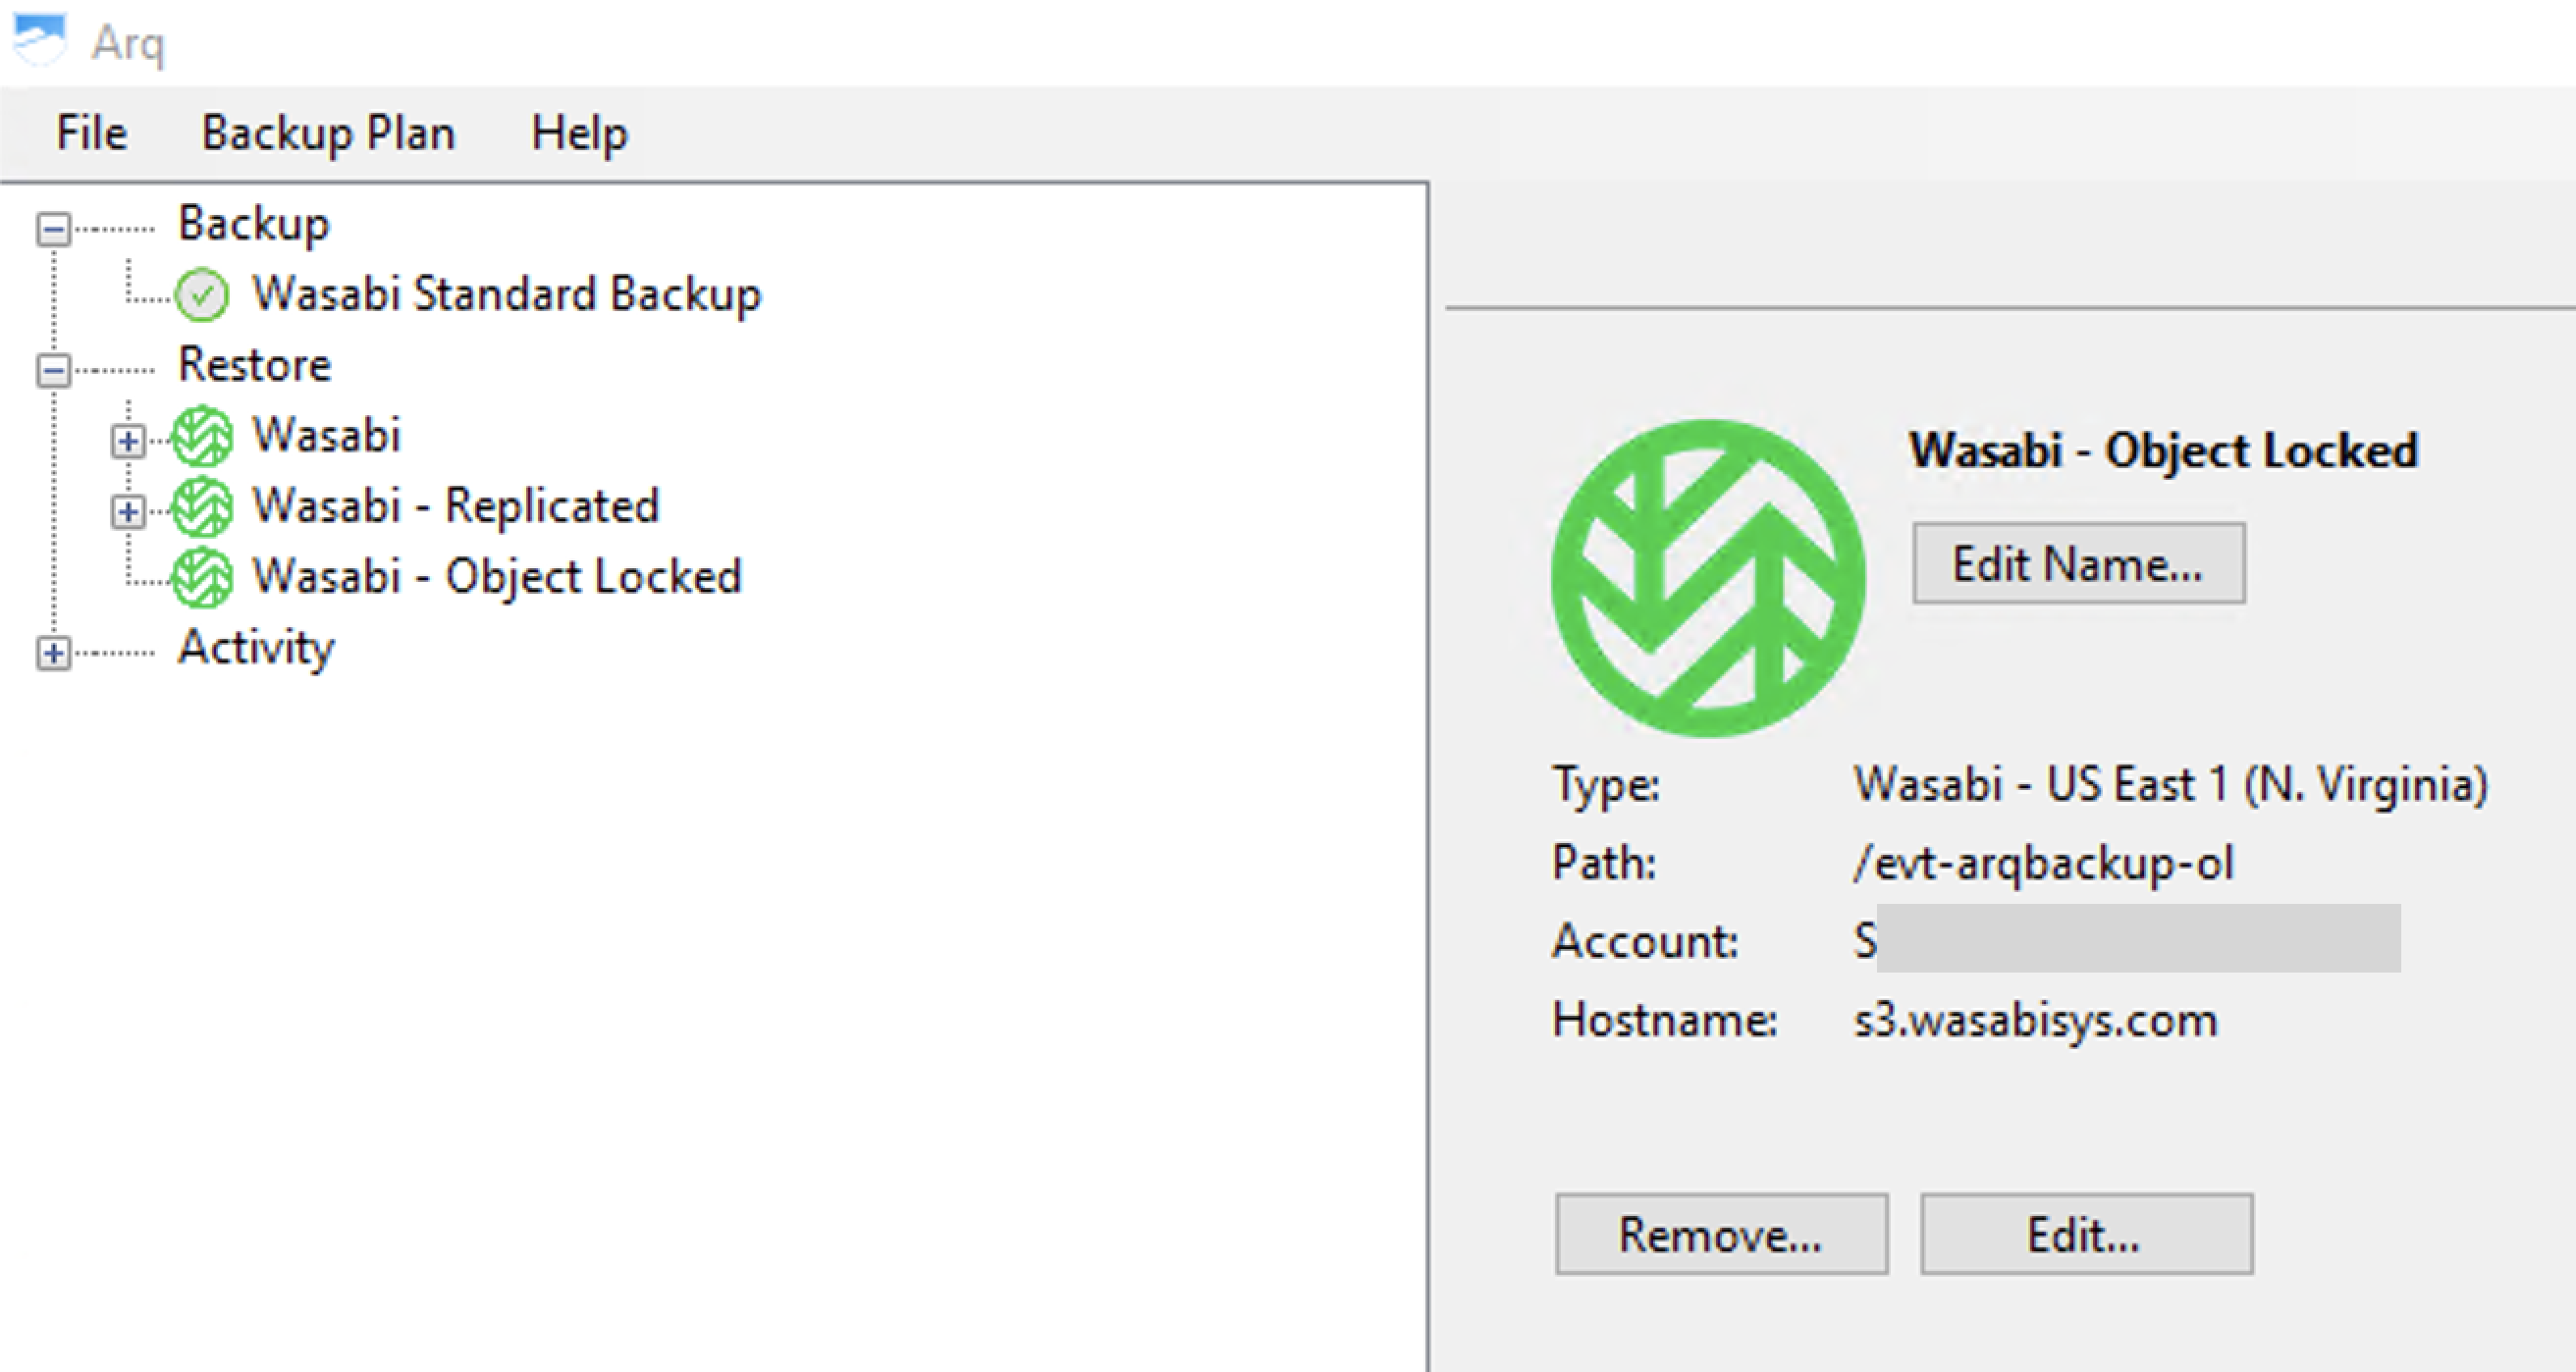
Click the button next to Use existing bucket, choose your Wasabi object locked bucket name from the dropdown. Click Continue.
Your new Storage Location will appear in the righthand pane. (If you have multiple Storage Locations, you may wish to rename this location.)
Creating a Backup Plan in Arq With Immutability - Object Locked Bucket
Open your Arq backup application.
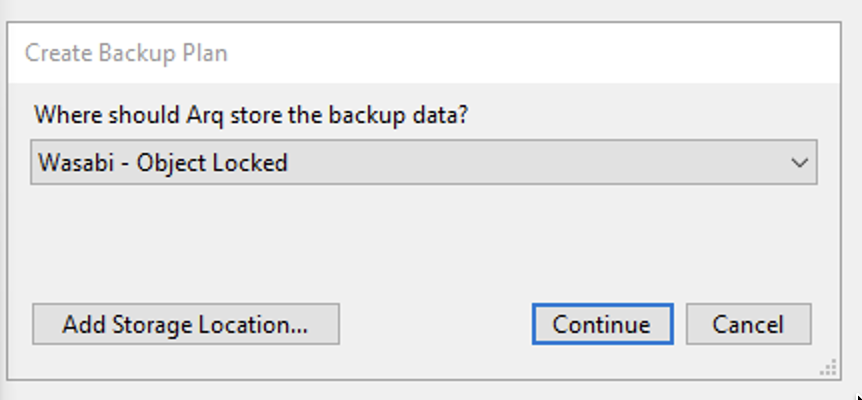
Click File. Click New Backup Plan.
Choose Wasabi - Object Locked (or the custom name you had set for your Object Locked Storage Location) from the dropdown menu. Click Continue.
Optionally, encrypt your backup with a password. Click Continue. You will need this password again to decrypt the data, so it should be stored securely.

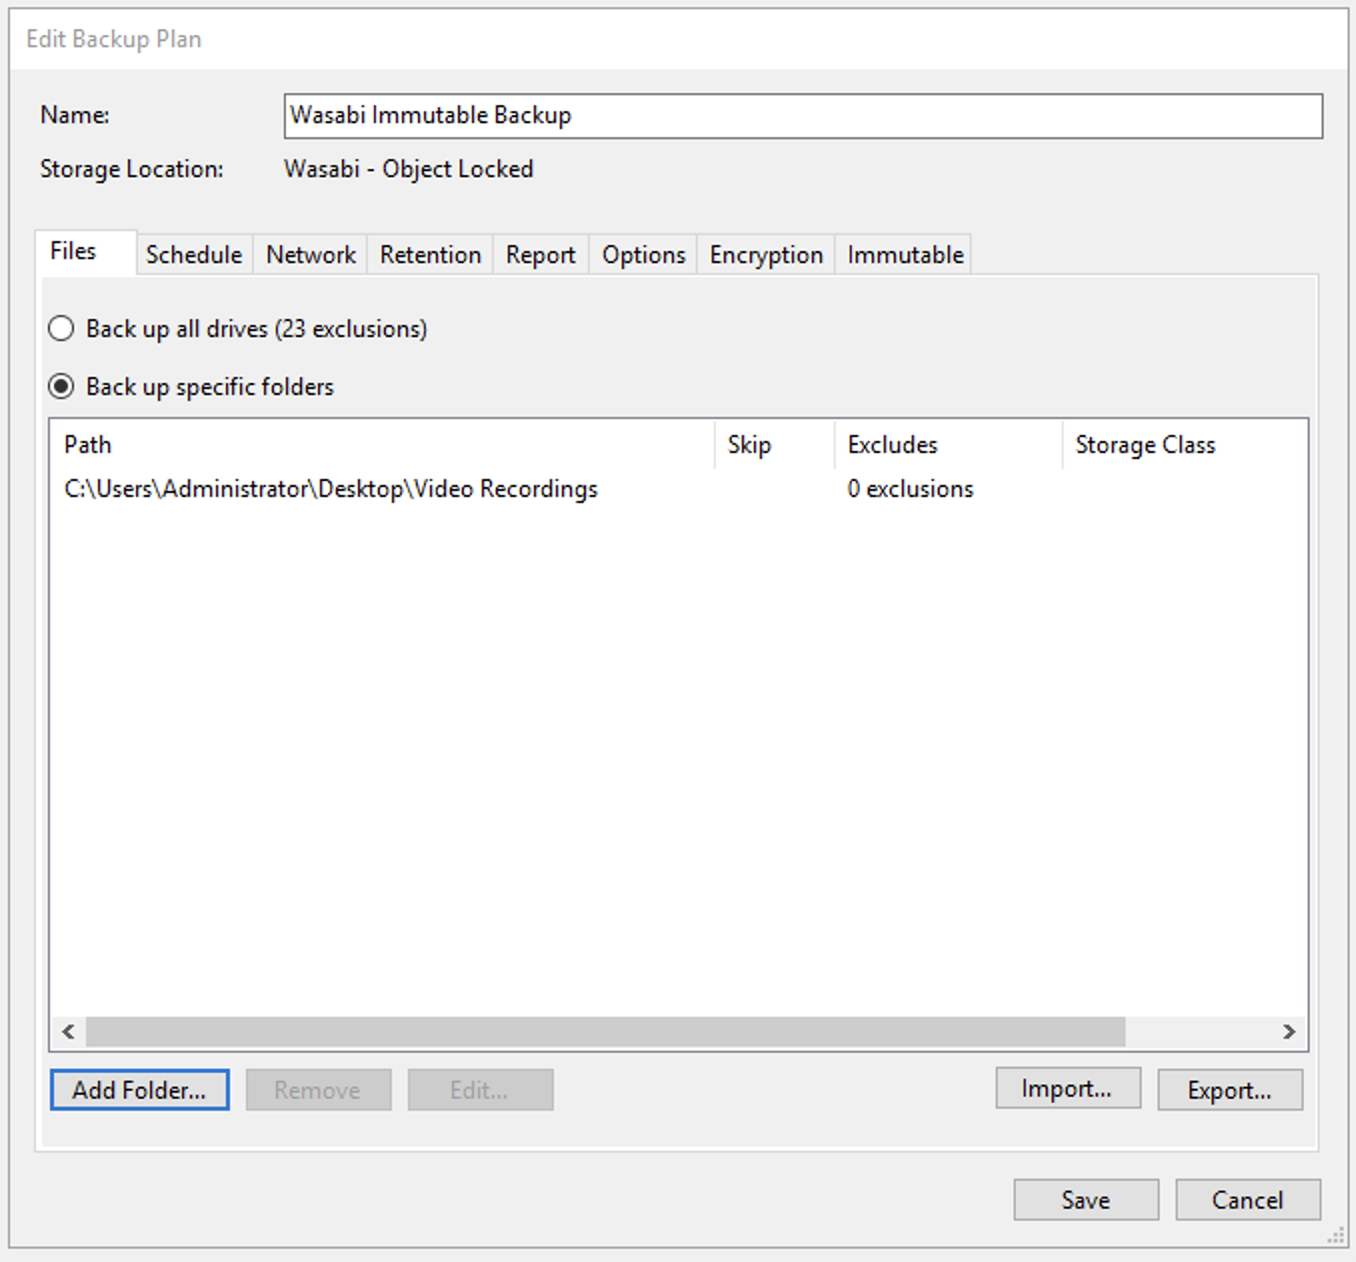
Choose the data to back up, this will depend on your organizational backup strategy. (For this example, we are backing up a folder on a Windows Server.) Click Create Backup Plan.

Add your desired folders/drives.
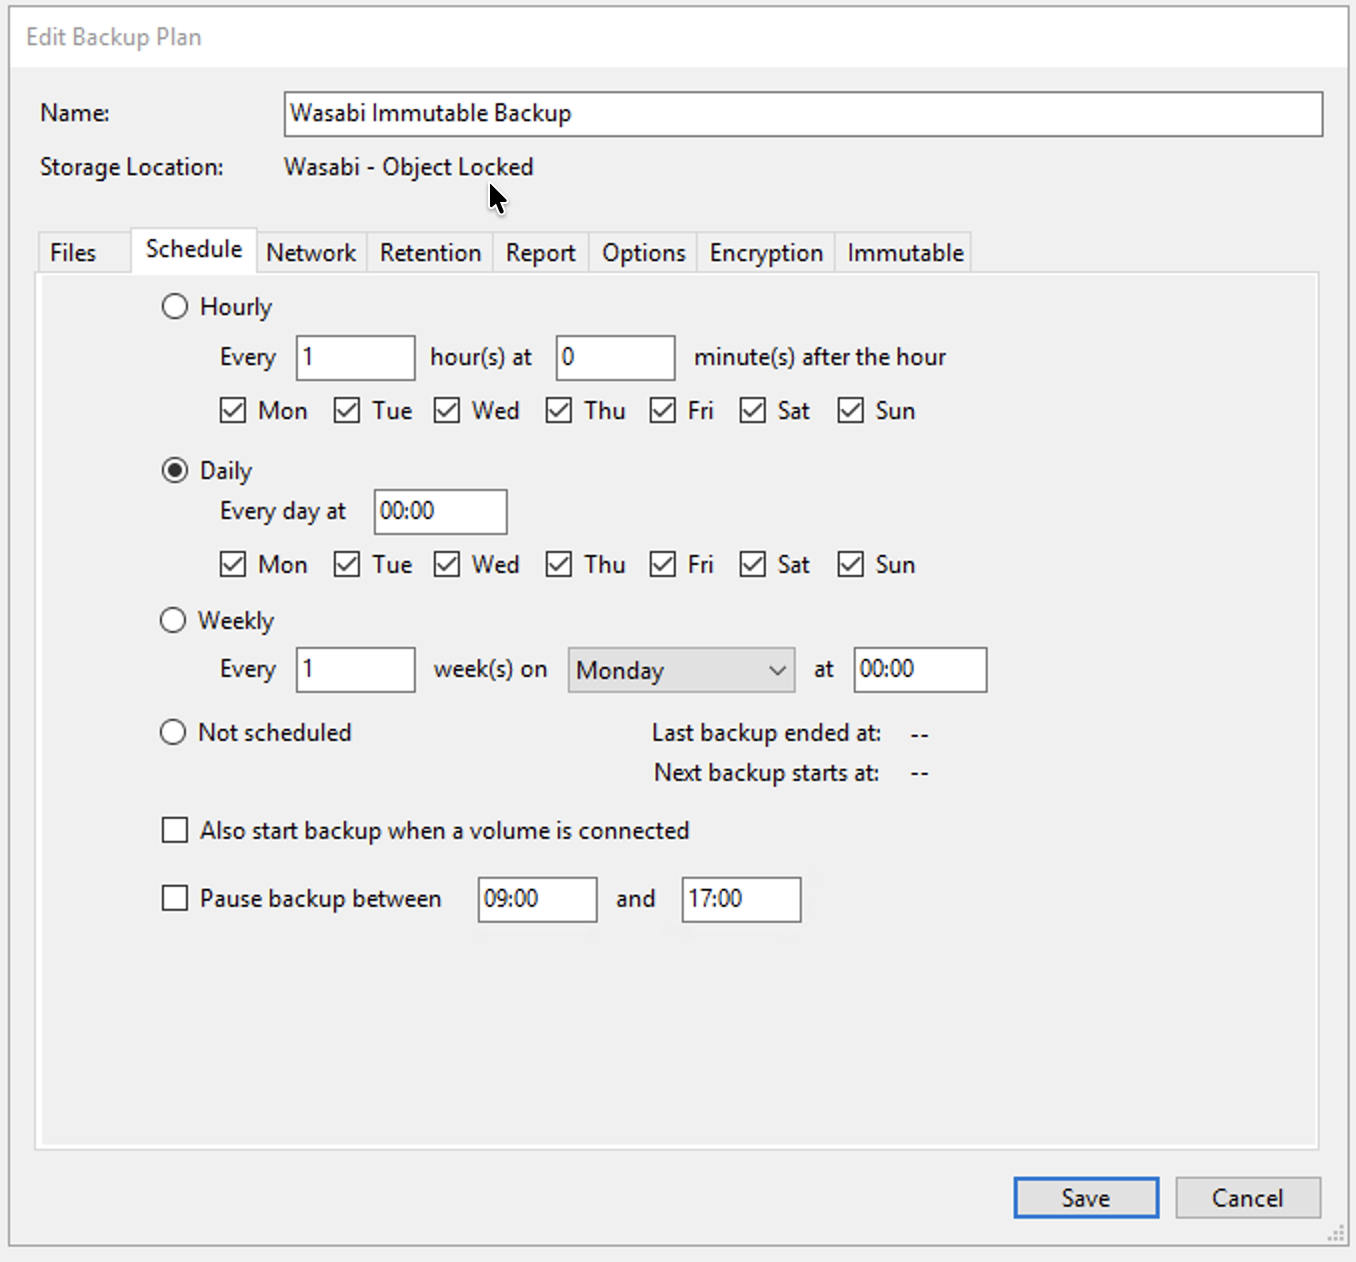
Set a Schedule for your backup operation.
Optionally, set a Retention period for your data to delete older backups as they age out.
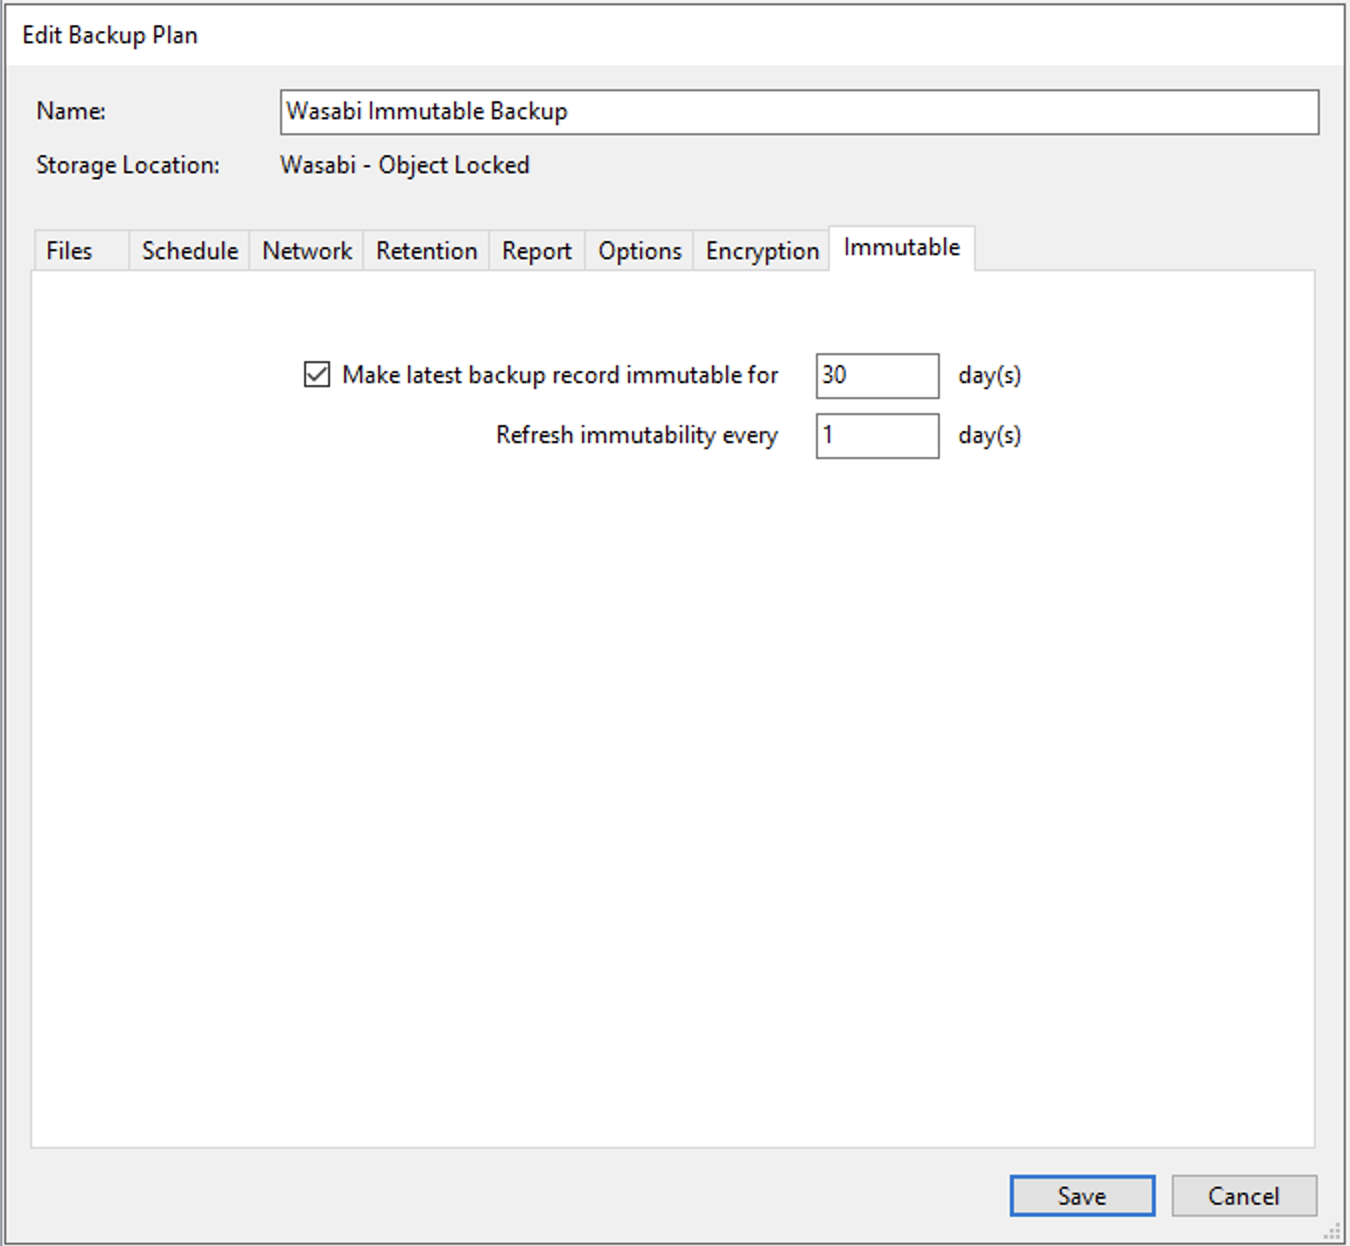
Enable Immutability, and set the immutable period for your backups. Click Save.
Please note that you will need to adjust the “Refresh Immutability” setting to ensure that it does not conflict with your “Retention” settings (in other words, you want to ensure that the data removed by the “Retention” setting is not still immutable when the application attempts to delete it). You may want to reach out to Arq support for recommendations based on your specific use case.
Backing Up Data With Arq - Object Locked Bucket
Open your Arq backup application.
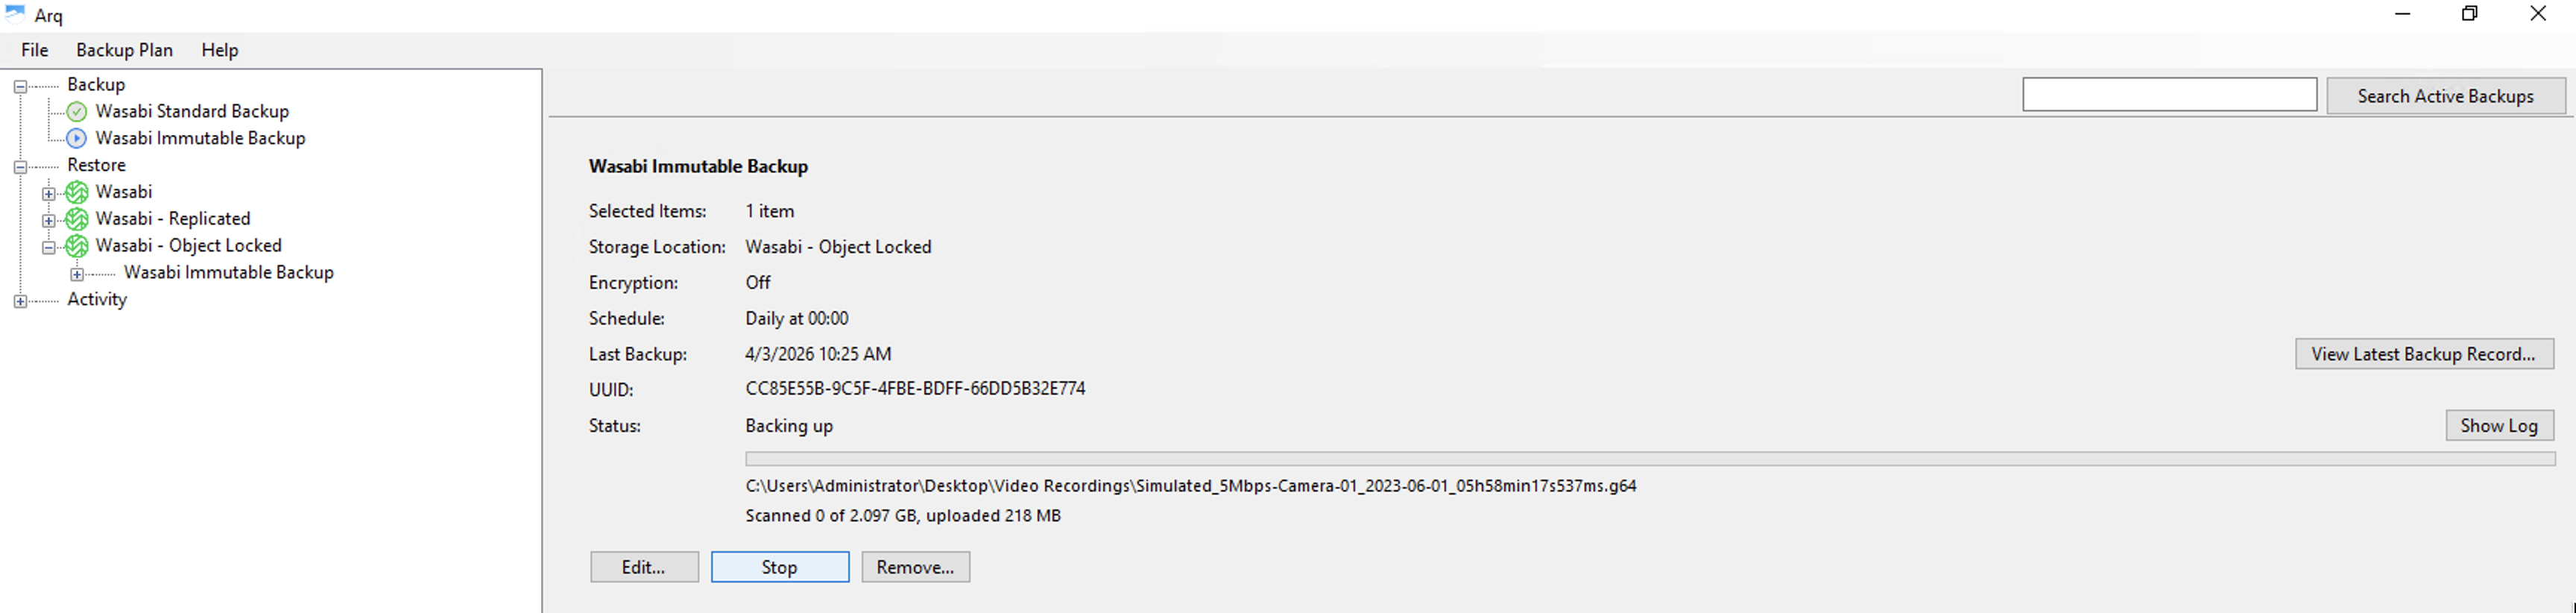
Click your Backup Plan under the top-level Backup title. Click Back Up Now.
Your backup progress will be displayed.
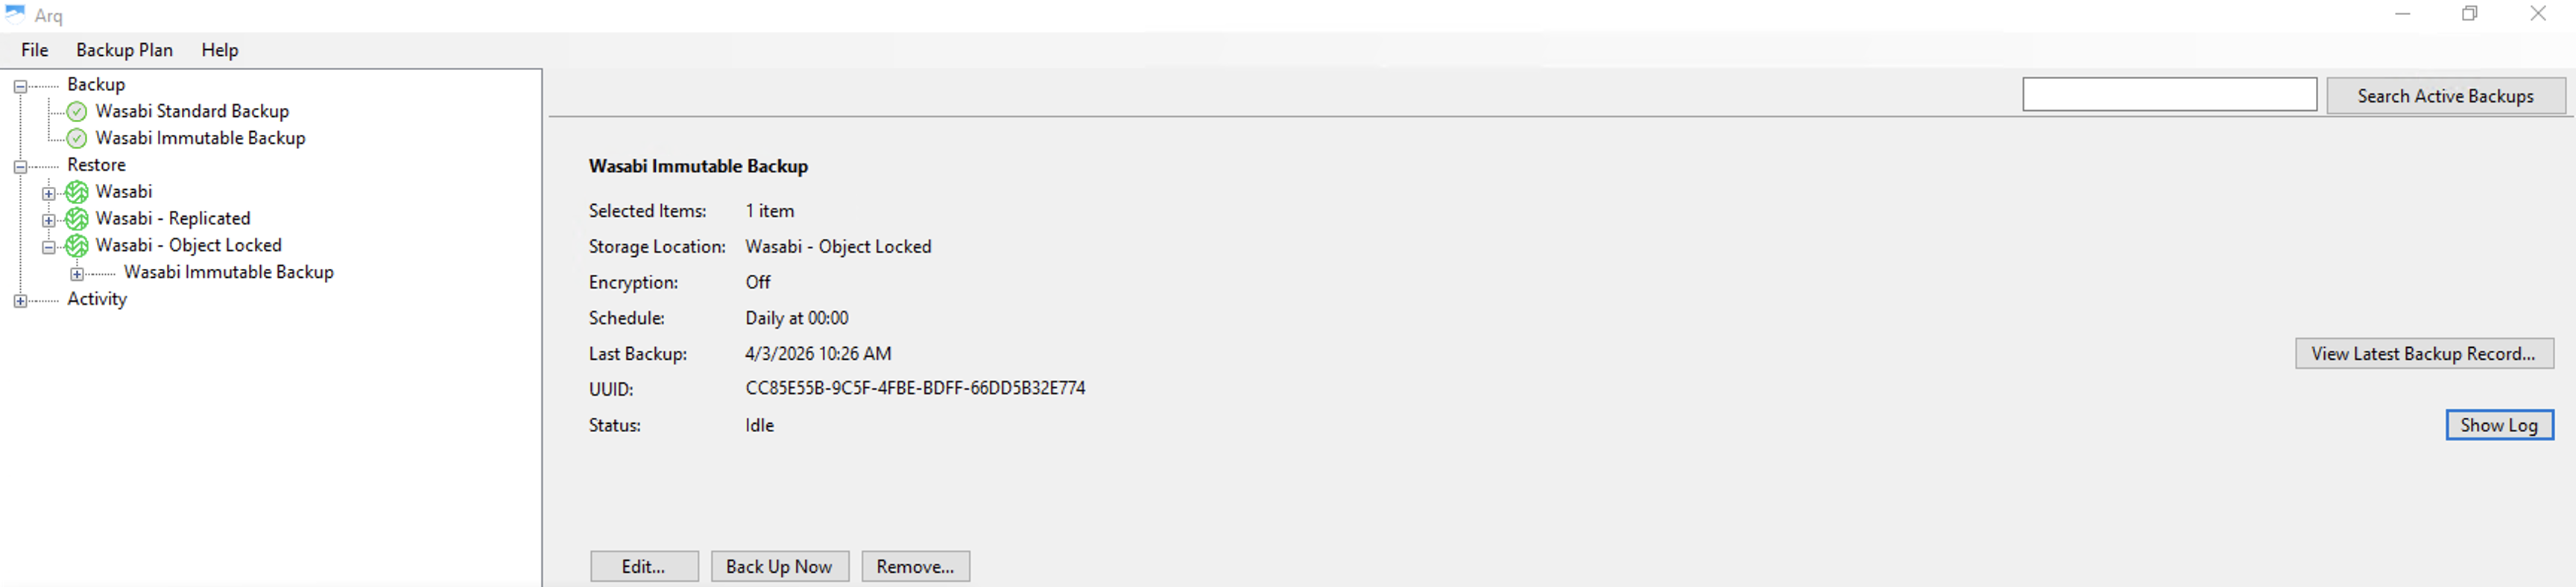
Once the backup completes, the status will return to idle. You can also check the backup log by clicking Show Log.
Verifying Data in Wasabi - Object Locked Bucket
Log in to your Wasabi Storage Console.
Search your bucket associated with Arq. Navigating through the folders in this bucket will show that your data is stored in a proprietary format. You’ll also see that the data has an Immutability period set.