How do I use BunnyCDN with Wasabi?
BunnyCDN is validated for use with Wasabi cloud storage, providing a solution to speed up the delivery of the contents of your Wasabi bucket to the public.
To integrate BunnyCDN with your Wasabi storage account, follow the steps below.
- Create a new bucket from the Wasabi Console. You may skip this step if you want to serve content from an existing Wasabi bucket.
- You will need a pair of access keys and the corresponding secret key. If you do not have one, you may generate it following the instructions in 3—Creating a User Account and Access Key.
- Sign in to your BunnyCDN account. Click Delivery > CDN > Add Pull Zone, as shown in the screenshot below.

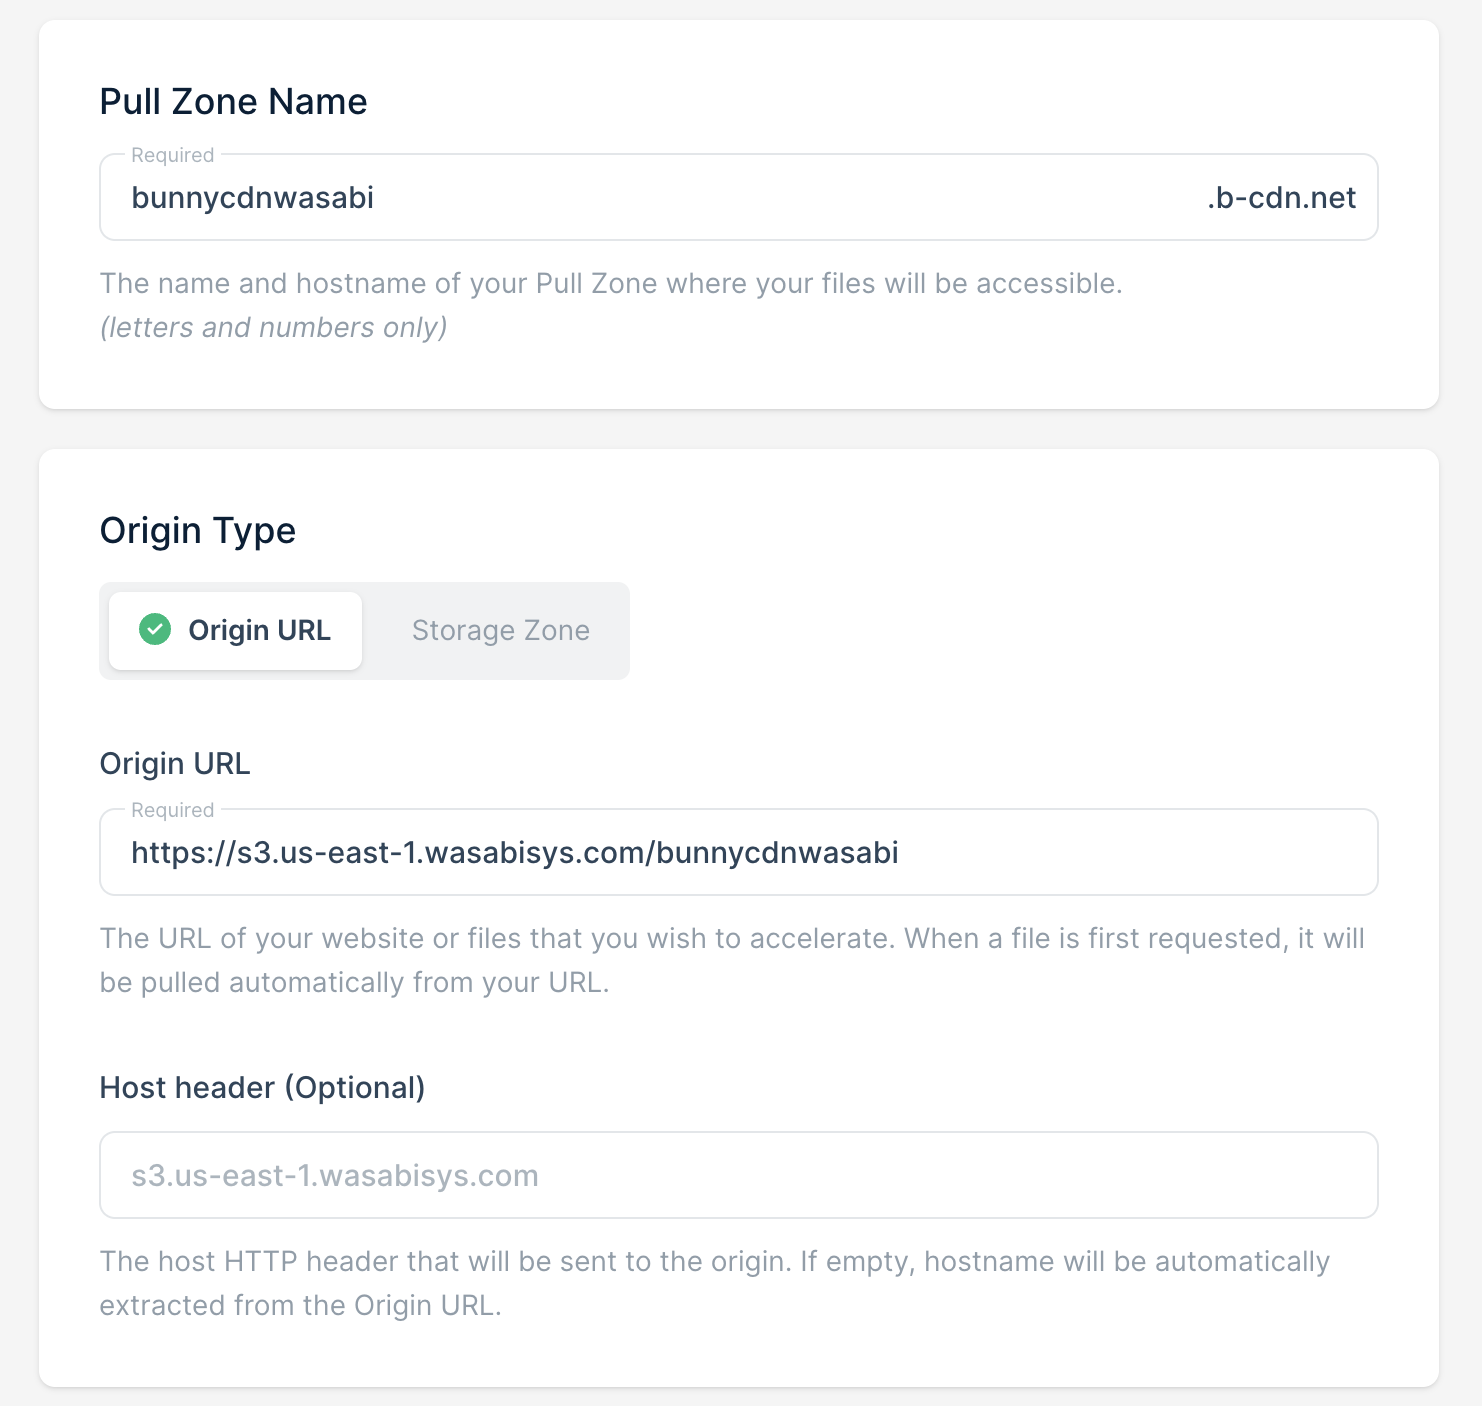
- Provide a name for your pull zone. In our example, we are using “bunnycdnwasabi" as the pull zone name. Note that the hostname associated with our pull zone would be “bunnycdnwasabi.b-cdn.net”. Provide an “origin URL.” The origin URL should be “https://s3.your-bucket-region.wasabisys.com/your-bucket-name”. Replace “your-bucket-region" with the region where your Wasabi bucket is located. Replace “your bucket-name" with the name of your Wasabi bucket. In our example, our bucket name is “bunnycdnwasabi and is located in the “us-east-1" region, so the origin URL would be https://s3.us-east-1.wasabisys.com/bunnycdnwasabi.For a list of Wasabi storage regions and their corresponding service URLs, review Service URLs for Wasabi's storage regions.
Once all the information has been entered, the page should look like the following:

You may leave the rest as default or choose as per your requirements and add the pull zone.
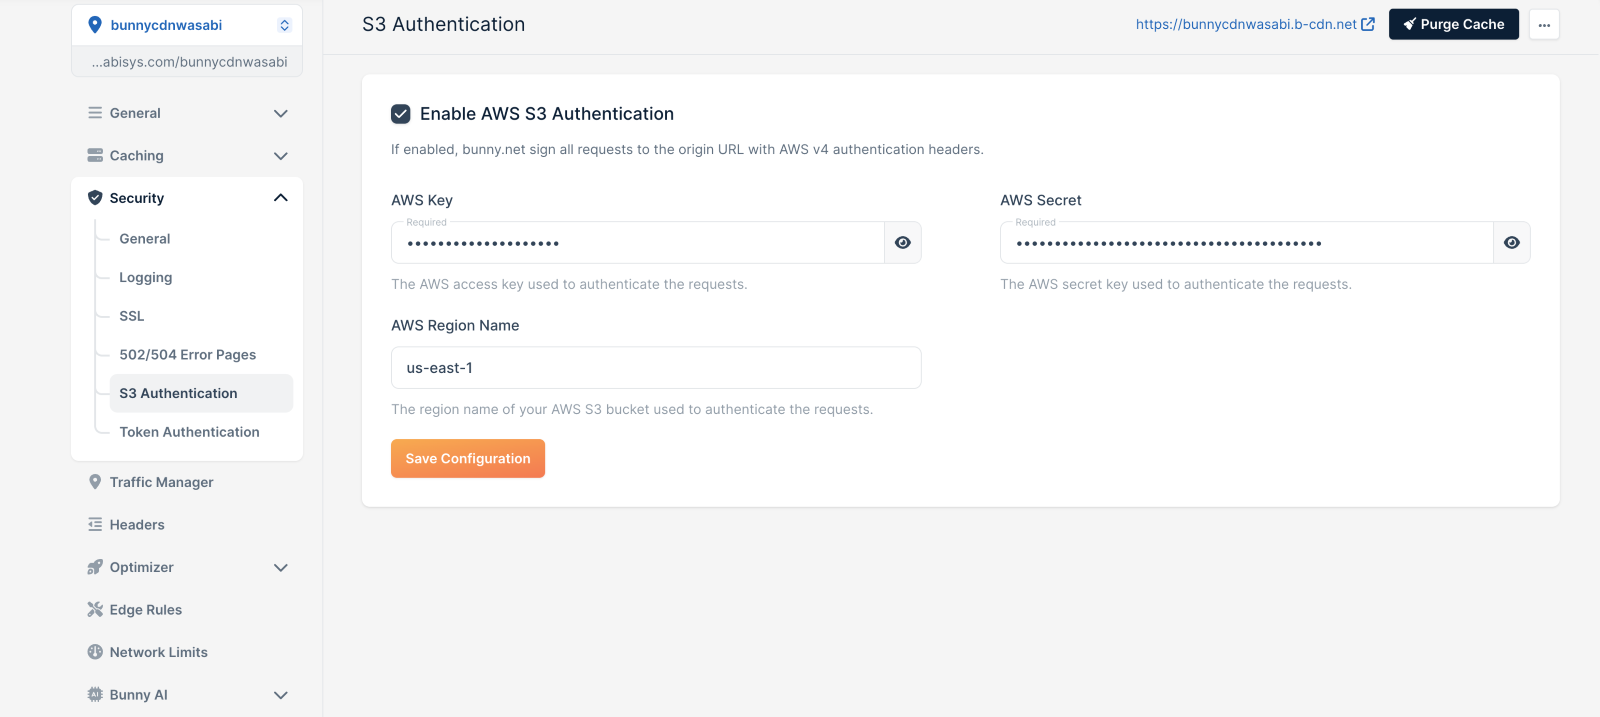
- Once the pull zone has been added, set up S3 Authentication for the pull zone. This will allow BunnyCDN to fetch content from your Wasabi bucket using your access key and its corresponding secret key, and serve it to your users publicly. In BunnyCDN, navigate to CDN, your pull zone, Security, then S3 Authentication to set up the S3 authentication for your pull zone. Click the checkbox to Enable AWS S3 Authentication. Enter your access key and secret key (from Step 2) in their respective fields. In the AWS Region Name field, enter the region where your bucket is located, which is “us-east-1" in our case. Once complete, click Save Configuration.

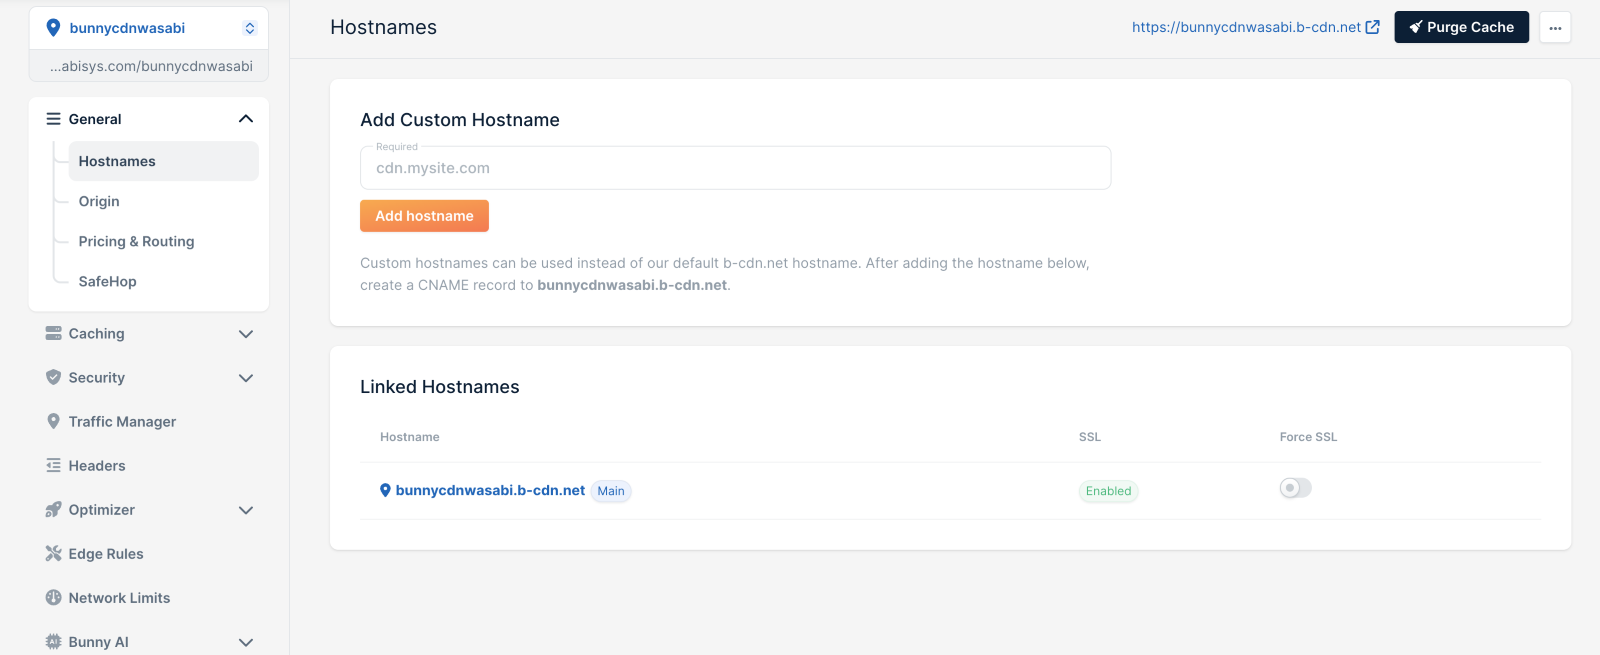
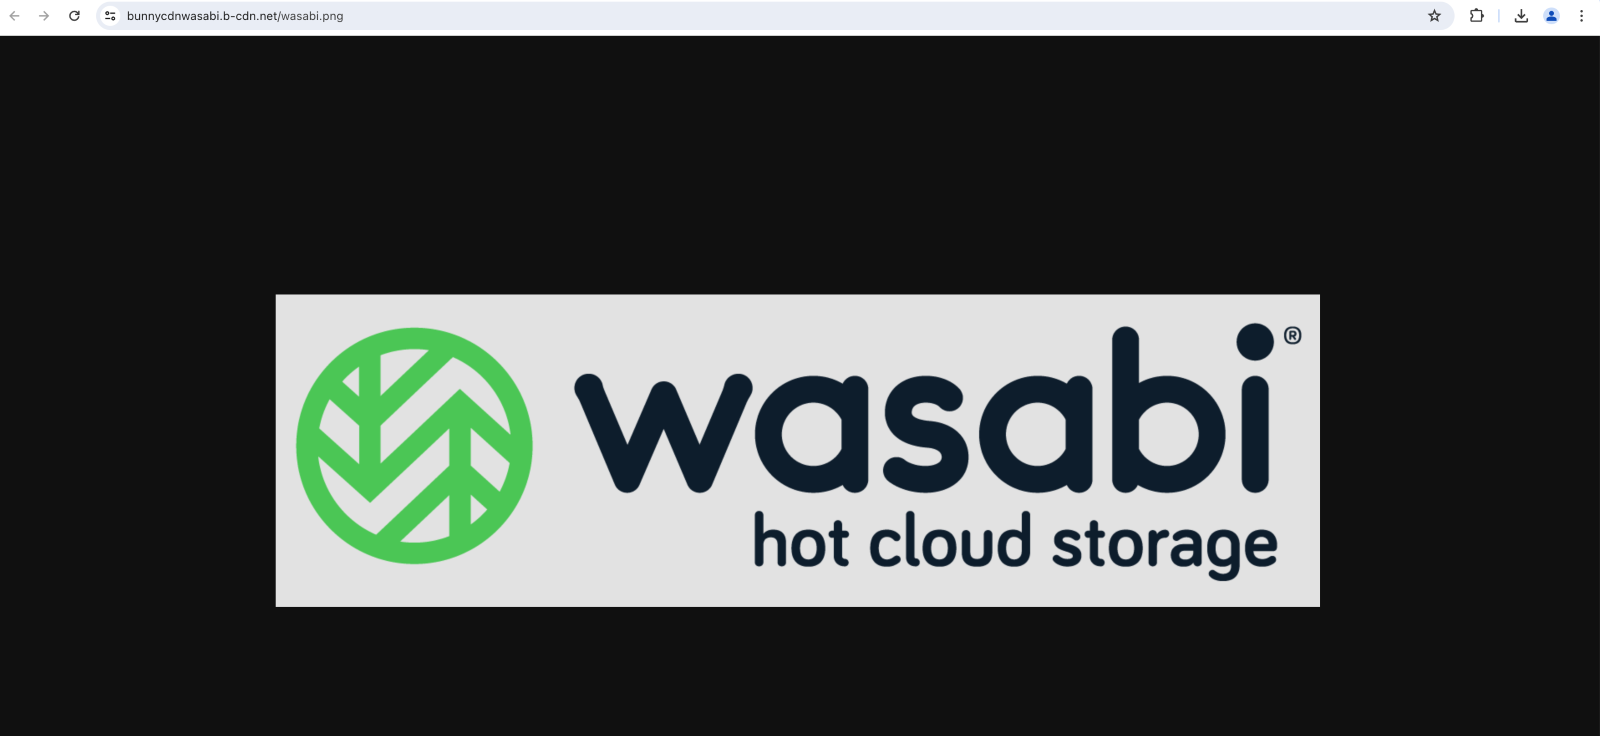
The URL to access your bucket’s contents would be in the format “https://your-bunnycdn-hostname/your-object-key”. In this example, the BunnyCDN hostname is “bunnycdnwasabi.b-cdn.net” and the test object key is “wasabi.png”, so the URL to access our test object would be https://bunnycdnwasabi.b-cdn.net/wasabi.png. Remember that the hostname associated with your pull zone would be in the format “pull-zone-name-entered-in-step-4.b-cdn.net”. You may also find it under CDN > General > Hostnames.

The object from our example (note the URL):
 Public access is not required when integrating BunnyCDN with Wasabi using S3-authentication. All requests to your Wasabi bucket are authorized using your access and secret keys. Content can be retrieved through the configured BunnyCDN pull zone and object path, enabling secure and optimized delivery without exposing your files to the public.