How do I use Couchdrop to migrate data from Google Cloud Platform to Wasabi?
Couchdrop's Movebot has been validated for use with Wasabi. To use this product with Wasabi, please follow the instructions below.
1. Reference Architecture
.png)
2. Prerequisites
Source platform access (Bucket identifier, keys, Oauth, etc.)
Movebot account
An active Wasabi account
3. Configuring a migration
Create your Movebot account at https://admin.movebot.io/register.
.png)
Click on "+ Create New Migration"
.png)
In the Create a new Migration window, select "Simple Migration".
.png)
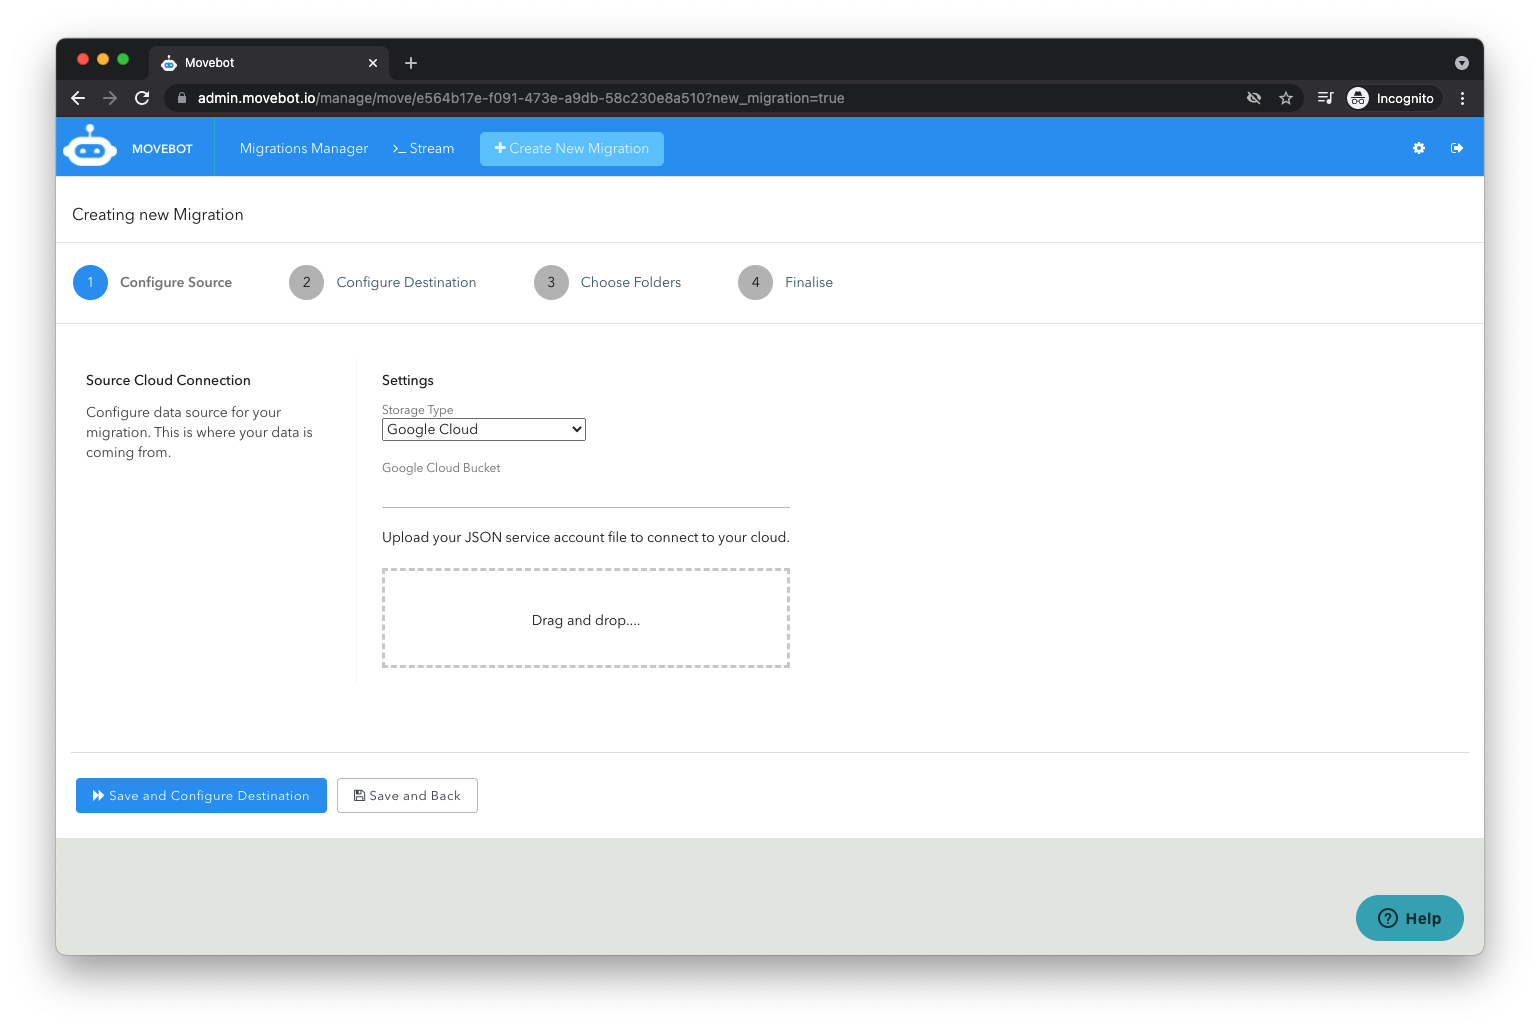
In the Configure Source section, select "Google Cloud" as the Storage Type, provide the required details and click "Save and Configure Destination".
Google Cloud Bucket

In the Configure Destination section, select "Wasabi" as the Storage type, provide the following details and click "Save and Choose folders"
Wasabi Region
Wasabi Bucket
Wasabi Access Key
Wasabi Access Secret Key
.png)
In the Choose Folders section, select individual folders (optional, if nothing is selected everything under root will migrate). Click "Save and Finalize"
.png)
Provide name, choose region, and then “Save and kick off”
.png) A pop-up window appears displaying that the migration has started, click Close and you will be directed to web app where you can monitor the status of the migration.
A pop-up window appears displaying that the migration has started, click Close and you will be directed to web app where you can monitor the status of the migration. .png)
You can monitor the status of the migration job.
.png)
4. Running a pre-migration discovery scan
Log in to your account. Create a simple migration following the steps 2 and 3 described above.
In the Configure Source section, select the desired storage type, provide the required details and click "Save and Back".
.png)
Select “Run Scan/Discovery”
.png)