EVO shared storage by Studio Network Solutions (SNS) enables a collaborative edit workflow for all major NLEs, as well as asset management and file automation tools to organize and ensure safety of data. Wasabi has been validated for use with EVO. To use this product with Wasabi, please follow the instructions below.
Reference Architecture
.png)
Prerequisites
EVO v6.1.5 and above
Slingshot version 1.4
An active Wasabi account.
EVO's included Slingshot automation engine can perform replication operations to automatically copy content to an external target on a schedule.
Follow steps outlined below to connect EVO to your Wasabi bucket.
On the EVO web interface, navigate to the Slingshot, then Aliases page.
.png)
Click Add Alias.
.png)
Give your Alias a name and select Amazon S3 as the schema
.png)
Under Region, select Custom host and provide the correct service URL for your Wasabi region, and enter the bucket name as it appears in the Wasabi Console.
Enter the Access and Secret Keys generated in the Wasabi Console. The user that owns the keys will need read/write access to the bucket in order to compare source and destination contents, and to write new content to the destination. If the root user is not entered, the user provided will need all S3 resources allowed.
.png)
Note: This config example discusses the use of Wasabi's us-west-1 storage region. To use other Wasabi storage regions, please use the appropriate Wasabi service URL as described in this article.
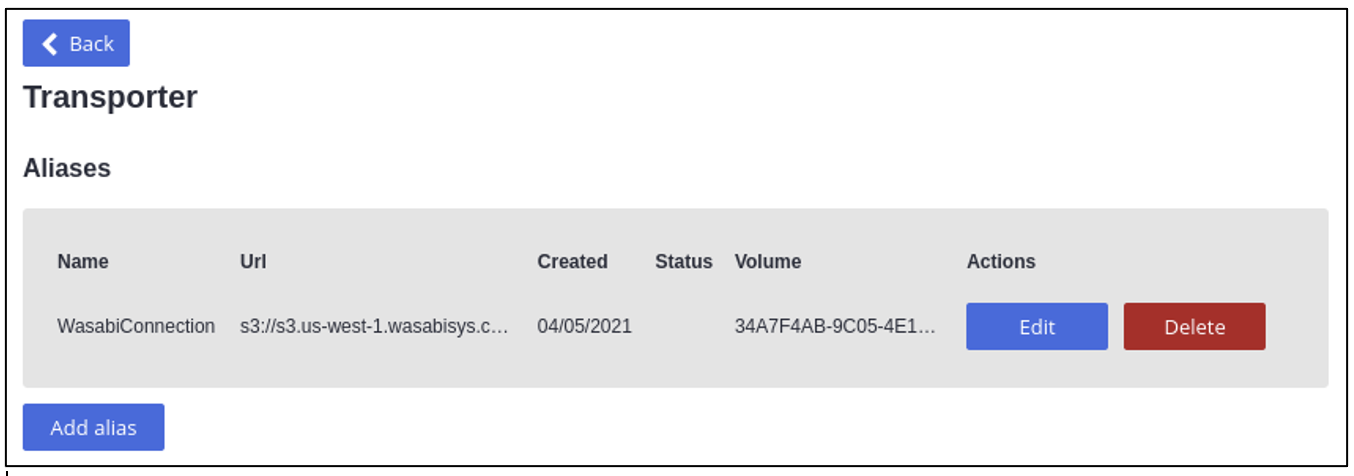
Click Save Changes, allow a few moments for authentication to complete, and confirm a Volume ID is displayed to show registration was successful.
Navigate back to the Slingshot page to create a new replication job.
.png)
Choose the source for what should be replicated to Wasabi, and set the destination as the S3 target. Note that by default this will create a folder on the destination with the same name as your job. The relative path can be changed if needed, or left empty to create the files at the root of the bucket.
The method used by default is Copy/Replace, which means content removed from the source will not be removed at the destination, so the job will only ever add updated content. The other option is Sync/Remove, in which case content deleted from the source will also be deleted from the destination the next time the job is run.
.png)
Note: If ShareBrowser is used with EVO, care should be taken not to manually modify the destination content after replication, since this can create a discrepancy in the ShareBrowser database. It's expected that only Slingshot will be used to modify replicated contents at the destination directory.
More details about advanced configuration options are found in this Slingshot Knowledge Base article and SNS support can provide additional assistance if needed.