How do I use HYCU with Wasabi?
Wasabi has been validated for use with HYCU, which is a leading multi-cloud backup as a service provider. To set up Wasabi with your HYCU application, follow the instructions below.
Prerequisites
- Active Wasabi Cloud Storage Account.
- Wasabi Bucket — For more information, review 2—Working With Buckets and Objects.
- Access & Secret Key Pair— For more information, review 3—Creating a User Account and Access Key.
- HYCU version 4.9.0 or above.
Reference Architecture
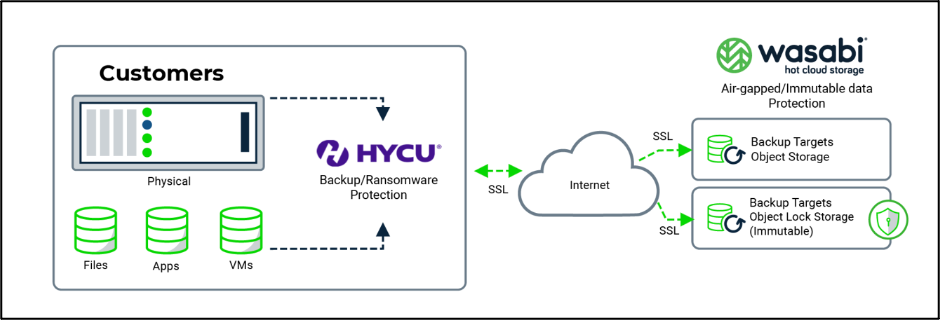
Configuring HYCU
- Launch the HYCU Backup Controller application.
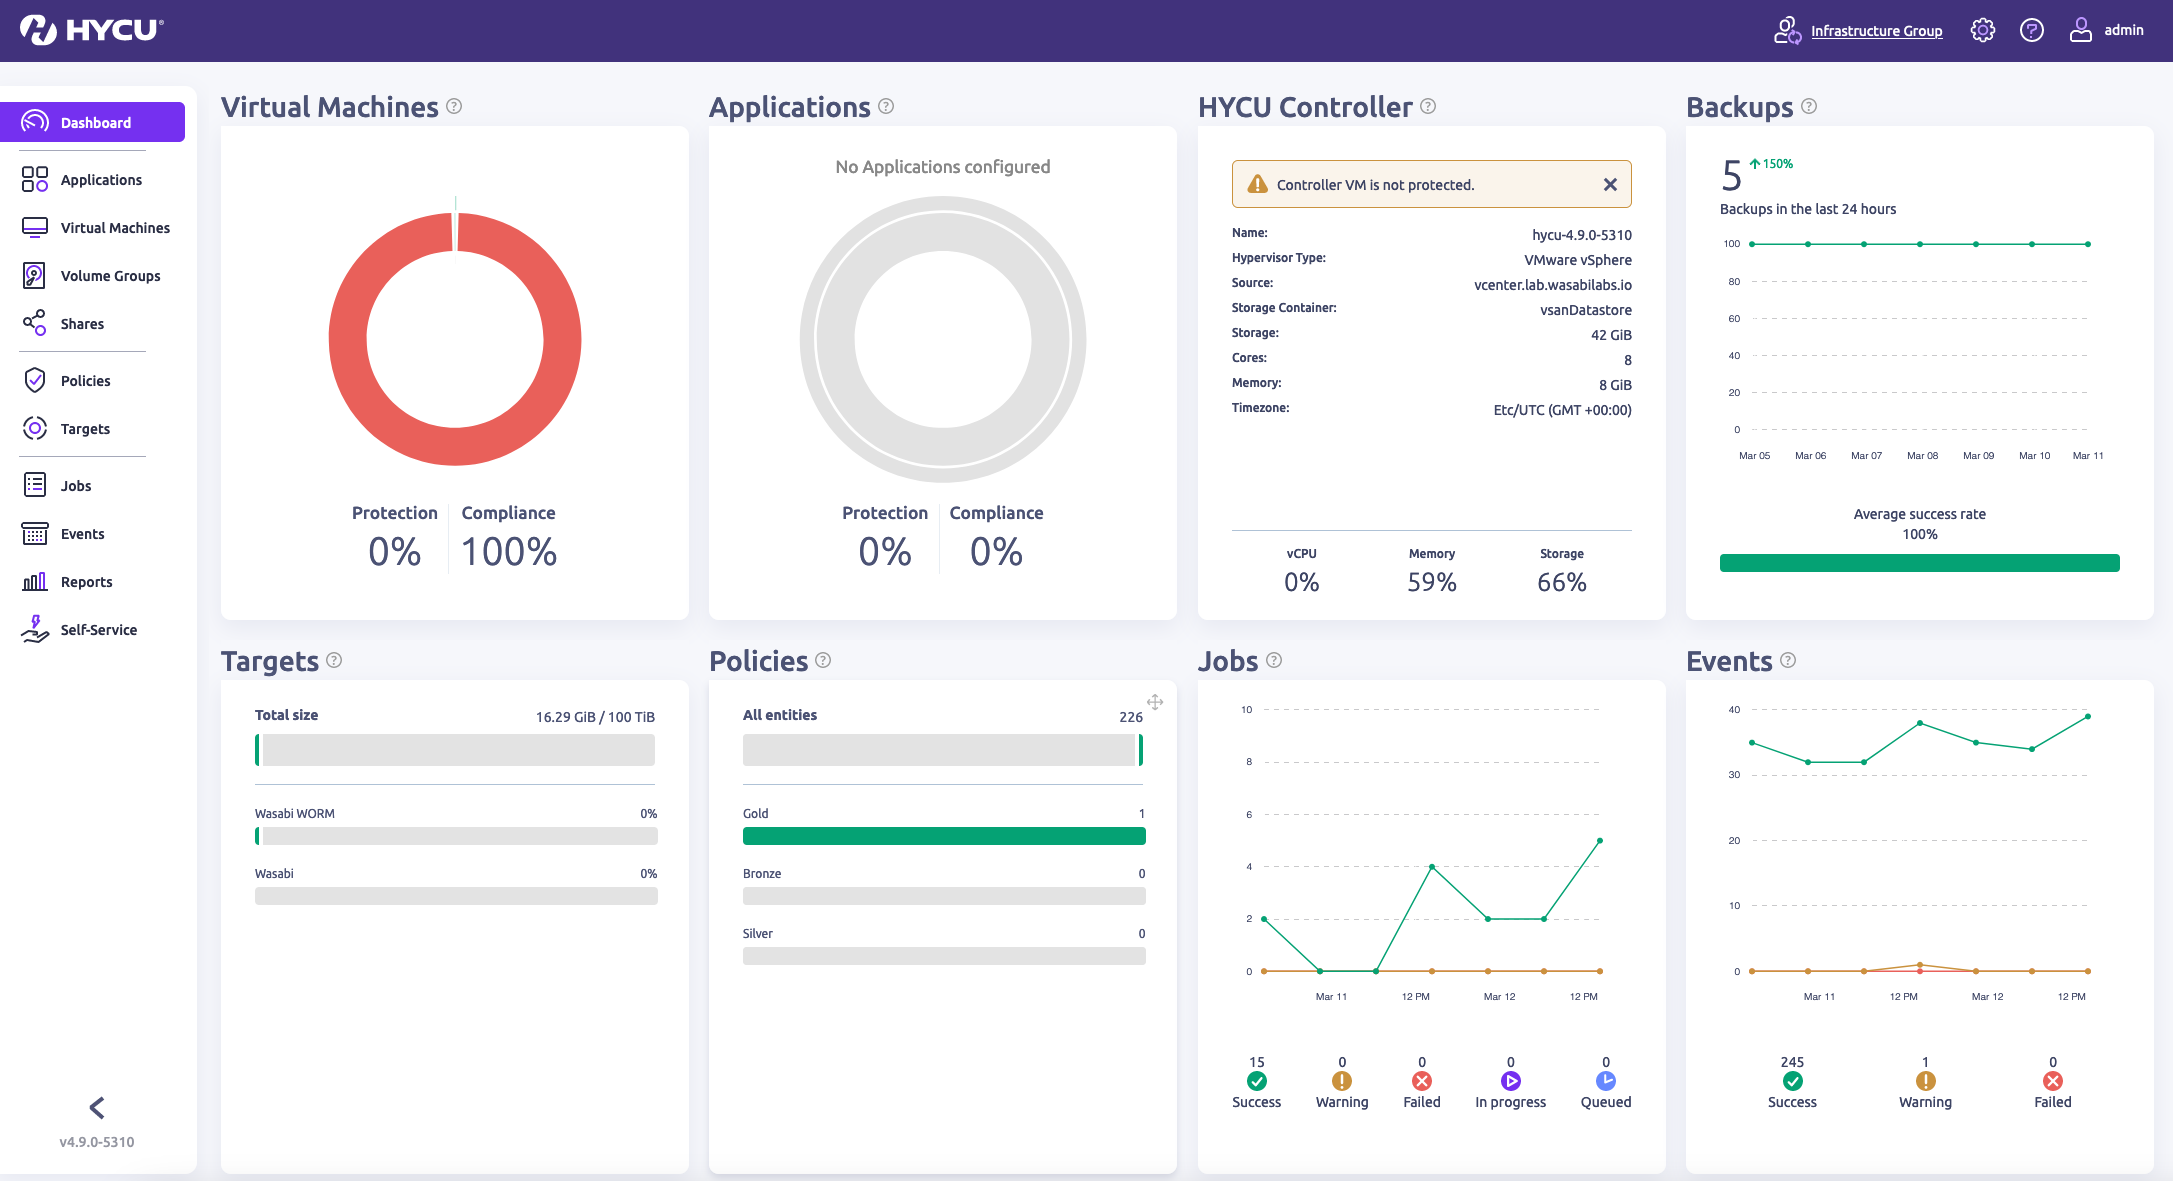
- To add a source for the protection environment, click Settings (gear icon) and select Sources.
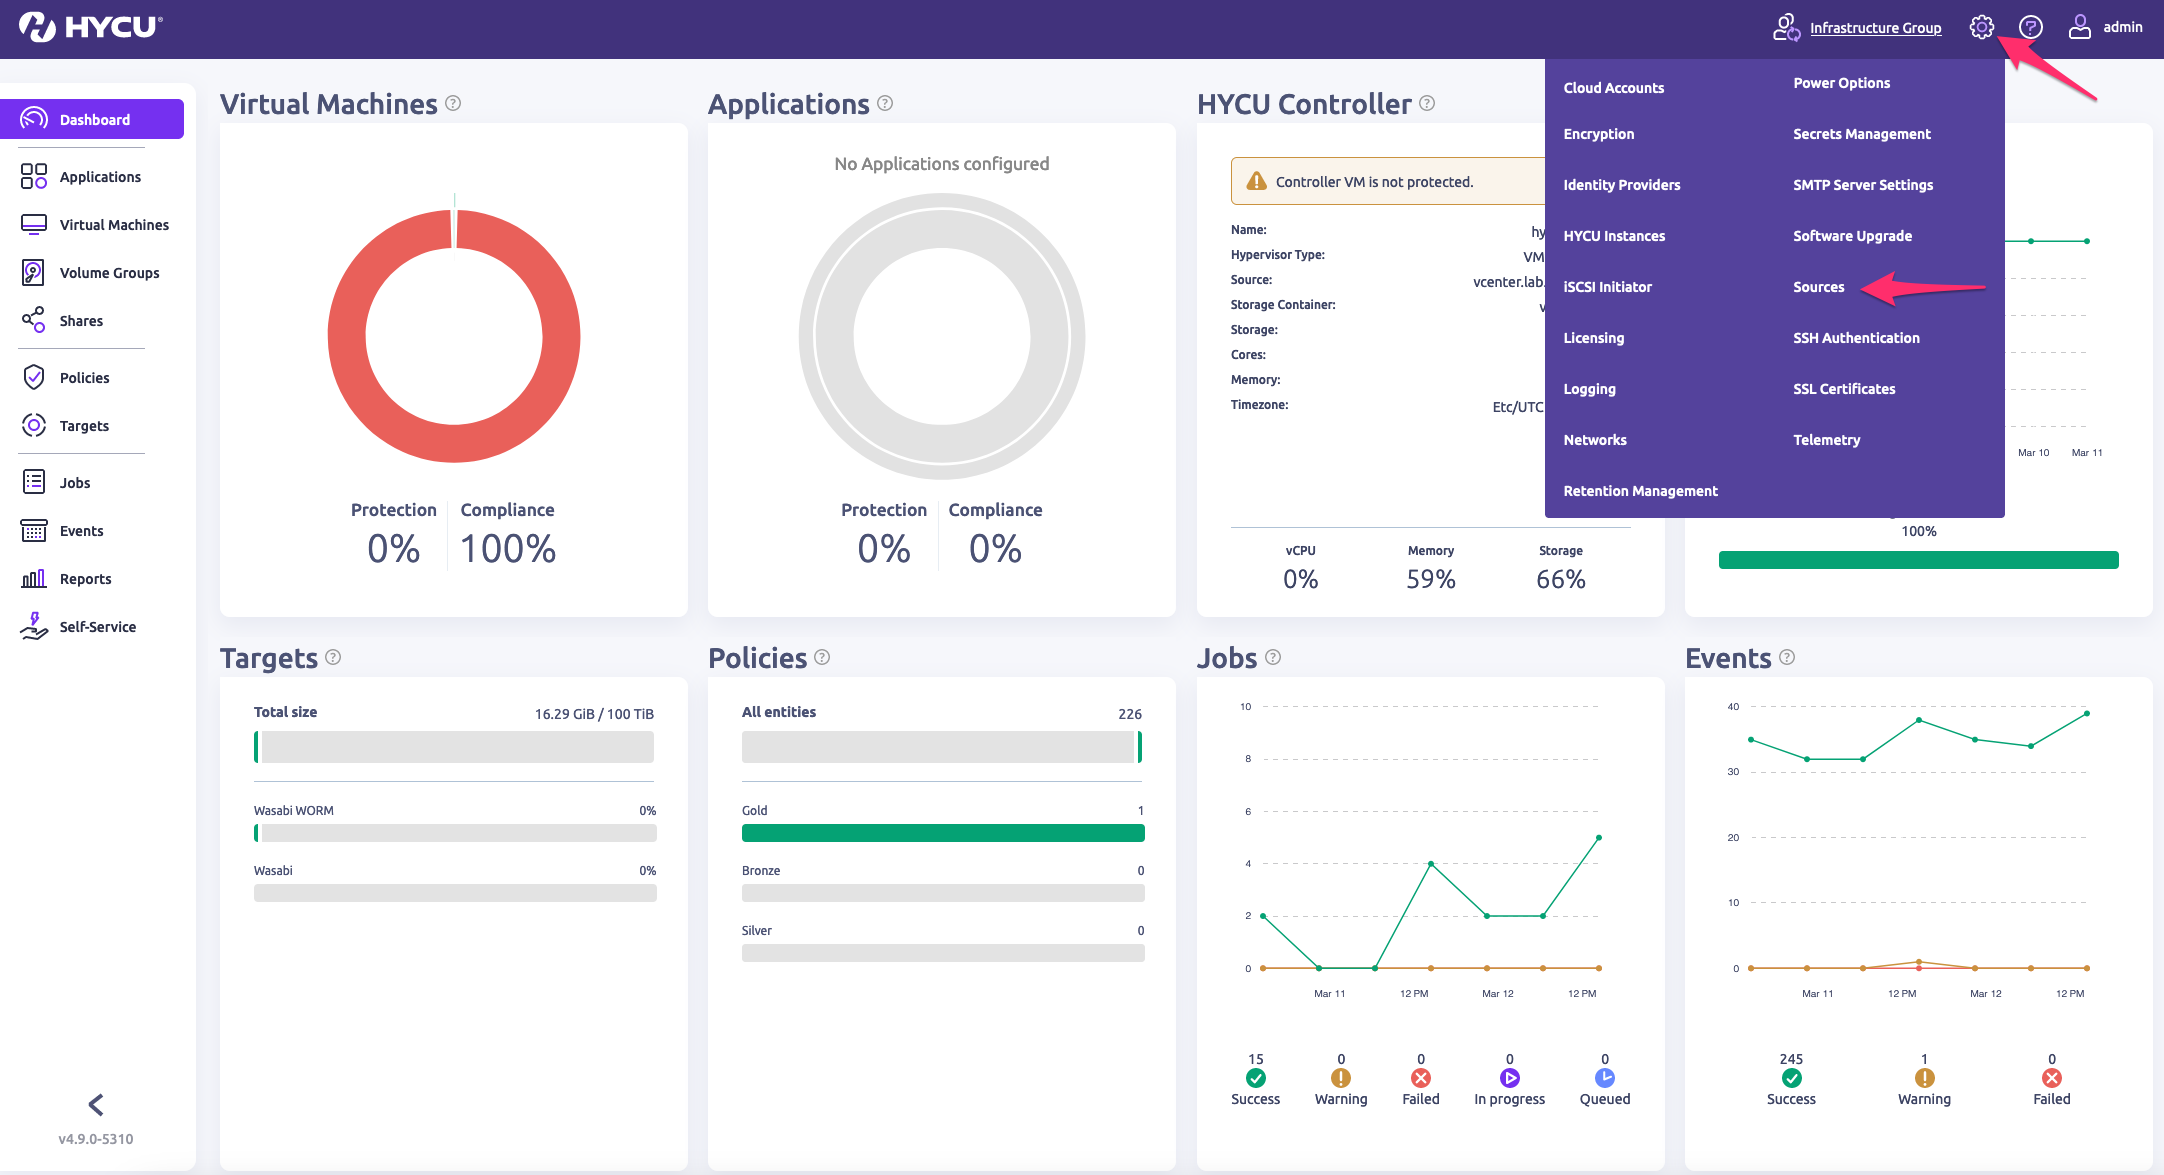
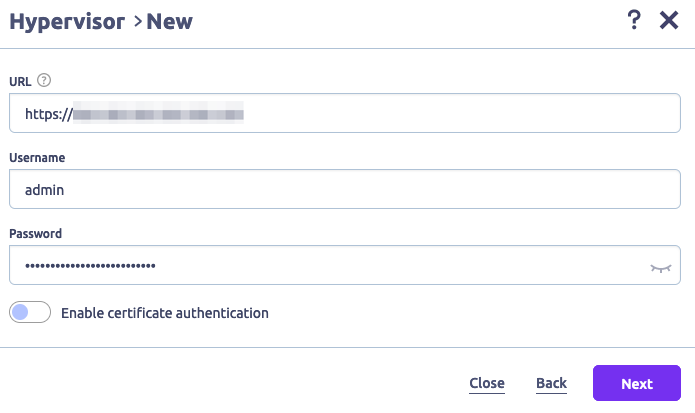
- In the Sources window, click + New in the Hypervisor tab.In this example, the source is a vCenter Server.
- In the New Hypervisor window, provide the required details. Click Next and Save in the Summary window.
Adding Wasabi as a Target
- Click Targets. Click + Add.

- Select AWS S3 and click Continue.
.png)
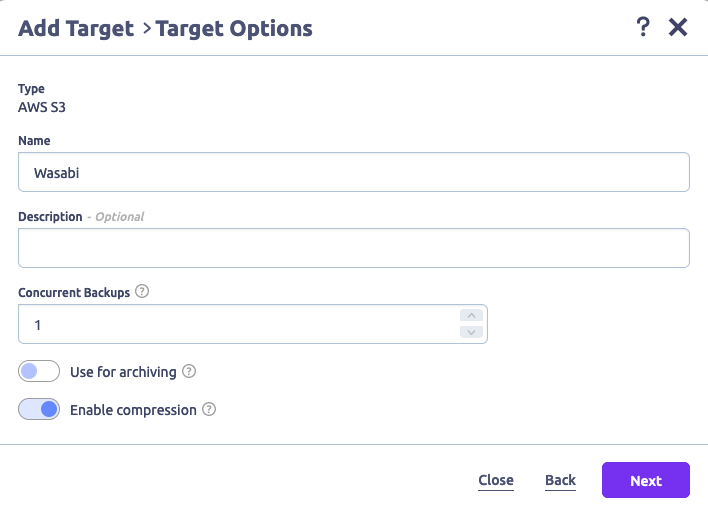
- Provide a name for the target and click Next.
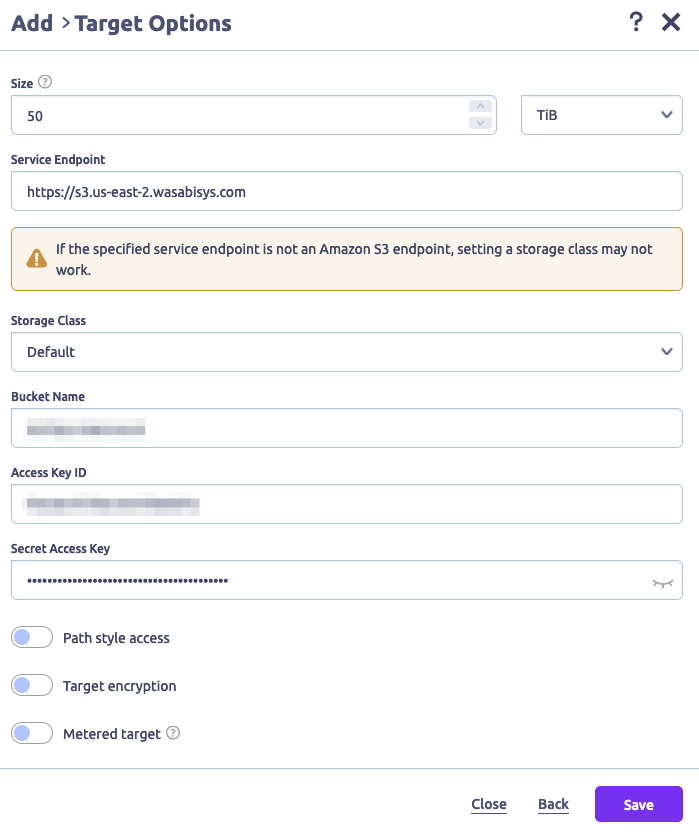
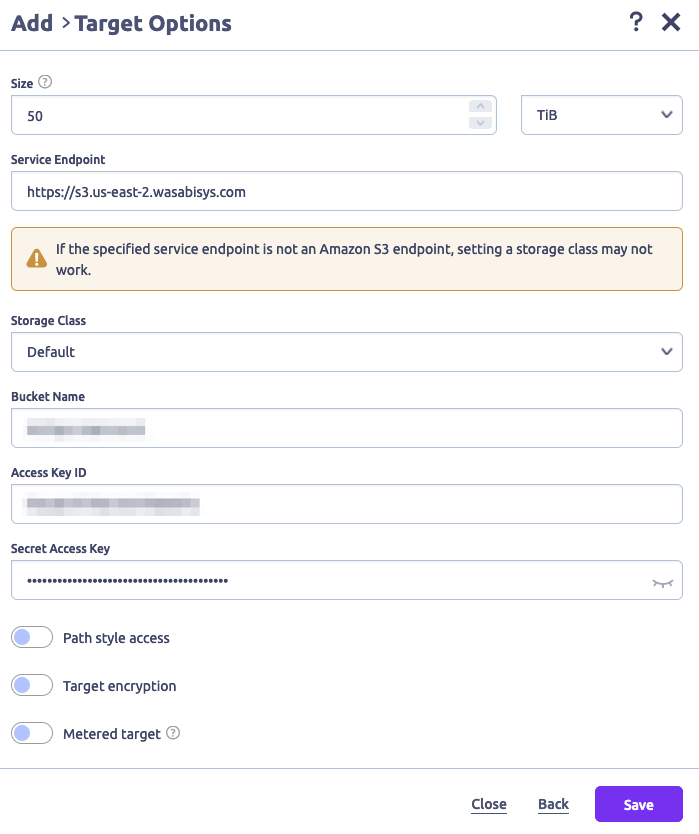
- Provide the following and click Save.
- Service Endpoint — For example, https://s3.us-east-2.wasabisys.com (Enter the service URL for the region your bucket is in. For more information, review the notes below.)
- Bucket Name — For more detail about creating a bucket, review 2—Working With Buckets and Objects.
- Access Key ID — Wasabi Access Key.
- Secret Access Key — Wasabi Secret Key.This configuration example discusses the use of Wasabi's us-east-2 storage region. To use another Wasabi storage region, use the appropriate Service URLs for Wasabi's Storage Regions.The HYCU application REQUIRES the service endpoint to be prepended with transport definition (https).
 The Targets tab will now display the newly added Wasabi cloud storage.
Creating a Policy
- To assign the Wasabi target to a policy, navigate to Policies on the left side pane. Select the desired pre-existing policy and click Edit. Optionally, to create a custom policy, click New.

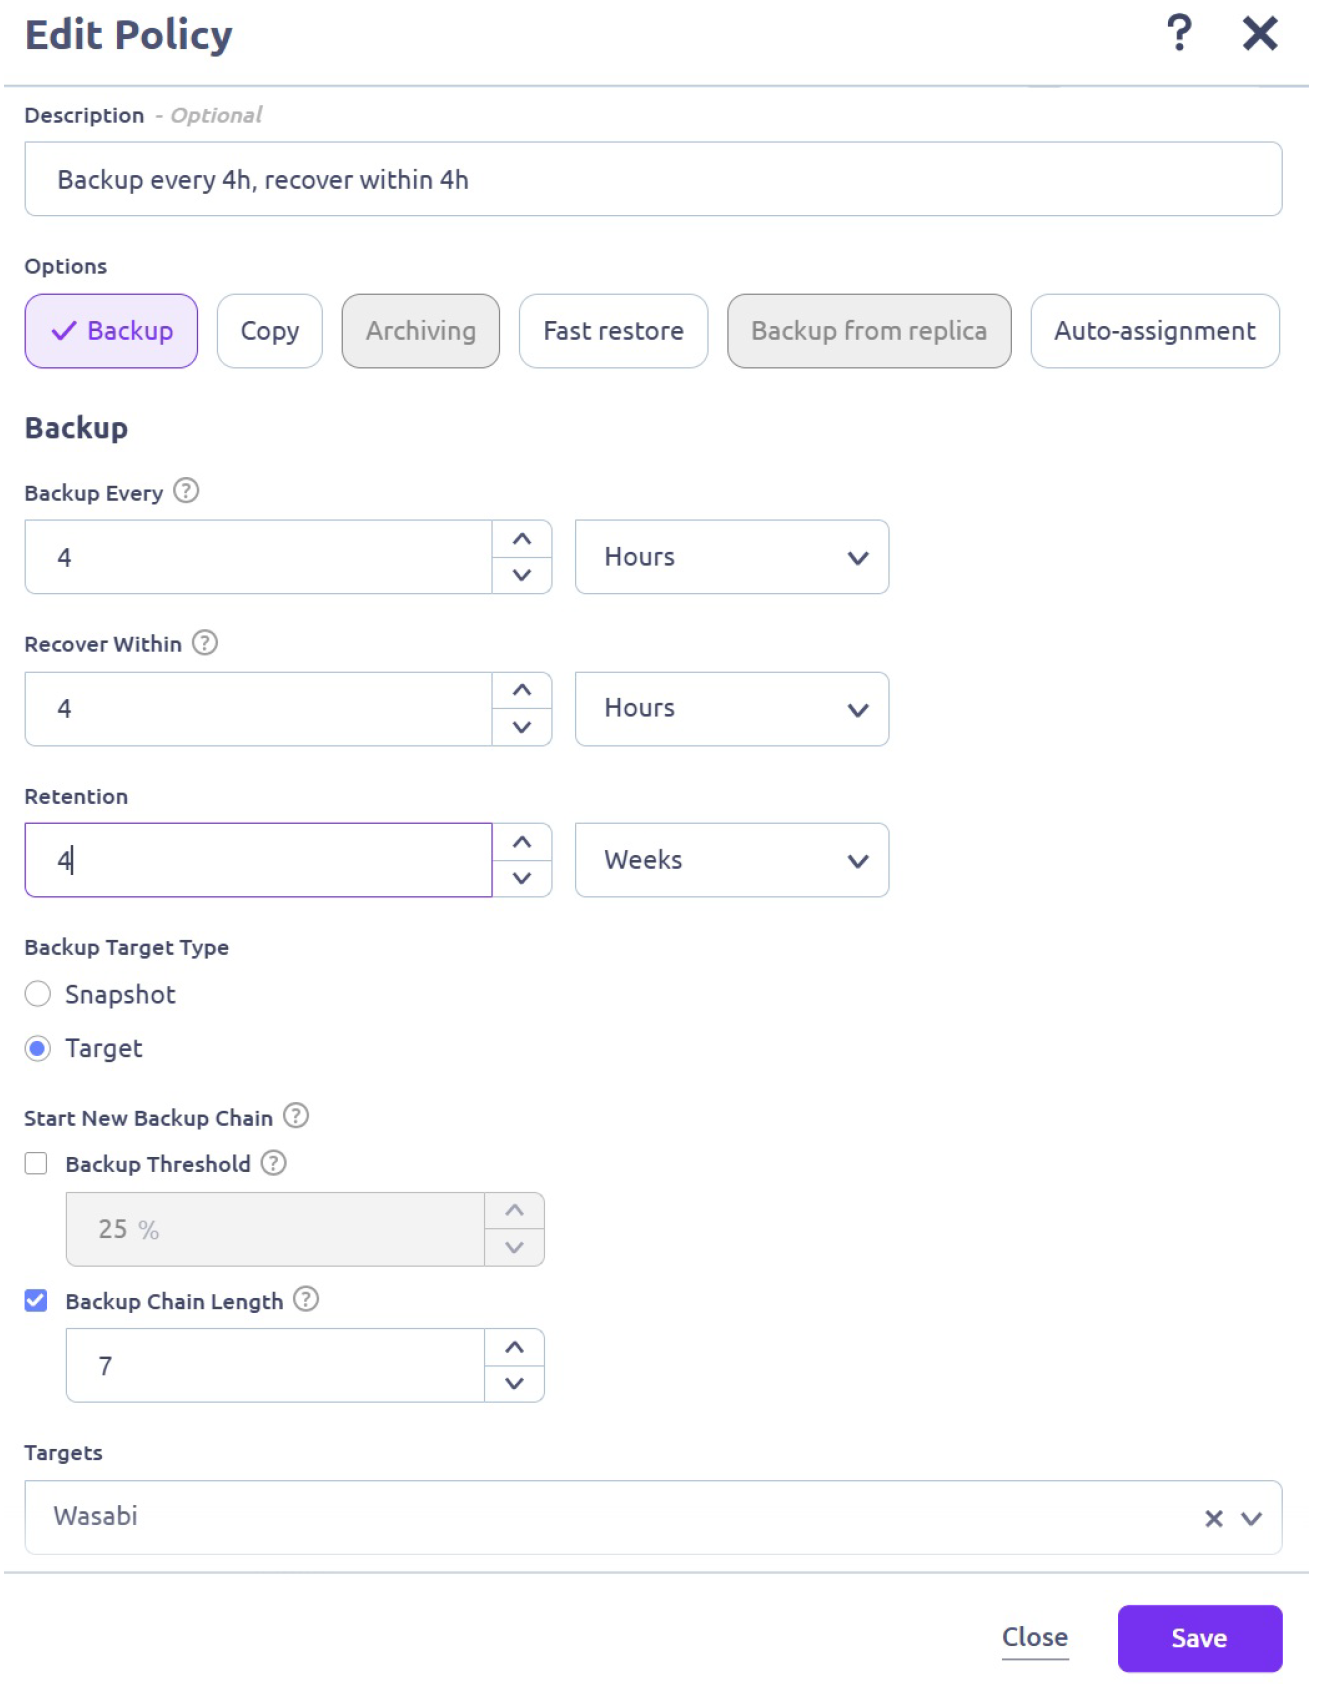
- Once in the Edit Policy Window, update or provide a description for the policy.
- Set the Backup options, as needed (such as how often, recovery window, and retention period).
- Set Backup Target Type as Target.
Start New Backup Chain Setting
Select when you want a new Backup Chain to be started by selecting Threshold % or Chain Length. You can also select both and whenever the first value is exceeded a new chain will be started.
This setting can affect the size of your buckets and your storage usage.The following HYCU article discusses Backup Expirations.
- Backup Threshold — A new backup chain is started when the percentage of the data changes since the last full exceeds the specified value. The default value is 25%. This can lead to more Full backups during your specified retention period and increased storage.
- Backup Chain Length — A new backup chain is started when the number the full and subsequent incremental backups in a chain exceed the specified value. The default value is 7. To keep the backup storage size to a minimum, be sure to set the Backup Chain length to the same value as the Retention.
The ideal Backup Chain Threshold or Chain Length setting can depend on multiple factors, such as Retention Policy, RTO, Storage Capacity, and Data Change Rate. Consult with HYCU Support to optimize these settings based on your environment variables. You can refer to Hycu's Policy Explanation KB for further insight and for details on the configuration elements, you can reference "Setting up an AWS S3/Compatible target" in the HYCU User Guide.
- Assign the policy to the virtual machines that must be protected. To do so, navigate to Virtual Machines on the left pane. Select the required VMs and click Set Policy.

- In the Set Policy window, select the desired policy (Gold in our example) and click Assign.
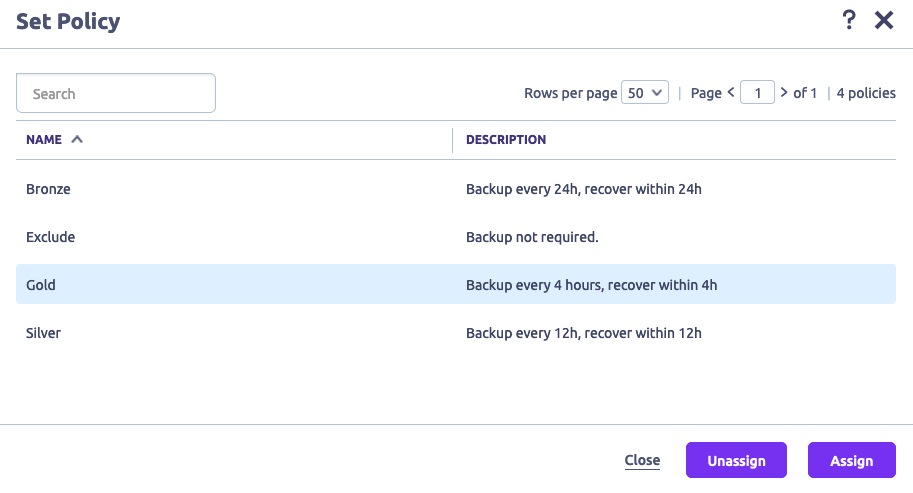
The protected virtual machines will now be backed up to Wasabi per the configured settings in the policy.
Enabling Immutable Backups
You can use Wasabi’s Object Lock feature with HYCU v4.9.0 and above to make your backups immutable. To protect the backups from ransomware events, this implementation utilizes the Object Lock capabilities offered by Wasabi, which means the retention mode setting and the required retention period will be set on Wasabi and extended by HYCU to match the retention period set in HYCU. For example, if you set bucket-level object retention in Wasabi to be 30 days and the retention period in HYCU to be two months, HYCU will extend the Wasabi retention period to be two months.
HYCU supports Compliance and Governance retention modes of Object Lock. For more information, refer to Object Lock: Setting for a Bucket or Object.
To make your HYCU backups immutable with Wasabi, follow the instructions below.
- Log in to the Wasabi Console and create an Object Lock-enabled bucket. For more detail, review Object Lock: Setting for a Bucket or Object. Enabling Object Lock on the bucket must be performed at the time of bucket creation.
- Select your bucket and click the gear iconin the top right corner.

- Select the Object Locking tab.

- Enable Bucket-level Object Retention. Select Enable Compliance Mode. Set the retention period (in our example, the retention period is 30 days) and click Apply.The bucket Retention Time configured in this step must be less than the HYCU retention period that is configured below.
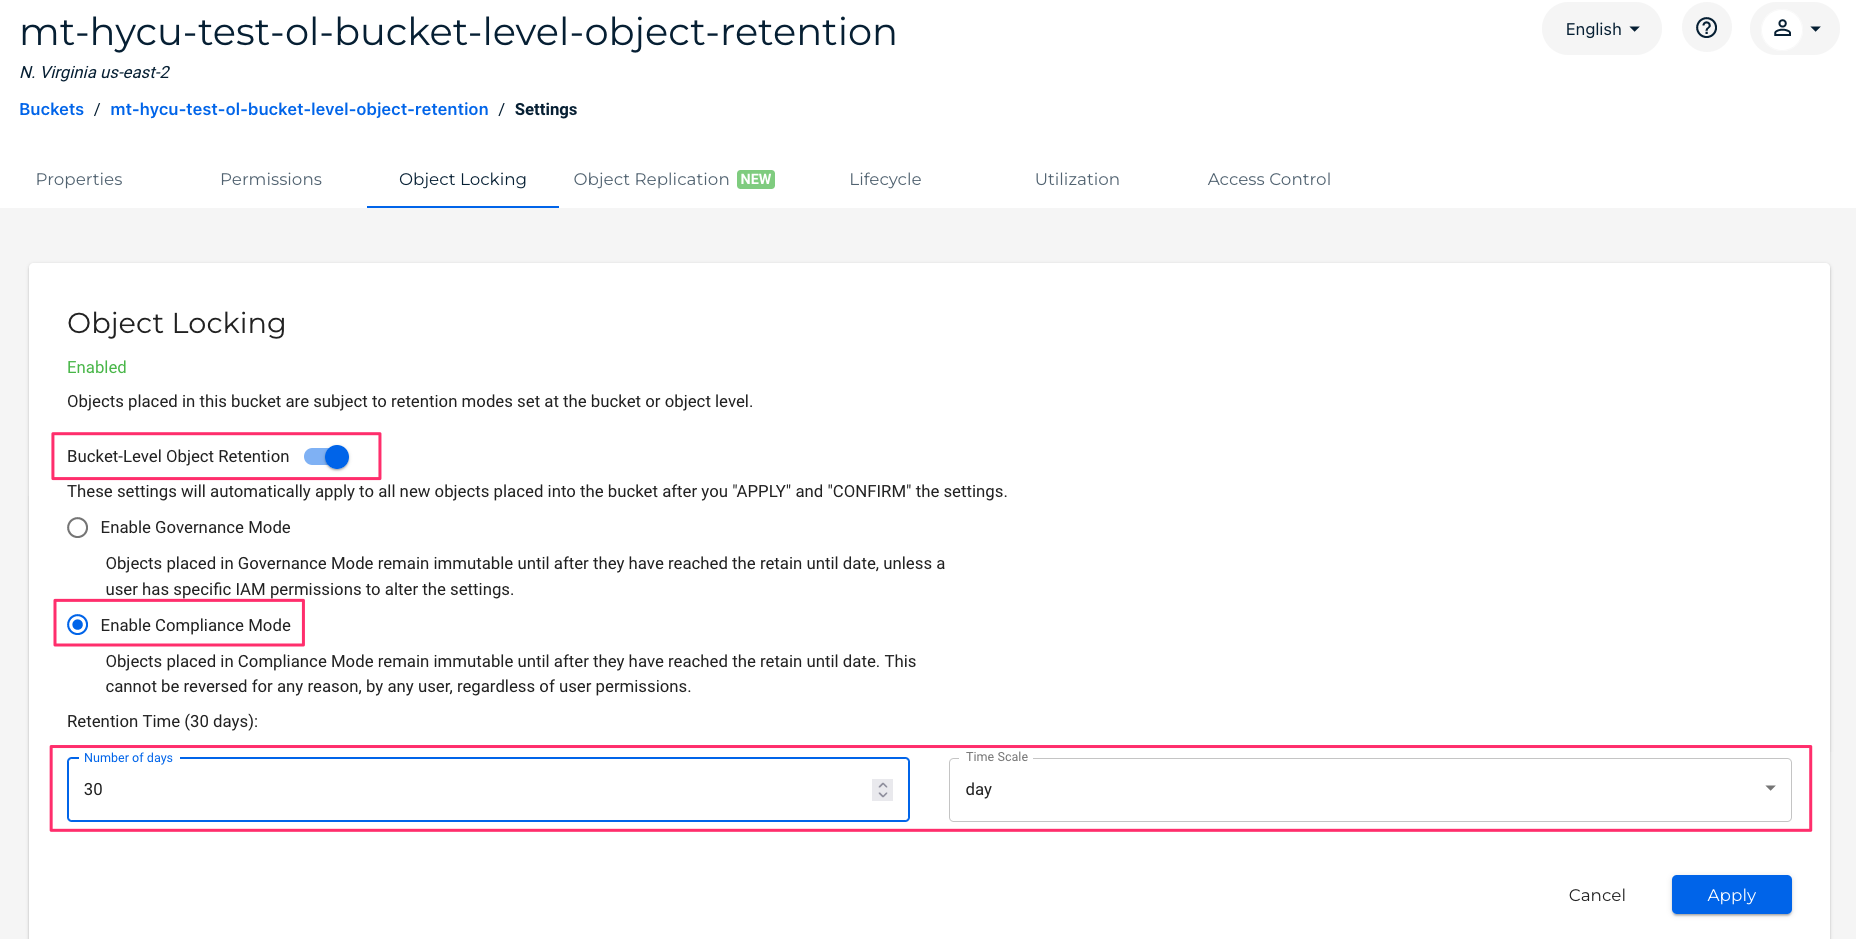
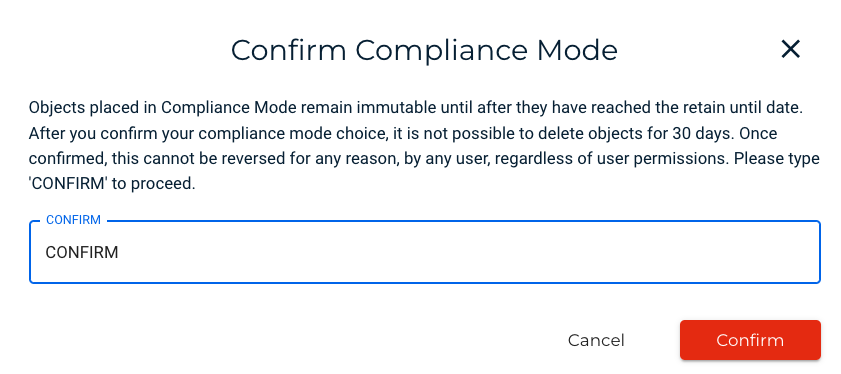
- Once you apply the settings, you will be presented with a confirmation box, type "CONFIRM" and click CONFIRM to apply the settings.
- Log in to the HYCU console. Click Targets. Click + Add.

- Select AWS S3 and click Continue.
.png )
- Provide a name for the target and click Next.
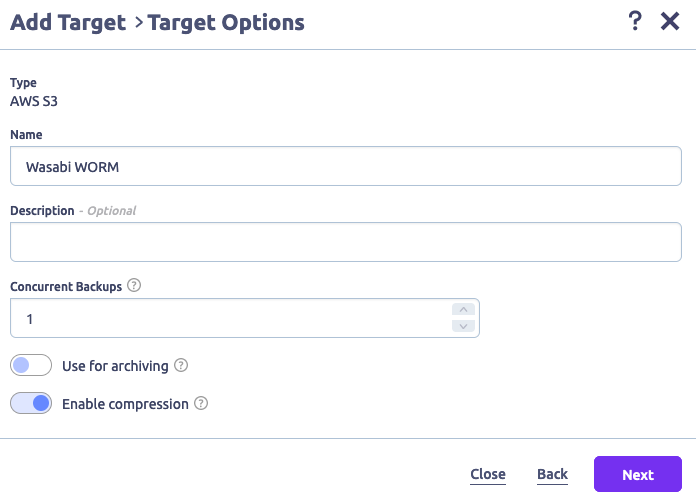
- Provide the following and click Save.
- Service Endpoint — For example, https://s3.us-east-2.wasabisys.com (Enter the service URL for the region your bucket is in. For more information, review the notes below.)
- Bucket Name — The name of the bucket you created.
- Access Key ID — Wasabi Access Key.
- Secret Access Key —Wasabi Secret Key.This configuration example discusses the use of Wasabi's us-east-2 storage region. To use another Wasabi storage region, use the appropriate Wasabi service URL.The HYCU application REQUIRES the service endpoint to be prepended with the transport definition (https).
The Targets tab will now display the newly added Wasabi cloud storage with a lock icon, as Object Lock & Bucket-Level Object Retention Time are configured for the bucket.

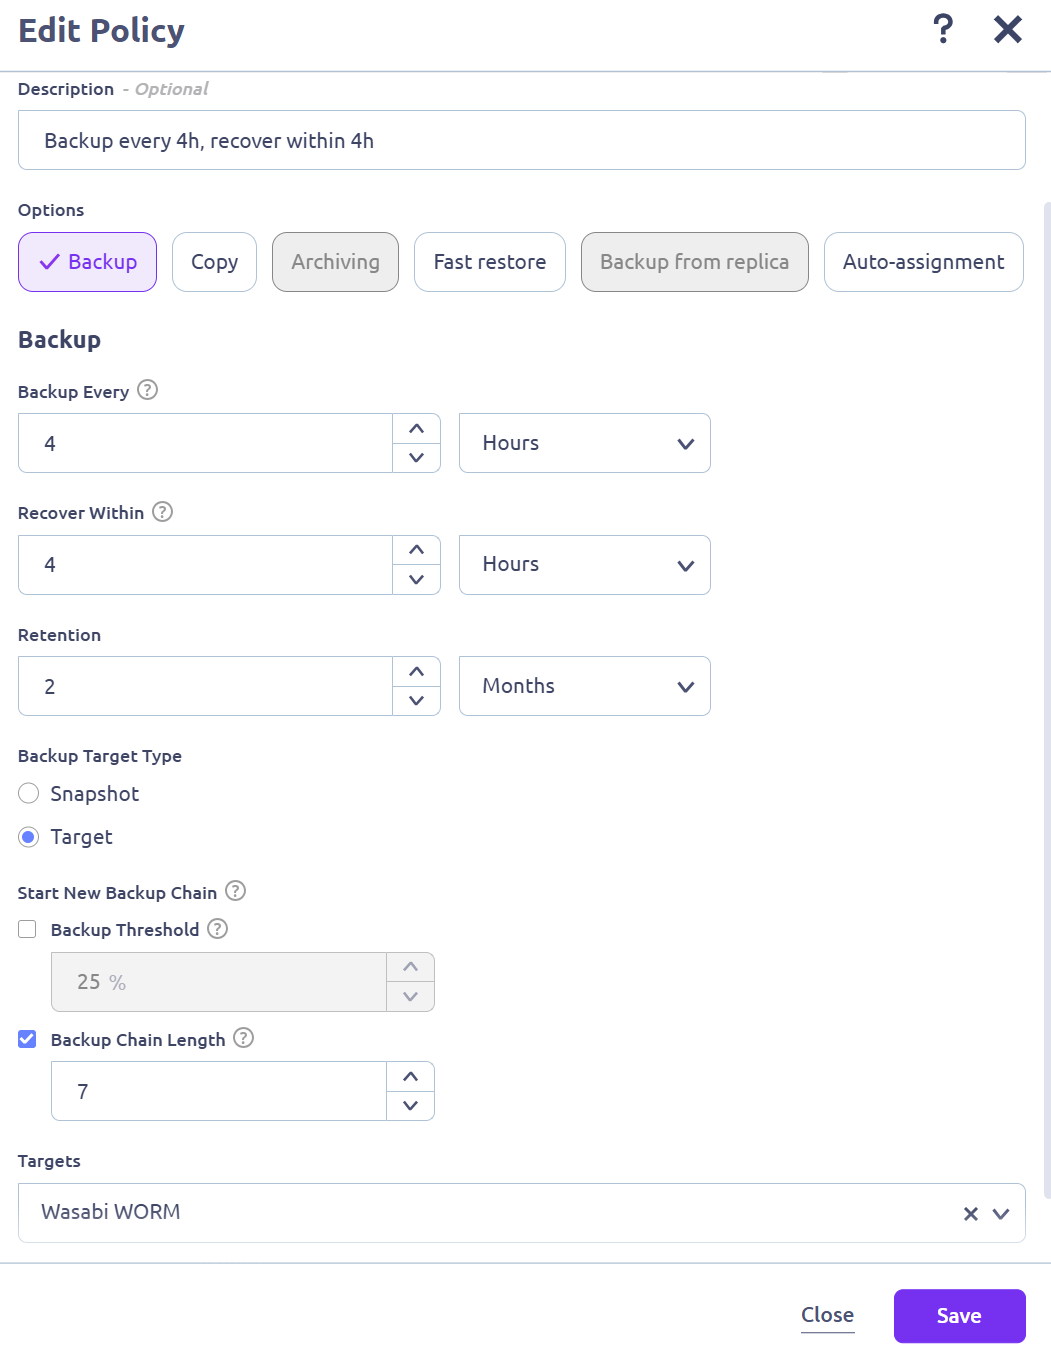
- To assign the Wasabi target to a policy, navigate to Policies on the left side pane. Select the desired policy and click Edit. Scroll down and expand the Targets drop-down menu. Select the Wasabi WORM target configured in Step 9 above as the Target and configure the Retention period.The HYCU Retention period must be greater than the Wasabi bucket Retention Time set above.
Start New Backup Chain Setting
Select when you want a new Backup Chain to be started by selecting Threshold % or Chain Length. You can also select both and whenever the first value is exceeded a new chain will be started.
This setting can affect the size of your buckets and your storage usage.Backup Threshold — A new backup chain is started when the percentage of the data changes since the last full exceeds the specified value. The default value is 25% This can lead to more Full backups during your specified retention period and increased storage.
Backup Chain Length —A new backup chain is started when the number the full and subsequent incremental backups in a chain exceed the specified value. The default value is 7.
The ideal Backup Chain Threshold or Chain Length setting can depend on multiple factors such as Retention Policy, RTO, Storage Capacity, and Data Change Rate. Please consult with Hycu Support to further consult to optimize these settings based on your environment variables.
- Click Save.
 Next, assign the policy to the virtual machines that must be protected. Navigate to Virtual Machines on the left side pane. Select the required VMs and click Policies and select the policy configured in this section above.
All the backups written to the backup target will now be immutable.