Objectives
1—Sign up for Wasabi and sign in.
2—Work with buckets and objects.
3—Create a user account and access key.
Wasabi stores objects (folders and files) in buckets. Once you create a storage bucket, you can:
Upload files directly into the bucket
Create folders into which you can upload files
You can create up to 1000 buckets per account.
Folders set up your file system by sorting files into groups. You can define a hierarchy of folders (folders within folders) and upload a file into the appropriate folder.
Minimum and Maximum Object Sizes That You Can Store in Wasabi
Individual objects stored in Wasabi can range in size from a minimum of zero bytes to a maximum of five terabytes. The largest object that can be uploaded in a single HTTP PUT is five gigabytes. For objects larger than 100 megabytes, Wasabi recommends customers consider using the multi-part upload capability.
The total volume of data and number of objects you can store with Wasabi is unlimited, but the free trial is capped at one TB.
Creating a Bucket
On the Wasabi menu, click Buckets.
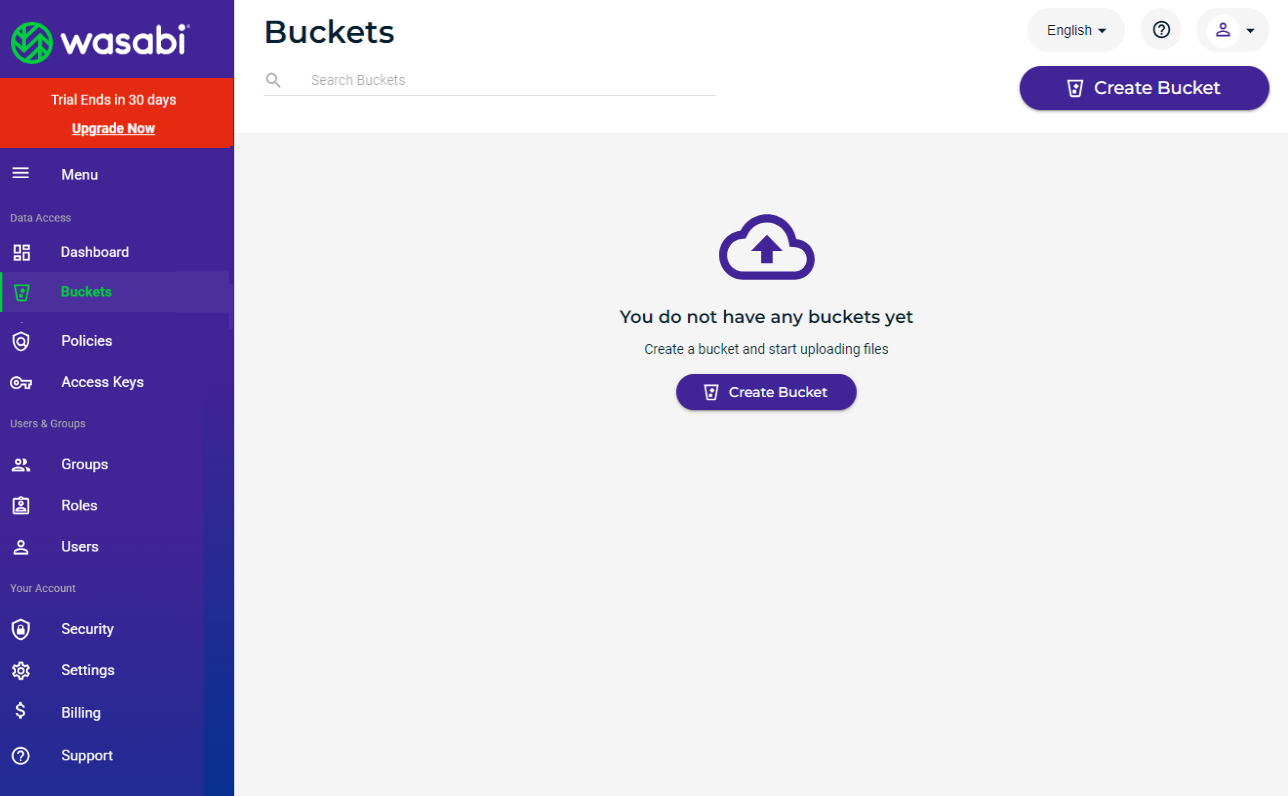
In the upper right of the Console panel, click Create Bucket. If you are a new user, you may see a screen such as the one below. You can click either blue Create Bucket button.
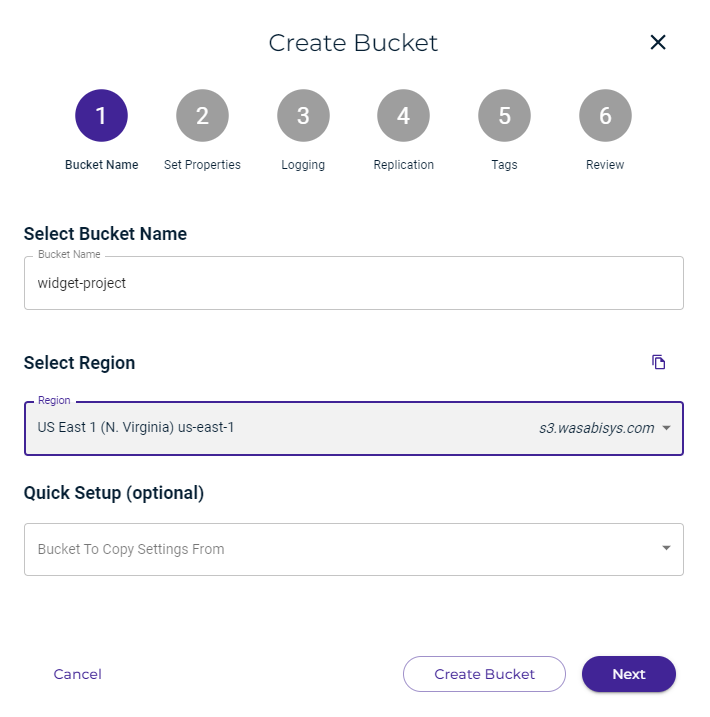
The Create Bucket panel is displayed. Notice that it is divided into six basic steps:
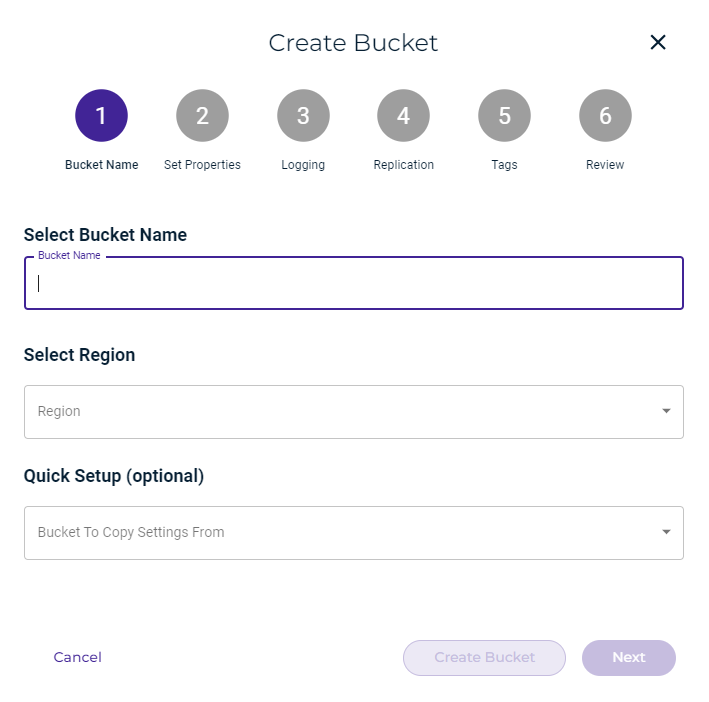
 Bucket Name
In the Select Bucket Name box, enter a unique DNS-compliant name for your new bucket. You should develop a naming strategy following these guidelines:
The name must be unique across all existing bucket names in Wasabi. A bucket name must:
Be a valid DNS-compliant name
Begin with a lowercase letter or number, and
Consist of 3 to 63 lowercase letters, numbers, periods, and/or dashes.
The name cannot contain underscores, end with a dash, have consecutive periods, or use dashes adjacent to periods. And, the name cannot be formatted as an IP address (123.45.678.90).
Choose a bucket name that reflects the objects you will store in the bucket.
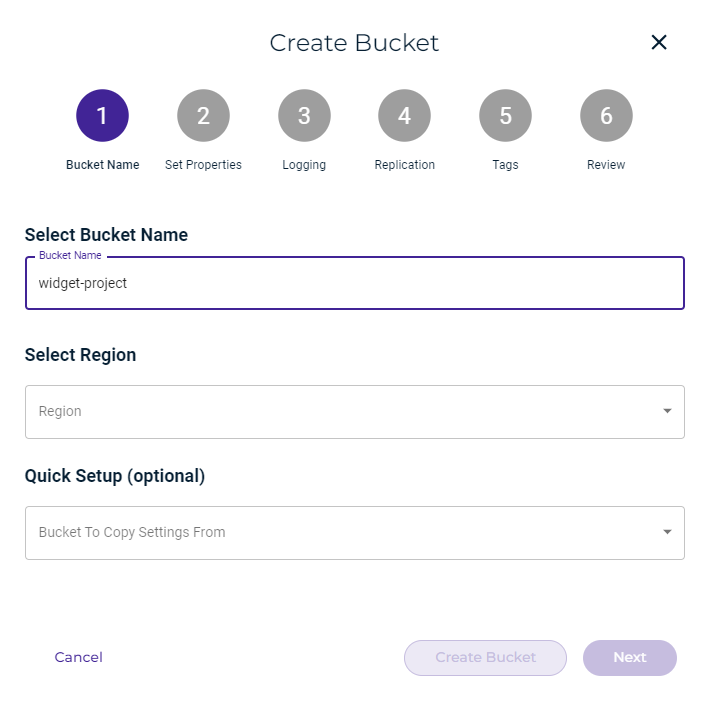
The bucket name is visible in the URL that points to the objects you will put in the bucket. widget-project is used in the example below; but, enter your own unique name.
Select the region (geographic location) where you want the bucket to reside. The URL of the region you select is displayed with the region name. For example:
You can click
 to copy this region URL to the clipboard.
At this point, you have several options:
Click Create Bucket to create the bucket now (and end this procedure).
Or:
Continue by reviewing the bucket properties, as described below.
Or:
Copy settings from an existing bucket, as described for Quick Setup in the Wasabi Cloud Storage: Advanced Usage Product Guide.Continue now by reviewing the bucket properties. Click Next.
 Set Properties
Options are provided to set bucket versioning and object lock.
Bucket versioning is a way to maintain multiple variations of an object in the same bucket, as described in Bucket Versioning.
Object lock is available to help prevent objects from being deleted or overwritten for a fixed amount of time or indefinitely. Object lock can be enabled only while creating the bucket, as described in Object Lock. For an understanding of the differences between object lock and compliance, refer to Immutability: Compliance and Object Lock.
By default, these features are suspended, and we will not change the defaults for this example. So, click Next.

 Logging
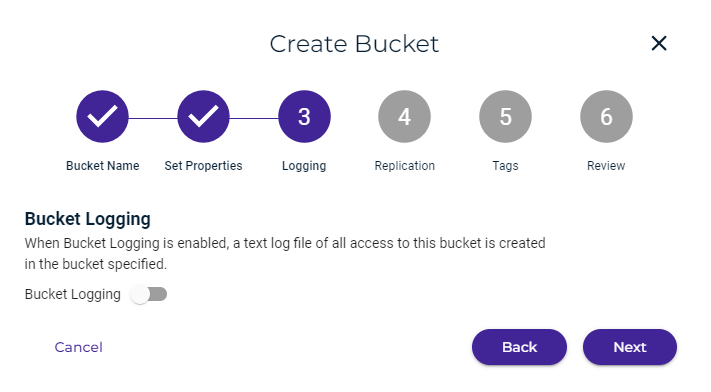
An option is provided to set bucket logging, which creates a text log file of all access to the bucket, as described in Bucket Logging.
By default, this feature is suspended, and we will not change the default for this example. So, click Next.
 Replication
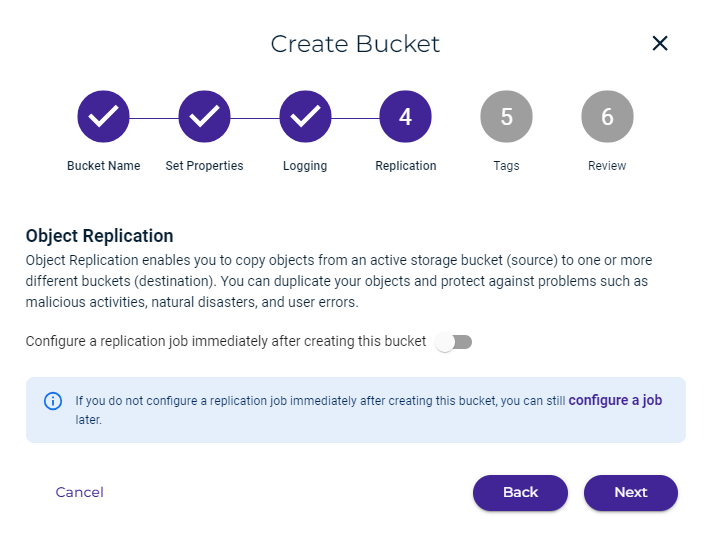
An option is provided to replicate or copy your data between Wasabi regions to protect against ransomware attacks, malicious data manipulation, natural disasters, or even accidental deletion. This feature is described in Object Replication.
By default, this feature is suspended, and we will not change the default for this example. So, click Next.
 Tags
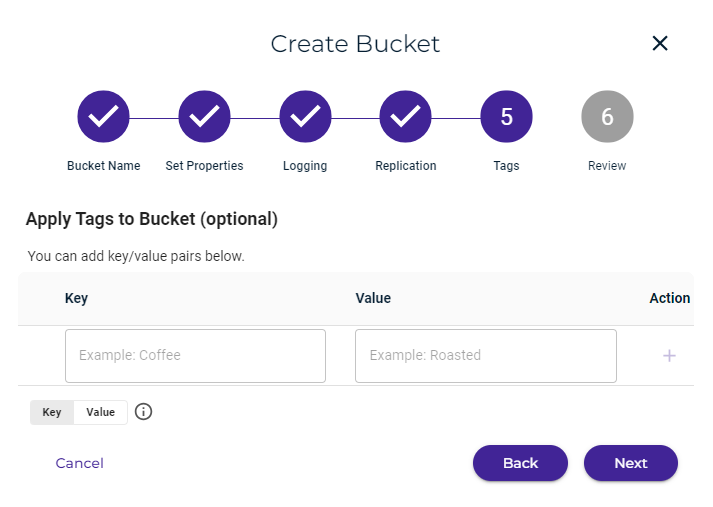
Tags
An option is provided to use tags to organize your objects (files). While folders are the first level of organization in a file system, tags add another dimension that can make objects easier to sort and find. Think of a tag as a keyword that you apply to an object. You can add up to 25 tags to an object, as described in Object Tags.
By default, this feature is suspended, and we will not change the default for this example. So, click Next.
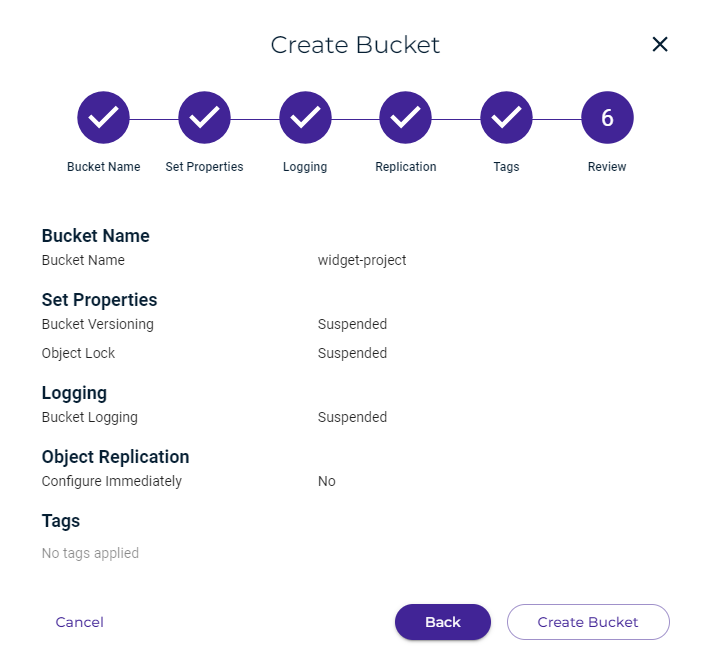
 Review
The bucket properties and settings are displayed for your review. You can click Back to change the bucket properties or settings. But, for this example, click Create Bucket to accept the information and create the bucket.
A message at the top of your screen indicates that the bucket was created successfully:

Reviewing the New Bucket
The new bucket is displayed in the Bucket List on the Buckets panel.
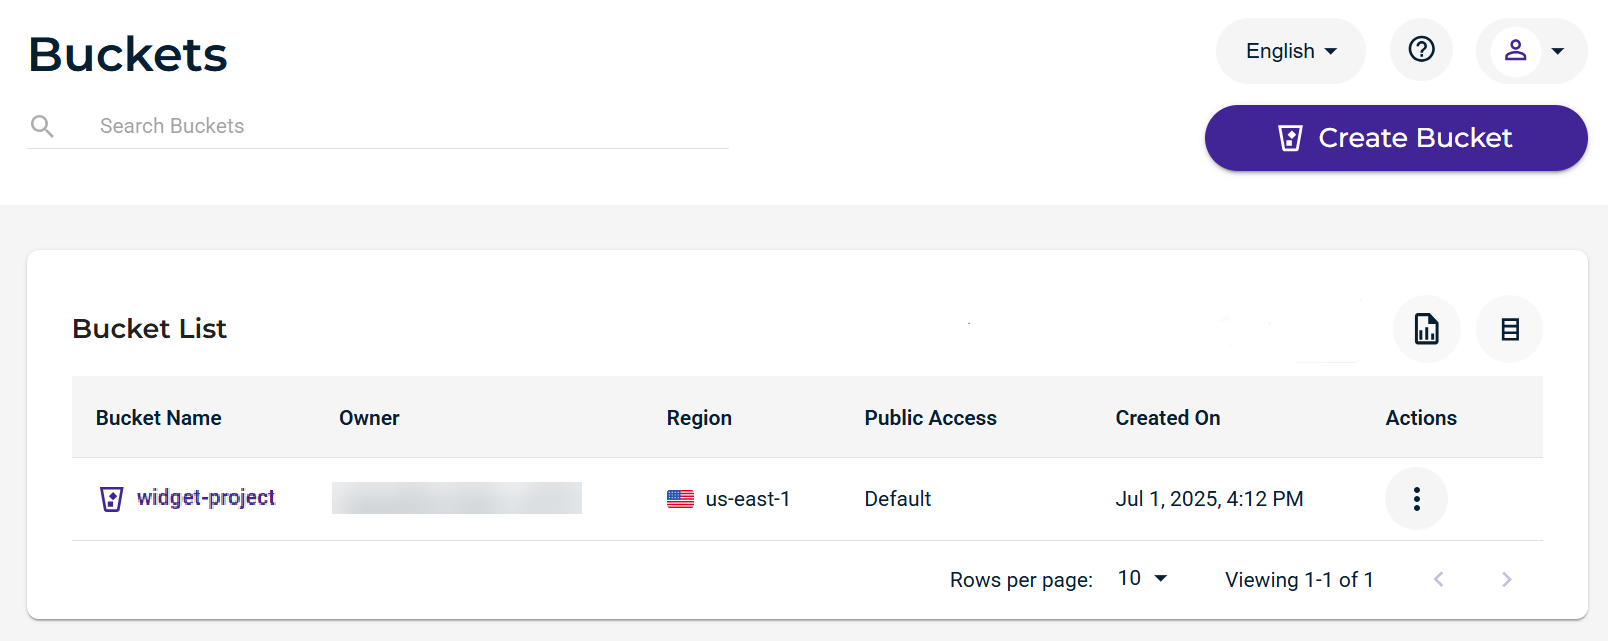
Each bucket is displayed with:
Bucket name that, when clicked, provides access to object information (you will see this later when Storing Objects in a Bucket)
Owner name, which is the name of the person who created the bucket
Region in which the bucket was created
Public Access status of the bucket (Default indicates that the bucket is private)
Date/time when the bucket was created
Actions accessed with the
 icon to:
Change settings for versioning, logging, bucket policy, compliance, and an access control list (ACL)
Rename the bucket
Delete the bucket
Click
 in the upper right corner of the Bucket List to generate a bucket utilization report.
Click
 in the upper right corner of the Bucket List to toggle the display of each column.
Working With a Bucket
Click the ![]() icon to access options for bucket features. Procedures for using these features are beyond the scope of Getting Started, but the following is an overview. (For details, refer to the Buckets and Objects section of the Wasabi Cloud Storage: Advanced Usage Product Guide.)
icon to access options for bucket features. Procedures for using these features are beyond the scope of Getting Started, but the following is an overview. (For details, refer to the Buckets and Objects section of the Wasabi Cloud Storage: Advanced Usage Product Guide.)
Establishing bucket settings. You can set features such as:
Versioning and/or logging features. Versioning is a way to maintain multiple variations of an object in the same bucket. You can then retrieve and restore any version of an object in the bucket. This provides protection against inadvertent removal of an object (such as by overwriting or expiration).
Policy for the bucket. You can attach a policy to define the actions that can take place on a bucket and the conditions under which those actions can occur.
Compliance features. Compliance features prevent the deletion of any objects and provide additional information to prove that the original data was not modified since the time it was stored.
Object locking. Object locking can help prevent objects from being deleted or overwritten for a fixed amount of time or indefinitely. Versioning must be enabled on a bucket before object locking is enabled. Object locking can be enabled only while creating the bucket. Once enabled, the Object Locking tab is available under bucket settings, where you can configure either governance or compliance mode along with retention time.
Access control list (ACL) features. An ACL enables you to manage the users and groups that have access to buckets and objects.
And more!
Changing the bucket name.
Deleting the bucket.
When you delete a bucket, all objects stored with the Wasabi service are subject to Wasabi’s minimum storage policy, which applies even if the objects are deleted. For additional information, refer to Wasabi Pricing.
Storing Objects in a Bucket
Now that you have created a bucket, you can store an object in it. An object can be any type of file—text, photo, video, etc. Here are a few notes to keep in mind before you begin to upload files:
You can use the Shift or Ctrl keys to select multiple files. If you choose the same file name from different folders, Wasabi will store the file chosen last before the upload starts.
Avoid the use of the following special characters in a file name:
% (percent)
< (less than symbol)
> (greater than symbol)
\ (backslash)
# (pound sign)
? (question mark)
Certain file names may have non-ASCII characters that are 4-byte UTF-8 characters (such as emojis). Wasabi does not support these characters and will return a 400 error message to an application that tries to write a file with 4-byte UTF characters in the file name. We recommend renaming the affected files, if possible.
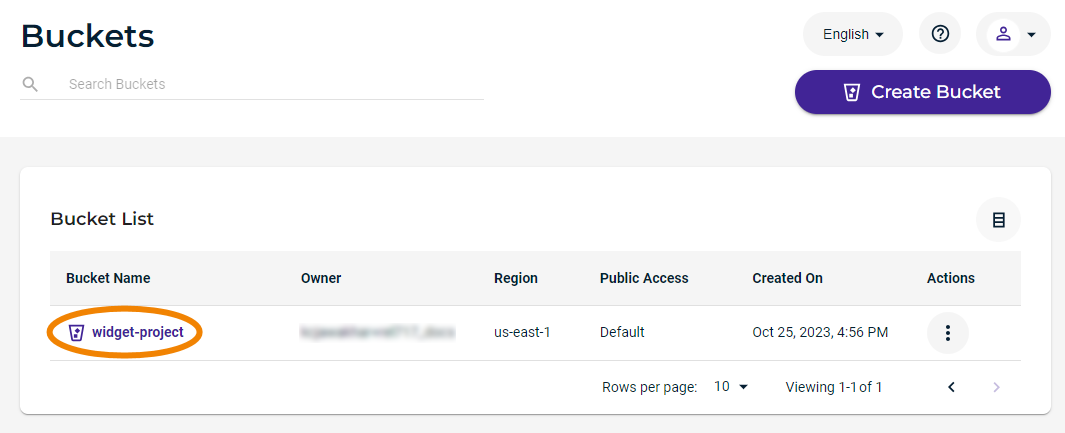
To store objects in a bucket:
In the Bucket List, click the bucket name (as circled below) into which you want to upload an object.
The bucket content panel is displayed. If your bucket already held objects, the panel would list the object names and associated information (as you will see later). With an empty bucket, you will see a panel such as:
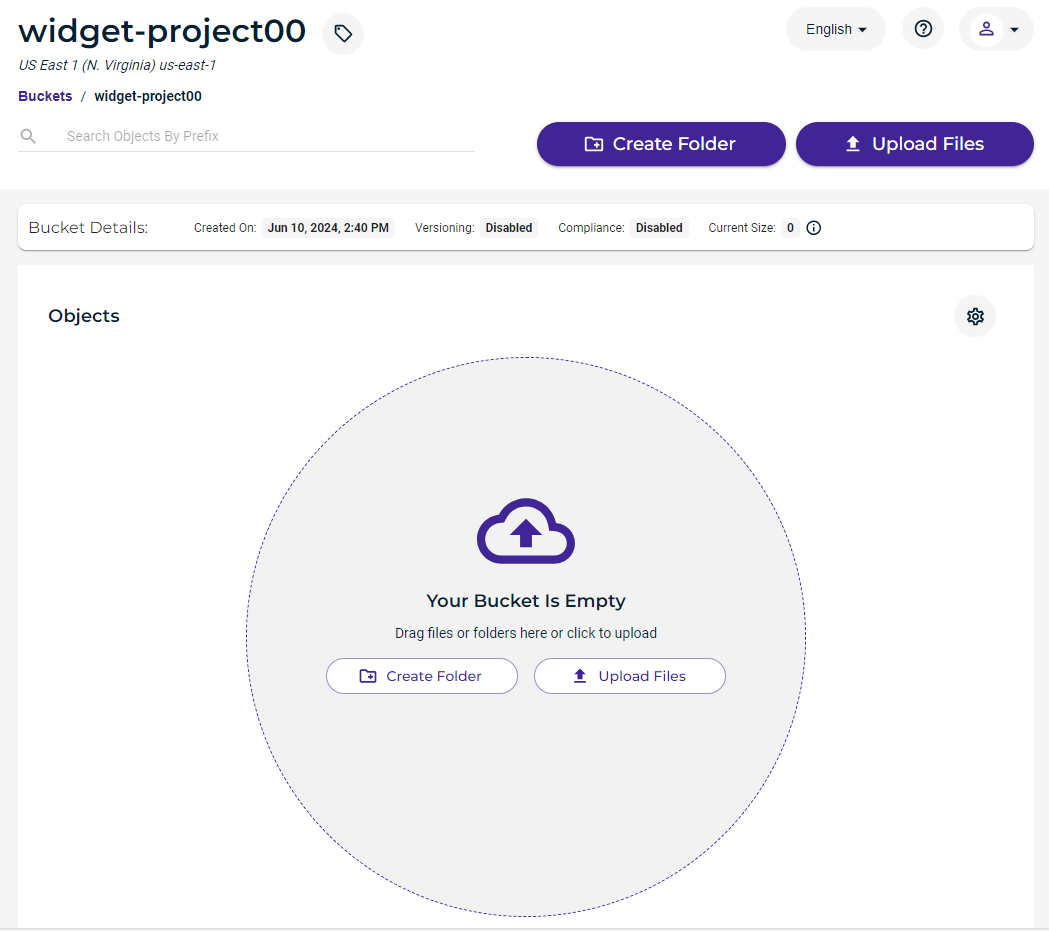
You can create a folder and/or upload files (as described in the next step. To create a folder into which you will upload files:
Click Create Folder.
Enter a name for the folder.
Click Create Folder.
The folder is listed in the Objects list. You can click the folder name and then upload files into it, as described in the next step.
You can upload files and folders in different ways:
If your bucket or folder is empty, you can drag and drop one or multiple files or folders into the Your Bucket Is Empty (or Your Folder Is Empty) circle. For example, we are copying three files here:
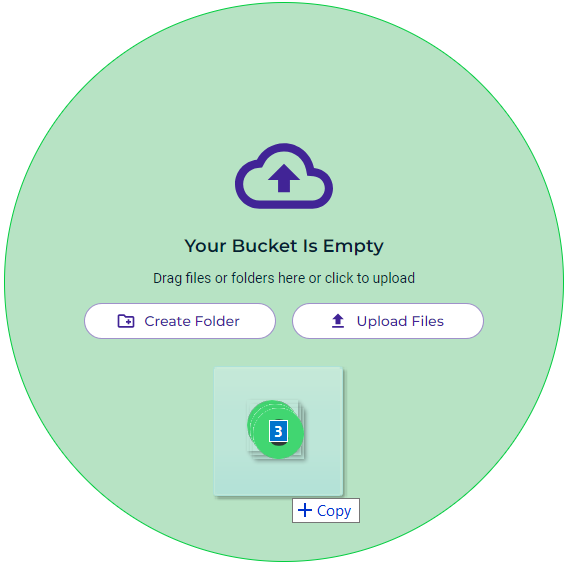
Then, continue with the next step.
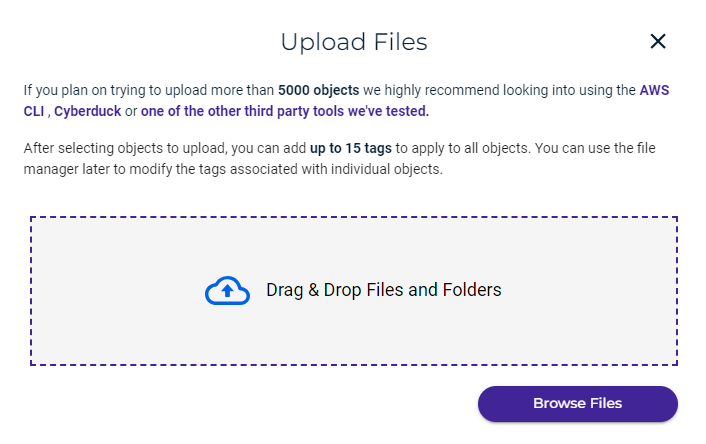
As an alternative (whether or not your bucket or folder is empty), you can click Upload Files. Then, drag and drop files or folders into the rectangular gray area, or click Browse Files and select files to upload.
Once you drag and drop or select objects to upload, the File Uploader is displayed. All files to upload are listed, including those from a folder if you selected a folder. For example:
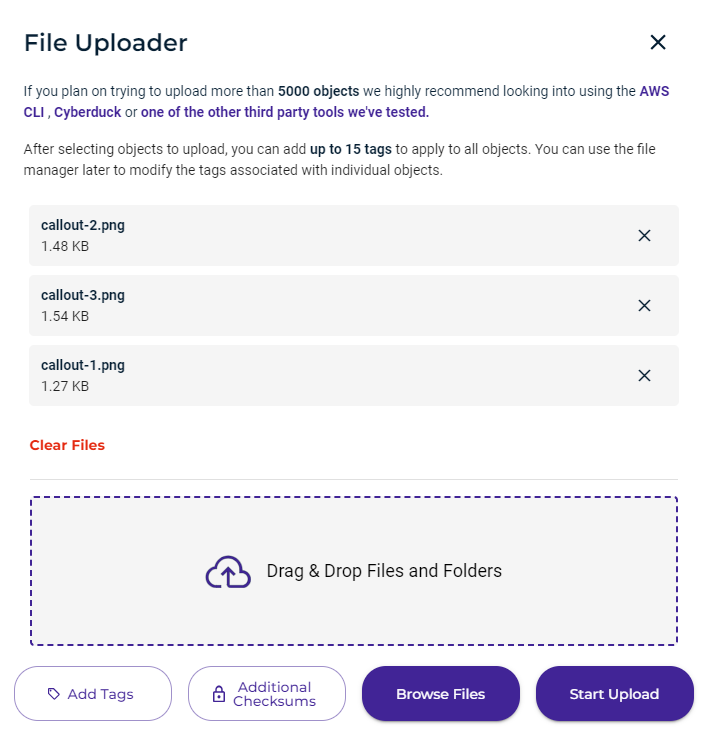
Review the list of files to upload. If the list is long, a scroll bar appears to the right of the files, enabling you to scroll through the list.
Optionally, you can add files to upload by clicking Browse Files and selecting them.
To remove a file from the list before uploading, click X to the right of the file name.
To remove all files, click Clear Files.
Optionally, you can add up to 15 tags to the objects (files) listed. Tags are a way to further organize your objects. While the action for adding tags here applies to all objects listed, you can later modify the tags associated with individual objects.
The use of tags is beyond the scope of Getting Started. Refer to Object Tags in the Wasabi Cloud Storage: Advanced Usage Product Guide.
Optionally, you can validate data integrity to be sure your data has not been altered or corrupted. By default, Wasabi applies an MD5 checksum to every newly uploaded object. You can apply an additional checksum for extra object integrity verification. Click Additional Checksums to specify a checksum when the object is uploaded. This generates a checksum value that is available in the object details. You can compare this value to a checksum calculated locally to verify the integrity of the upload. If you are uploading a single object under 96 MB, you can enter your checksum value, and Wasabi will compare it for you. If the values do not match, Wasabi will reject the upload.

Click Start Upload to upload the objects. A blue line under the file name indicates the progress of the upload for that file.
In the example below, notice that the upload of the first two files (callout-1.png and callout-2.png) is completed. The word "Completed!" appears below each file name, and a checkmark
 appears to the right of each file name. The upload of the third file (callout-3.png) is still in progress, as noted with the text "Uploading..." and an indication of the remaining portion to upload.
You can abort an upload before it is completed (as for callout-3.png) by clicking Abort to the right of the file name.
When the upload is complete, you are returned to the Upload Files panel, where you can repeat the steps to upload additional folders or files.
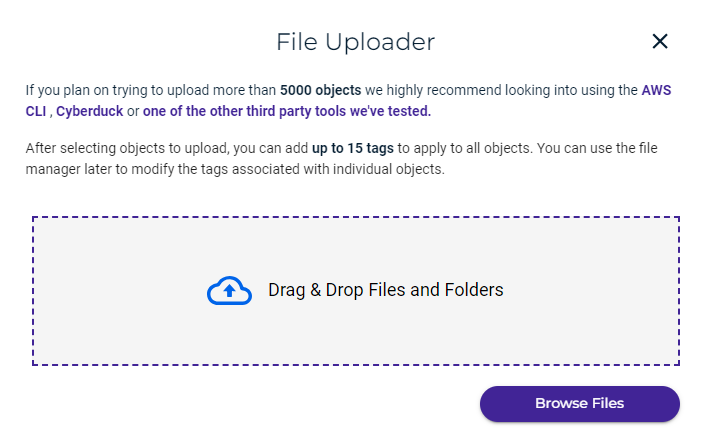
For now, close the Upload Files window by clicking X.
When the file upload is in progress, you can minimize the Upload Files window by clicking the X in the upper-right corner. When the Upload Files window is minimized and an upload is in progress, you can navigate to all pages except Billing.
The message, "Network Failure," is displayed if the network is interrupted during an upload.
The time it takes to upload or download your storage to or from Wasabi is dependent on several factors, including:
Volume of storage (which will vary for each customer)
The internet speed you have from your location (which will vary for each customer)
The internet speed that Wasabi supports (multiple 10 GB/s connections per data center)
Given the variability of the above factors, there is no universal answer to the question, "How long does it take?" Fortunately, there are many online calculators available for this purpose.
Reviewing Uploaded Objects
Uploaded objects are listed on the Objects panel. The following example shows one folder (fonts) and three files (callout-1.png, callout-2.png, and callout-3.png) stored in the bucket named widget-bucket.

Folders and files are displayed with a Name, Type, Last Modified (date), and Size. You can click the column heading to sort the listing by:
Name—number and then alphabetically (a to z) or reverse
Last Modified—oldest to newest date, or newest to oldest
Size—smallest size to largest, or largest to smallest
Actions ![]() are available for each object. For an individual folder, you can:
are available for each object. For an individual folder, you can:
Delete
Make public or private
For an individual file, you can:
Rename
Delete
Download as
Share with a presigned URL
Add tags
Make public or private
These features are described in More Options for Folders and Files.
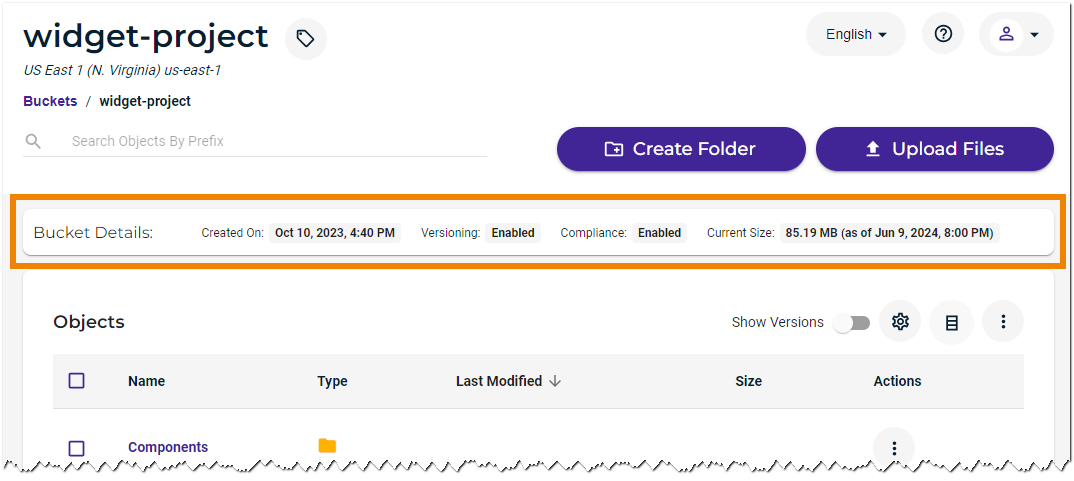
Also, notice that bucket details are provided to show the bucket creation date, compliance status, and current size (calculated daily):
Folders
Each folder is displayed with:
Select icon
 , which enables you to select the folder for actions
Folder name
Folder type
 , which you can click to display folder details
The Last Modified and Size columns are blank intentionally.
Files
Each file is displayed with:
Select icon
, which enables you to select the file for actionsFile name
File type, which you can click for file details:
 general file
 text (TXT)
 Word document
 Excel spreadsheet
 PowerPoint presentation
 graphics
 media
mediaDate/time when the file was last modified
Size of the file
Objects List Tools
Notice the icons in the upper right part of the Objects list:
 Or, if versioning is enabled:
 accesses the Bucket Settings panel, as described in the Wasabi Cloud Storage: Advanced Usage Product Guide.
 enables you to toggle the display of each column. This tool is not available if a folder is empty.
 provides More Options for Folders and Files.

and
toggle between hiding and showing file versions if versioning is enabled. For details, refer to Versioning in the Wasabi Cloud Storage: Advanced Usage Product Guide. This tool is not available if a folder is empty.
Working With Folders and Files
Before moving on to Step 3, you may want to review more details about Working With Folders and Files.
Objectives Met!
1—Sign up for Wasabi and sign in.
2—Work with buckets and objects.
Before moving to Step 3, you may want to:
Work with folders and files in the Folder Details and File Details panels
Learn about actions you can take on folders and files using the More Options icon:

After Getting Started, there are many features to explore in the Product Guide for Wasabi Hot Cloud Storage.