Wasabi has been validated for use with EasiShare, an Enterprise File Security Platform that helps organizations secure, manage, and govern their files effortlessly. To setup Wasabi with EasiShare, follow the instructions below.
Please be aware of and follow Wasabi's Free Egress Policy when storing and sharing files.
The use of EasiShare allows the EasiShare admin to regulate the security of a bucket. It is not making it a publicly shared bucket.
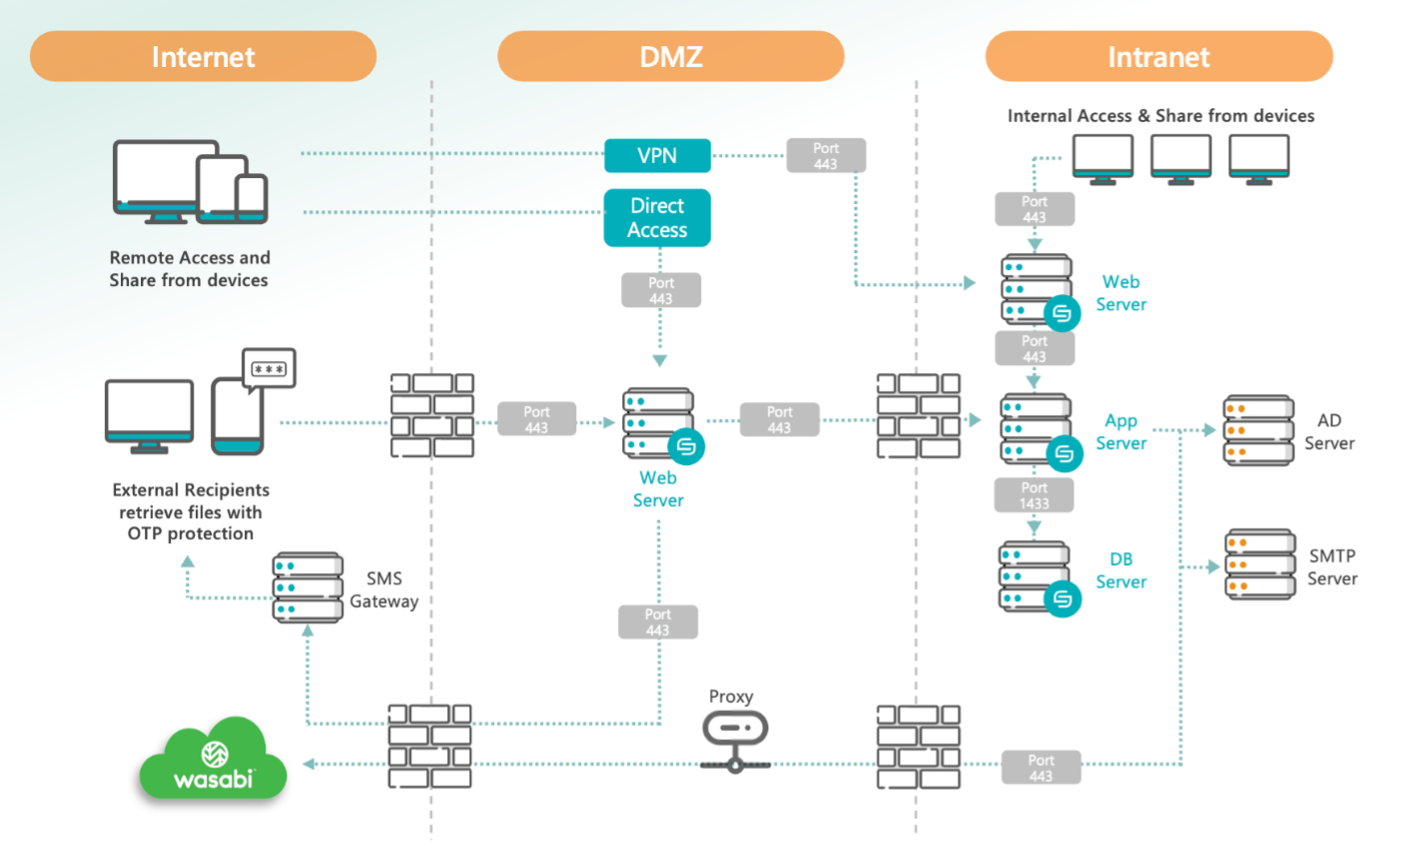
Reference Architectures
Cloud Deployment Example

Hybrid Deployment Example: On-Premise with Cloud Storage
Prerequisites
Support for Wasabi S3-compatible storage is available on EasiShare. No minimum version is required.
An active Wasabi account
Configuring EasiShare
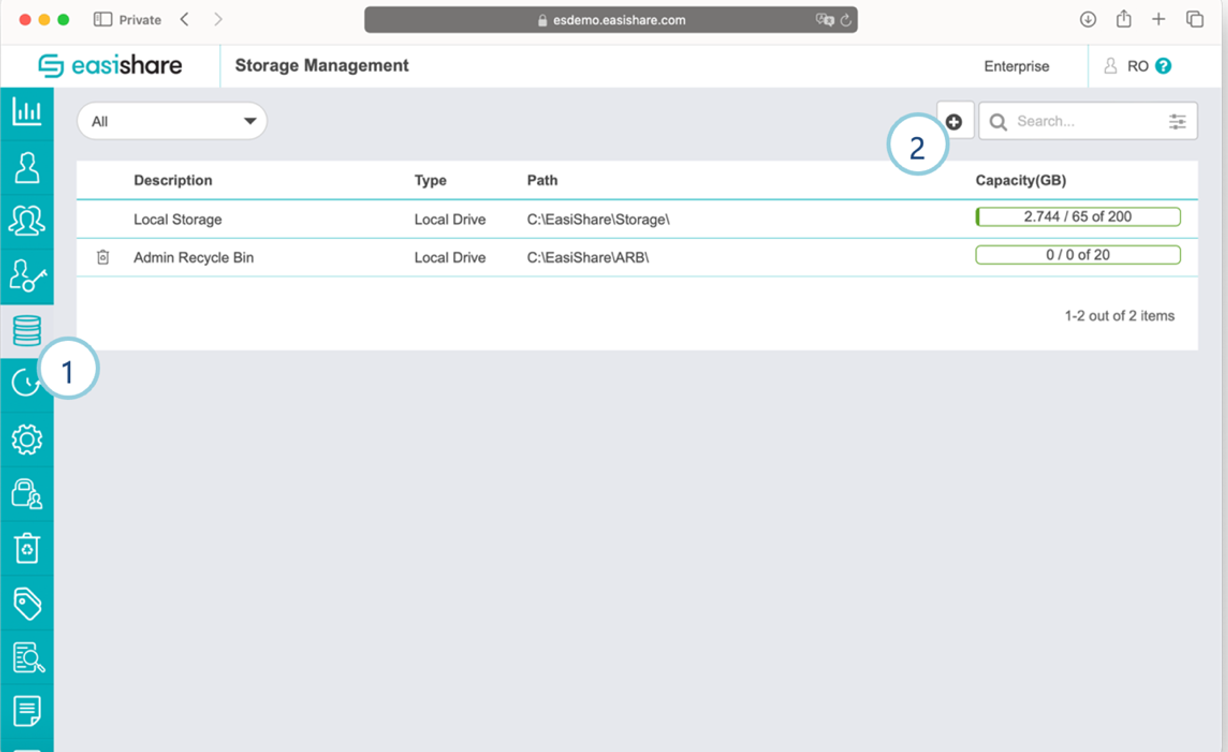
1. Login to the EasiShare Admin Portal and navigate to Storage Management.
2. Click the Add Storage icon.
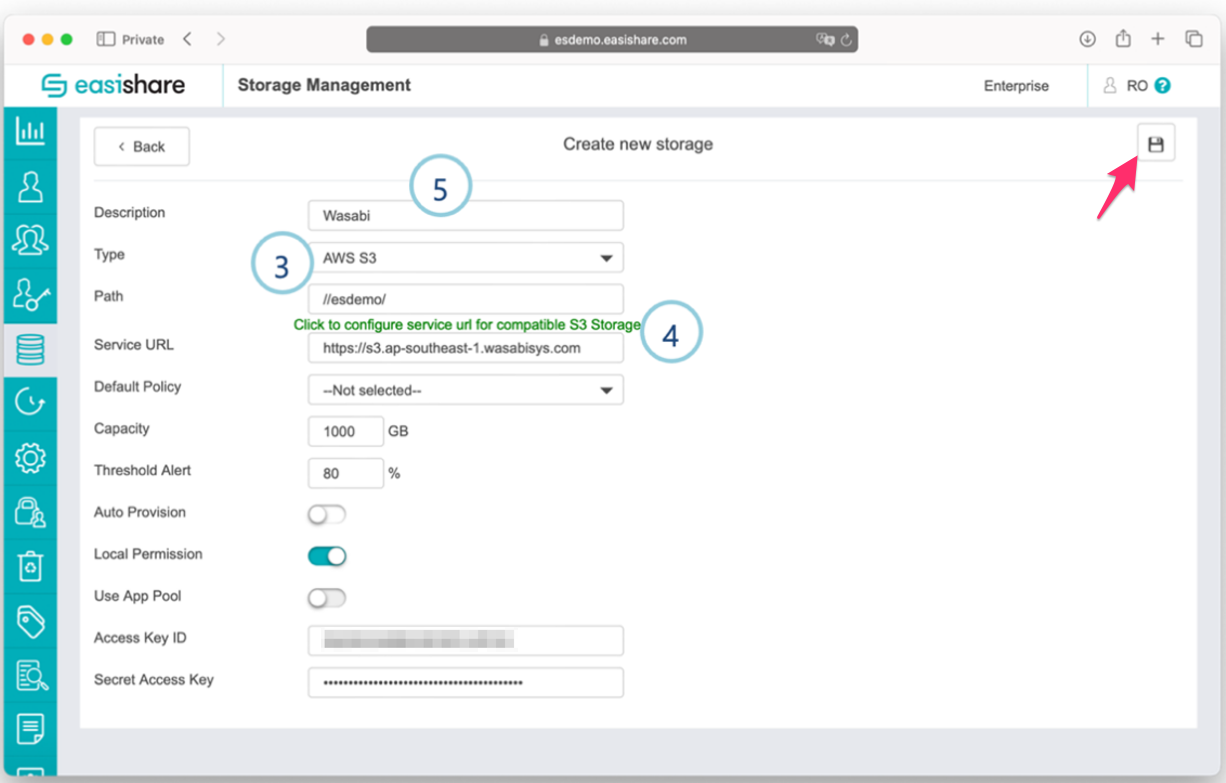
3. Select AWS S3 in the Type dropdown.
4. Click the link to configure the Service URL for Wasabi.
5. Enter all required information, which includes Description, Path, Service URL for the region your Wasabi bucket is in, Capacity, Access Key ID and Secret Access Key. Click the Save icon.
Note: The entered bucket in the Path field must already exist in Wasabi. See Working With Buckets and Objectsfor details on creating a bucket.
This configuration example discusses the use of Wasabi's ap-southeast-1 storage region. To use another Wasabi storage region, use the appropriate Wasabi service URL.
6. Wasabi now appears in the Storage Management screen.

Step by Step Guidelines for Document Sharing
1. Using EasiShare, select the documents that you would like to share with a recipient.
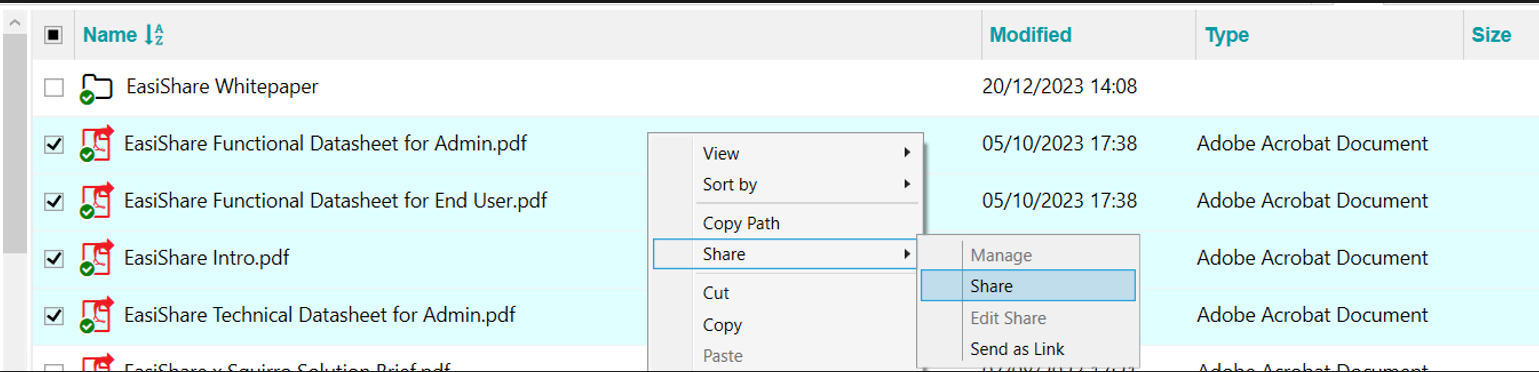
2. Enter the recipient’s name, email address, and mobile number (for OTP - One Time Password). Click Share.
You can configure sharing with the following restrictions/settings.
Link Expiry
OTP for Two Factor Authentication
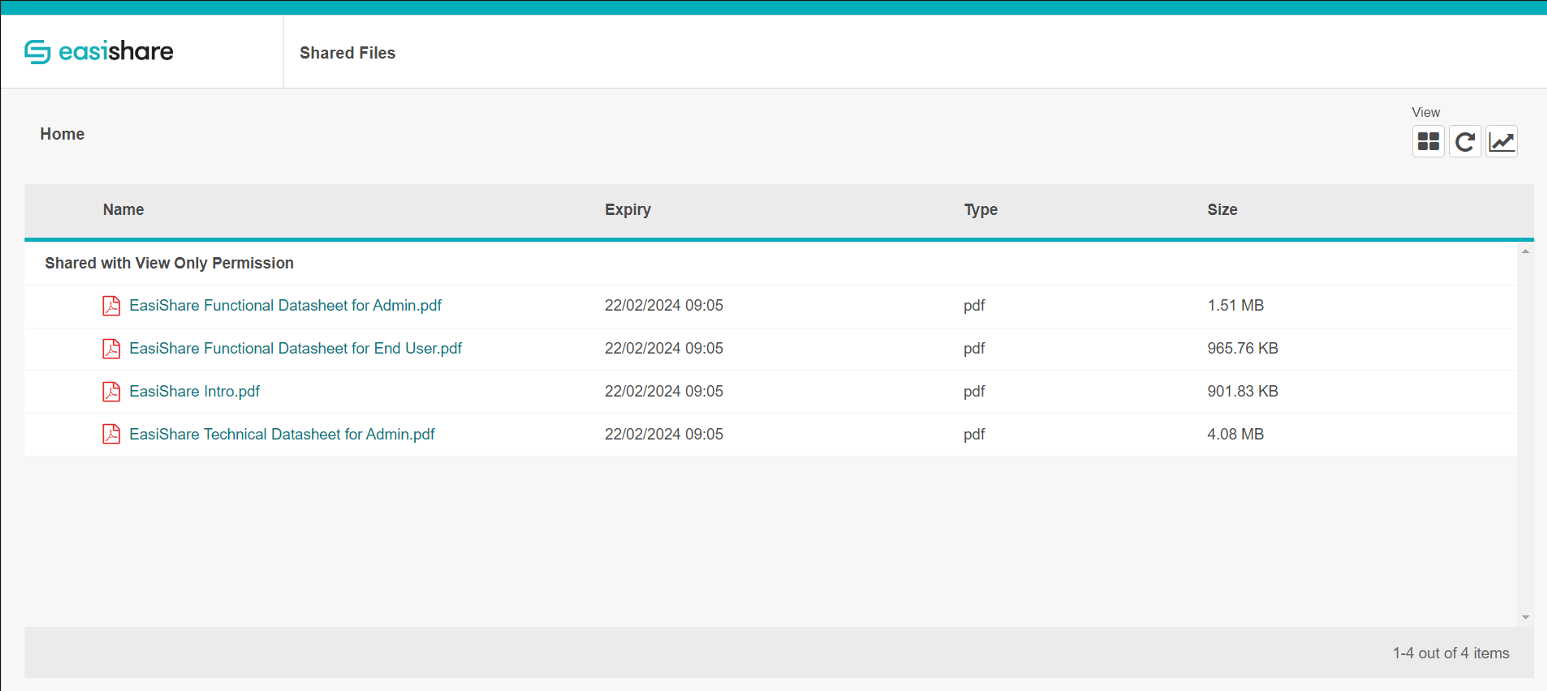
View Only Mode
Notifications
Number of download/view attempts

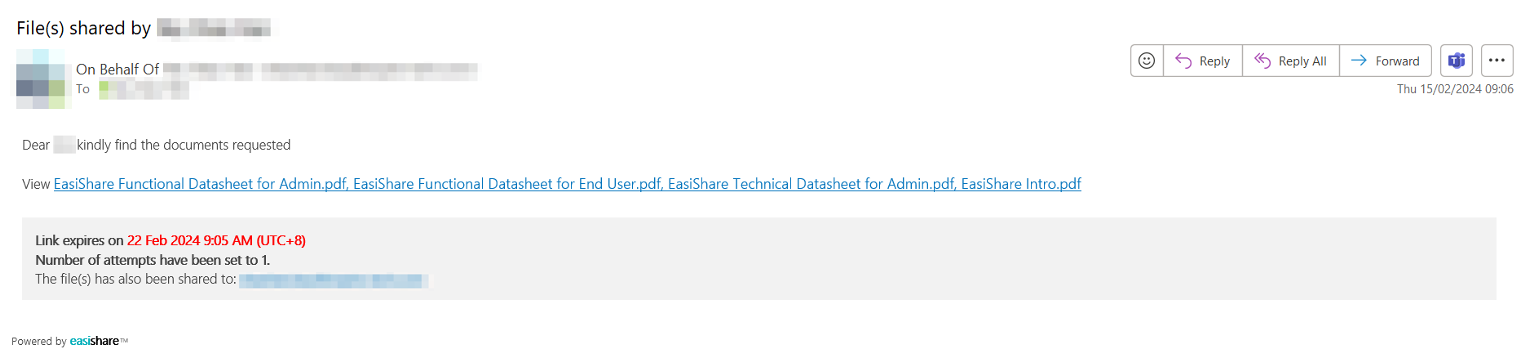
3. Recipients will receive a web link to access the shared documents.
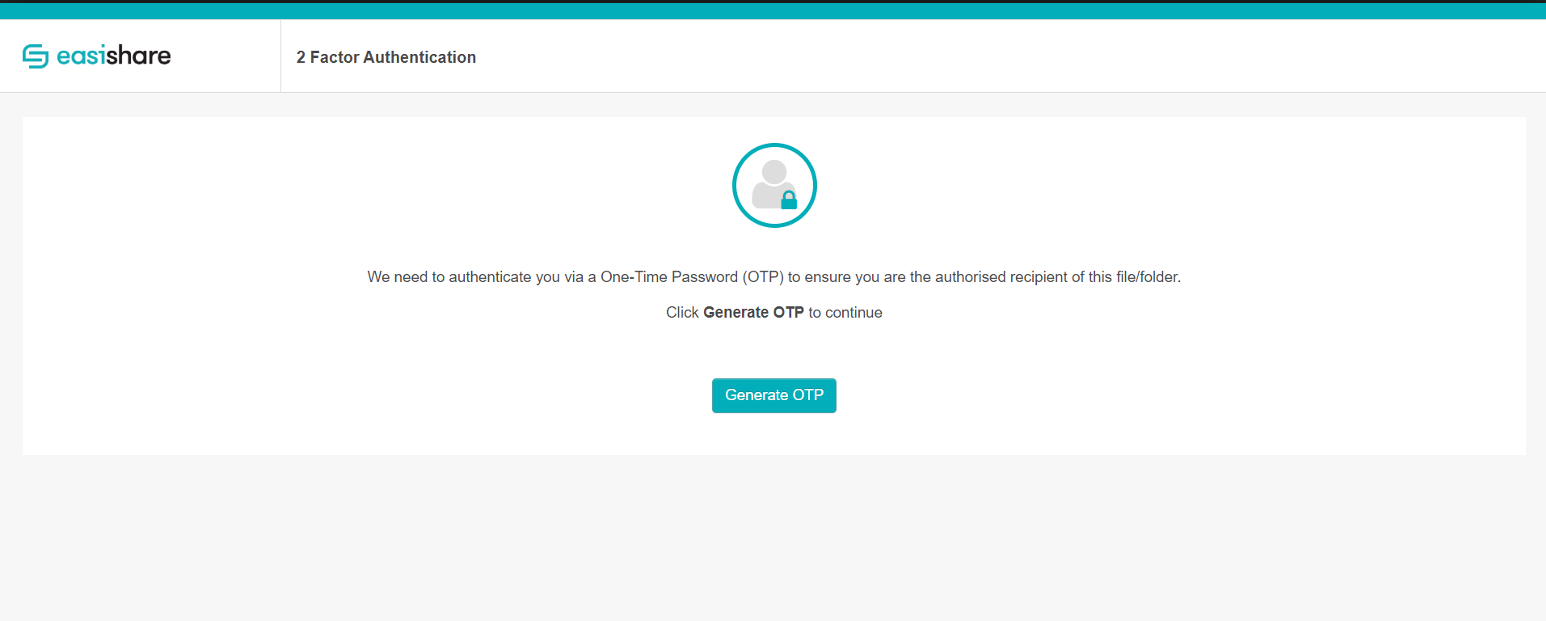
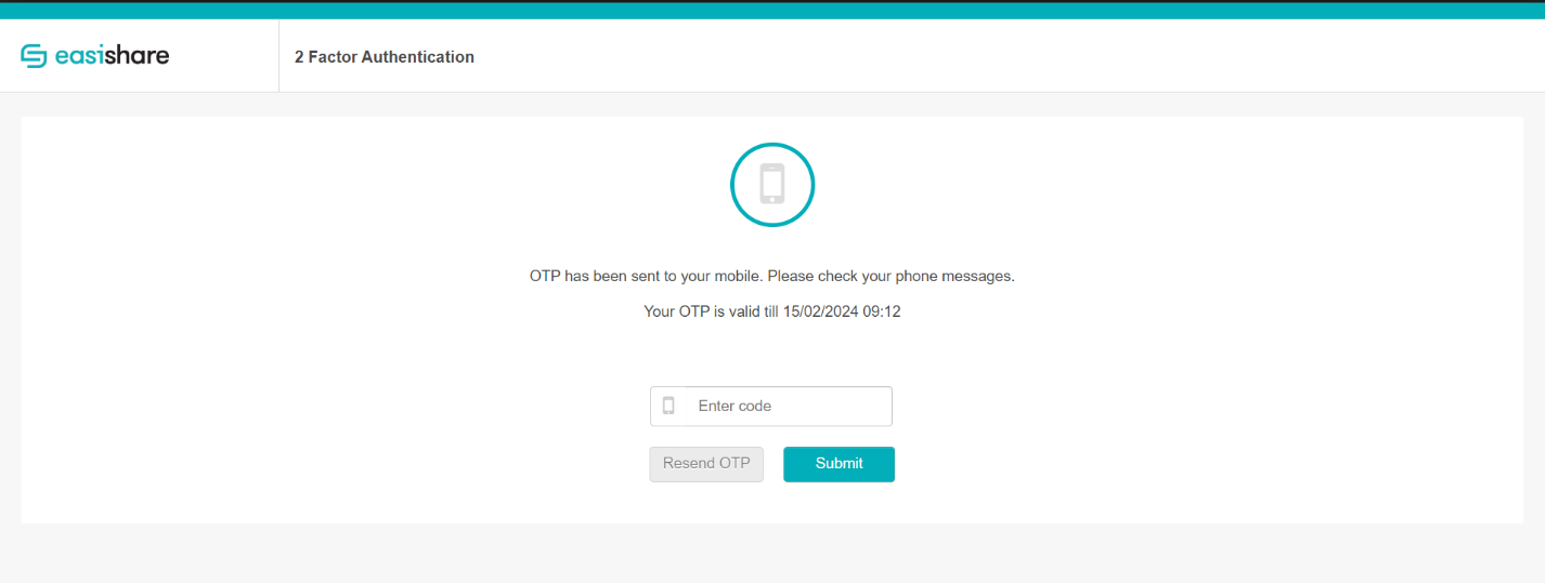
4. Recipients will be prompted to enter the OTP that is sent to their mobile before they can access the documents. Click Generate OTP.
5. Users will be able to download/view the documents shared to them.