OpenSearch has been validated for use with Wasabi. Follow the instructions below for more information.
We are running this on an Ubuntu 24.04 System in single-node mode. You will have to restart the OpenSearch services after installing the "repository-s3" plugin. This procedure should be adjusted to your cluster and tested in a lab environment before attempting on a production system. Additionally, if you are running a different OS, you may need to adjust certain commands to fit your OS.
Downloading and Configuring the OpenSearch Package
Download and extract the OpenSearch-Package.


Before running OpenSearch, be sure that the Linux parameter "vm.max_map_count" is at least 262144 and memory paging is Disabled. To stop memory paging, use the following command.
sudo swapoff -aTo increase the amount of memory mappings available for OpenSearch, change the following sysctl configuration file by adding the following line vm.max_map_count=262144 to the conf file and restart the Kernel.
sudo vi /etc/sysctl.confTo restart the kernel, execute the following command.
sudo sysctl -pVerify the changes by executing the following command.
cat /proc/sys/vm/max_map_count
Installing the Plugin and Setting the Wasabi Repository
Install the repository-s3 plugin by navigating to the OpenSearch directory that has been extracted.
./bin/opensearch-plugin install repository-s3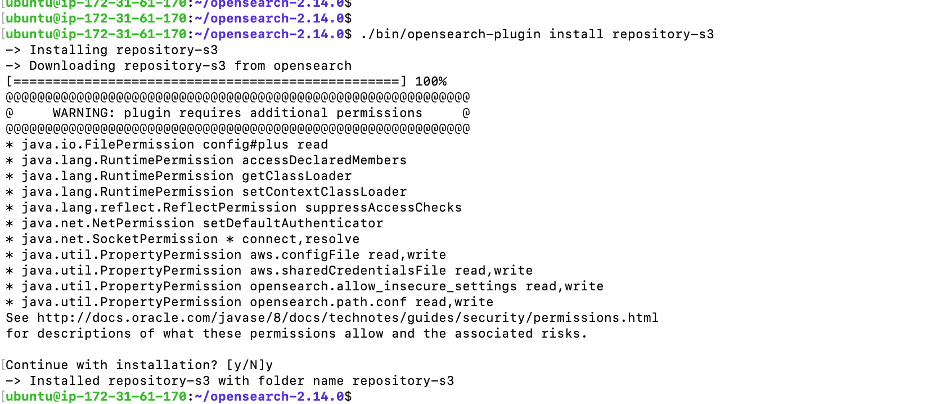
Set a password for OpenSearch using the following command.
export OPENSEARCH_INITIAL_ADMIN_PASSWORD=<custom-admin-password>
Configure Wasabi account access keys and secret keys using the following commands. You will need to replace the access key and secret key with keys generated from your Wasabi account. For more information, refer to 3—Creating a User Account and Access Key.
./bin/opensearch-keystore add s3.client.default.access_key

./bin/opensearch-keystore add s3.client.default.secret_key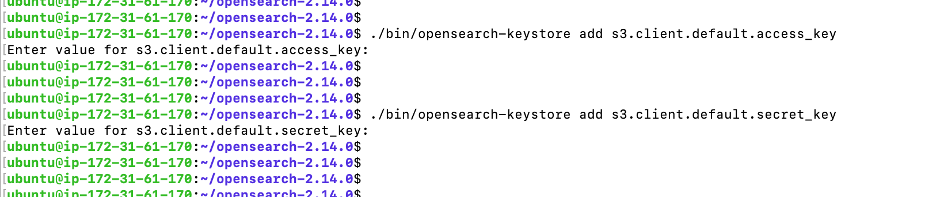
Open the configuration folder and edit the opensearch.yml config file with the following configuration. Set the default region and endpoint URL per the bucket region that was created in the Wasabi account.
plugins.security.disabled: true
### to disable the ssl plugin security

s3.client.default.endpoint: s3.ca-central-1.wasabisys.com
### endpoint url

s3.client.default.region: ca-central-1
### bucket region
Start the OpenSearch by executing the startup script.
./opensearch-tar-install.sh
From another terminal session, check if the OpenSearch is started by executing the following CURL command on port 9200.
curl -X GET http://localhost:9200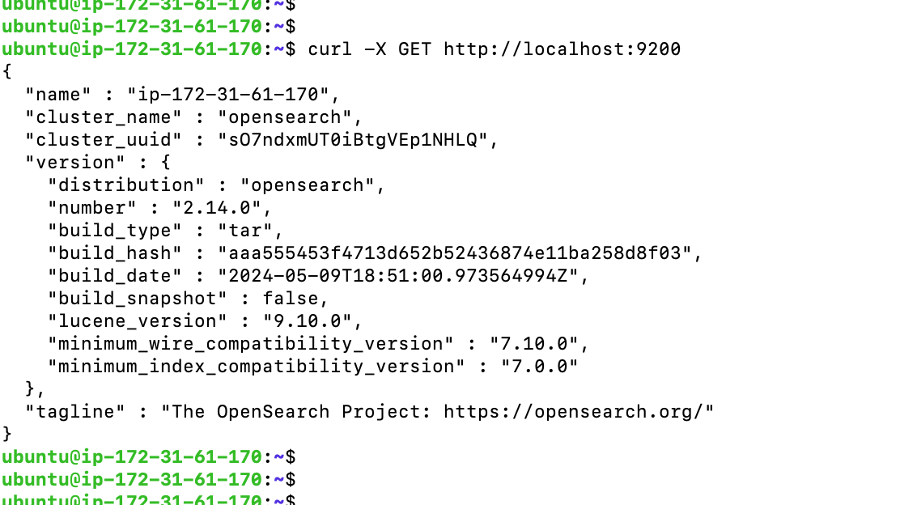
Register the Wasabi bucket as a repository in OpenSearch once it is up and running. Replace the repository name to identify this repository. Replace the bucket name with the name of the bucket that is created in the Wasabi account.
curl -XPUT "http://localhost:9200/_snapshot/<repository-name> " -H 'Content-Type: application/json' -d'
{
  "type": "s3",
  "settings": {
    "bucket": "<bucket-name>",
    "base_path": “<base path or object prefix>"
  }
}'
The above CURL command returns the following output after successful execution.
{"acknowledged": true}
Taking Snapshots
To take a snapshot and save in the Wasabi bucket, execute the following command by replacing the repository-name with the name configured in the previous step. The following snapshot includes all indexes and the cluster state.
curl -XPUT "http://localhost:9200/_snapshot/<repository-name>/1"
You can also add a request body to include or exclude certain indexes or specify other settings. Snapshots can take a while to complete, so consider using this option by adding the query parameters at the end.
curl -XPUT "http://localhost:9200/_snapshot/<repository-name>/1?wait_for_completion=true"To check the Snapshot status, execute the following command.
curl -XGET "http://localhost:9200/_snapshot/_status"Verify from the Wasabi Console that the snapshot is successfully saved to the bucket.
Restoring Snapshots
Create the new OpenSearch server and configure the repository to restore the snapshot.
Be sure that the basepath and repository name match the repository that was created initially. Once configured, execute the following command to check the list of snapshots that are available.
curl -XGET "http://localhost:9200/_snapshot/<repository-name>/_all"
To restore the second snapshot, execute the following command by replacing the repository name. Before restoring, ensure that the indices in the snapshot have no naming conflict with the existing indices.
curl -XPOST "http://localhost:9200/_snapshot/<repository-name>/2/_restore"
For additional information, contact a Wasabi Customer Support representative: support@wasabi.com