Quest's QoreStor has been validated for use with Wasabi. For more info on how Quest & Wasabi work together, please visit this solution page. To use this product with Wasabi, please follow the instructions below. Further info can be found in this Quest article.
Requirements
Operational QoreStor installation
Min Quest QoreStor release - 6.0 or higher
Active Wasabi storage account
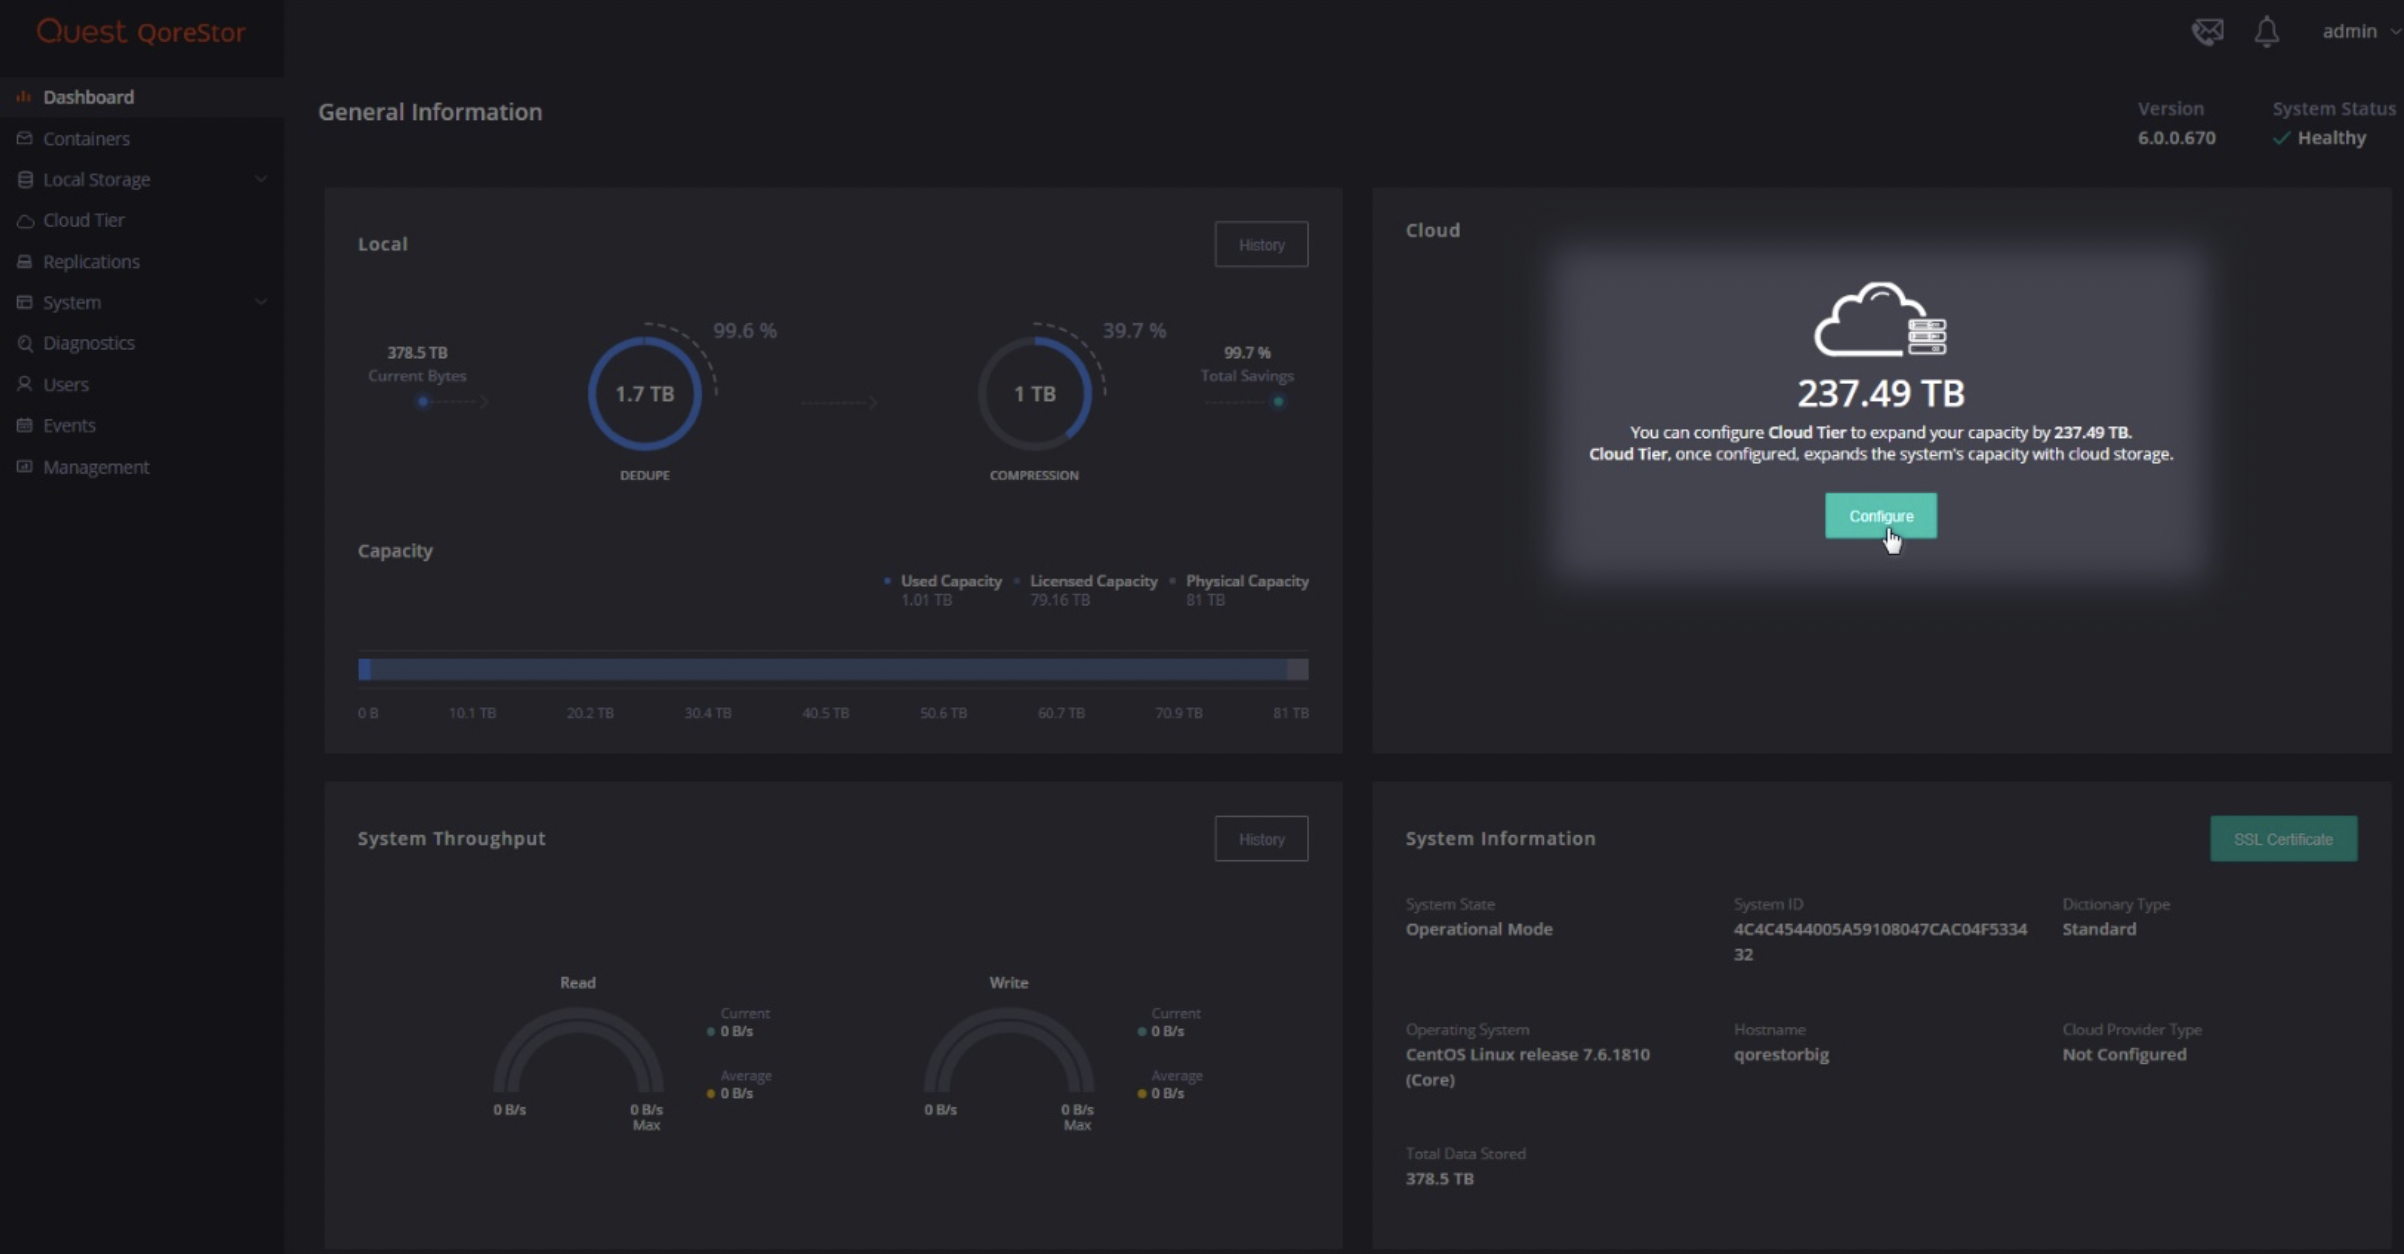
To start configuring a connection to Wasabi, log in to the QoreStor application, then click the configure button in the cloud panel of the user interface.
You will now be presented with a menu, select ‘Wasabi S3’ from the drop down as shown below.
Provide the following information:
A Name for the storage bucket
Your access key
Your secret key
Region
Endpoint details
Add a passphrase to encrypt data being sent from QoreStor to Wasabi Storage.
Note: Follow instructions on creating Access & Secret keys.
Note: This config example uses Wasabi's us-west-1 storage region. To use other Wasabi storage regions, please use the appropriate Wasabi service URL as described in this article.
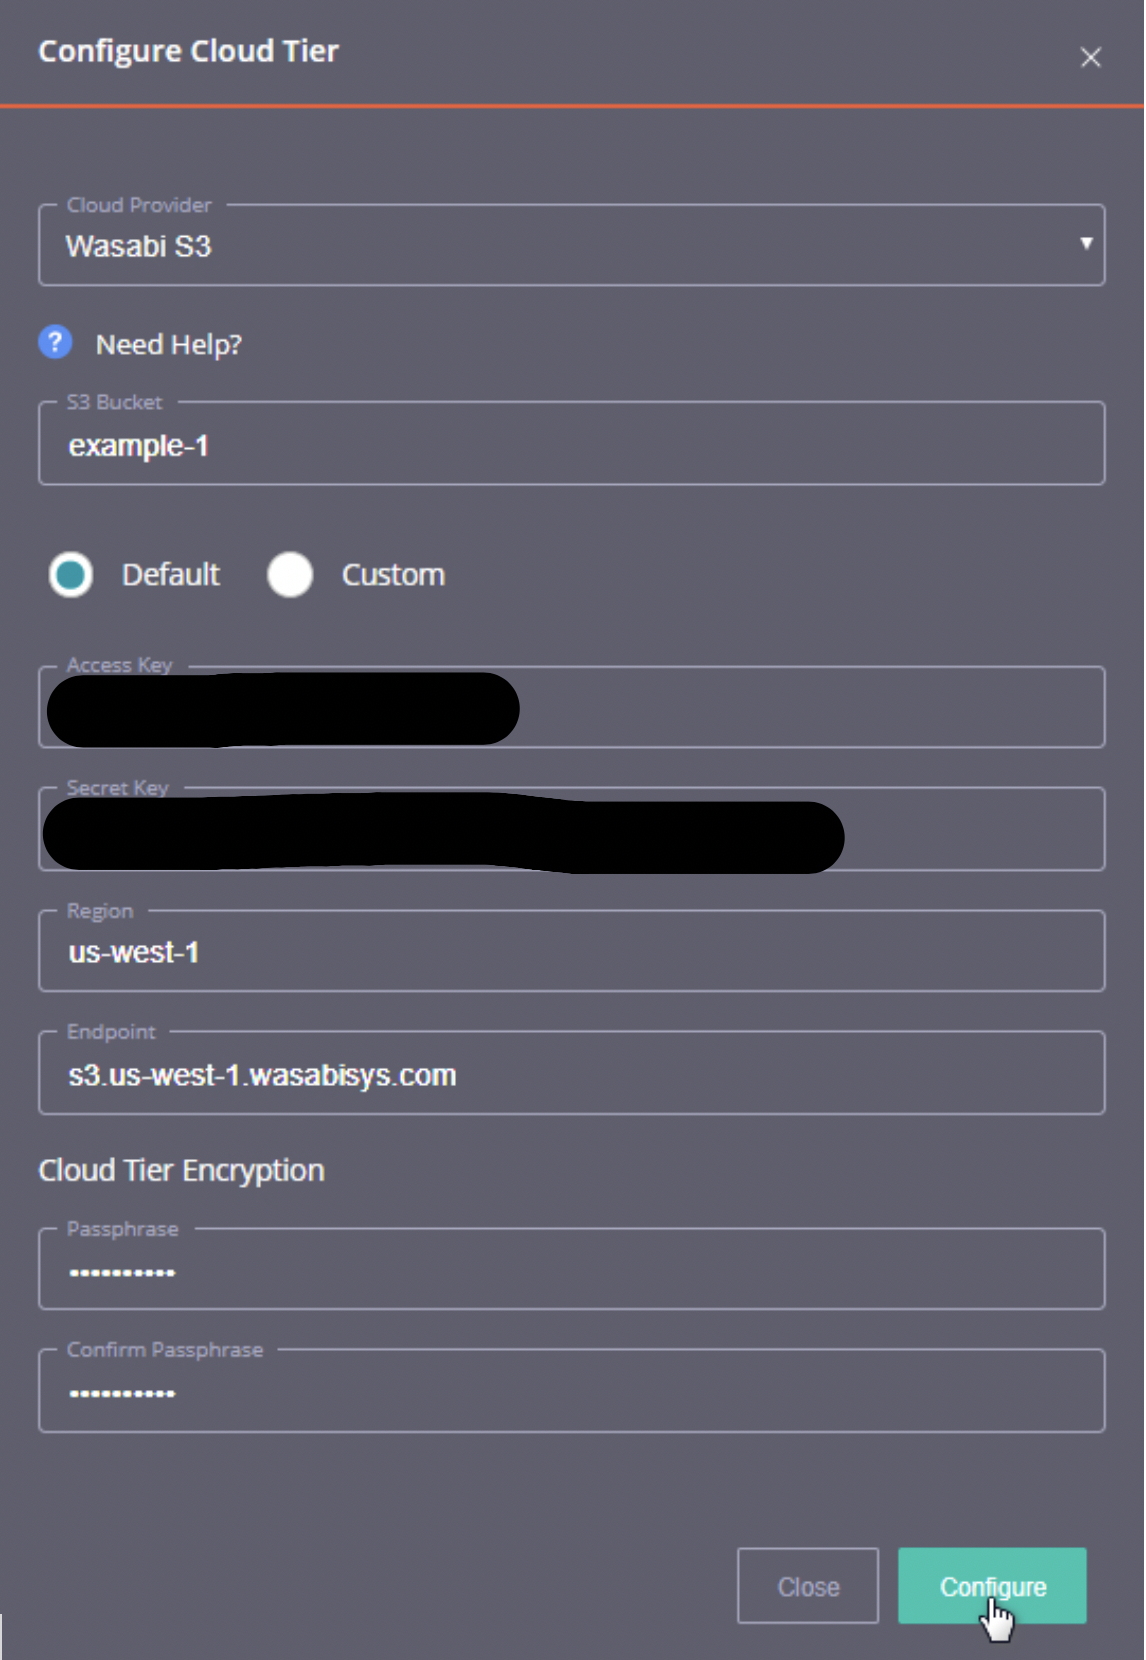
Click the Configure button to finalize the setup.
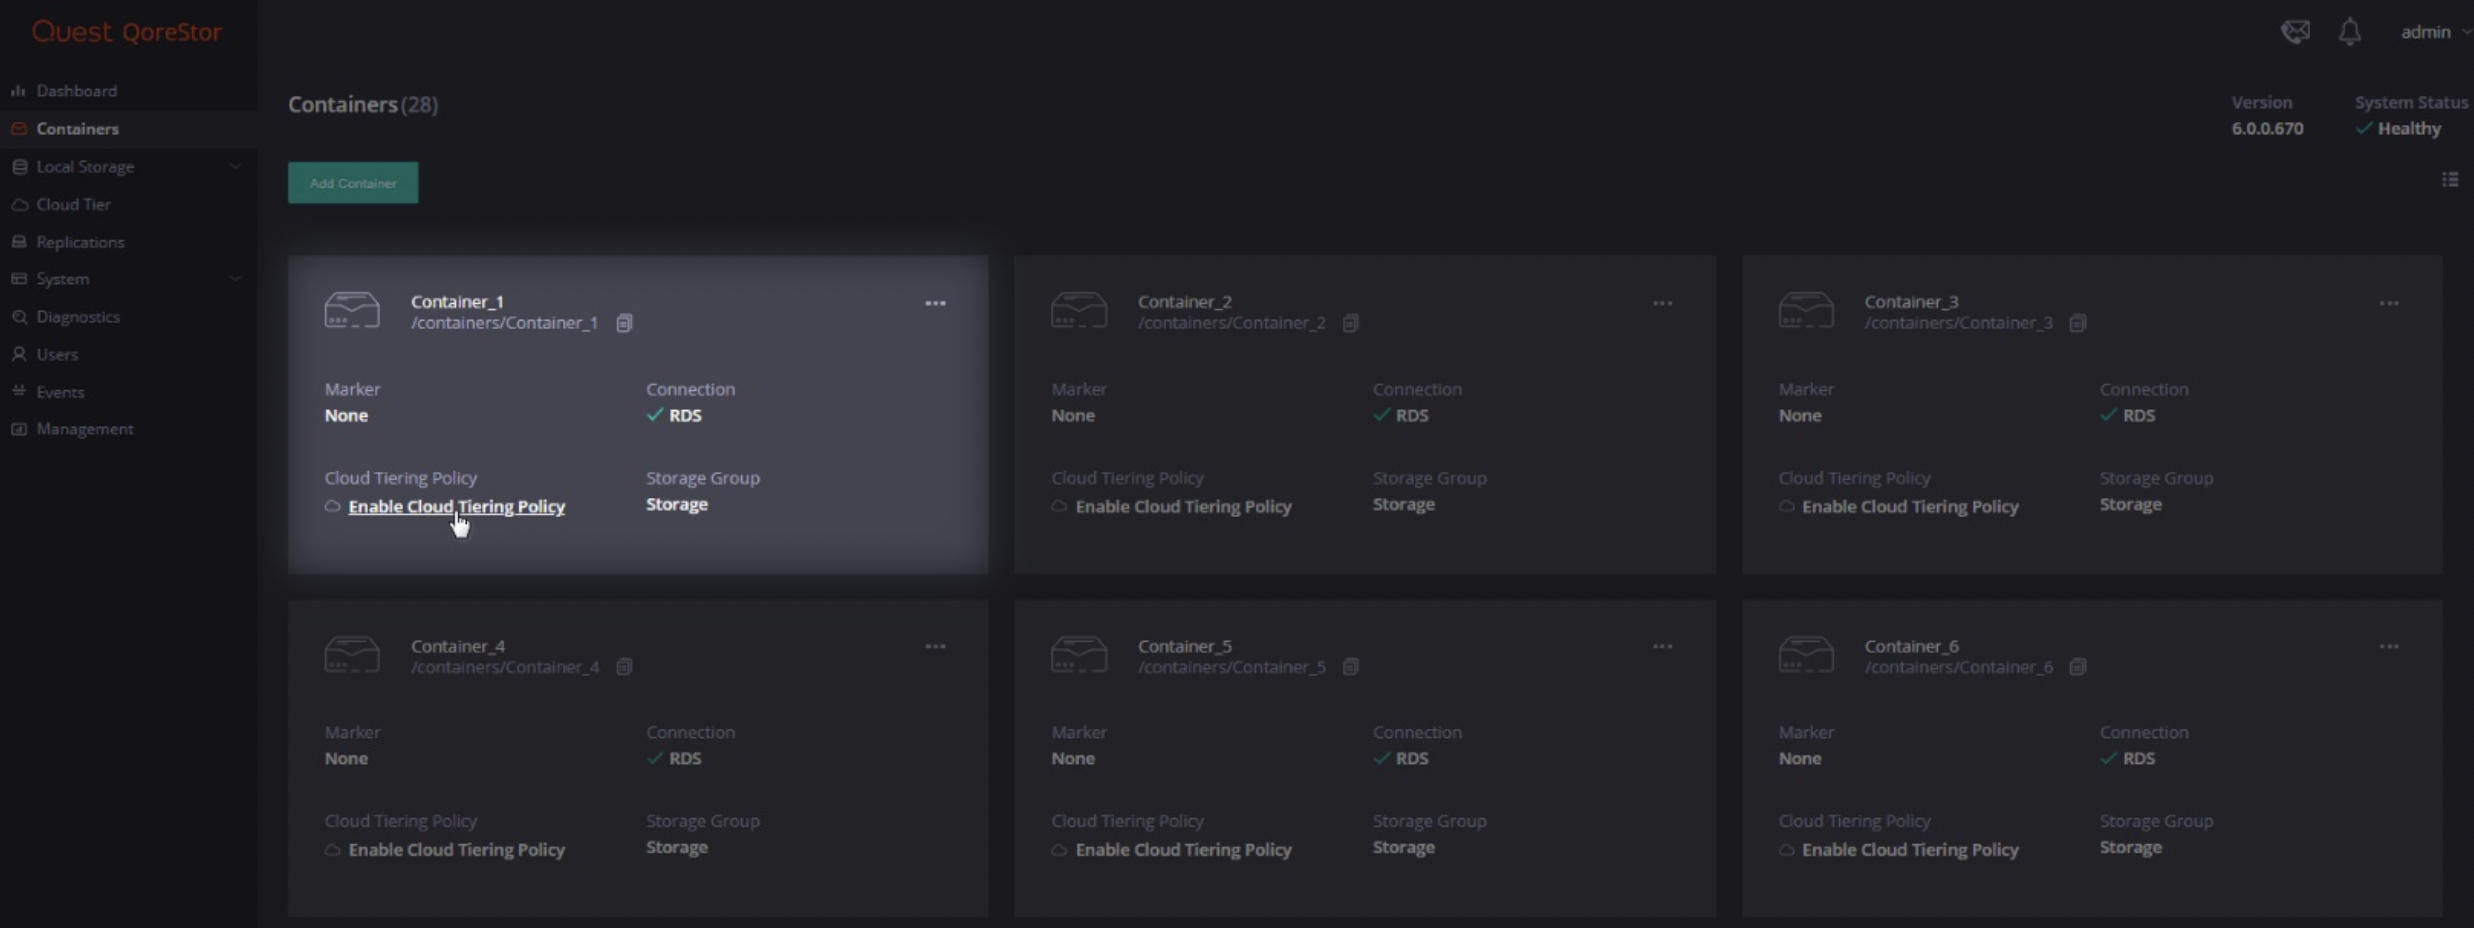
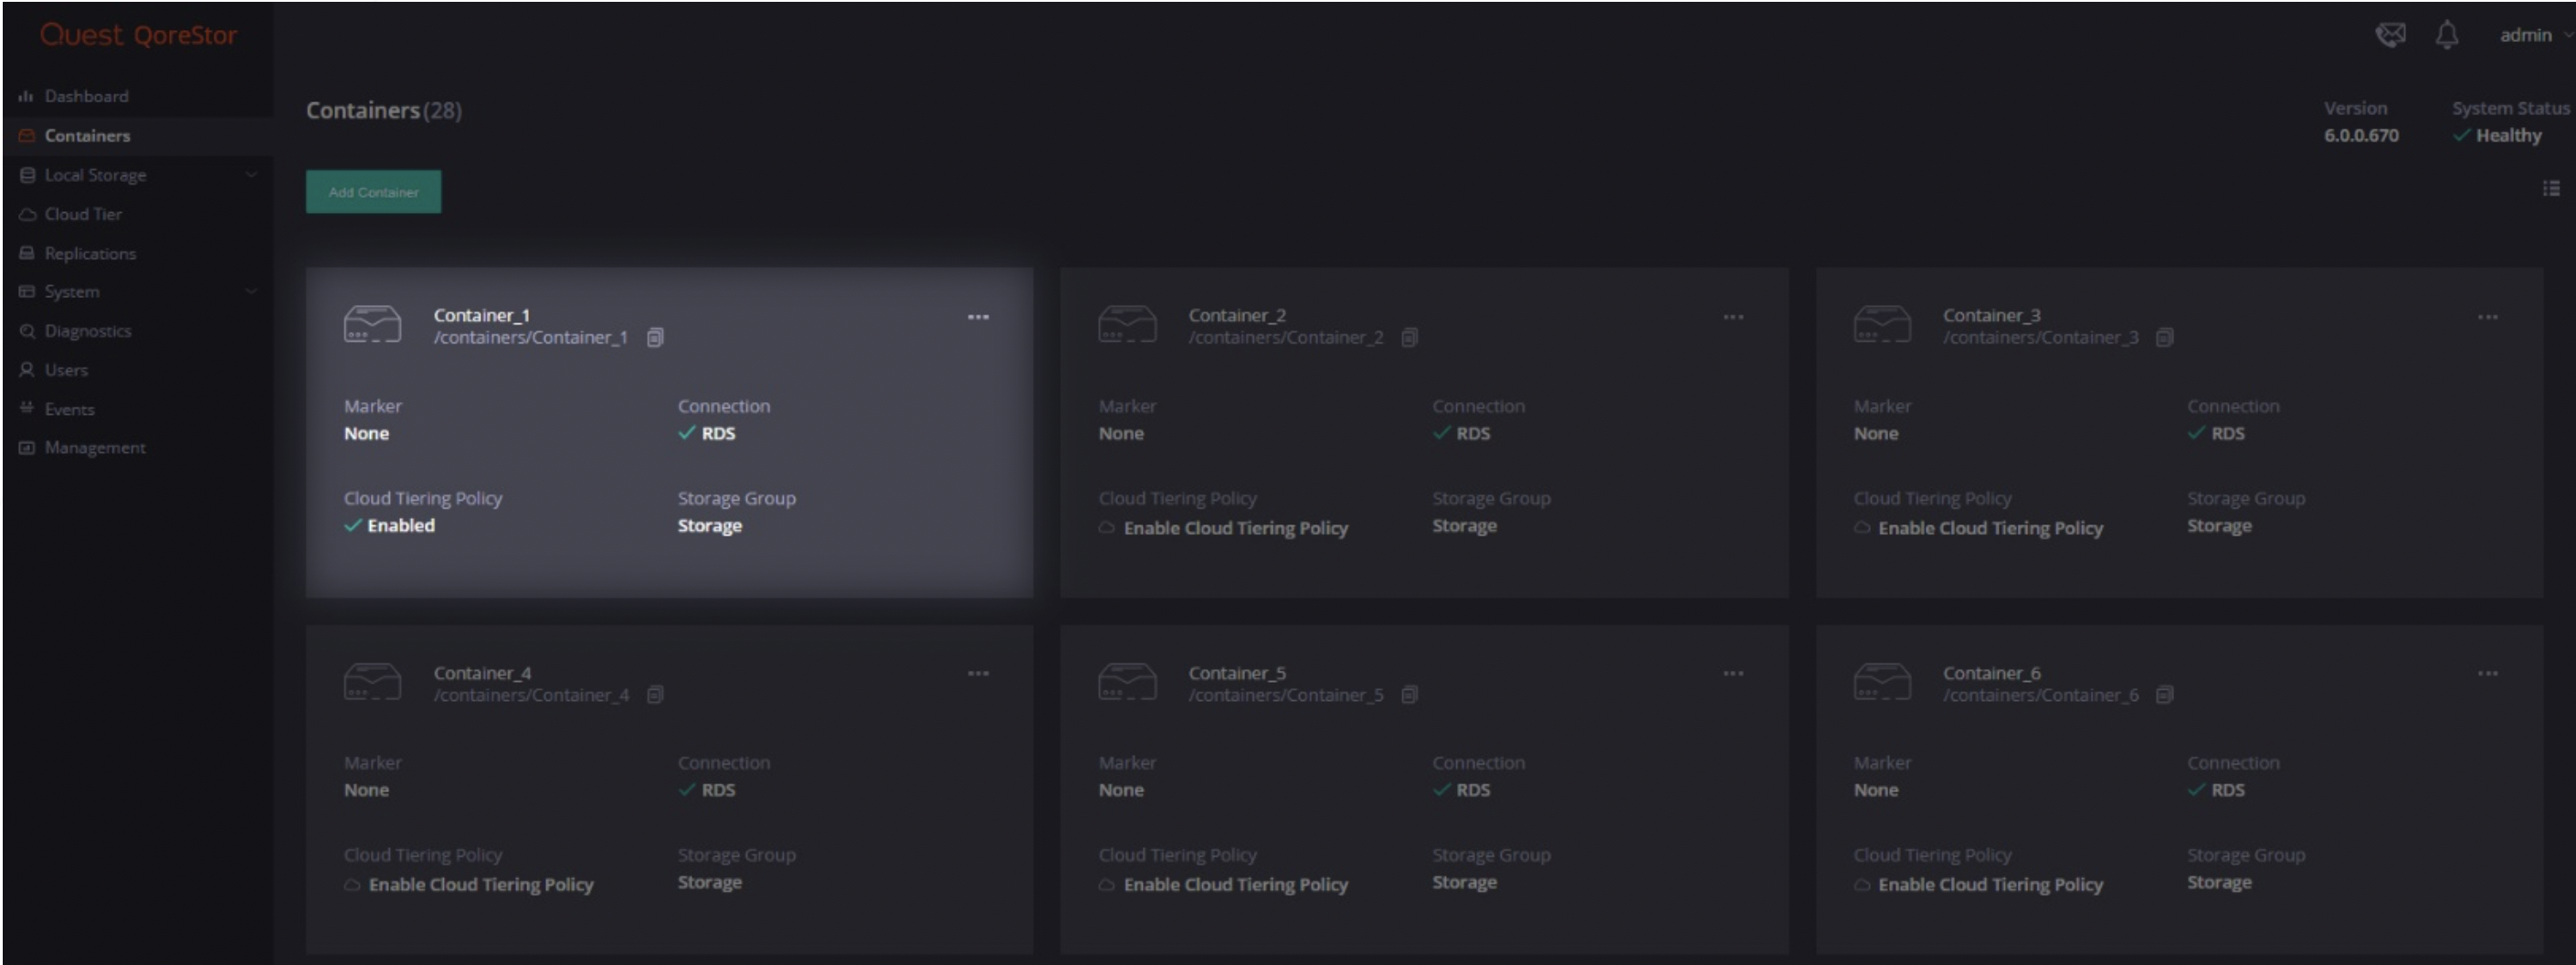
To start to move data, a configured storage container must have its cloud tier option enabled. To do this, select the Containers menu of the user interface.
In the Containers’view, select the Enable Cloud Tiering Policy option on the data container that you wish to send data to the now configured Wasabi cloud tier.
Selecting the Enable Cloud Tiering Policy option will open the policy configuration slide out panel on the right as shown below.
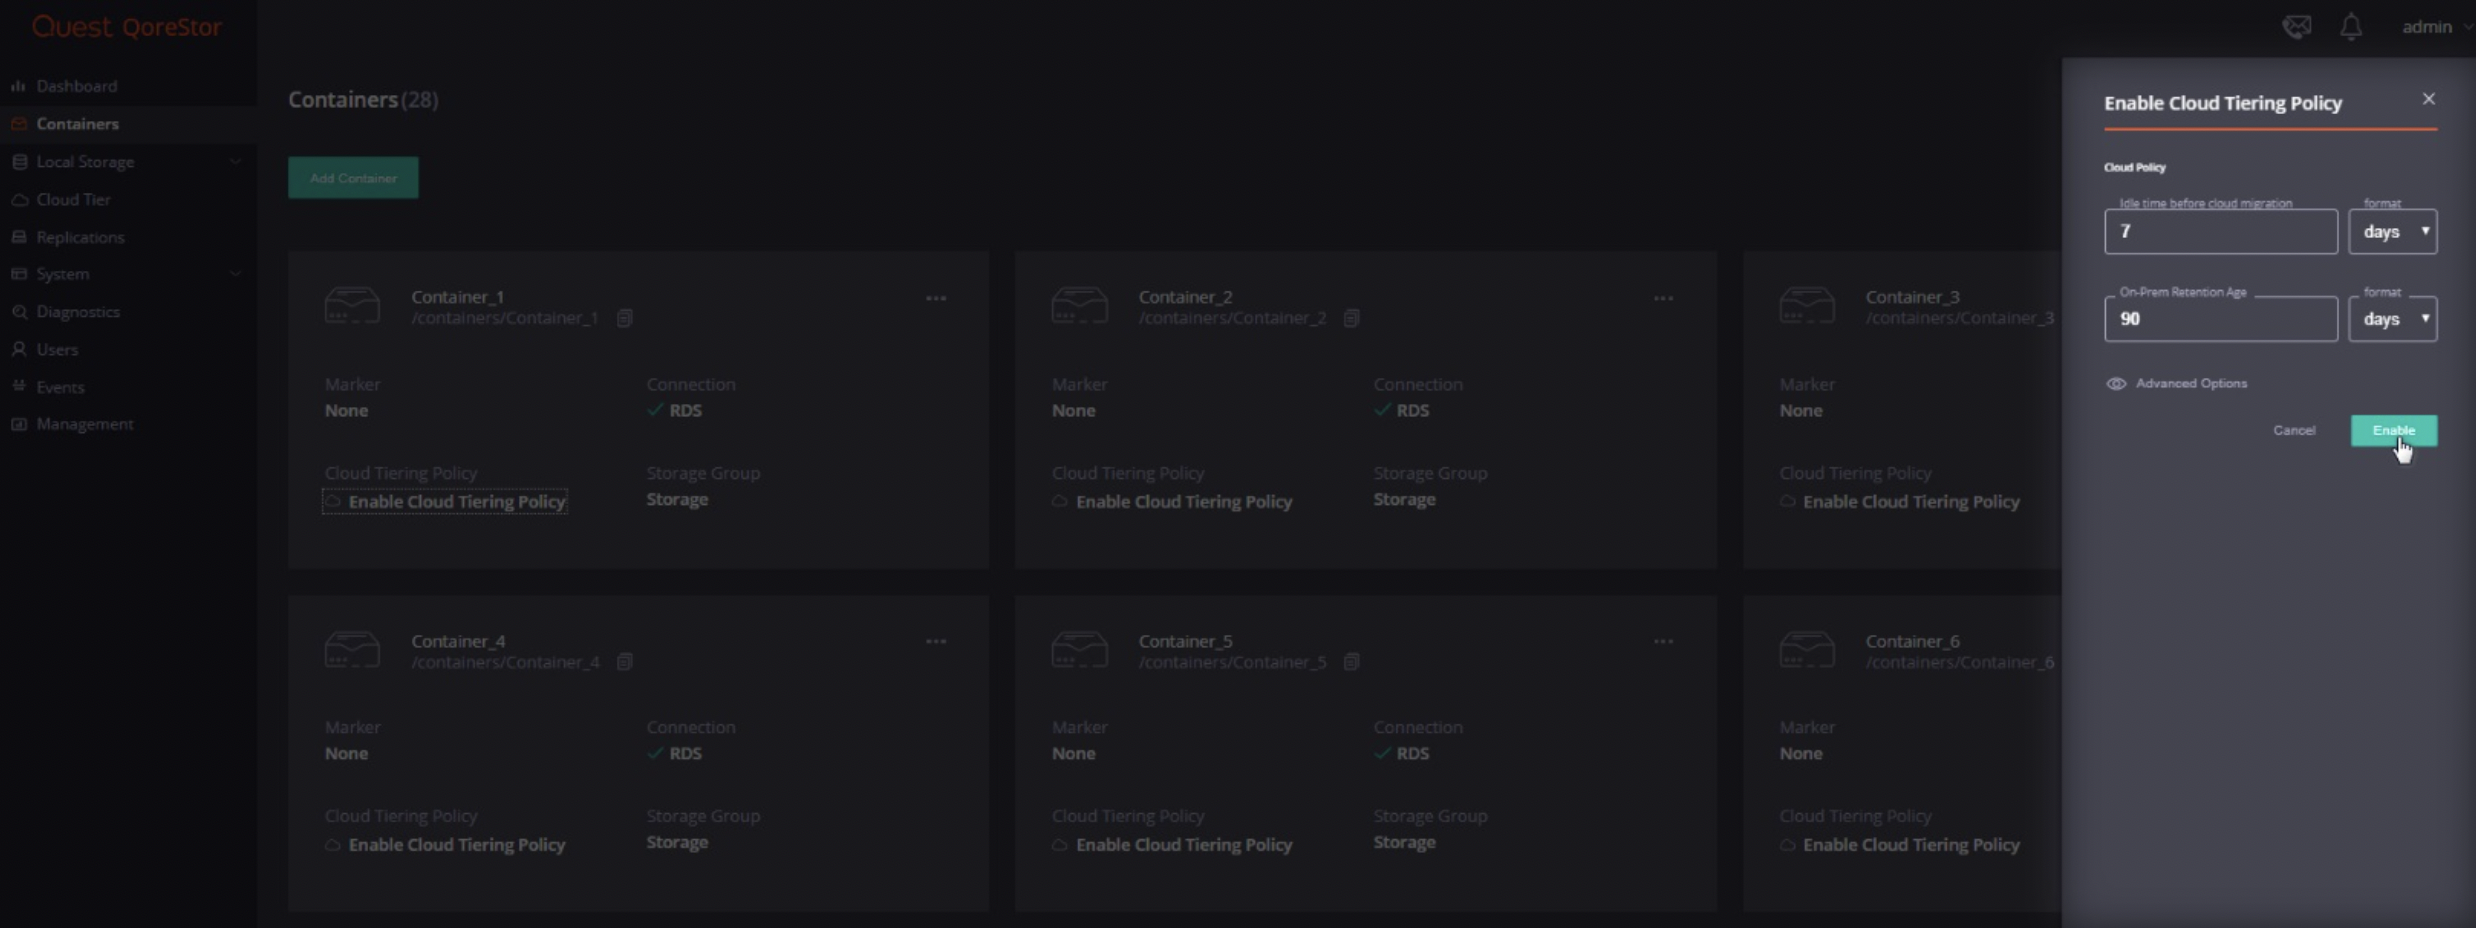
There are two policy options to set. The first is set for how long the data is idle before a copy is sent to the configured Cloud Tier. The second denotes how long the data in the source container is held for before being removed. Once the policy options have been decided click the enable button. This will start moving any data that falls inside the policy definition to the configured Cloud Tier.
Note: This is important to understand that QoreStor will copy data to a configured cloud tier, leaving it for the configured period on the local system. This allows for a recent copy of data to be immediately restored from the local container. In this way data is always available and can be tied to a corporate policy for local and remote data retention. Once the data has been copied to the cloud tier and the local retention age has been reached, older data will only be held in the cloud tier. The only way data can be fully deleted is via the backup application expiring data or deleting the data
Once configured the container panel will change and you will see that the Cloud Tiering Policy now shows as enabled as below.
Other containers can be configured in the same way by using the already configured cloud tier, just by enabling each container to use the cloud tier. Each container can have separate policies that can match a backup data age and retention plan.