Signiant's Media Shuttle (version 4.0 or higher) is validated for use with Wasabi. Media Shuttle’s file acceleration technology speeds up transfers over public and private networks, eliminating latency and utilizing available bandwidth.
Requirements
Active Wasabi storage account
Media Shuttle server
Note: The Media Shuttle SDCX server must be deployed in the same data center region as the Wasabi storage.
Configuration
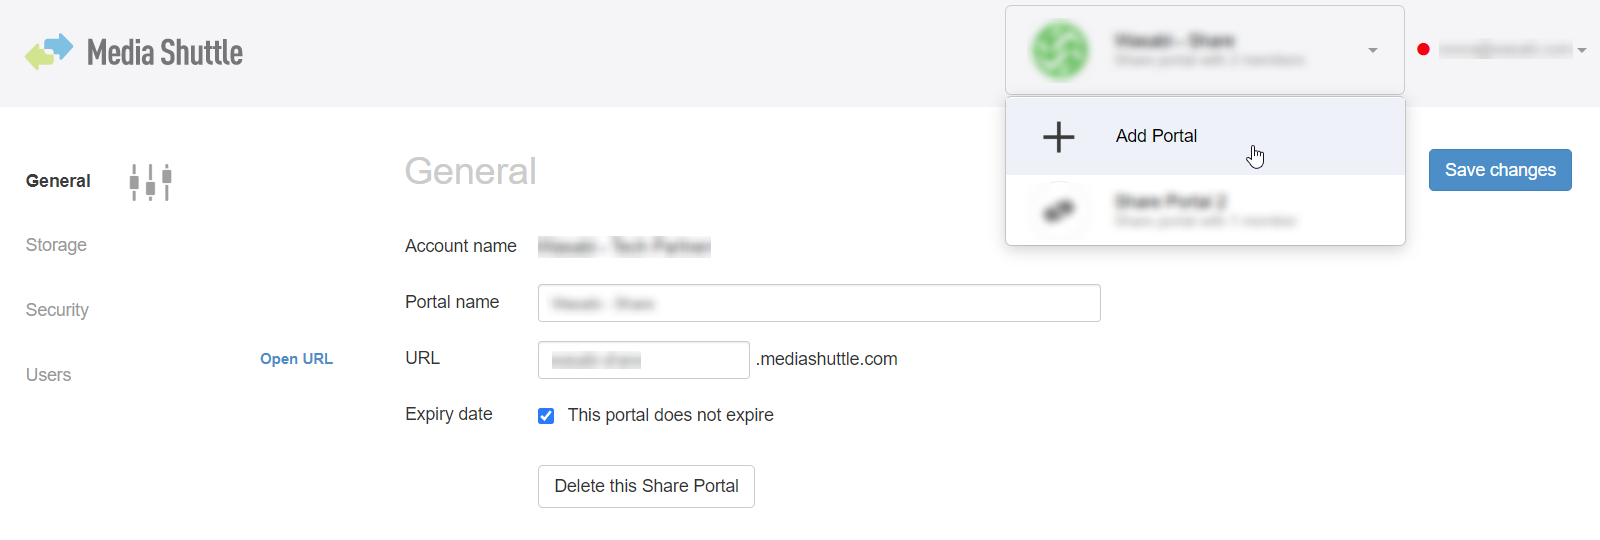
Log in to the Media Shuttle server IT admin portal (for example, manage.mediashuttle.com)
Navigate to the top right drop down option, and click on Add Portal, as shown below.
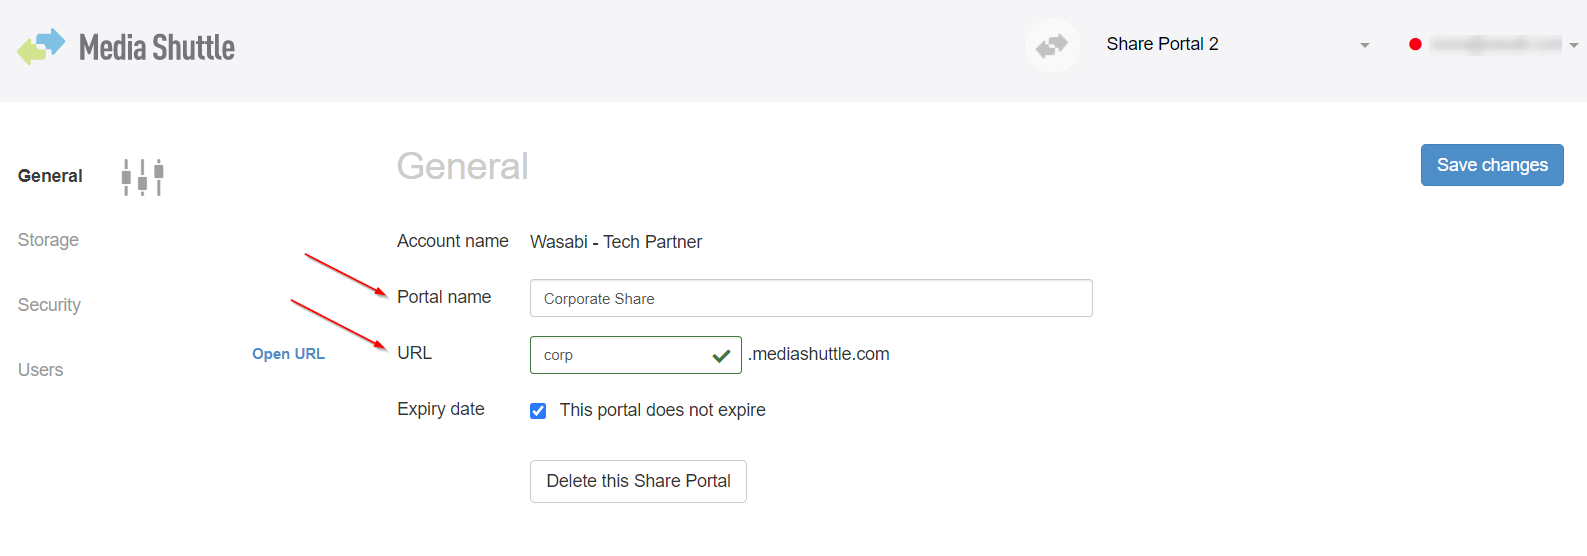
Select the appropriate portal type (Send, Share, Submit). We will choose Share for this article.

Enter an appropriate Portal Name and URL prefix, as shown below. Click Save changes when done.
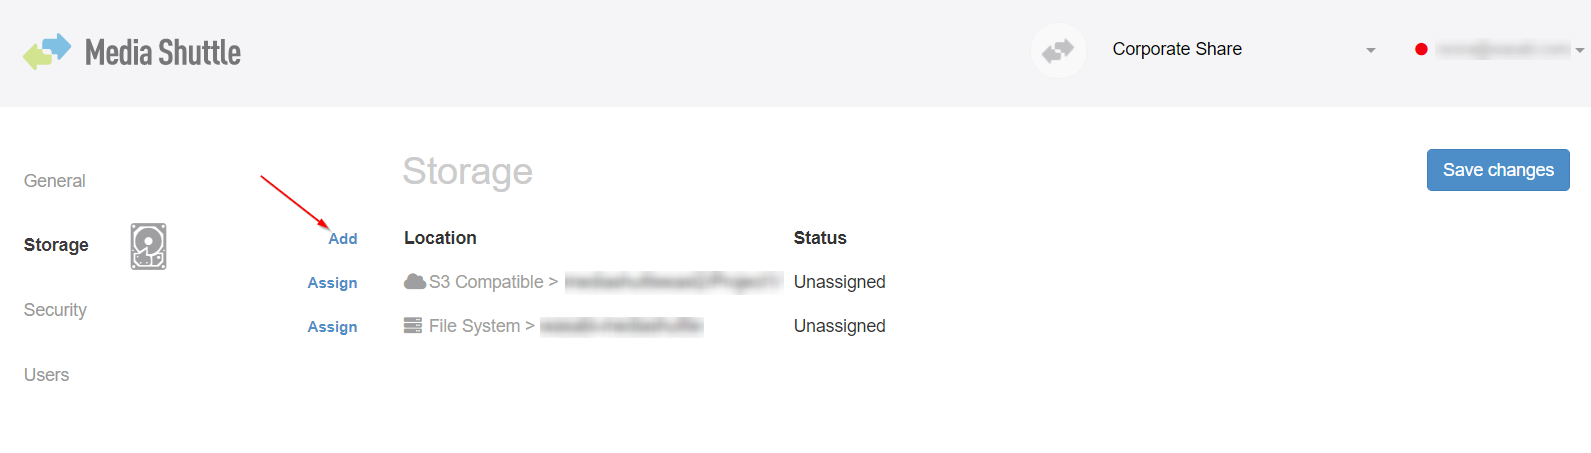
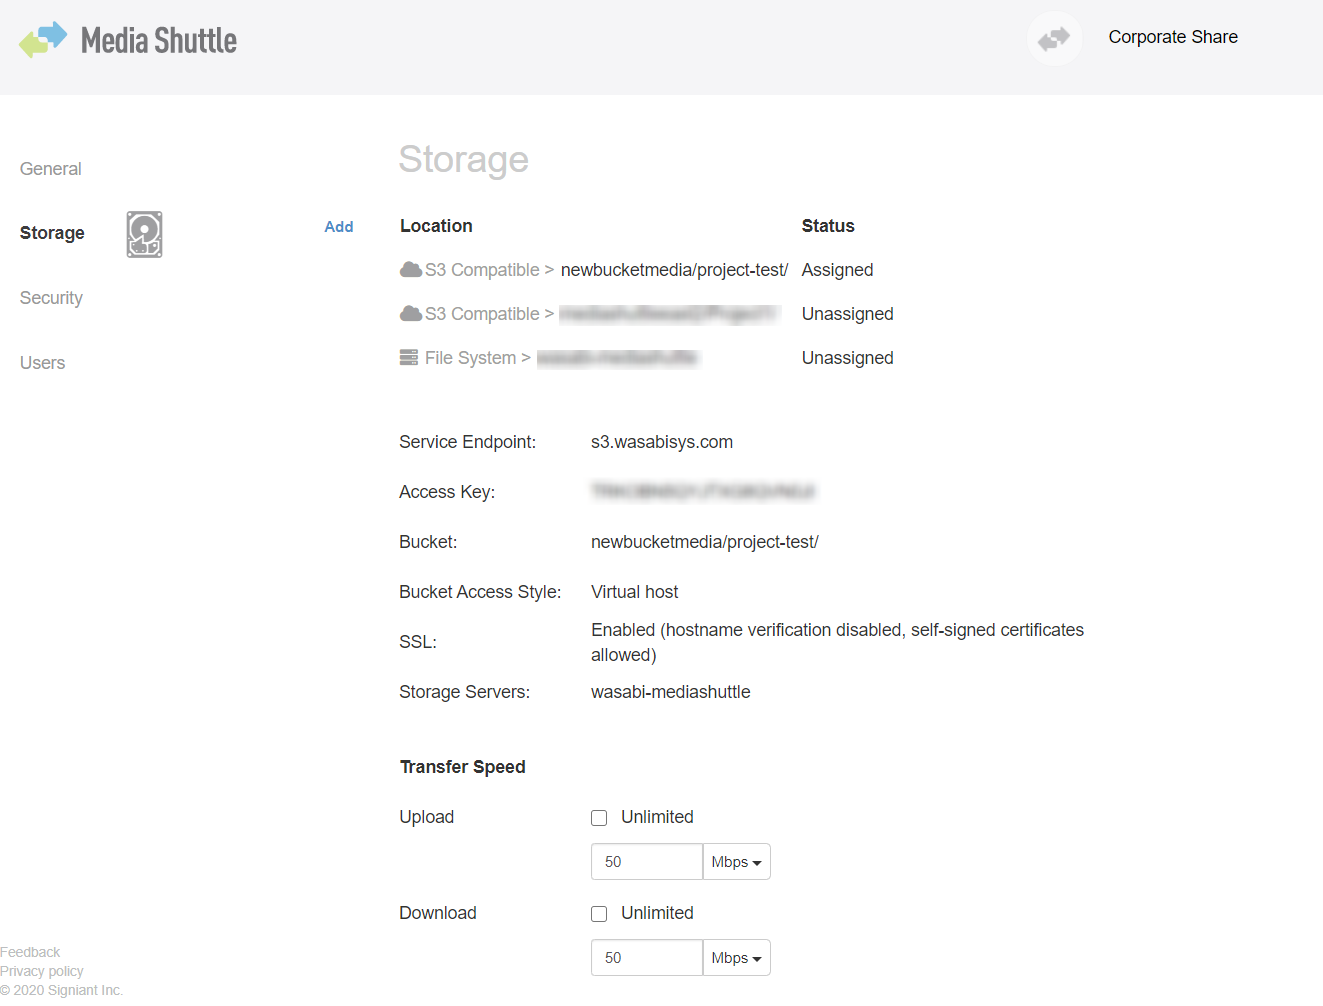
Click on Storage, and then Add
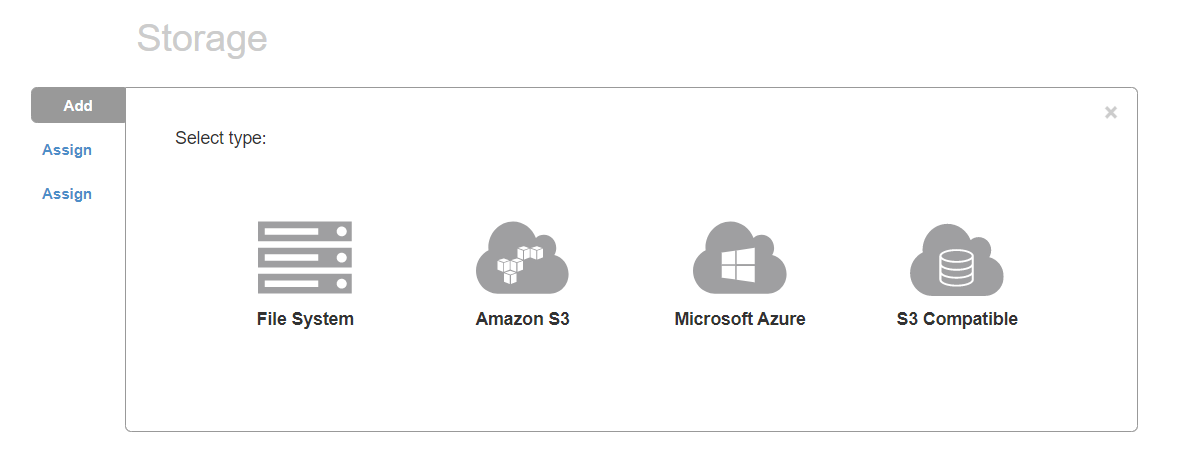
Select S3 Compatible.
Add the appropriate information.
Storage Server - Select the Storage Server (Media Shuttle instance)
Service Endpoint - Click here for different Wasabi service URLs.
Bucket - Enter an appropriate existing Wasabi bucket name on your account
Subfolder - Enter a name for the subfolder (Media Shuttle will create a new folder if it doesn’t exist)
Access Key - Enter a valid Wasabi account access key
Secret Key - Enter a valid Wasabi account secret key
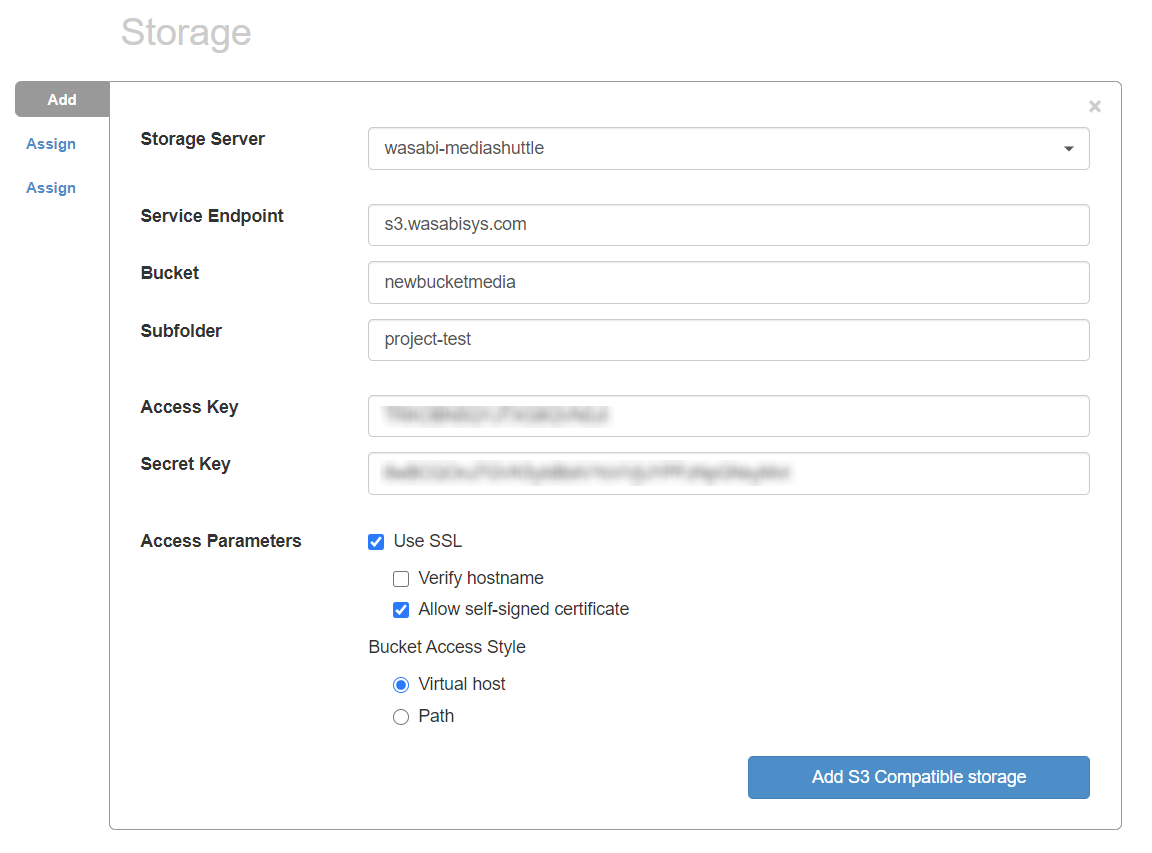
Click Add S3 Compatible storage.
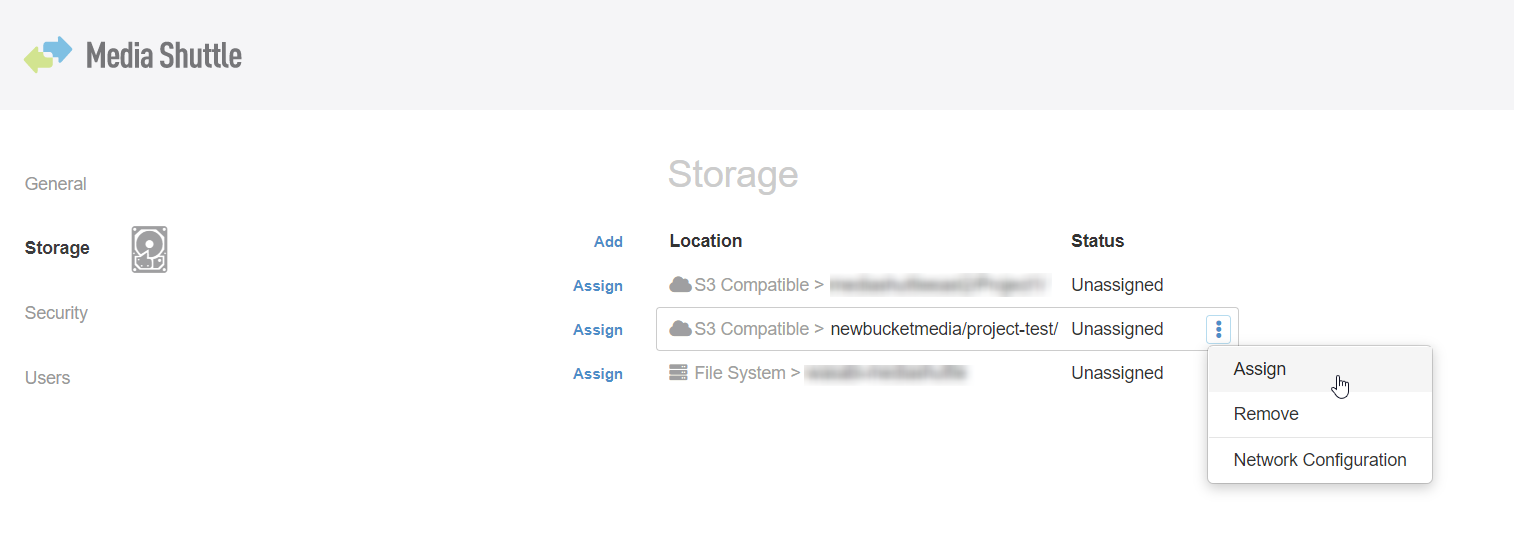
You need to assign the portal to the server. Click on the three dots, click Assign.
The portal is now active. You can set transfer speeds as shown below (you can even set it to Unlimited).
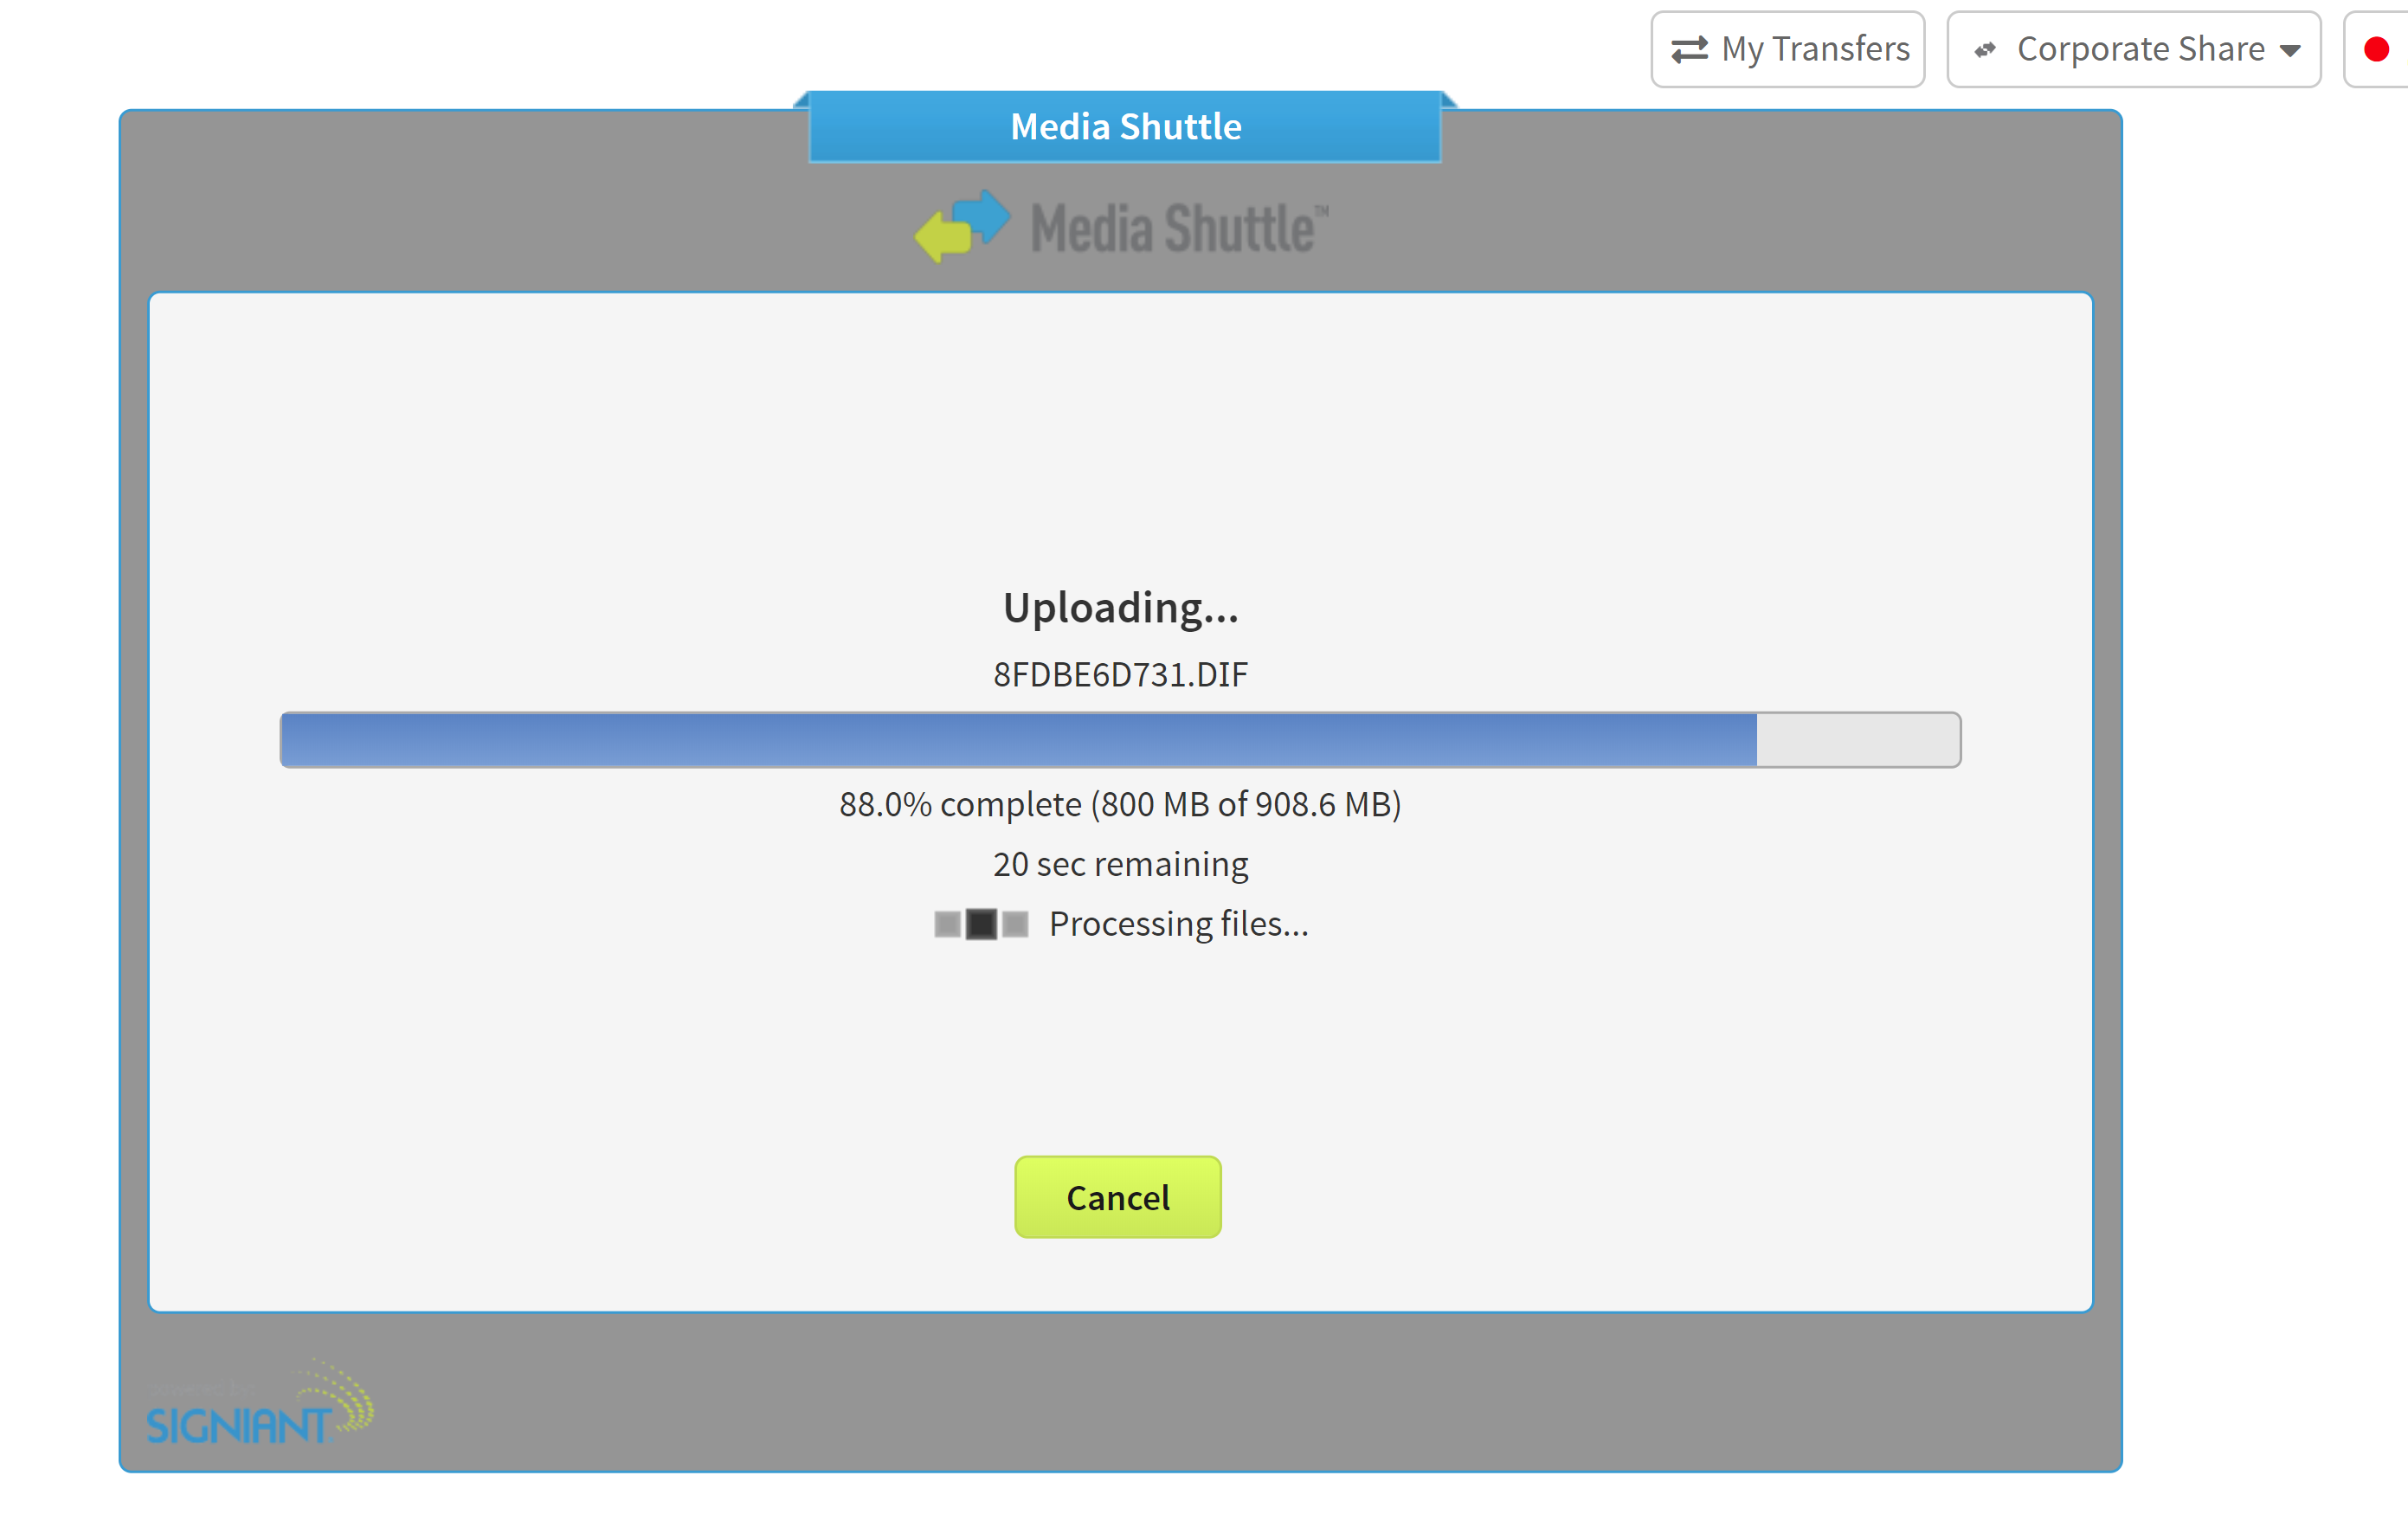
Now, an authorized user can access the user portal defined in Step 4 above and begin making transfers through the Media Shuttle server to the Wasabi storage bucket.
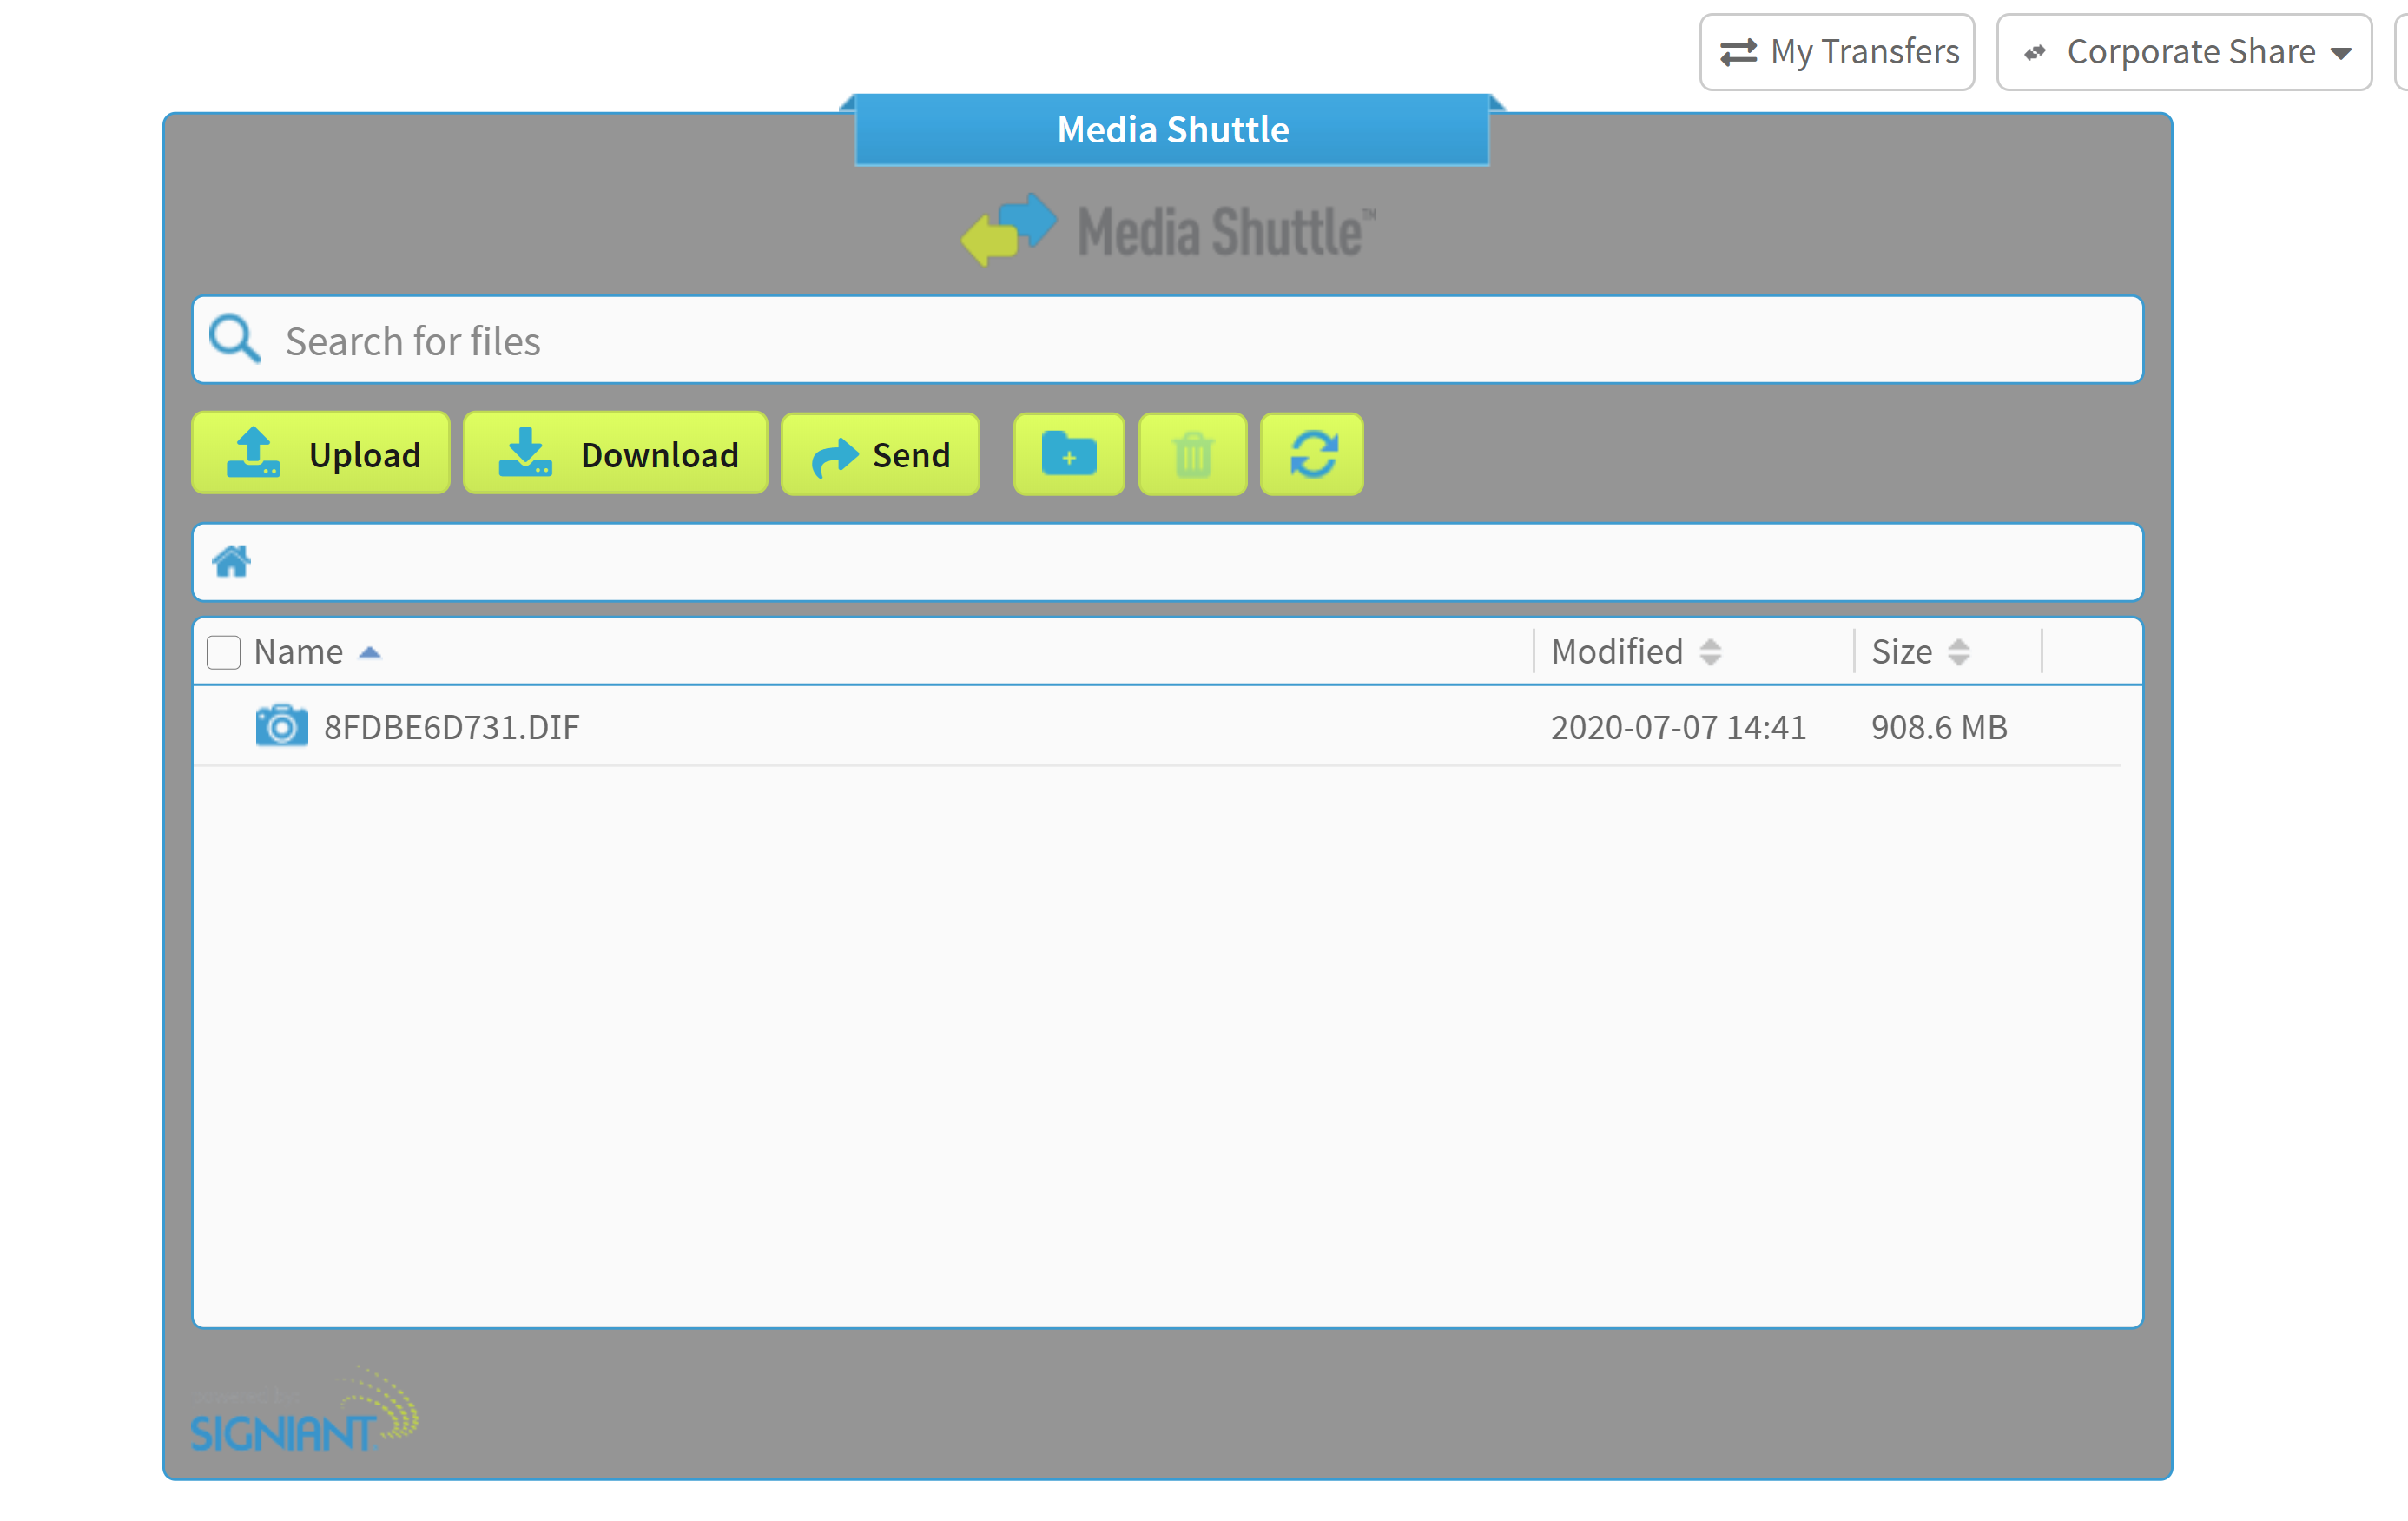
You can also monitor the progress of file transfers on the user portal.
The admin portal of the Media Shuttle server provides information related to the transfers as well.
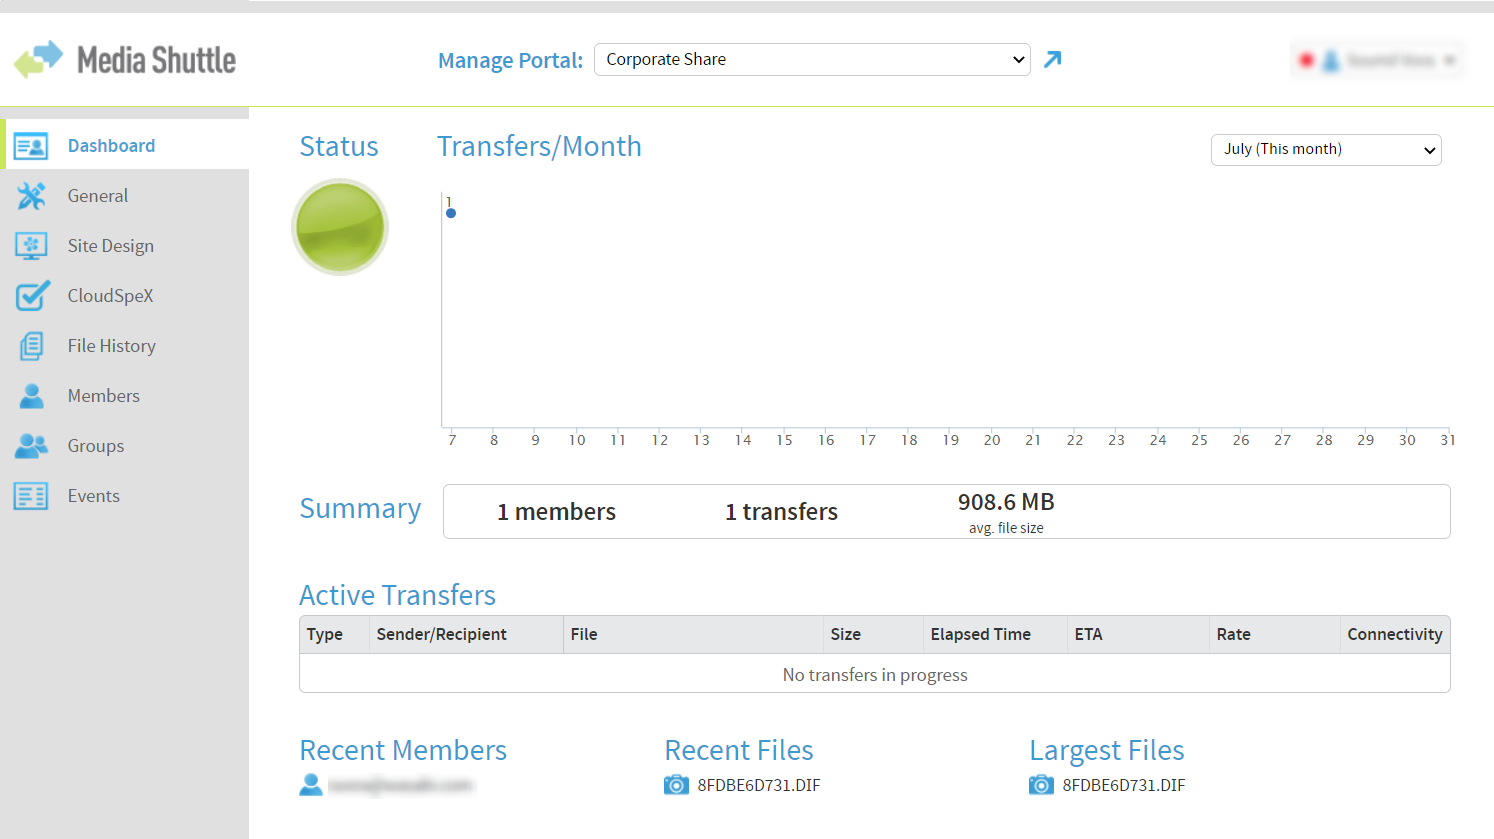
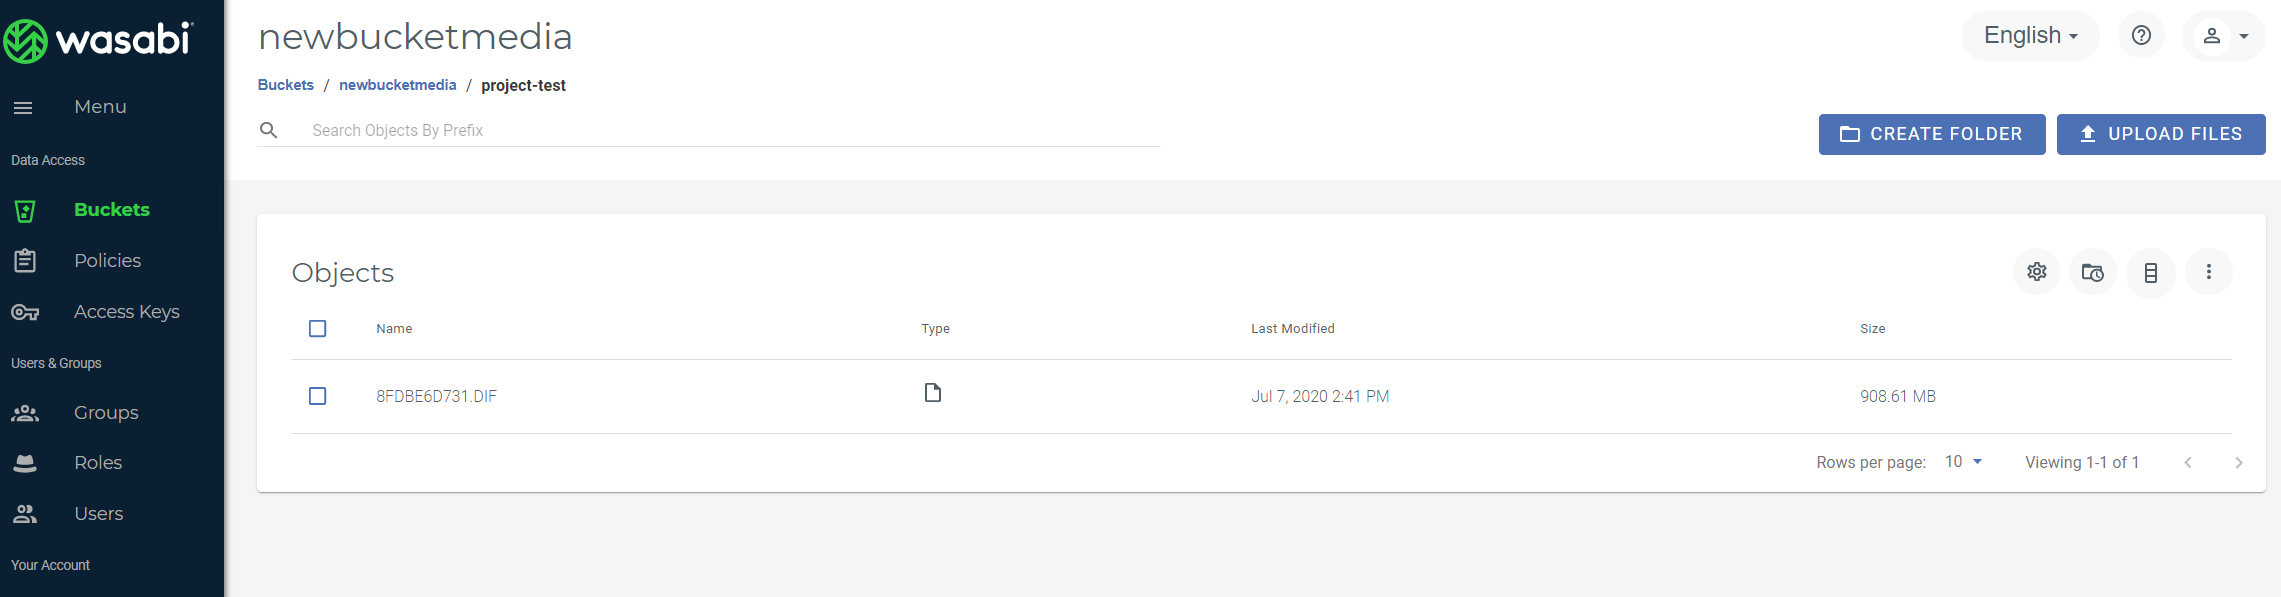
You can verify that the data is stored on your Wasabi bucket through the Wasabi console.