Splunk Enterprise can be used to ingest Wasabi bucket logs to see S3 events affecting your bucket's data, such as when an object is uploaded or deleted. This requires the use of Wasabi Simple Notification Service (SNS) (see Event Notifications: Configuring and Creating), being sent to an AWS SNS topic, an AWS Simple Queue Service (SQS) queue subscription to that SNS topic, and Splunk polling that SQS queue.
Prerequisites
An active Wasabi Cloud Storage account.
Access to the Wasabi Console as the account's root user or a sub-user with WasabiFullAccess permissions.
AWS console access.
An AWS account with SNS and SQS.
An AWS IAM user with SNS and SQS permissions.
AWS access and secret keys.
Splunk Enterprise software. This solution was tested on versions 9.4.0 and 10.0.1.
Splunk Add-On for AWS.
High-Level Configuration Steps
Create an AWS SNS topic.
Create an AWS SQS Dead-letter queue.
Create an AWS SQS queue and subscribe to the SNS topic.
Configure Splunk to poll the AWS SQS queue.
Configure your AWS account in the Wasabi console with AWS access and secret keys.
Configure your Wasabi bucket to send SNS events to the AWS SNS topic.
Test the Wasabi event types and observe them in Splunk.
Create an AWS SNS Topic
Log in to your AWS account via the AWS console.
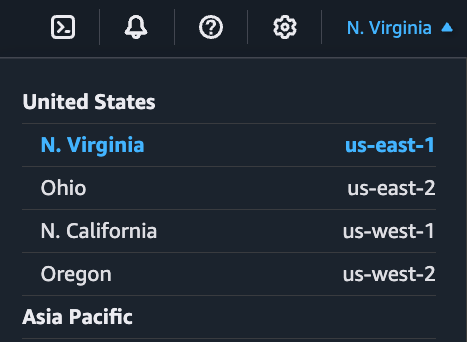
Once in console, select the region you wish to create the SNS topic (and subsequent SQS queues). In the example below, us-east-1 is selected.
Ensure your AWS IAM user or group has the necessary SNS and SQS permissions. See Change permissions for an IAM user for details. This solution was tested with the following permissions.
AmazonSNSFullAccess
AmazonSQSFullAccess
Navigate to Amazon SNS, click Topics, then click Create topic. Select Standard type and give the SNS topic a name.
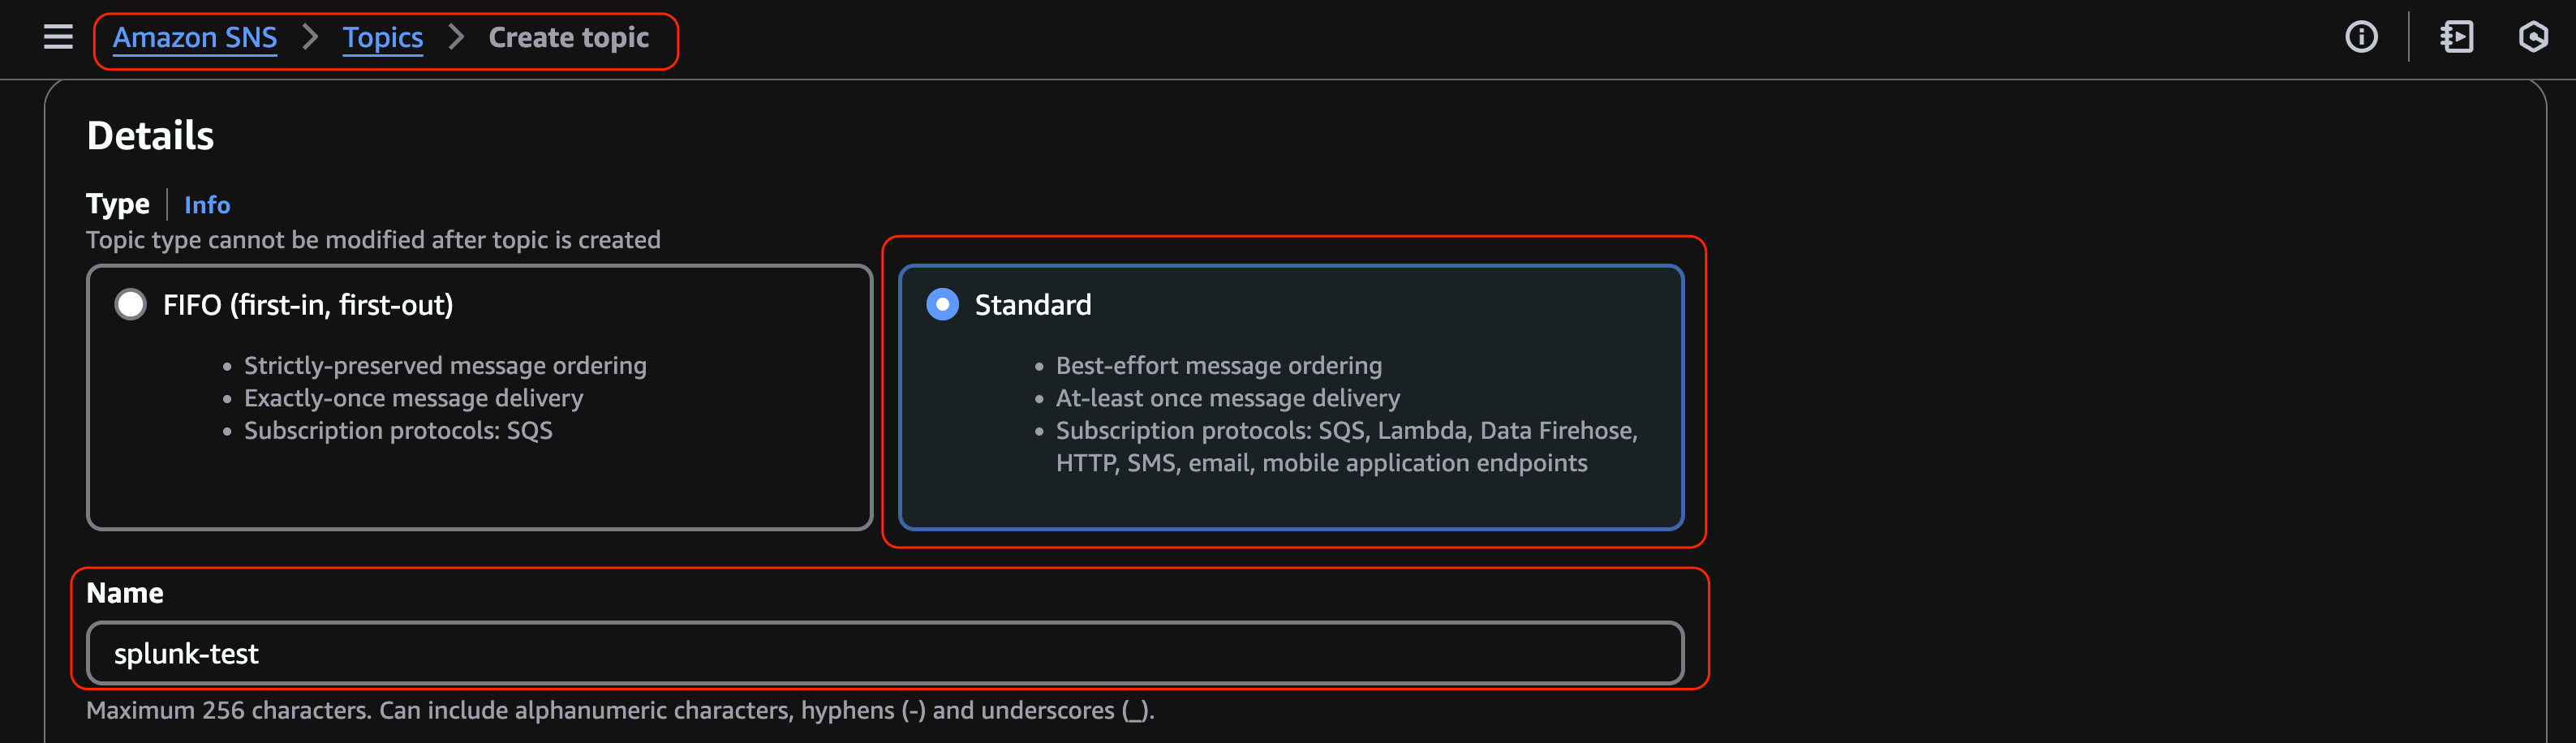
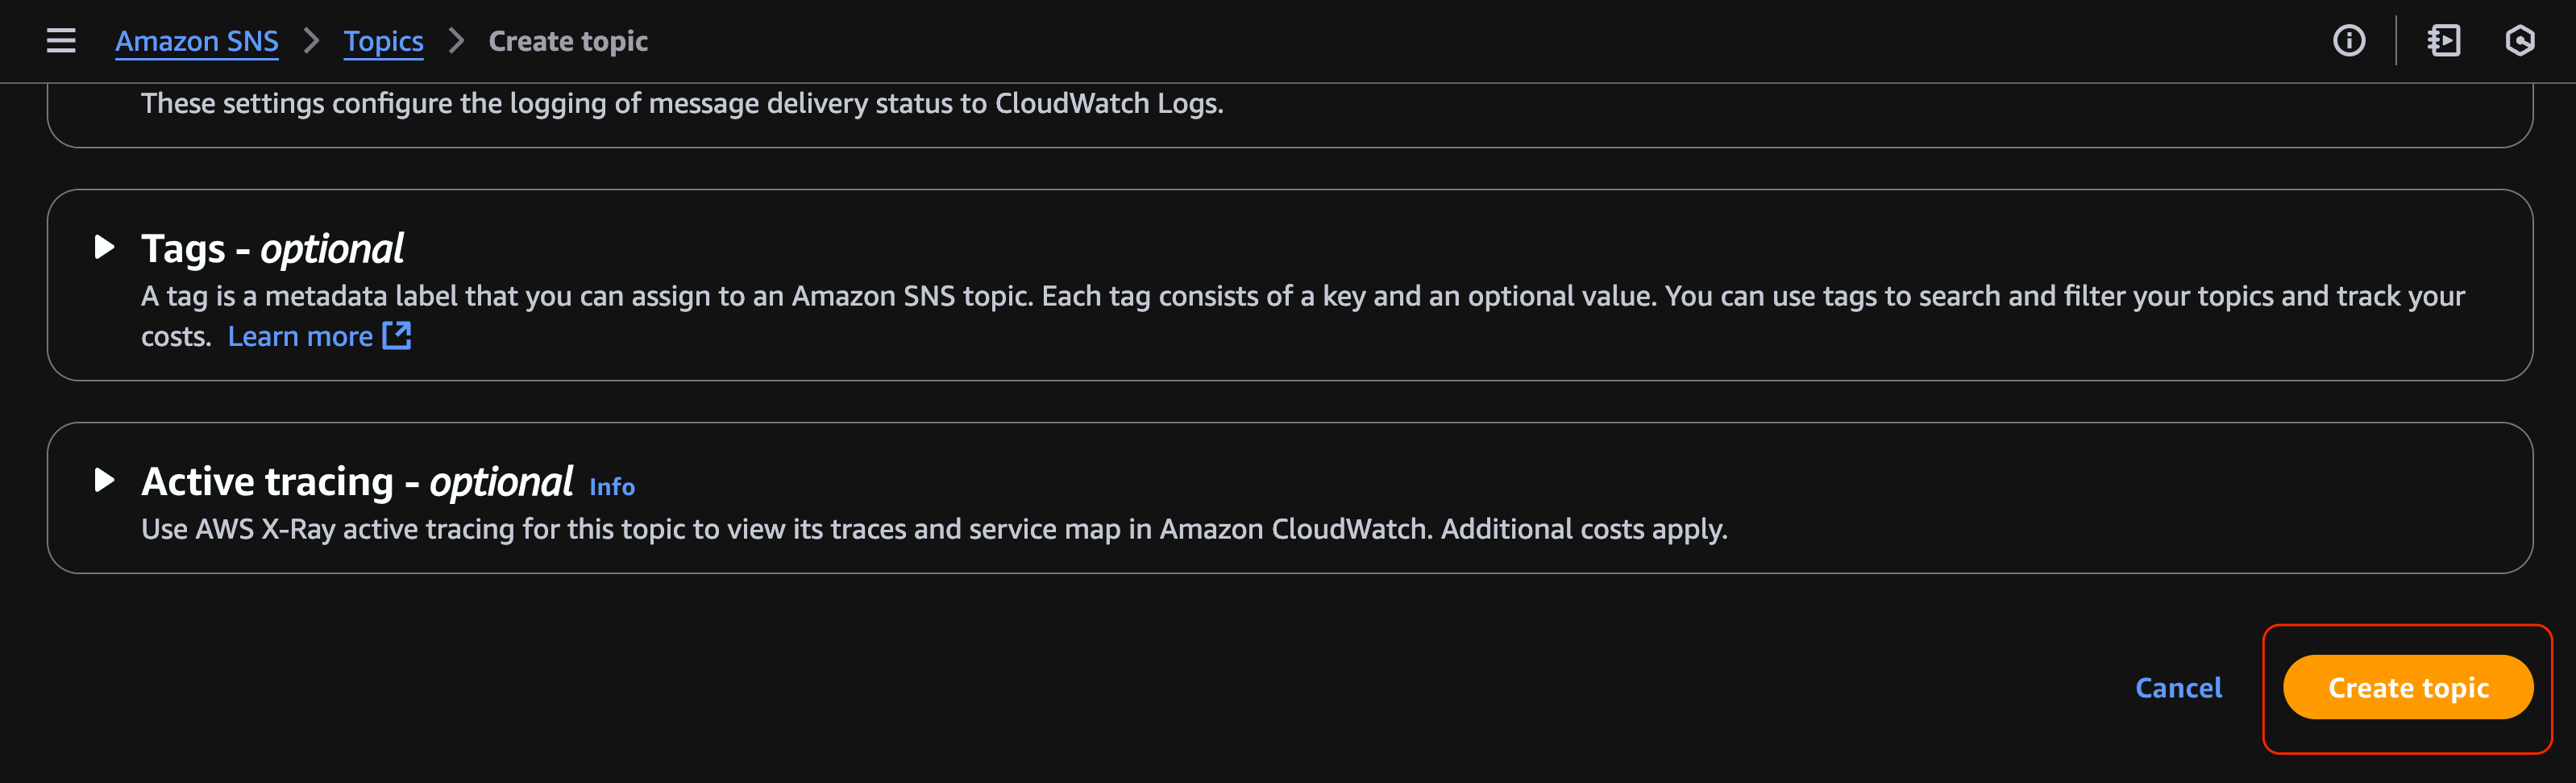
Leave all the other settings at their defaults. Scroll down and click on Create topic.
Create an AWS SQS Dead-letter Queue
A dead-letter queue is where undeliverable messages will be sent.
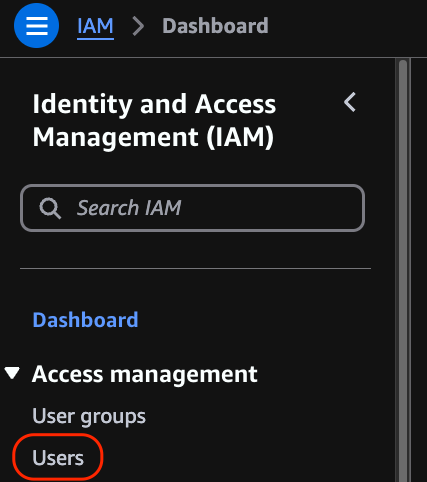
Find the ARN of the IAM user or group being used. The ARN can be found under Identity and Access Management (IAM), click Users. Search for the name of your IAM user, click the user name. Copy the ARN and save it in a secure location.
Navigate to Amazon SQS, click Queues, then click Create queue.
Select the Standard type and give the queue a name.
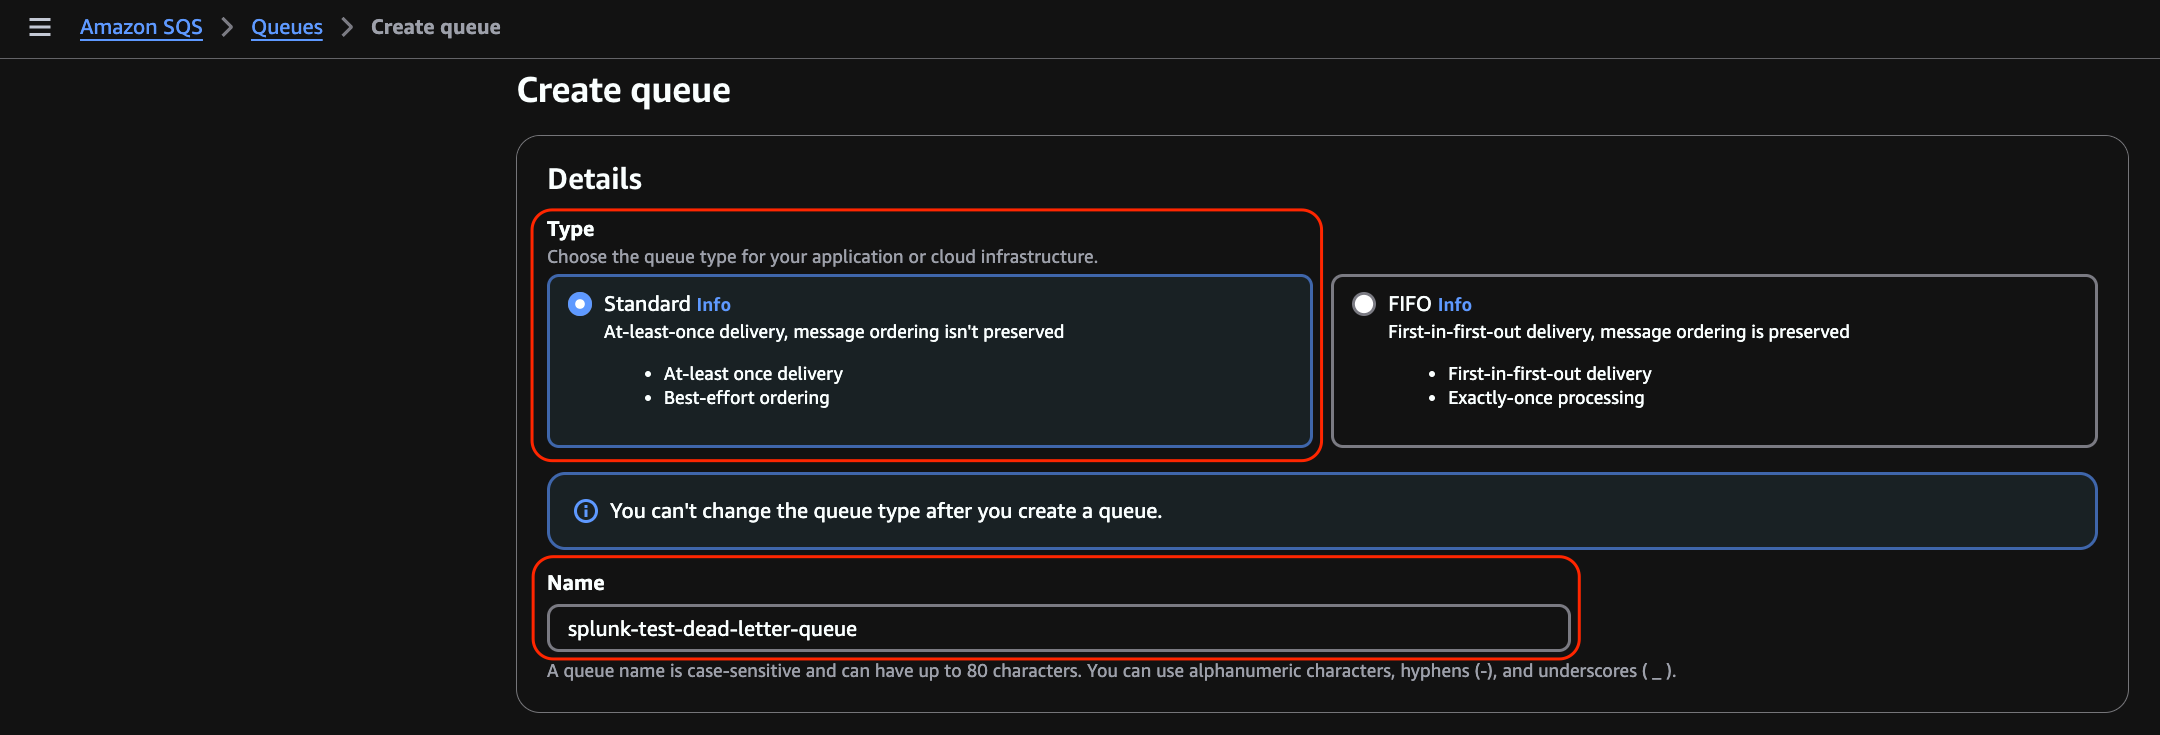
Change Encryption to Disabled. This was set to disabled for uniformity and reduced complexity during our testing.

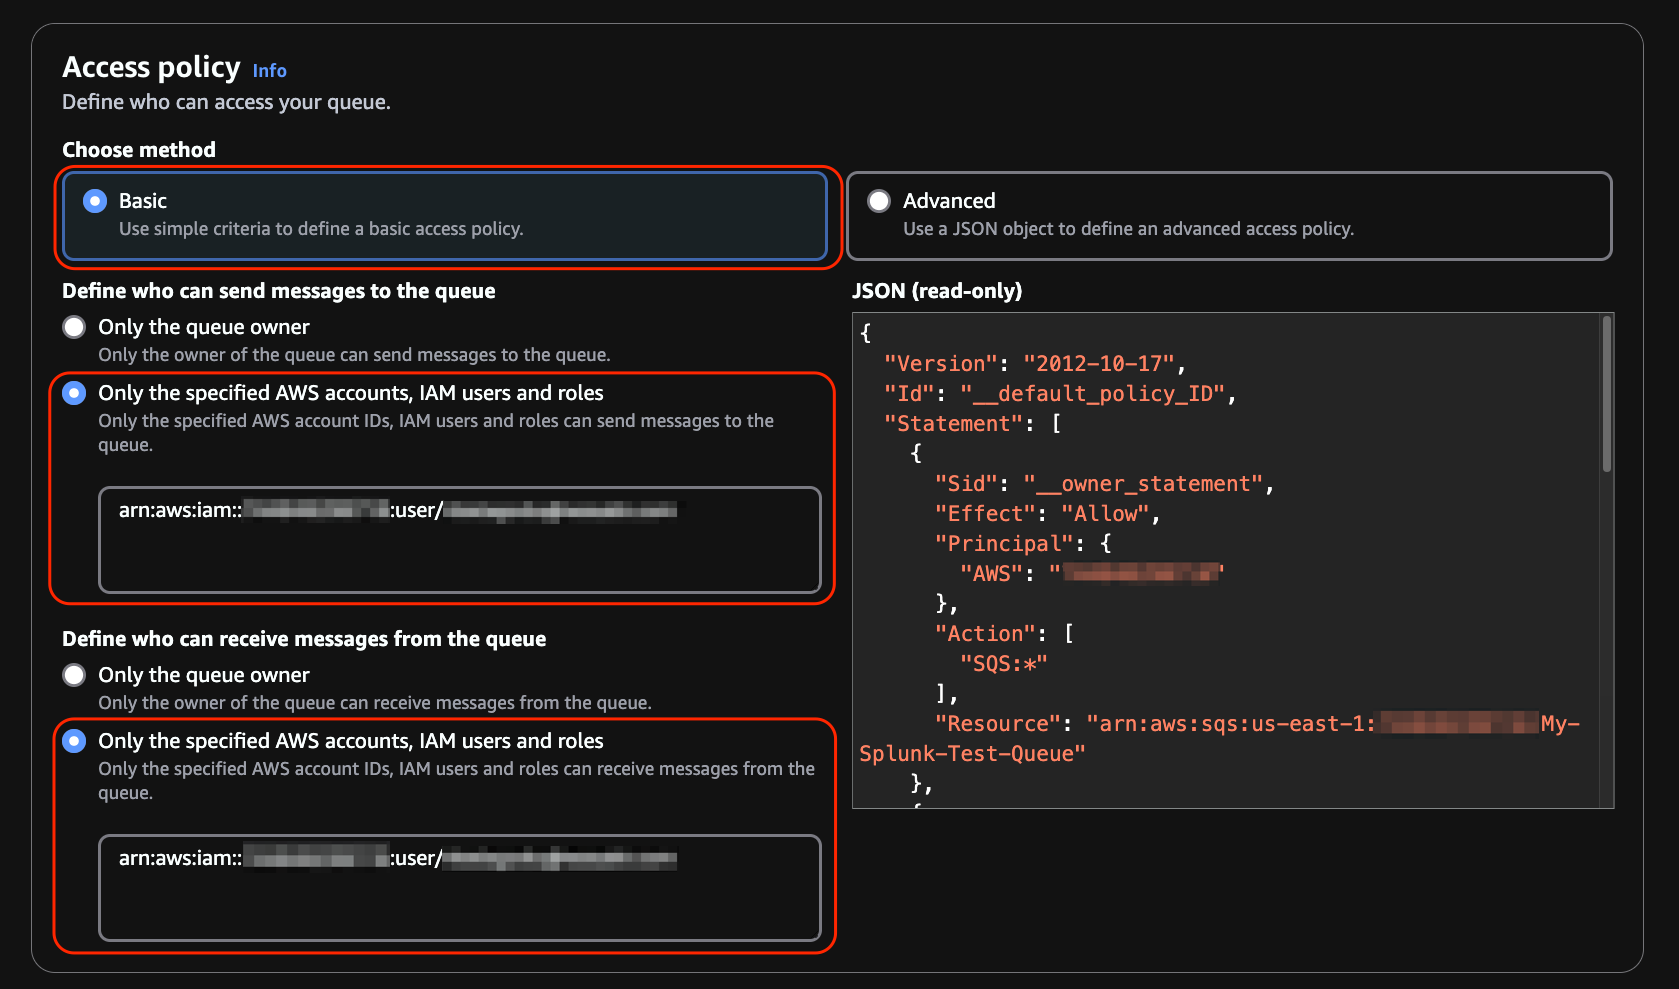
Under Access Policy, select Basic as the type. For Define who can send messages to the queue and Define who can receive messages from the queue, select Only the specified AWS accounts, IAM users, and roles. Paste the ARN copied above into both of these fields.
Leave the Dead-letter queue disabled. Scroll down. Click Create queue.

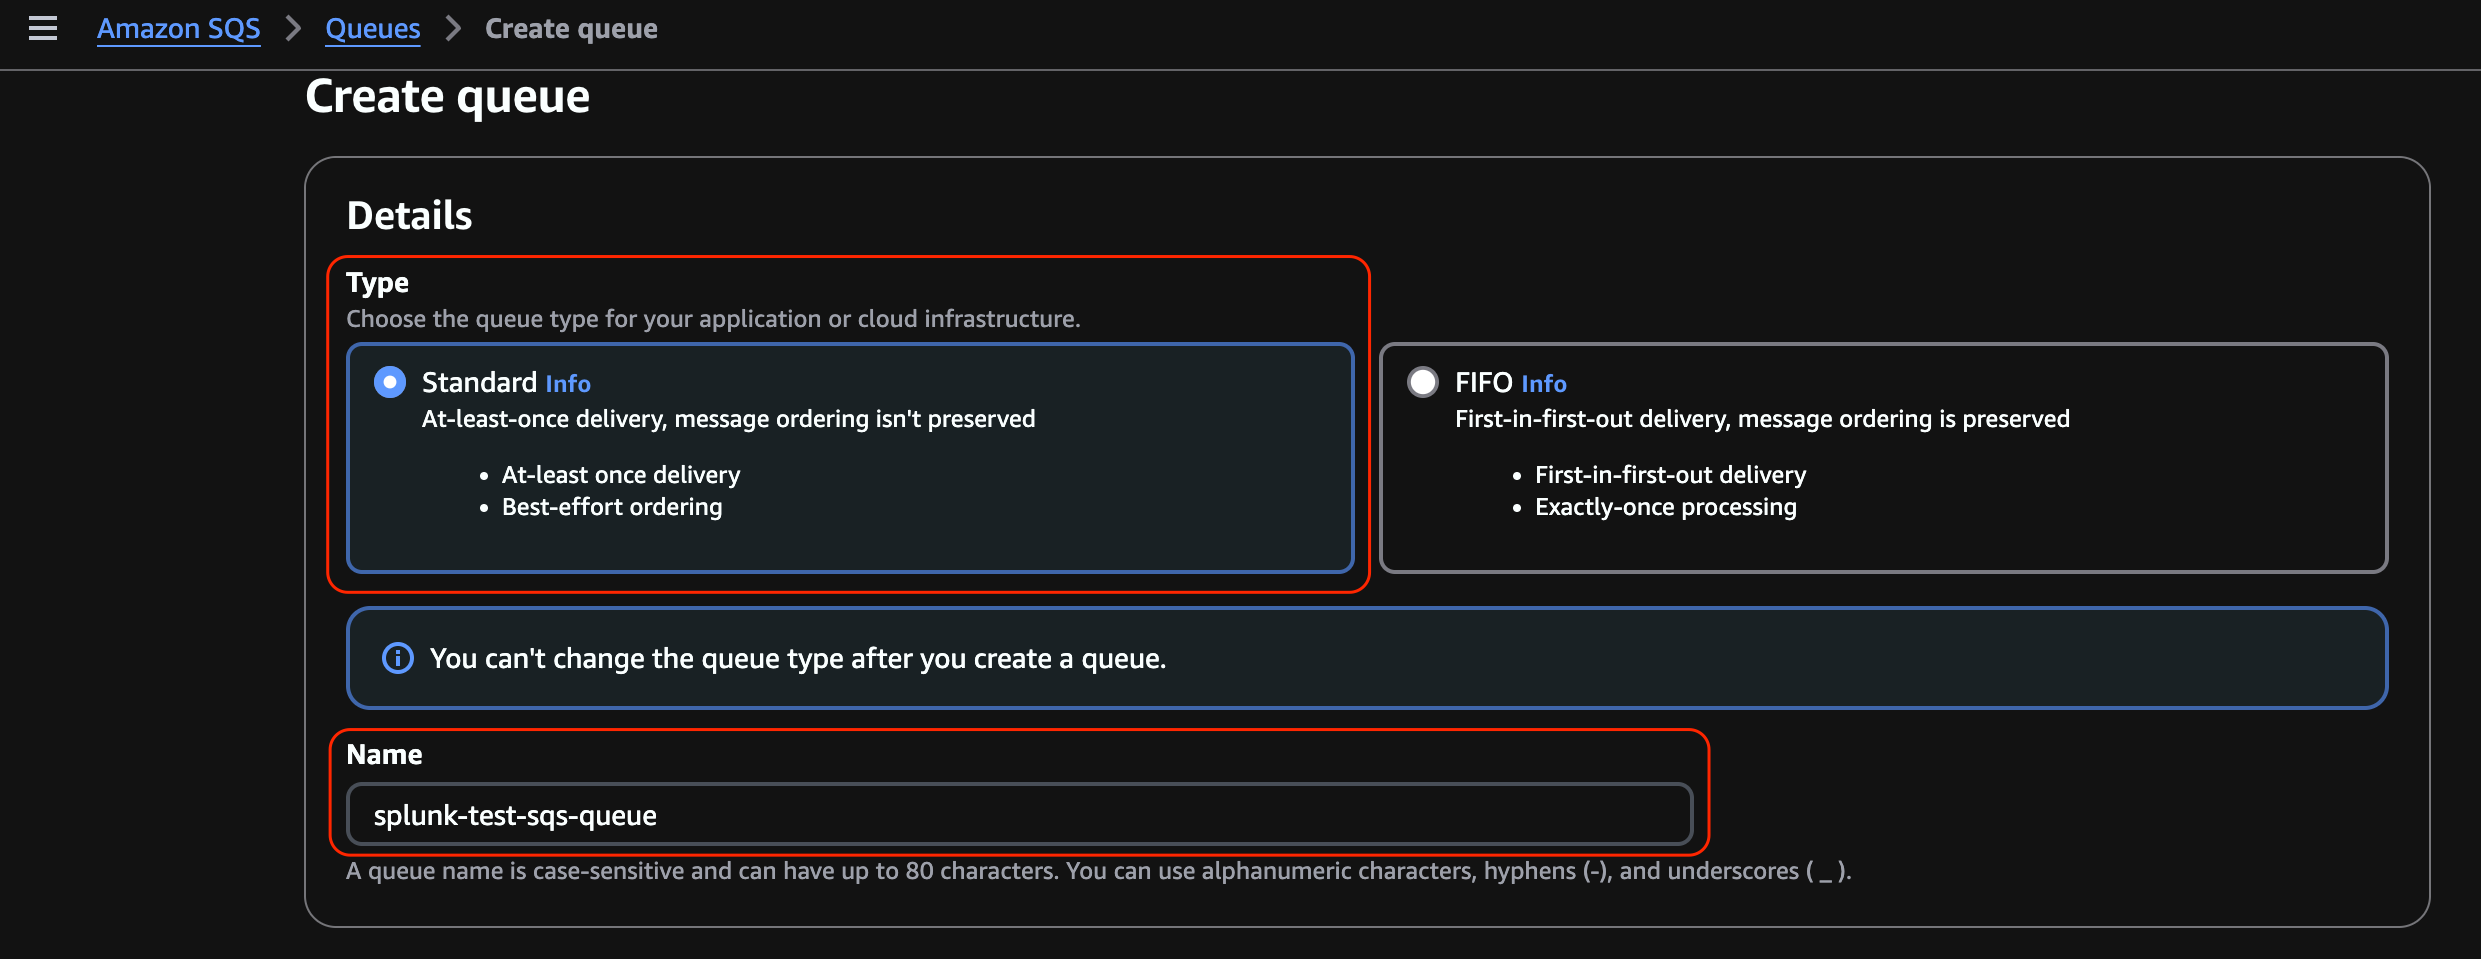
Create an AWS SQS Queue
Navigate to Amazon SQS, then Queues, click Create queue.
Select the Standard type and give the queue a name.
Under Configuration, change the Visibility timeout to 10 minutes.
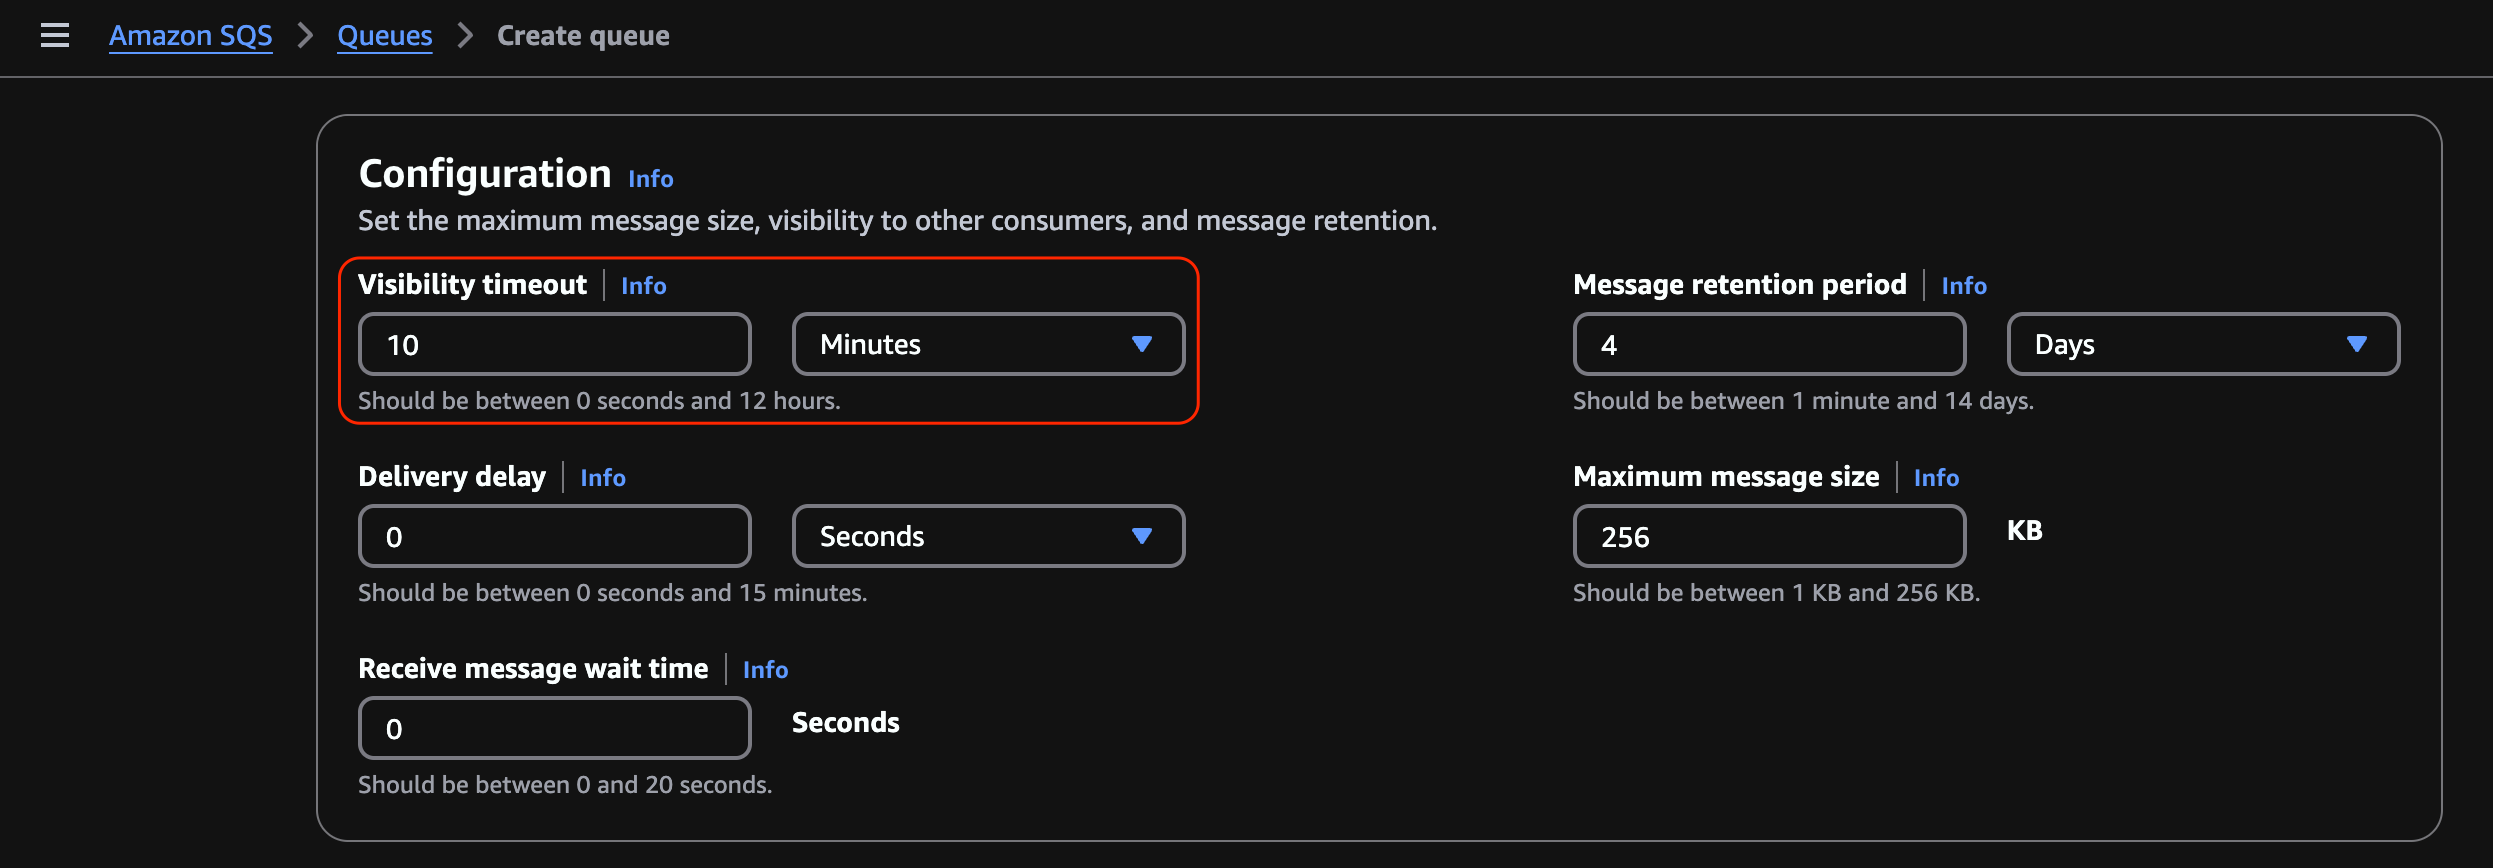
Change Encryption to Disabled.
This was changed to disabled for uniformity during our testing due to the complexity of SNS requiring a custom KMS key, whereas SQS allows a Server Side Encryption (SSE) key to be used.
See Setting up Amazon SNS topic encryption with encrypted Amazon SQS queue subscription. To enable encryption in your SNS topic and then in your SQS queue, set Encryption to Enabled and select either encryption key type depending on your organization’s policies.
Under Access Policy, select Basic as the type. For Define who can send messages to the queue and Define who can receive messages from the queue, select Only the specified AWS accounts, IAM users, and roles. Paste the ARN copied above into both of these fields.
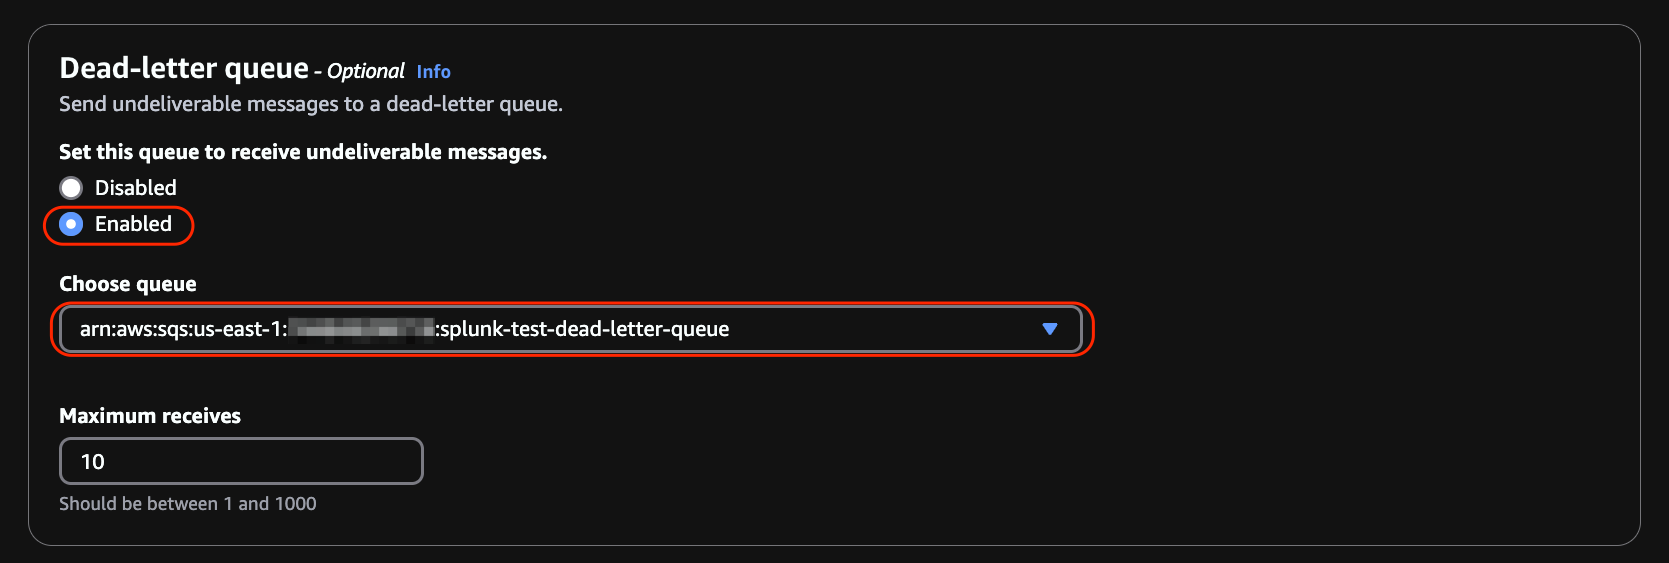
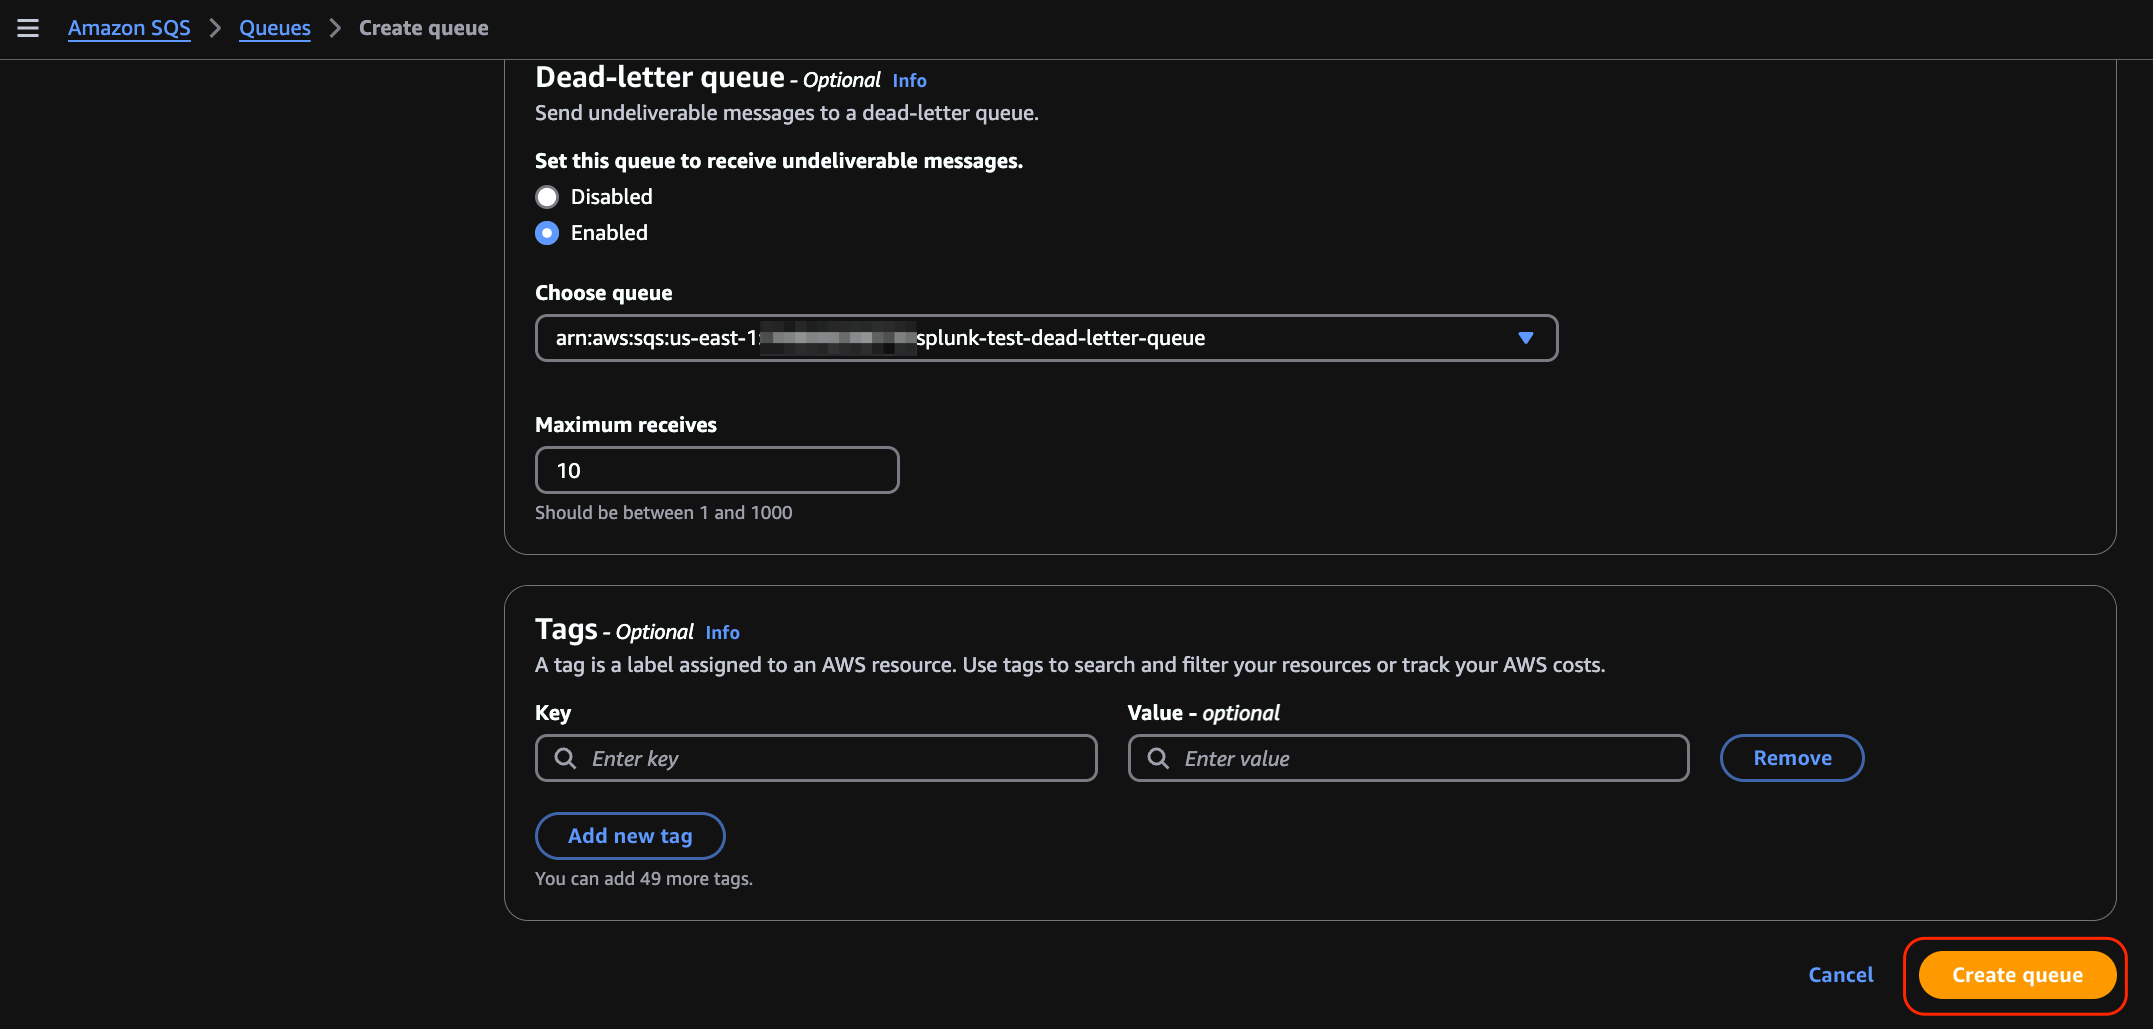
Enable the Dead-letter queue and select the previously created Dead-letter queue from the drop-down menu.
Scroll down and click on Create queue.
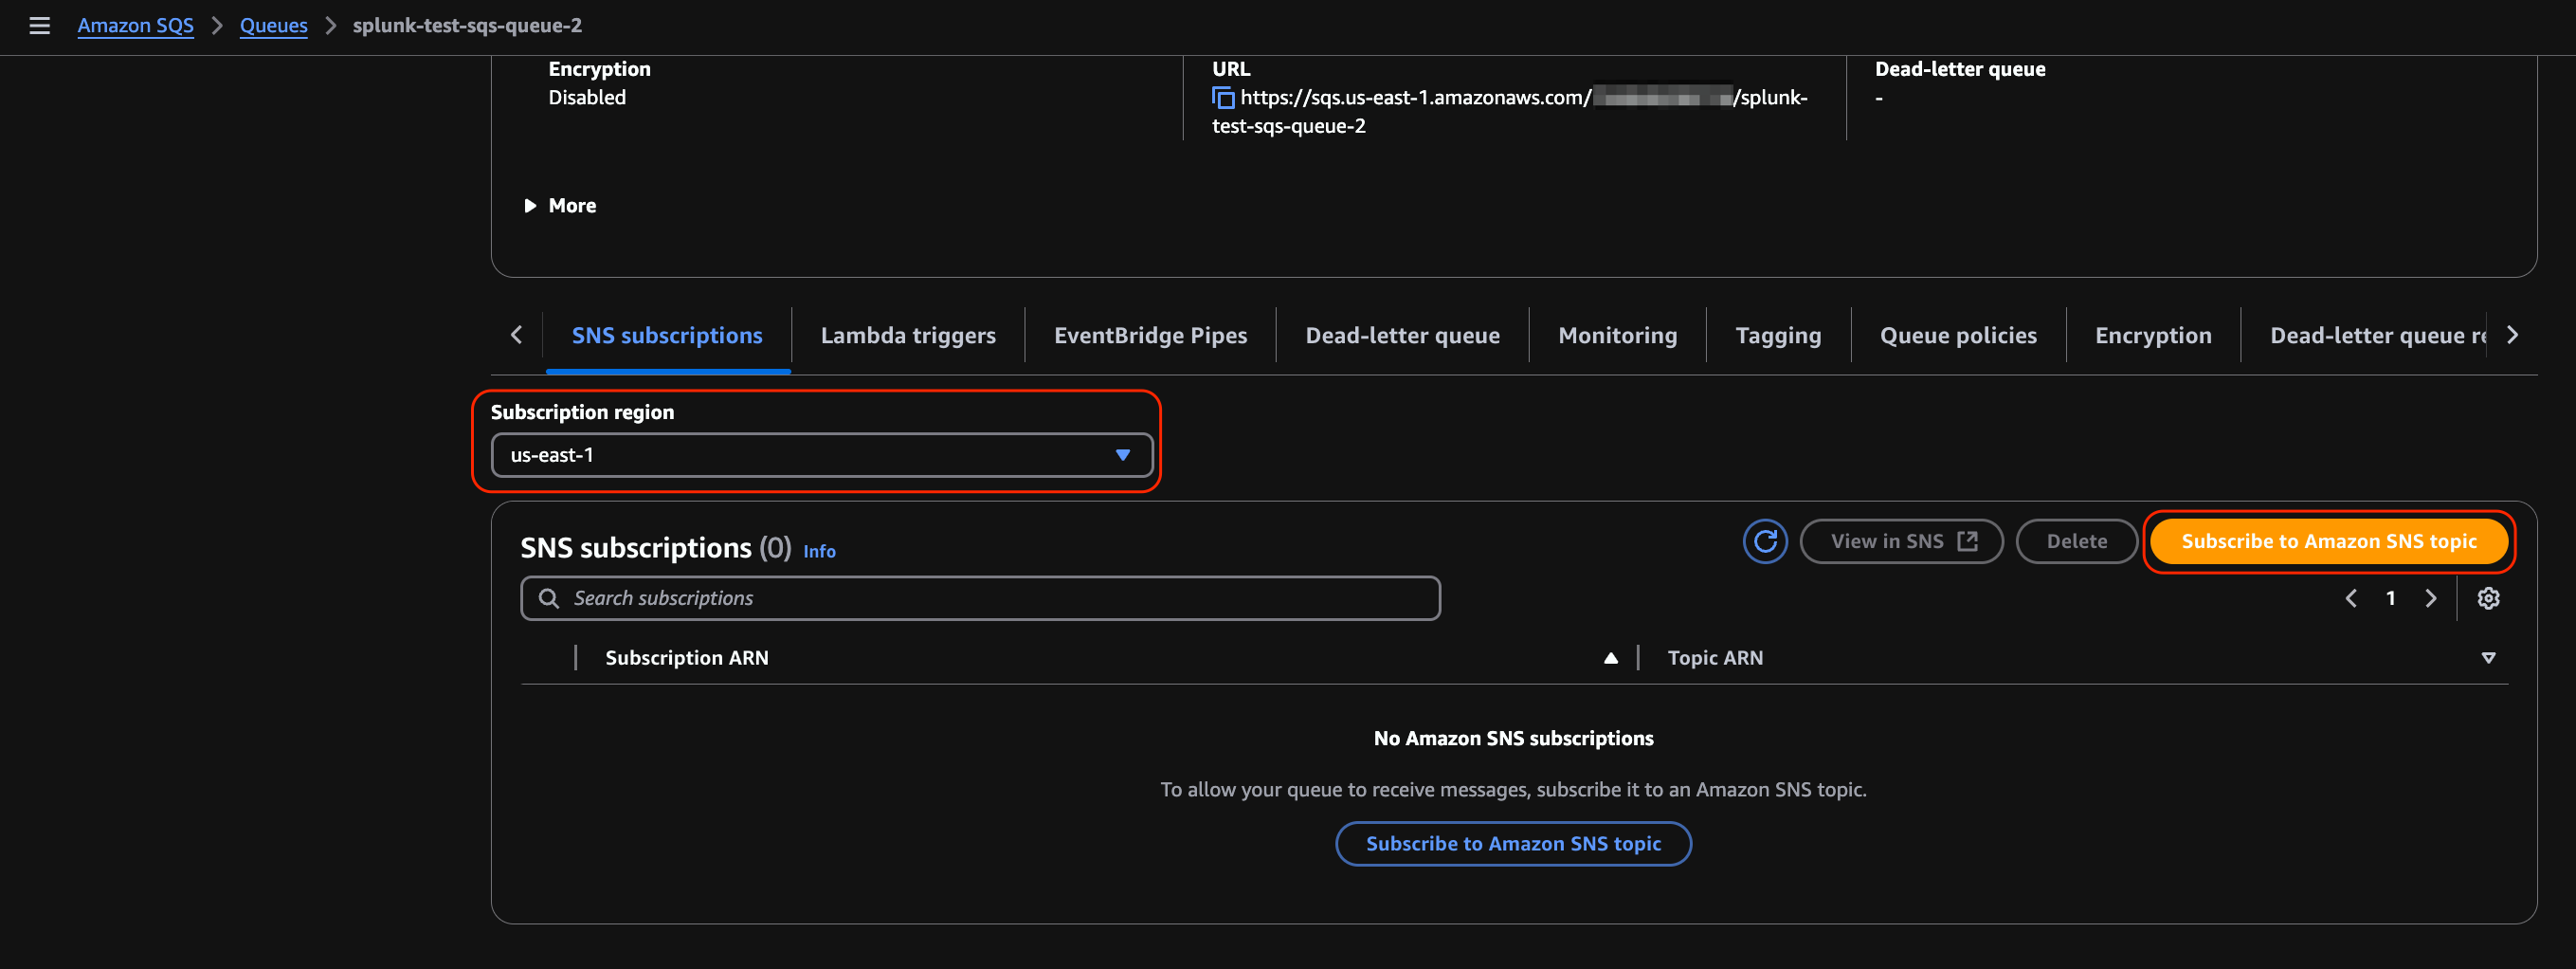
Select the Subscription region associated with your SNS topic and click Subscribe to Amazon SNS topic.
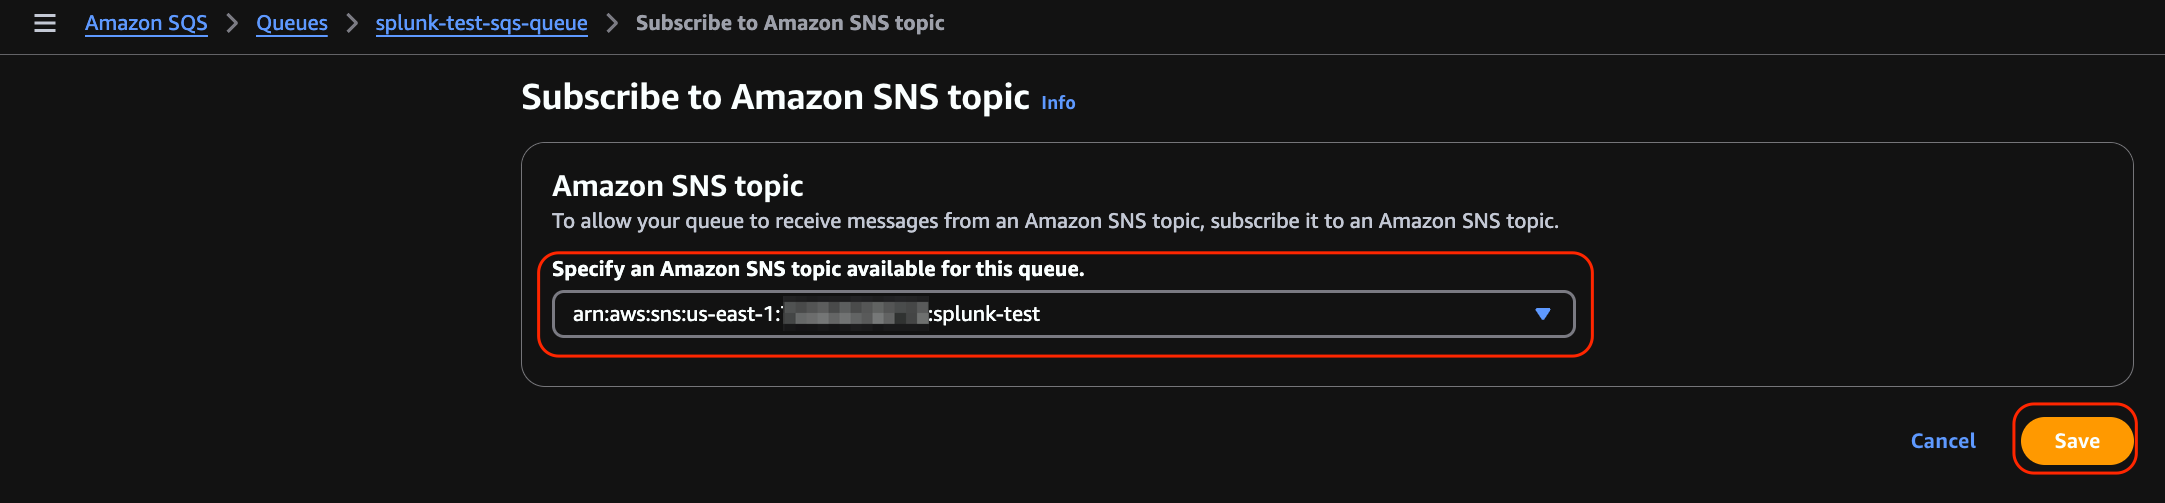
Select the previously created SNS topic from the drop-down menu and click Save.
Configure Splunk to Poll the AWS SQS Queue
Navigate to the Splunk Add-On for AWS app in your Splunk console. On our Splunk Linux server, this was located at localhost:8000.
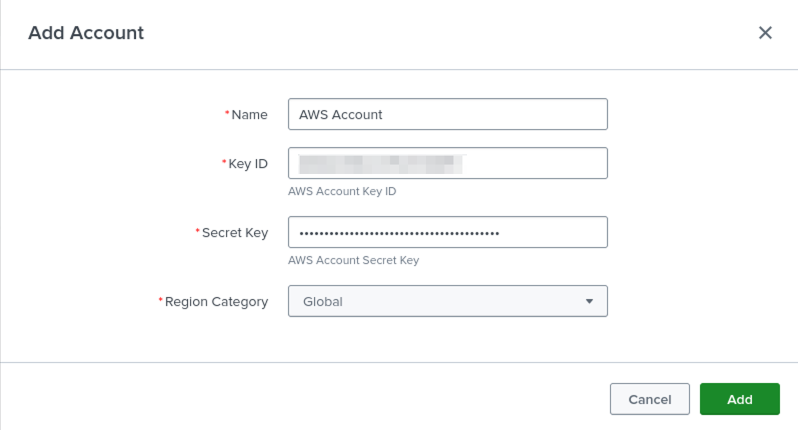
Click Configuration, Account, then Add.

Enter the following information for your AWS account.
A name for the account
AWS access key
AWS secret key
The region category. This is typically Global. Click Add.
Your AWS account will now be listed in the Account section of the Configuration. Click Inputs.

Click Create New Input, then Custom Data Type from the drop-down menu.
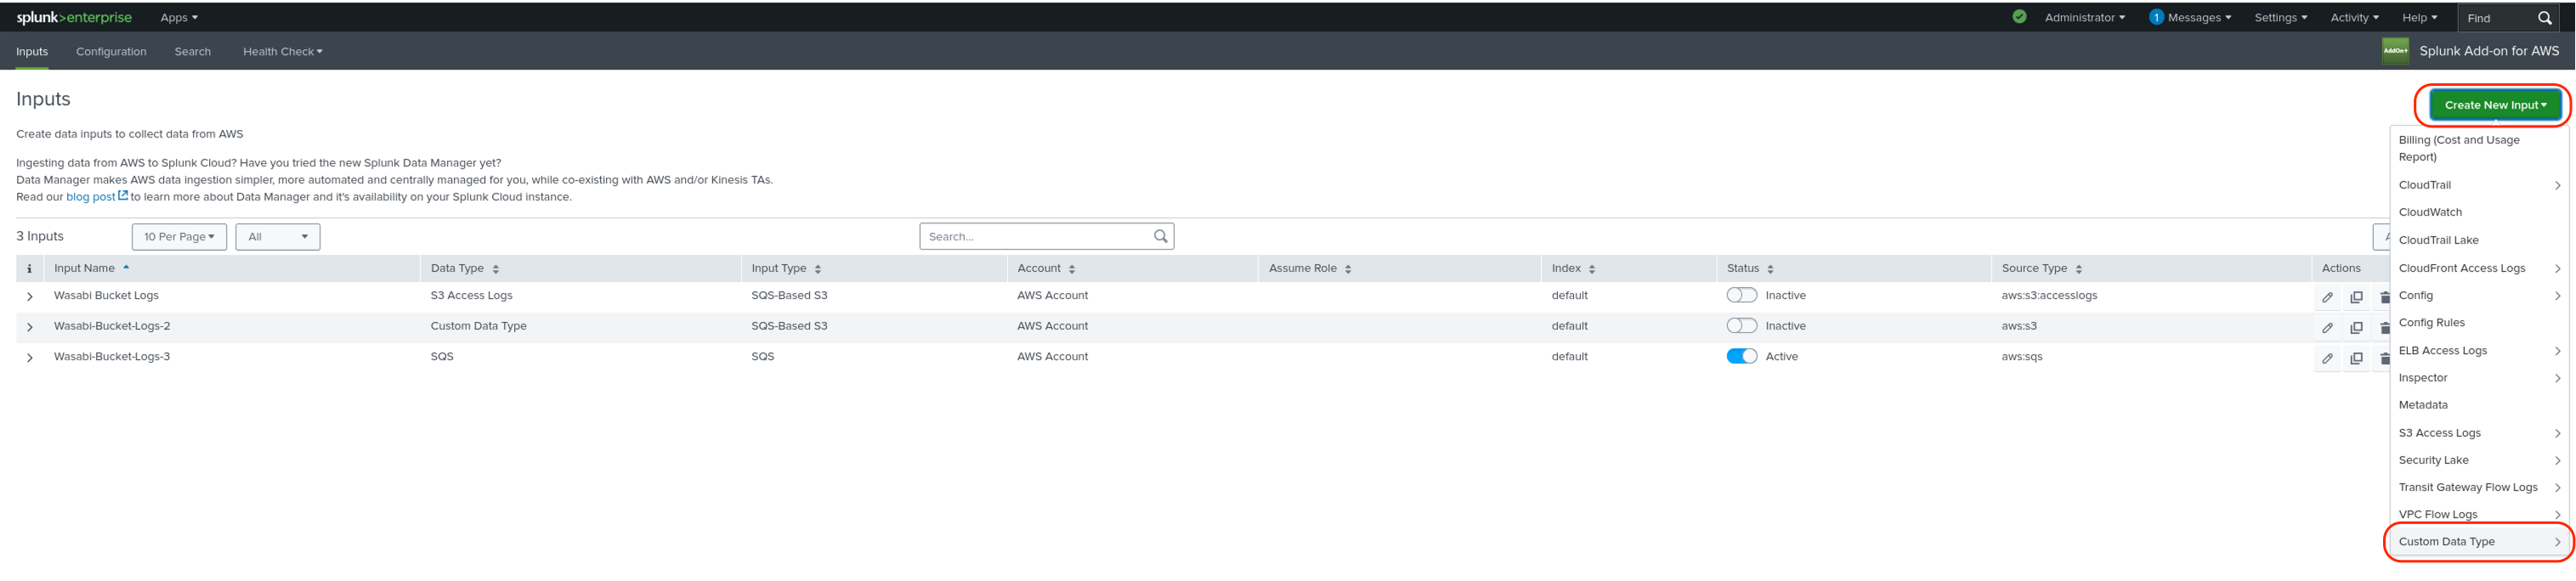
Click SQS.

Enter the following information about your SQS queue, then click Add.
A name for the queue.
Select your AWS account from the drop-down menu.
Select the AWS region your SQS queue is located in from the drop-down menu.
Select the SQS queue from the menu.
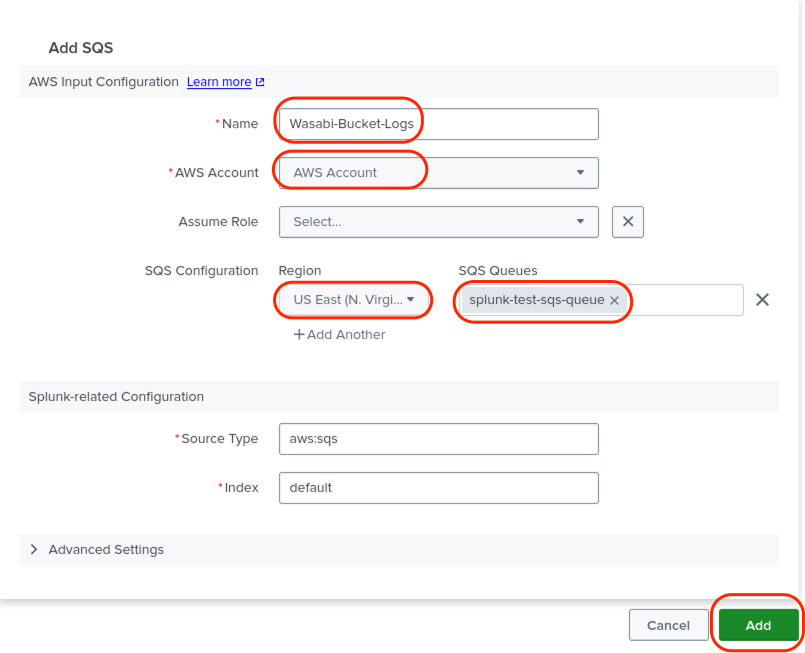
Your new input will now appear on the Inputs screen.

Configure Your AWS Account in the Wasabi Console
Log in to the Wasabi Console as the root user.
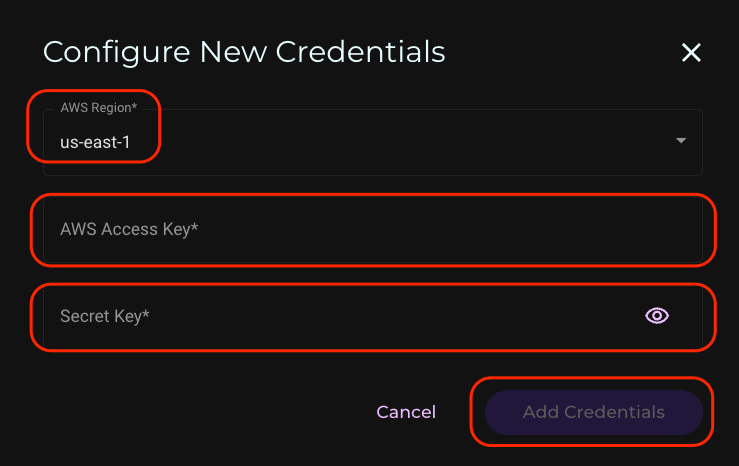
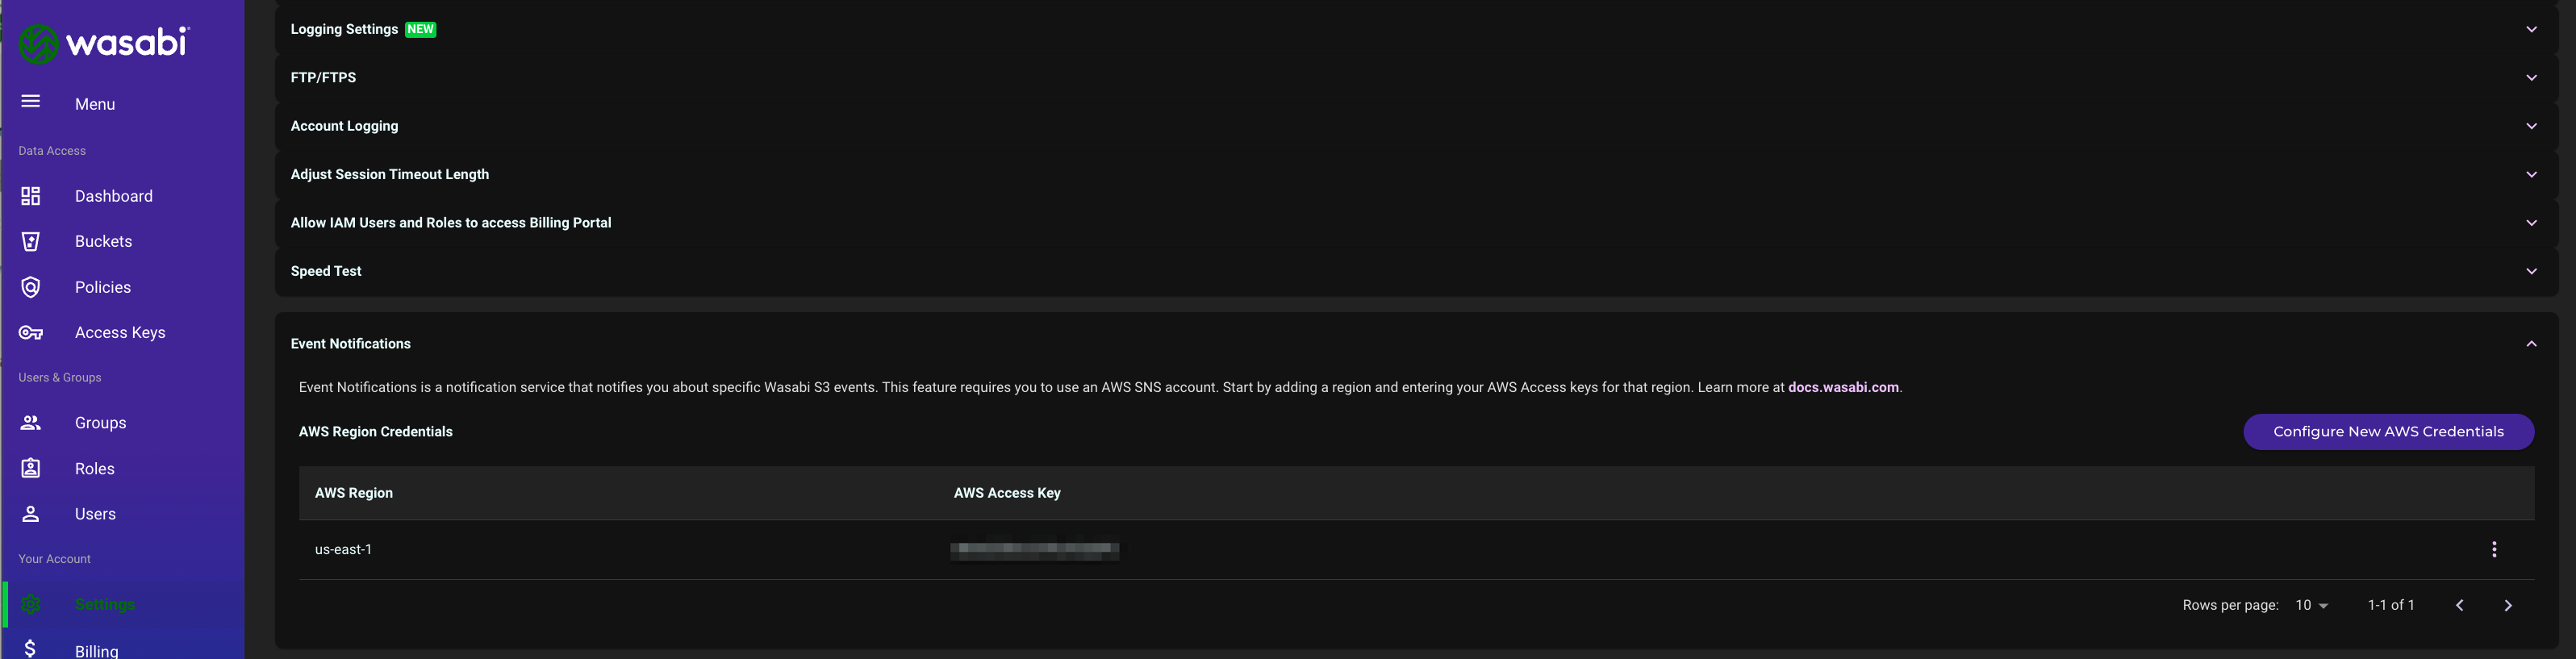
Navigate to Settings. Click on Event Notifications. Click Configure New Credentials.
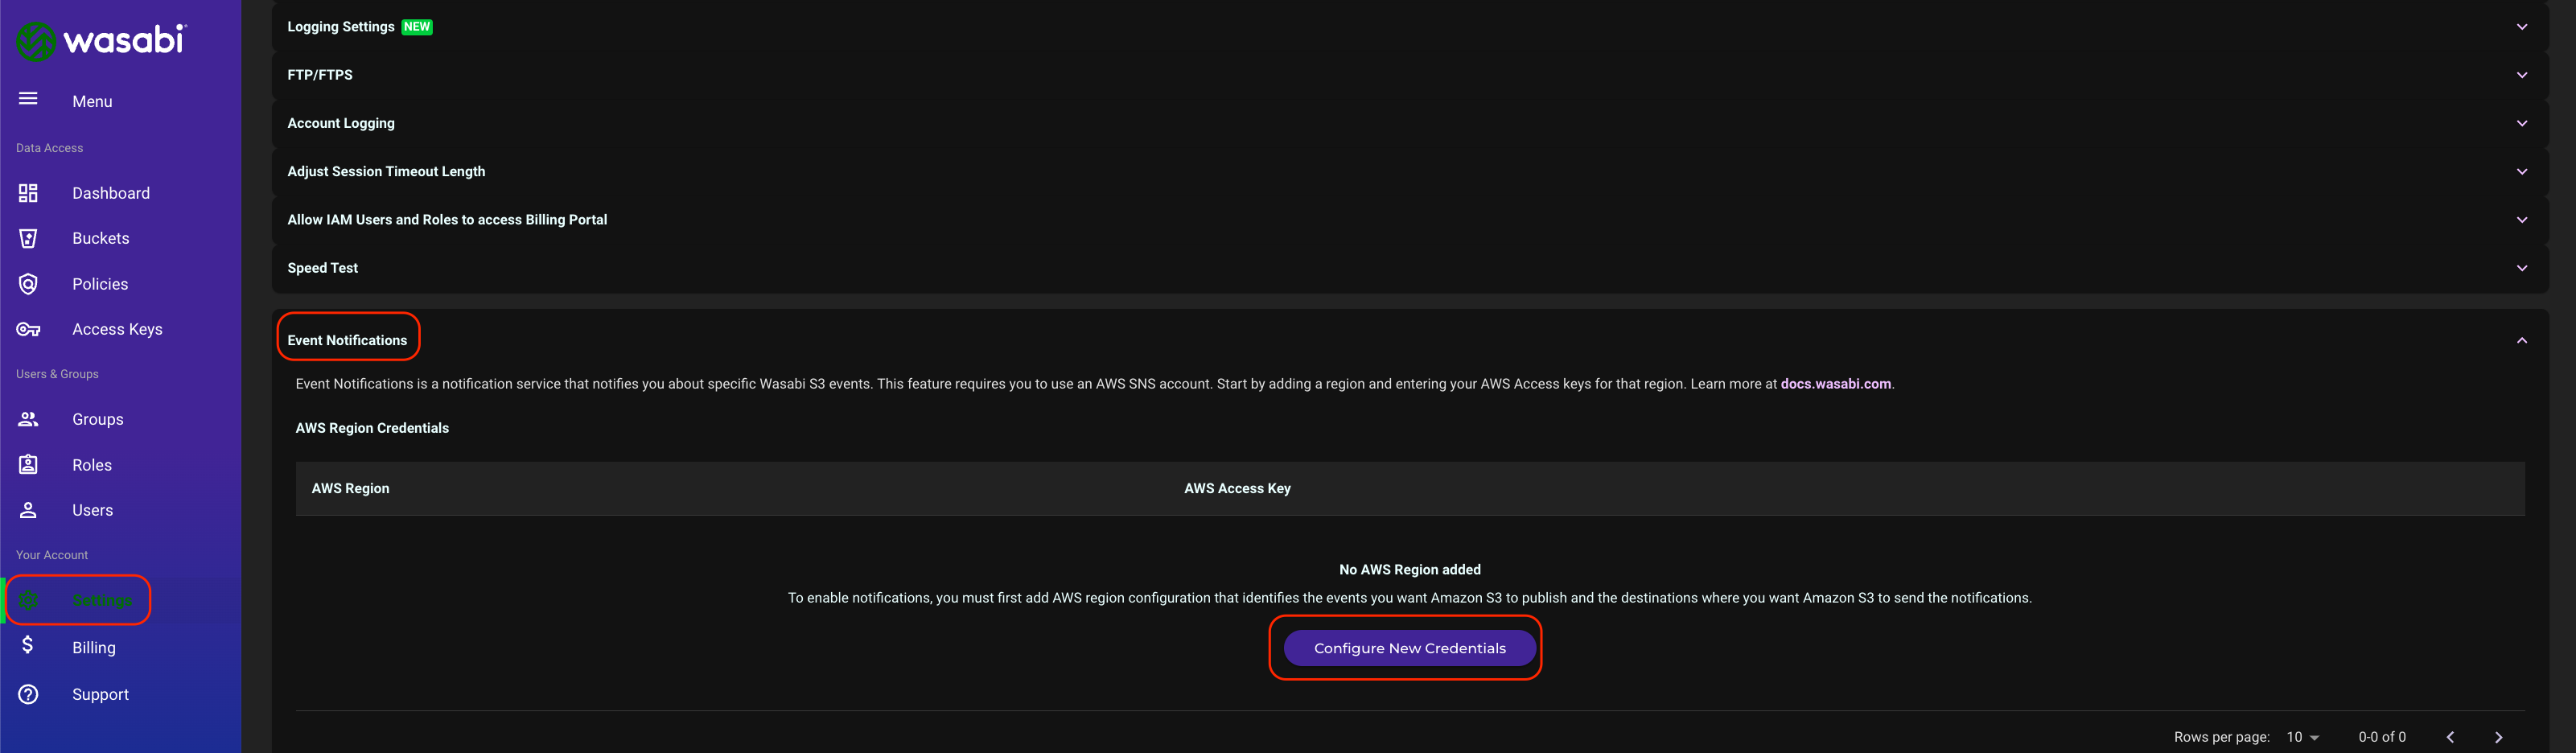
Select the AWS region your SNS topic is located in from the drop-down menu. Enter your AWS access and secret keys. Click Add Credentials.
Your AWS credentials entry will now show in the Wasabi Console.
Configure Your Wasabi Bucket to send SNS Events
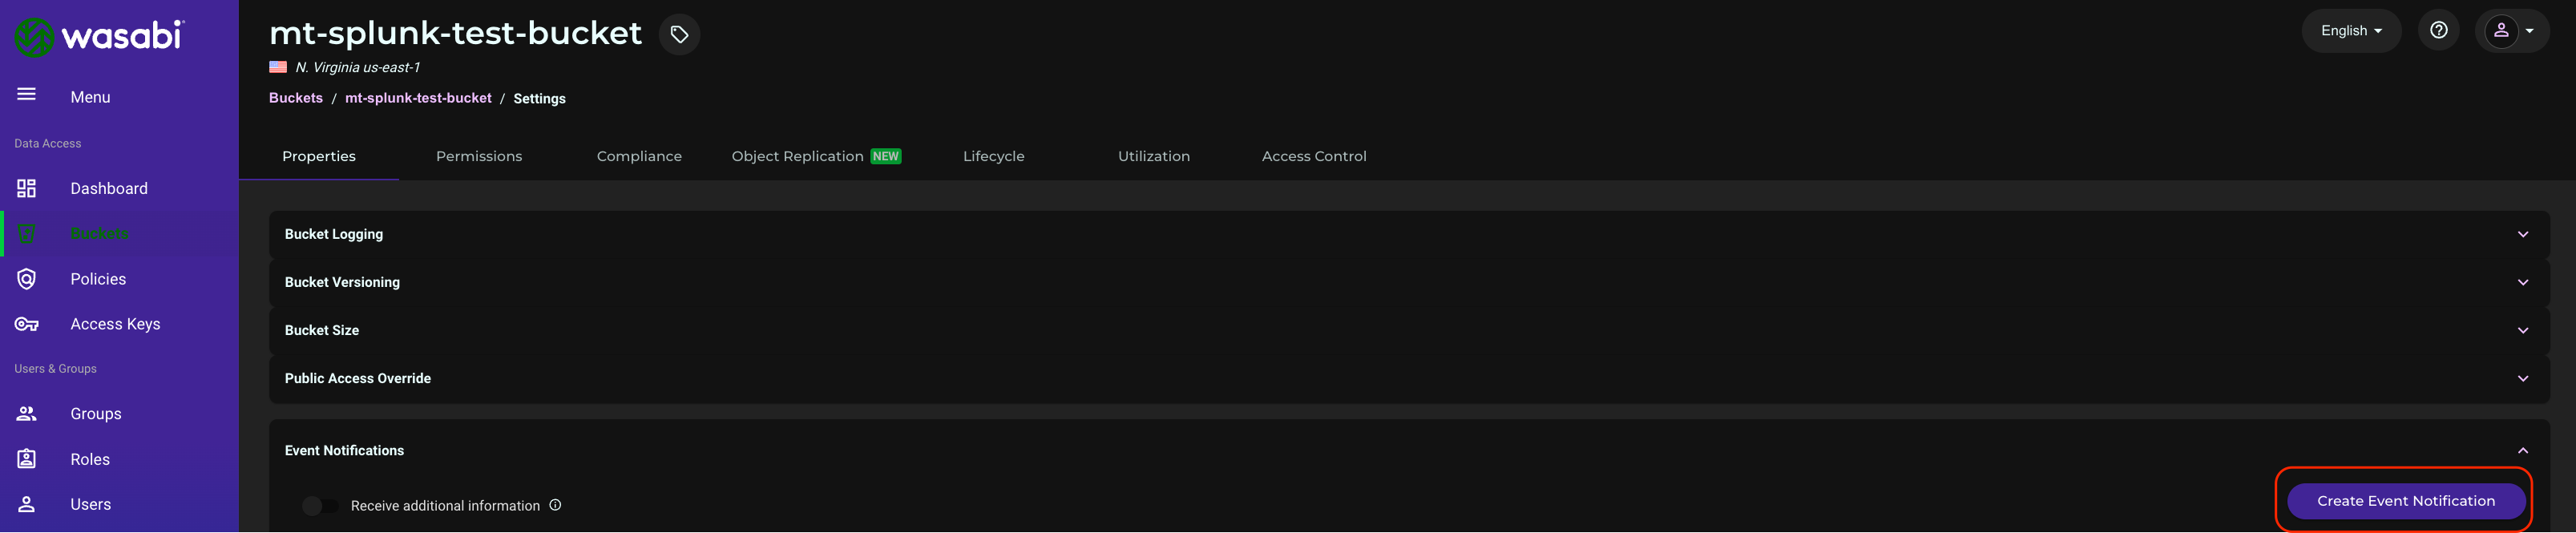
Navigate to Buckets and select the name of the bucket to monitor.

Click on the Settings.
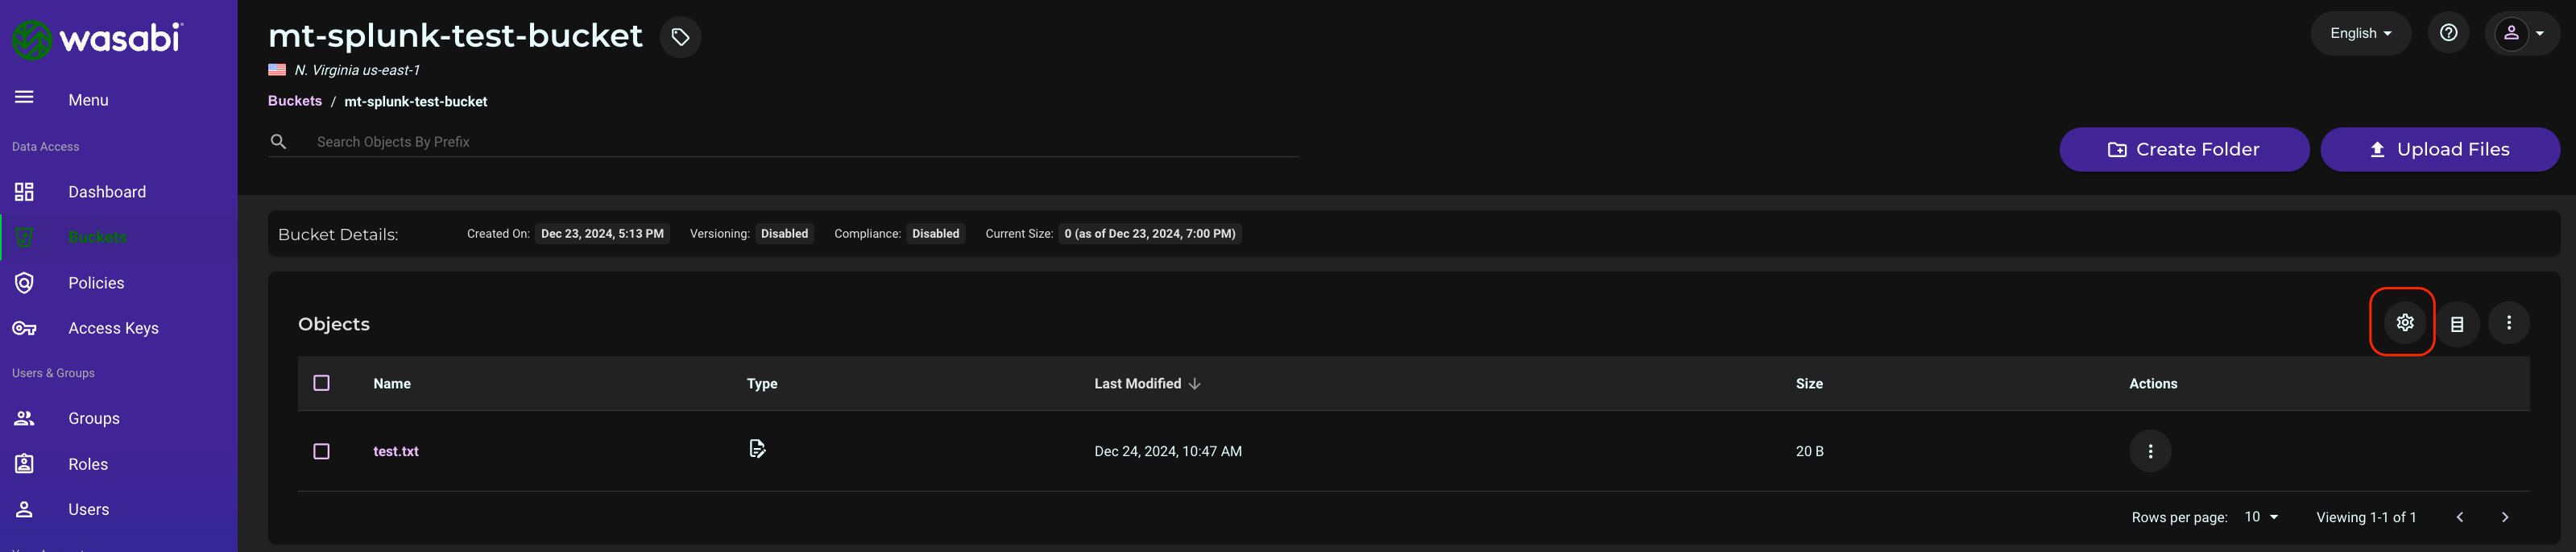
Under Properties, click Event Notifications.
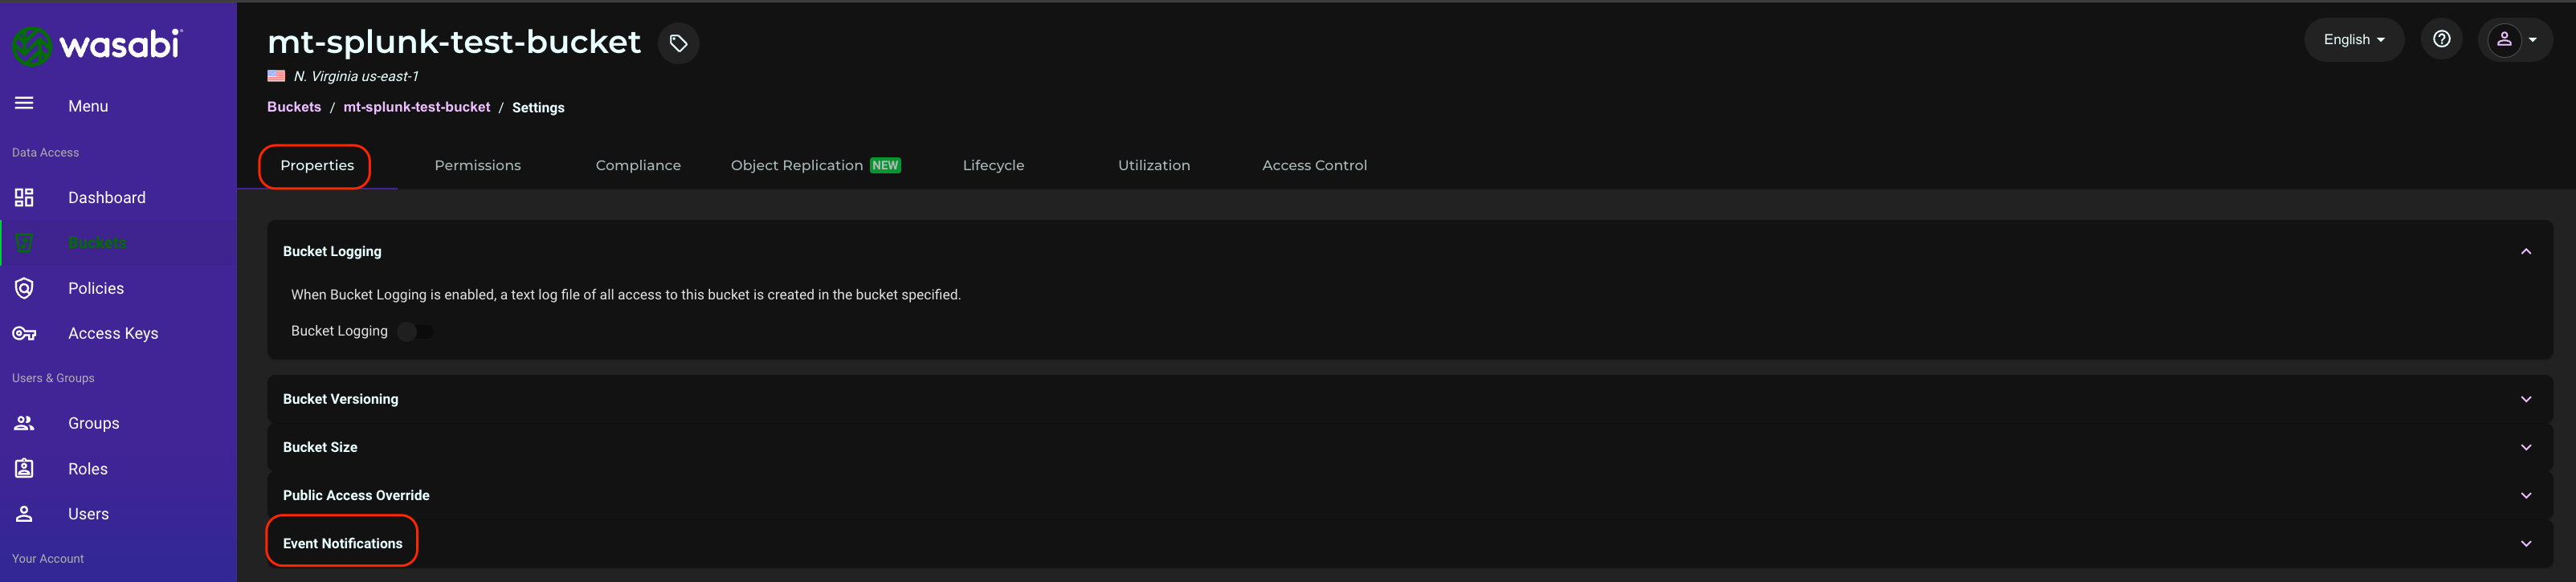
Click Create Event Notification.
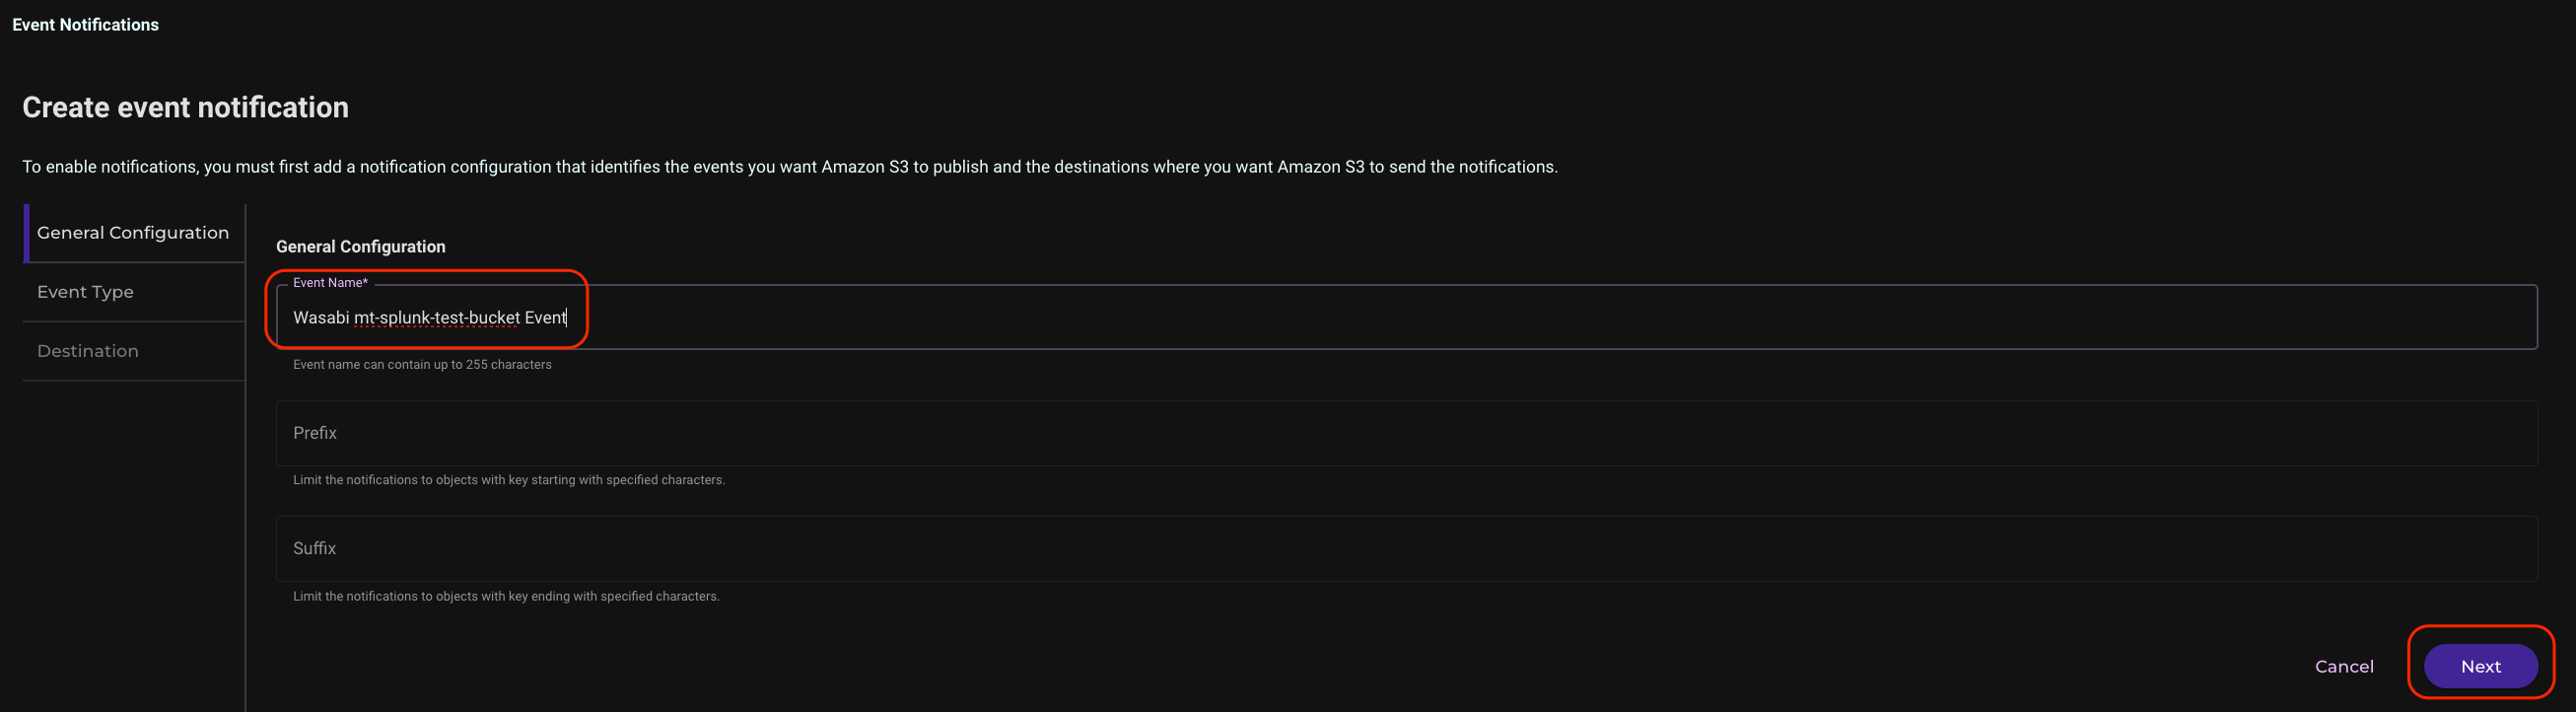
Give the event a name and click Next.
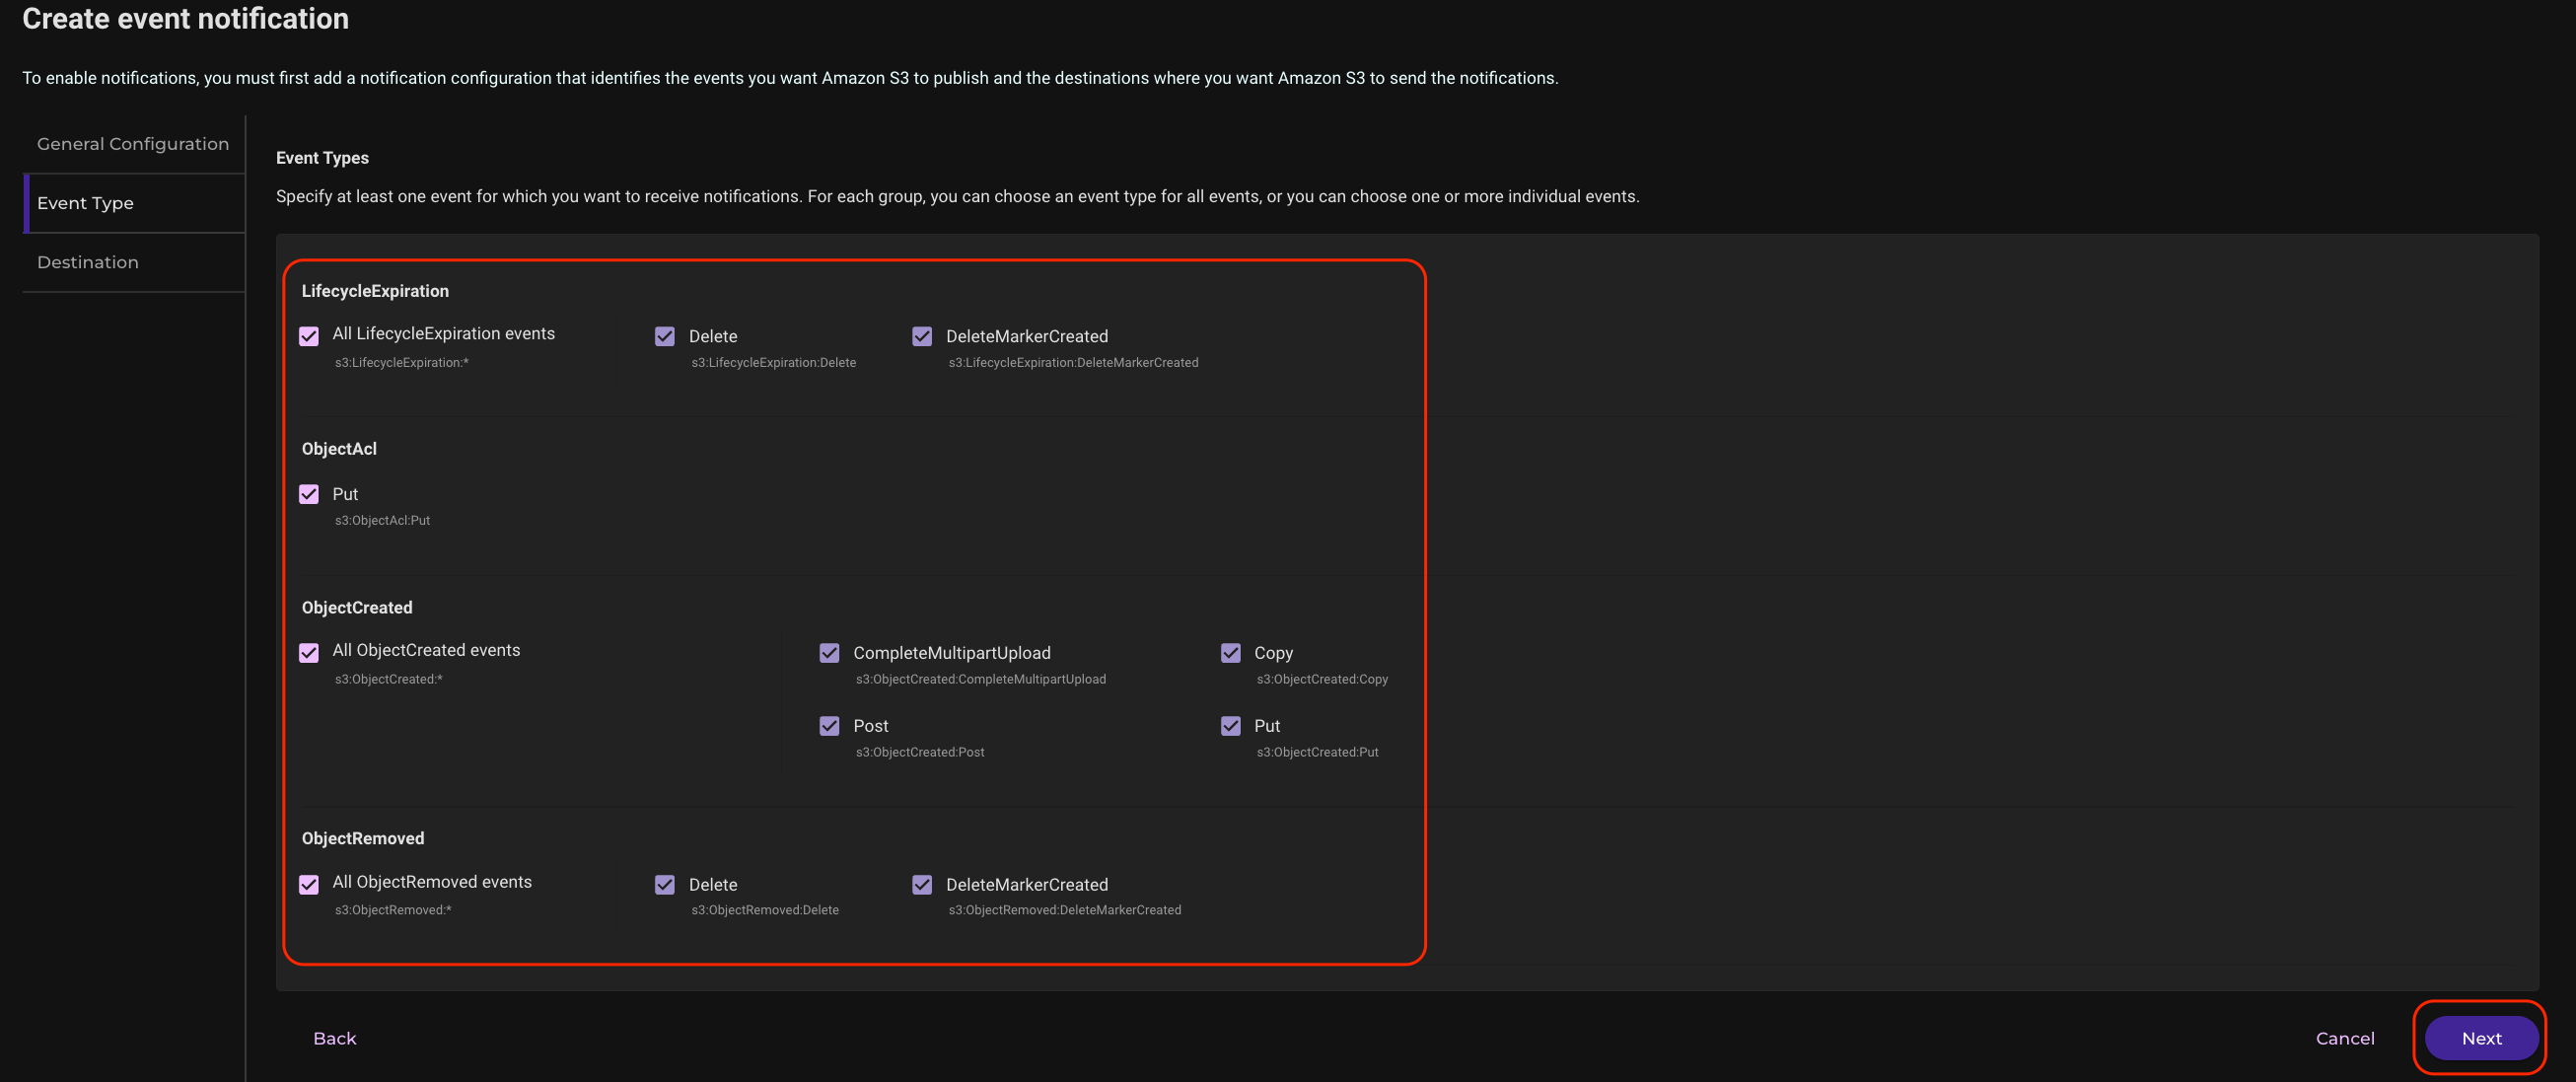
Enable the events you wish to receive notifications about and click Next.
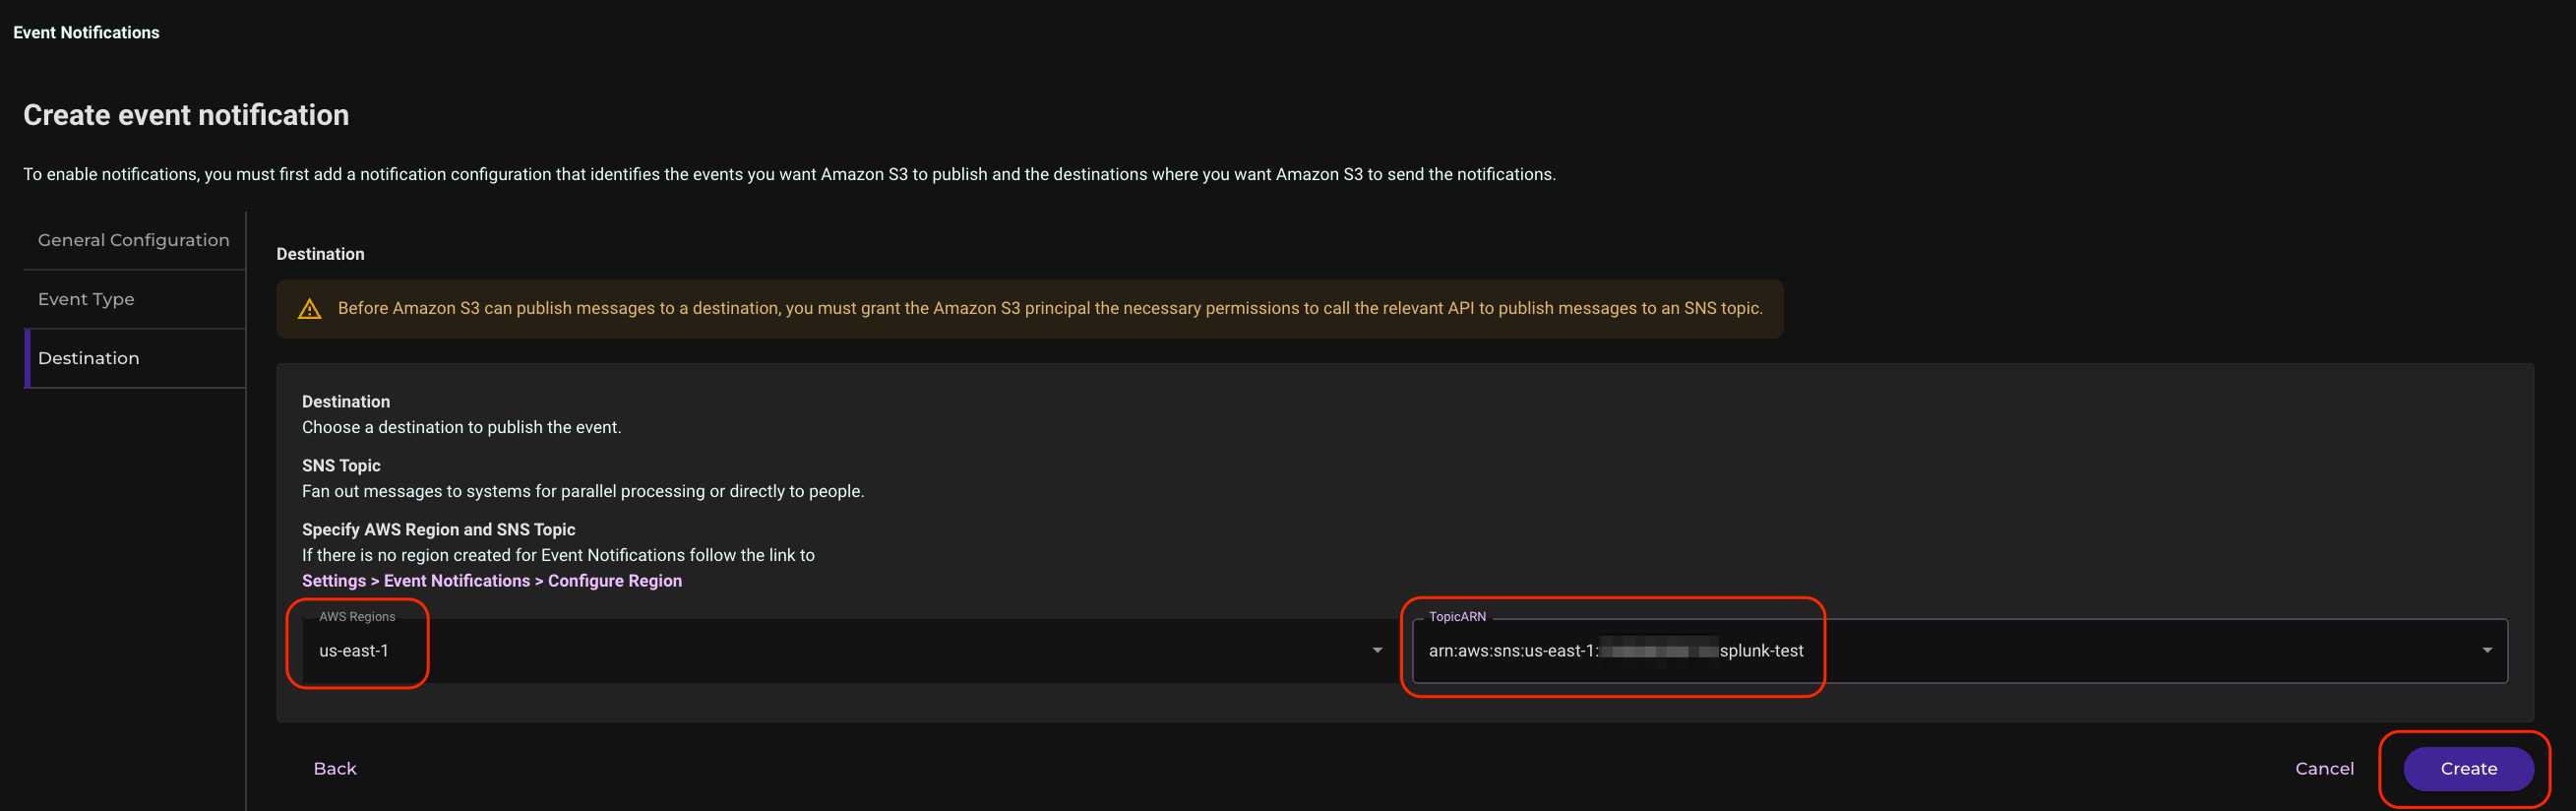
Select the AWS region and the previously created SNS topic in that region. Click Create.
Test Wasabi Event Types and Observe Them in Splunk
In the Splunk Add-on for AWS console, click Search.

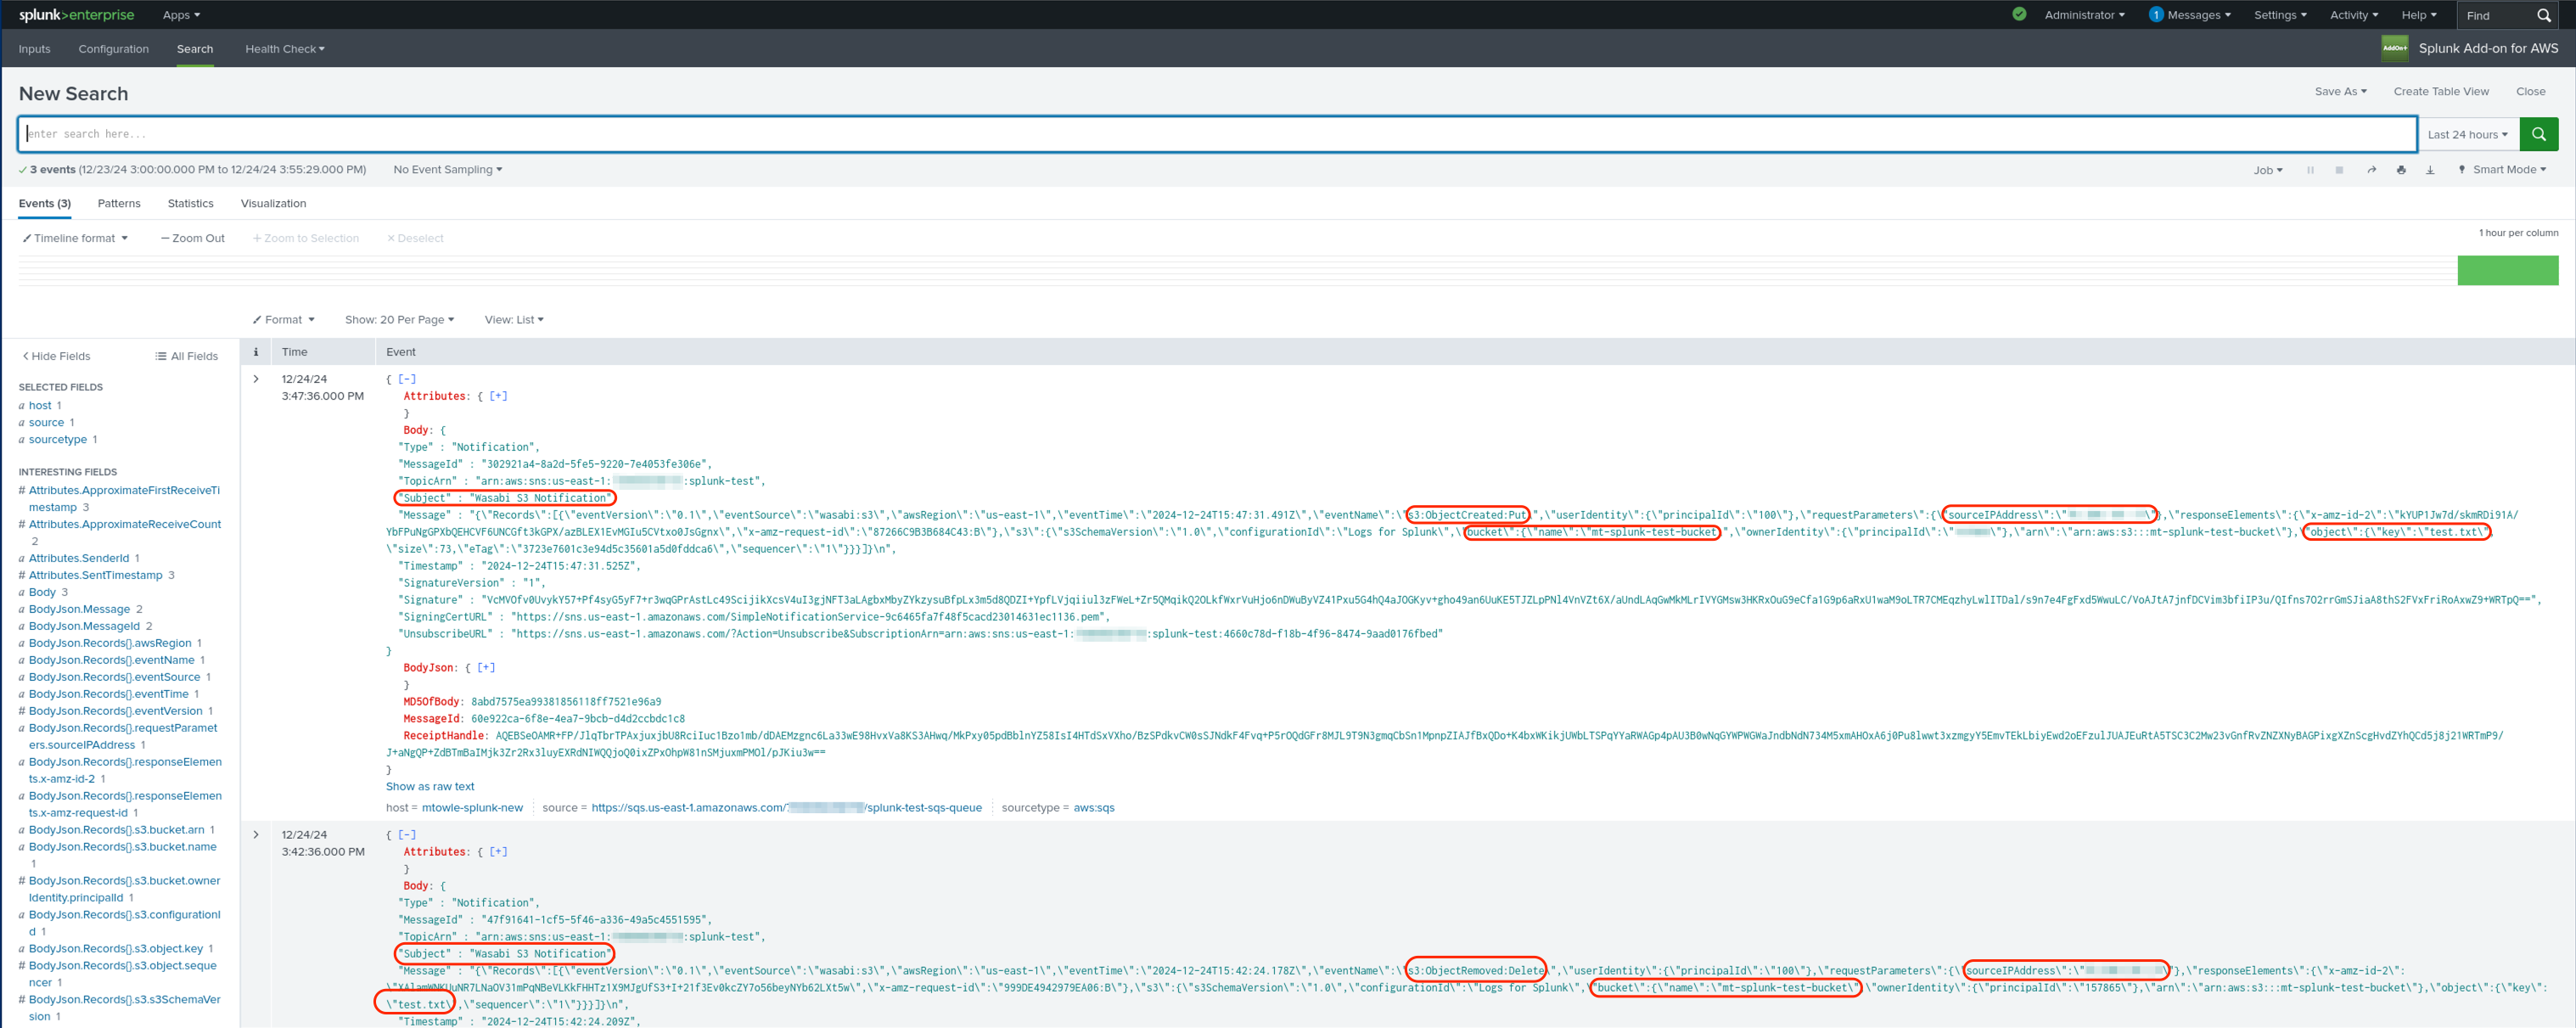
Perform actions such as uploading a test file and deleting an object in your Wasabi bucket using an S3 client such as Cyberduck, Wasabi Explorer, or the Wasabi Console. Your S3 events will show up on the Splunk Search screen. You may need to place your cursor in the Search text box. Click Enter. Some example fields of interest are circled in the following diagram.
You can also search for Wasabi in the search field to narrow the results.
