Wasabi has been validated for use with Telestream's DIVA. DIVA software makes it easy for your organization to manage all your digital content across all of your broadcast, production and archive operations, and across multiple locations. To learn more about the Telestream DIVA + Wasabi solution, please refer to our joint solution brief. To use this product with Wasabi, please follow the instructions outlined below.
1. Reference Architecture
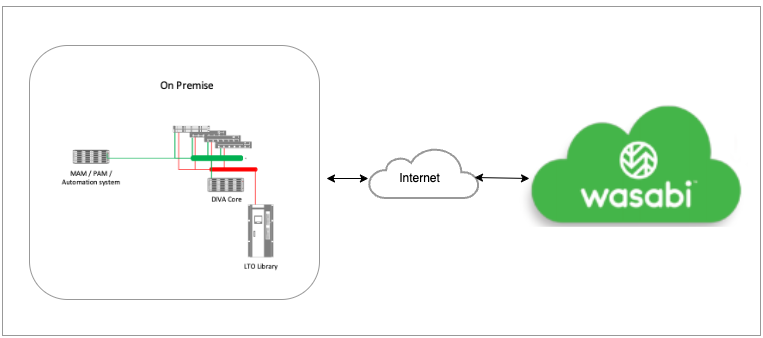
2. Prerequisites
DIVA Core v7.7 and later installed
Cloud Connection license
An active Wasabi account
Two buckets should be created in the Wasabi account:
Bucket 1 - Will Store the Data
Bucket 2 - Will Store the Metadata
The bucket for the metadata needs to be named in a specific way. It should follow the name of the bucket for the data, and include the suffix "-metadata". For example:
Bucket 1 - "diva-wasabi-test"
Bucket 2 - "diva-wasabi-test-metadata"
3. Configuration
1. Launch the DIVA Config utility and connect to the Core Database.
.png)
2. Navigate to the Disks tab.
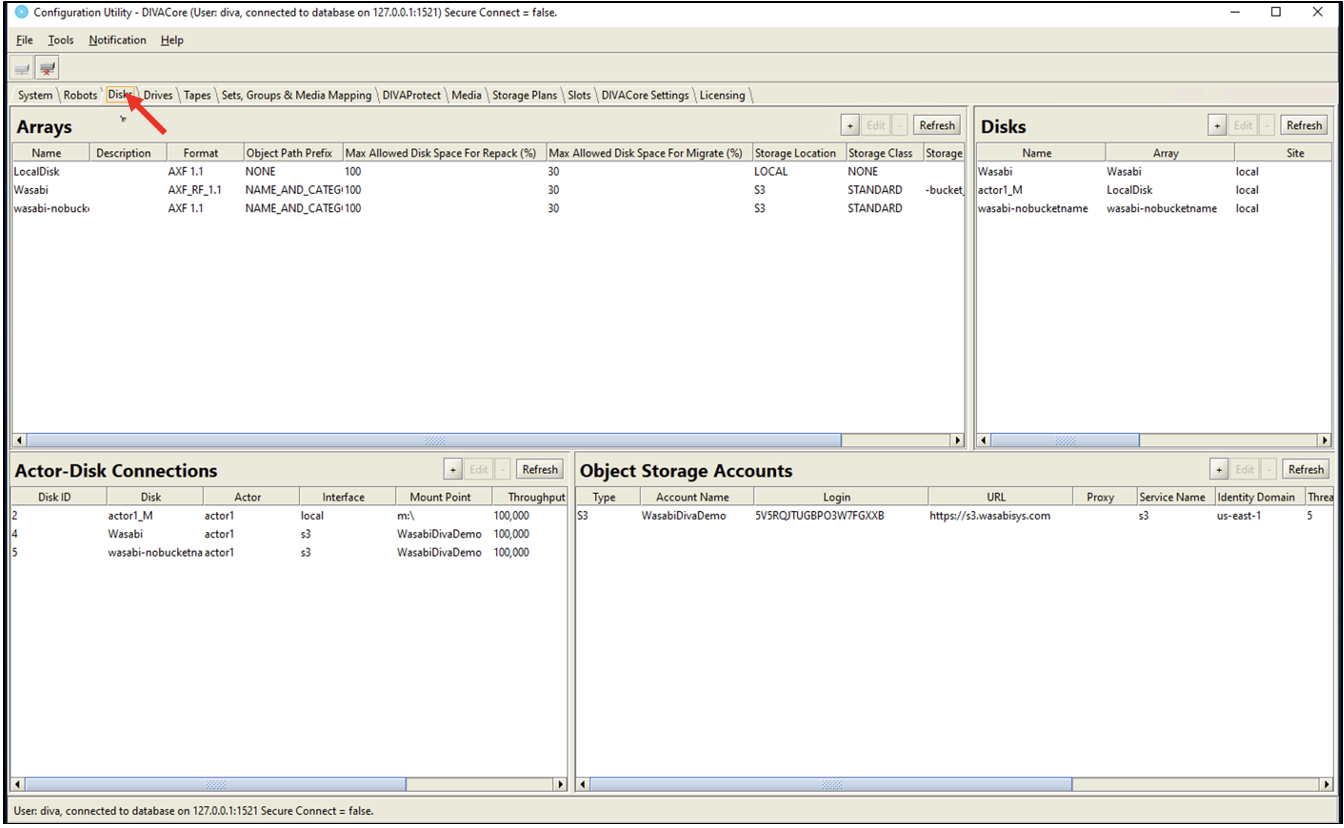
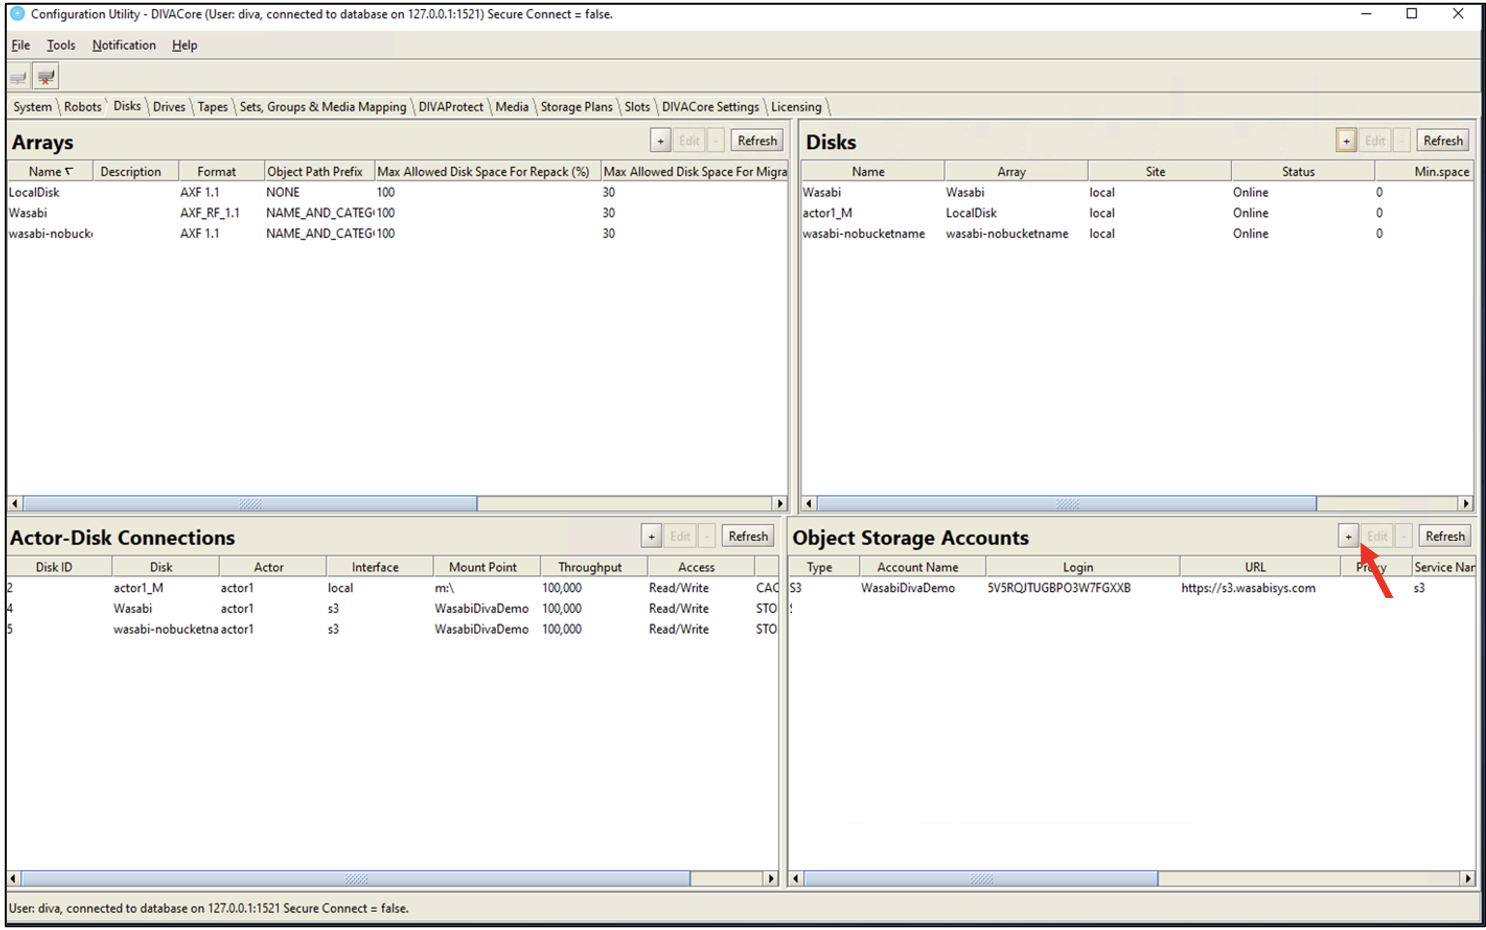
3. In the Object Storage Accounts section, click on the + sign, to add a new storage account.
4. In the Add new row in Object Storage Accounts dialog box, input the following details and click OK.
Type - Select S3 from the dropdown menu
Account Name - provide a name for the storage account
Access Key
Secret Key
URL - endpoint URL of the Wasabi region in which your bucket is located
Protocol - s3
Region - Wasabi region being used
Vendor - Select Amazon from the dropdown menu
.png)
Note: This config example discusses the use of Wasabi's us-east-1 storage region. To use other Wasabi storage regions, please use the appropriate Wasabi service URL as described in our Wasabi Service URLs article.
Note: DIVA application REQUIRES service endpoint to be prepended with transport definition (https).
5. The new storage account is displayed in the Object Storage Accounts section.
.png)
6. In the Arrays section, click on the + sign to add an array for the storage account created earlier.
.png)
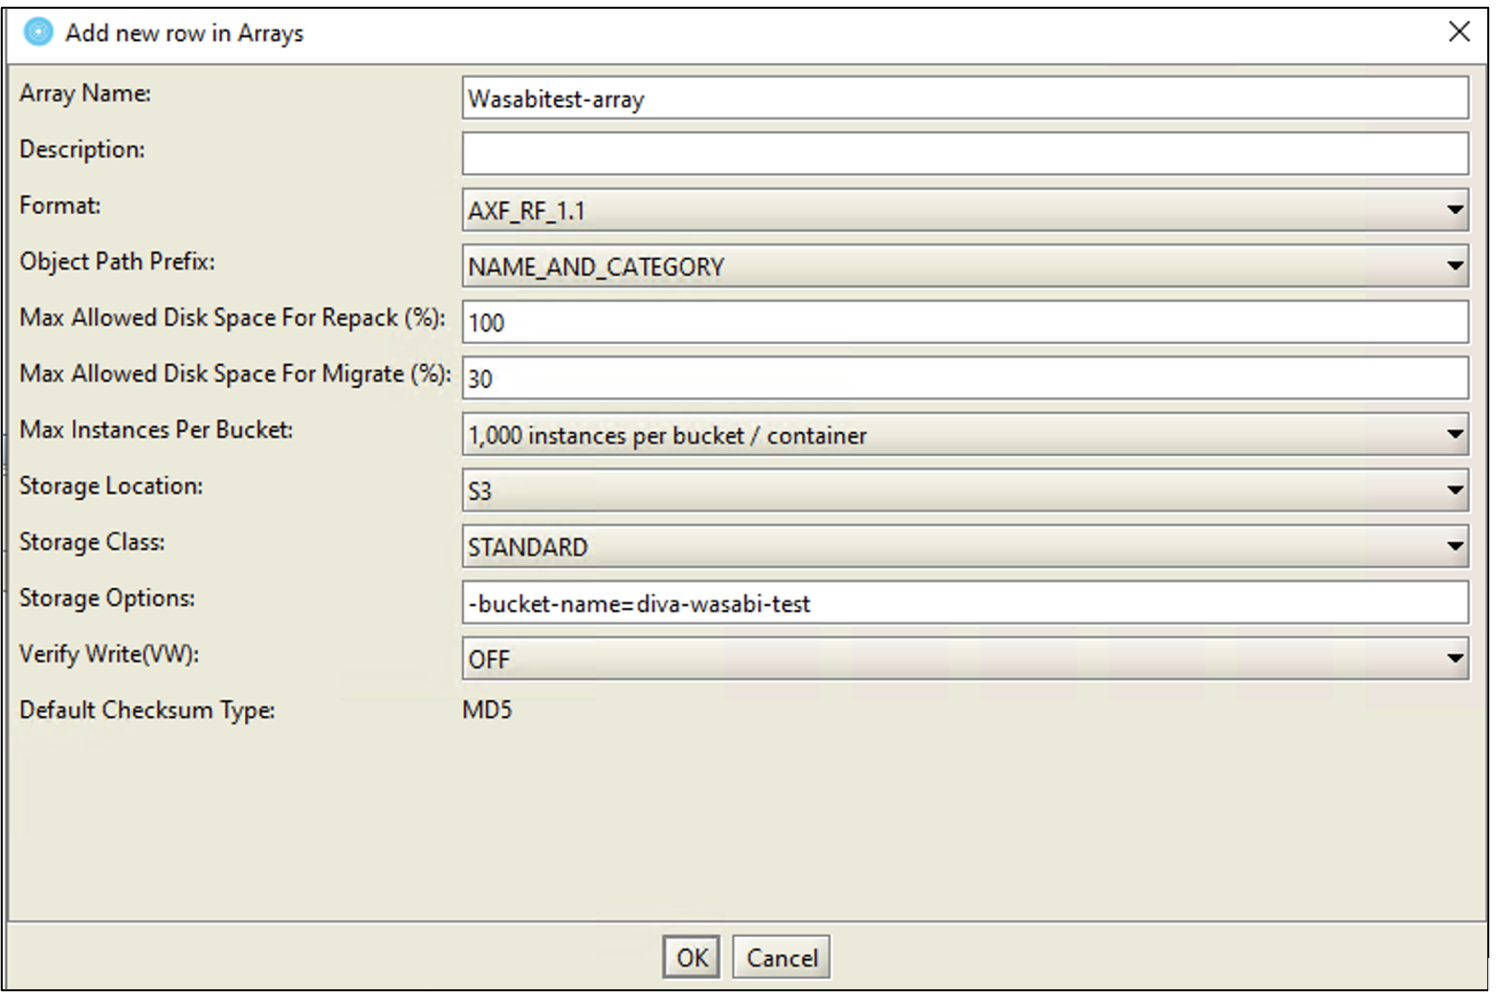
7. In the Add new row in Arrays dialog box, input the following details and click OK.
Array Name
Format - Select AXF_RF_1.1 from the dropdown menu
Object Path Prefix - Select NAME_AND_CATEGORY from the dropdown menu
Storage Location - Select S3 from the dropdown menu
Storage Class - Select Standard from the dropdown menu
Storage Options - Specify the bucket to use by adding the parameters bucket-name=diva-wasabi-test
8. The new array is displayed in the Arrays section.
.png)
9. In the Disks section, click on the + sign to add a new Disk for the Wasabitest-array.
.png)
10. In the Add new row in Disks dialog, provide a Disk Name, select the Array created in Step 7 and click OK.
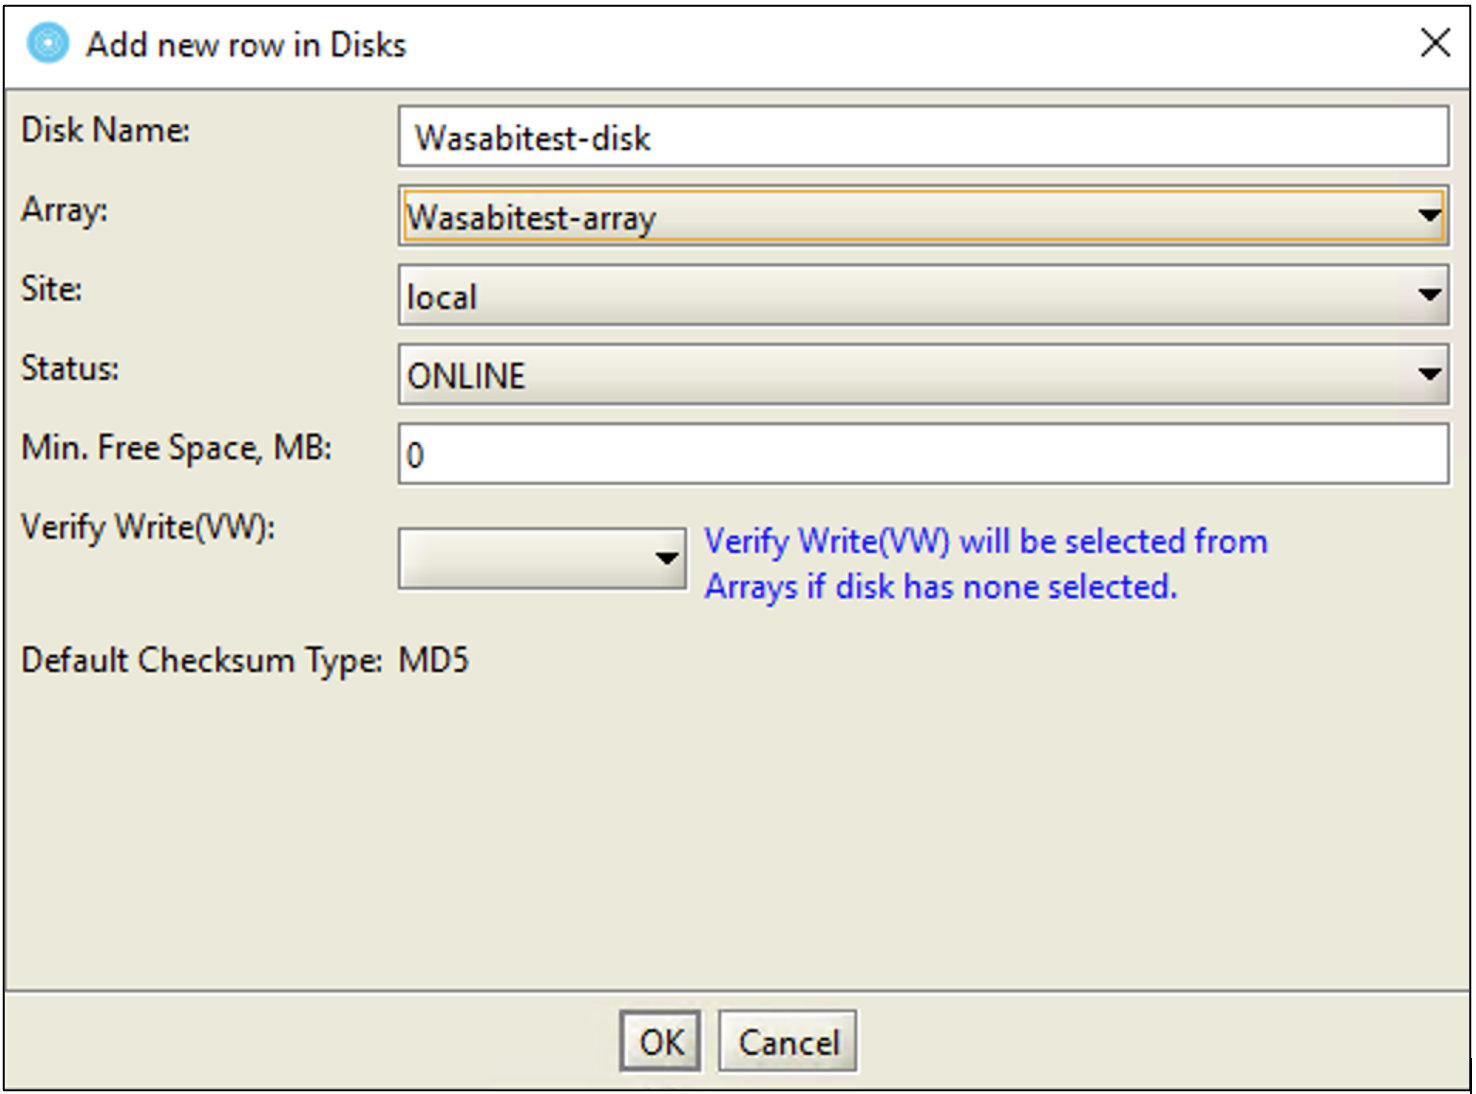
11. The new disk is displayed in the Disks tab.
.png)
12. In the Actor-Disk Connections tab, click the + sign to add a new connection.
.png)
13. In the Add new row in Actor-Disk Connections dialog box, select the following options and click OK.
Disk - select the disk created in the earlier step
Actor - select the actor you would like to use
Interface - select s3 from the dropdown menu
Mount Point - select the Object Storage account created in Steps 3 - 4
Access - select Read/Write
Used for - select STORAGE_ONLY
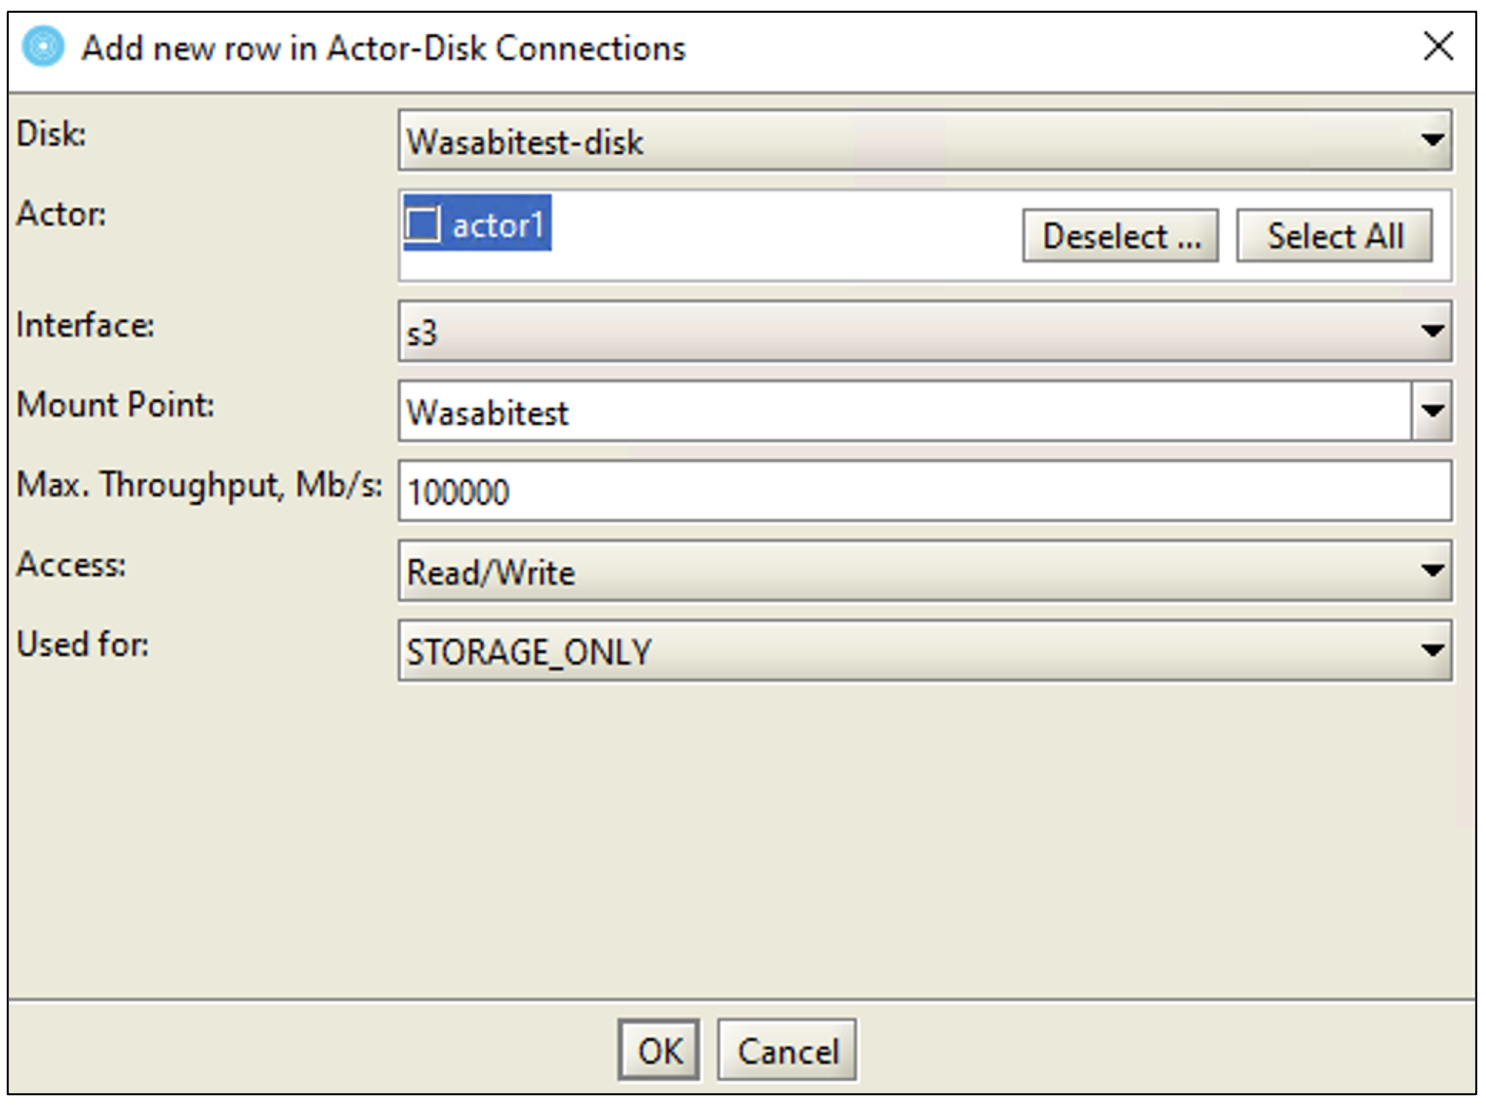
14. The new connection is displayed in the Actor-Disk Connections section.
.png)
15. Next, click Notification, then Notify Manager to save the changes.
.png)
16. To create a request, launch the DIVA Control GUI.
.png)
17. Navigate to the Actions tab and click Archive.
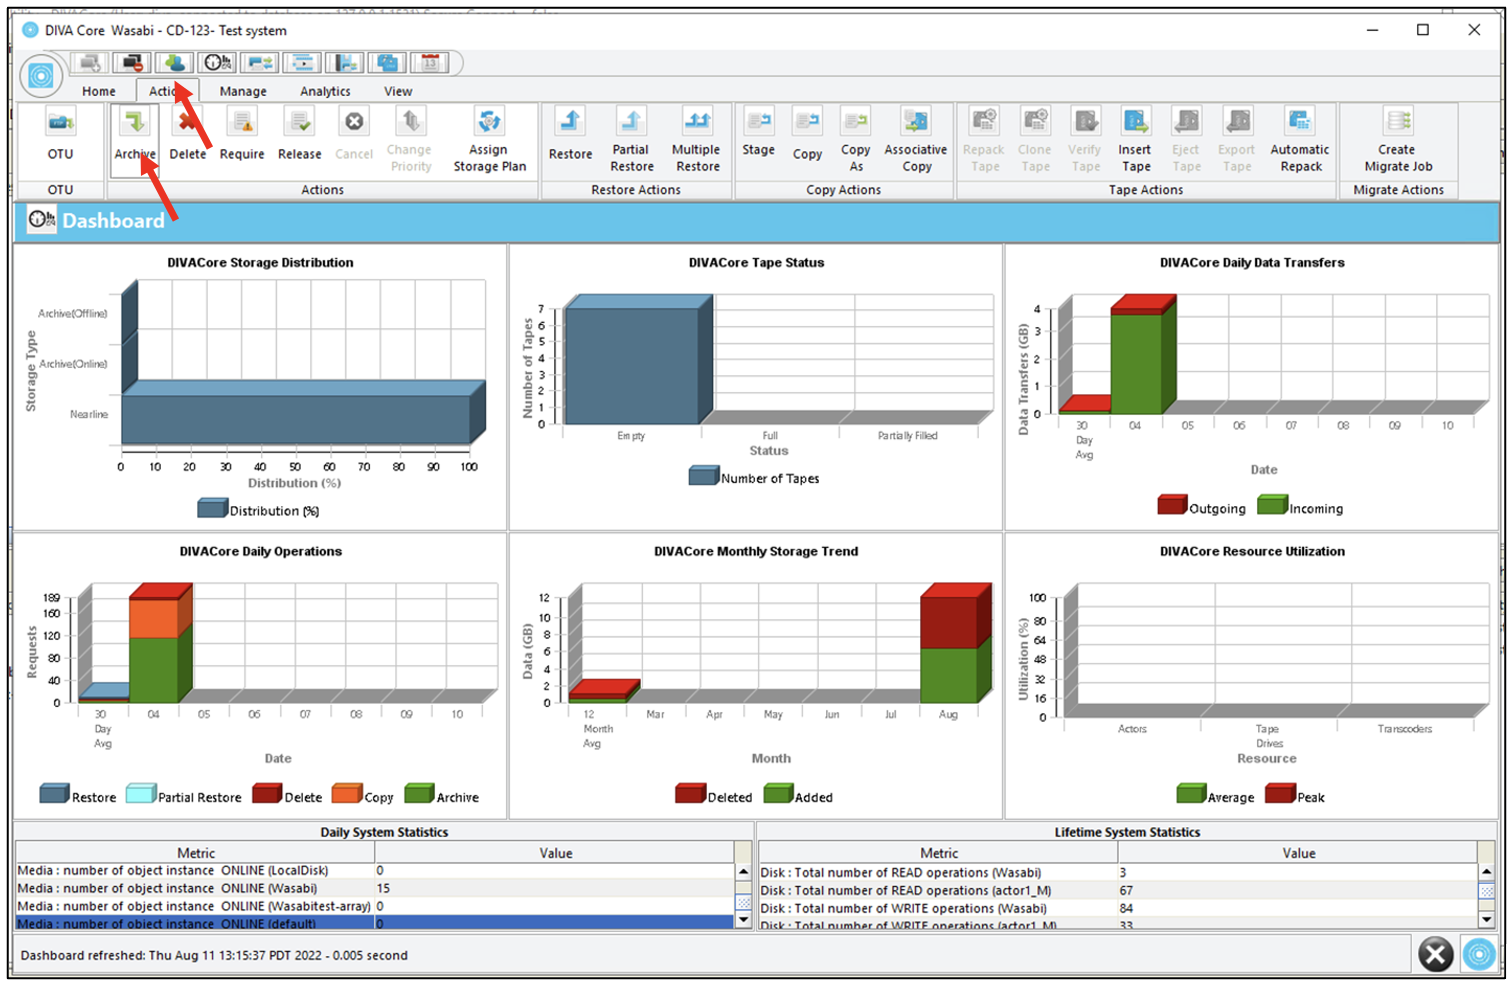
18. In the Send Archive request dialog box, input the required details. Under Media, select the Wasabitest-array created earlier. Click Send.
.png)
19. To monitor the progress of the request, navigate to the Home tab and click Manager.
.png)
For more information regarding DIVA configuration, reach out to support@telestream.net.