If you are a Mac user, see Installing Wasabi Explorer for Mac.
Prerequisites
Valid Wasabi Hot Cloud Storage account
Wasabi access and secret keys
Minimum system requirements
Microsoft .NET Framework 4.0
1.4 GHz 64-bit processor
512 MB RAM, 100 MB minimum disk space, Gigabit (10/100/1000baseT) Ethernet adapter
Minimum Windows OS:
Windows 7/8/10
Windows Server 2008 or higher
Installing Wasabi Explorer
Download the Wasabi Explorer Install package (updated February 2025, v6.7.0.22 Windows only):
Install Wasabi Explorer by following the prompts in the installation package.
When prompted to enter an email address, you can use the same email address used with your Wasabi account.
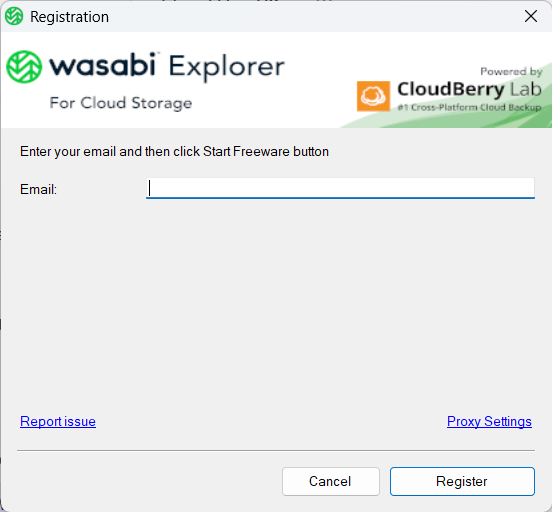
Click Register.
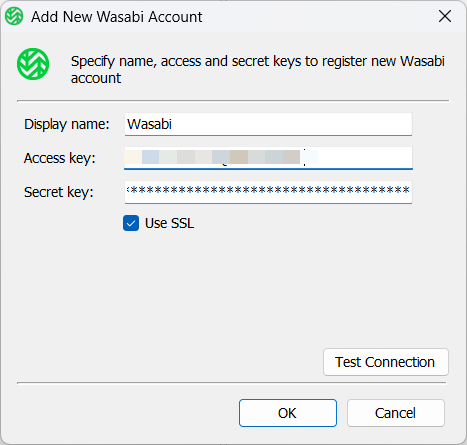
Enter valid access and secret keys from your Wasabi account to connect the Wasabi Explorer application to your storage account. Optionally, you can choose to use SSL.
Click Test Connection to verify that the key set is validated and Wasabi Explorer can communicate with Wasabi Hot Cloud Storage. You will receive the Connection Success message if connectivity and key validation are successful.
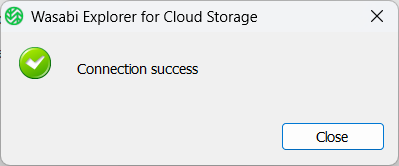
Click Close for the connection success message.
Click OK to add the new account for Wasabi Explorer.
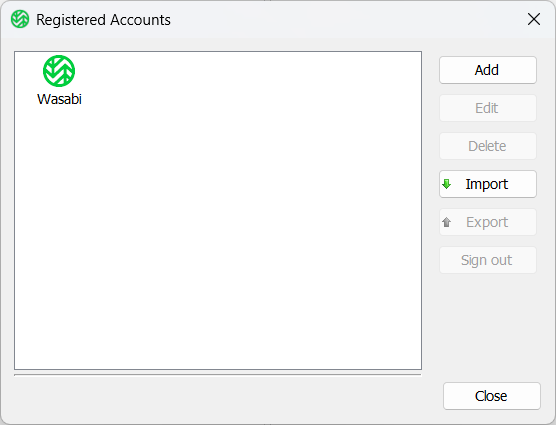
Once the Wasabi connection is built, you will see the Wasabi logo on the list of Registered Accounts. You can click Close to complete the registration.