Wasabi has been validated for use with Globus Connect Server v5.4. Designed for multi-user systems, Globus Connect Server delivers advanced file transfer and sharing capabilities to users, no matter where their data lives.
Requirements
Active Wasabi Cloud Storage Account
Wasabi Bucket - Refer to Bucket Creation Guide
Access & Secret Key Pair - Refer to Access Keys Guide
Globus Connect Server v5.4 installed on Supported Linux Distribution
Open Firewall Ports 50000-51000 and 443 Inbound & Outbound -Any/Any
Public Routable IP Address for Data Transfer Nodes
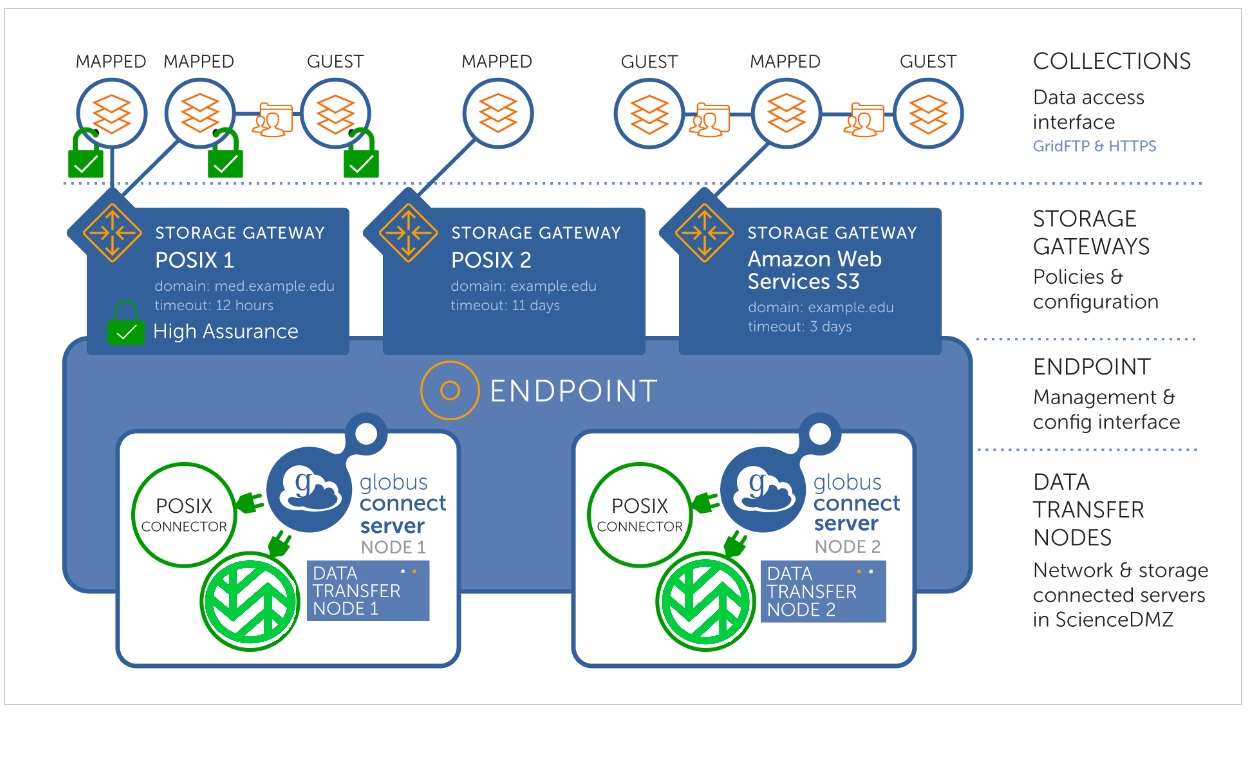
Architecture
Configuring
To install the Globus Connect Server version 5 software:
Once your Linux machine is up and running, install the Globus Connect Server software.
Open your preferred terminal and run the following commands (you can find your distribution-specific commands here).
curl -LOs https://downloads.globus.org/globus-connect-server/stable/installers/repo/deb/globus-repo_latest_all.deb
sudo dpkg -i globus-repo_latest_all.deb
sudo apt-key add /usr/share/globus-repo/RPM-GPG-KEY-Globus
sudo apt update
sudo apt install globus-connect-server54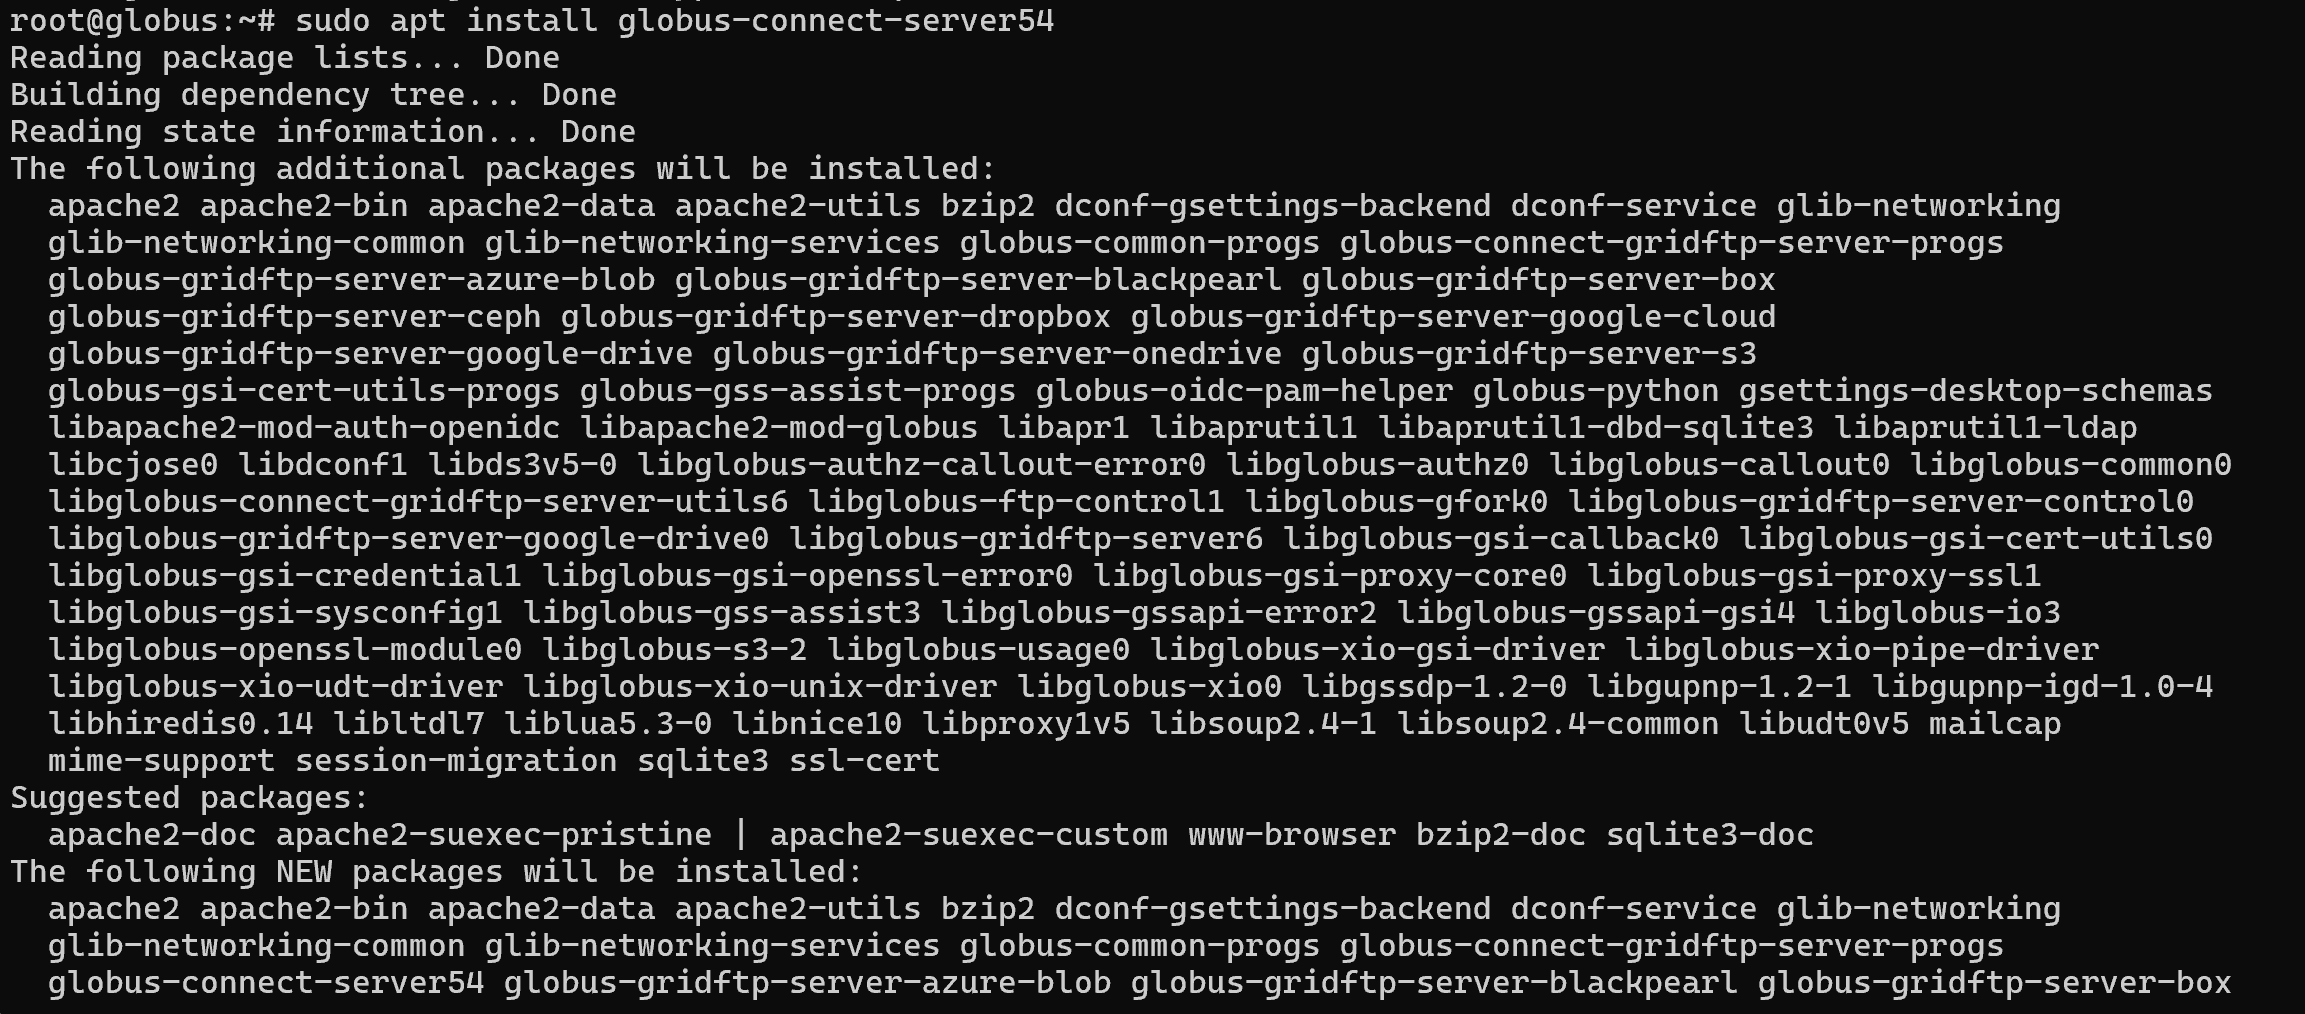
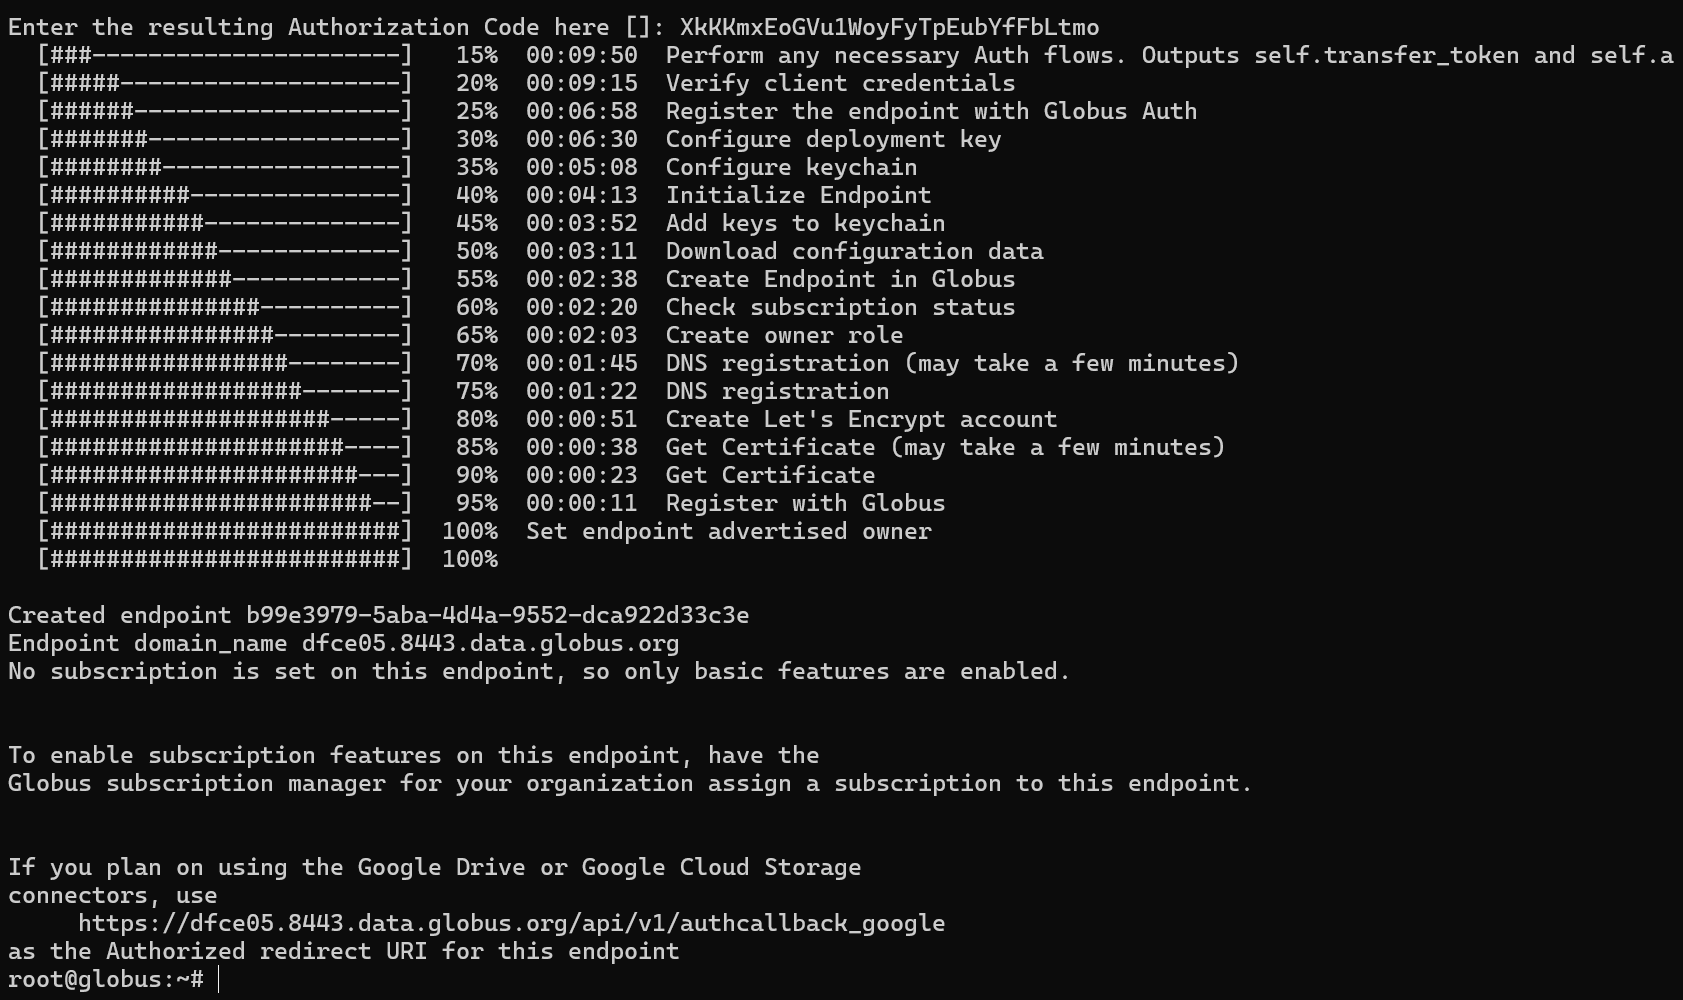
Creating the Endpoint
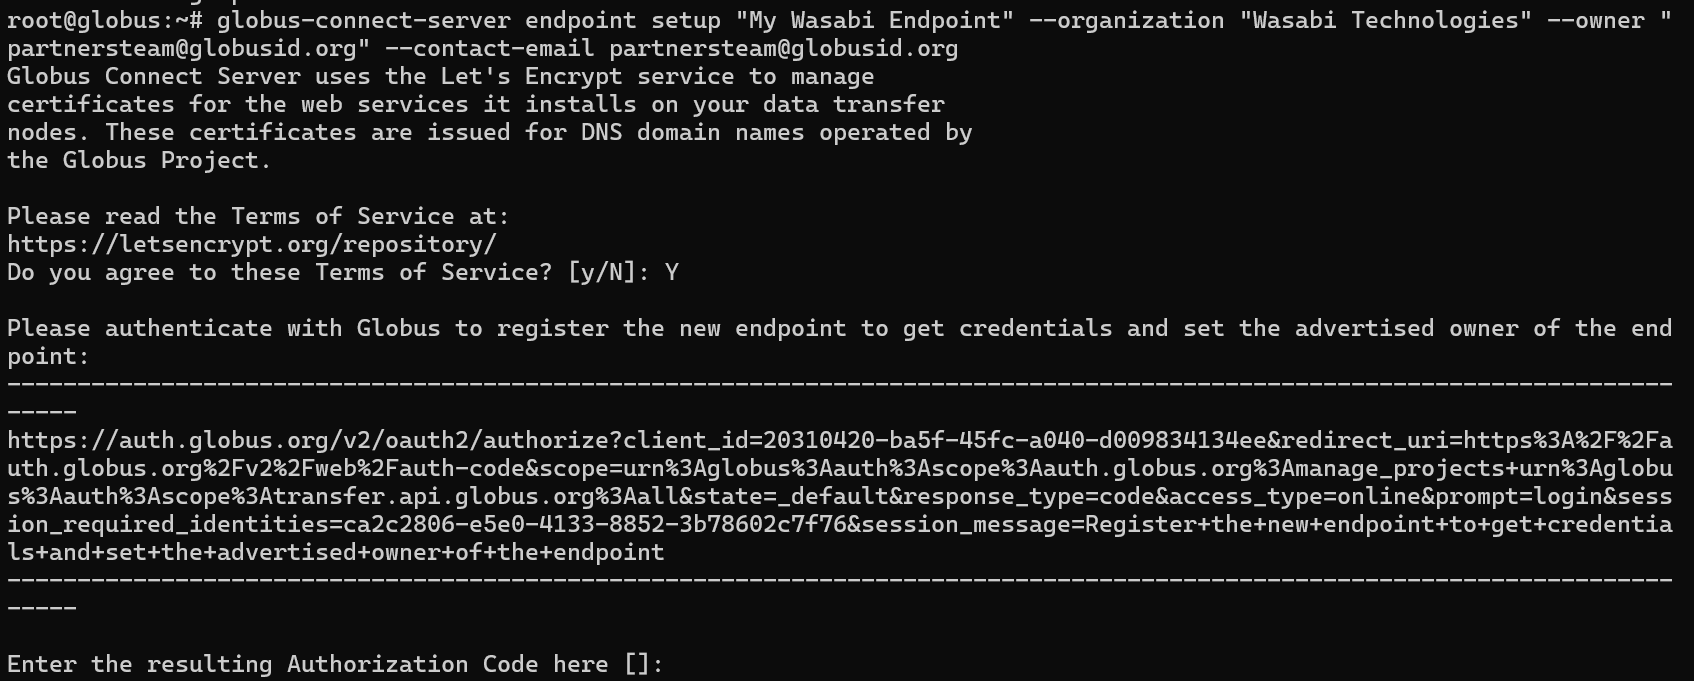
Enter the following commands to setup your endpoint.
globus-connect-server endpoint setup "My Wasabi Endpoint" \
    --organization "Wasabi Technologies" \
    --owner partnersteam@gloubsid.org \
    --contact-email partnersteam@globusid.org
You will be prompted to accept the Terms of Service. Type Y for Yes.
Authenticate your endpoint with Globus by clicking on the link provided in the terminal and getting the authorization code.
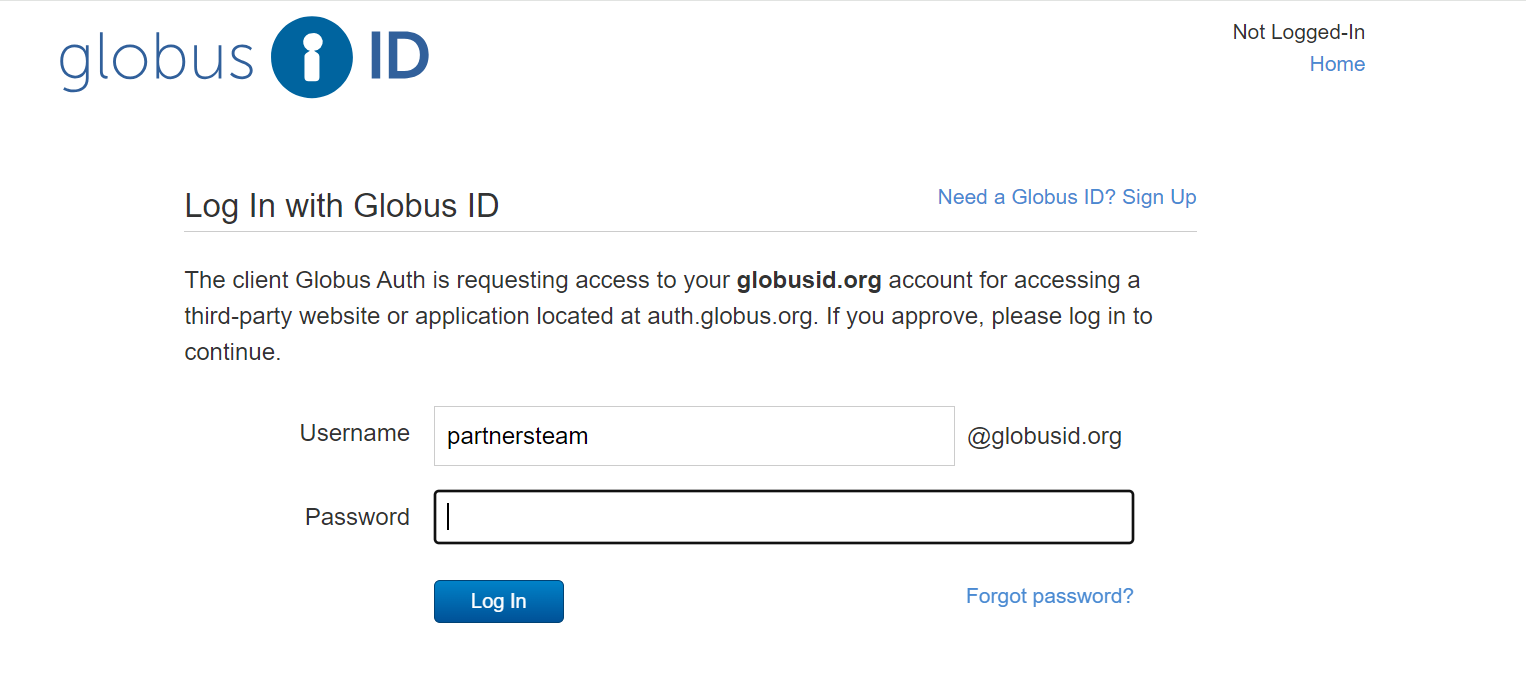
Log in to your account.
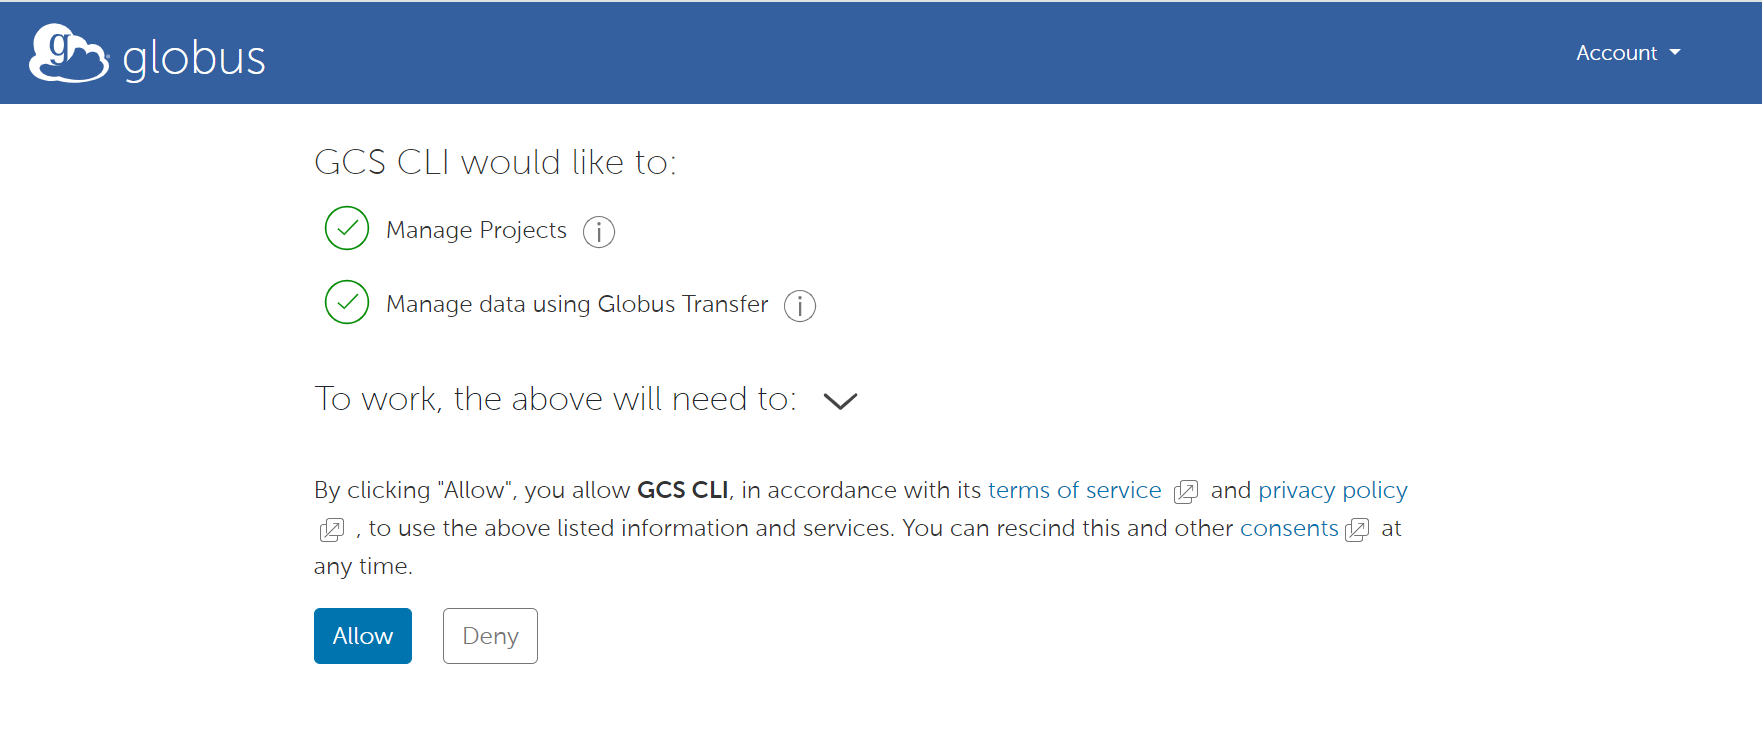
Click Allow.
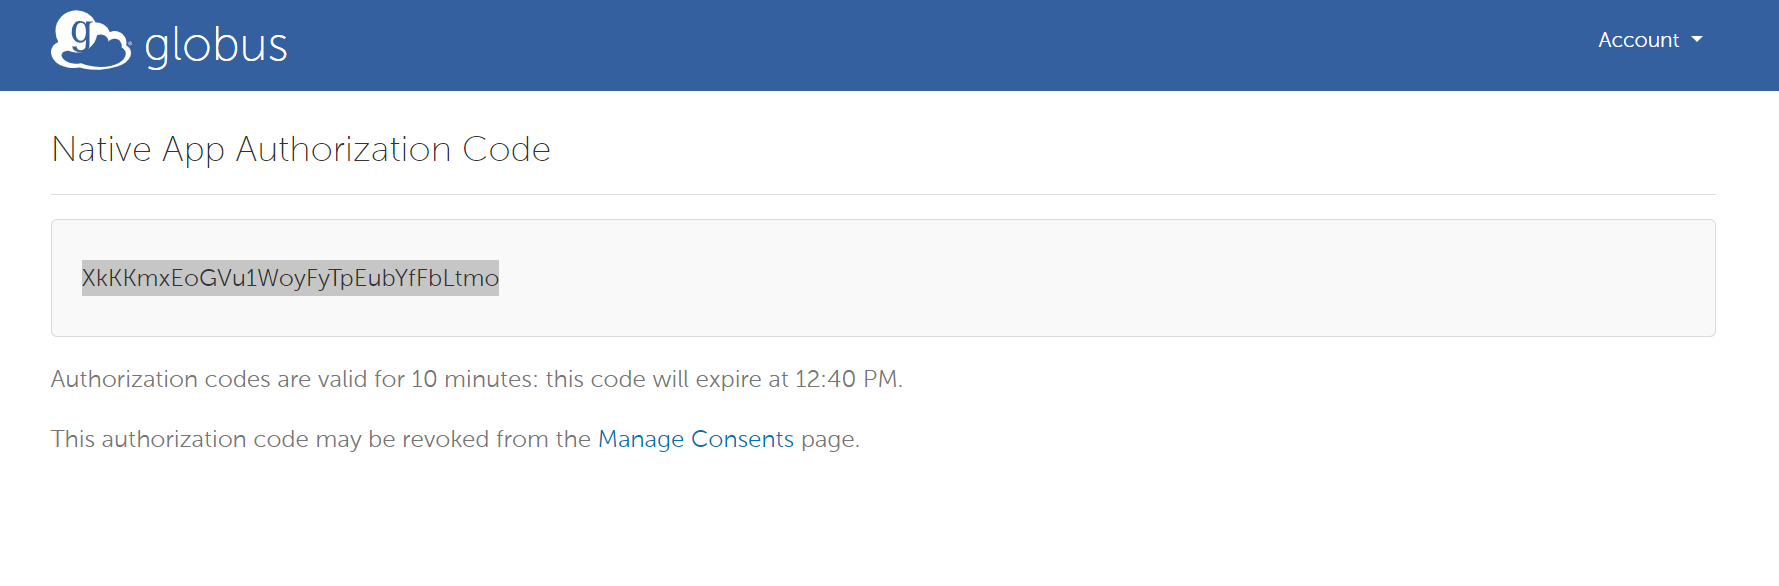
Copy the authorization code and paste it back into your terminal.
Click enter. Globus Connect will start to register and configure the endpoint.
Setting up Services on the Data Transfer Node
Run the globus-connect-server node setup command to configure and start the Globus services on the Data Transfer Node. This command must be done as the root user, as it enables and starts systemd services. The IP address must be publicly routable. If your network infrastructure leverages NATing, refer to NAT Support.
sudo globus-connect-server node setup --ip-address xxx.xxx.xxx.xxx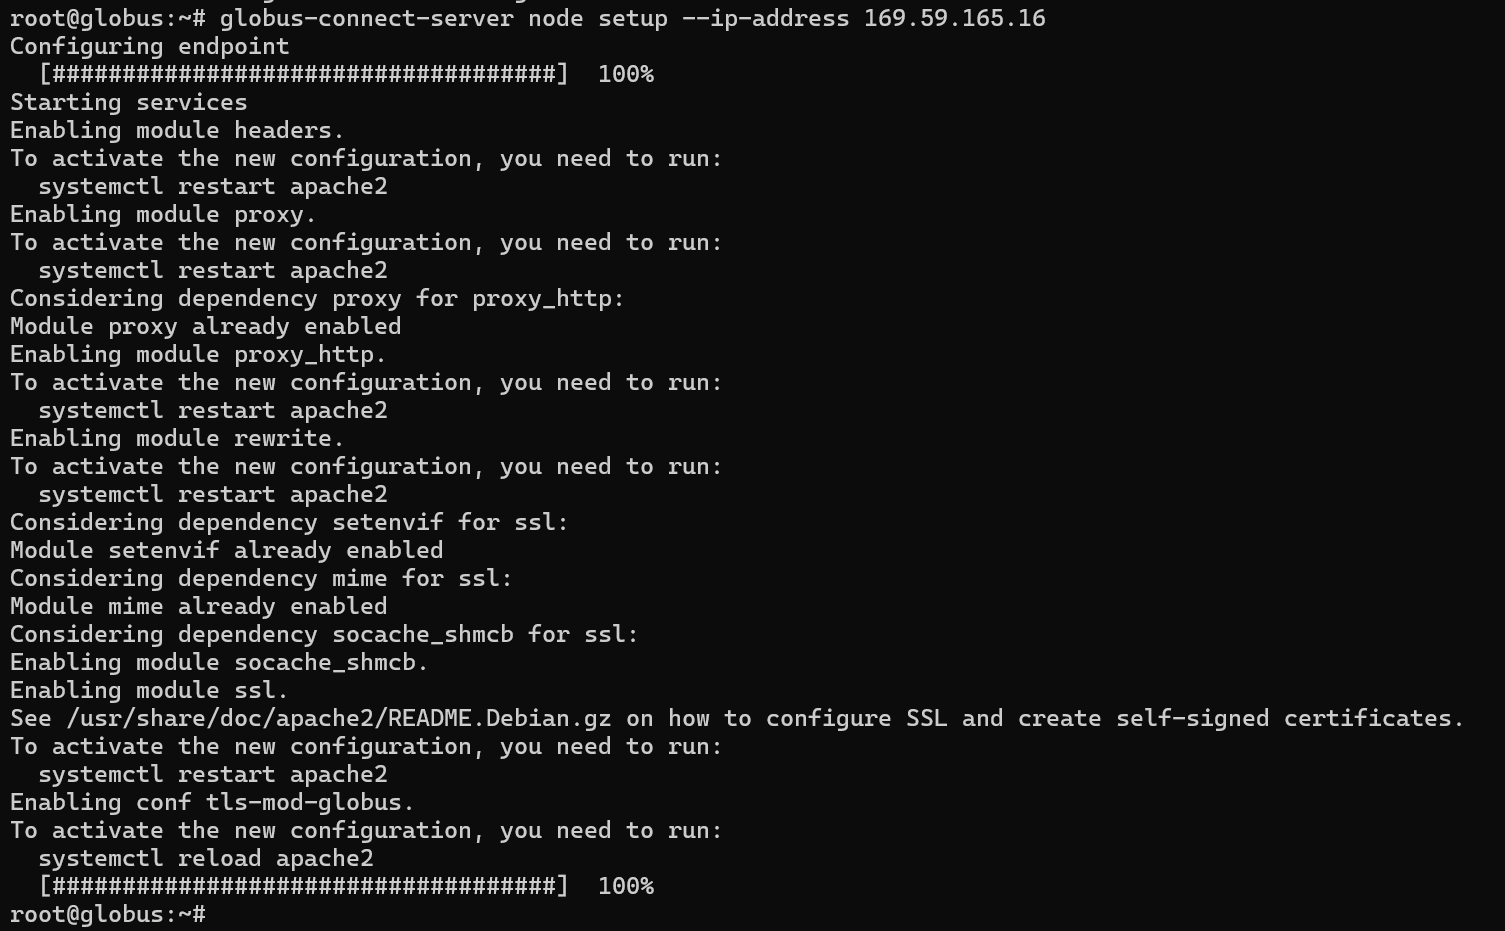
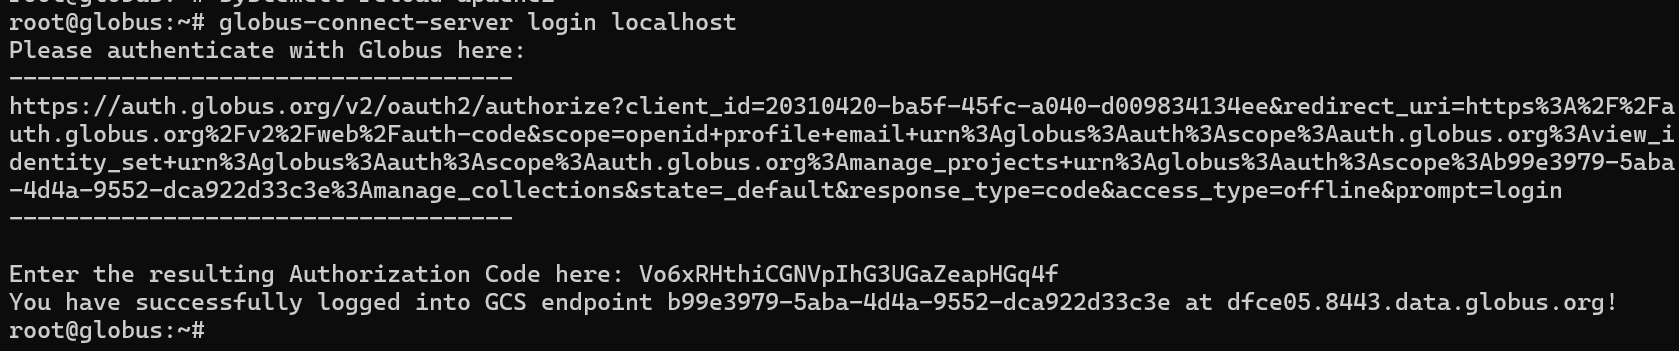
Logging in to the Endpoint
This creates local authentication tokens that can be used by the Globus Connect Server command-line interface to interact with the endpoint. Log in with the identity you chose as the endpoint owner in Creating the Endpoint above.
globus-connect-server login localhostAuthenticate with Globus by clicking on the link provided, logging into your account, and retrieving the authorization code.
Setting the Endpoint as Managed
Endpoints that require premium functionality (such as guest collections for data sharing and premium connectors) must be managed under a Globus subscription. If your organization has a subscription and your Globus account has the subscription manager role, you may set the endpoint as managed using the globus-connect-server command below.
globus-connect-server endpoint set-subscription-id DEFAULT
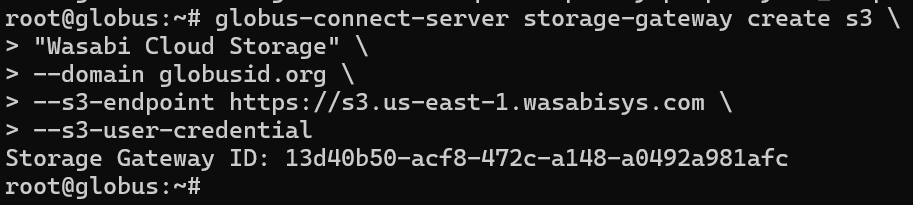
Creating the Storage Gateway
The globus-connect-server storage-gateway create command creates a new storage gateway. When creating a storage gateway, provide the policies to access a storage system through Globus Connect Server collections. The S3 connector provides access to Wasabi Cloud Storage.
You will need to create a Storage-Gateway for each region that your buckets are stored in so that you can access them with your mapped collections.
globus-connect-server storage-gateway create s3 \
"Wasabi Storage Gateway" \
--domain globusid.org \
--s3-endpoint https://s3.us-east-1.wasabisys.com \
--s3-user-credential
This example discusses the use of Wasabi's us-east-1 storage region. To use other Wasabi storage regions, refer to Wasabi Service URLs to obtain the appropriate service URL.
Creating a Mapped Collection
This creates a Mapped Collection with a name specified by you and the base path can either be / or /bucket-name using the Storage Gateway created in Create the Storage Gateway. This Collection will be visible to users through the Globus Web App, who will be able to access data in / or /bucket-name if they have access using IAM policies listed on the bucket.
Make sure that you have created a local user account on the local linux system that matches the allowed domain.
Get the Storage Gateway ID in order to create the collection. To do so, run the list command below.

Once you have the storage gateway ID, create a mapped collection with the following command.
Inputting a / as the base path will list the root of Storage Gateway listing all bucket. If you do not want all bucket listed for the collection you can put a /bucket-name and then only the specific bucket will be listed.

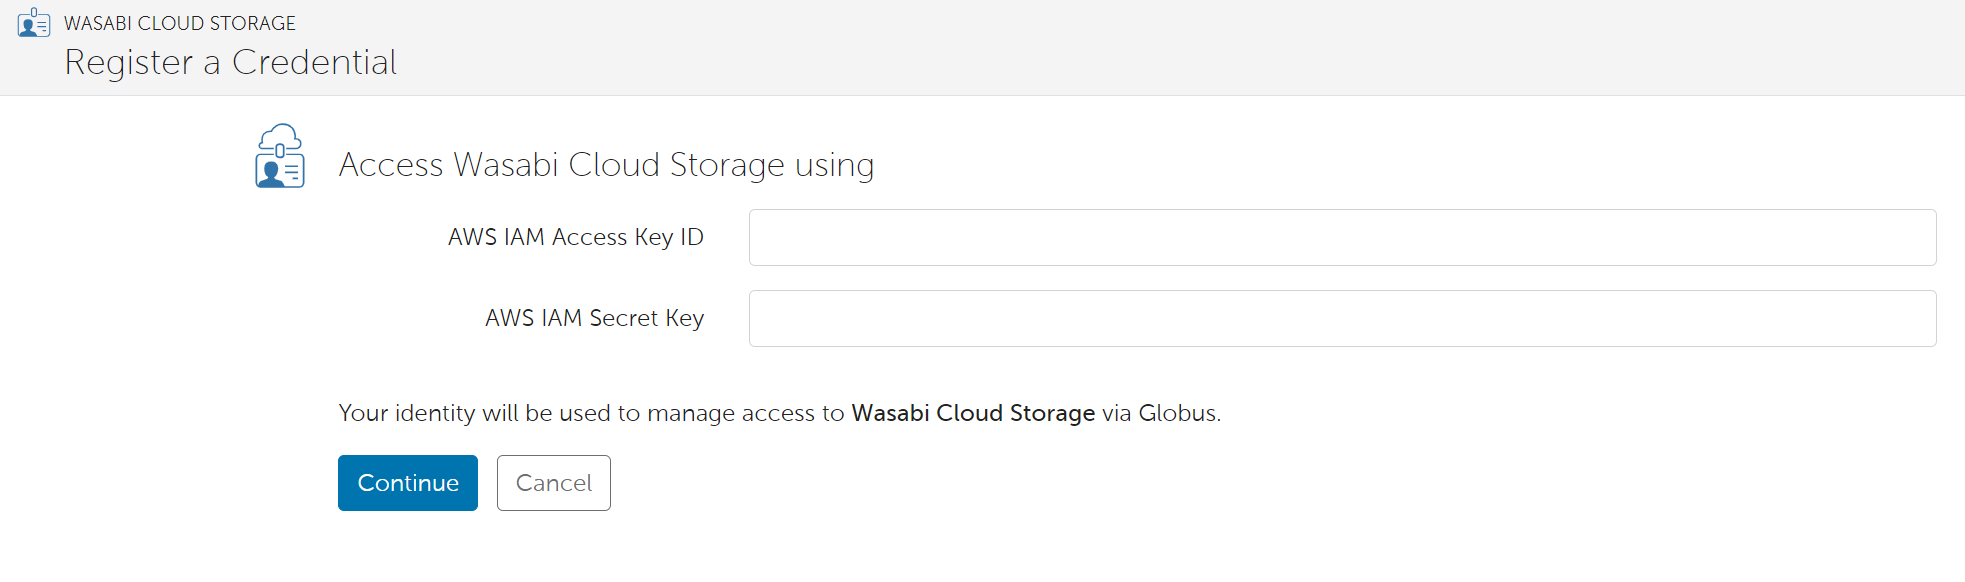
Registering Wasabi Credential Keys
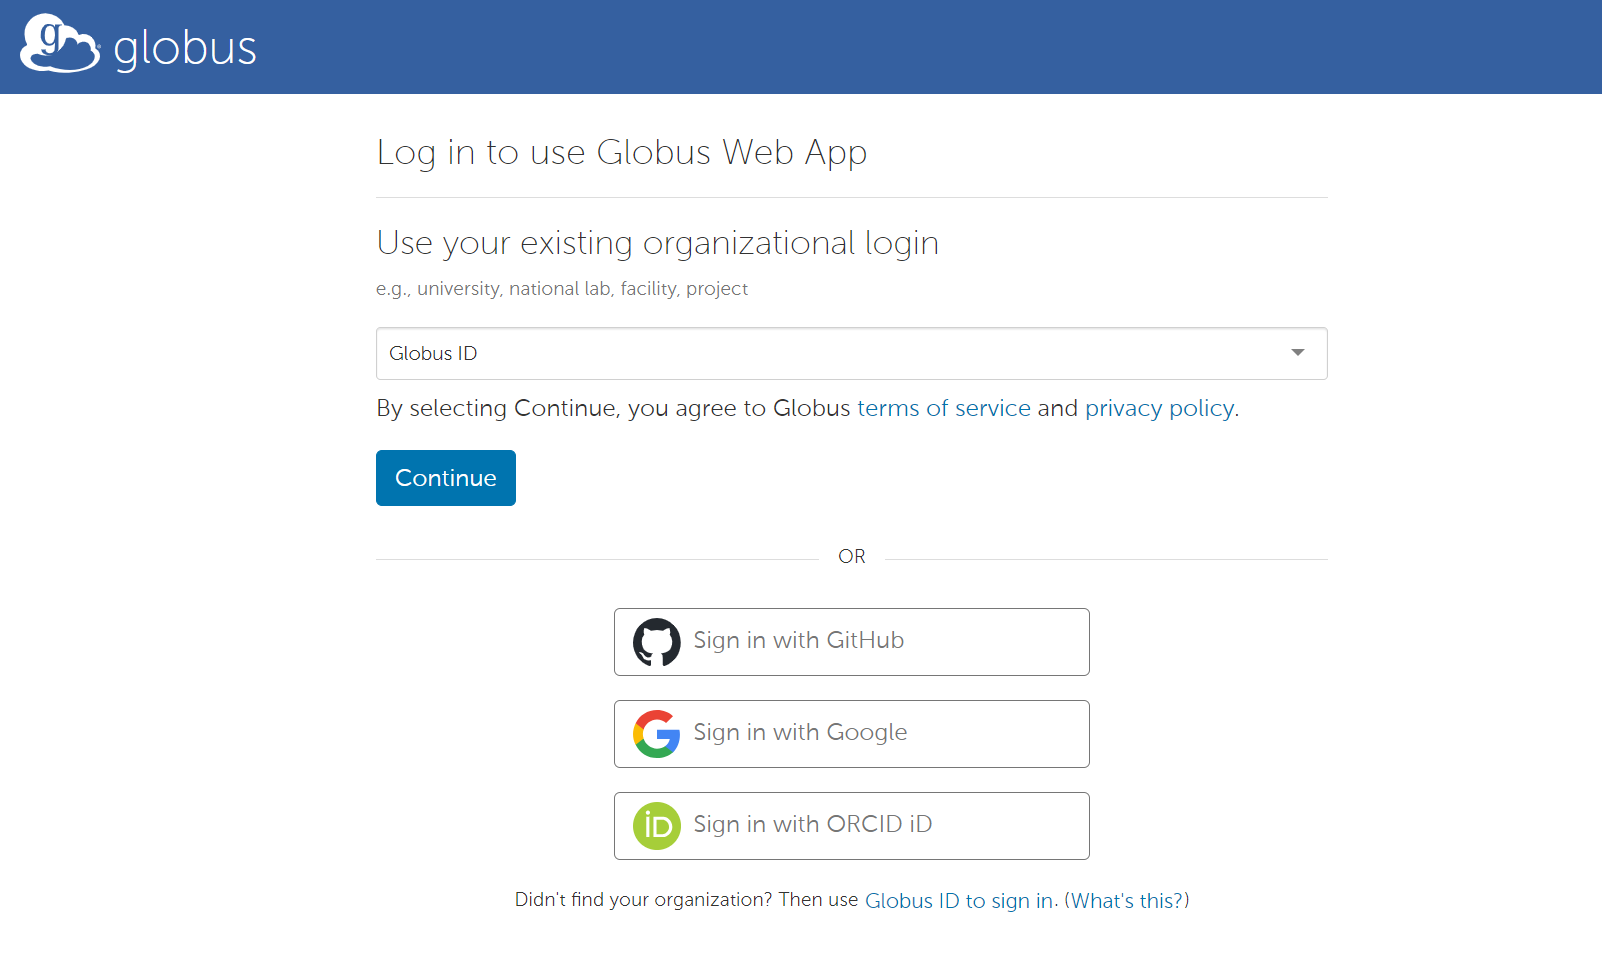
Log in to the Globus App by opening a web browser and going to https://app.globus.org/.
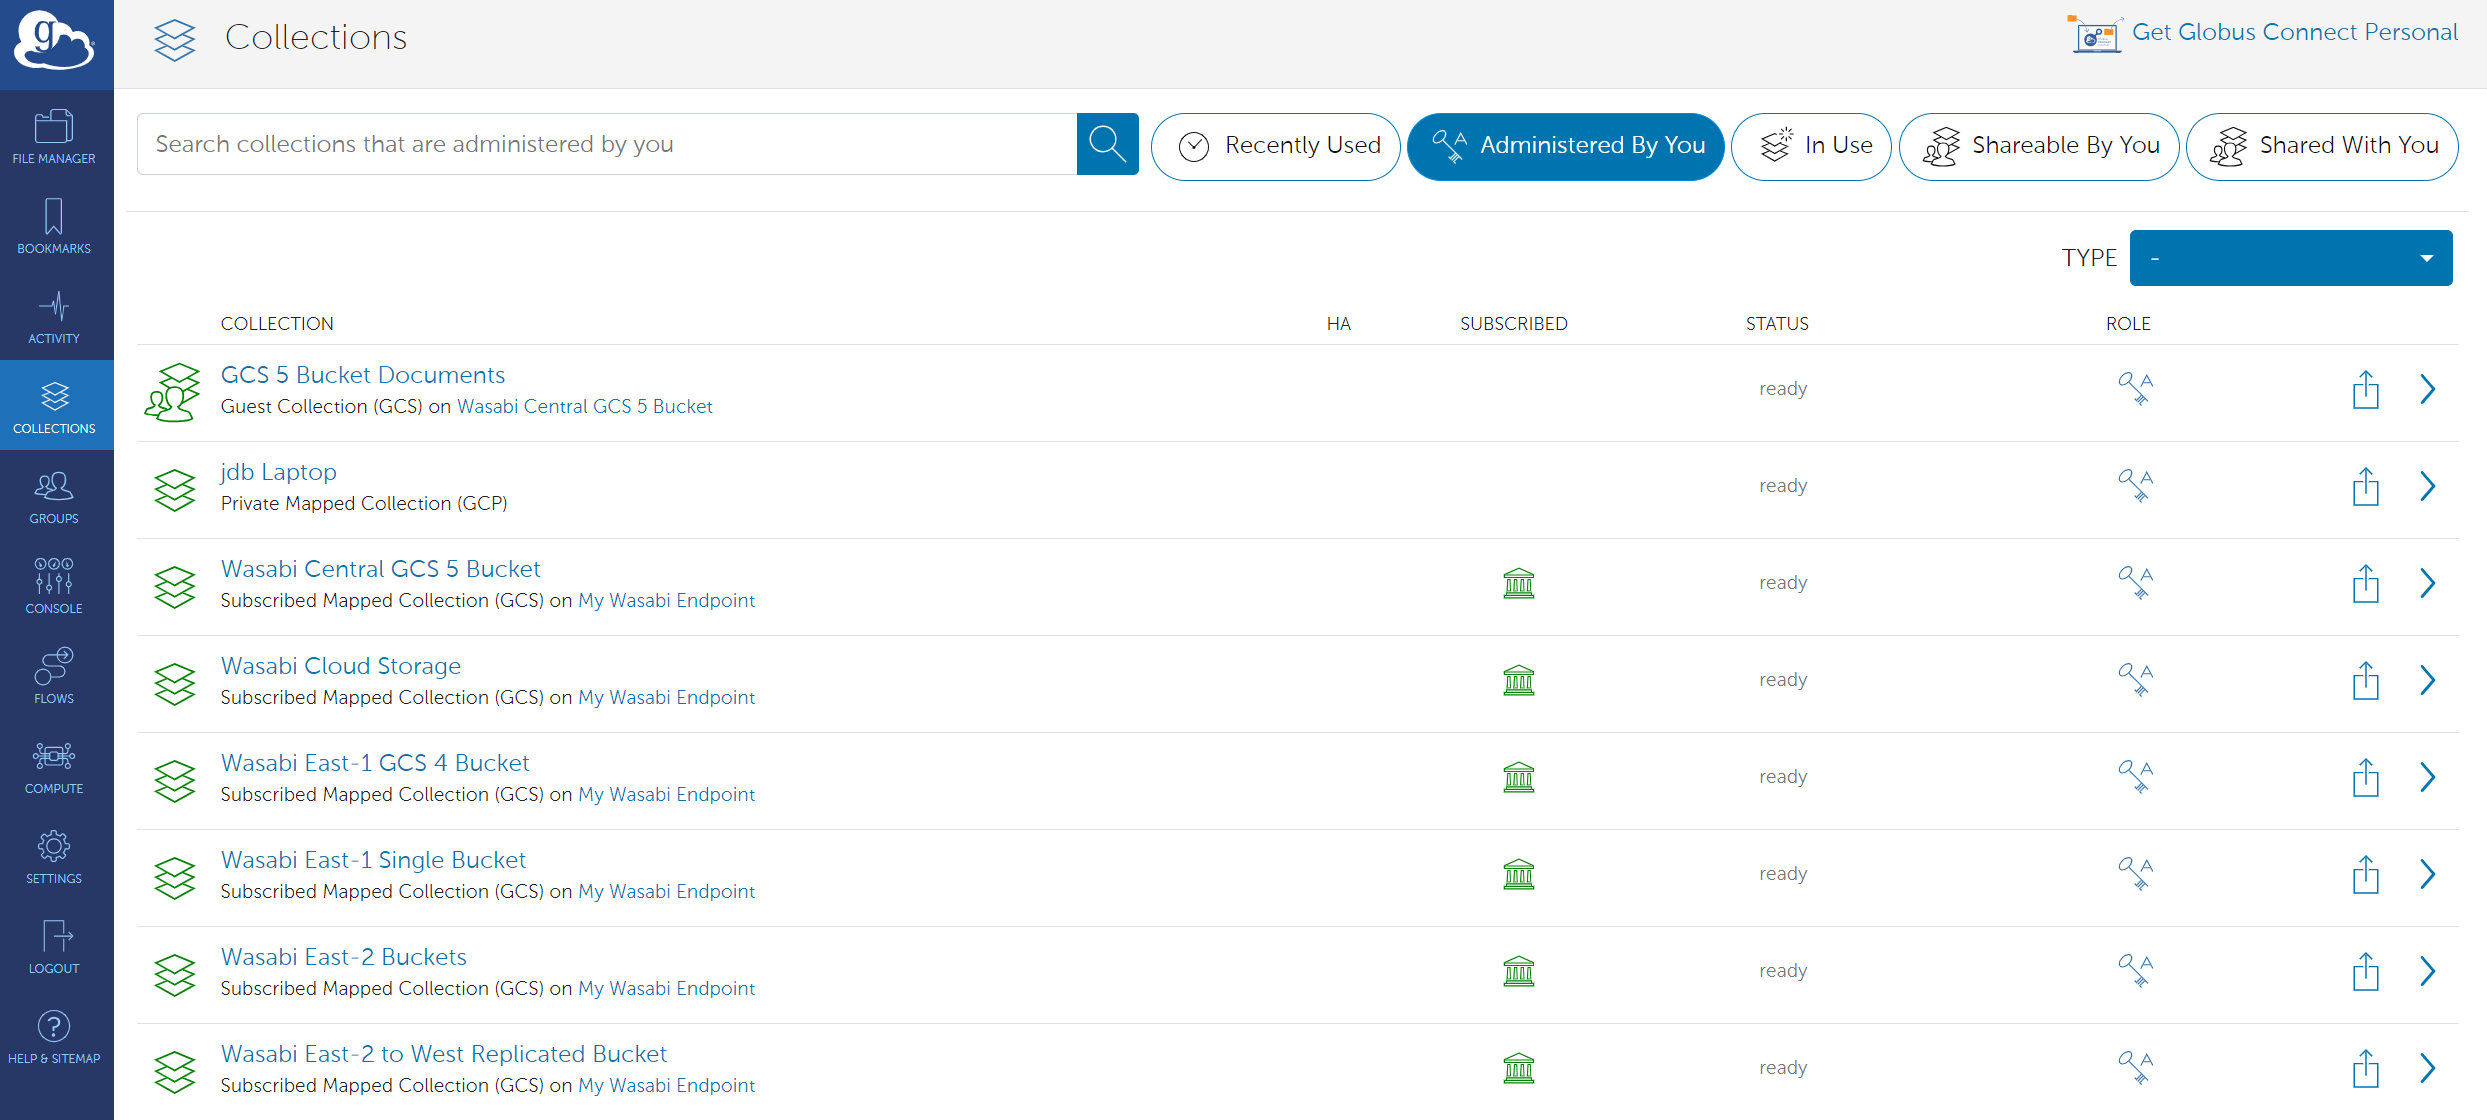
Click Collections in the left hand pane.
Select the Administered by You tab at the top. Locate and click the Wasabi Cloud Storage collection that you created.
Click the Credentials tab.
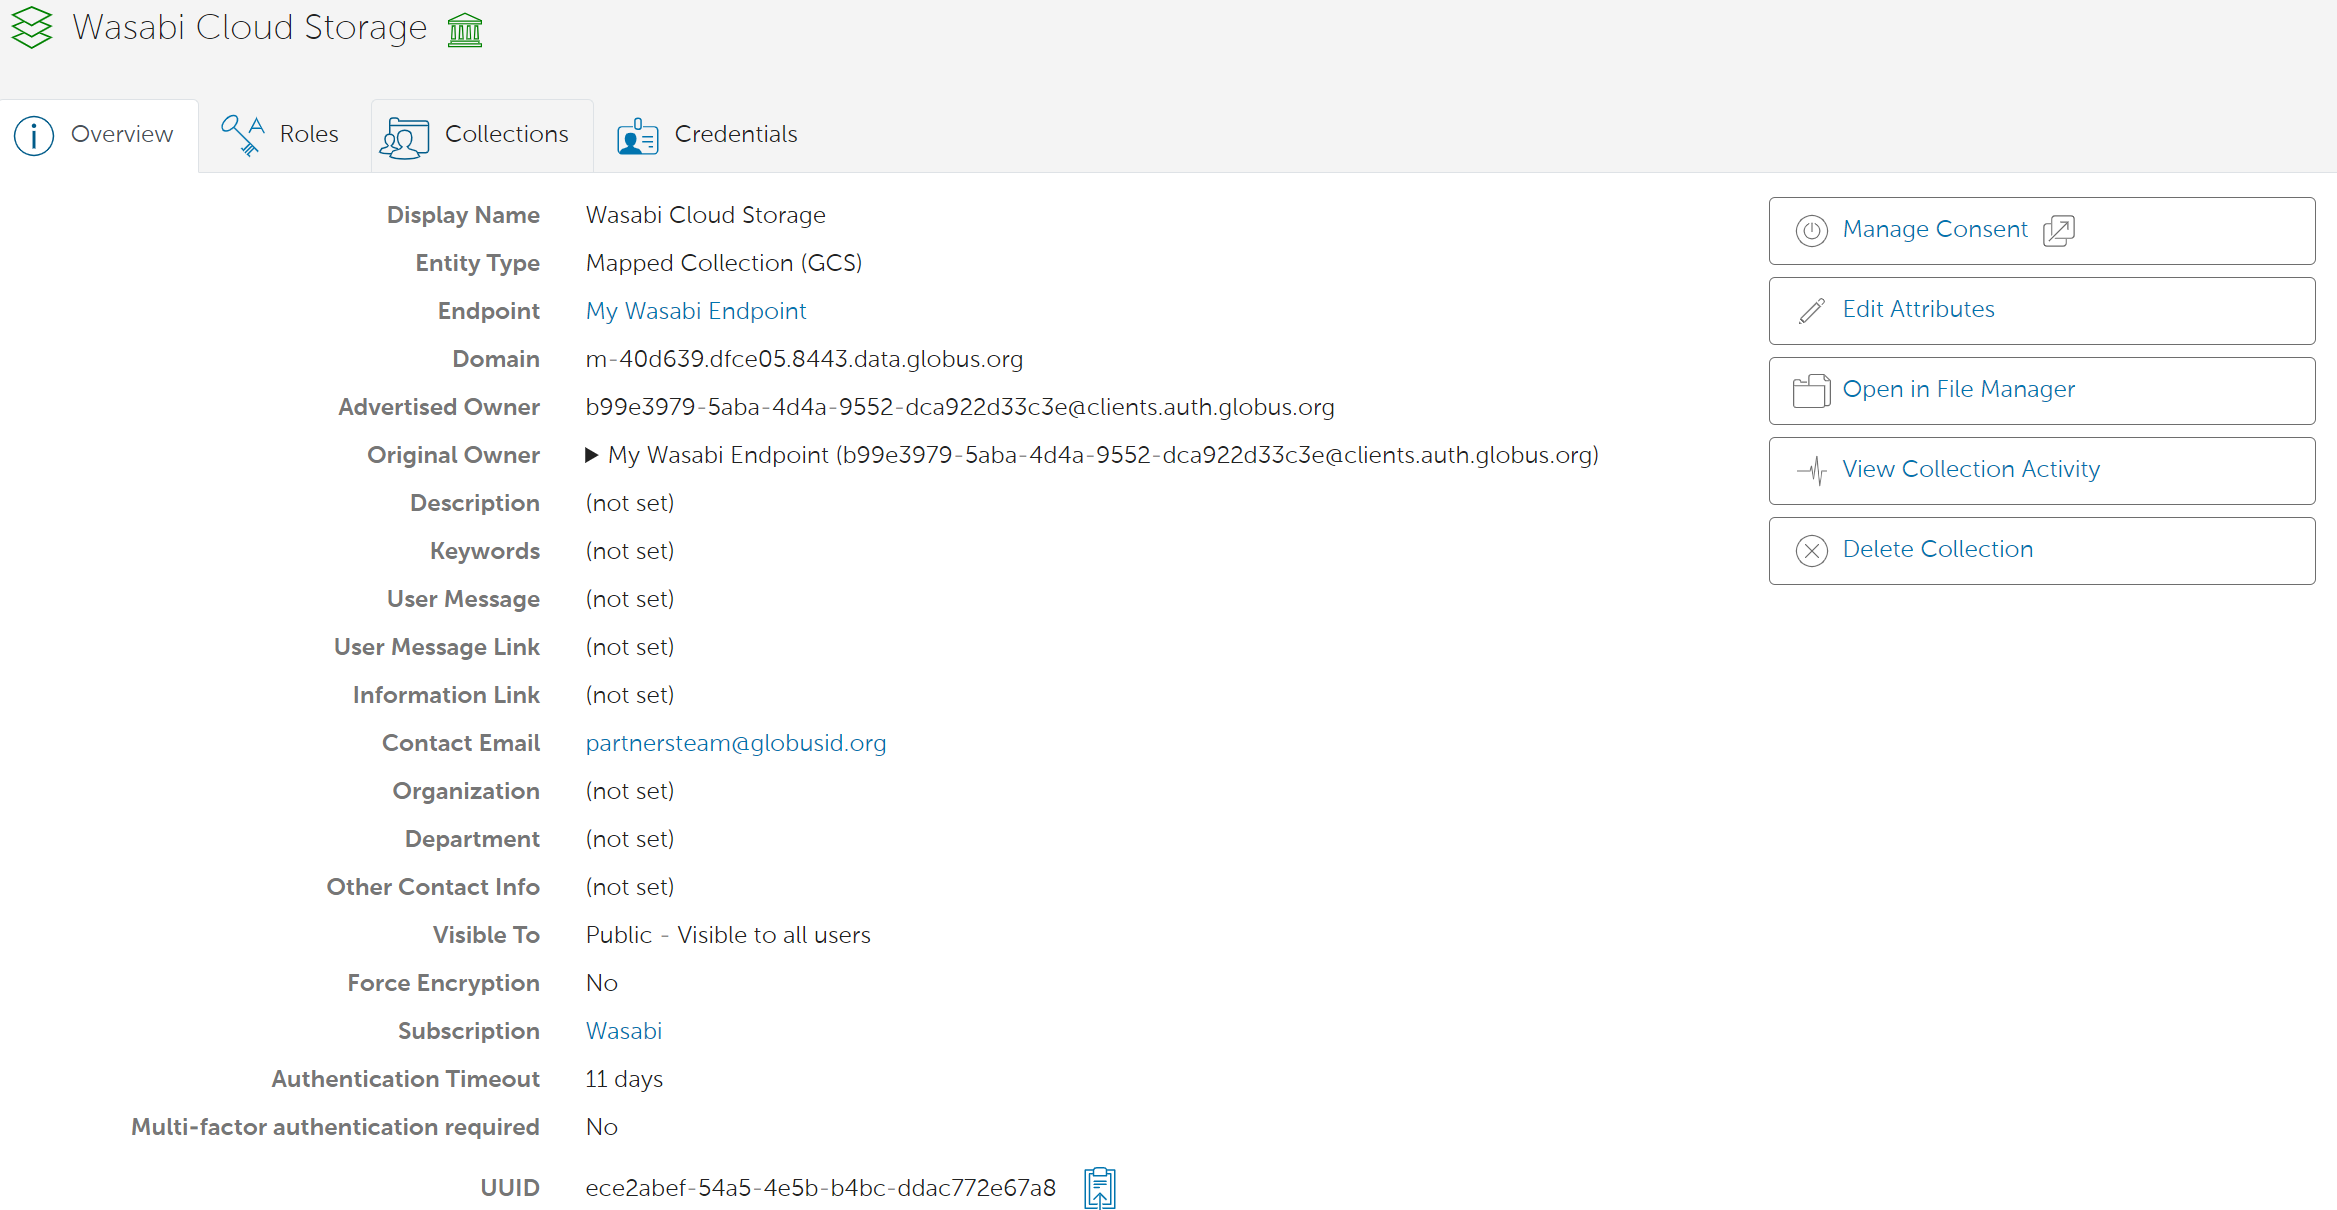
Enter your Wasabi access and secret keys. Click Continue. You will see your account now listed as active.
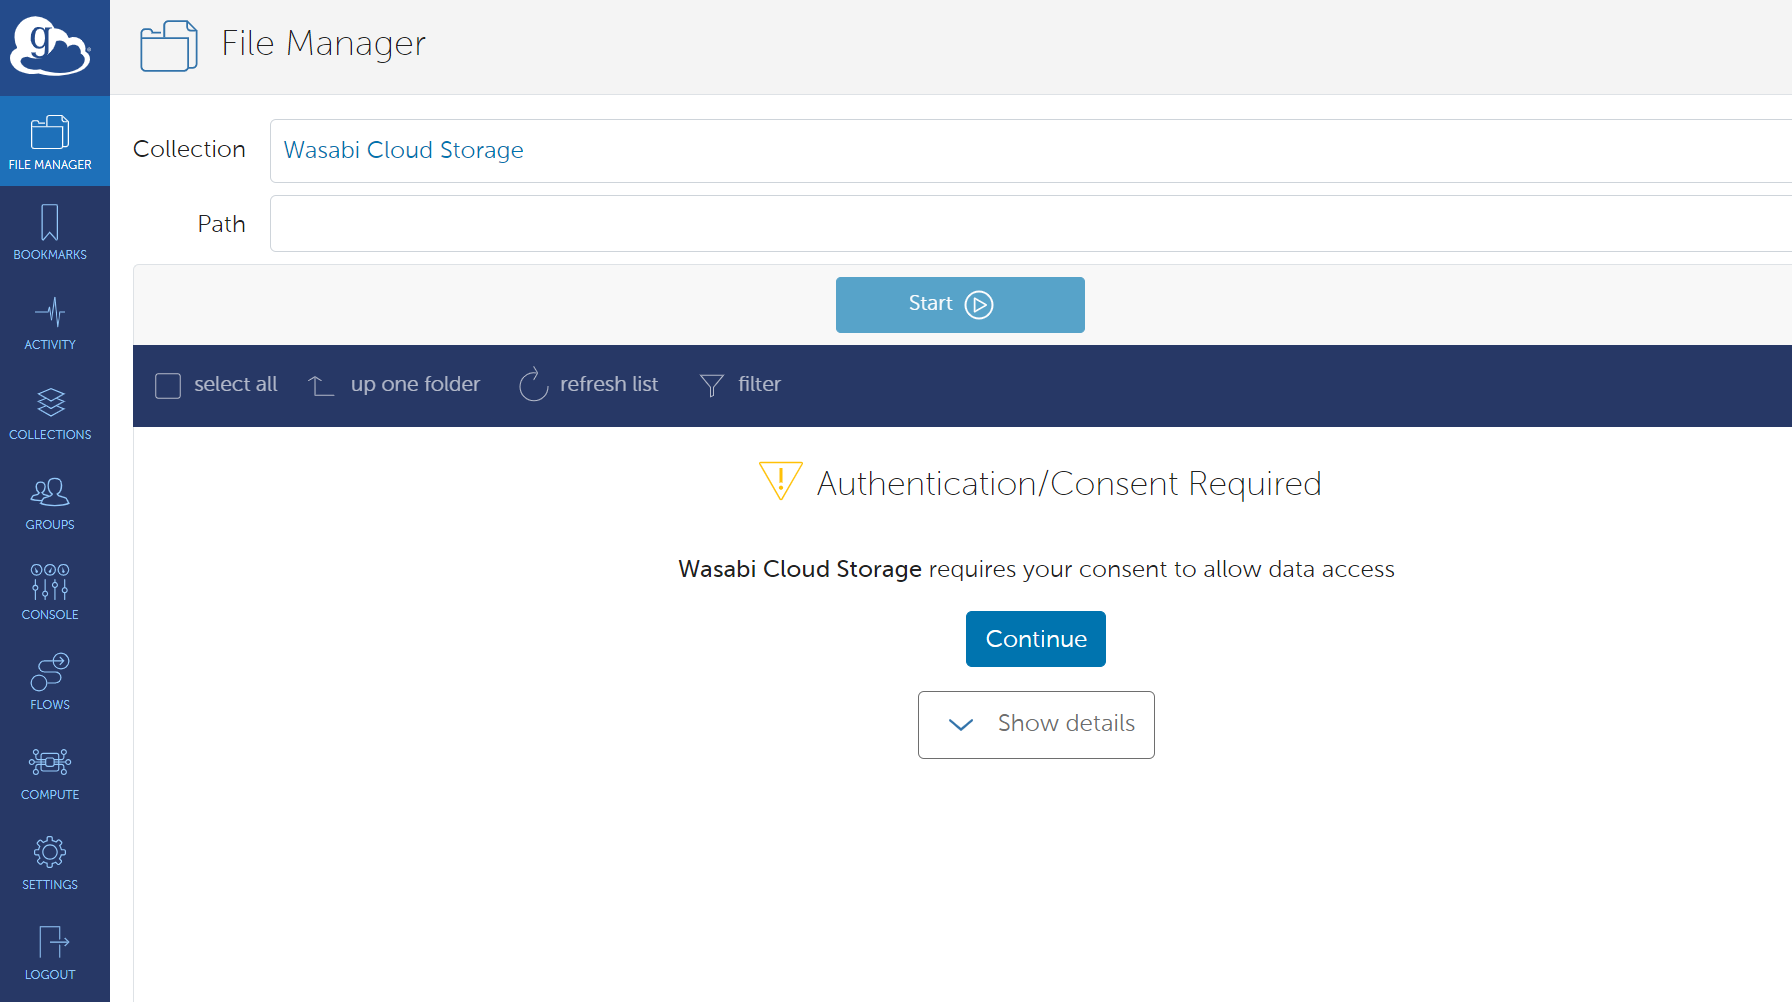
Click back to the Overview tab and then select Open in File Manager.
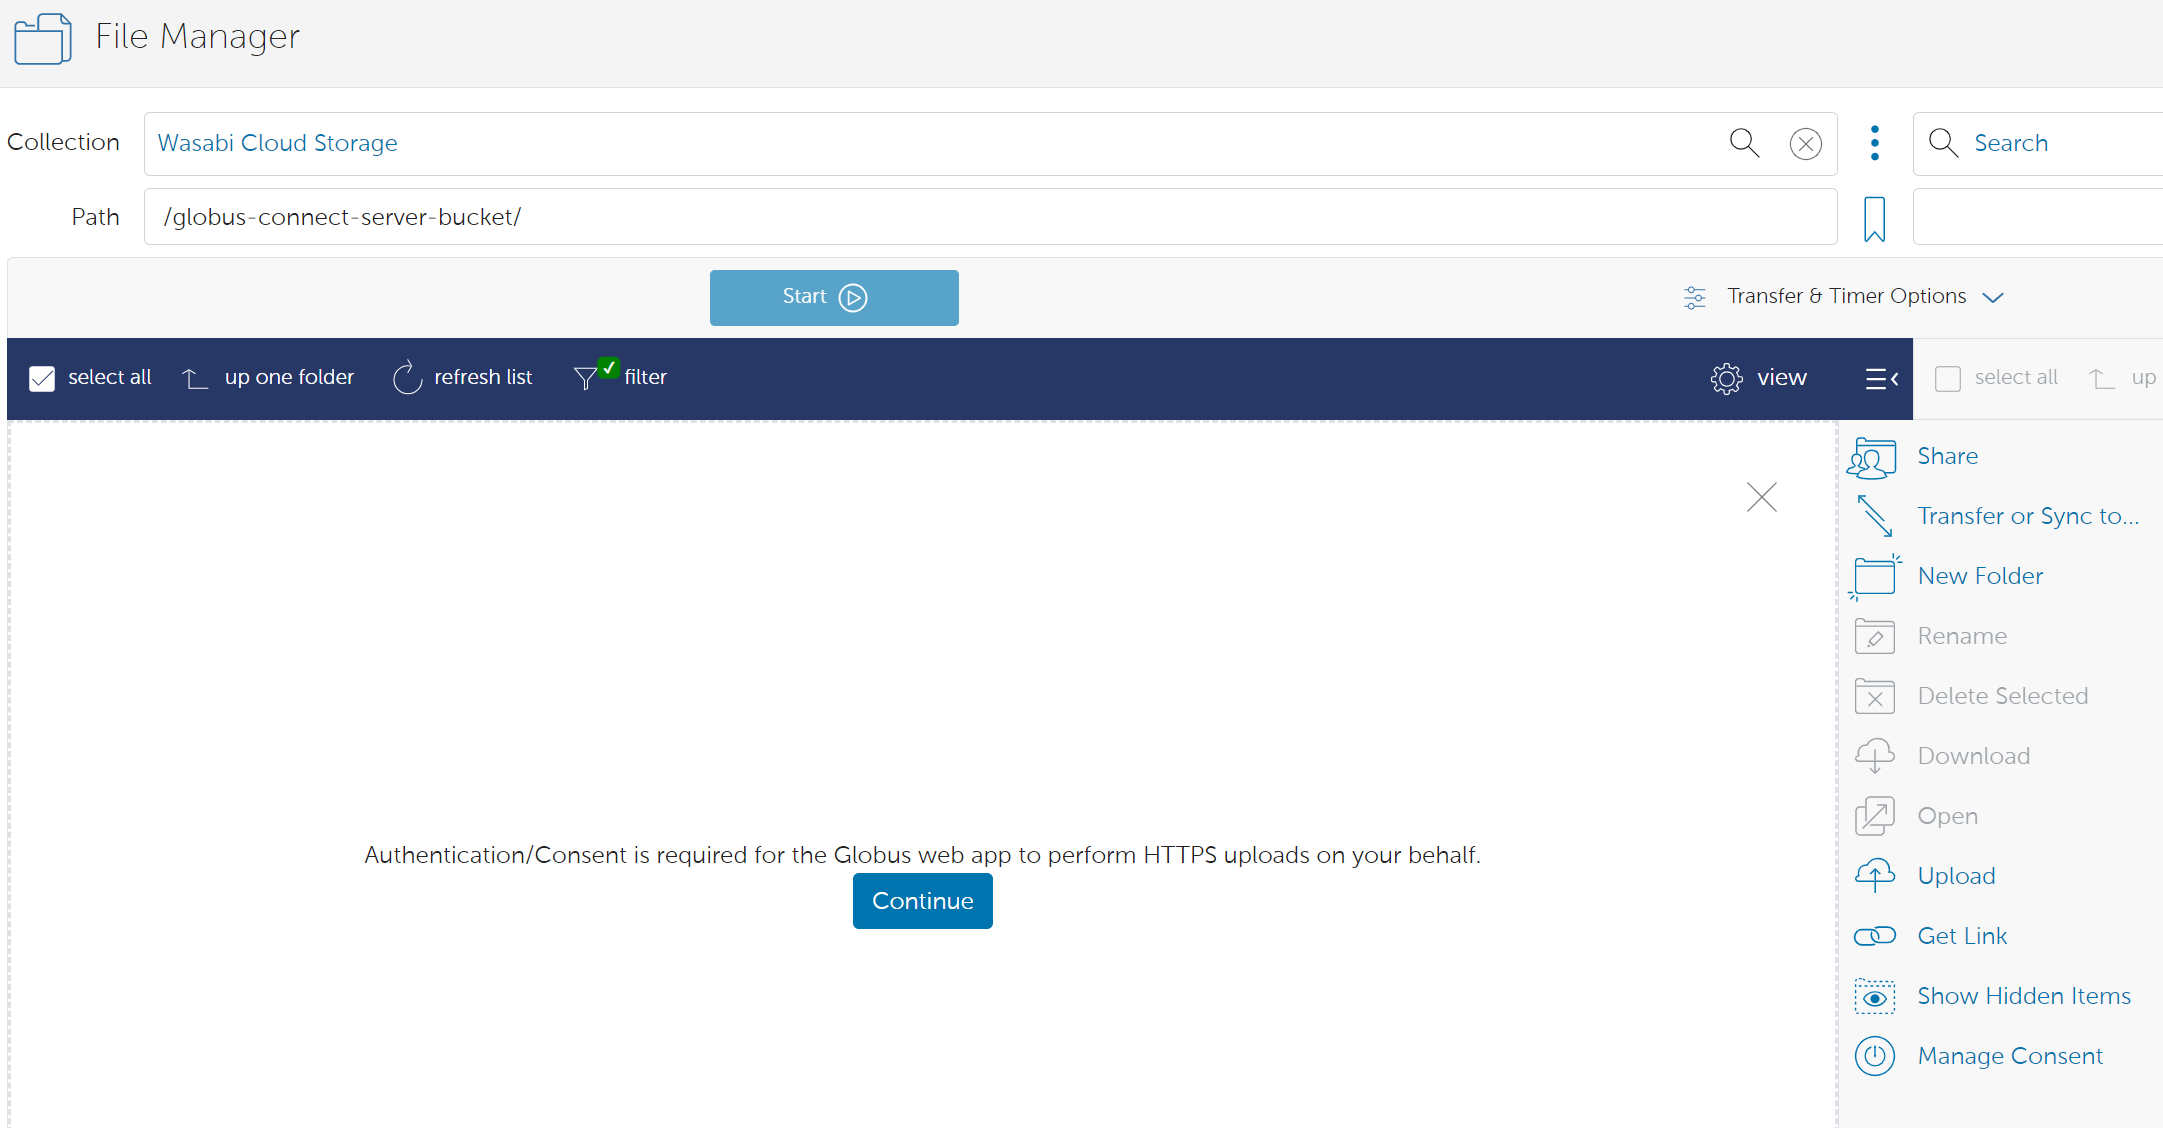
You will need to Authenticate/Consent to view the collection data. Click Continue.
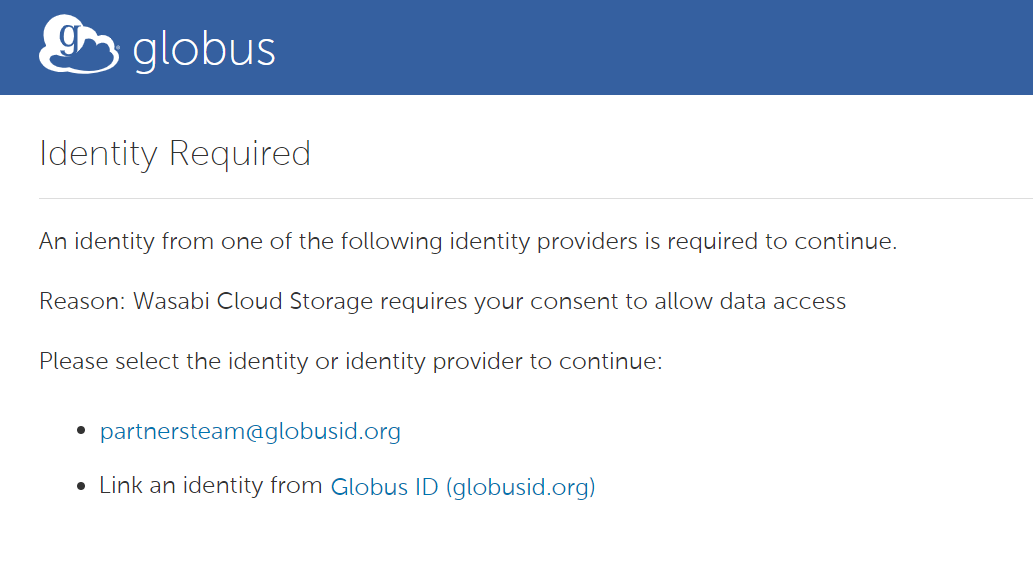
Select the account in which to authenticate.
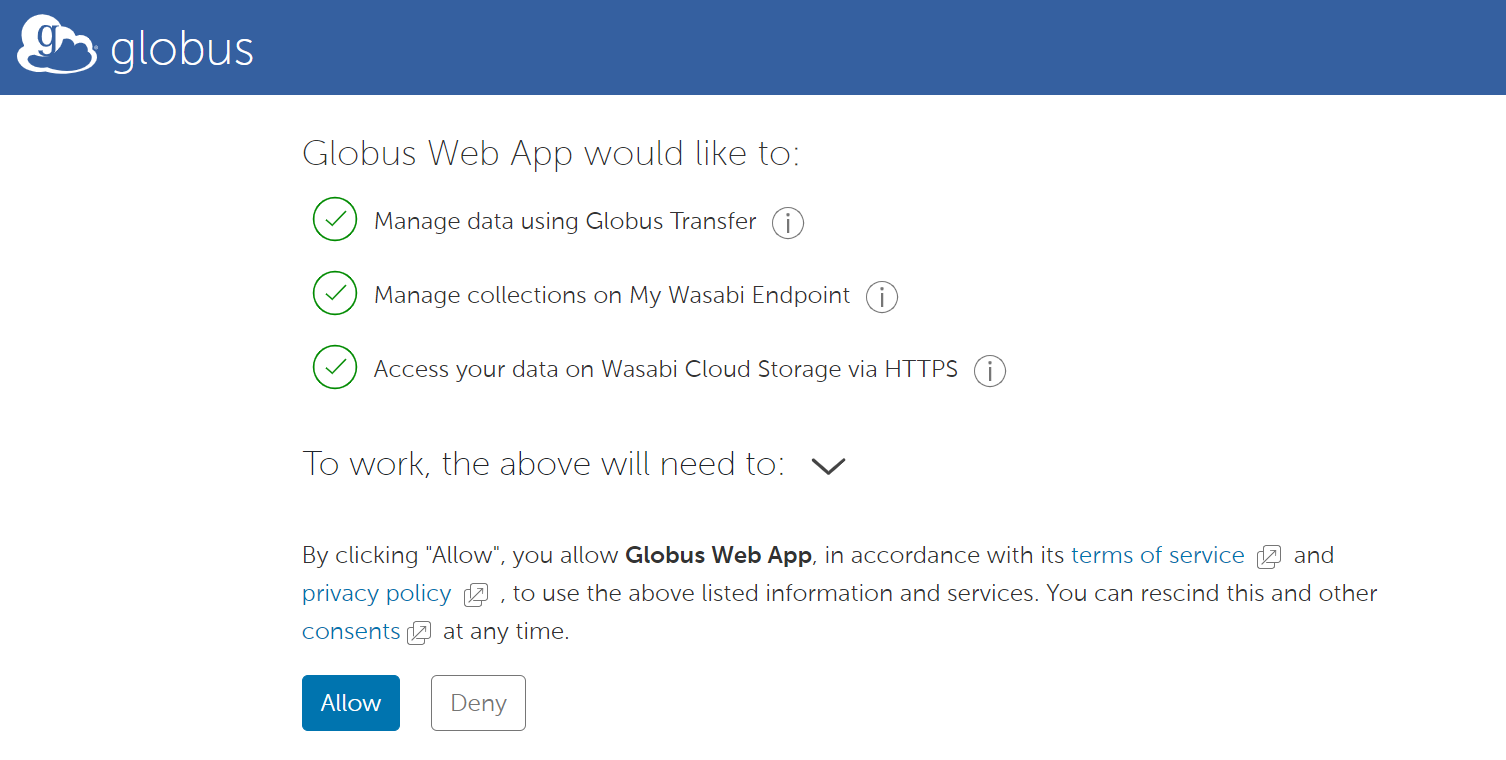
Click Allow.
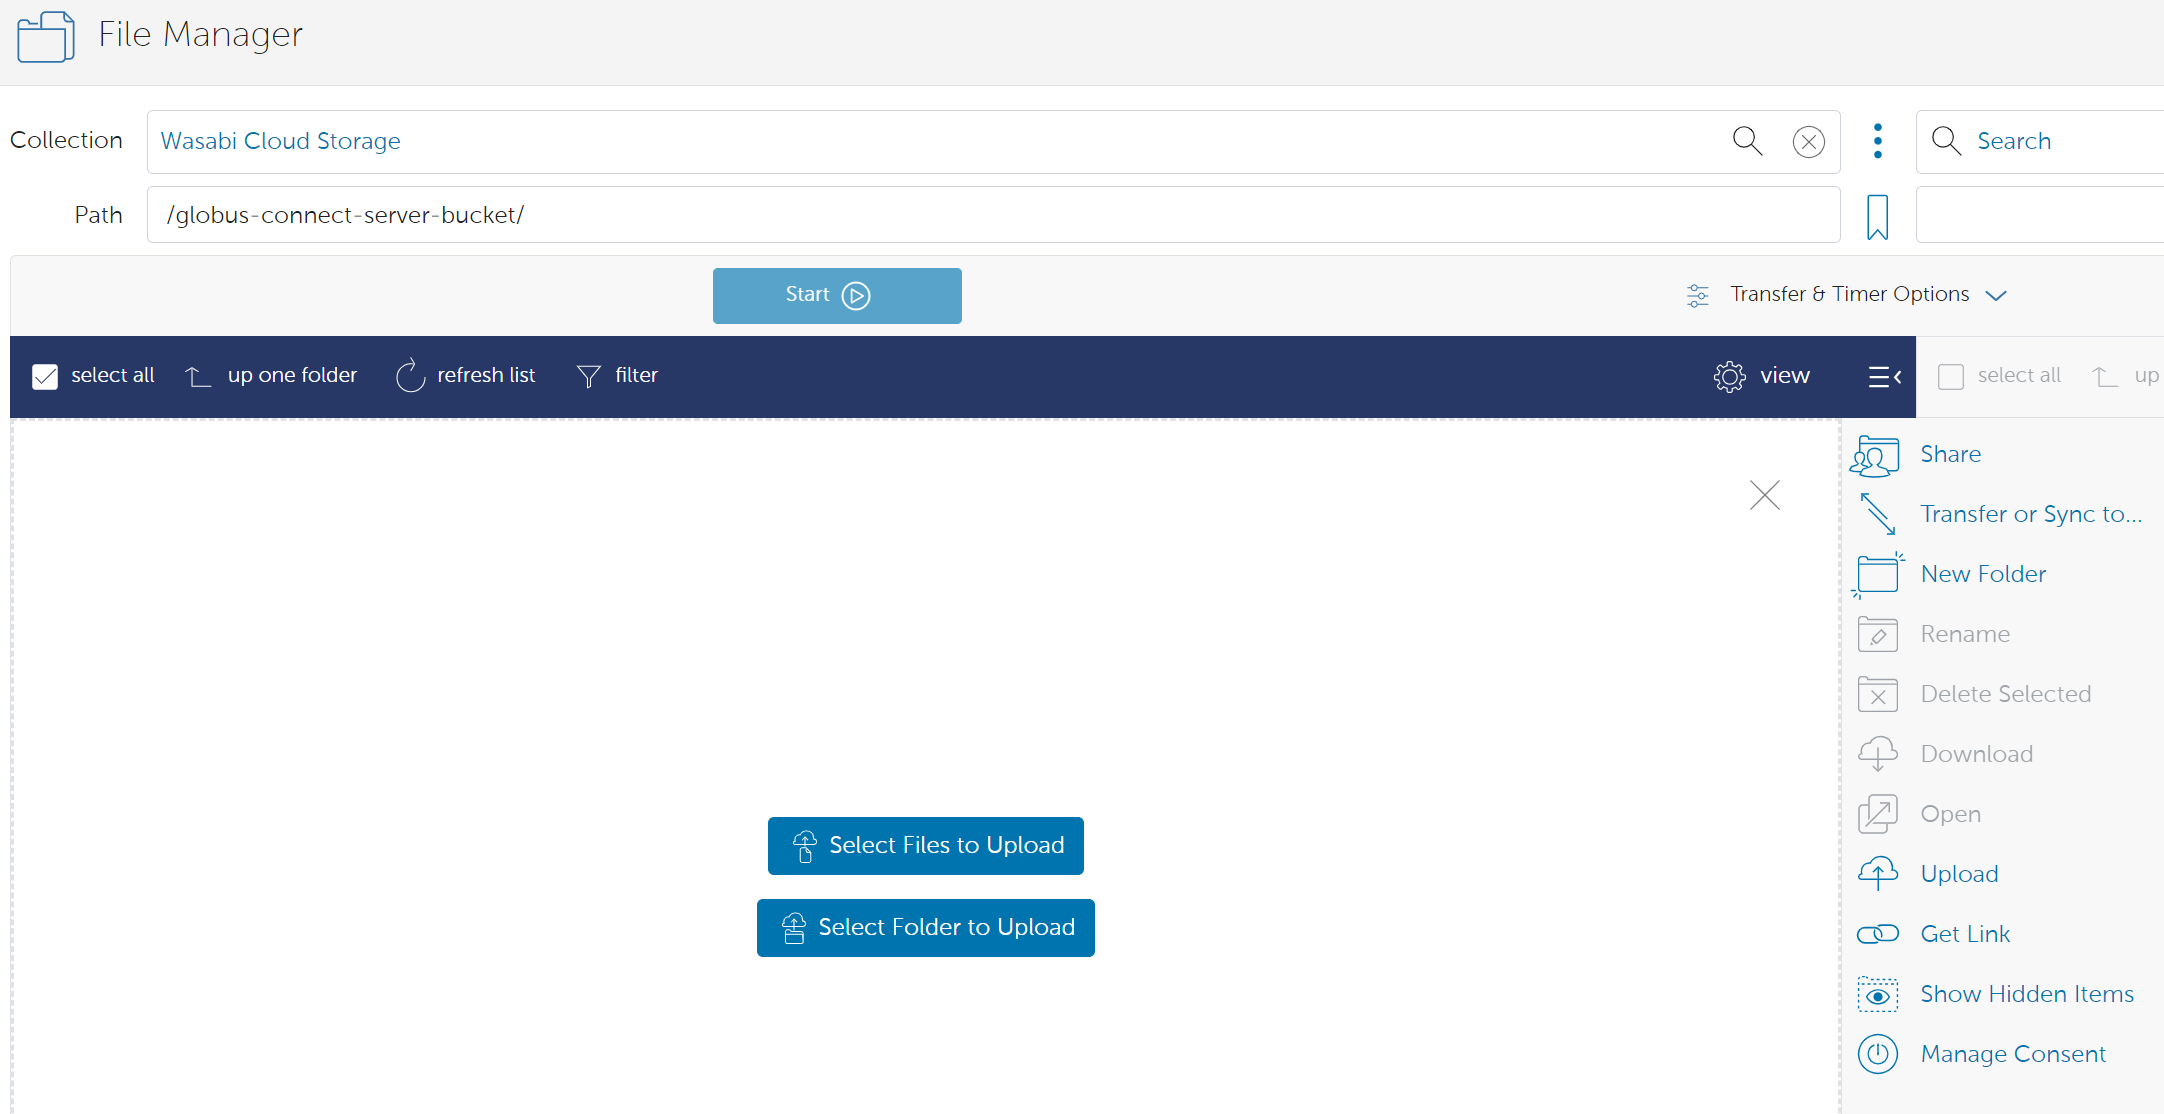
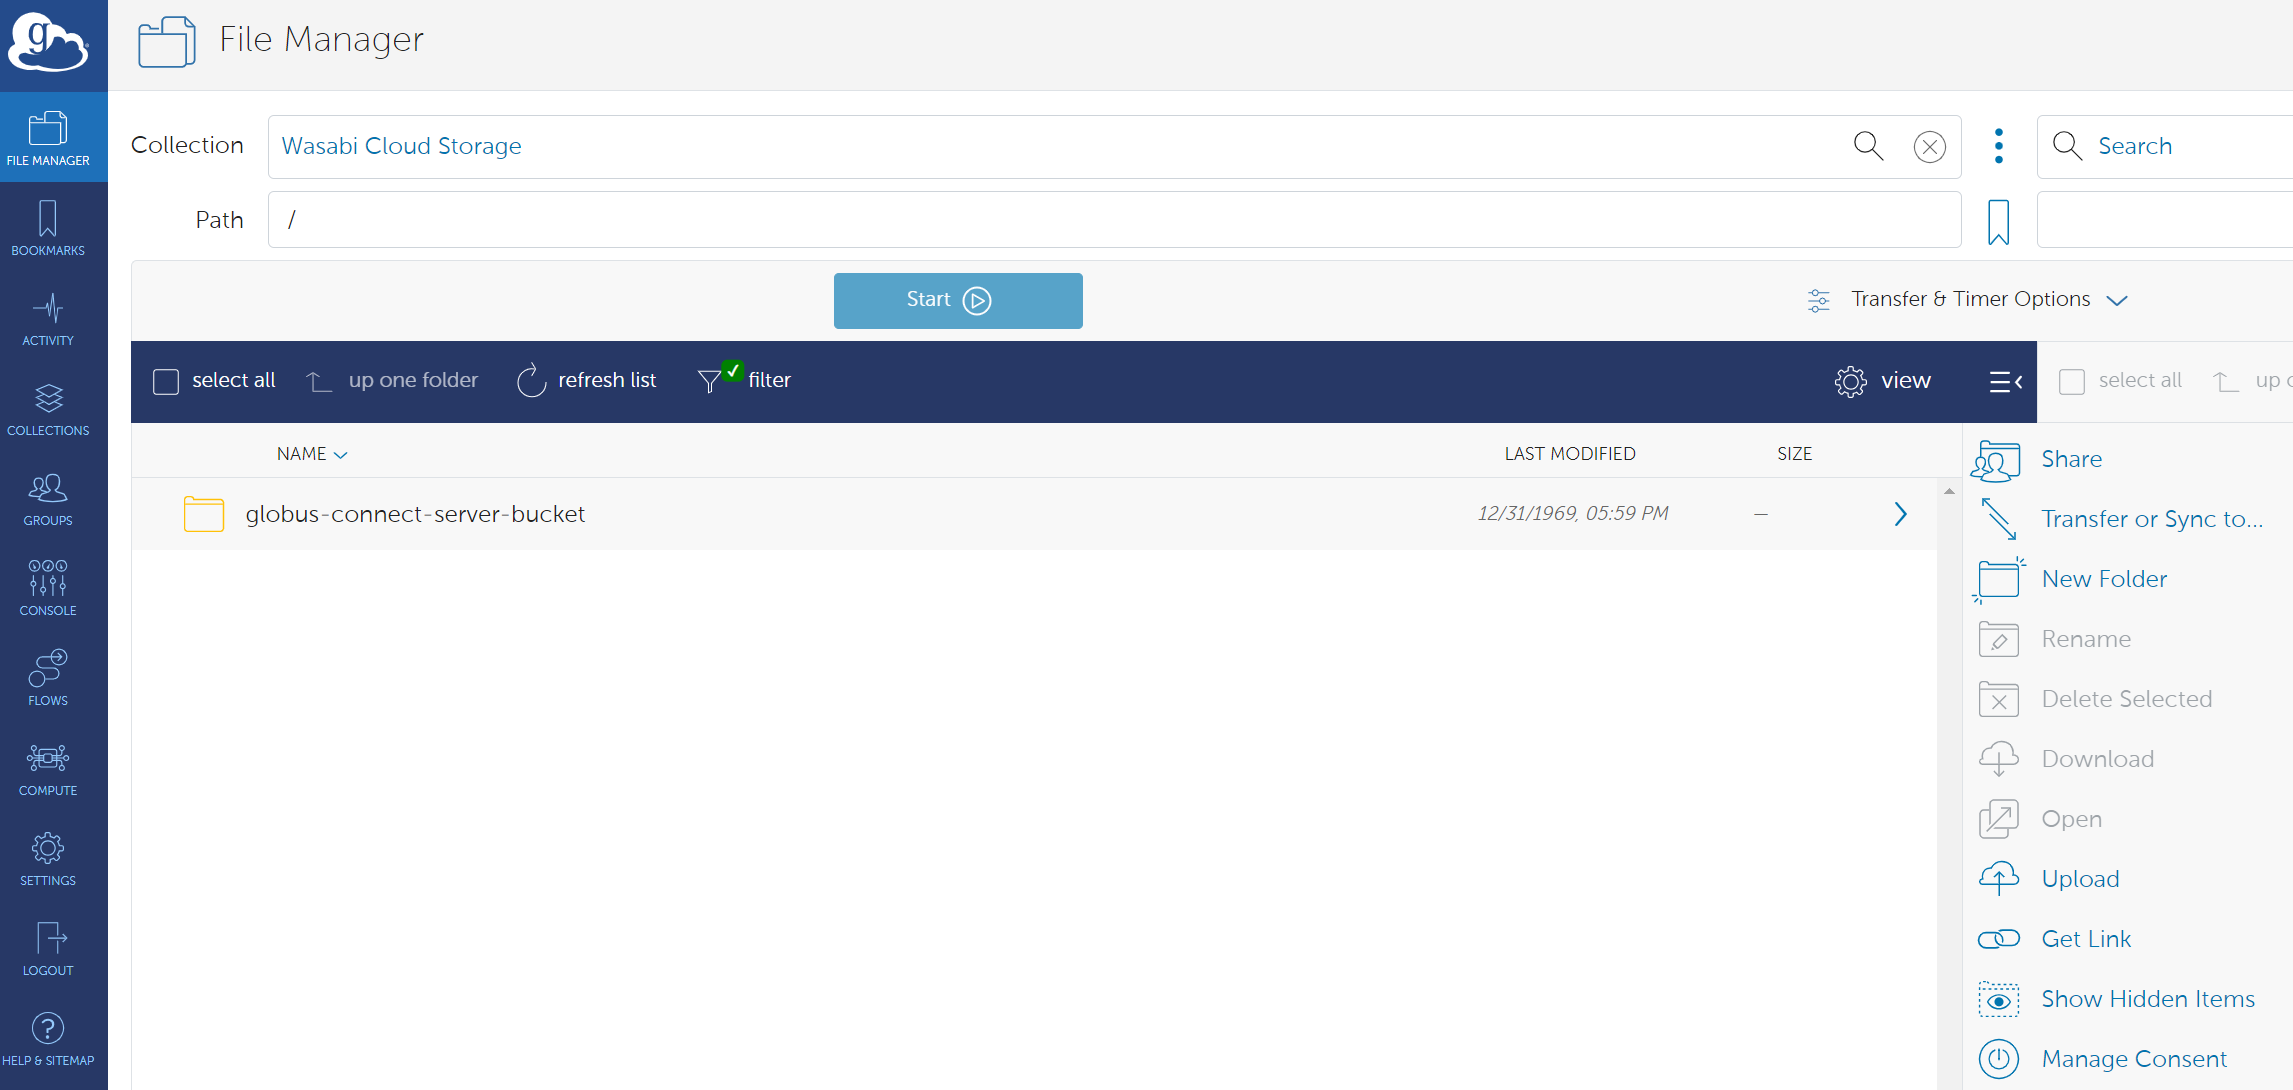
You will now see your bucket(s) listed for that collection.
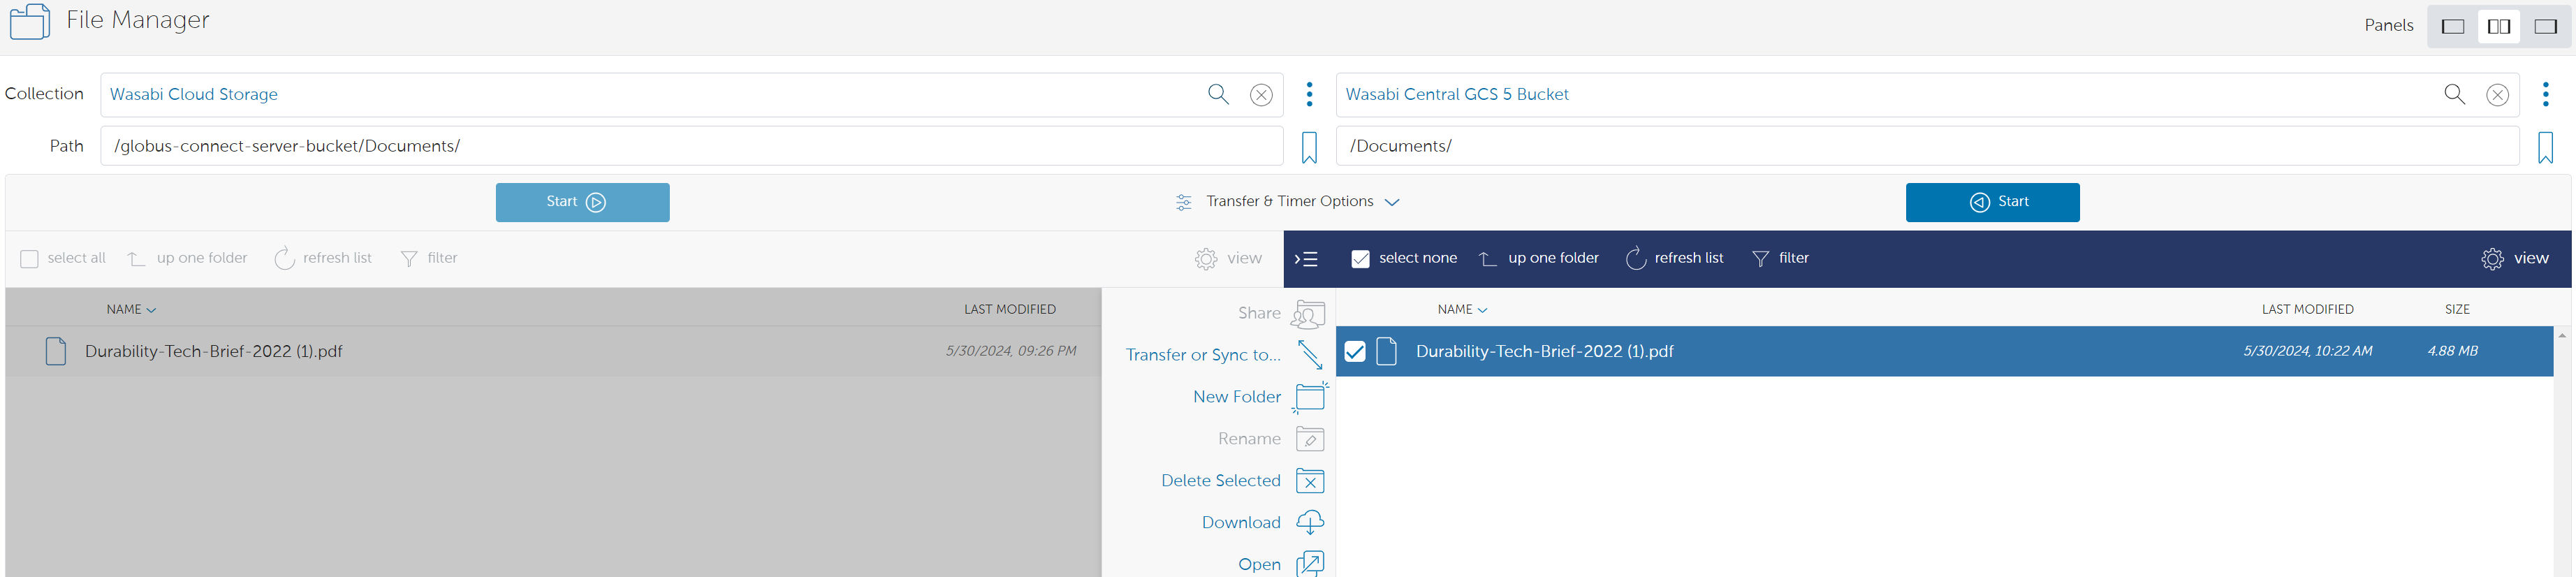
You can now transfer data to this collection from other Data Transfer Nodes or Mapped Collections.
You can upload data to this collection directly from your local host by clicking Upload. You will need to allow Globus Web App to perform https uploads.