StroageDNA's DNAfabric has been validated for use with Wasabi. DNAfabric is a cloud optimized, distributed data management platform that enables multiple data services between Wasabi and other on-premise and cloud storage platforms.
DNAfabric data services for Wasabi.
Indexing and Analytics - Scan, browse, search and analyze Wasabi buckets
Backup and Disaster Recovery - Backup with snapshots from on-premise storage to Wasabi for disaster recovery workflows.
Archive and Tiering - Archive with stubs from on-premise storage to Wasabi for seamless tiering and space recovery for on-premises storage.
Avid, Adobe, DaVinci Workflows - Project and AAF archiving to Wasabi for media applications with ALE-based conforming.
Migration - Supports migration from LTO to Wasabi, 3rd party cloud to Wasabi, on-premise storage to Wasabi, as well as handling of Wasabi Ball migrations.
Syncing - Enables file system syncing via the Wasabi cache for multi-site replication workflows.
1. Prerequisites
Active Wasabi Cloud Storage Account
Wasabi Bucket - See our Bucket Creation Guide
Access & Secret Key Pair - See our Access Keys Guide
DNAfabric Version 1.0+ (DNAfabric Cloud, Pro or Enterprise)
2. Reference Architecture

3. Configuration
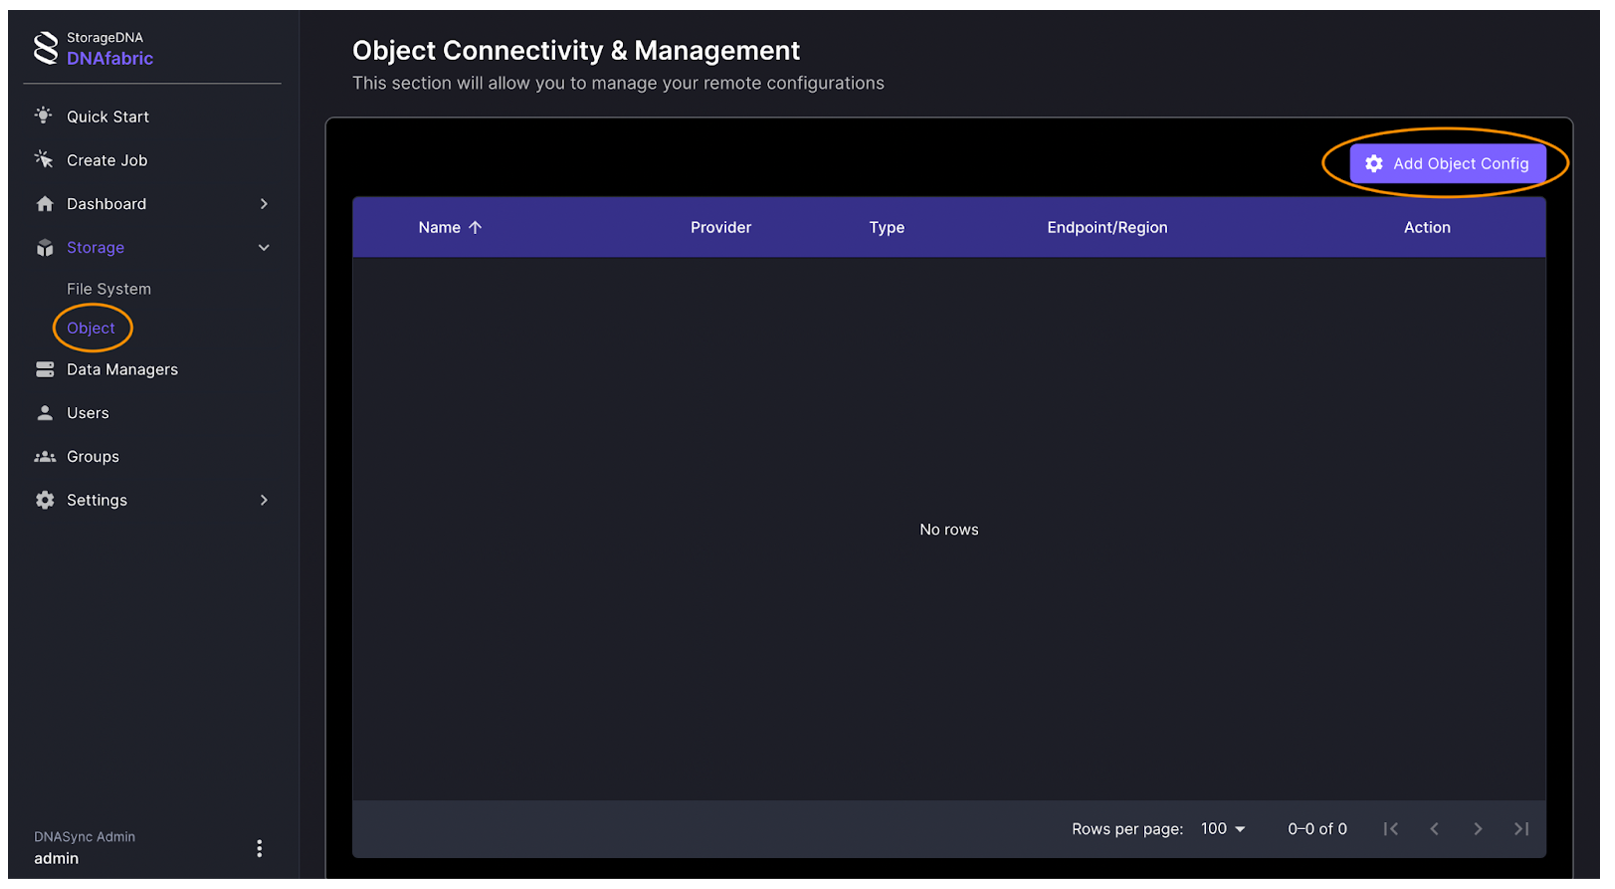
3.1 Log into the DNAfabric web console.
3.2 Click and expand Storage. Click Object.
3.3 Click Add Object Config.
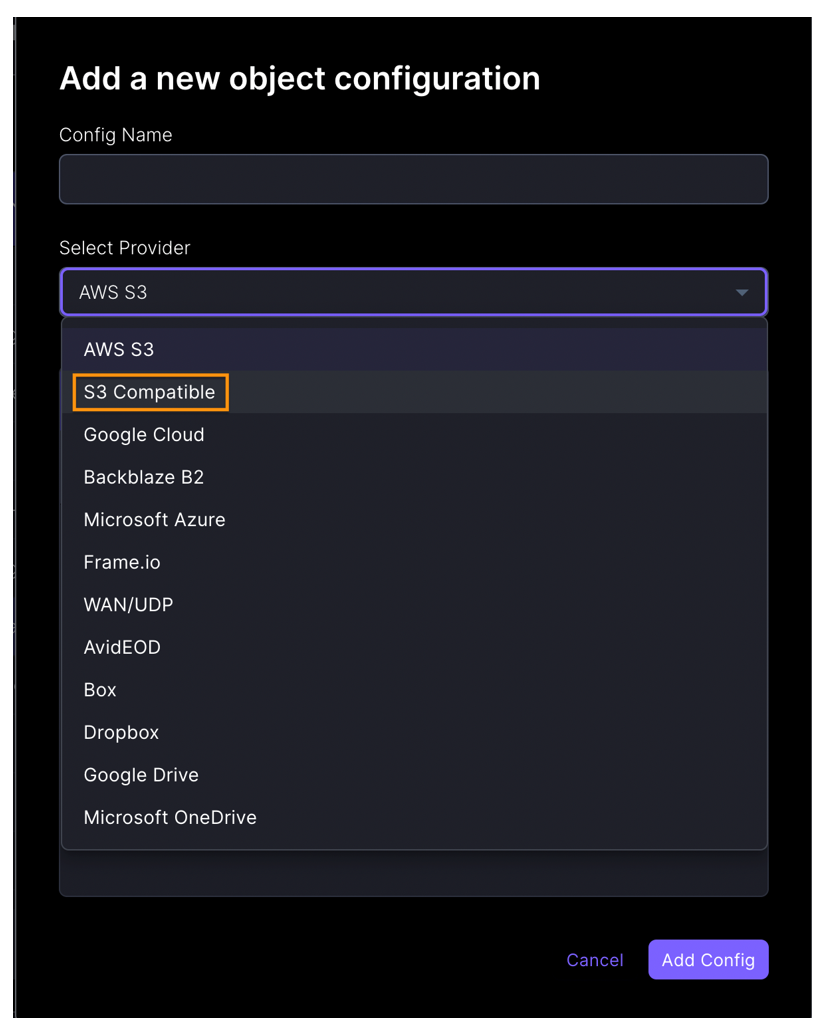
3.4 Enter a name for the Cloud Config.
3.5 Click Select Provider. Select S3 Compatible.
3.6 Fill in the following fields.
access_key_id - Enter your Wasabi Access Key
secret_key_id - Enter your Wasabi Secret Key
endpoint - Specify the Wasabi Service URL specific to where your bucket is located. You can find the service URLs listed in our Wasabi Service URL KB
buckets_list - select your bucket
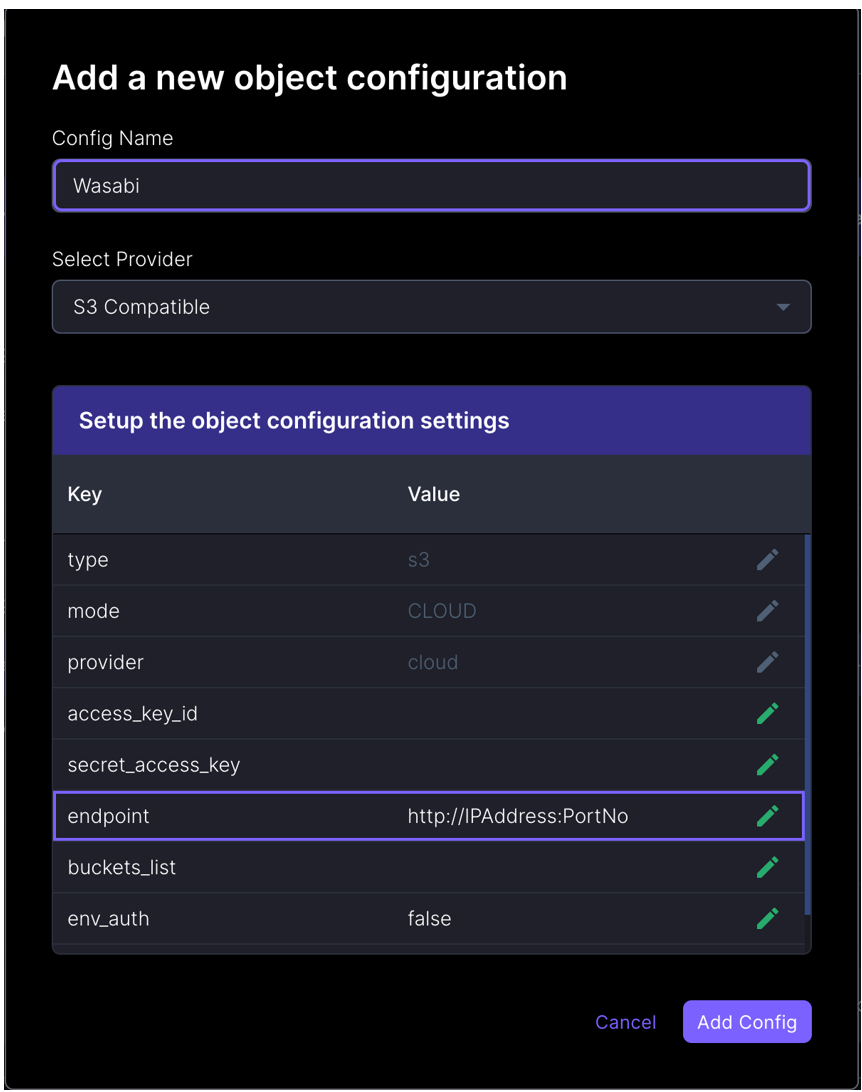
3.7 Once all the fields are populated, click Add Config.
,
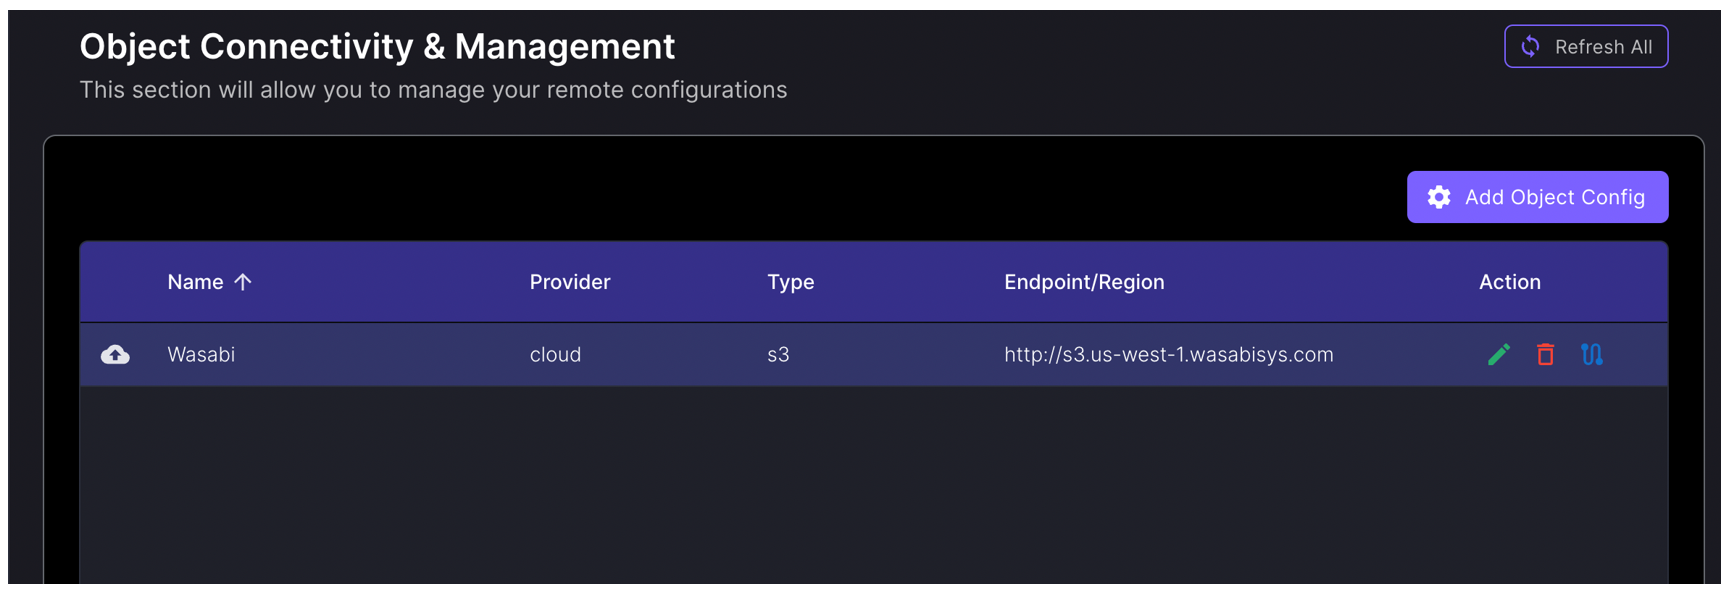
Note: This config example discusses the use of Wasabi's us-west-1 storage region. To use other Wasabi storage regions, please use the appropriate Wasabi service URL as described in this article.
3.8 You will now see your Wasabi Cloud config listed and successfully configured.
4. Create Job
4.1 Index Workflow
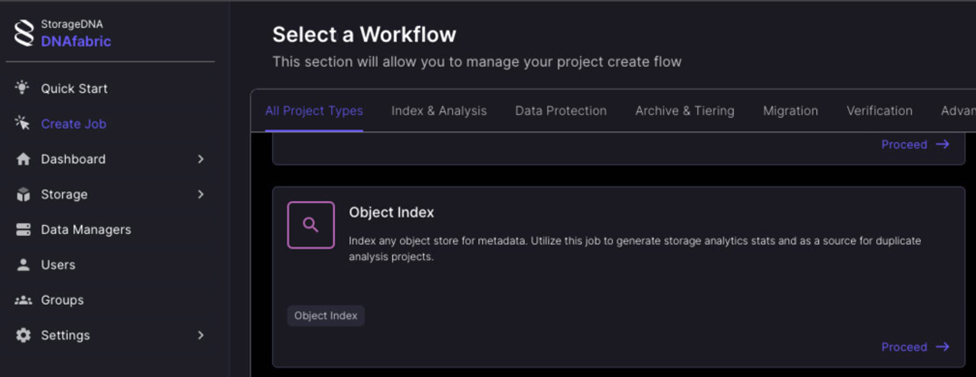
Object Index - Index any object store for metadata. Utilize this job to generate storage analytics
4.1.1 Click Create Job.
4.1.2 Scroll down to Object Index under the All Project Types section. Click Proceed.
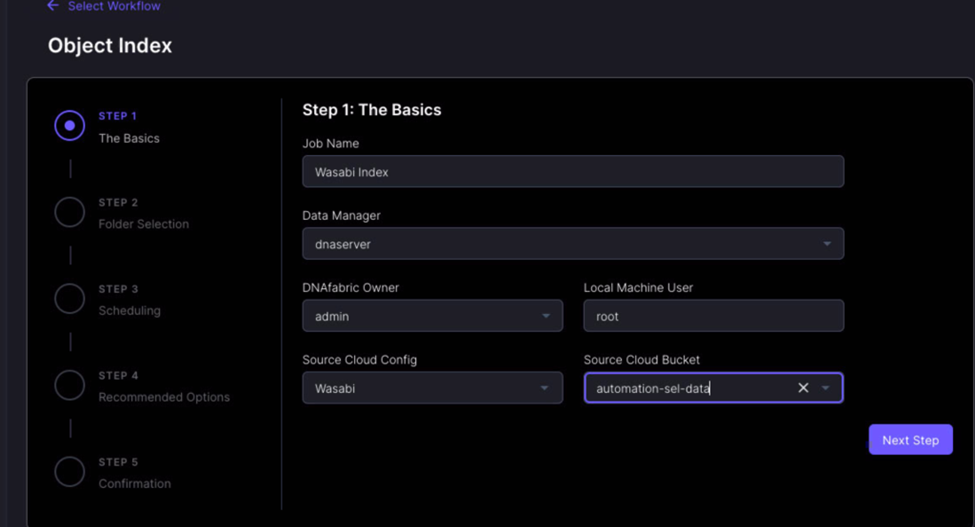
4.1.3 Fill out the following fields
Job name - give a specific name
Data Manager - select the server you wish to use
DNAfabric Owner - select the appropriate owner
Local Machine User - specify the appropriate machine user account
Source Cloud Config - select Wasabi from the drop down
Source Cloud Bucket - specify the Wasabi bucket you created
Click Next Step.
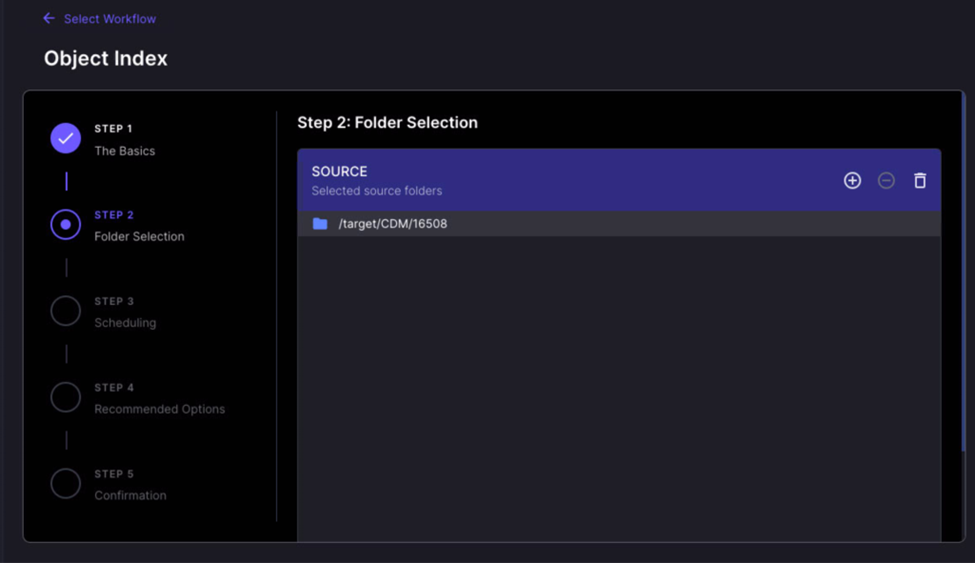
4.1.4 Click + and specify the source folder.
Click Next Step.
4.1.5 Select the schedule you wish to use to run the job. Click Next Step.

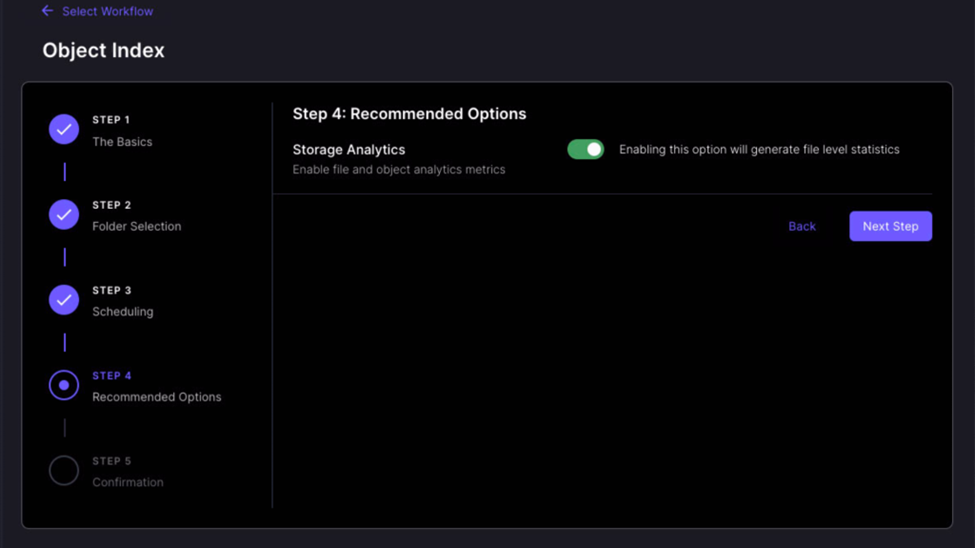
4.1.6. Make sure to enable the toggle select for Storage Analytics. Click Next Step.
4.1.7 Review the job details. Click finish to create the job.
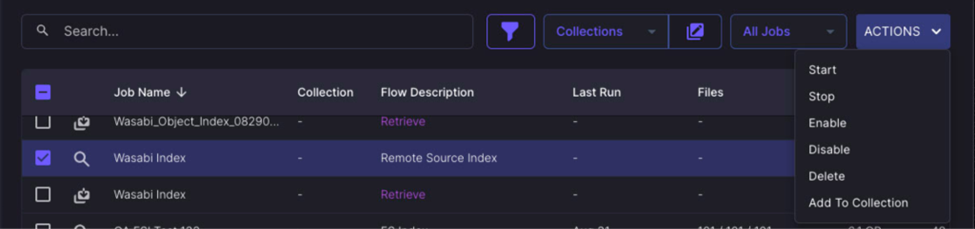
The job will be listed.
4.1.8 Double-click the job and navigate Job History. 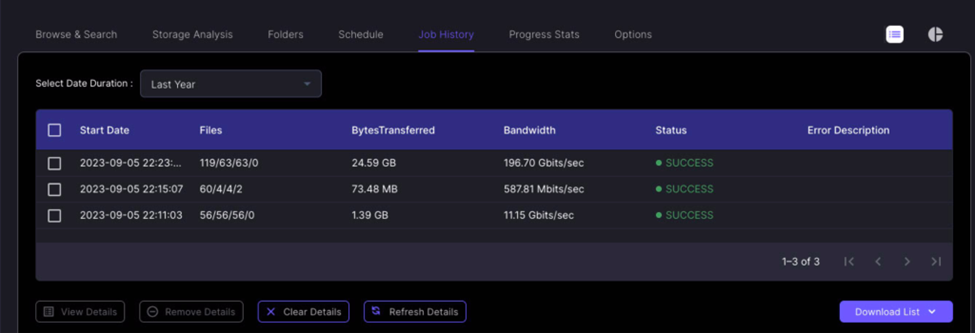
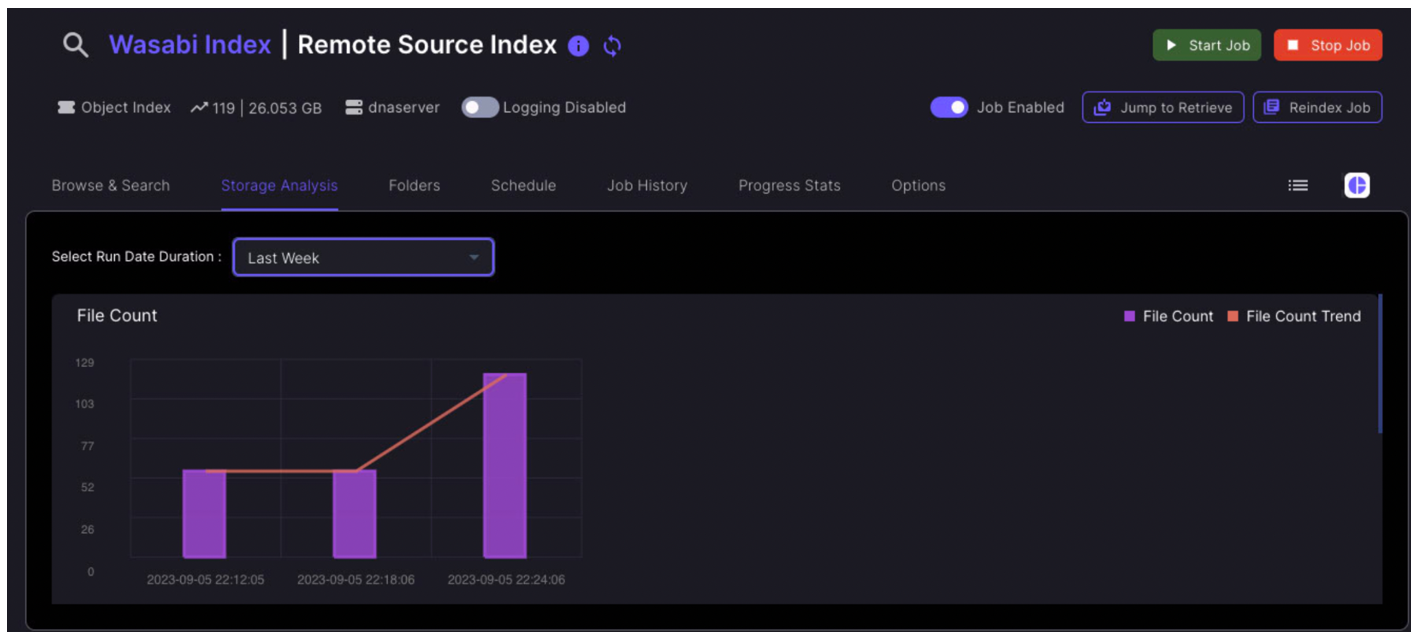
4.1.9 Click Storage Analysis.
Review the trend data of File Count and File Sizes

4.2 Backup Workflow
Backup (in native format), from a source file system to an object store on demand or on a schedule. Add options such as rolling snapshots to recover from multiple time points.
4.2.1 Click Create Job.
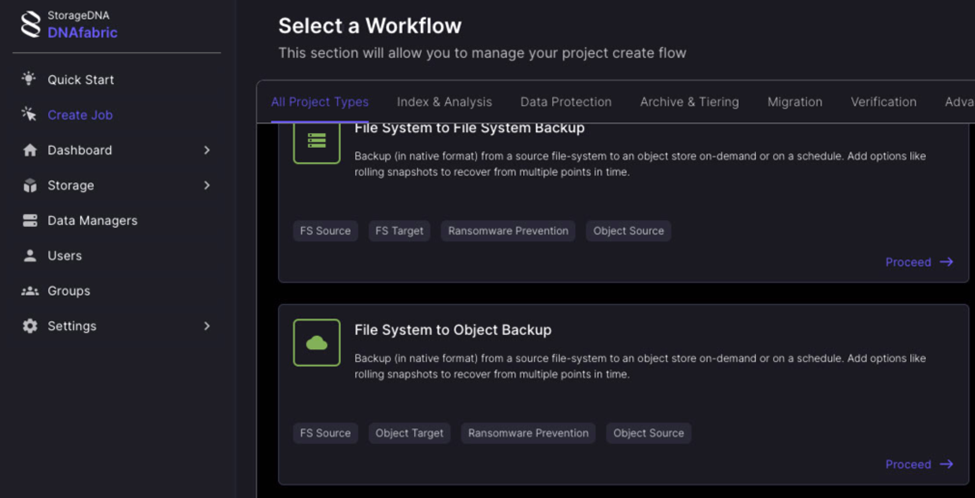
4.2.2 Under All Project Types, scroll down until you find File System to Object Backup. Click Proceed.
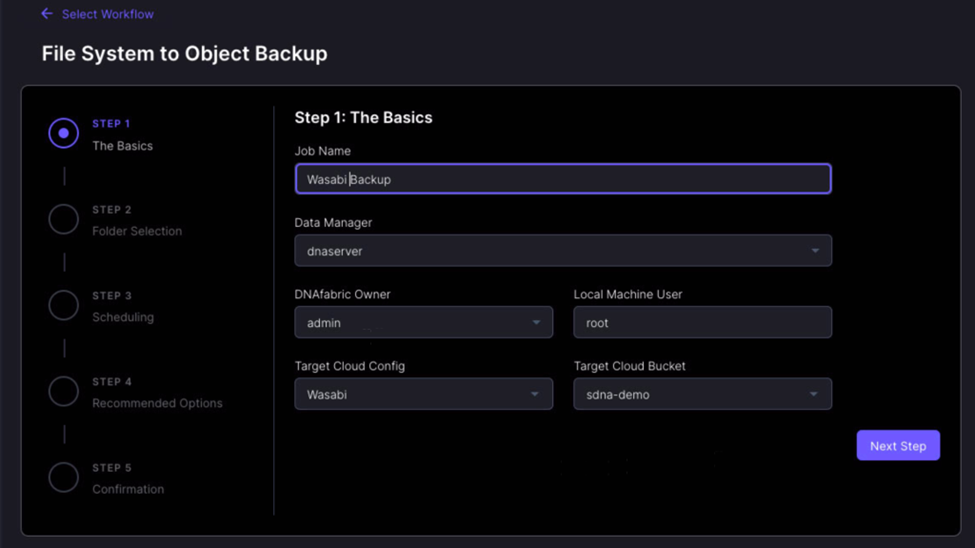
4.2.3 Fill out the following information.
Job name - give a specific name
Data Manager - select the server you wish to use
DNAfabric Owner - select the appropriate owner
Local Machine User - specify the appropriate machine user account
Target Cloud Config - select Wasabi from the drop down
Target Cloud Bucket - specify the Wasabi bucket you created
Click Next Step.
4.2.4 Under source, click on the + to choose your source folder.
4.2.5 Click + and specify the target folder inside the specified bucket
Click Next Step.

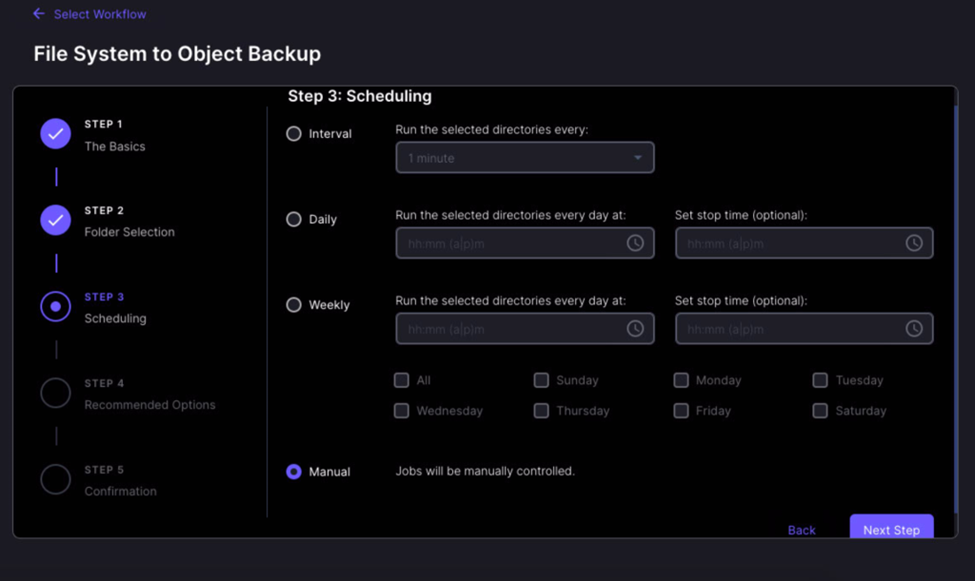
4.2.6 Select the schedule you wish to use to run the job. Click Next Step.
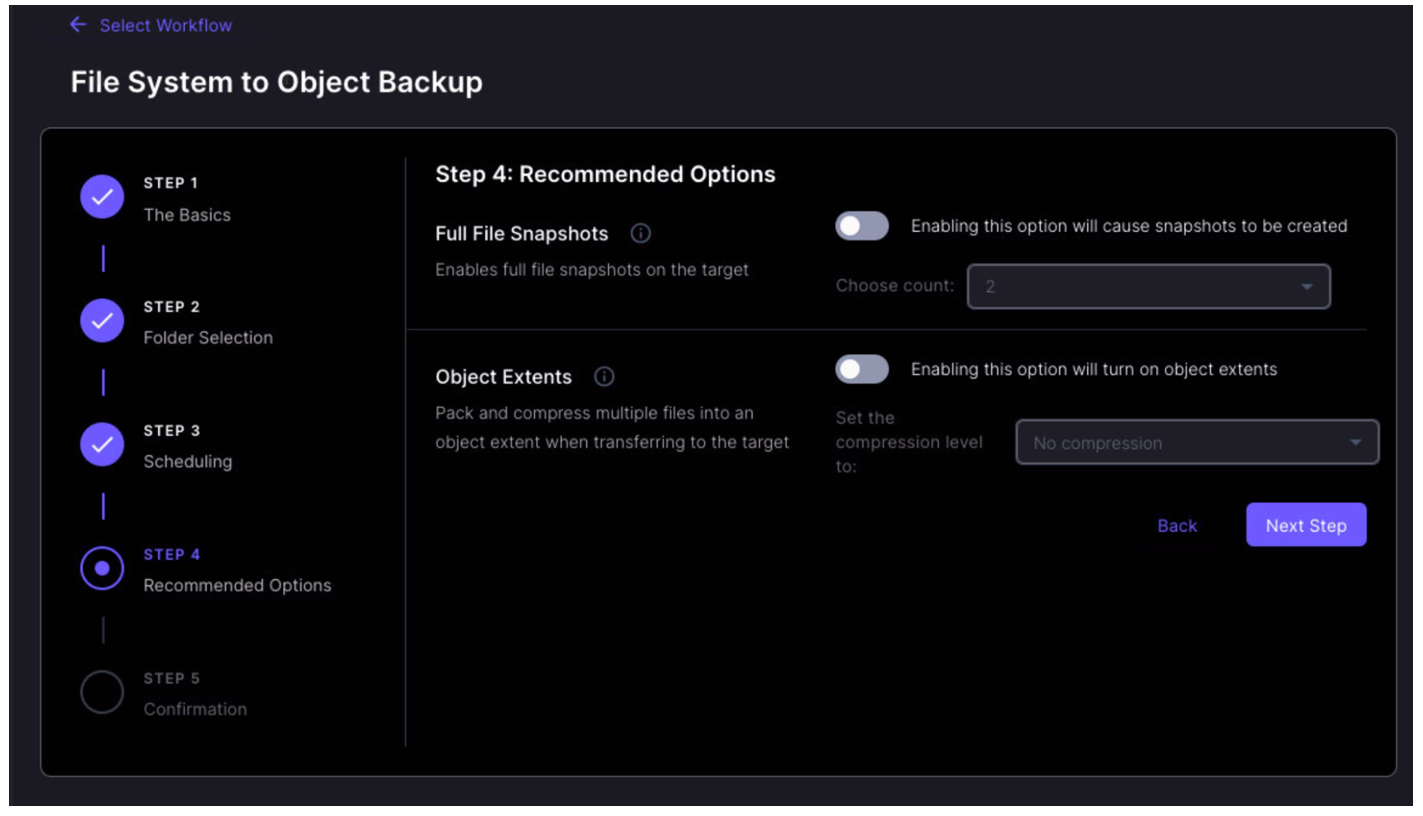
4.2.7 Enable the options you want to utilize Snapshots and Object Extents and click Next Step.
4.2.8 Review the job details. Click finish to create the job.
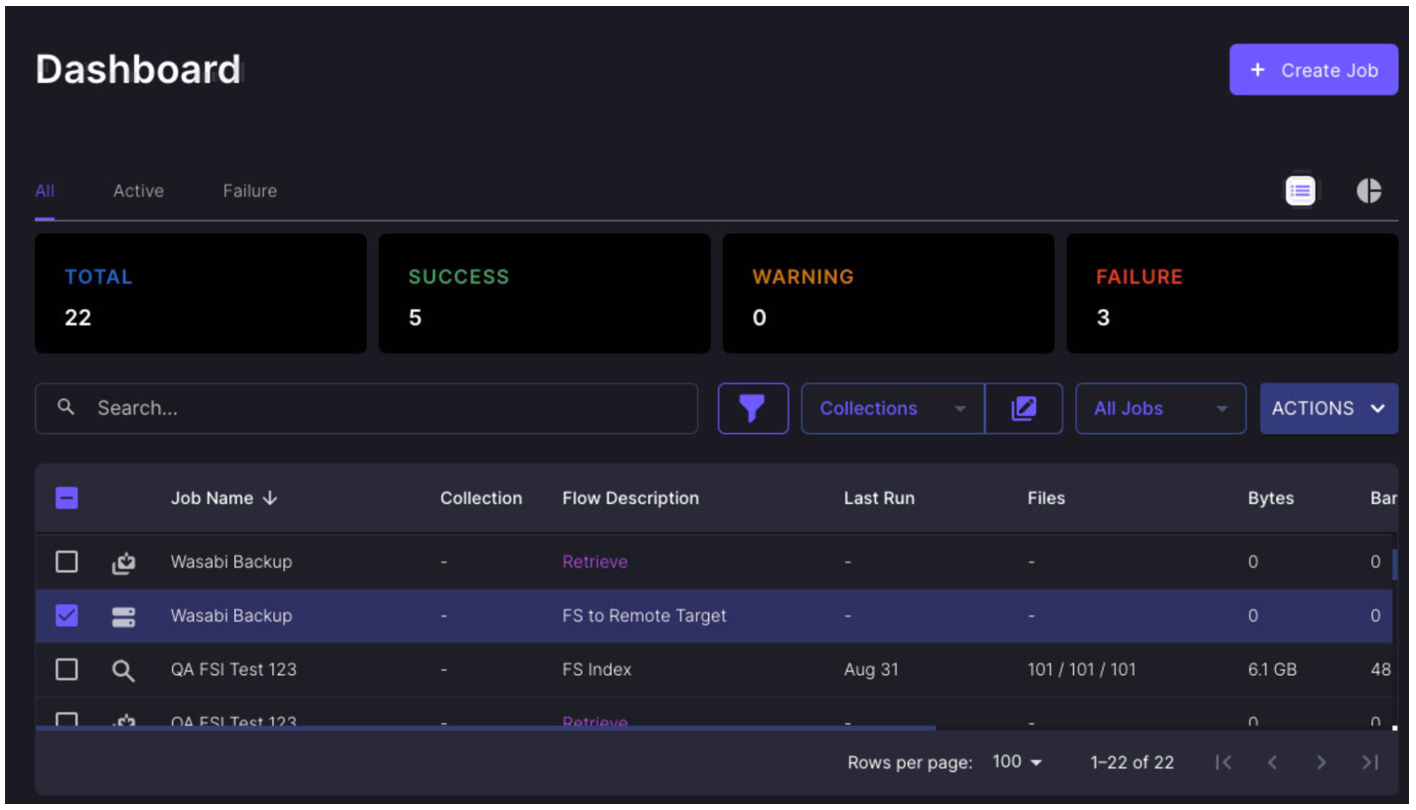
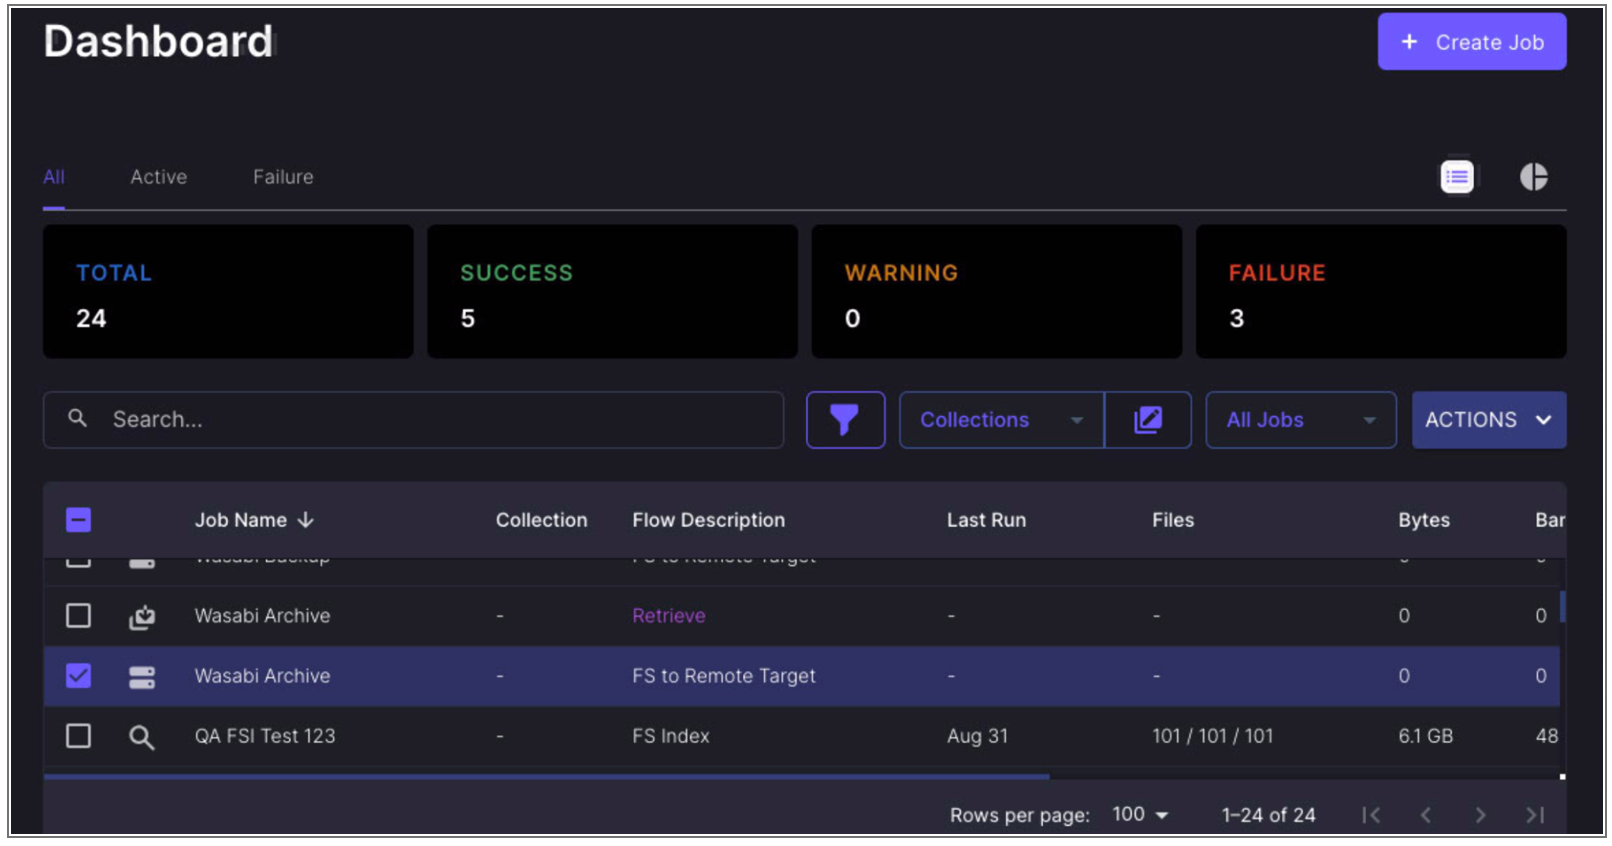
4.2.9 Under the Dashboard, you will see your Wasabi backup job listed.
4.3 Archive Workflow
Archive from a source file system to an object store on demand or on a schedule. Add policies based on size, age, type, or options like source delete and stubs to reclaim space.
4.3.1 Click Create Job.
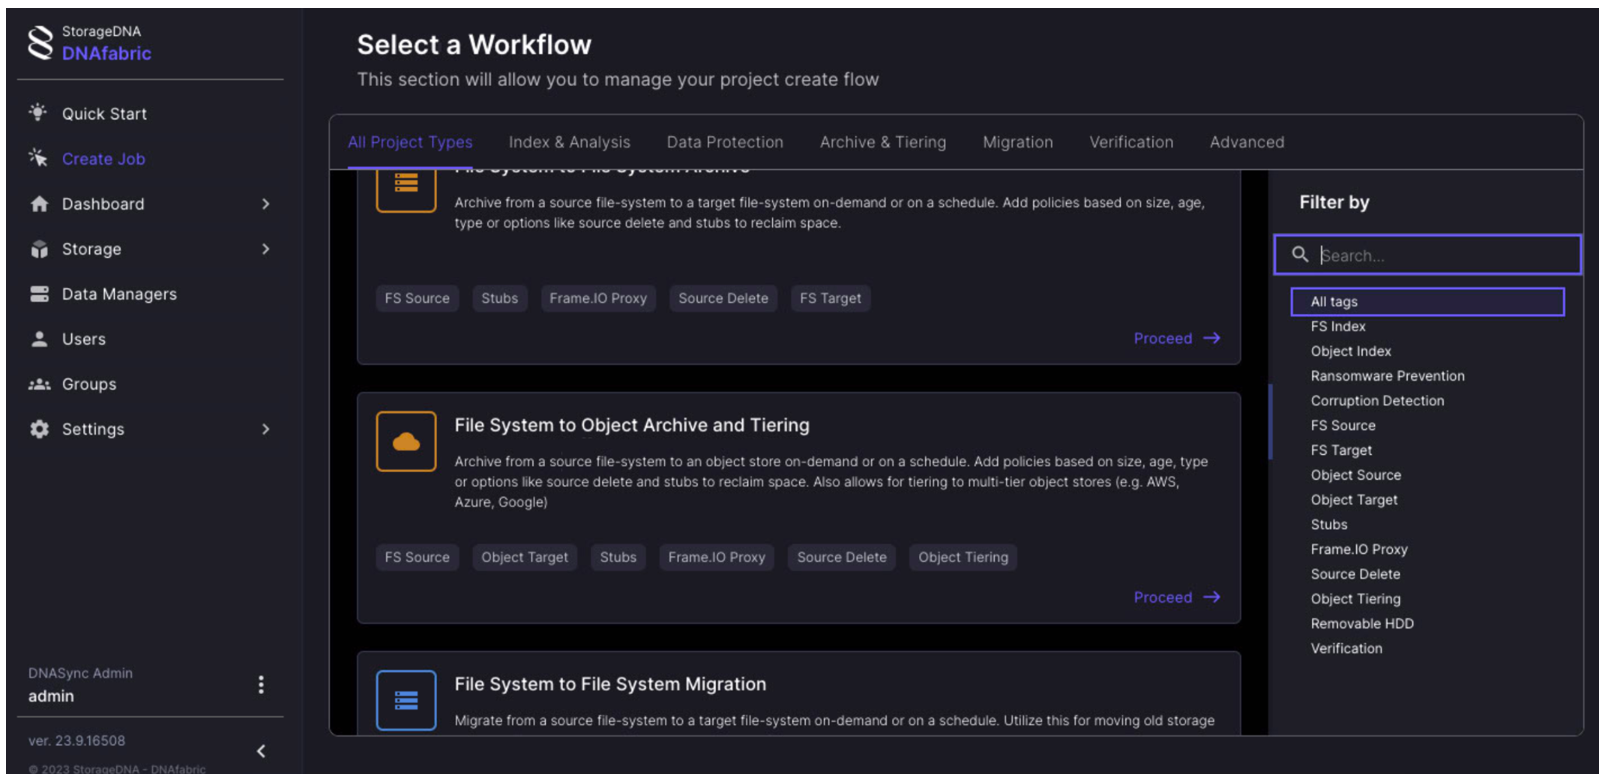
4.3.2 Under the All Project Types tab, search for File System to Object Archive and Tiering. Click Proceed.
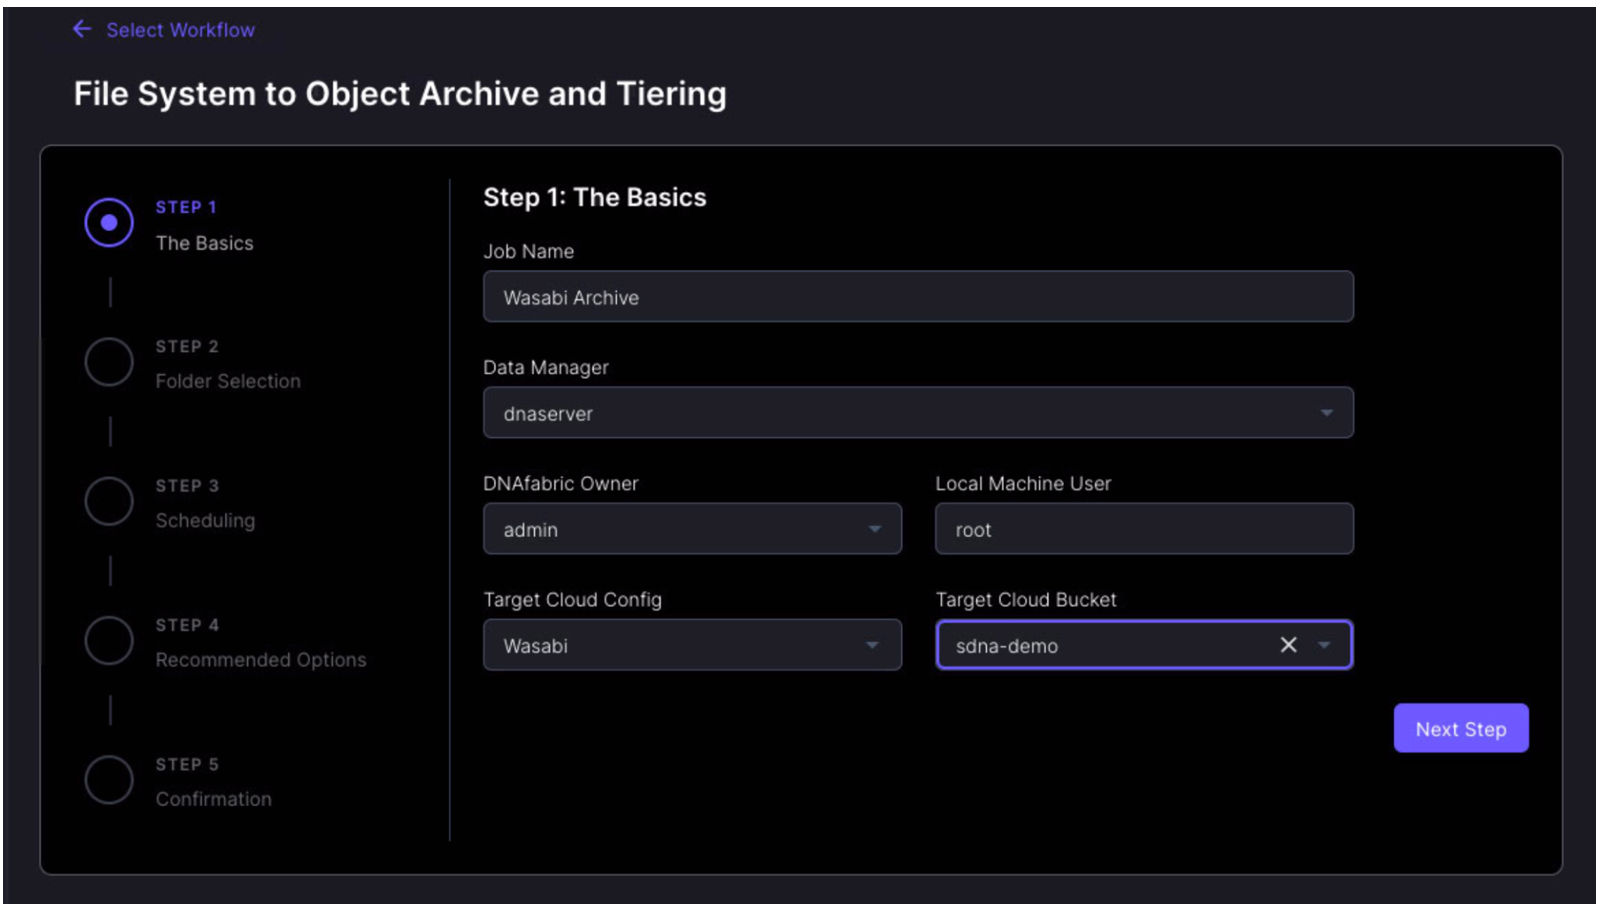
4.3.3 Fill out the following fields:
Job name - give a specific name
Data Manager - select the server you wish to use
DNAfabric Owner - select the appropriate owner
Local Machine User - specify the appropriate machine user account
Target Cloud Config - select Wasabi from the drop down
Target Cloud Bucket - specify the Wasabi bucket you created
Click Next Step.
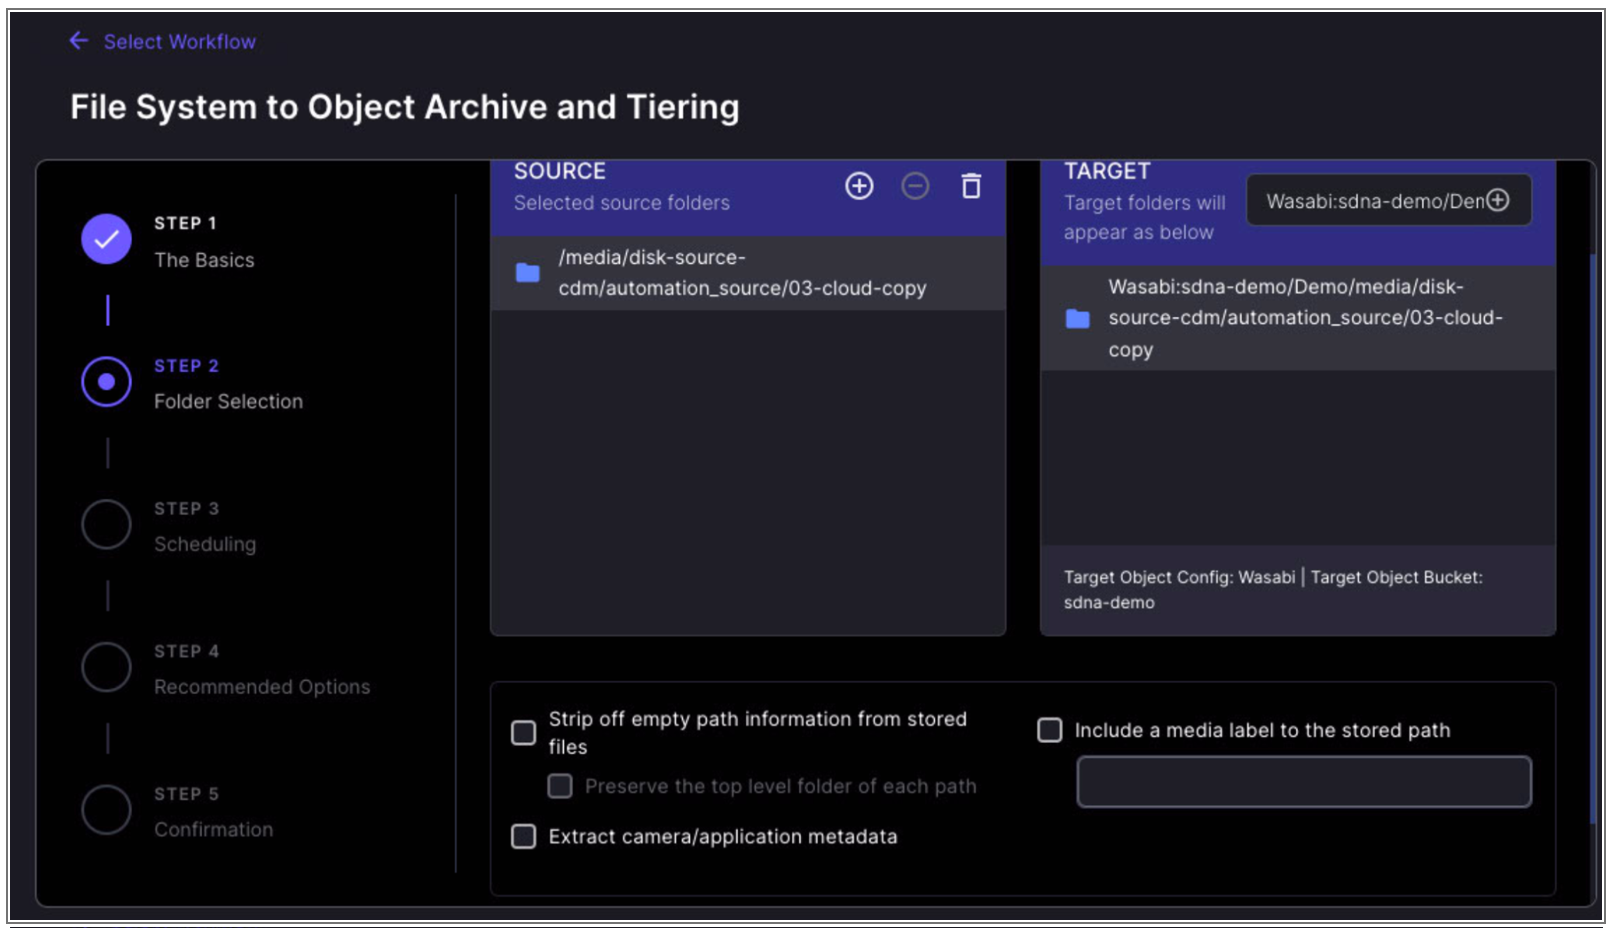
4.3.4 Under source, click + to choose your source folder.
4.3.5 Click + and specify the target folder.
Click Next Step.
4.3.6 Select the schedule to use to run the job. Click Next Step.
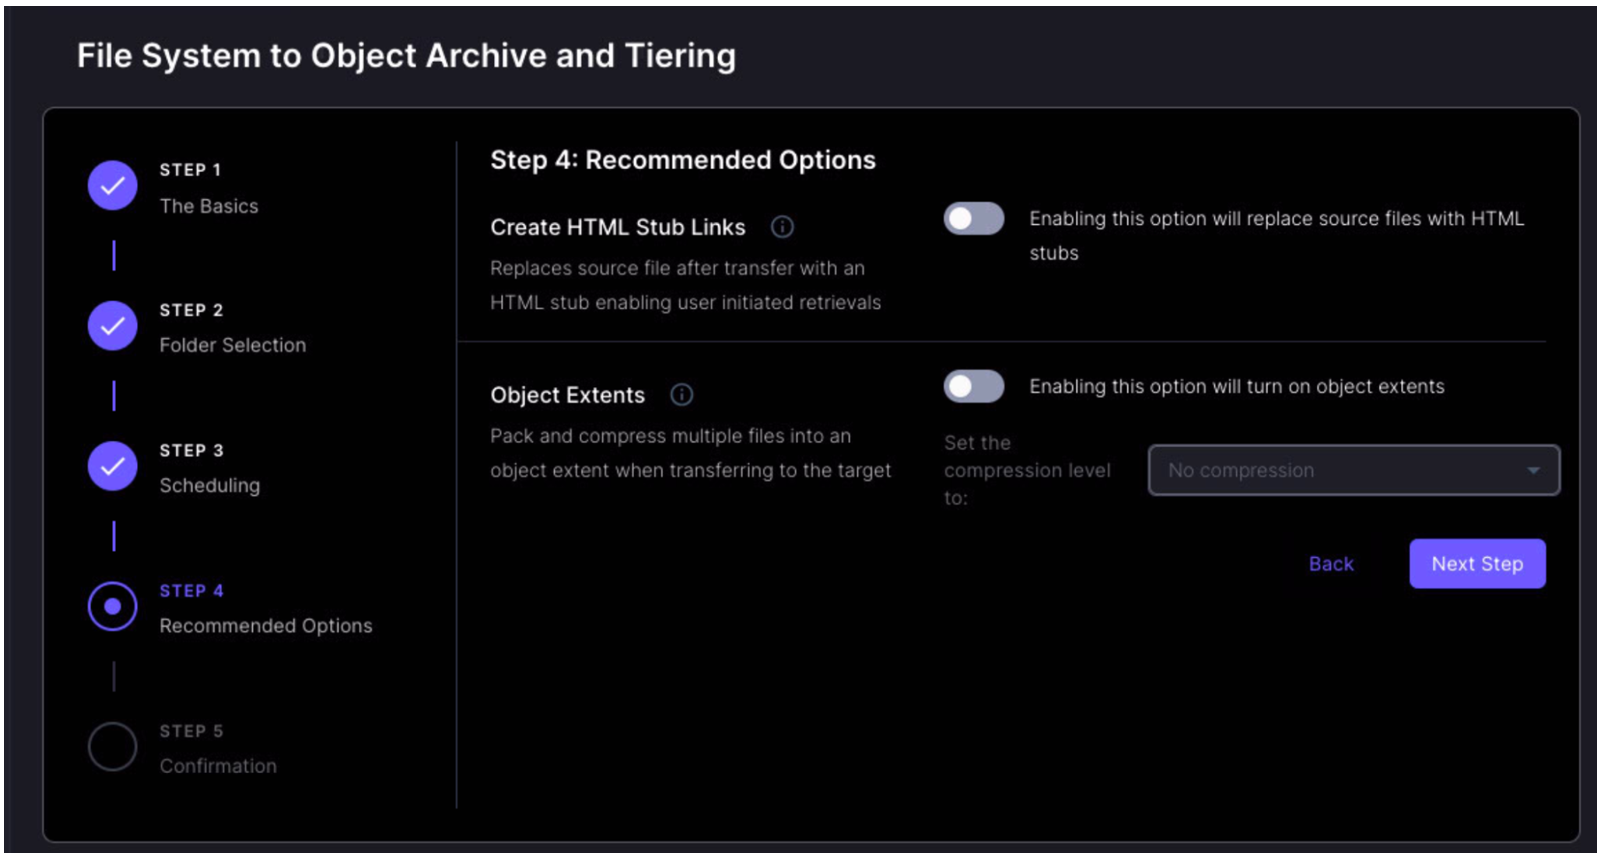
4.3.7 Enable the options for either Stub links or Object Extents. Click Next Step.
4.3.8 Review the job details. Click finish to create the job.
4.3.9 Under the Dashboard, you will now see your Wasabi backup job listed.
5. Immutability
The ability to back up to an Object Lock-enabled/Immutable bucket is supported.
An object lock bucket and settings have to be created and configured in Wasabi's Console prior to configuring object storage for Wasabi.
5.1 Log into your Wasabi Cloud Console and create your Object Lock Enabled Bucket following the steps in Object Lock Enabled Bucket article.
5.2 Once created, you can create your object storage, and starting in Steps 3.6, you can specify the OL bucket.