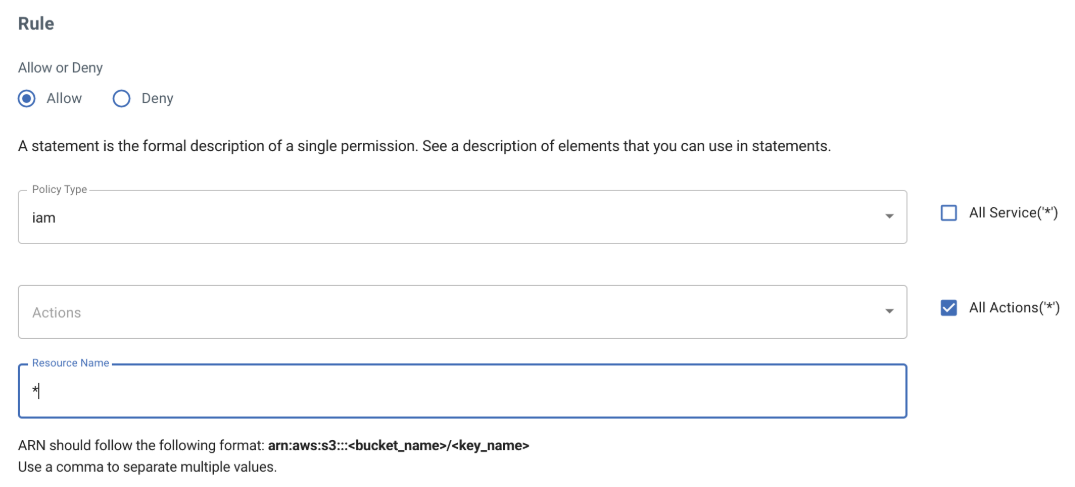
Allow All IAM Actions for a Sub-User
You can attach this policy to any sub-user to whom you want to allow all IAM actions.
Start by selecting the iam service.
Click All Actions(‘*’) to select all actions.
Enter * for the Resource Name to indicate any user.
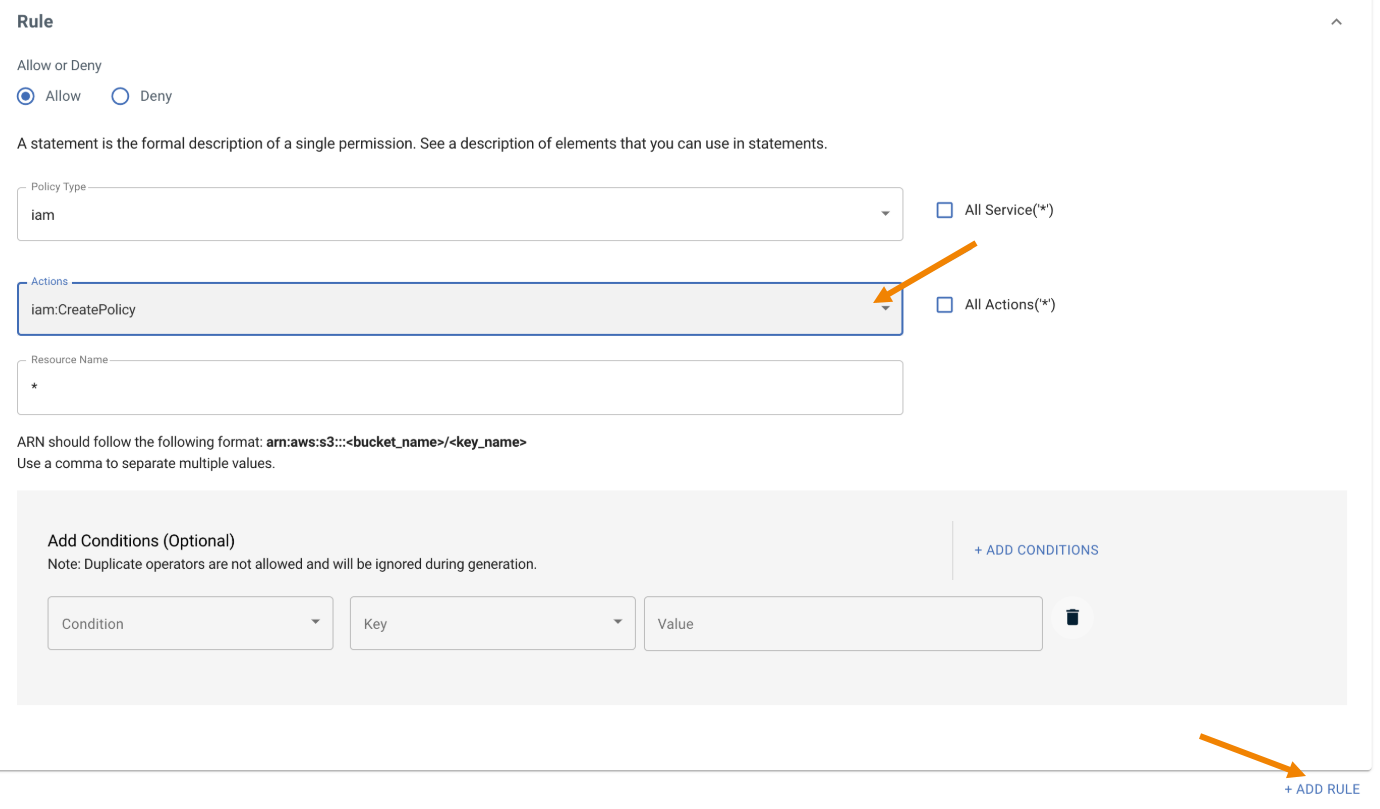
Allow Multiple Actions for All Policies for a Sub-User
This policy enables a sub-user to create, update, delete, list, get, and set the default version for all policies.
Start by selecting the iam service.
Select only one required action.
Enter * for the Resource Name to indicate any user.
Click Add Rule to add more actions.
Repeat this for all actions (iam:CreatePolicy, iam:CreatePolicyVersion, iam:DeletePolicy, iam:DeletePolicyVersion, iam:GetPolicy, iam:GetPolicyVersion, iam:ListPolicies, iam:ListPolicyVersions, and iam:SetDefaultPolicyVersion).
After adding all actions as a new rule, your generated policy will be:
{
        "Version": "2012-10-17",
        "Statement": [
        {
        "Effect": "Allow",
        "Action": "iam:CreatePolicy",
        "Resource": [
        "*"
        ],
        "Condition": {}
        },
        {
        "Effect": "Allow",
        "Action": "iam:CreatePolicyVersion",
        "Resource": [
        "*"
        ],
        "Condition": {}
        },
        {
        "Effect": "Allow",
        "Action": "iam:DeletePolicy",
        "Resource": [
        "*"
        ],
        "Condition": {}
        },
        {
        "Effect": "Allow",
        "Action": "iam:GetPolicy",
        "Resource": [
        "*"
        ],
        "Condition": {}
        },
        {
        "Effect": "Allow",
        "Action": "iam:GetPolicyVersion",
        "Resource": [
        "*"
        ],
        "Condition": {}
        },
        {
        "Effect": "Allow",
        "Action": "iam:ListPolicies",
        "Resource": [
        "*"
        ],
        "Condition": {}
        },
        {
        "Effect": "Allow",
        "Action": "iam:ListPolicyVersions",
        "Resource": [
        "*"
        ],
        "Condition": {}
        },
        {
        "Effect": "Allow",
        "Action": "iam:SetDefaultPolicyVersion",
        "Resource": [
        "*"
        ],
        "Condition": {}
        }
        ]
        }
Allow All S3 Actions for a Sub-User Inside Their Bucket
Start by selecting the s3 service.
Click All Actions(‘*’) to select all actions.
In the Resources Name section, enter the sub-user's S3 bucket ARN (arn:aws:s3:::bucket-name in this example) to which you want to give access.
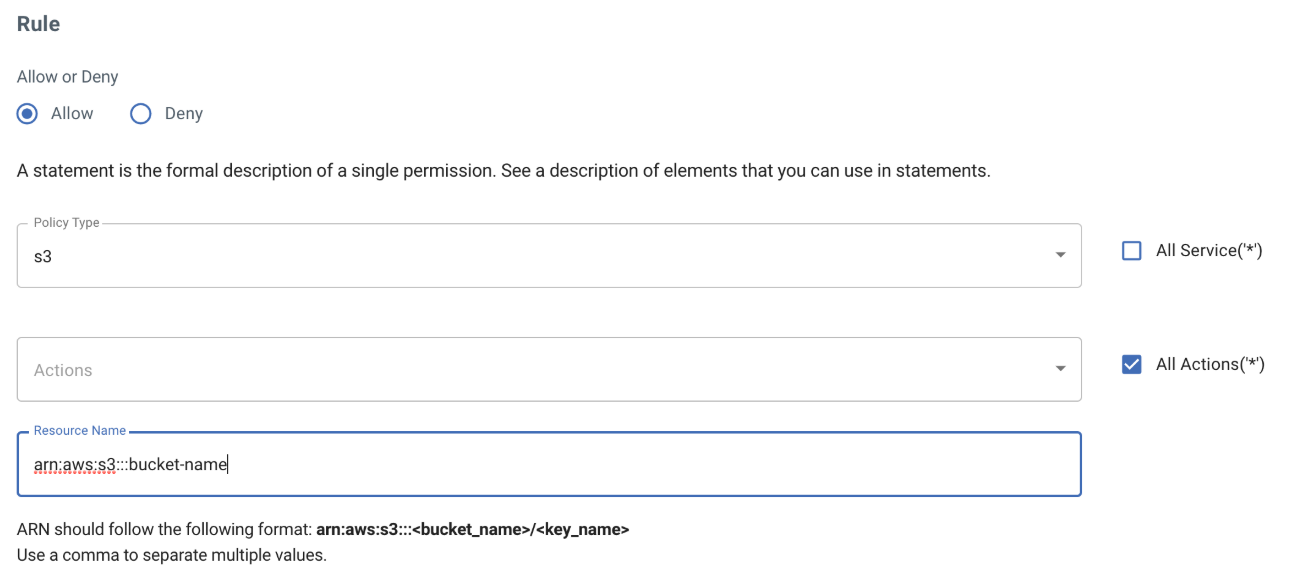
Click Add Rule and add another rule to allow everything inside that bucket by editing the ARN as: arn:aws:s3:::bucket-name/*
This is one example in which you would require multiple statements. Once the auto-generated policy is ready and before saving the policy, edit it (using the Policy Editor) to add another statement, as shown below. In this case, the sub-user MUST have ListAllMyBuckets permission to perform any bucket/object operations through the Console.
{
        "Version": "2012-10-17",
        "Statement": [
        {
        "Effect": "Allow",
        "Action": "s3:ListAllMyBuckets",
        "Resource": "arn:aws:s3:::*"
        },
        {
        "Effect": "Allow",
        "Action": "s3:*",
        "Resource": "arn:aws:s3:::bucket-name"
        },
        {
        "Effect": "Allow",
        "Action": "s3:*",
        "Resource": "arn:aws:s3:::bucket-name/*"
        }
        ]
        }
Allow Read Access to the Public
A resource-based policy is directly applied to the resource (as opposed to an IAM user), and you must include the Principal in your statement. You must indicate the account, user, role, or federated user to which you want to allow or deny access. If you are creating an IAM permissions policy to attach to a user or role, you cannot include this element. The Principal is implied as that user or role.
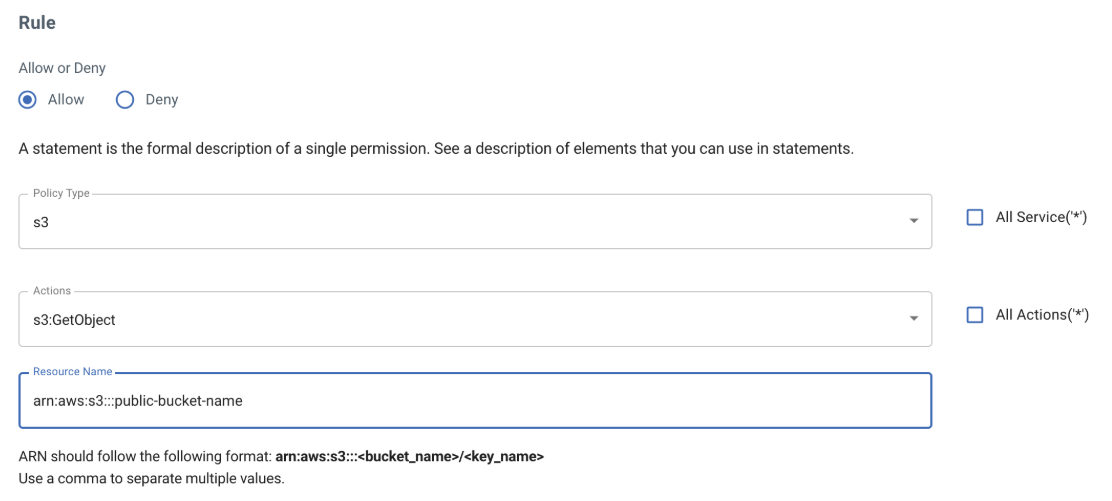
Before creating this policy, add the Principal element in the policy editor as shown below, and copy this policy to your desired bucket that you want to make public. (Also refer to Defining a Bucket Policy for Public Access.)
{
        "Version": "2012-10-17",
        "Statement": [
        {
        "Effect": "Allow",
        "Principal": {
        "AWS": "*"
        },
        "Action": "s3:GetObject",
        "Resource": [
        "arn:aws:s3:::public-bucket-name"
        ],
        "Condition": {}
        }
        ]
        }
Restrict the Client IP From Which API Calls are Made
This example creates a policy with a condition to deny all API calls to your Wasabi account if access is not through the source IP in the condition statement. 203.0.113.0/24 IP is used in this example, but you can add any value based on your IP address.
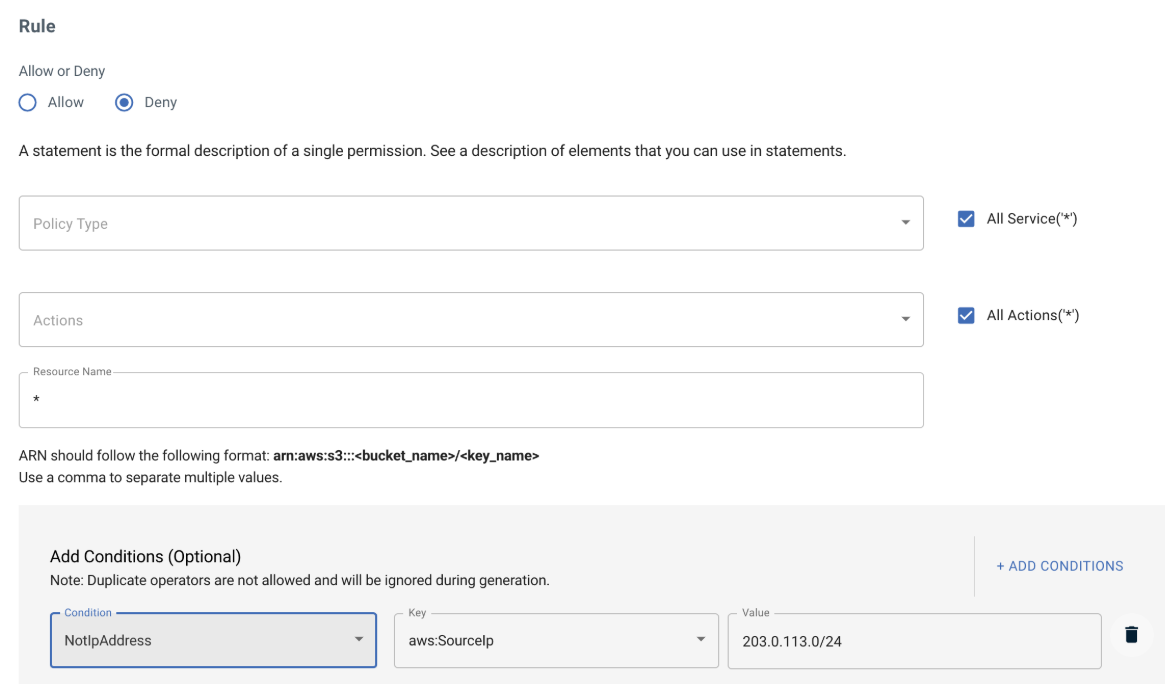
The policy will be similar to:
{
"Version": "2012-10-17",
"Statement": [
{
"Effect": "Deny",
"Action": "*",
"Resource": "*",
"Condition": {
"NotIpAddress": {
"aws:SourceIp": "203.0.113.0/24"
}
}
}
]
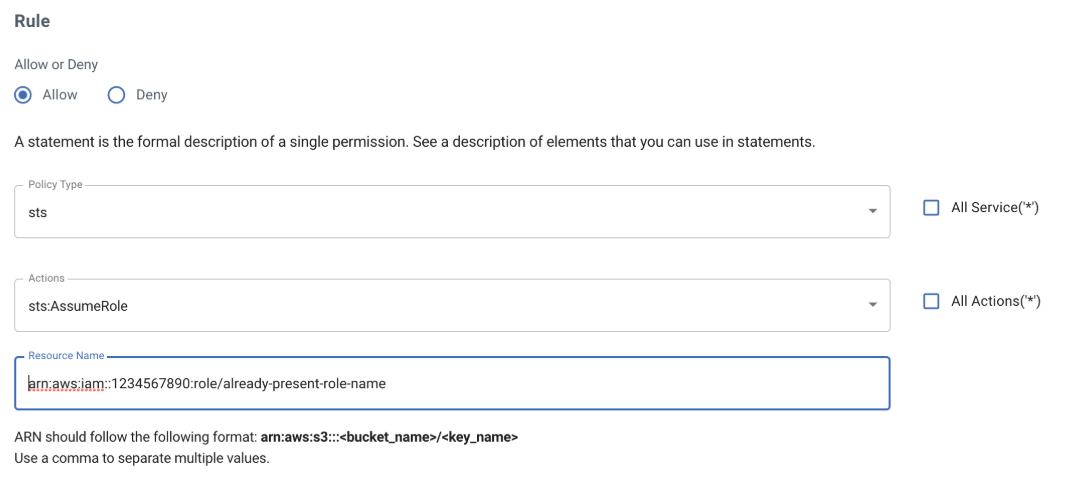
}Grant Sub-User Permission to Assume a Role Using the STS Service
You can attach this policy to a sub-user to grant permission to call AssumeRole actions using the STS service for a role that you have already created in your account.
Use the correct ARN for the Resource Name with the proper Wasabi account number and your role name.
The example policy is:
{
"Version": "2012-10-17",
"Statement": [
{
"Effect": "Allow",
"Action": "sts:AssumeRole",
"Resource": [
"arn:aws:iam::1234567890:role/already-present-role-name"
],
"Condition": {}
}
]
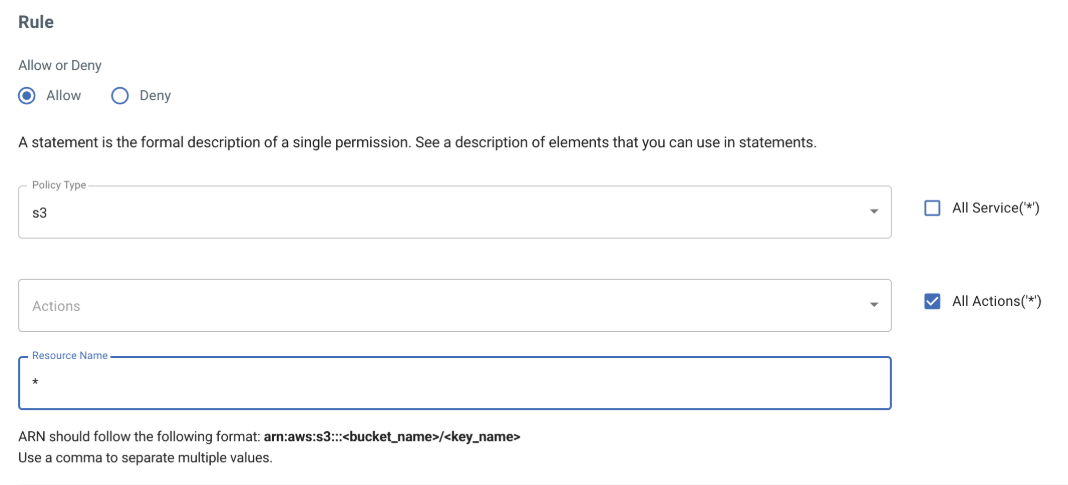
}Force MFA to Allow Deletion of Any Kind
This policy allows S3 actions on all resources but denies any kind of DELETES to be done in your account unless they are authorized through an MFA for authentication. To perform any bucket/object operations through the Console, the sub-user MUST have ListAllMyBuckets permission. For this reason, another statement is added in this example.
Start by allowing full S3 permission for drill-down access per bucket.
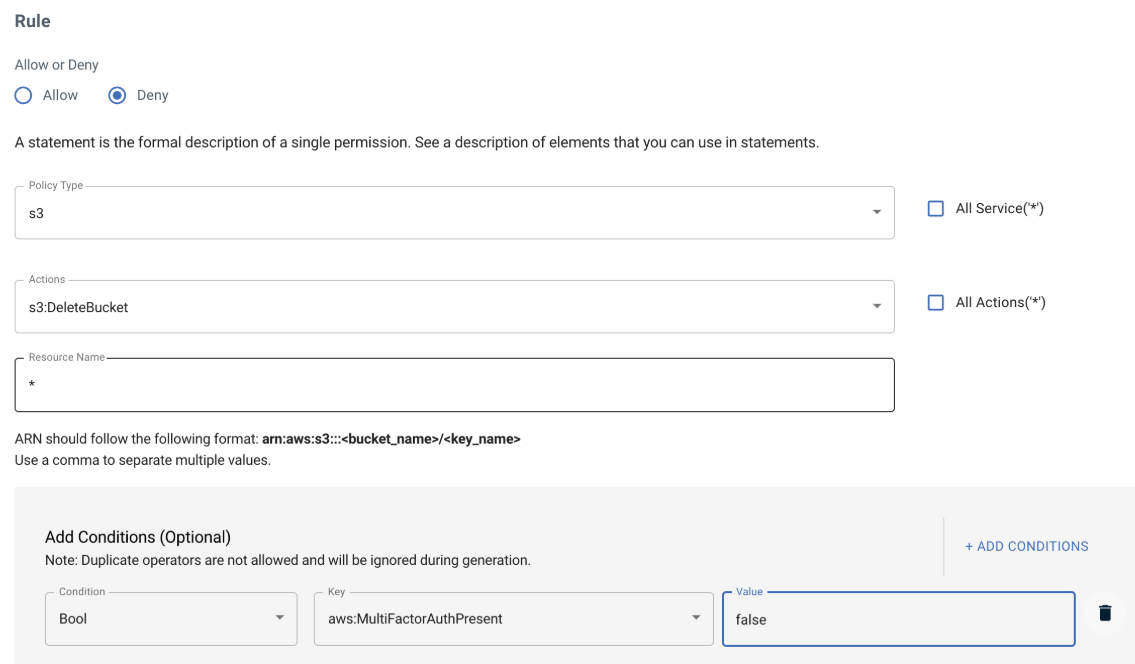
Add rules to deny S3 actions such as:
s3:DeleteBucket
s3:DeleteBucketPolicy
s3:DeleteObject
s3:DeleteObjectVersion
Add conditions to all rules that state that if MultiFactorAuthPresent is NOT present (Boolean value is False), then deny the underlying S3 action. For example:
Before creating this policy, add another statement to allow ListAllMyBuckets (for Console operation on buckets) using the Policy Editor.
The example policy is:
{
        "Version": "2012-10-17",
        "Statement": [
        {
        "Effect": "Allow",
        "Action": "s3:ListAllMyBuckets",
        "Resource": "arn:aws:s3:::*"
        },
        {
        "Effect": "Allow",
        "Action": "s3:*",
        "Resource": "*"
        },
        {
        "Effect": "Deny",
        "Action": "s3:DeleteBucket",
        "Resource": "*",
        "Condition": {
        "Bool": {
        "aws:MultiFactorAuthPresent": "false"
        }
        }
        },
        {
        "Effect": "Deny",
        "Action": "s3:DeleteBucketPolicy",
        "Resource": "*",
        "Condition": {
        "Bool": {
        "aws:MultiFactorAuthPresent": "false"
        }
        }
        },
        {
        "Effect": "Deny",
        "Action": "s3:DeleteObject",
        "Resource": "*",
        "Condition": {
        "Bool": {
        "aws:MultiFactorAuthPresent": "false"
        }
        }
        },
        {
        "Effect": "Deny",
        "Action": "s3:DeleteObjectVersion",
        "Resource": "*",
        "Condition": {
        "Bool": {
        "aws:MultiFactorAuthPresent": "false"
        }
        }
        }
        ]
        }
Allow Viewing of Billing Page, But Deny All S3 Actions
This policy allows a sub-user to view the account billing information for audit purposes. However, a sub-user cannot modify the billing. The sub-user will not be able to view any S3 bucket(s) or perform any S3-related actions in your account.
This policy uses two different services: aws-portal and s3.
Start by assigning the aws-portal service ViewBilling permission.
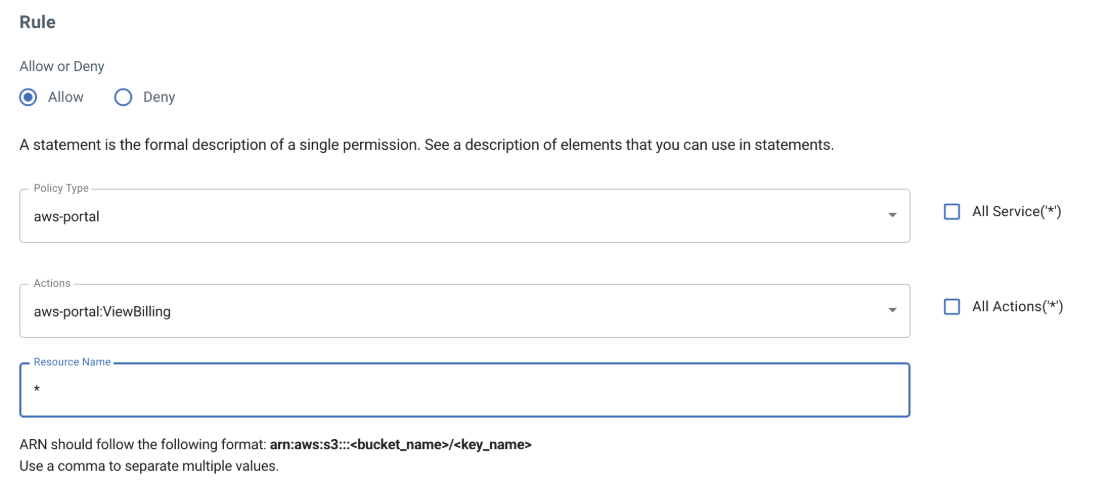
Add a rule to DENY all S3 actions from the S3 service.

We did NOT include another statement to allow ListAllMyBuckets permission, even though this is a Console operation. The reason for this is that the policy is outside the realm of bucket/object operation and only concerns billing.
To execute this permission, the Root user must toggle Allow IAM users and roles to Access Billing Portal in Settings in Console.
When sub-users log in to the Console, they will see an Access Denied message initially (during the bucket listing process) and then will be automatically directed to the Billing page.
The example policy is:
{
        "Version": "2012-10-17",
        "Statement": [
        {
        "Effect": "Allow",
        "Action": "aws-portal:ViewBilling",
        "Resource": [
        "*"
        ],
        "Condition": {}
        },
        {
        "Effect": "Deny",
        "Action": "s3:*",
        "Resource": [
        "*"
        ],
        "Condition": {}
        }
        ]
        }