Sharlic is a Service Delivery Management platform for companies that resell Wasabi cloud storage. It offers native support for both channel accounts and sub-accounts, allowing distributors and integrators to track usage, automate billing, and apply custom pricing. Whether selling directly or through complex multi-tier channels, everything is managed from a single unified interface. To learn more about this partnership and integration, review the Wasabi and Sharlic solution brief Wasabi and Sharlic Empowering Channel Partners with Simplified Cloud Storage Delivery.
Requirements
Active Sharlic Account
Active Wasabi Control Account with Wasabi Account Control Manager enabled
Sub Accounts and/or Channel Accounts created in WACM
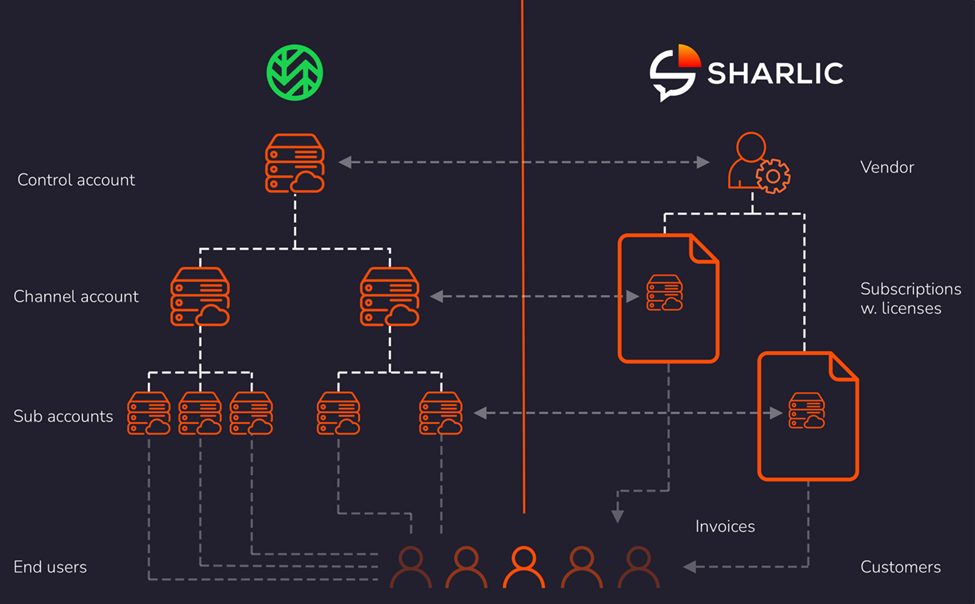
Reference Architecture Diagram
Enabling the Sharlic Integration
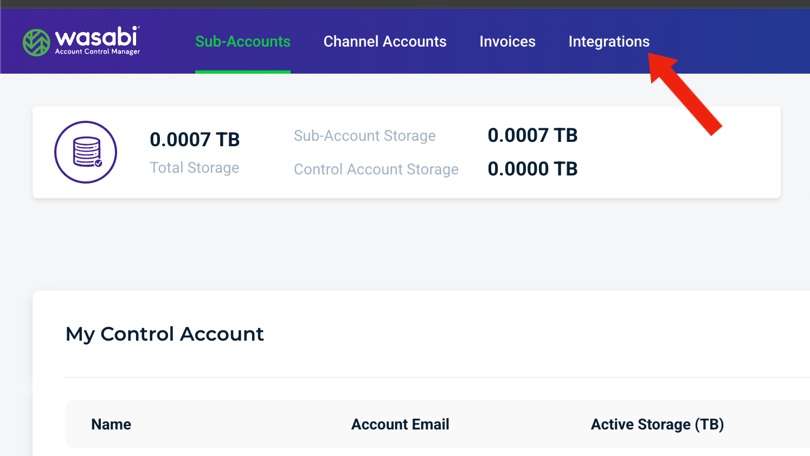
Log in to the Wasabi Account Control Manager (WACM) console and navigate to the Integrations tab.
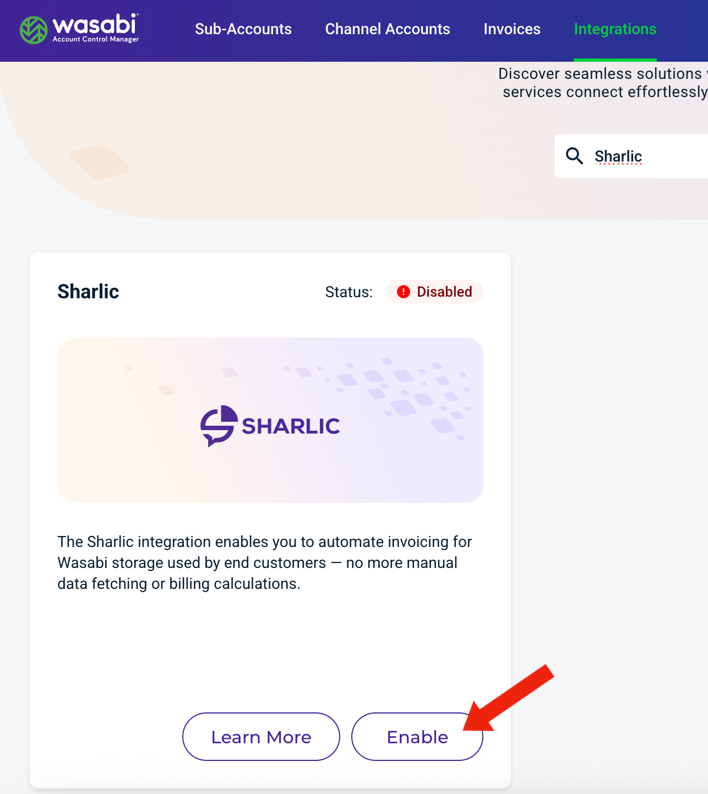
Locate the Sharlic integration and click Enable.
Click on Enable.
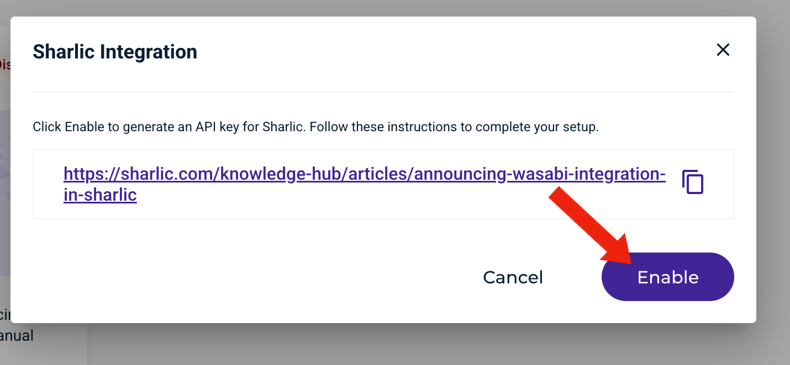
WACM will generate an API Key and associate it with a Key Name.
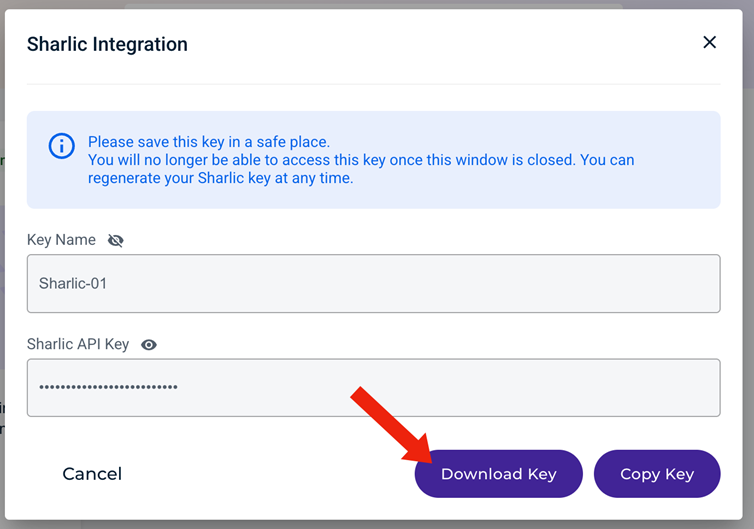
Remember to store this key as you will only be able to download and save it once.
Connecting to Wasabi in Sharlic
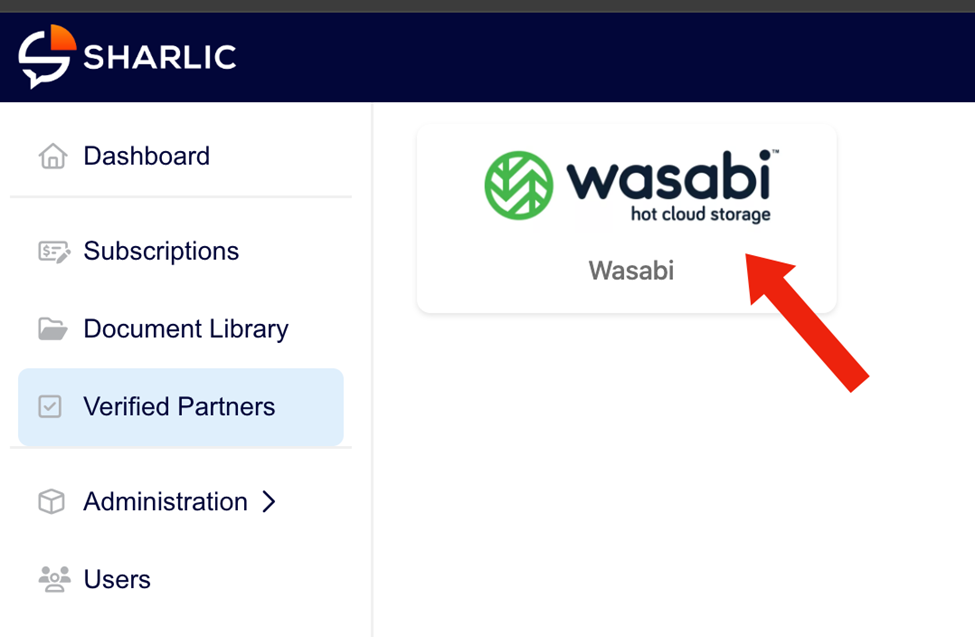
Log in to Sharlic with your administrator credentials and navigate to the Verified Partners tab.
Click on Wasabi.
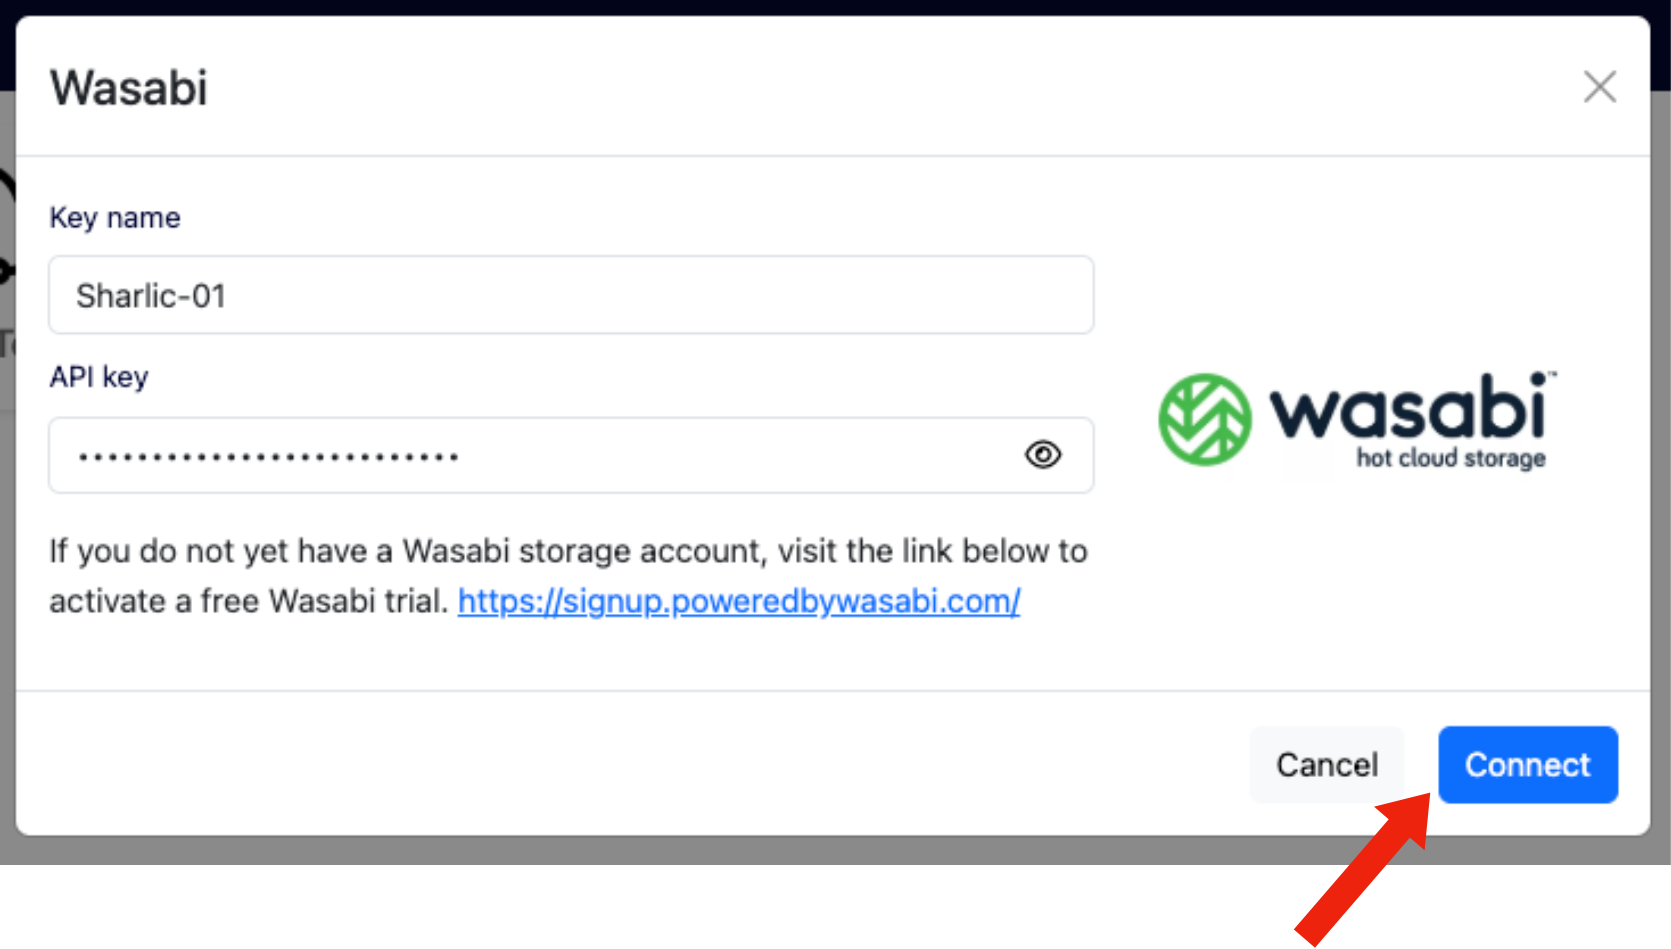
Enter the Key Name and API Key generated from your WACM Integration.
Click Connect.
Selecting Accounts to Import
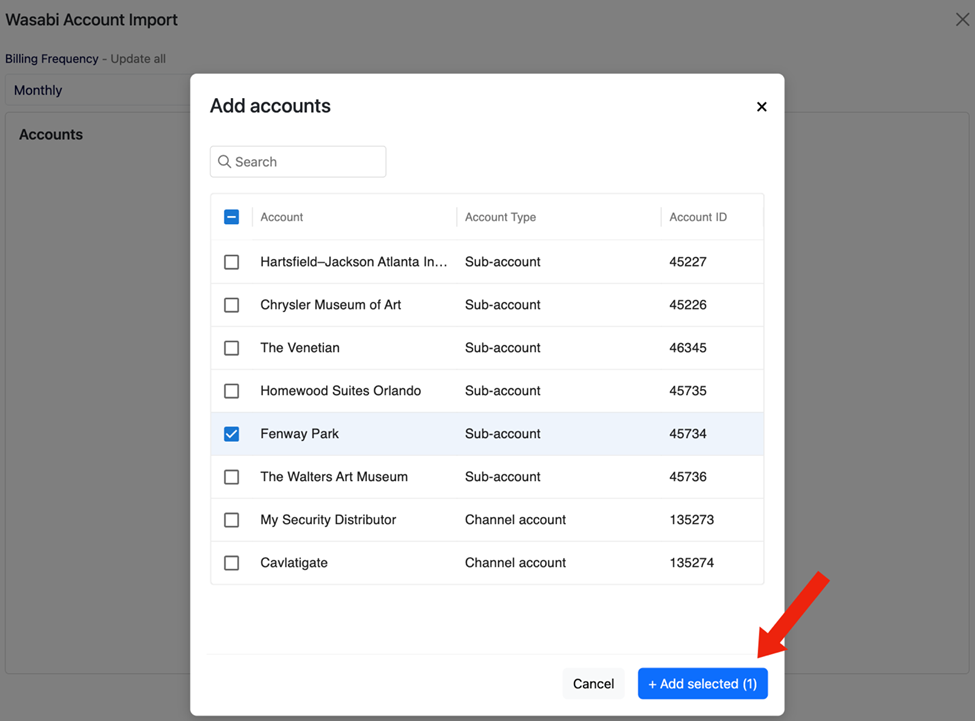
After successfully connect your Wasabi account, Sharlic will display a list of available channels and sub-accounts based on the account type you connected.
If you connected a control account, you’ll see all channel accounts and any sub-accounts directly linked to it.
If you connected a channel account, you’ll only see the sub-accounts under that channel.
Use the checkboxes to select which accounts to import, then click + Add selected to proceed.
To select all accounts, click the upper left check box.
Configuring Subscriptions and Billing Rules
For each selected account:
Assign it to an existing or new customer in Sharlic.
Select or create an article that defines the pricing logic.
Choose a billing frequency (for example, monthly, quarterly, yearly).
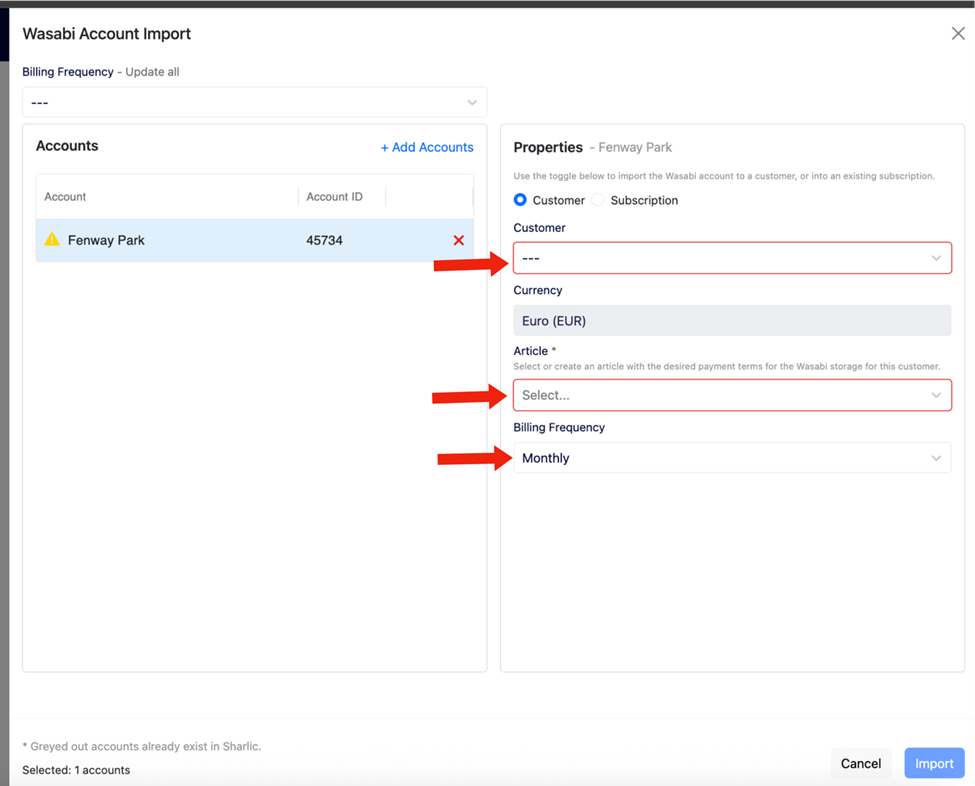
When creating a customer, Sharlic will import billing information from WACM if it has already been entered.
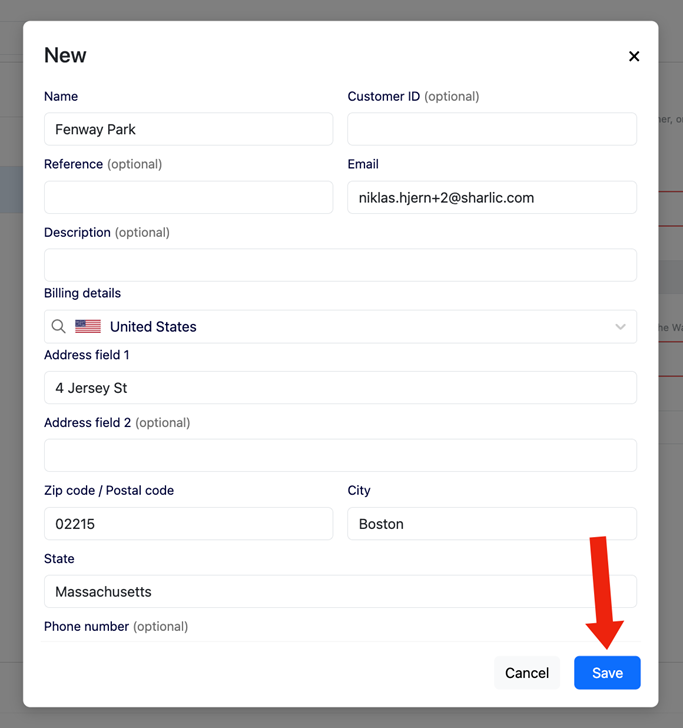
If not, simply populate all required fields and click Save.
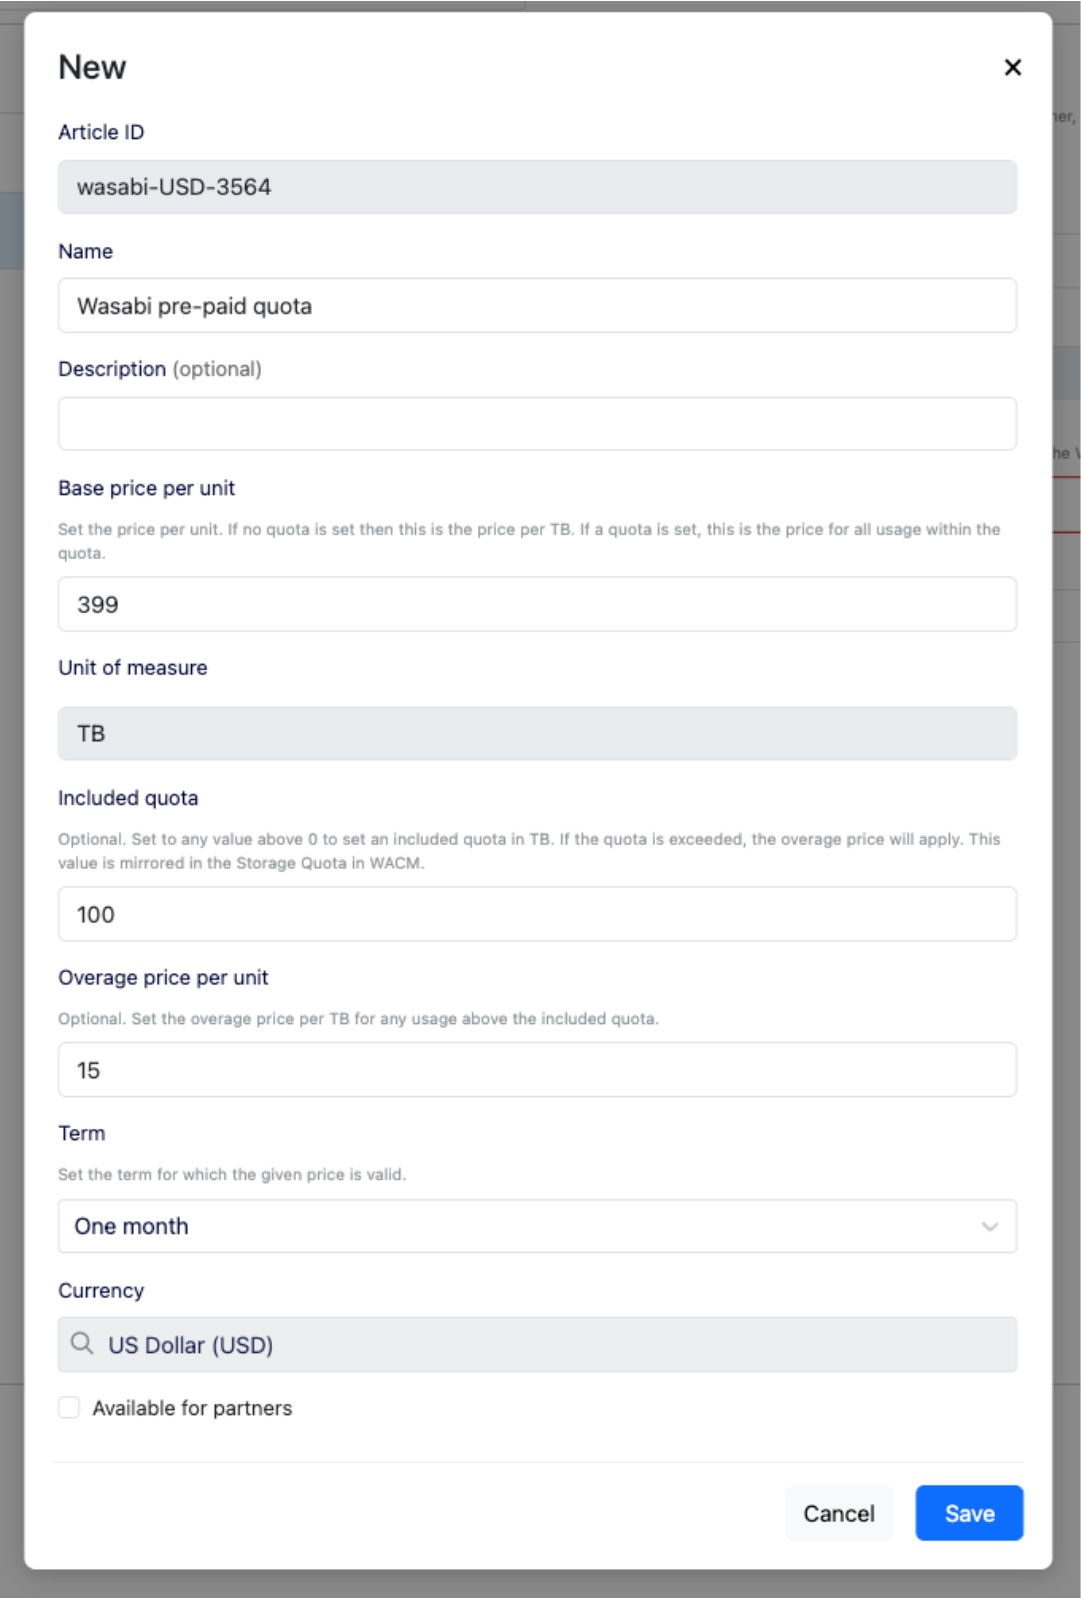
Articles offer total flexibility in how you bill your customers by letting you change the base values Sharlic uses to generate invoices.
Pay-as-you-go: Charge per TB stored per month.
Quota-based: Set a base quota with overage pricing.
Prepaid plans: Offer annual storage at a fixed price by setting a different Term.
The article currency is locked to the selected customer's currency, and the dropdown menus will only show existing articles in that currency.
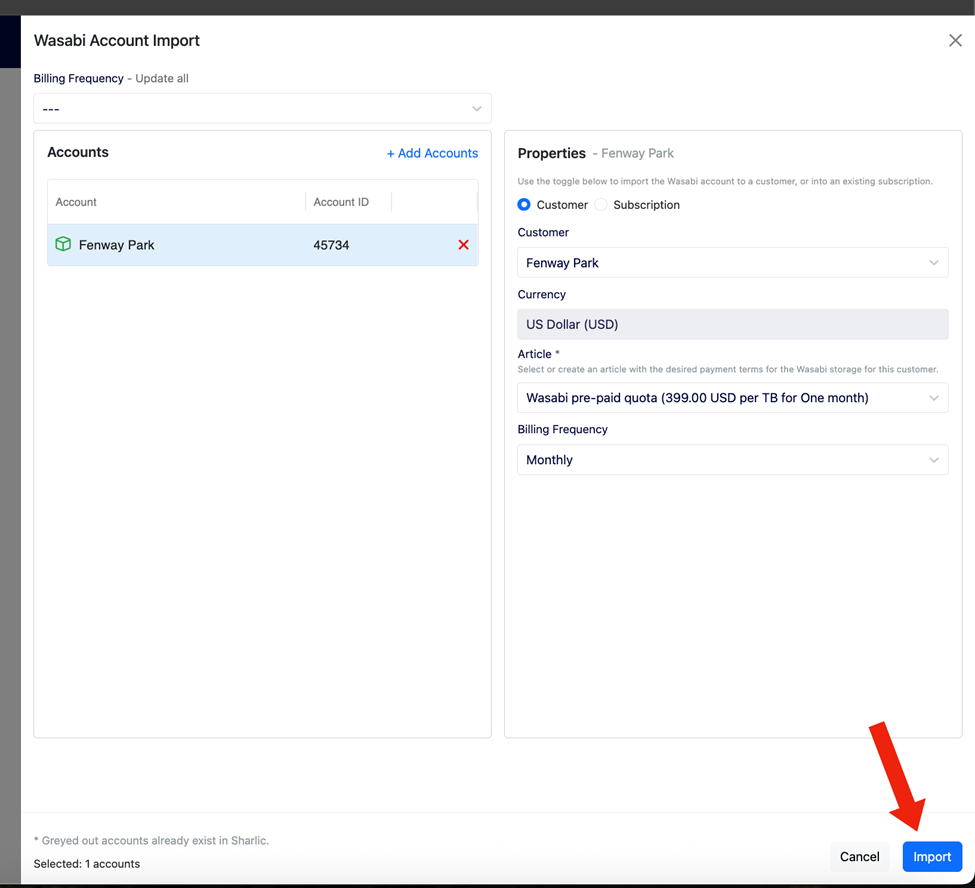
By clicking Import, Sharlic will then link the account to a license, nested within a subscription.
Monitoring and Managing Subscriptions
Go to the Subscriptions tab in Sharlic to view all imported subscriptions.
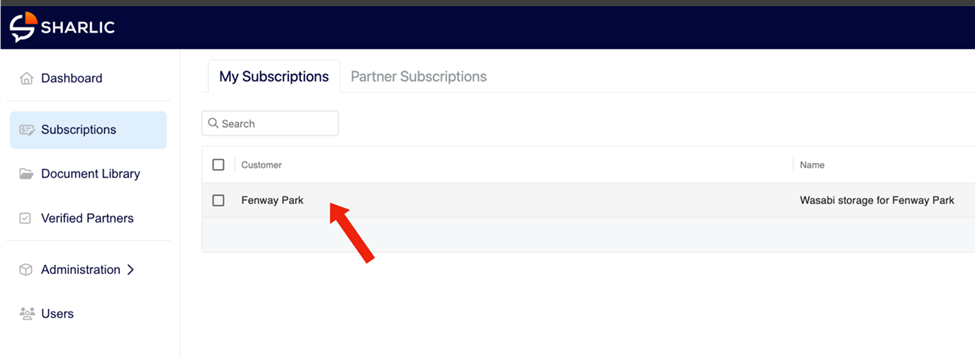
Each subscription displays the following.
Customer name
Billing model
Sales partners
Next invoice date
Actions such as detailed notifications for each license.
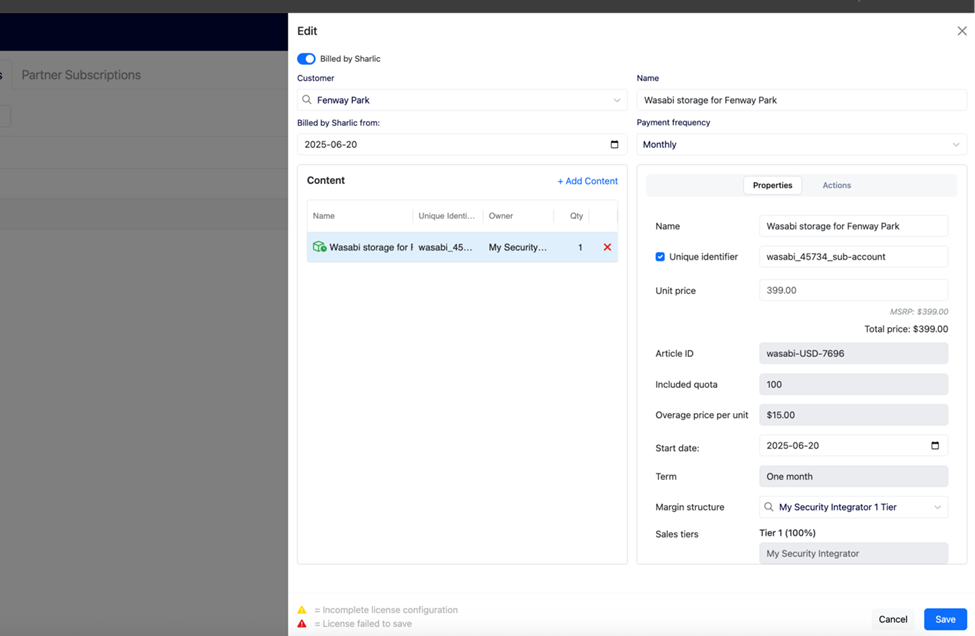
Sharlic will now automatically do the following.
Track storage usage from Wasabi using the same metrics that Wasabi bills you with.
Generate customer invoices on your chosen billing schedule.
Apply your selected pricing model for each customer.
Send invoices to your customers via email or integrated billing platforms (depending on your Sharlic configuration).
You remain in full control of pricing and invoicing. Sharlic simply automates what would otherwise be manual and error-prone work.