Synology Cloud Sync is a real-time, bidirectional file synchronization application for DSM that connects a Synology NAS directly to Wasabi S3-compatible object storage with support for one-way or two-way sync, client-side AES-256 encryption, bandwidth control, and flexible scheduling. For more information, see Cloud Sync - Synology Knowledge Center.
Requirements
Wasabi Hot Cloud Storage Account
A Wasabi Bucket (see Creating a Bucket)
Wasabi Access & Secret Key
Be sure to note your bucket name, storage region URL, and Access & Secret Key, as you will need these for later steps.
Synology NAS running DSM 6.2 or later.
Cloud Sync version 2.3.7 or later (available via DSM Package Center)
This configuration example discusses the use of Wasabi's us-east-1 storage region. Use the region your bucket is located in. For a list of regions, see Service URLs for Wasabi's Storage Regions.
Configuring Synology Cloud Sync With Wasabi
Open Cloud Sync. In DSM, open Package Center and install Cloud Sync (if not already installed). Launch Cloud Sync from the main menu. Either click the + or Create to add a new sync task.
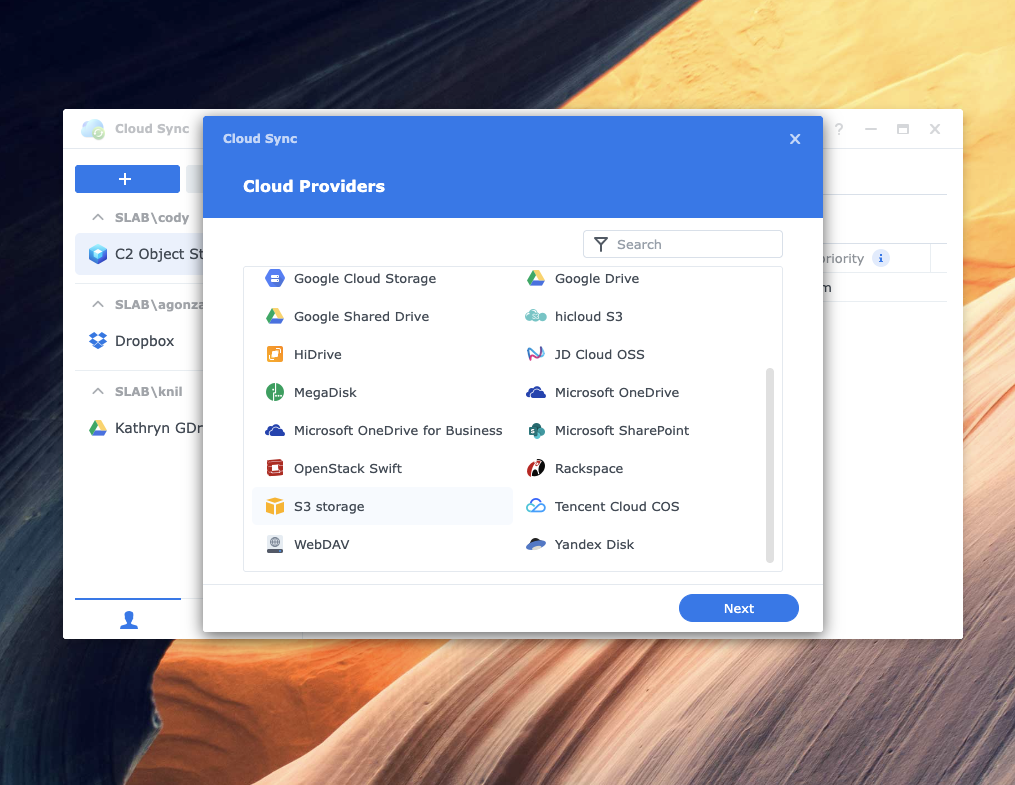
Select cloud provider. On the cloud provider selection screen, select S3 Storage. Do not select any provider-specific option.
Click Next.
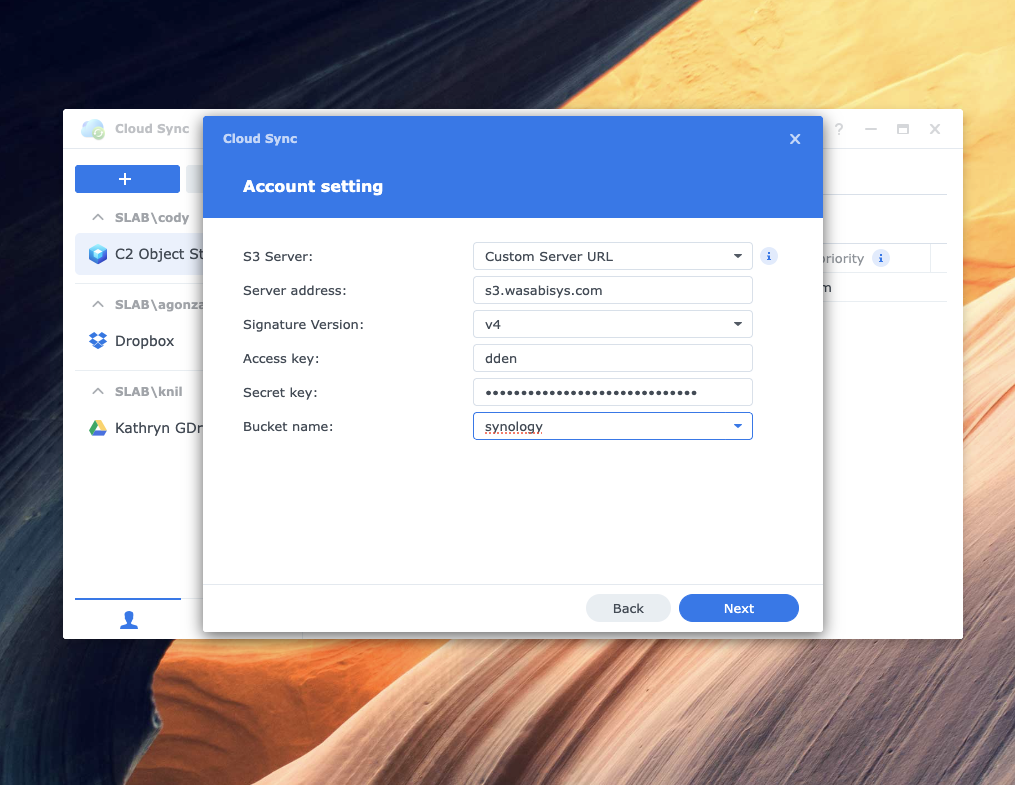
Enter the following Wasabi credentials in the Server address field.
Wasabi service URL for your region (for example, s3.wasabisys.com).
Wasabi Access Key and Secret Key.
Select the target bucket from the drop-down or type the bucket name.
Optionally, specify a remote path within the bucket.
Click Next.
Configure the following sync settings.
Input a Task name.
Set the Sync direction. Choose Bidirectional to keep NAS and Wasabi in sync, Download remote changes only to mirror Wasabi to NAS, or Upload local changes only to push NAS data to Wasabi.
Select the Local path on the NAS to sync.
Enable data encryption (client-side AES-256), if needed. Be sure to record the encryption password securely.
Enable data compression to reduce transfer size, if appropriate.
Configure Bandwidth control to limit the upload/download rates, if needed.
Click Next.
Optionally, to set a schedule, select whether the task runs continuously or only during a defined time window. Click Apply to create the task.
Verify and monitor. The task will appear in the Cloud Sync task list and begin syncing immediately if no schedule restriction applies. Monitor sync status and file counts from the task list. Verify synced objects appear in the Wasabi console under the destination bucket. Review the sync log for any errors or skipped files.