Synology Hyper Backup is a versatile, multi-version backup solution for Synology NAS that enables direct cloud backup to Wasabi S3-compatible object storage with AES-256 encryption, data deduplication, and flexible version rotation. For more information, see Hyper Backup - Synology Knowledge Center.
Requirements
Wasabi Hot Cloud Storage Account
A Wasabi Bucket (see Creating a Bucket)
Wasabi Access & Secret Key
Be sure to note your bucket name, storage region URL, and Access & Secret Key, as you will need these for later steps.
Synology NAS running DSM 6.2 or later.
Hyper Backup version 2.1.8 or later (available via DSM Package Center)
This configuration example discusses the use of Wasabi's us-east-1 storage region. Use the region your bucket is located in. For a list of regions, see Service URLs for Wasabi's Storage Regions.
Configuring Synology Hyper Backup With Wasabi
Open Hyper Backup. In DSM, open Package Center and install Hyper Backup (if not already installed). Launch Hyper Backup from the main menu. Click + in the lower-left corner. Then select Data backup task.
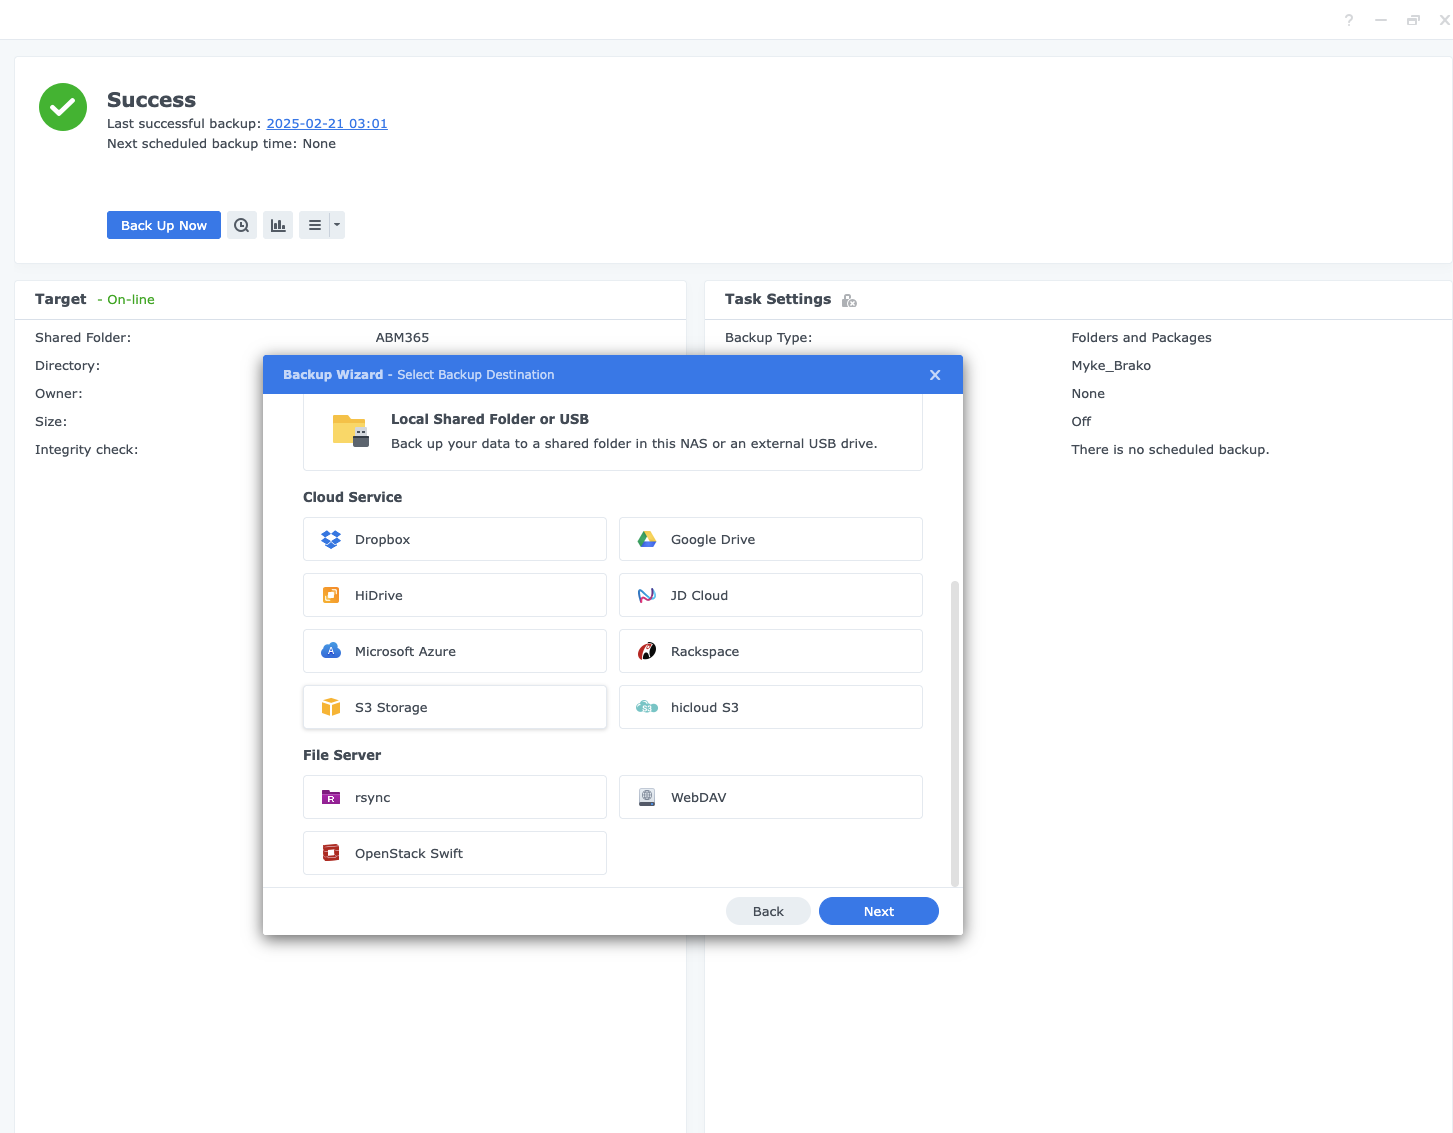
On the Backup Destination screen, select S3 Storage from the list of cloud providers. Do not select any provider-specific option.
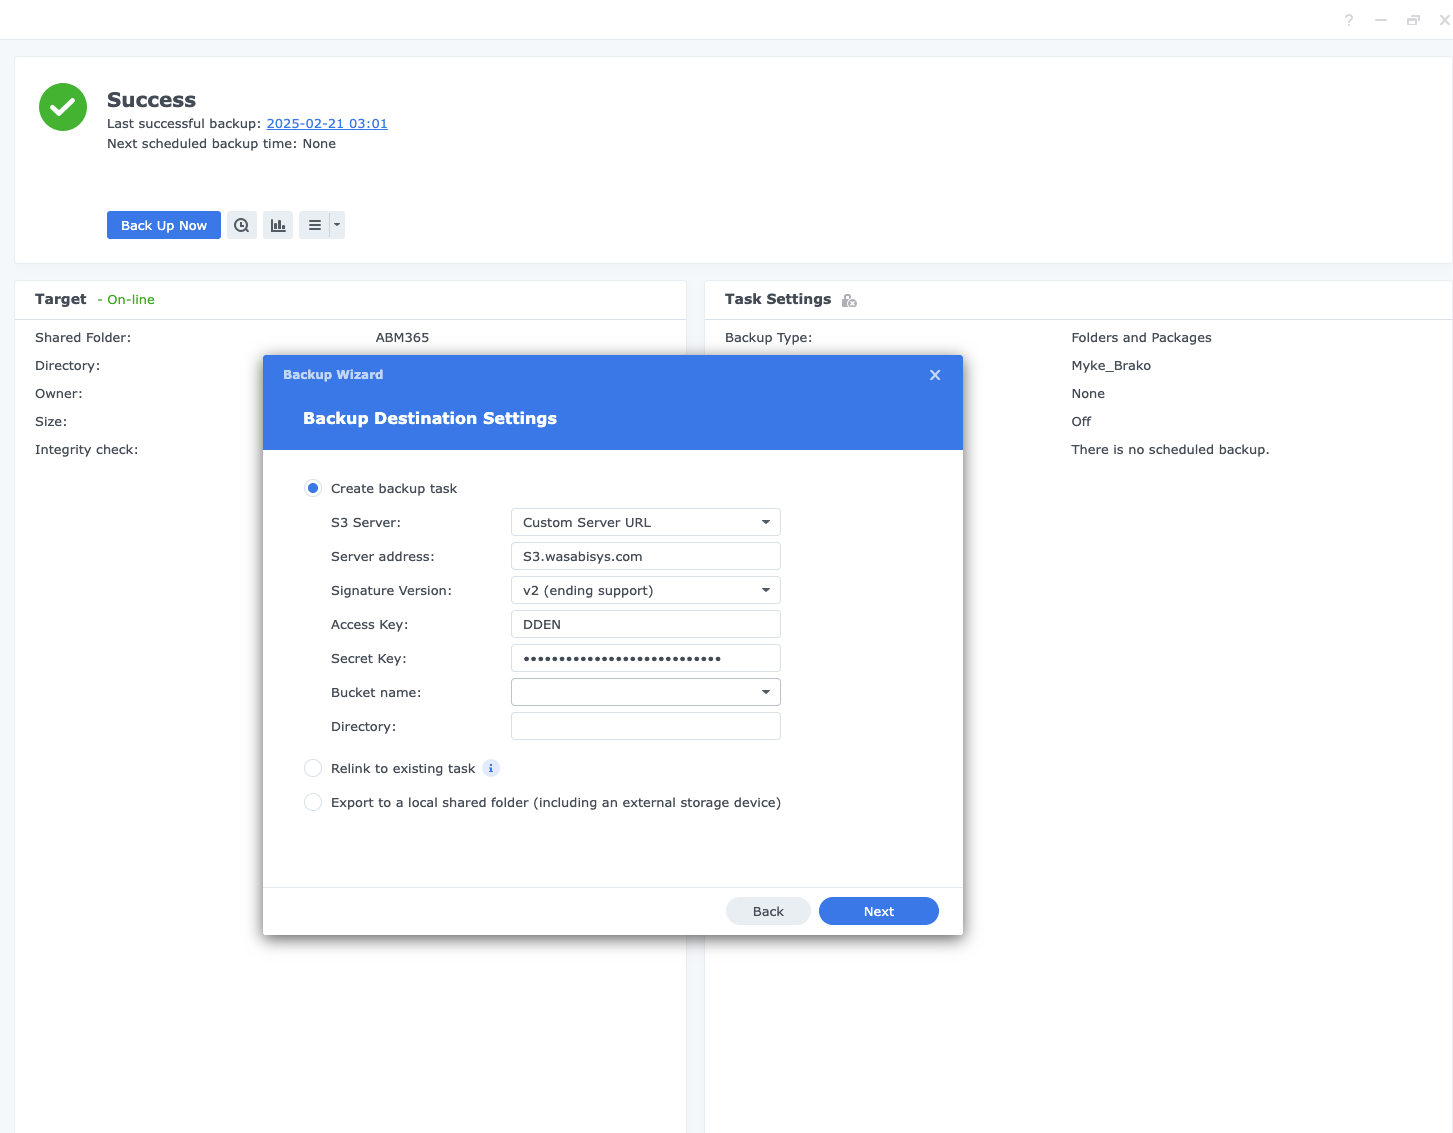
Enter the following Wasabi credentials.
In the S3 Server field, select Custom Server URL.
Input the Wasabi service URL for your region.
Input your Wasabi Access Key and Secret Key.
Input the bucket name.
Leave the Storage path as the default. Optionally, specify a subfolder.
Click Next.
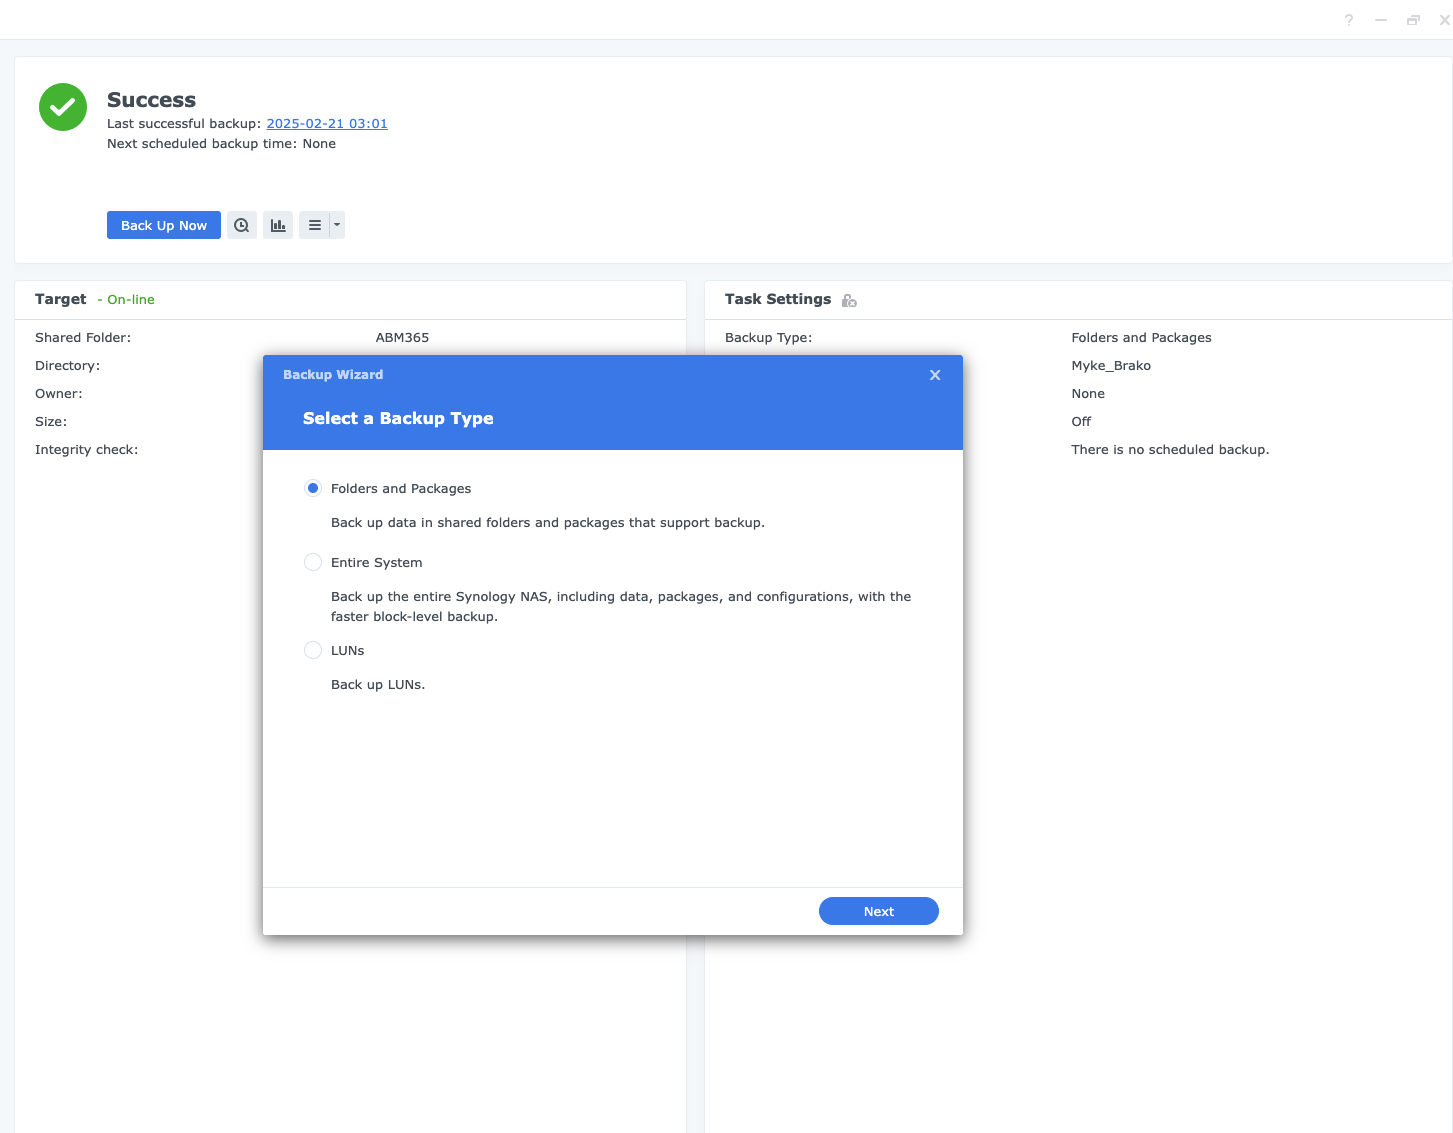
Select backup source. Choose the shared Folders and Packages, and system configurations to include in the backup task.
Click Next.
Configure the following backup settings.
Set a backup schedule (such as manual, hourly, daily, or weekly).
Enable Client-side encryption (if require). Be sure to record the encryption password securely.
Configure version rotation policy (for example, smart Recycle or custom retention rules).
Enable Data compression to reduce transfer size, if appropriate.
To create the task, click Apply.
Run the initial backup. The task will appear in the Hyper Backup task list. Click the backup icon next to the task to run the first backup immediately. Monitor progress from the task list. Verify the backup in the Wasabi Console by confirming objects appear in the destination bucket.
Restoring Data With Synology Hyper Backup
The data restoration process is handled by your specific backup software application. As there are many, potential variables that will affect your unique environment, Wasabi strongly recommends that you seek the guidance of your backup software's technical support team in the event that you encounter difficulty or have application-specific inquiries.
To restore, open Hyper Backup, select the task, click the Restore icon. Browse backup versions using the timeline interface. Select files or folders to restore and choose a restore destination. Click Restore to initiate recovery.