Cohesity DataProtect is a high-performance, secure backup and recovery solution. Wasabi is validated to be used as an External Target for Cohesity DataProtect. To learn more about the Cohesity + Wasabi solution, refer to our solution brief, Comprehensive Enterprise Data Protection and Fast, Cost-effective Cloud Storage with Wasabi and Cohesity.
This article describes the procedure to use Wasabi Object Replication to replicate objects from one region to another within the same continent. This can be used to recover from natural disasters or other events in a region.
In the case of a disaster, a second, licensed Cohesity DataProtect cluster will be required to recover from your “destination” bucket that contains replicated data.
The data restoration process is handled by your specific backup software application. As there are many potential variables that will affect your unique environment, Wasabi strongly recommends that you seek the guidance of your backup software's technical support team in the event that you encounter difficulty or have application-specific inquiries.
Requirements
Cohesity DataProtect is installed and licensed. This solution was tested with 7.3_release-20251021_a422614d.
A second, licensed Cohesity DataProtect cluster.
An active Wasabi Hot Cloud Storage account.
Access to the Wasabi Console as your account’s root user or with equivalent IAM permissions.
An active Cohesity DataProtect external target pointing to a Wasabi bucket.
Access to your Cohesity DataProtect portal as an administrator.
Login credentials to your VM hypervisor will be required in order to recover a VM.
High-Level Steps
Follow the high-level steps below to implement Object Replication from a source bucket to a destination bucket in another region with Cohesity. These are detailed further in the sections below.
Sign up for notifications to be sent to your account email address.
Create a Wasabi "destination" bucket where the source bucket will be replicated to.
Configure an object replication job on the source bucket pointing to the destination bucket.
In the case of a disaster:
A second Cohesity DataProtect cluster will be required.
On this second cluster, a Cohesity external target pointing to the destination bucket may be created and a restore performed.
Signing Up for Object Replication Notifications
Signing up for notifications will allow you to receive information about any object replication failures as well as when the initial replication has finished.
Log in to the Wasabi Console.
Navigate to Settings, then click Notifications. Next to Object Replication, enable email notifications. Enter your Multi-Factor Authentication (MFA) code, and click Save Changes.
.png)
Creating the Wasabi Destination Bucket
The destination bucket is the bucket that the source bucket will replicate to.
Navigate to Buckets and search for the source bucket. Select the bucket name.

Note the name, region, Versioning, and Object Lock settings of the source bucket. In this example, we are using an mt-cohesity-replication-source source bucket in Wasabi’s us-east-1 region that has Versioning and Object Lock disabled (Object Lock would appear next to Versioning if it was enabled).

Choose a region within the same continent for the destination bucket.
This configuration example discusses the use of Wasabi's us-east-1 storage region for the source and us-west-2 for the destination. For a list of regions, see Available Storage Regions.
Navigate to Buckets, then click Create Bucket.

Follow the instructions in Creating a Bucket to create a destination bucket. The Versioning and Object Lock settings must match those of the source bucket. In our example, we are creating a “mt-cohesity-replication-dest” bucket in the us-west-2 region.
Creating an Object Replication Job
Navigate to Buckets and click the name of the SOURCE bucket.
Click the Settings gear wheel on the right side of the screen.

Click the Object Replication tab, then click Create Replication Job.

Select the Replication Type. For this example, we are selecting Replicate to a bucket within this account. Give the job a name, and click in the Destination Bucket text field to select the destination bucket. Click the checkbox next to Sync Deleted Objects. This allows Cohesity to control the lifecycle of the source bucket, and older files that Cohesity deletes from the source bucket will also be deleted from the destination bucket. Then click Create.

The objects in the source bucket will now begin to replicate to the destination. There is no ETA for completion, as it depends on many factors, such as the number of objects. Since you signed up for Object Replication email notifications, you will receive an email when the initial replication is complete.
Appendix A - In Case of a Disaster
If a disaster affects your source bucket, proceed with this section. The example below shows how to recover a Virtual Machine (VM) from your destination bucket.
A second licensed Cohesity DataProtect cluster must be made available for the restoration.
On the second cluster, add your hypervisor as a Registered Source if it has not already been added. See Register or Edit a Hypervisor Source for instructions.
On the second cluster, click Infrastructure, then click External Targets. Click Add External Target.
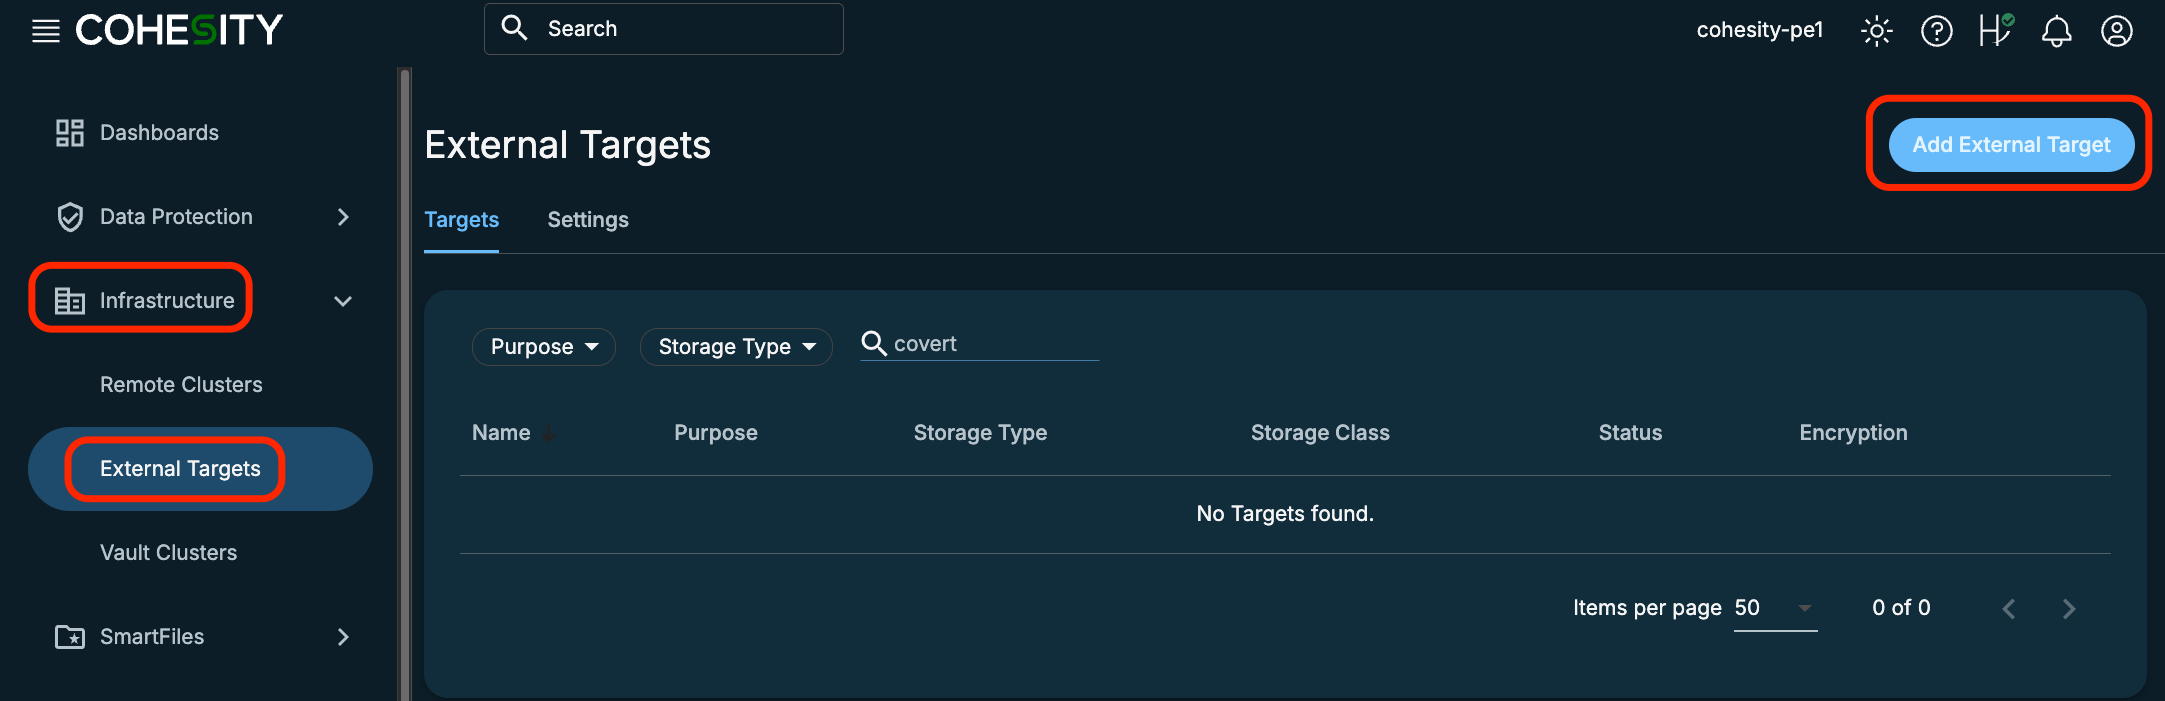
Configure the following for the destination target, then scroll down.
Select the radio button next to Archival.
Select S3Compatible from the drop-down Storage Type menu.
Select Regular from the Storage Class drop-down menu.
Enter your destination bucket name.
Enter your Wasabi access key.
Enter your Wasabi secret key.
Enter the endpoint associated with your destination bucket.
Select Storage Optimized.
Ensure the slider next to Secure Connection (HTTPS) is enabled.
Select AWS Signature Version 4.
Give the external target a name.

If Object Lock was enabled originally (on the source Wasabi bucket), enable Archive Object Lock here. Be sure to leave encryption disabled even if it was used on the original target. We tested with non-encrypted backups and encrypted backups with a manually managed key. We did not test with the Cohesity built-in KMS service. Click Register.

You will now see the registered external target.

Click Data Protection then Cloud Retrieve. Click Start Search.
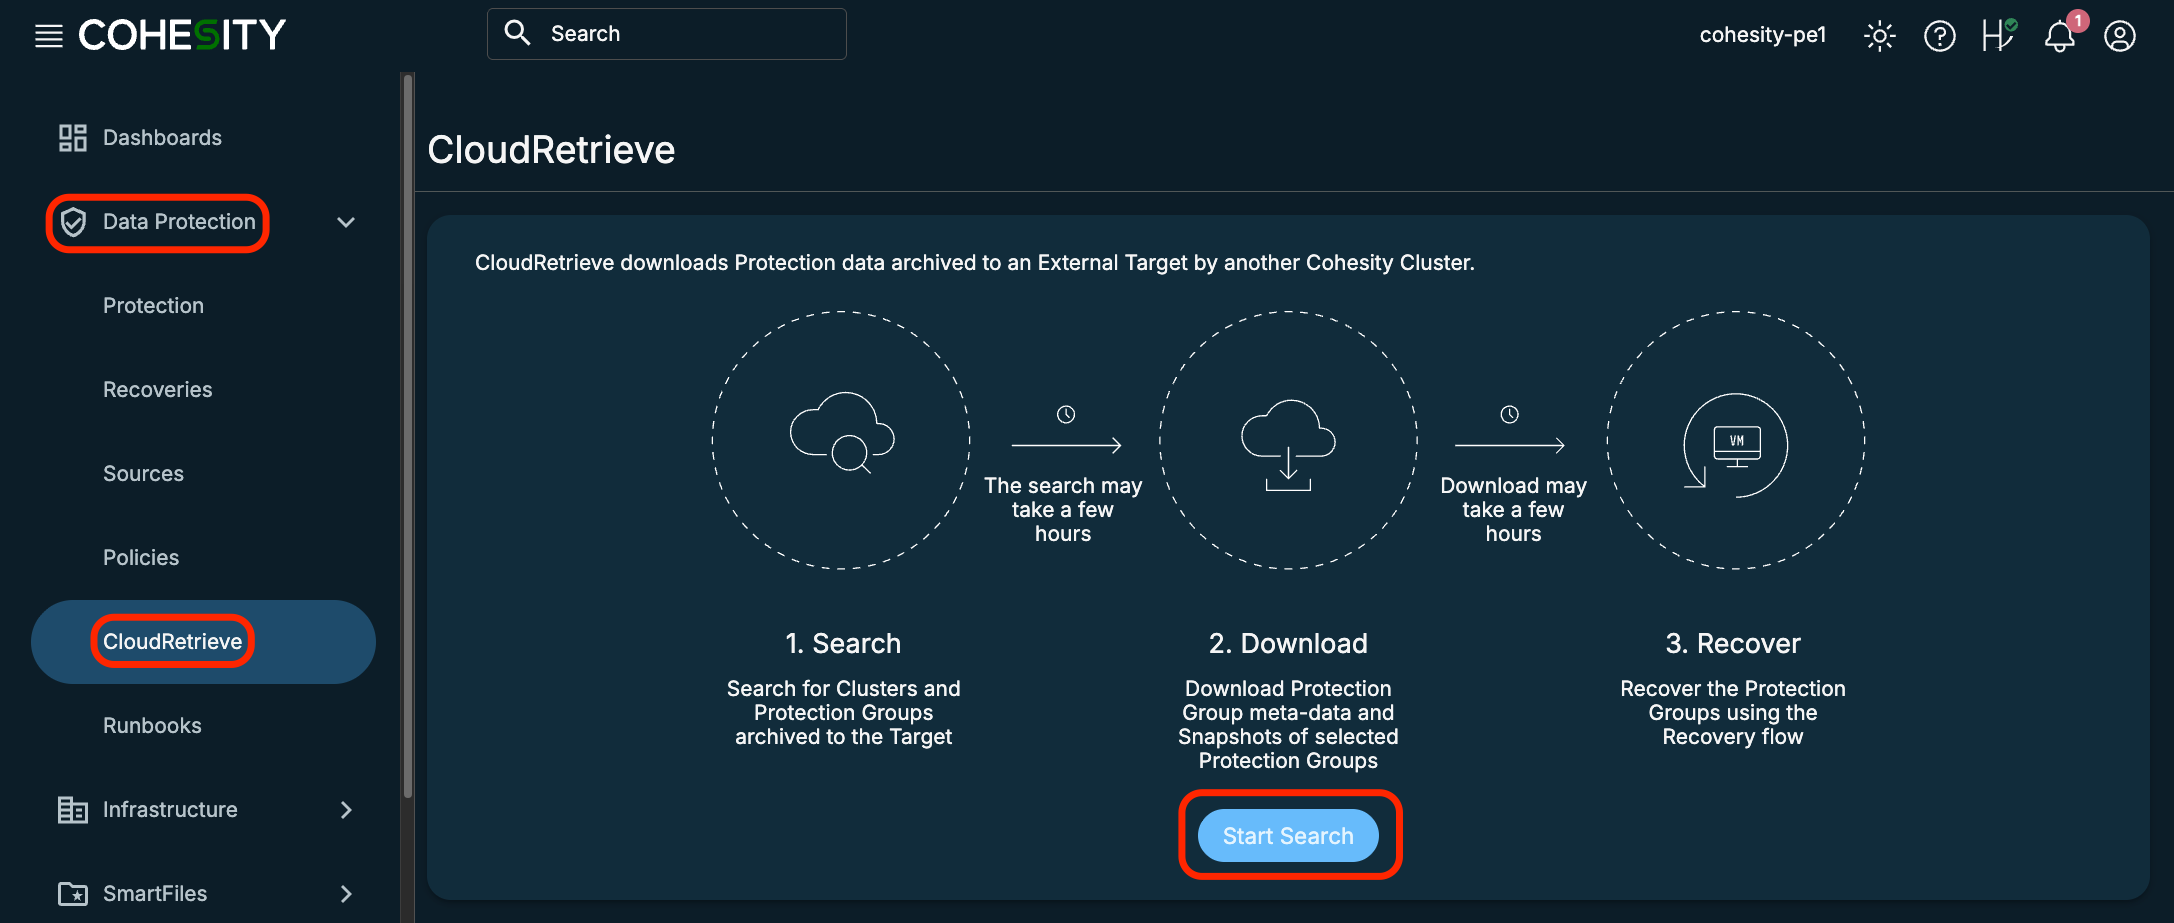
Select the destination external target from the drop-down menu. Set the appropriate date range, and attach a manually managed key file if encryption was used originally. Click Search.

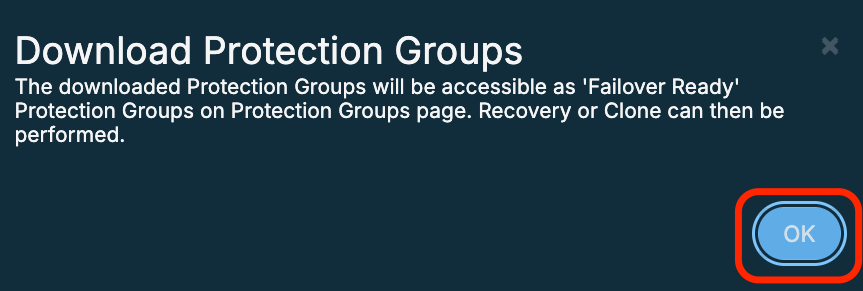
When the Status shows Success, click the checkbox next to the recovered protection group. Select the Storage Domain (we selected the Default Storage Domain). Click Download.

Click OK.
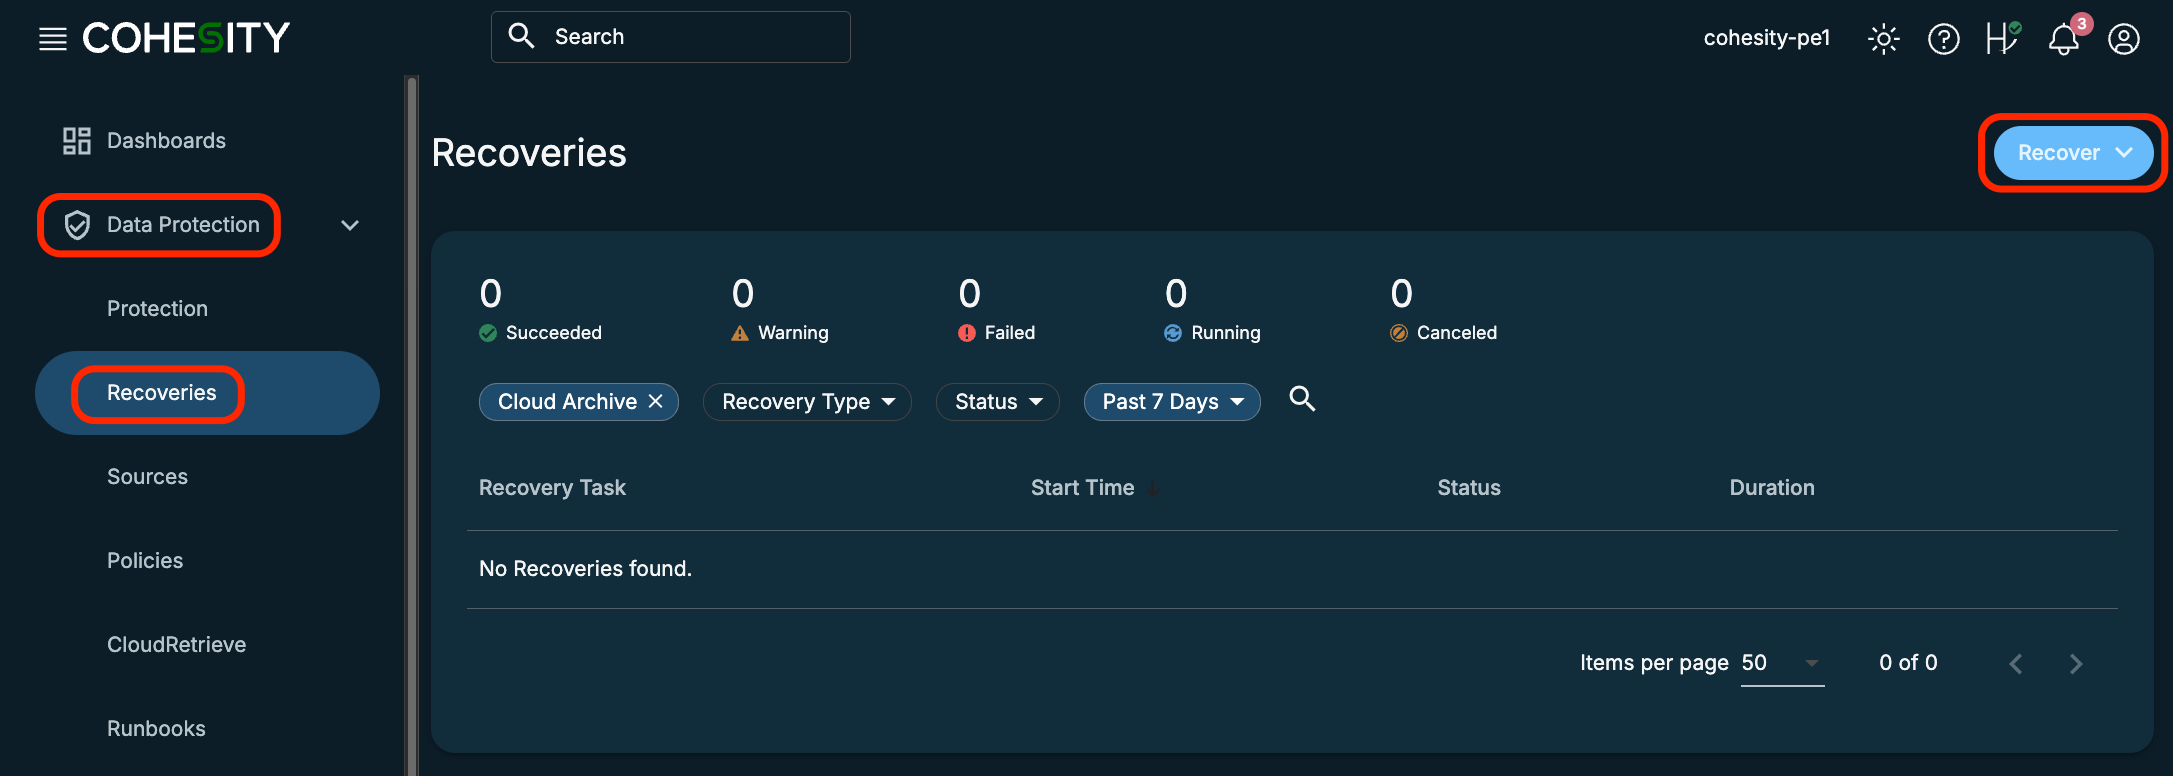
After the Protection Group Meta-Data and Snapshot both show Success, proceed to the next step.

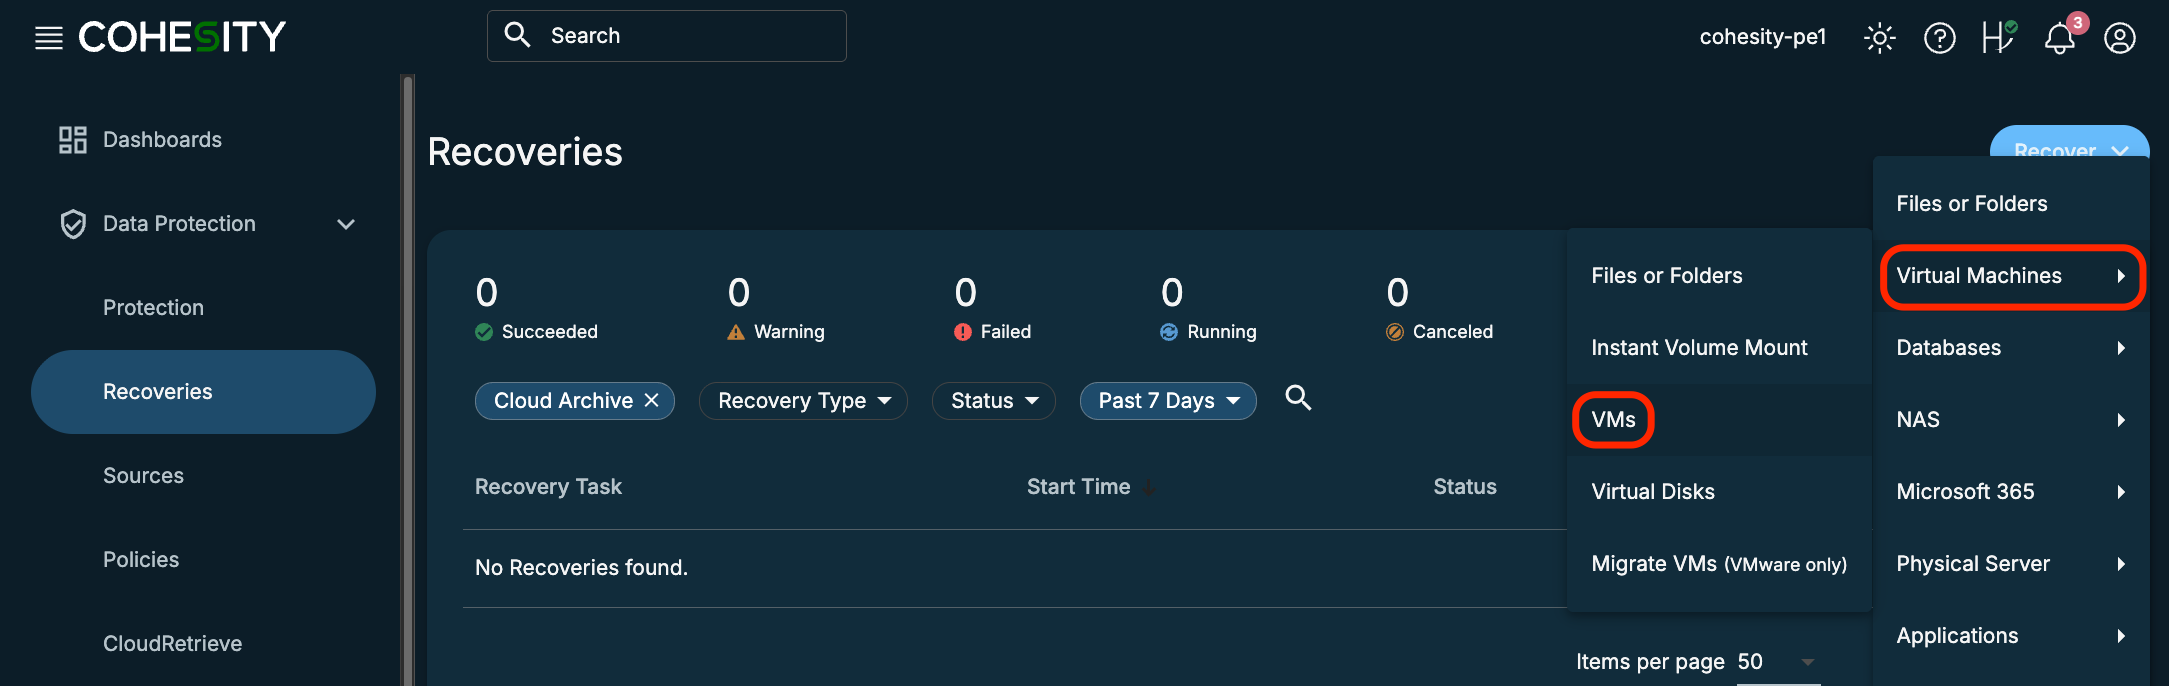
Click Data Protection, then Recoveries. Click Recover.
Click Virtual Machines. Click VMs.
Enter an asterisk (wildcard) in the search field and hit enter. Select the VM(s) you wish to recover and click Next: Recover Options.

Configure the options appropriate for your restore. In the example below, we used a Registered Source we previously configured and a New Location. Scroll down.
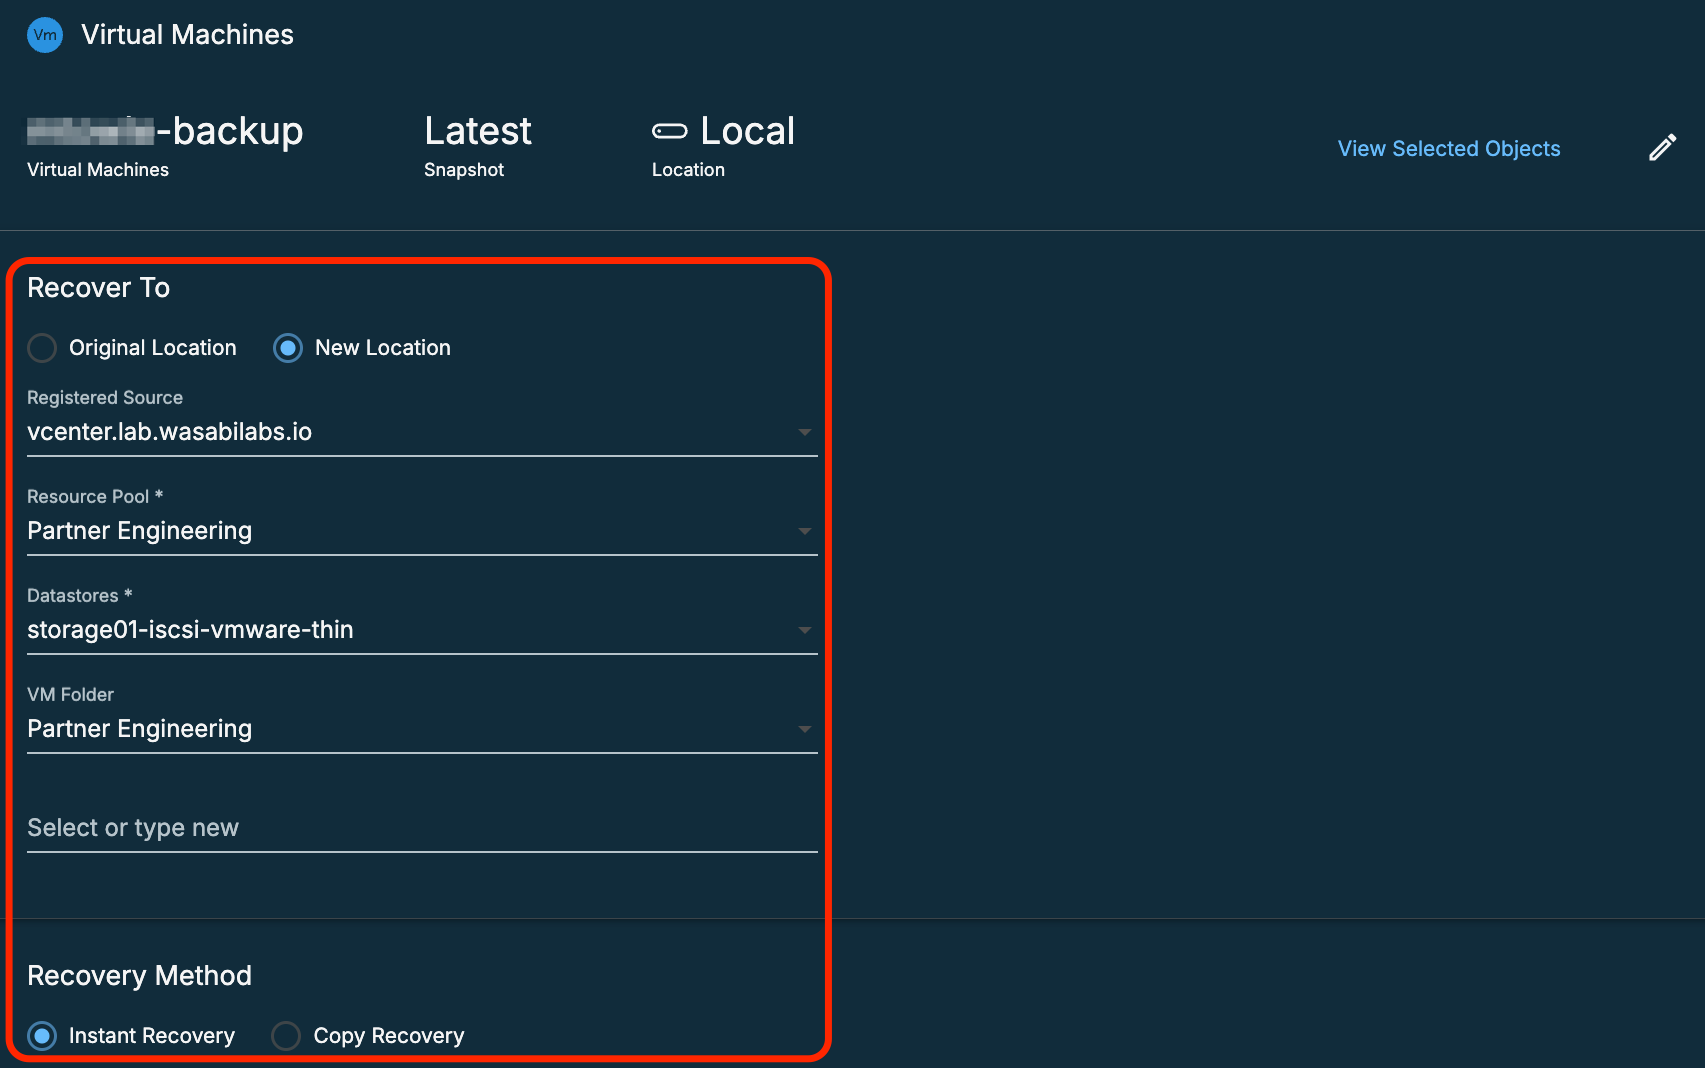
Continue configuring the options. We left the network as Unattached so as to avoid IP address conflicts with the original server. Click Recover.

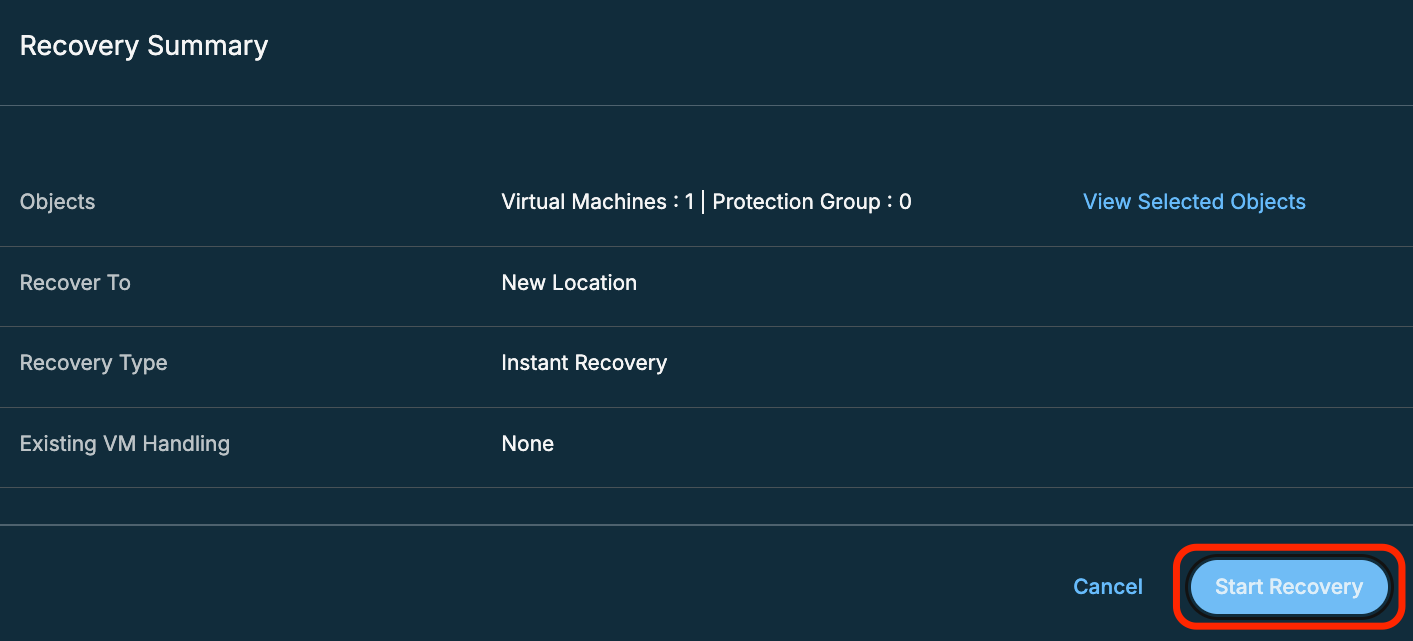
Click Start Recovery.
You will see the Status show Succeeded when the recovery is finished. You may have to refresh the page to update the results.
