Objectives
1 | Download and Install Wasabi Cloud NAS. |
2 | Activate the Wasabi Cloud NAS software. |
3 | Configure Wasabi Cloud NAS. |
Once you have created a Wasabi Cloud NAS (WCN) storage account and downloaded the software, follow the instructions below to activate the software.
The WCN software will present you with a one-time login, as shown below. The one-time login establishes the connection between your WCN storage account and the WCN software, creating a storage bridge used to replicate your on-premise source data to the Wasabi cloud. This process creates a programmatic user in your WCN storage account. The programmatic user is then assigned API keys with AmazonS3FullAccess permissions.
Enter the following Wasabi Cloud NAS account credentials:
— Email Address
— Password
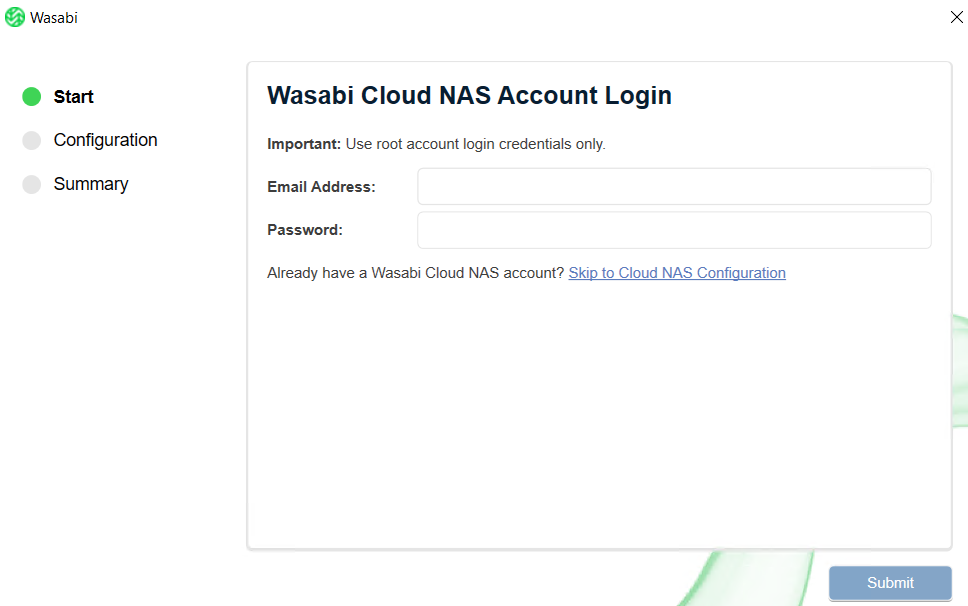
Click Submit.
Optionally, if you have previously installed WCN on a different server, click Skip to Cloud NAS Configuration to manually enter the S3 API keys.
.png)
On the Account Configuration Details screen, enter the following information:
— Email Address — The email address with which you signed up for WSC.
— Account ID — This information is located under Settings in the Wasabi Console.
— Access Key — Wasabi Access Key.
— Secret Key — Wasabi Secret Key.
Click Configure.
You will be presented with The Configuration Wizard. The Configuration Wizard connects the WCN software to your WCN storage account. To configure WCN, continue to 3—Configuring Wasabi Cloud NAS.
Objectives Met!
| 1 | Download and install Wasabi Cloud NAS. |
| 2 | Activate the Wasabi Cloud NAS software. |
| 3 | Configure Wasabi Cloud NAS. |
After Getting Started With Wasabi Cloud NAS (WCN), explore more features in the Product Guide for Wasabi Cloud NAS (WCN).