Adobe Premiere Pro is the leading video editing software for film, television, and the web. Adobe Premiere Pro does not natively support cloud storage, such as Wasabi Hot Cloud Storage. To use Wasabi's low-cost and high-speed cloud storage service, you can utilize WCN. To do so, follow the steps below.
Prerequisites
Adobe Premiere Pro application and active subscription.
Wasabi cloud storage account with an active subscription.
Wasabi bucket. For more detail, review 2—Working With Buckets and Objects.
Access key and secret key pair. For more detail, review 3—Creating a User Account and Access Key.
WCN software (latest version).
Configuration
Install WCN. For instructions on setting up your WCN instance, refer to 1—Downloading and Installing Wasabi Cloud NAS.
Configure a source folder to back up your Wasabi bucket. For more detail, refer to 3—Configuring Wasabi Cloud NAS.
Update the following registry key settings to optimize the video playback inside Premiere Pro. To do so, open the Windows Registry by entering "regedit".

Navigate to the following path to locate the registry settings of Wasabi Cloud NAS: Computer\HKEY_LOCAL_MACHINE\SOFTWARE\Wasabi\tiger-bridge\tiersvc\settings. Source_icon_mode setting.
Be sure the value is set to 0.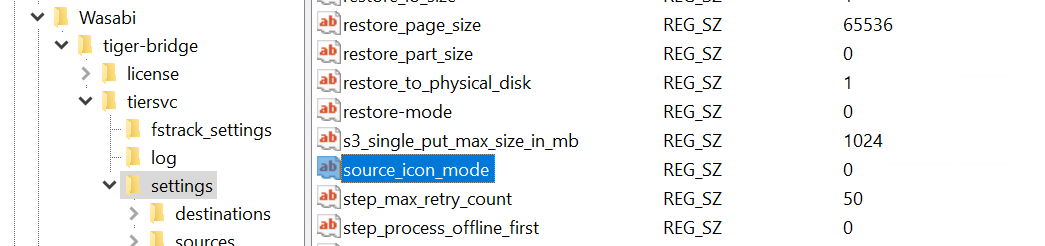
Verify or adjust the restore_part_size setting. Be sure it is set to 0.
Be sure that the progressive_restore_mode is set to 1.
Adjust progressive_restore_timeout to 10,000.
Open Adobe Premiere Pro and Create a new Project.

Click Media Browser. Navigate to the source folder where your video files are stored.
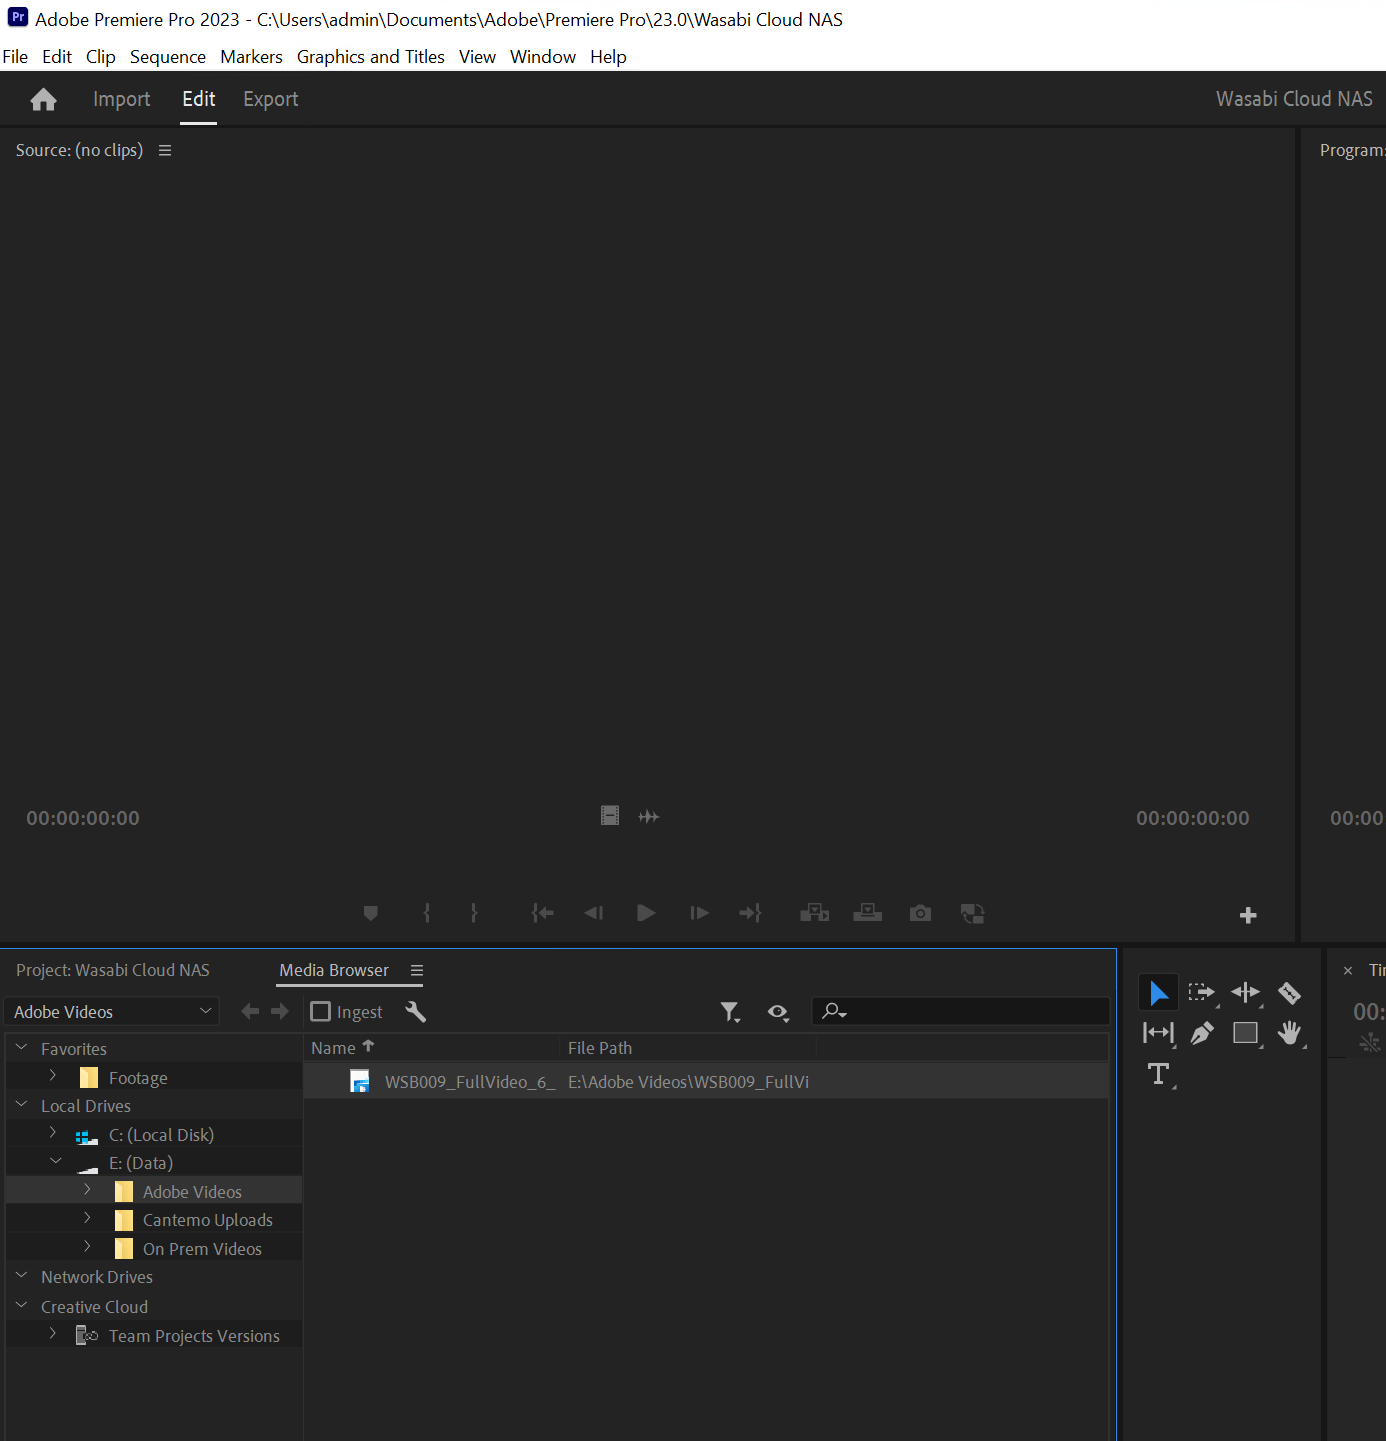
Drag and drop the video file you want to edit into the open tile.
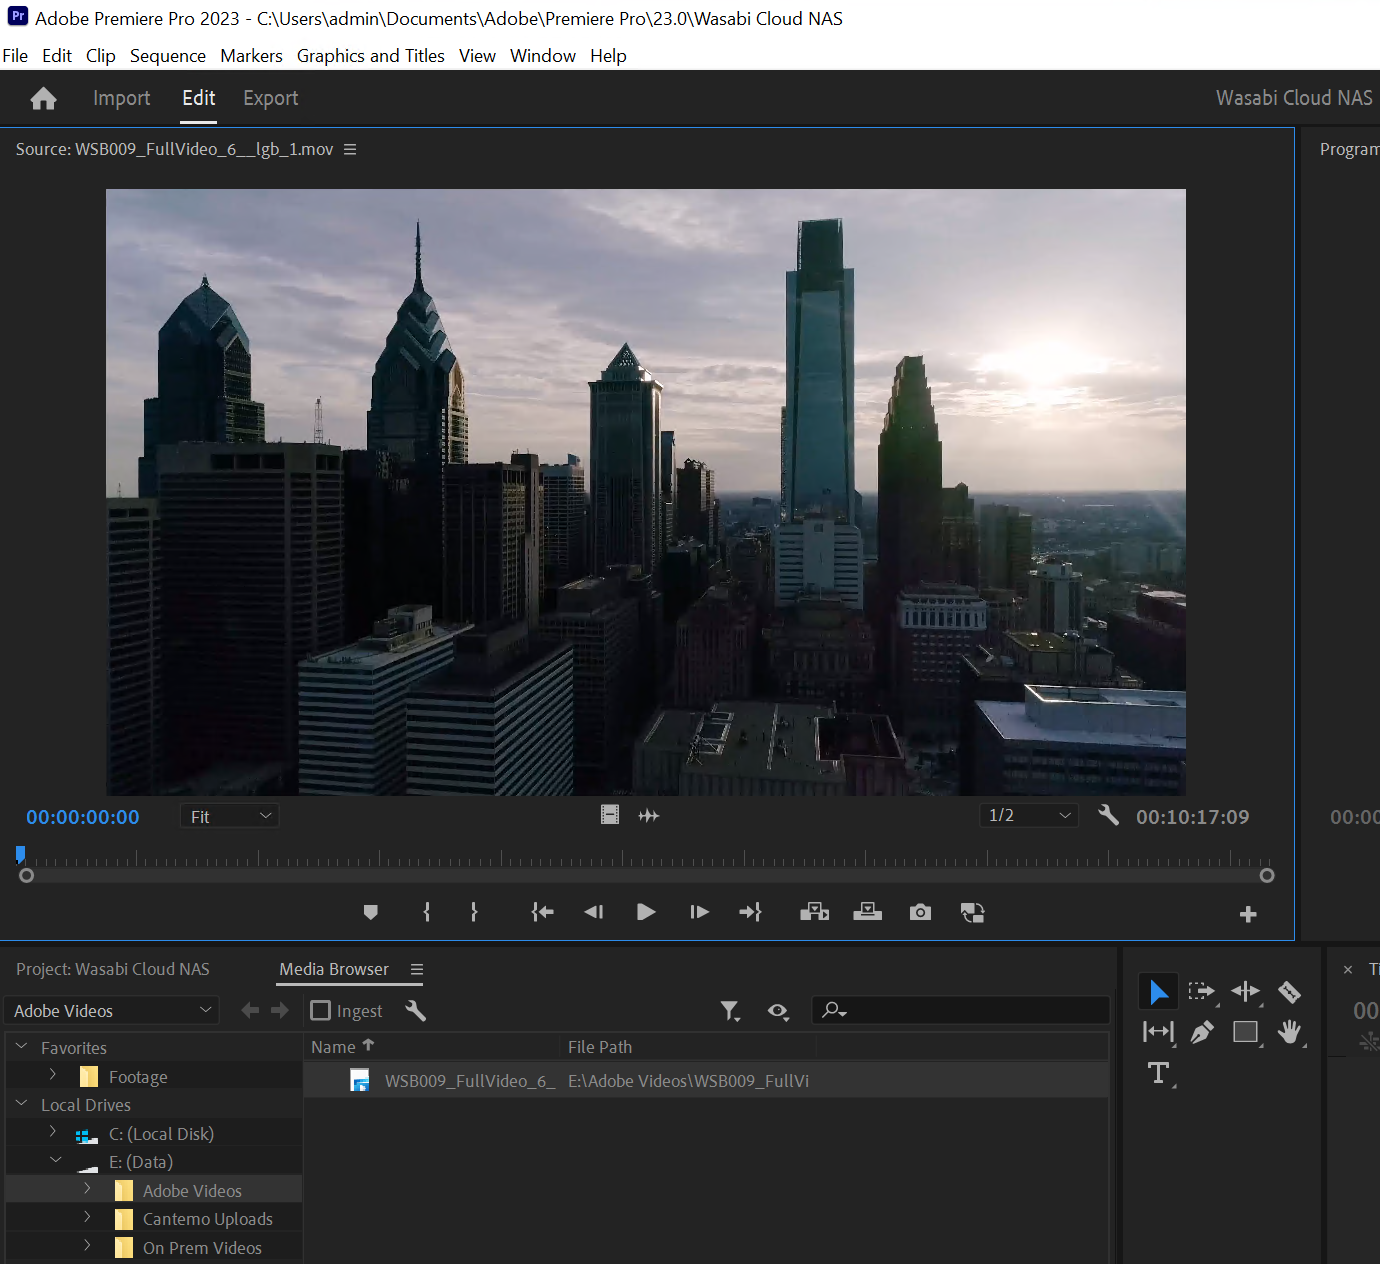
The video file will play back from the cloud as needed for editing. Once done editing and saving the file, it will be replicated and reclaimed in your bucket after meeting your policy settings.