If You Are a Trial Customer...
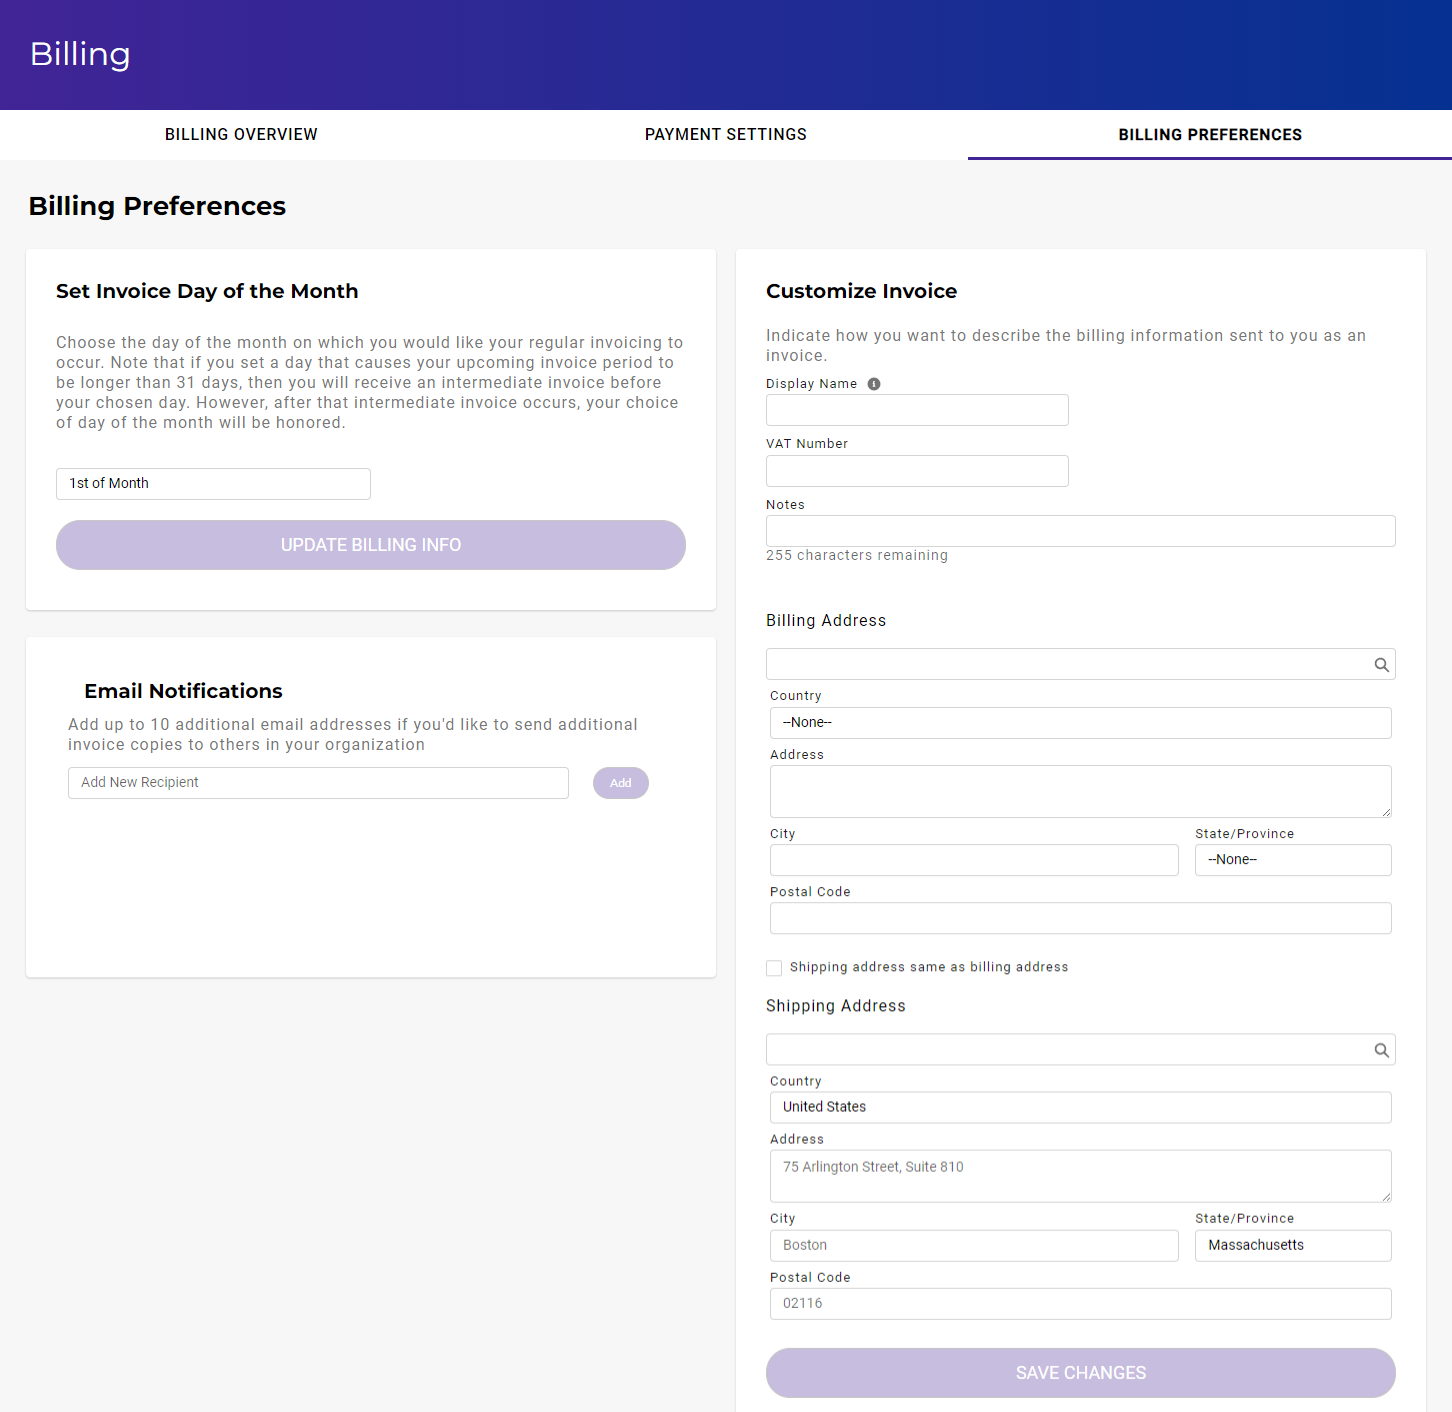
You cannot change anything on the BILLING PREFERENCES tab, but it will appear as:
If You Have a Paid Account...
You can specify billing preferences on the BILLING PREFERENCES tab to:
Set the day of the month for invoicing
Add recipients for email notifications
Customize your invoice
The following is an example of the BILLING PREFERENCES tab, but the specific information may vary depending on your payment settings.
Setting the Invoice Day of the Month
By default, Wasabi uses a 30-day billing cycle that begins when you become a paid customer. In other words, once you become a paid customer, you will receive an invoice every 30 days. This also means that the start date of your billing cycle may not always be the same day every month because not every month has 30 days.
You can control the start date of the Wasabi billing cycle by choosing a day of the month on which you would like your regular invoicing to occur. You cannot select a day that produces an invoice that is fewer than 5 days old. If you set a day that causes your upcoming invoice period to be longer than 31 days, you will receive an intermediate invoice before your chosen day. However, after the intermediate invoice occurs, your chosen day of the month will be honored.
If you change from the default 30-day cycle to a specific day every month, you will not always be charged the same amount every month for months that have more or fewer days than 30. Rather than a fixed amount, you will be charged a little less for February and a little more for months that have 31 days.
To set the invoice day of the month:
Click the "day of the month" area and click to select an option (such as 7th of Month) from a drop-down menu.
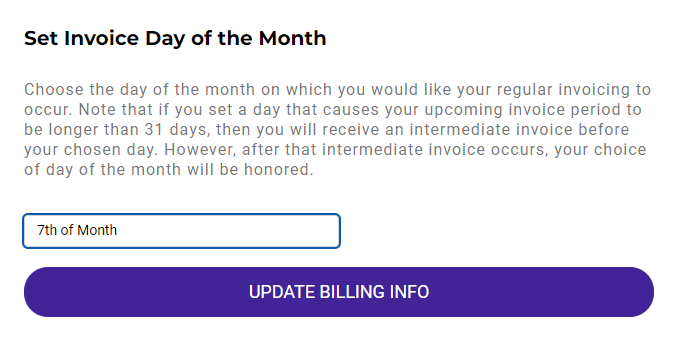
Click UPDATE BILLING INFO.
Adding Recipients for Email Notifications
You can specify that email notifications should be sent to recipients in your organization. An email notification will be sent to the email address(es) associated with the Wasabi storage account every time the storage account reaches 75%, 90%, or 100% of the account’s storage capacity.
The information that can be sent will vary depending on your account type:
If you purchased Wasabi directly:
As an RCS account, you can send invoice, payment, and RCS usage information to additional recipients.
As a Pay as You Go (Pay-Go) account, you can send invoice and payment information to additional recipients.
If you purchased Wasabi indirectly through a Wasabi reseller or partner:
As an RCS account, you can send RCS usage information to additional recipients.
As a Pay-Go account, you cannot send information to additional recipients.
Adding email notifications for each account type is described below.
Wasabi Purchased Directly With RCS
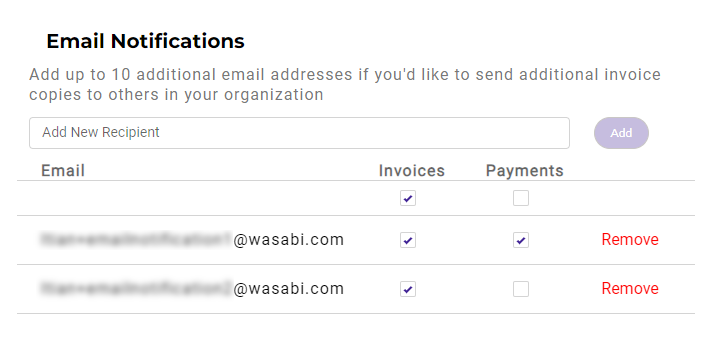
You can add up to ten email addresses in your organization to which invoice information should be sent. You can specify that a recipient should receive copies of invoices and/or notices of payments. In addition, you can specify that the recipient receives information about the RCS usage.
Click in the Add New Recipient area and enter an email address.
Click Add. Each recipient is displayed. For example, two recipients are shown below.
Check to indicate if a recipient should receive copies of invoices, payment information, and/or RCS usage information.
To remove a recipient from the list, click Remove to the right of the appropriate email address.
Wasabi Purchased Directly as Pay-Go
You can add up to ten email addresses in your organization to which invoice information should be sent. You can specify that a recipient should receive copies of invoices and/or notices of payments.
Click in the Add New Recipient area and enter an email address.
Click Add. Each recipient is displayed. For example, two recipients are shown below.
Check to indicate if a recipient should receive copies of invoices and/or payment information.
To remove a recipient from the list, click Remove to the right of the appropriate email address.
Wasabi Purchased Through a Reseller or Partner With RCS
You can add up to ten email addresses in your organization to which information about the RCS usage should be sent.
Click in the Add New Recipient area and enter an email address.
Click Add. Each recipient is displayed. For example, two recipients are shown below.
Check to indicate if a recipient should receive RCS usage information.
To remove a recipient from the list, click Remove to the right of the appropriate email address.
Customizing the Invoice
You can customize the invoice to indicate how you want to describe the billing information that is sent to you. All of this information is optional. Customization affects only invoices that are generated after the customization has been done. It is not possible to change previously generated invoices.
Enter the Display Name of the organization or company that will be displayed on invoices.
Enter a VAT Number(up to 25 characters), if applicable.
Wasabi will validate that VAT number to prevent future charges for VAT. Once the VAT ID is entered and validated, Wasabi will no longer charge for VAT in the monthly invoice. Wasabi uses VAT validation services that are provided by EU member states. These services can be unreliable and very sensitive to VAT ID formatting. If you cannot validate the VAT ID, try again in a few hours in case the EU member state services are offline. Even if the validation of the VAT ID fails, you will still see what you entered into the field. It will not be considered tax-exempt until Wasabi can complete the verification.
Netherlands customers will still have to pay VAT tax.
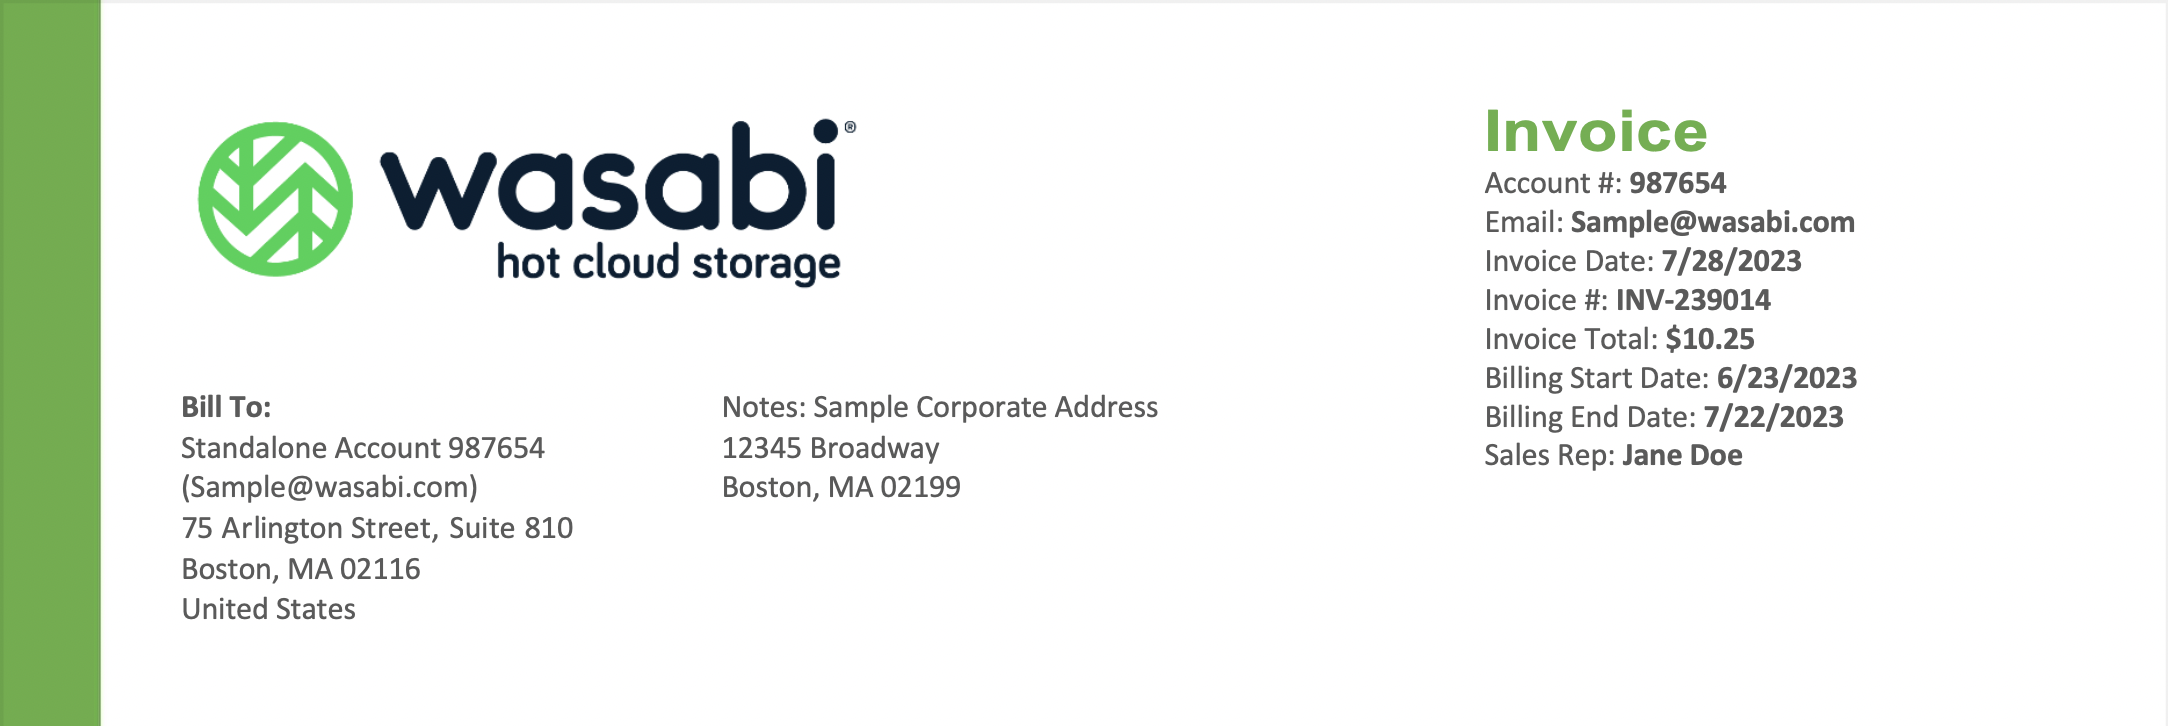
Enter notes that will appear on invoices in the center of the invoice header. Refer to the examples below.
Enter billing address information. The address on an Invoice is taken from the address on the credit card associated with your account. You cannot change this.
You can check to indicate that your shipping and billing addresses are the same. If they are not the same (you uncheck this option), you can enter shipping address information.
Click SAVE CHANGES.
In this example, the corporate address is added in the Notes section:
In this example, the VAT ID number is added in the Notes section:
