Commvault Cloud (formerly Metallic) has been validated for use with Wasabi. Follow the steps outlined below to use Commvault Cloud with Wasabi.
Requirements
A Commvault Cloud account subscription
Commvault Cloud Backup Gateway downloaded and installed
An active Wasabi cloud storage account
Configuring Wasabi as a Cloud Storage Target
Log in to the Commvault Cloud account.
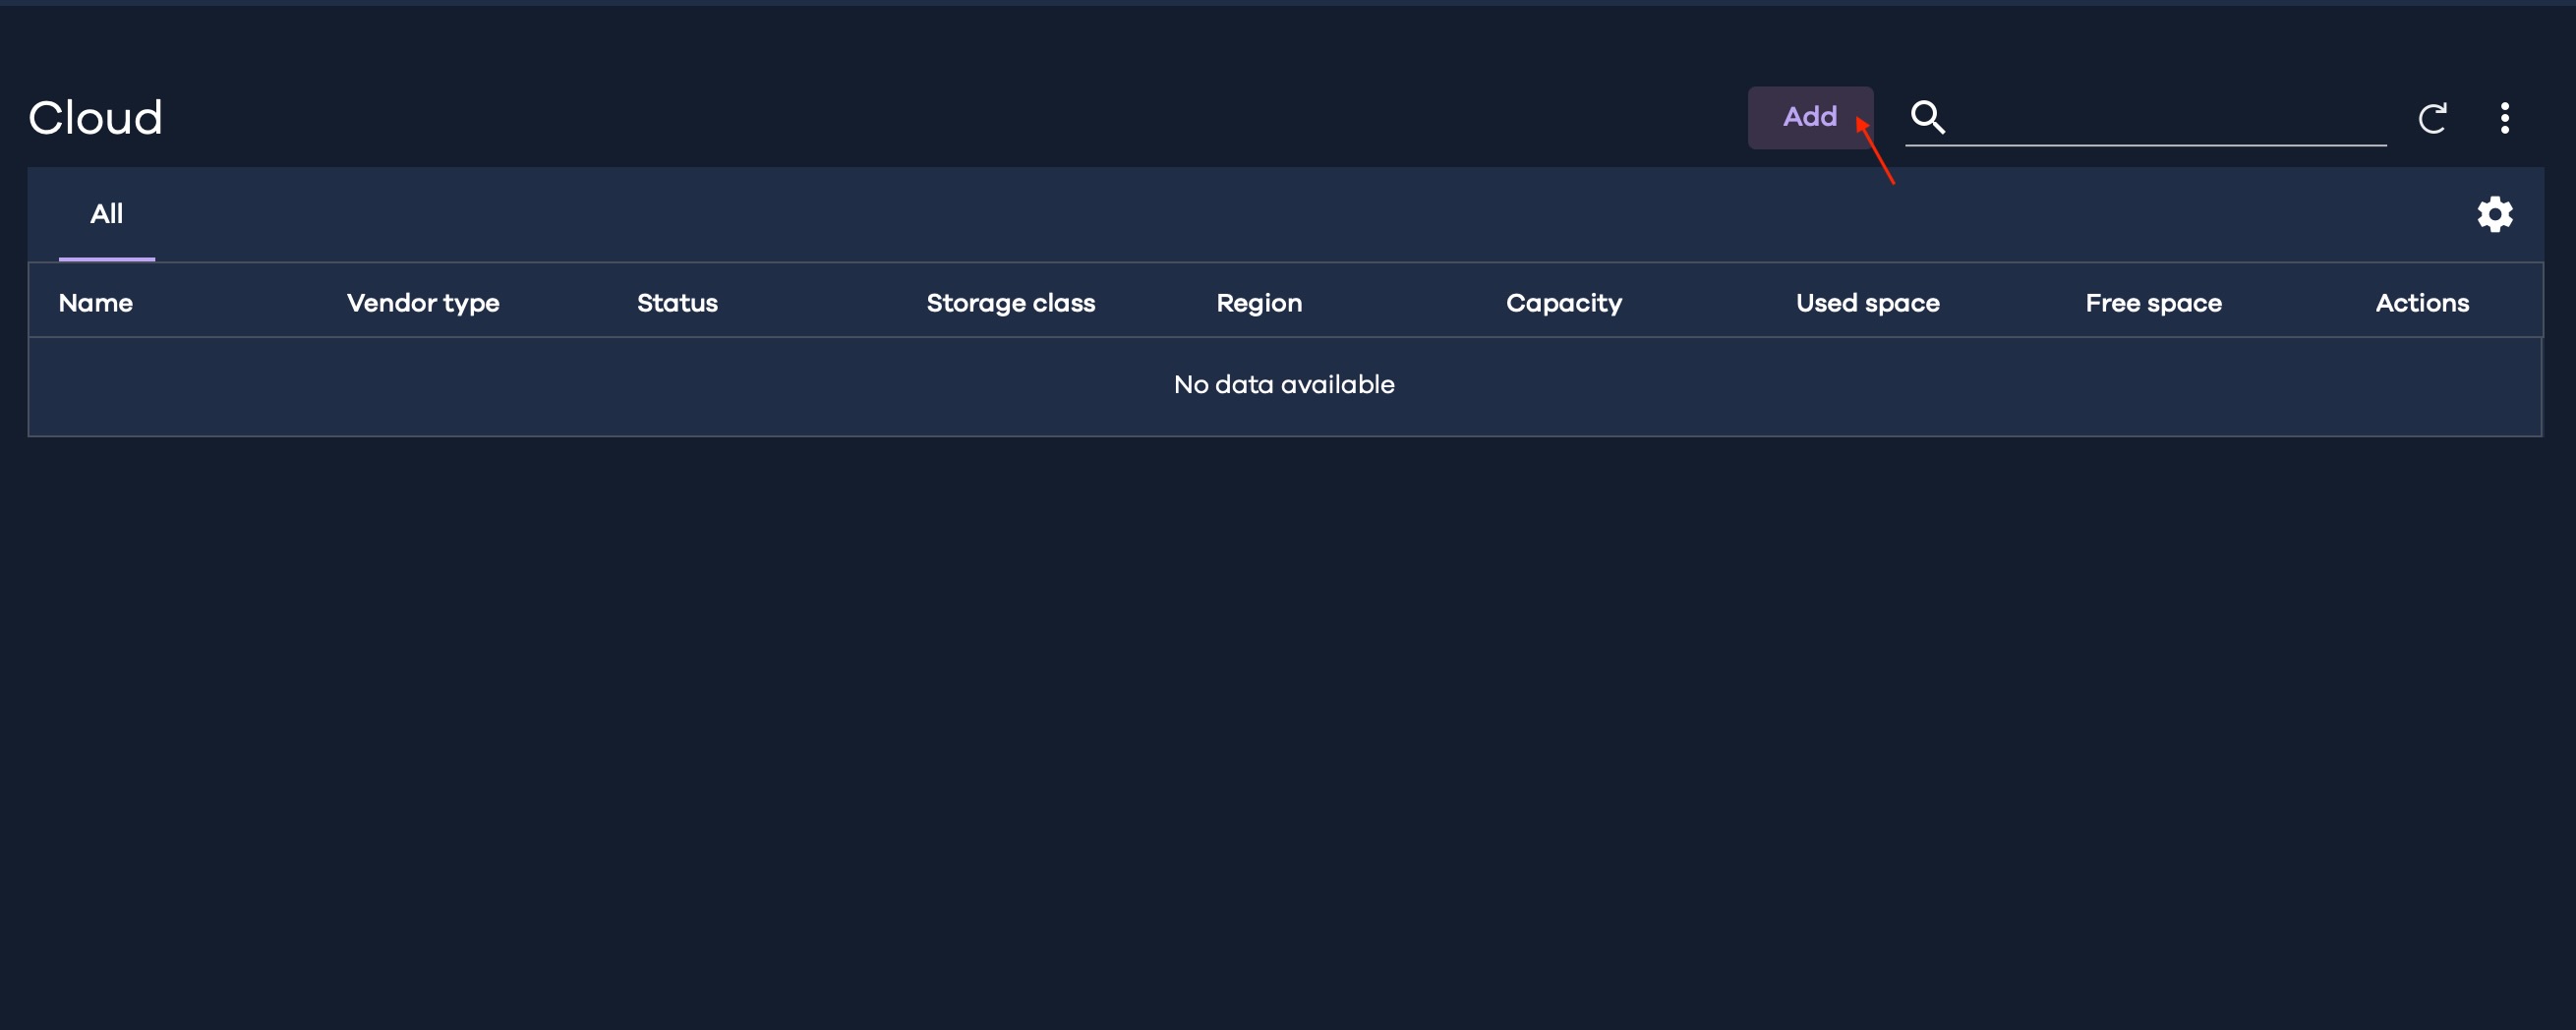
Navigate to Storage. Click Cloud.
.png)
Click Add to add a new storage target.
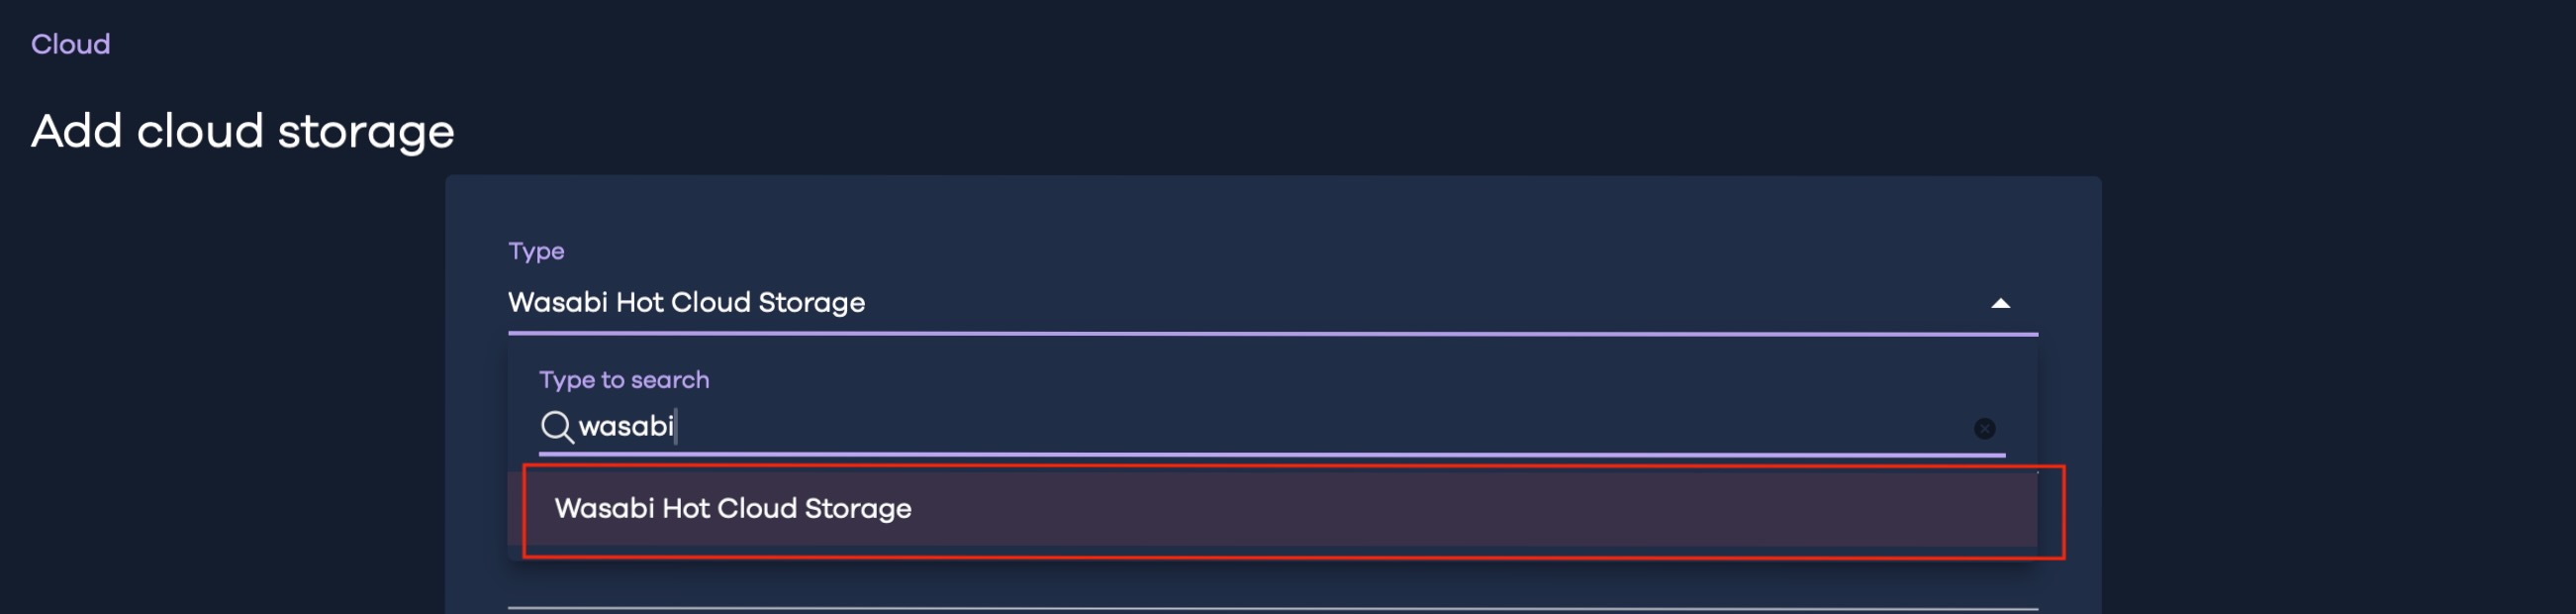
In the Add Cloud Storage window, expand the Type drop-down menu. Search for Wasabi and select Wasabi Hot Cloud Storage.
Provide the following details:
Name — Provide a name for the cloud storage.
Service Host — Provide the endpoint URL of the region where the bucket is located.
Media agent — Select the desired media agent.
Click + sign under Credentials to add the credentials for your Wasabi account.
.png)
This configuration example discusses the use of Wasabi's us-east-2 storage region. To use other Wasabi storage regions, use the appropriate Wasabi service URL as described in Service URLs for Wasabi's Storage Regions.
In the Add Credential dialog box, provide the following details and click Save.
Credential name — Provide a name for the credentials
Access key ID — Provide the Wasabi access key
Secret access key - Provide the Wasabi secret access key
.png)
Select the added Wasabi credential and provide a bucket name. Enable deduplication and add a location for the Deduplication DB. Click Save.
.png)
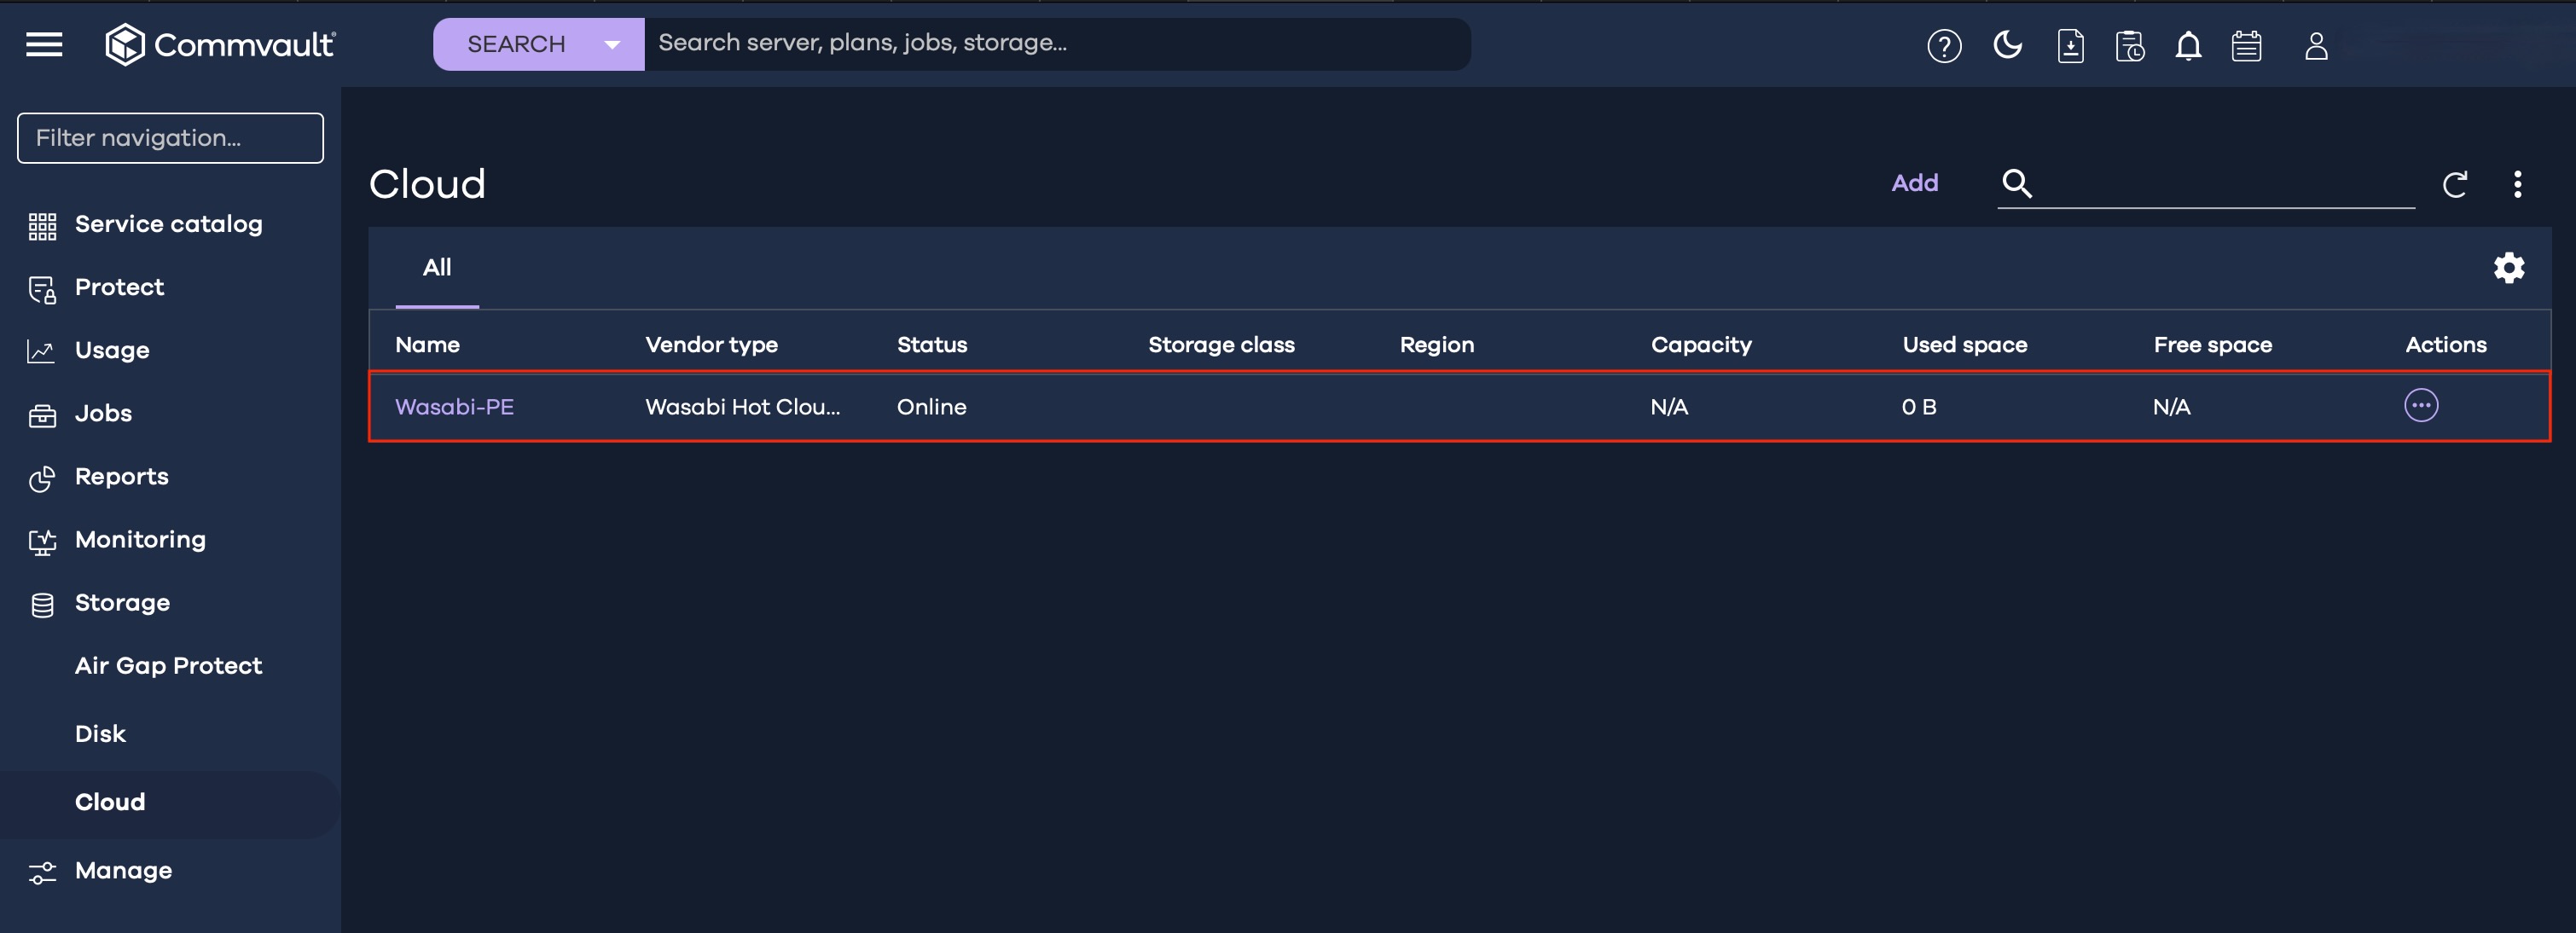
The Cloud tab displays the newly added Wasabi storage location.
Creating a Backup Plan
Navigate to Manage. Click Plans.

Click Create Plan. Select Backup.
.png)
In the Create Backup Plan wizard, select Create a new plan and provide a name in the Plan name field. Click Next.

In the Storage Policy tab, configure the storage targets. Click Add Copy.
.png)
Wasabi can be configured as primary storage or as a target for a secondary copy of backup data.
5.1. Configuring Wasabi as a Primary Copy
5.1.1. In the Add copy dialog box, provide the following details and click Save.
Name — Provide a name for the destination
Storage — Select the Wasabi storage location configured earlier
Retention period — Configure the desired retention period

5.1.2. Click Next to configure the Schedule Policy.
5.2. Configuring Wasabi as a Secondary Copy
5.2.1. To configure Wasabi as a secondary storage target, configure the desired storage as primary storage and click Save.
.png)
5.2.2. Click Add Copy to add Wasabi as a secondary copy.

5.2.3. Provide the required information. Click Save.
5.2.4. Click Next to configure the Schedule Policy.
Configure the desired schedule policy. Click Submit.

The virtual machines associated with this plan will be backed up to the Wasabi storage location.
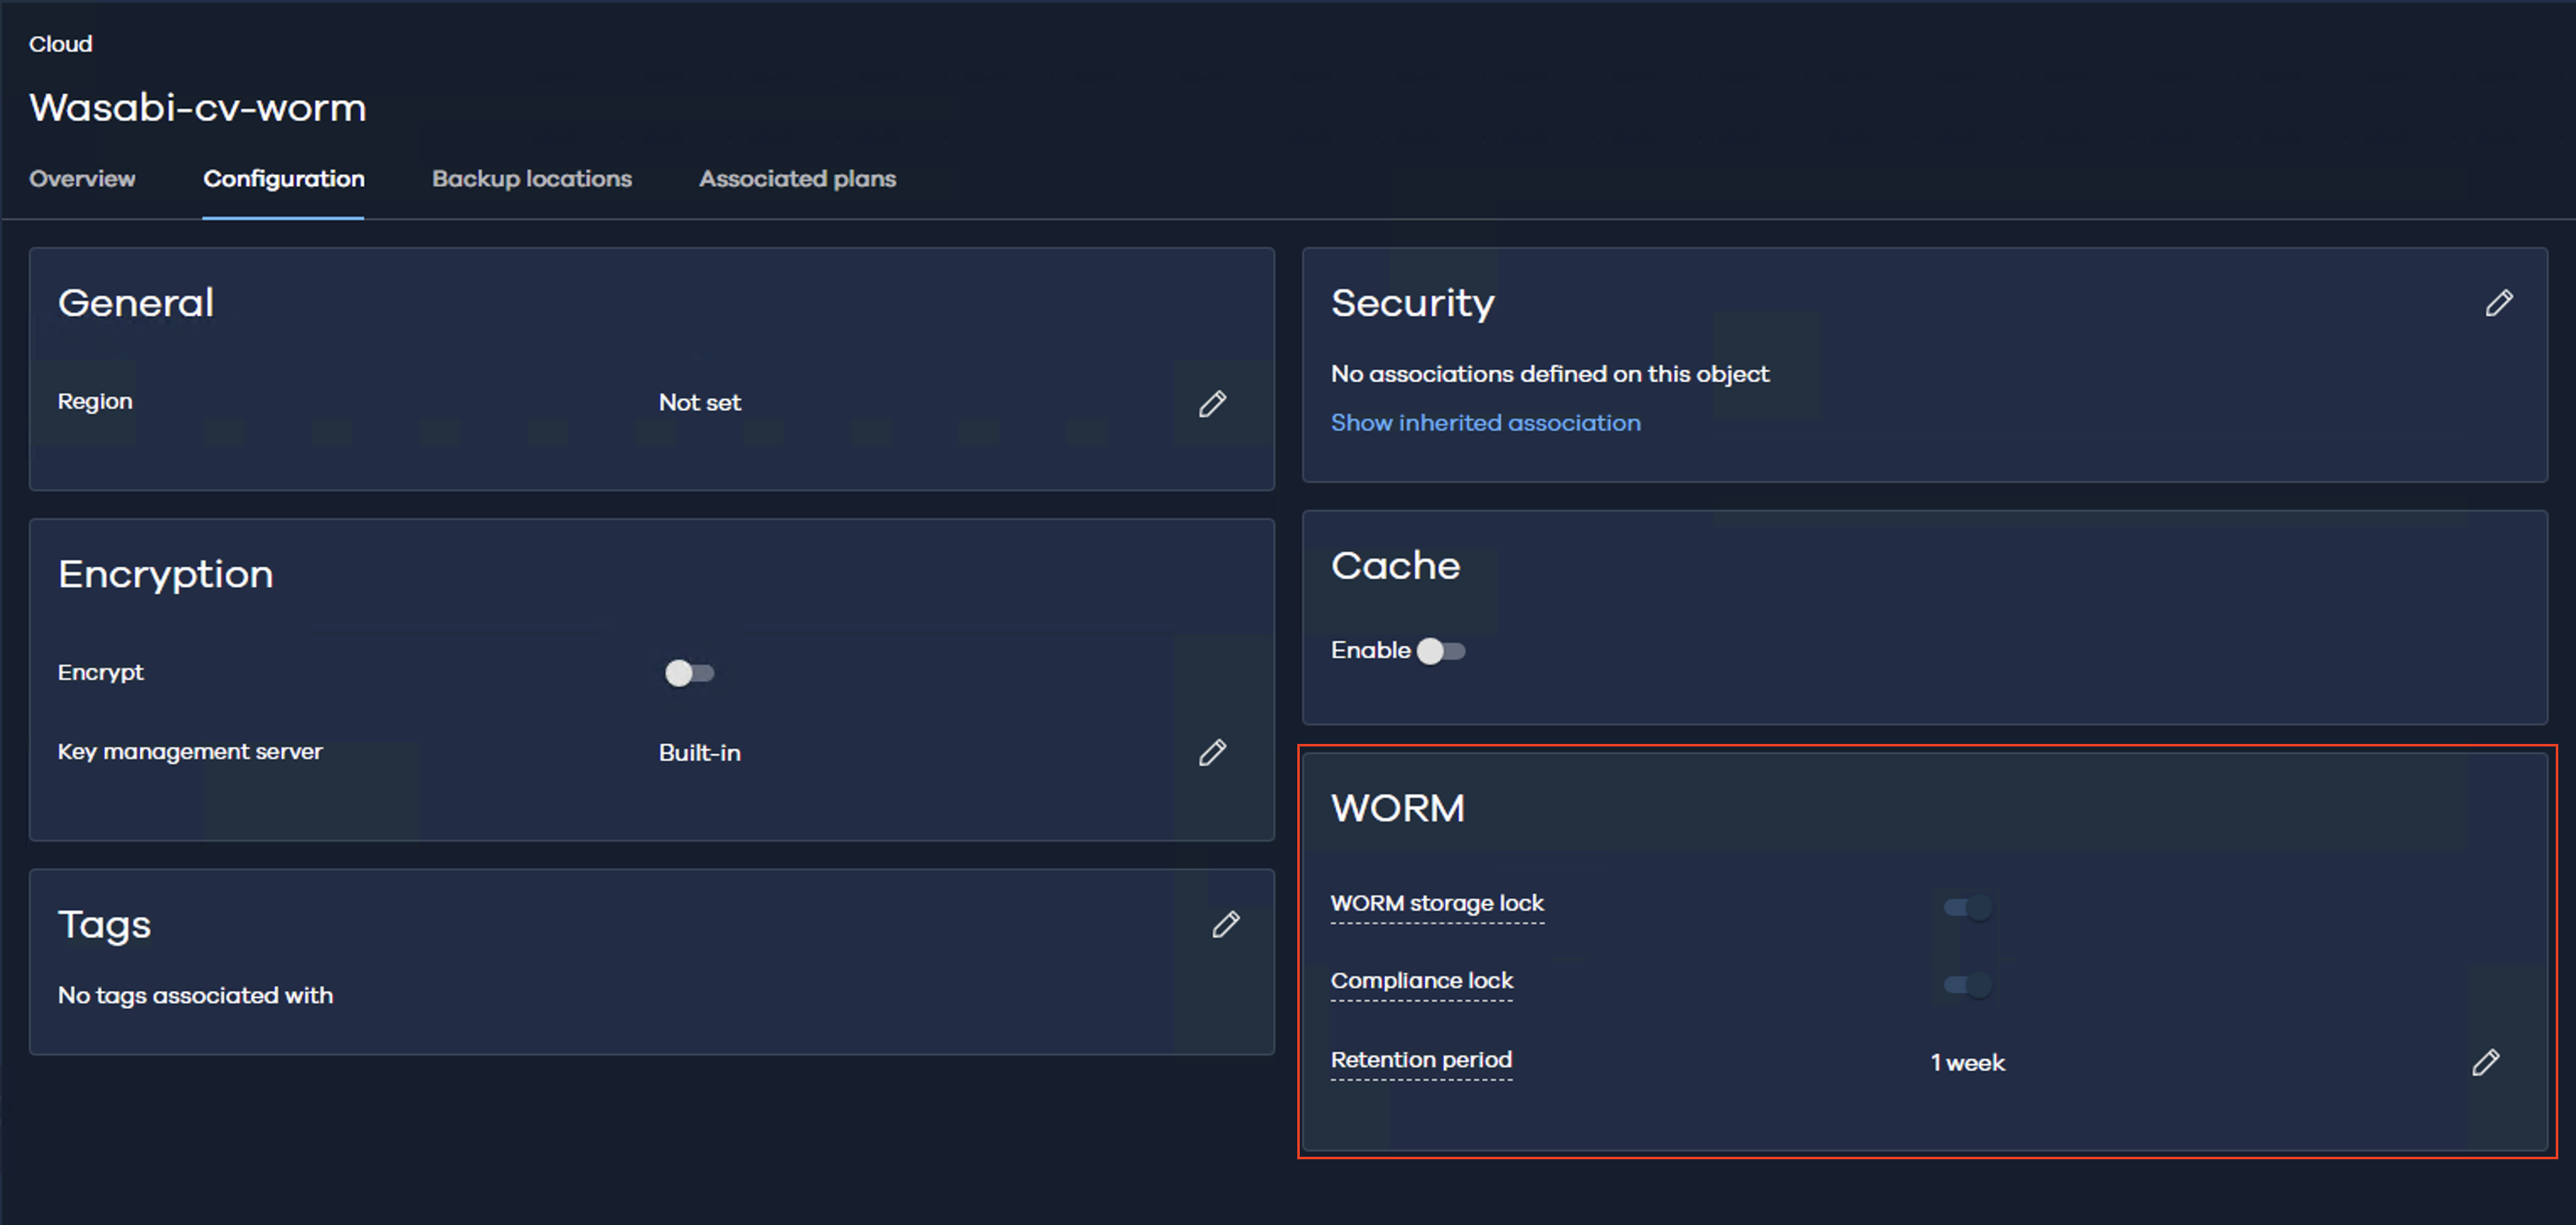
Configuring Immutable Backups Using Object Lock
You can configure immutable backups by enabling WORM functionality on the cloud storage server. Commvault Cloud supports object lock in Compliance mode.
When WORM is enabled, the cloud storage utilization will be increased due to the deduplication databases used by Commvault as a part of its backup process. This applies to all cloud storage providers. For more information, please refer to Commvault documentation at https://documentation.commvault.com/saas/worm_storage_and_retention_for_cloud_storage.html
Follow the steps below to make your backups immutable.
Create an object lock-enabled Wasabi bucket. For more information, refer to Object Lock: Enabling.
Configure the object lock enabled bucket as a cloud storage server location following the steps in section, Configuring Wasabi as Cloud Storage target.
Click the cloud storage location, then navigate to Configuration. Under the WORM section, enable WORM Storage Lock and configure the desired retention period.
Assign this storage server as the destination in the appropriate backup plan
All backups will be written to Wasabi in WORM mode after the retention period specified in the backup plan.