To create a policy:
Click Create Policy.
Enter a policy name. A list of names may be suggested from which you can select. But you can enter any name.
Optionally, enter a description.

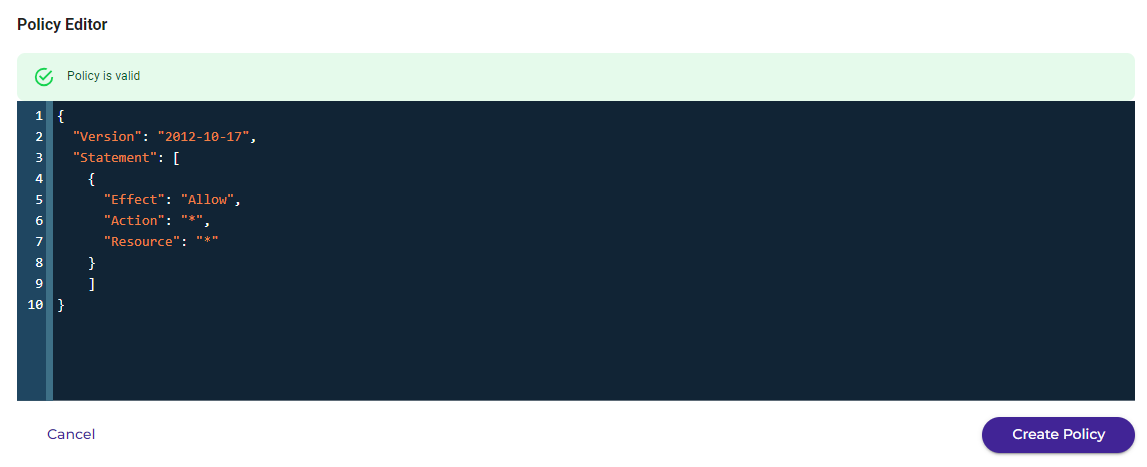
You can enter the code for the policy, as shown in the example below. Or, you can use the Policy Generator, as described in Using the Policy Generator.
Note that the following are the general formats for ARNs:
arn:aws:service:account-id:resource-id
arn:aws:service:account-id:resource-type/resource-id
arn:aws:service:account-id:resource-type:resource-id
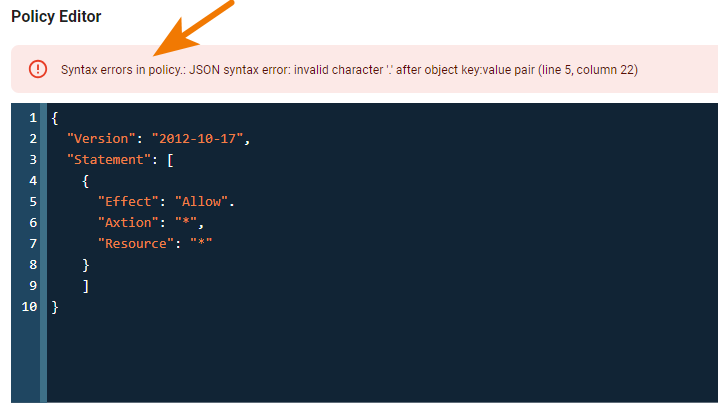
Note that syntax errors will be flagged as you enter information. For example:
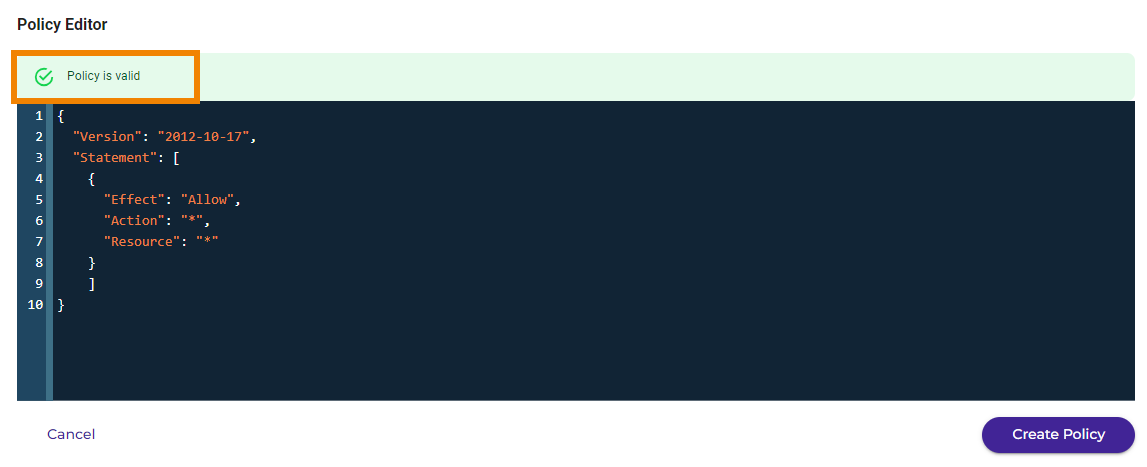
When you see a message that the policy is valid, you can click Create Policy to create the new policy.
With a user policy, you can control user access to buckets. In the following example, two users (Alice and Bob) belong to a common group called Consultants. Alice has access to only one bucket named bucket1. Bob has access to only one bucket named bucket2. Three policies are created to achieve this: one policy is attached to the group, one is attached to Alice, and one is attached to Bob.
{
        "Version": "2012-10-17",
        "Statement": [
        {
        "Sid": "AllowGroupToSeeBucketListInTheConsole", "Effect": "Allow",
        "Action": [ "s3:ListAllMyBuckets", "s3:GetBucketVersioning"
        ],
        "Resource": "arn:aws:s3:::*"
        },
        {
        "Effect": "Allow", "Action": [
        "iam:Get*",
        "iam:List*", "iam:ChangePassword", "iam:UpdateLoginProfile", "iam:*MFA*",
        "sts:Get*"
        ],
        "Resource": "arn:aws:iam::${aws:accountid}:user/${aws:username}"
        }
        ]
}
The Group policy is:
{
        "Version": "2012-10-17",
        "Statement": [
        {
        "Sid": "AllowGroupToSeeBucketListInTheConsole", "Effect": "Allow",
        "Action": [ "s3:ListAllMyBuckets", "s3:GetBucketVersioning"
        ],
        "Resource": "arn:aws:s3:::*"
        },
        {
        "Effect": "Allow", "Action": [
        "iam:Get*",
        "iam:List*", "iam:ChangePassword", "iam:UpdateLoginProfile", "iam:*MFA*",
        "sts:Get*"
        ],
        "Resource": "arn:aws:iam::${aws:accountid}:user/${aws:username}"
        }
        ]
}
The Alice policy is:
{
        "Version": "2012-10-17",
        "Statement": [
        {
        "Sid": "AllowAccessToBucketNamedBucket1", "Effect": "Allow",
        "Action": [
        "s3:ListBucket", "s3:GetObject", "s3:PutObject", "s3:GetObjectAcl", "s3:PutObjectAcl", "s3:DeleteObject"
        ],
        "Resource": [ "arn:aws:s3:::bucket1", "arn:aws:s3:::bucket1/*"
        ]
        }
        ]
}
The Bob policy is:
{
        "Version": "2012-10-17",
        "Statement": [
        {
        "Sid": "AllowAccessToBucketNamedBucket2", "Effect": "Allow",
        "Action": [ "s3:ListBucket", "s3:GetObject", "s3:PutObject", "s3:GetObjectAcl", "s3:PutObjectAcl", "s3:DeleteObject"
        ],
        "Resource": [ "arn:aws:s3:::bucket2", "arn:aws:s3:::bucket2/*"
        ]
        }
        ]
}
Using the Policy Generator
The Policy Generator enables you to create a policy with conditions using simple user interface controls. The Policy Generator automatically creates a JSON policy that drives access to Wasabi's resources. You can:
Create a policy for AWS-Portal, AiR, IAM, S3, and/or STS services.
Add multiple rules in one policy.
Add multiple conditions in one statement.
Add only one statement using this tool. If you need to have multiple statements, you can edit the policy in the editor box after creating a policy using the Policy Generator.
To use the Policy Generator (also refer to Example of Using the Policy Generator):
Click the Policy Generator button to begin a new policy creation.

Enter a policy name. A list of names may be suggested from which you can select. But you can enter any name.
Optionally, enter a description. For example:
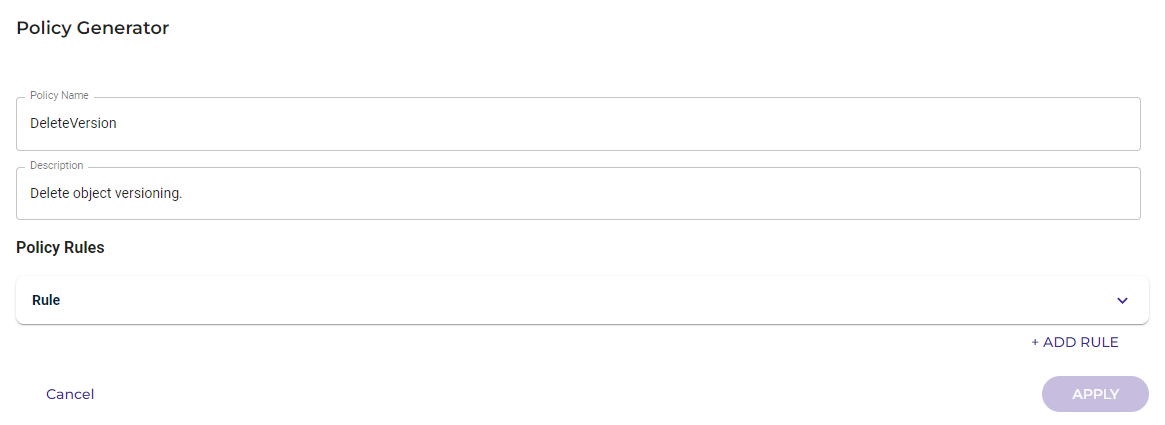
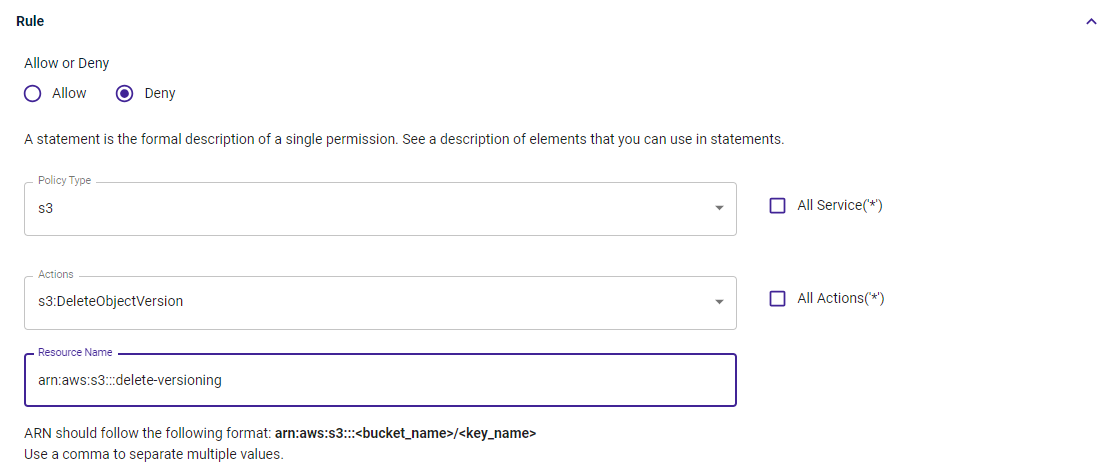
Click Rule and then enter information for the rule.
From the Policy Type drop-down, select the service type. Or, select All Service(‘*’) to create a policy for all services.
From the Actions drop-down, select an action. Or, select All Action(‘*’) to create a policy for all available actions.
A special resource-based policy is directly applied to the resource (as opposed to an IAM user), and you must include the Principal in your statement. You must indicate the account, user, role, or federated user to which you would like to allow or deny access. If you are creating an IAM permissions policy to attach to a user or role, you cannot include this element. The Principal is implied as that user or role.
In the following example, the s3 service is selected with the s3:DeleteObjectVersion action. This is a resource-based policy with the name arn:aws:s3:::delete-versioning.
Optionally, you can add conditions using the Condition and Key drop-downs as well as the Value field.
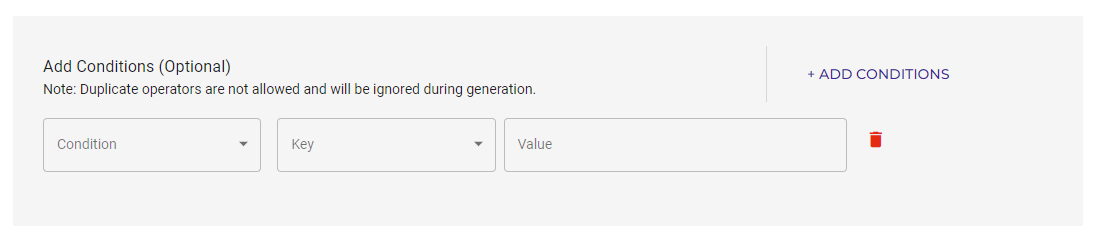
Click ADD CONDITIONS to include more conditions. Click
 to delete a condition.
Optionally, you can click + ADD RULE (above the APPLY button in the bottom right) to add another rule for the policy. Then, repeat Steps 2 through 5 to define the rule.
Click APPLY. The generated policy is displayed. For example:
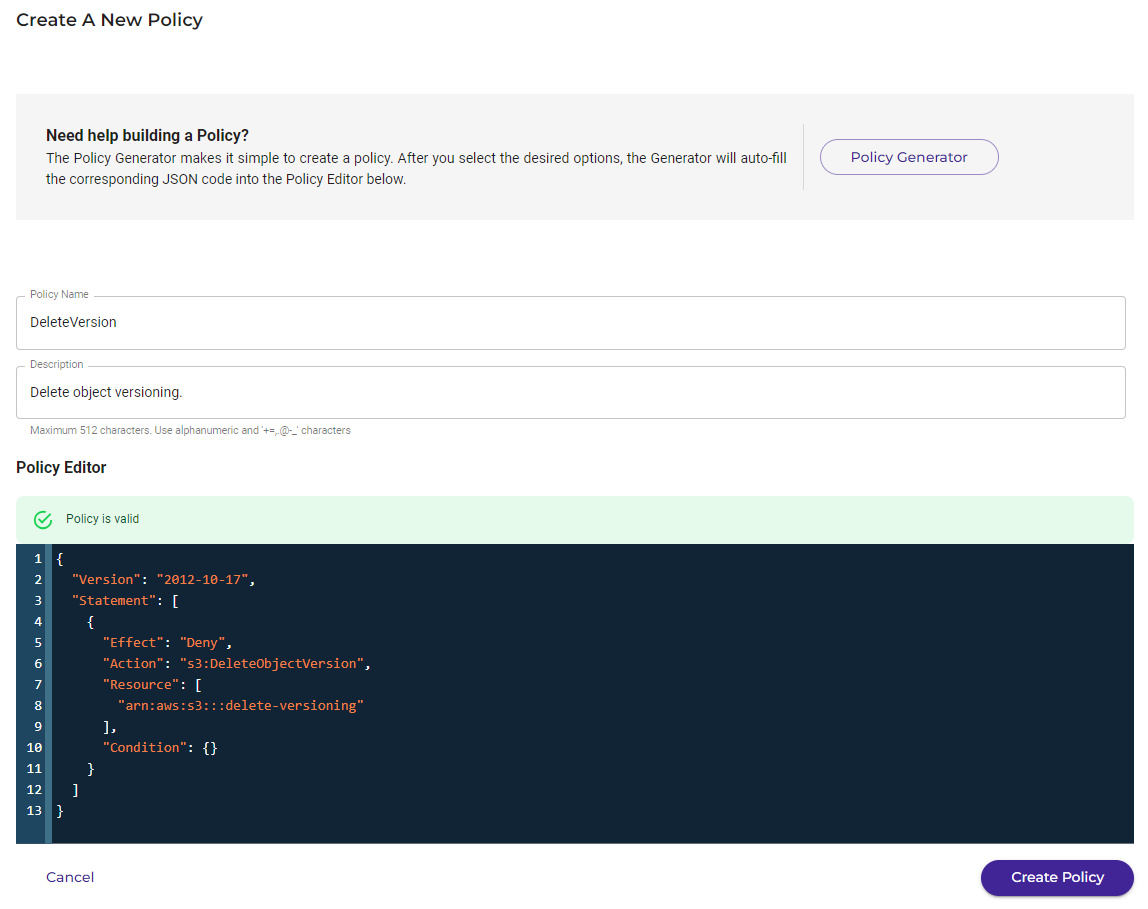
Click Create Policy.