How do I copy files from a Geyser Data Cloud Tape Library to Wasabi?
Geyser Data provides a Tape Archive Platform-as-a-Service that is built to archive and preserve data that requires infrequent access.
This article details the procedure to configure Wasabi and Geyser Data so that files may be copied from Geyser to Wasabi Hot Cloud Storage.
Prerequisites
- An active Wasabi Hot Cloud Storage account
- Access to the Wasabi Console as the account root user
- An active Geyser Data account
- Access to the Geyser Data Console
- Geyser Data access and secret keys
Creating a Wasabi Bucket
The first step is to create a bucket in your Wasabi account that will used to receive objects from Geyser Data. Login to the Wasabi Console as the root user and follow the instructions to create a bucket in the Working With Buckets and Objects article. Make note of the bucket name and region that your bucket resides in.
Creating an IAM Policy
You will then create a Wasab Identity and Access Management (IAM) policy for a user (that is created below) to restrict access to the previously created bucket. Follow the instructions in Creating a Policy using the following policy that may be copied and pasted into the Policy Editor on the Wasabi Console. Replace BUCKETNAME with the name of the previously created bucket, using lower-case characters.
{
  "Version": "2012-10-17",
  "Statement": [
    {
      "Effect": "Allow",
      "Action": "s3:ListAllMyBuckets",
      "Resource": "arn:aws:s3:::"
    },
    {
      "Effect": "Allow",
      "Action": "s3:*",
      "Resource": [
        "arn:aws:s3:::BUCKETNAME",
        "arn:aws:s3:::BUCKETNAME/*"
      ]
    }
  ]
}
Creating a Wasabi User
The next step is creating a Wasabi user on your account via the Wasabi Console and access and secret keys for that user following the directions in Creating a User Account and Access Key.
- Select "Programmatic (create API keys)" under Type of Access.
- You may skip assigning the user to a group unless desired.
- Assign the previously created IAM policy to the user.
- At the end of the user creation, a "Create Access Key" popup will be displayed. Make sure to download the keys (Access and Secret) and save them in a secure location. They will be needed in the next step.
Associate a Wasabi Bucket with Your Geyser Cloud Tape Library
- Login to the Geyser Data Console.
- If you are creating a new Cloud Tape Library (CTL) follow these steps:
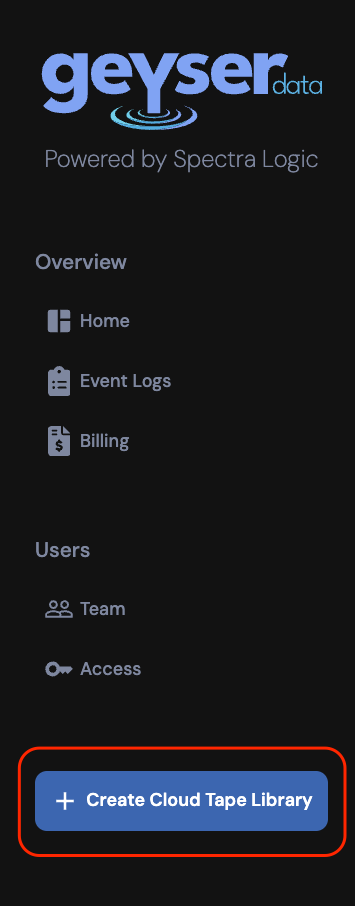
- Click on Create Cloud Tape Library
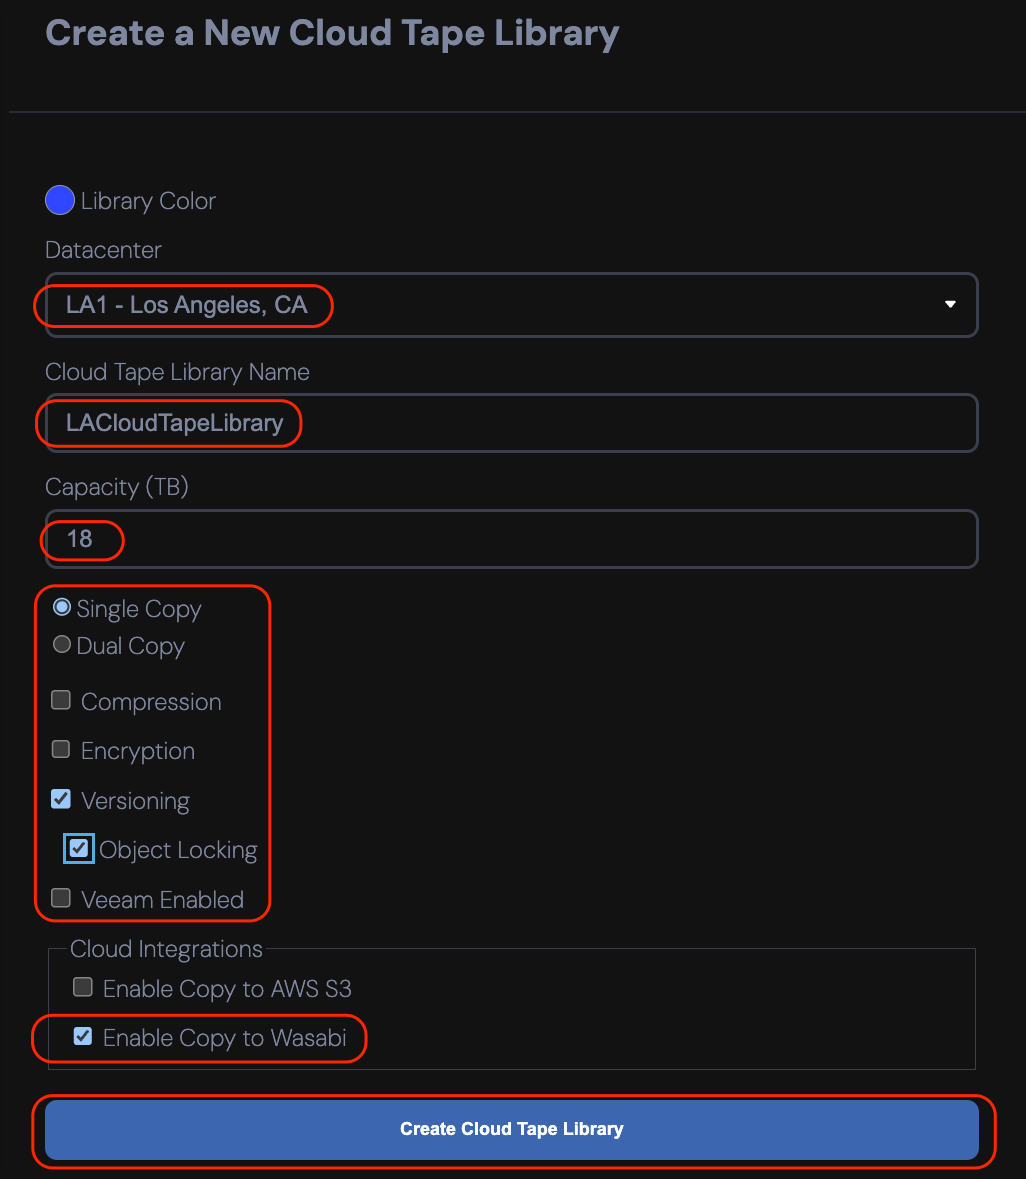
- Select the Data Center, give the CTL a name, set a capacity, and select the appropriate options. Under Cloud Integrations, select "Enable Copy to Wasabi." Click Create Cloud Tape Library.
- Click on Create Cloud Tape Library
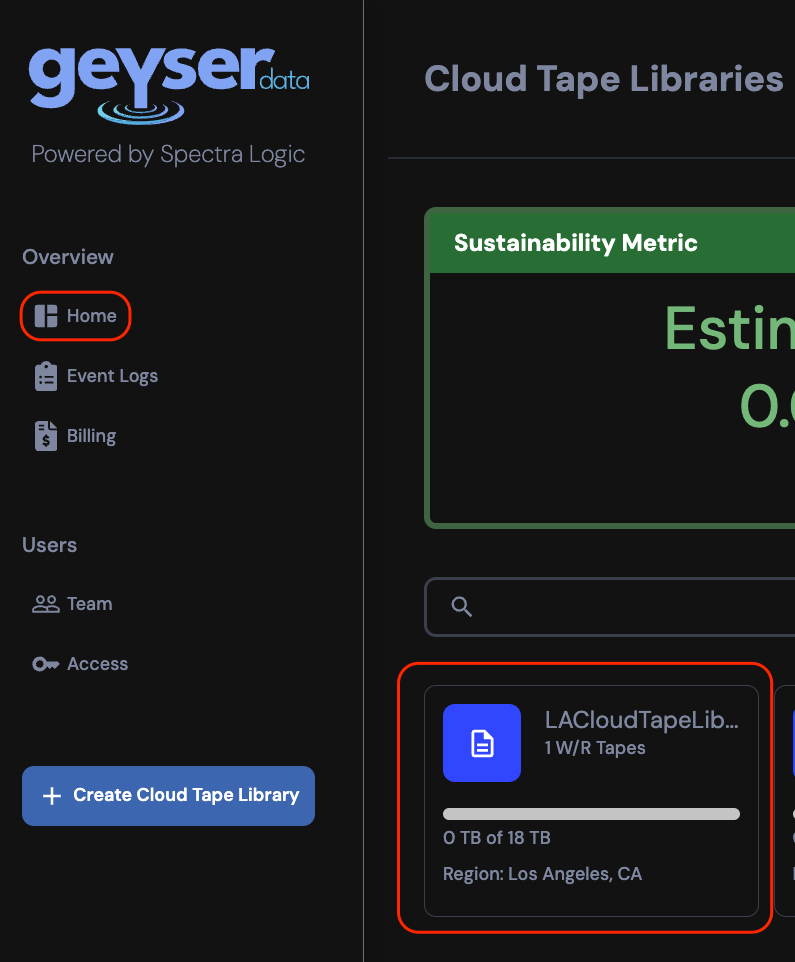
- Navigate to Home, then click on either the new CTL or an existing CTL.
- Add your Wasabi bucket to the CTL.
- If Wasabi is already linked, click Add Wasabi Bucket.
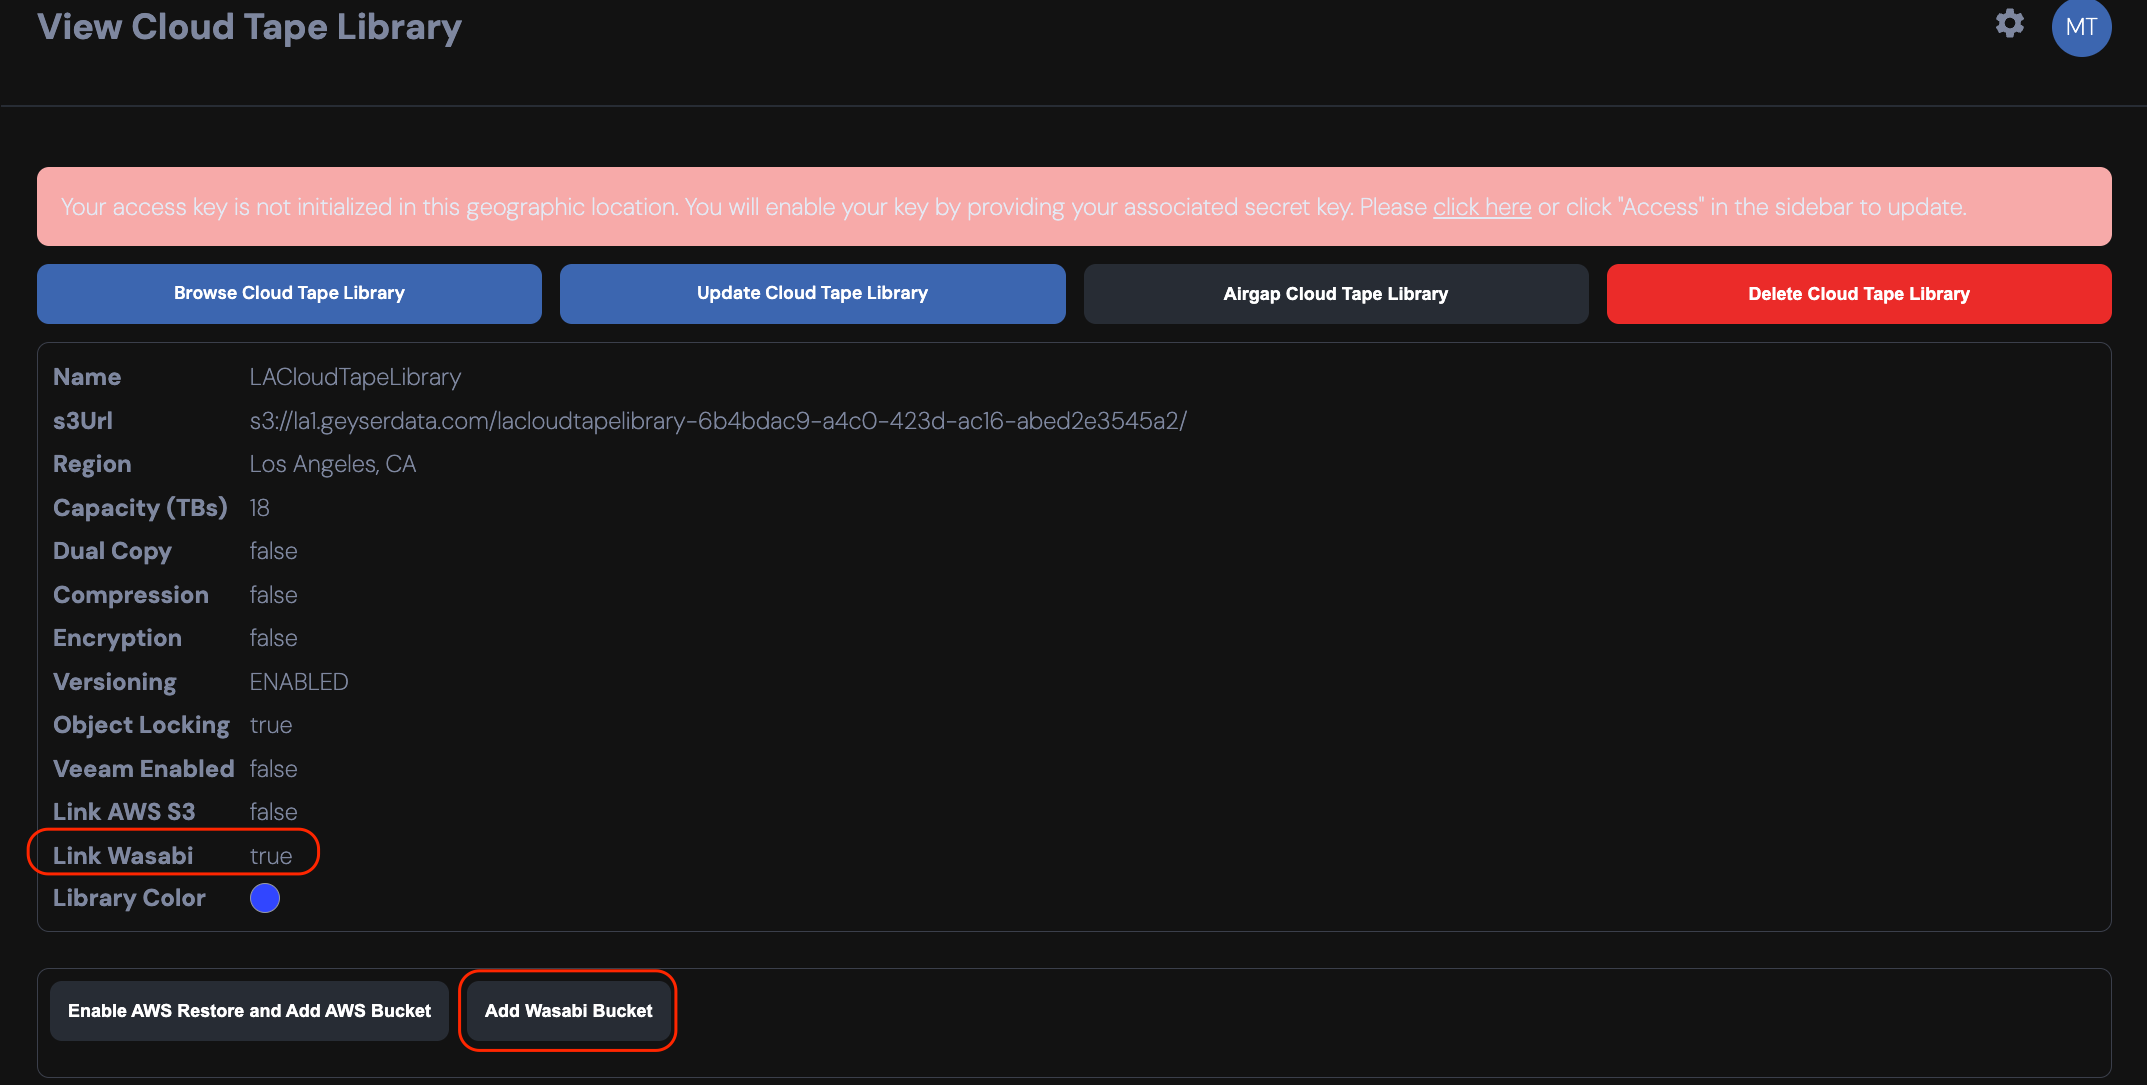
- If Wasabi is not linked, click Enable Wasabi Restore and Add Wasabi Bucket.
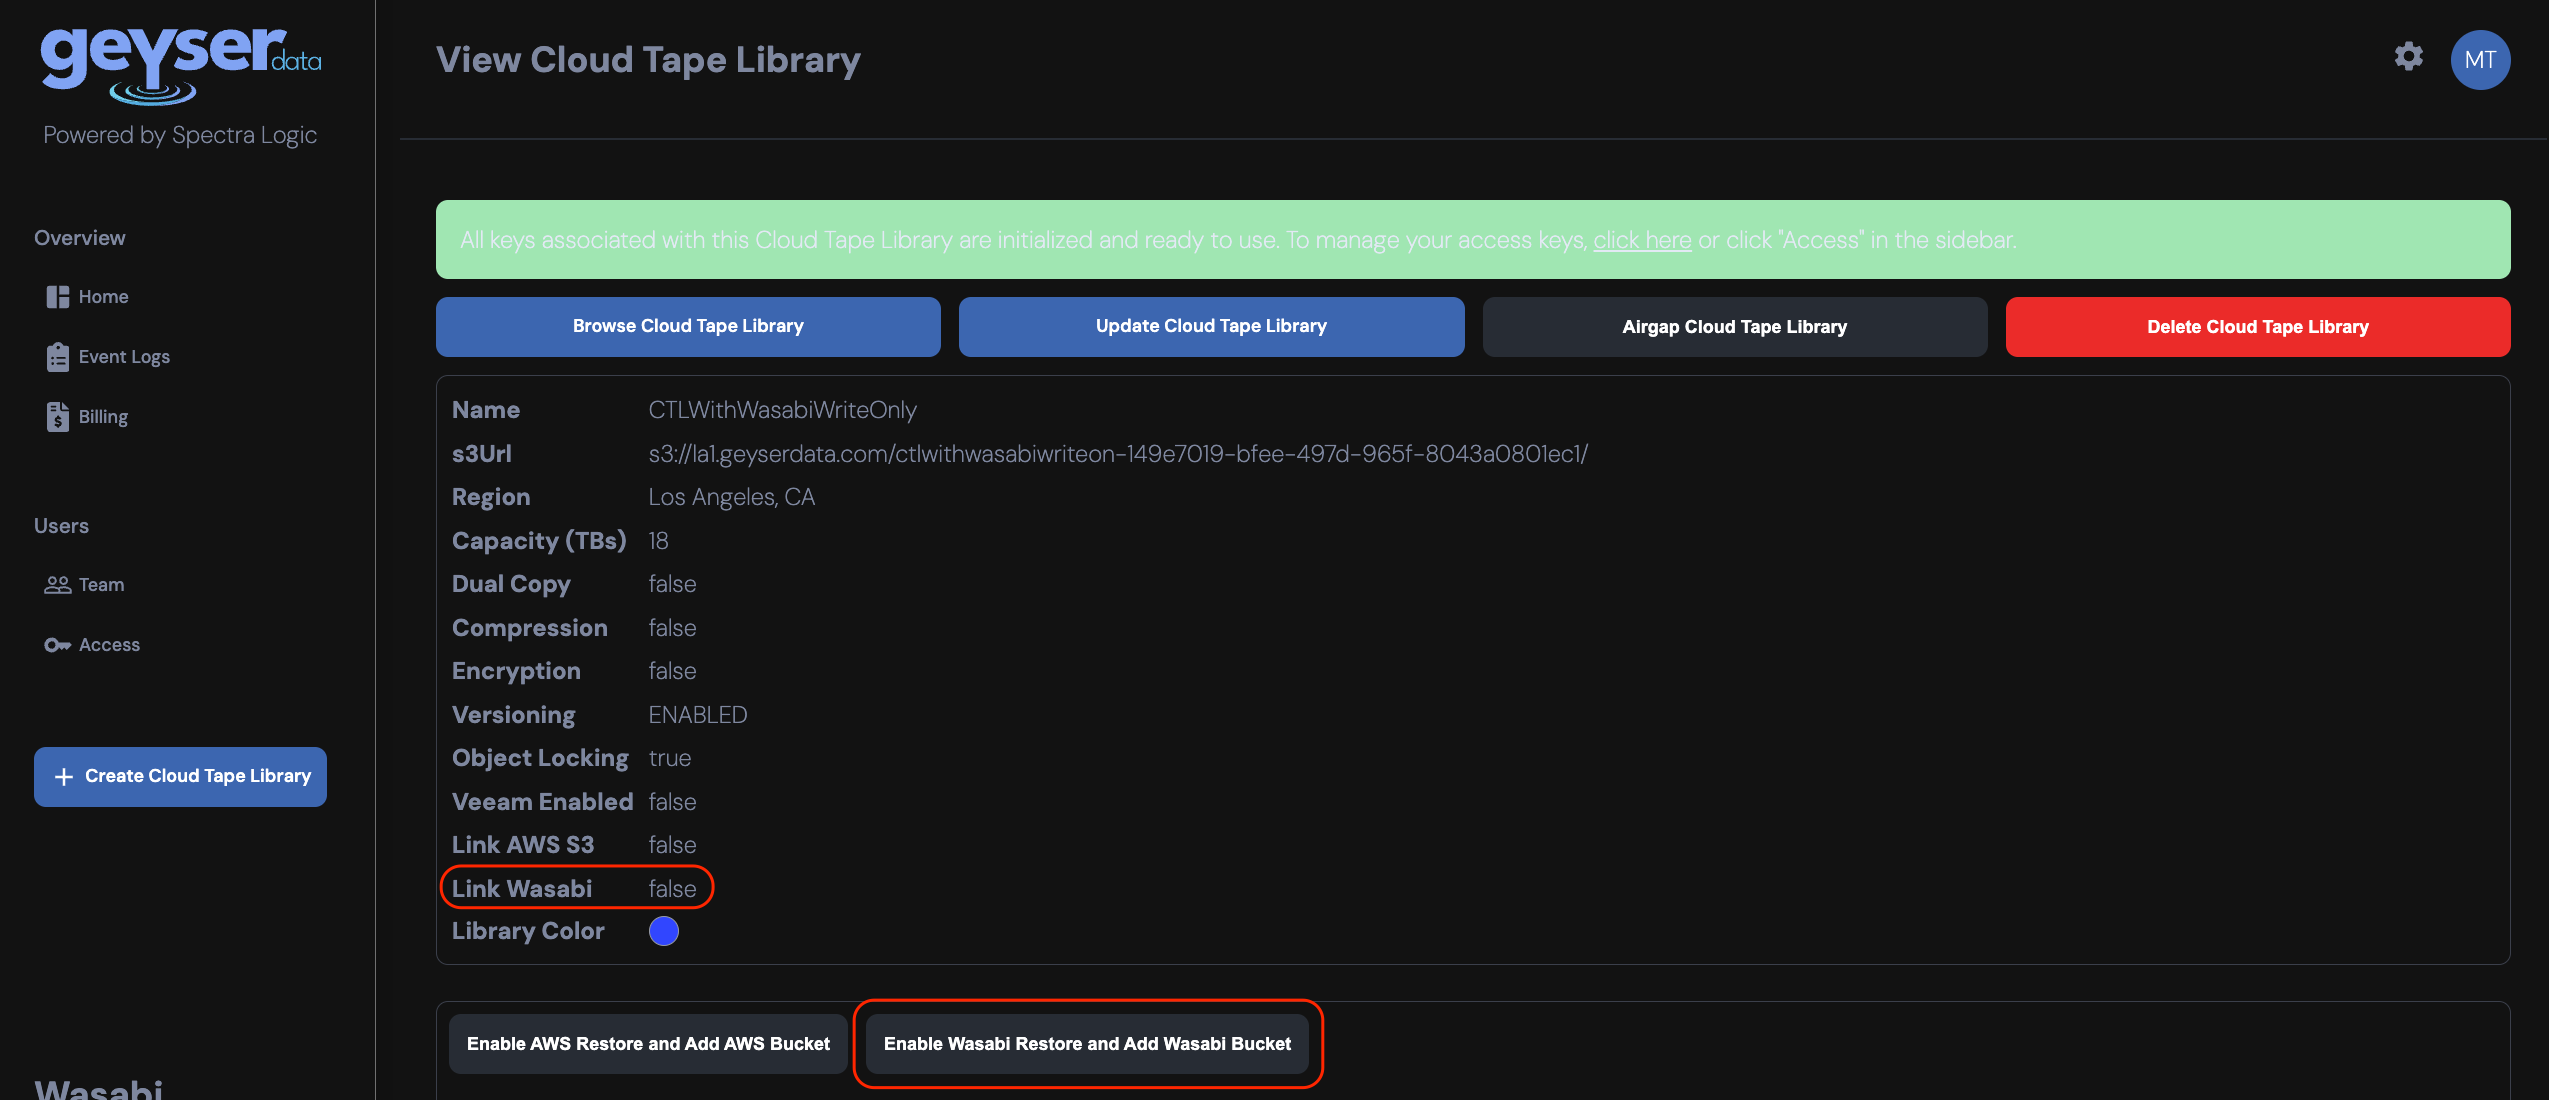
- If Wasabi is already linked, click Add Wasabi Bucket.
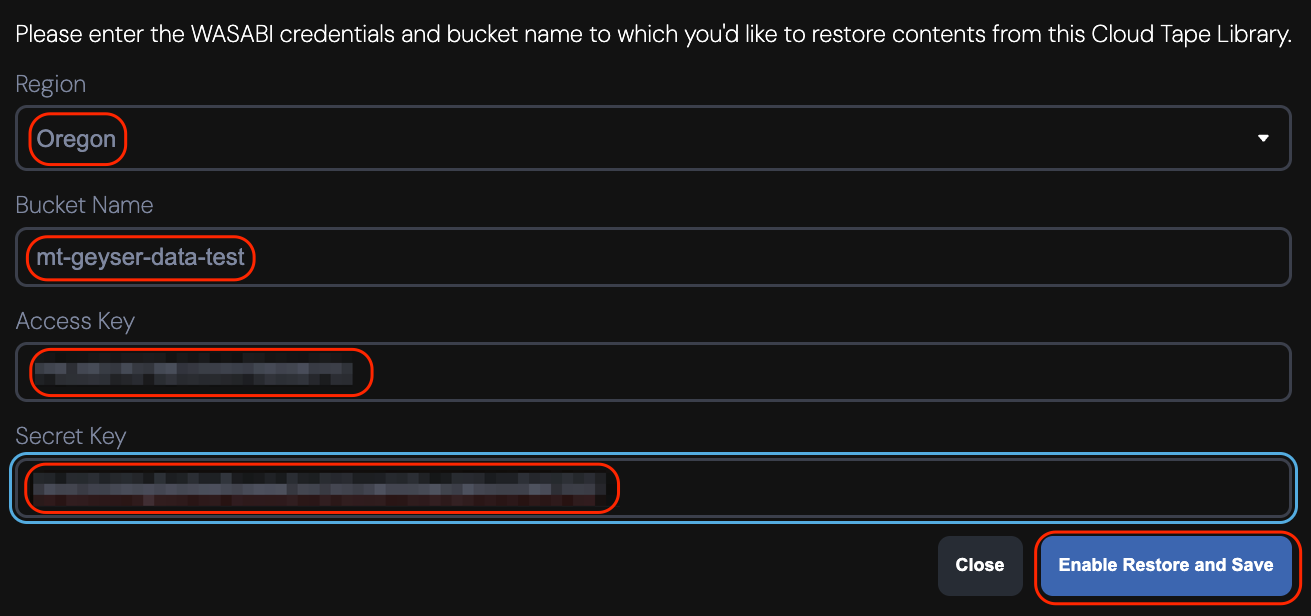
- From the drop-down menu select the Wasabi region your previously created bucket is in, enter your bucket name and your Wasabi sub-user's access and secret keys created above. Click Enable Restore and Save.This configuration example discusses the use of Wasabi's us-west-1 storage region in Oregon. Use the region your bucket is located in. For a list of regions, see Available Storage Regions.
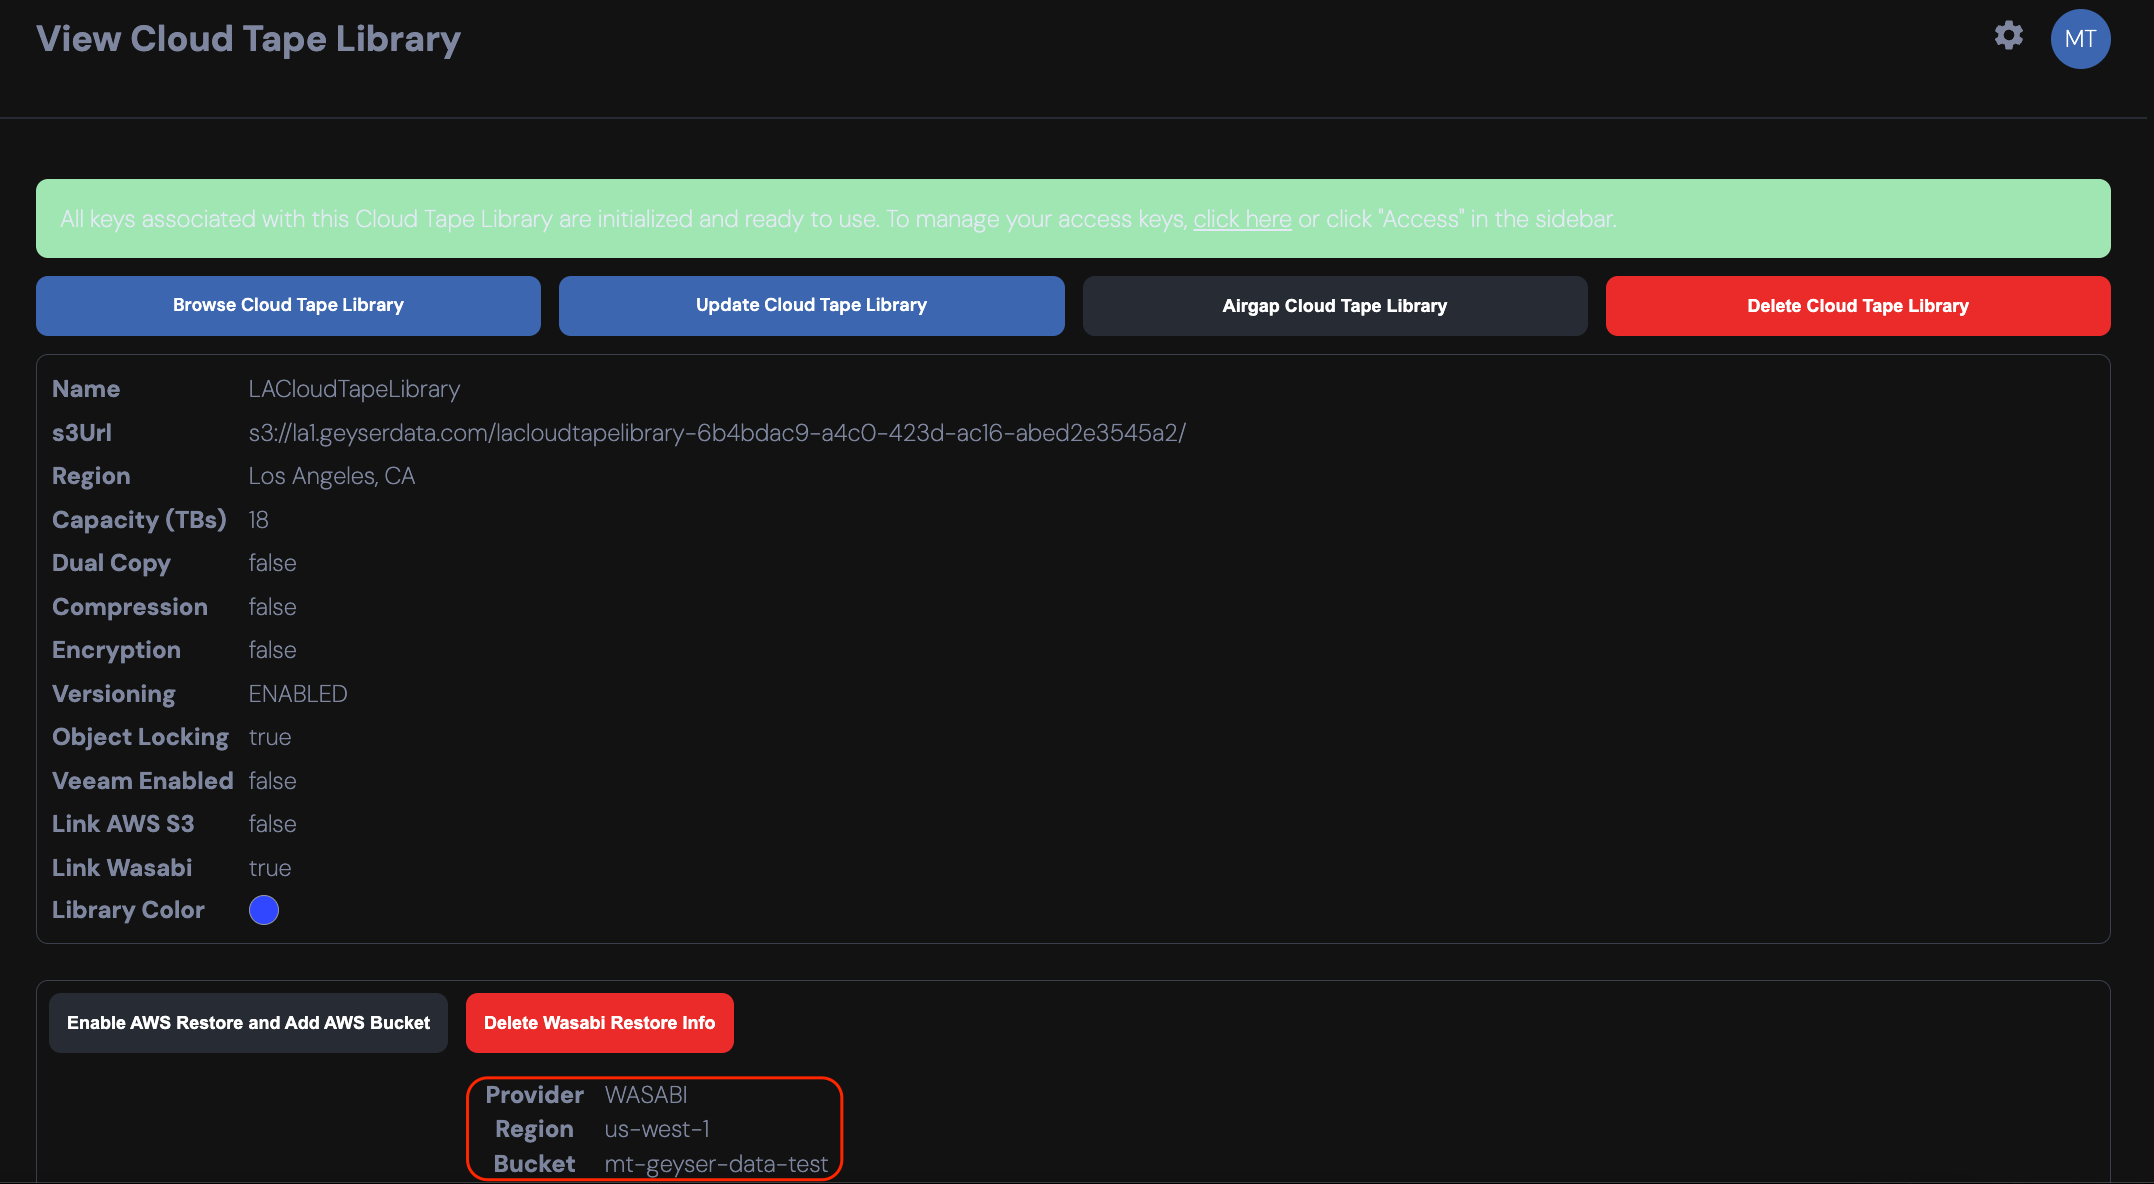
- You will now see your Wasabi bucket linked to the CTL.
Copy a Test File from your Cloud Tape Library to Wasabi
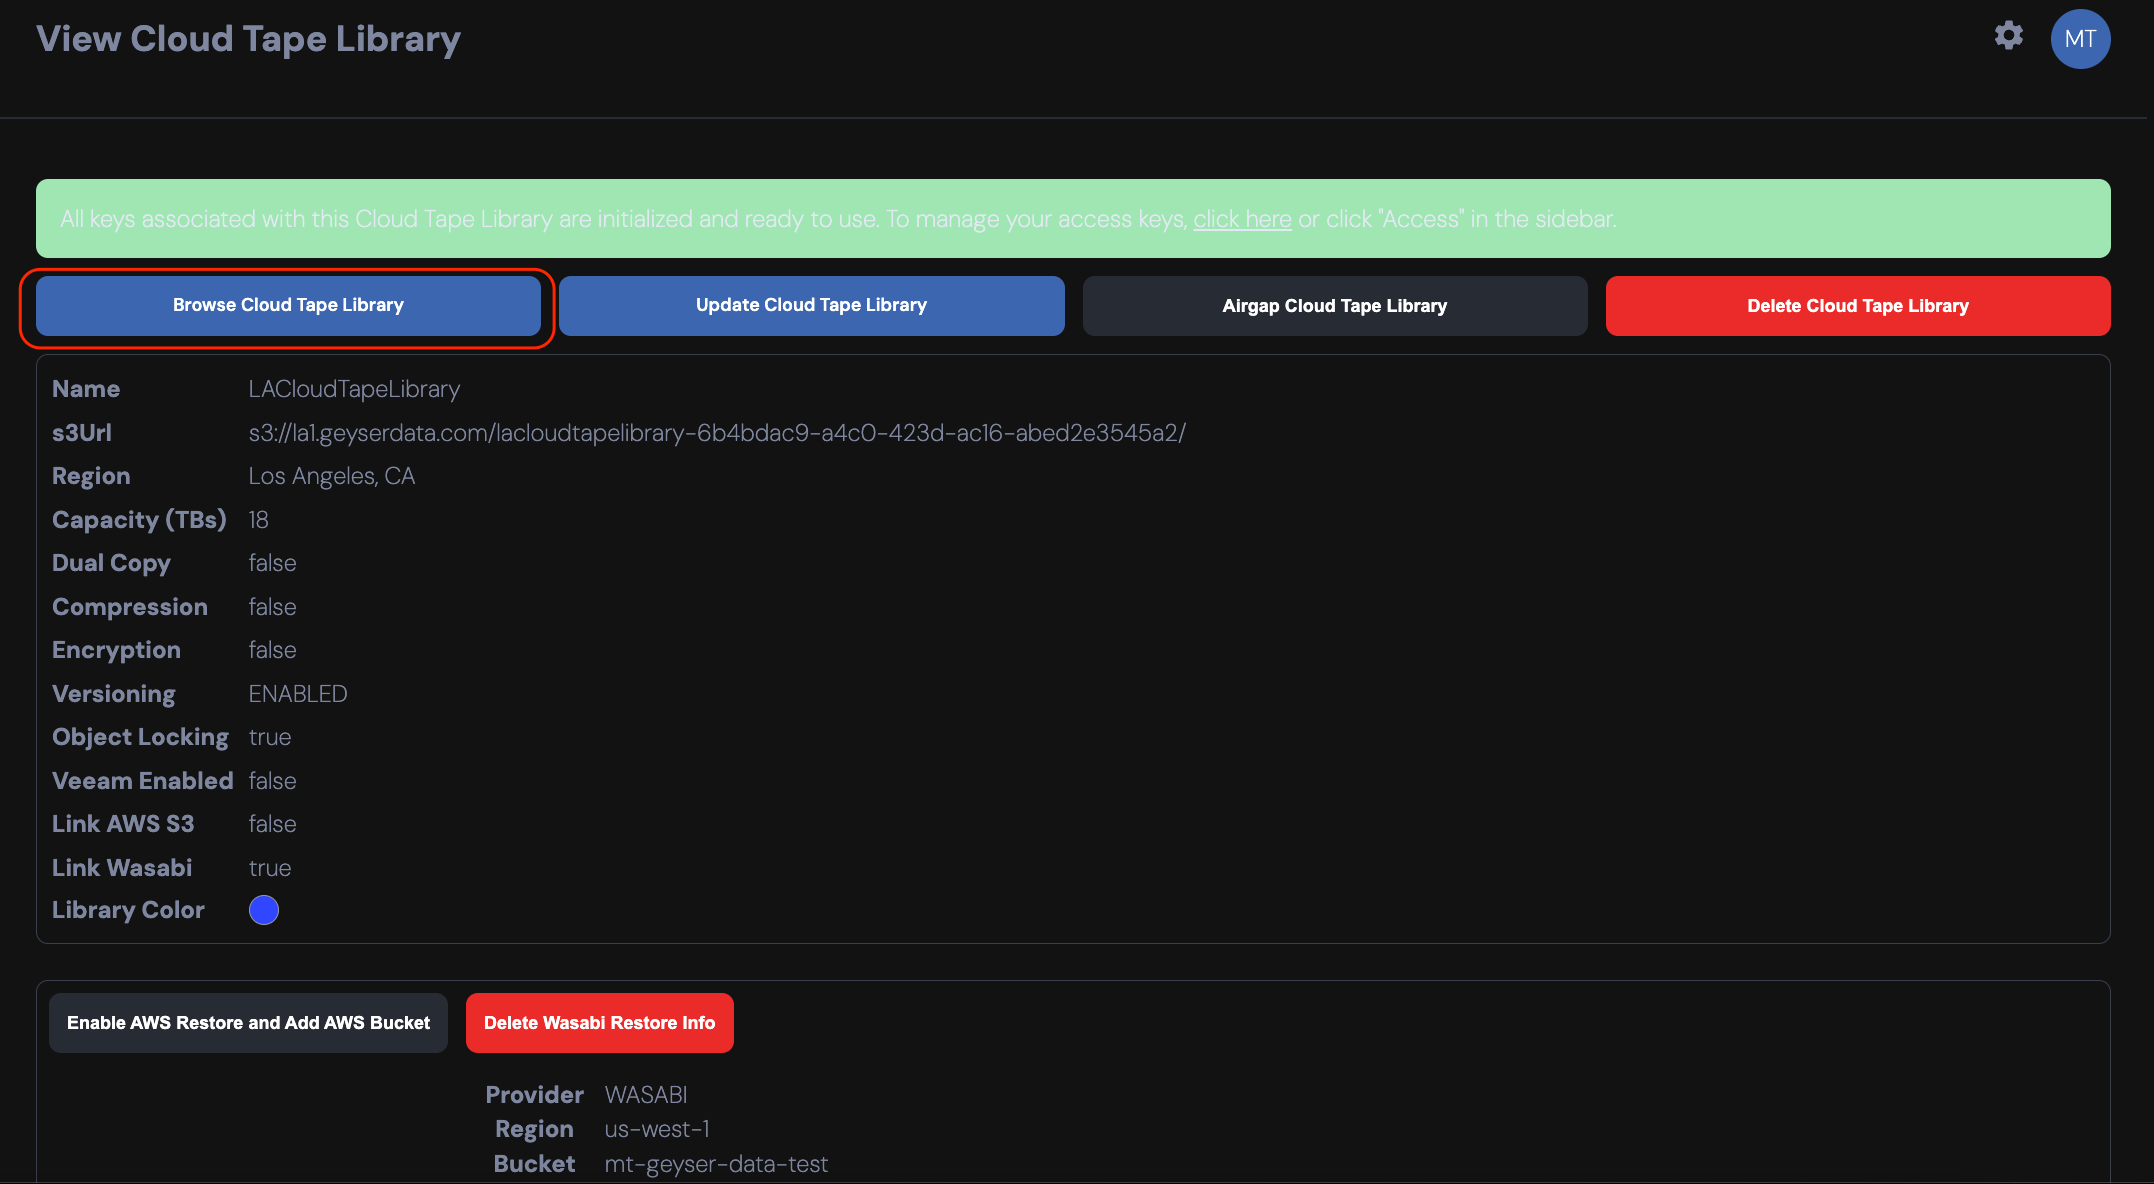
- Upload a test file to your CTL. Navigate to Home and click on your CTL. Click Browse Cloud Tape Library.Note that uploading using S3 clients such as AWS S3 CLI or Cyberduck requires the CTL to be included the URL, such as:
% aws s3 cp test.pdf s3://lacloudtapelibrary-6b4bdac9-a4c0-423d-ac16-abed2e3545a2/test2.pdf --endpoint-url https://la1.geyserdata.com --profile geyser --no-verify-ssl
Or using Cyberduck: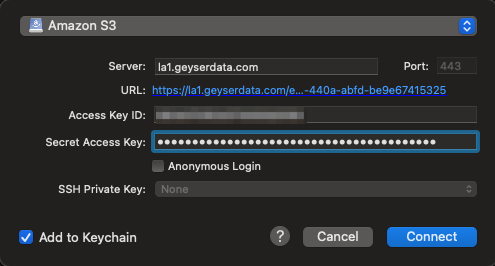
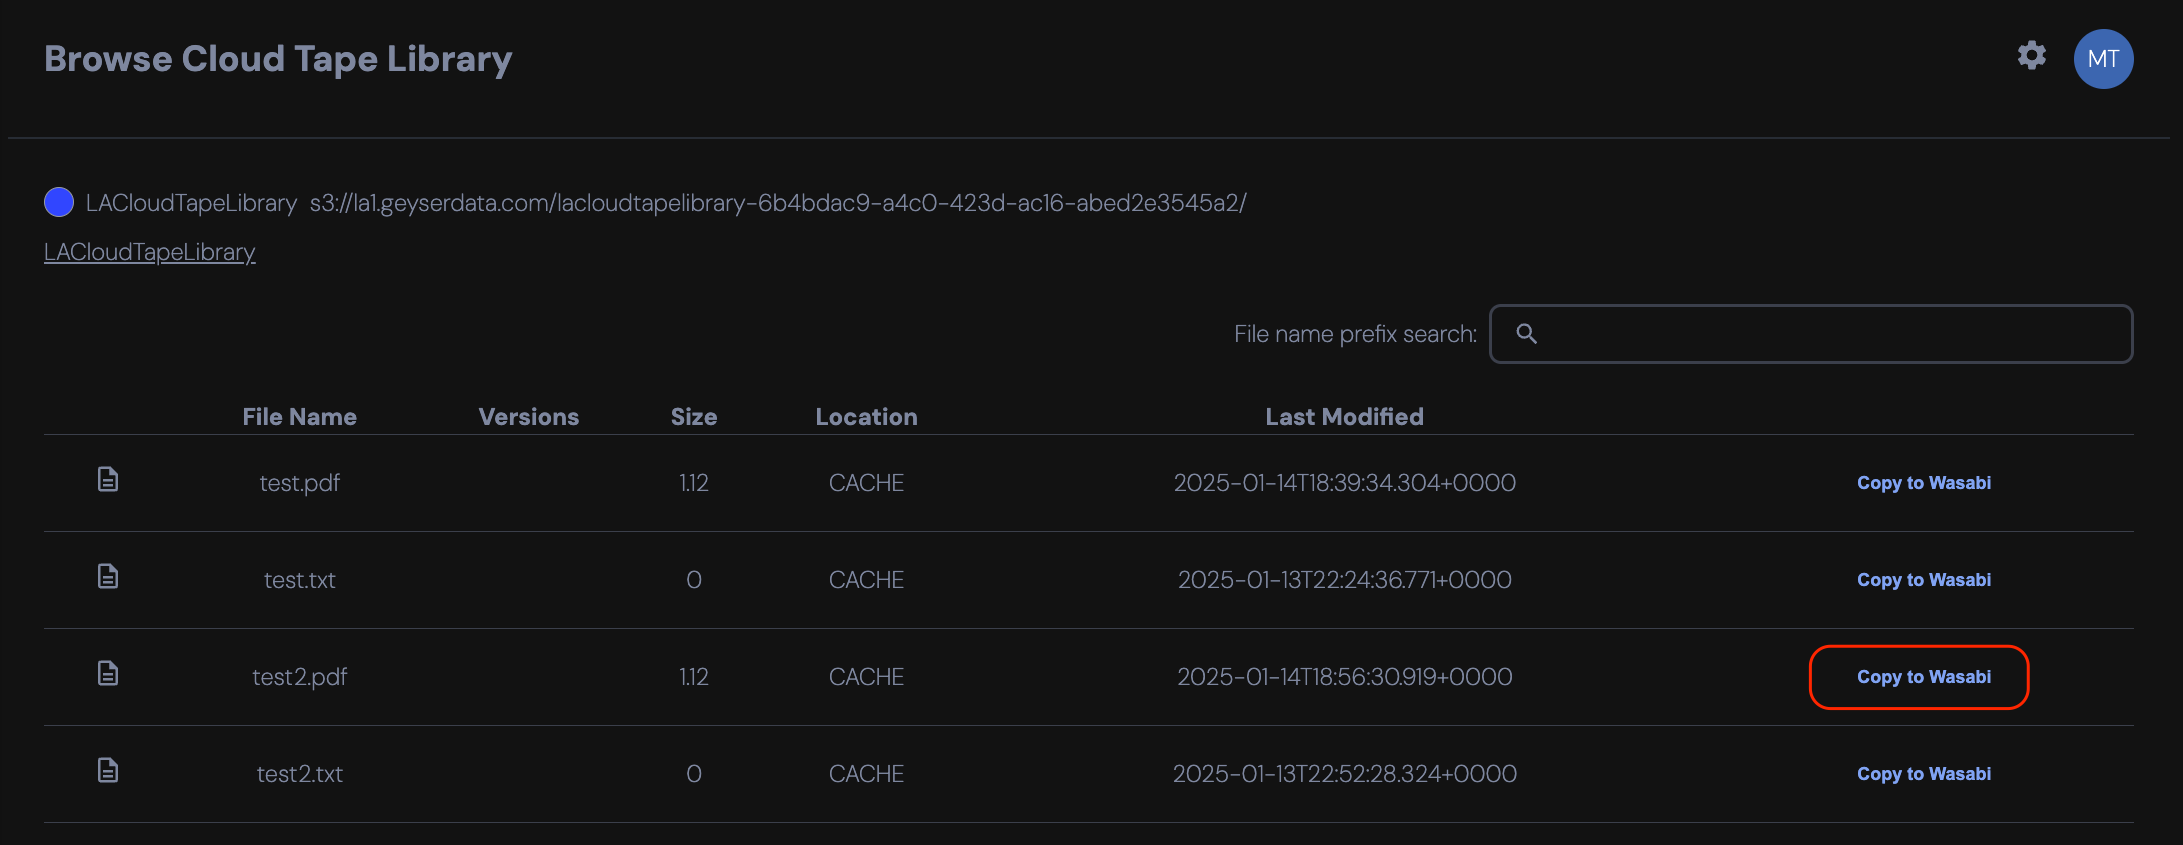
- Click Copy to Wasabi next to the test file.
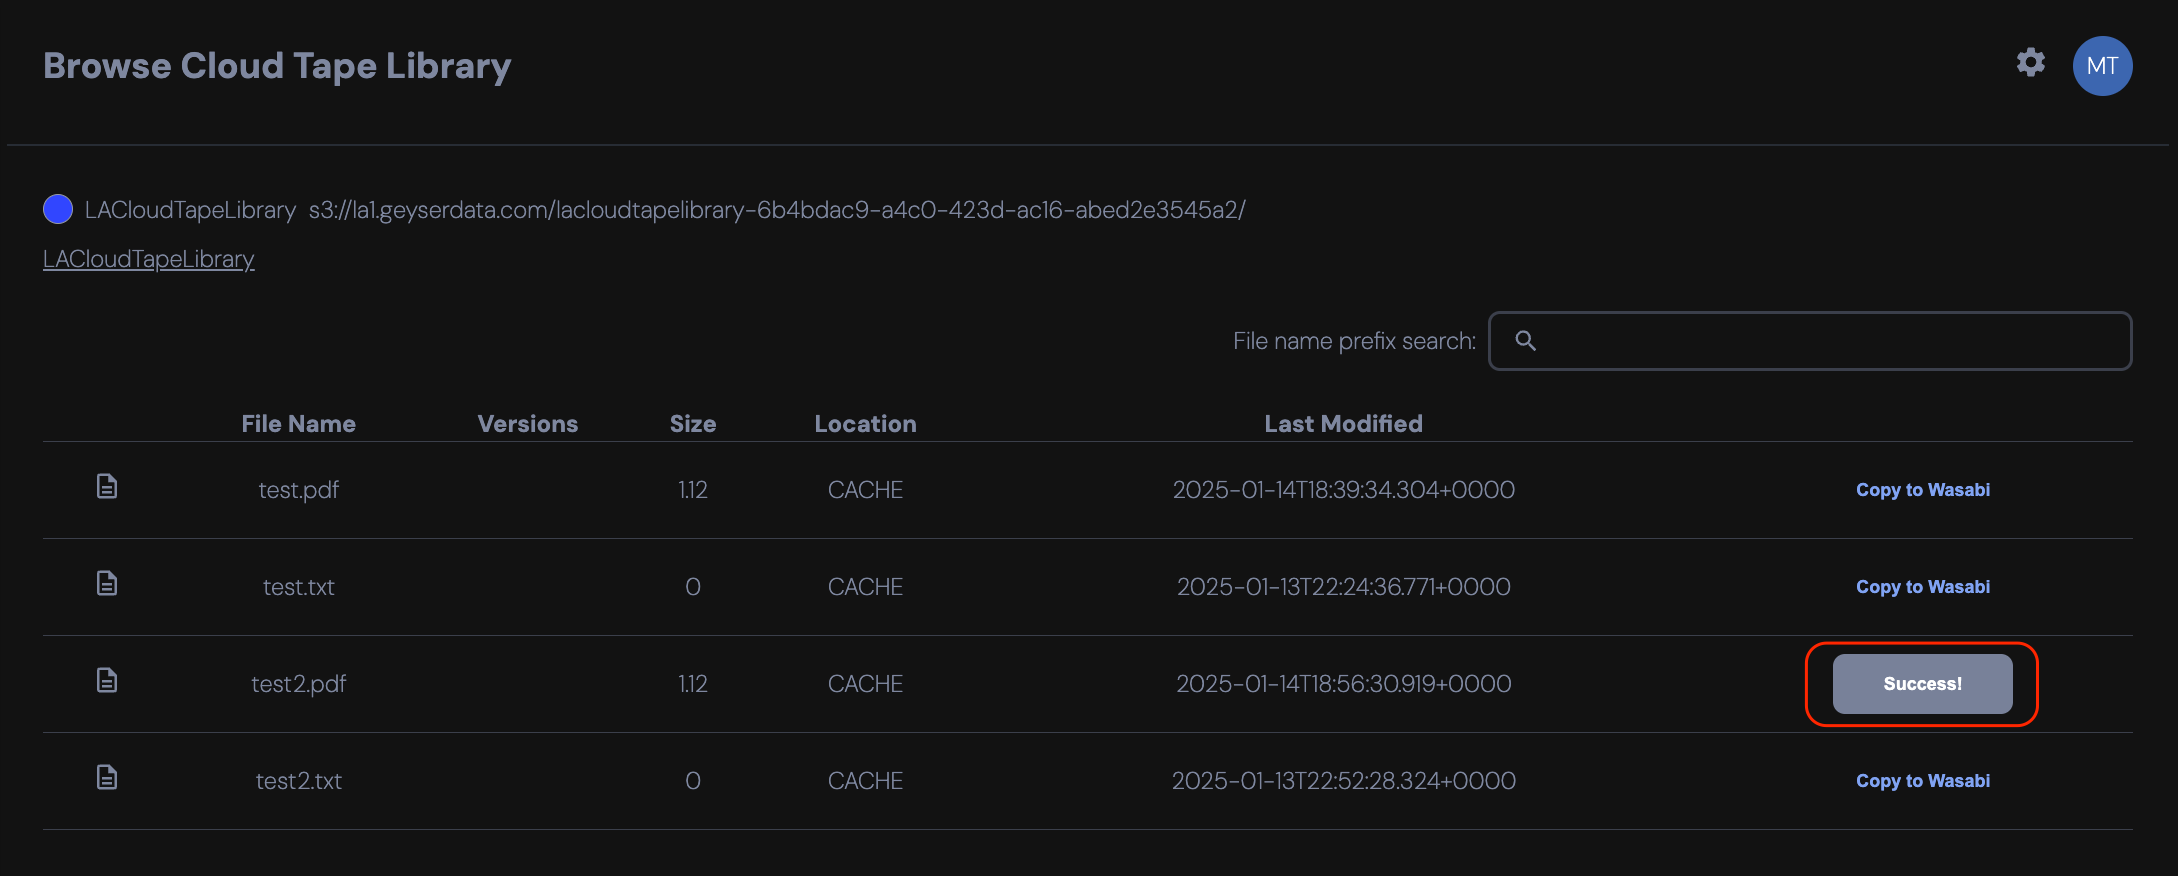
- You should now see "Success."
Verify Your Test File Appears in Your Wasabi Bucket.
- Login to the Wasabi Console as the root user.
- Navigate to Buckets then click your bucket name.
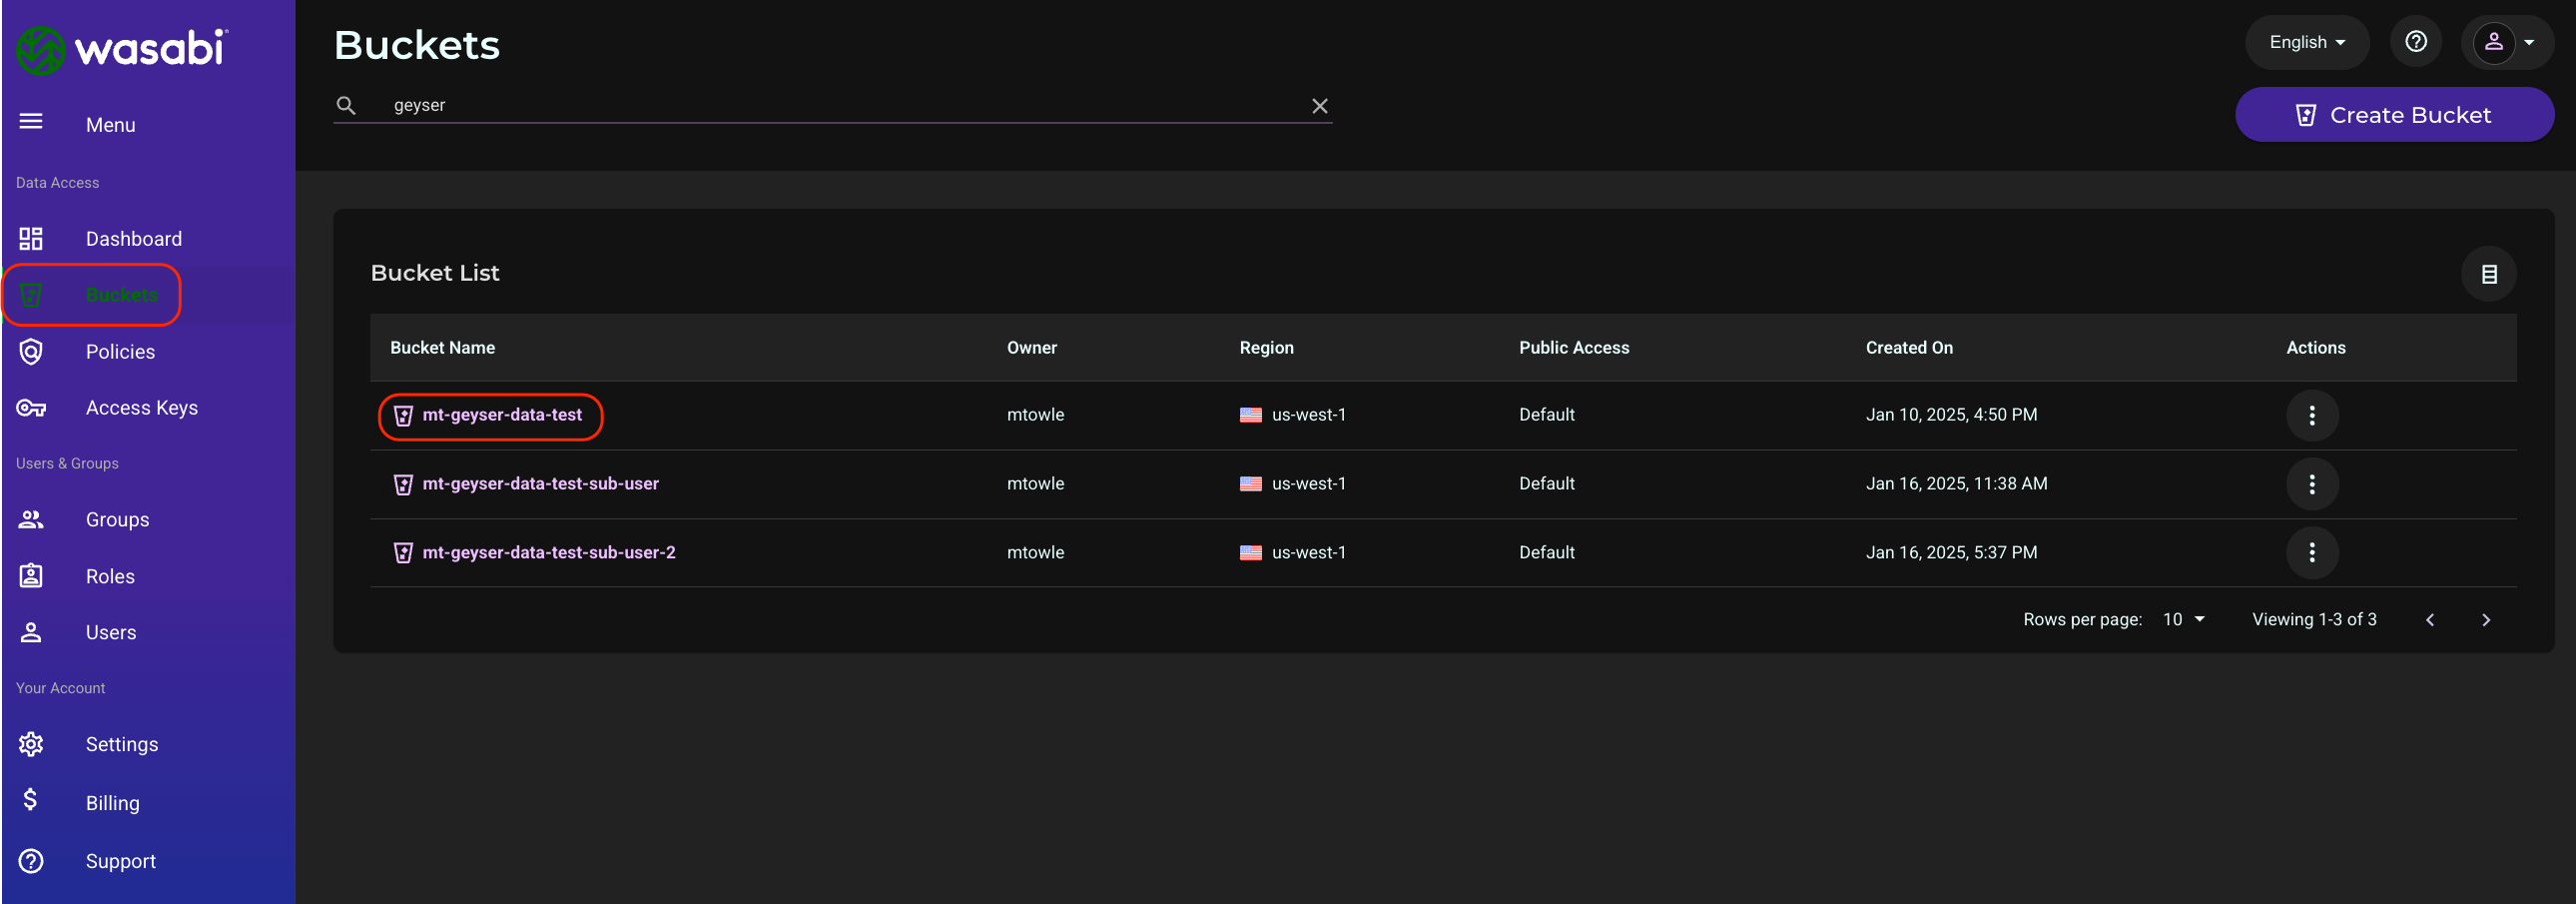
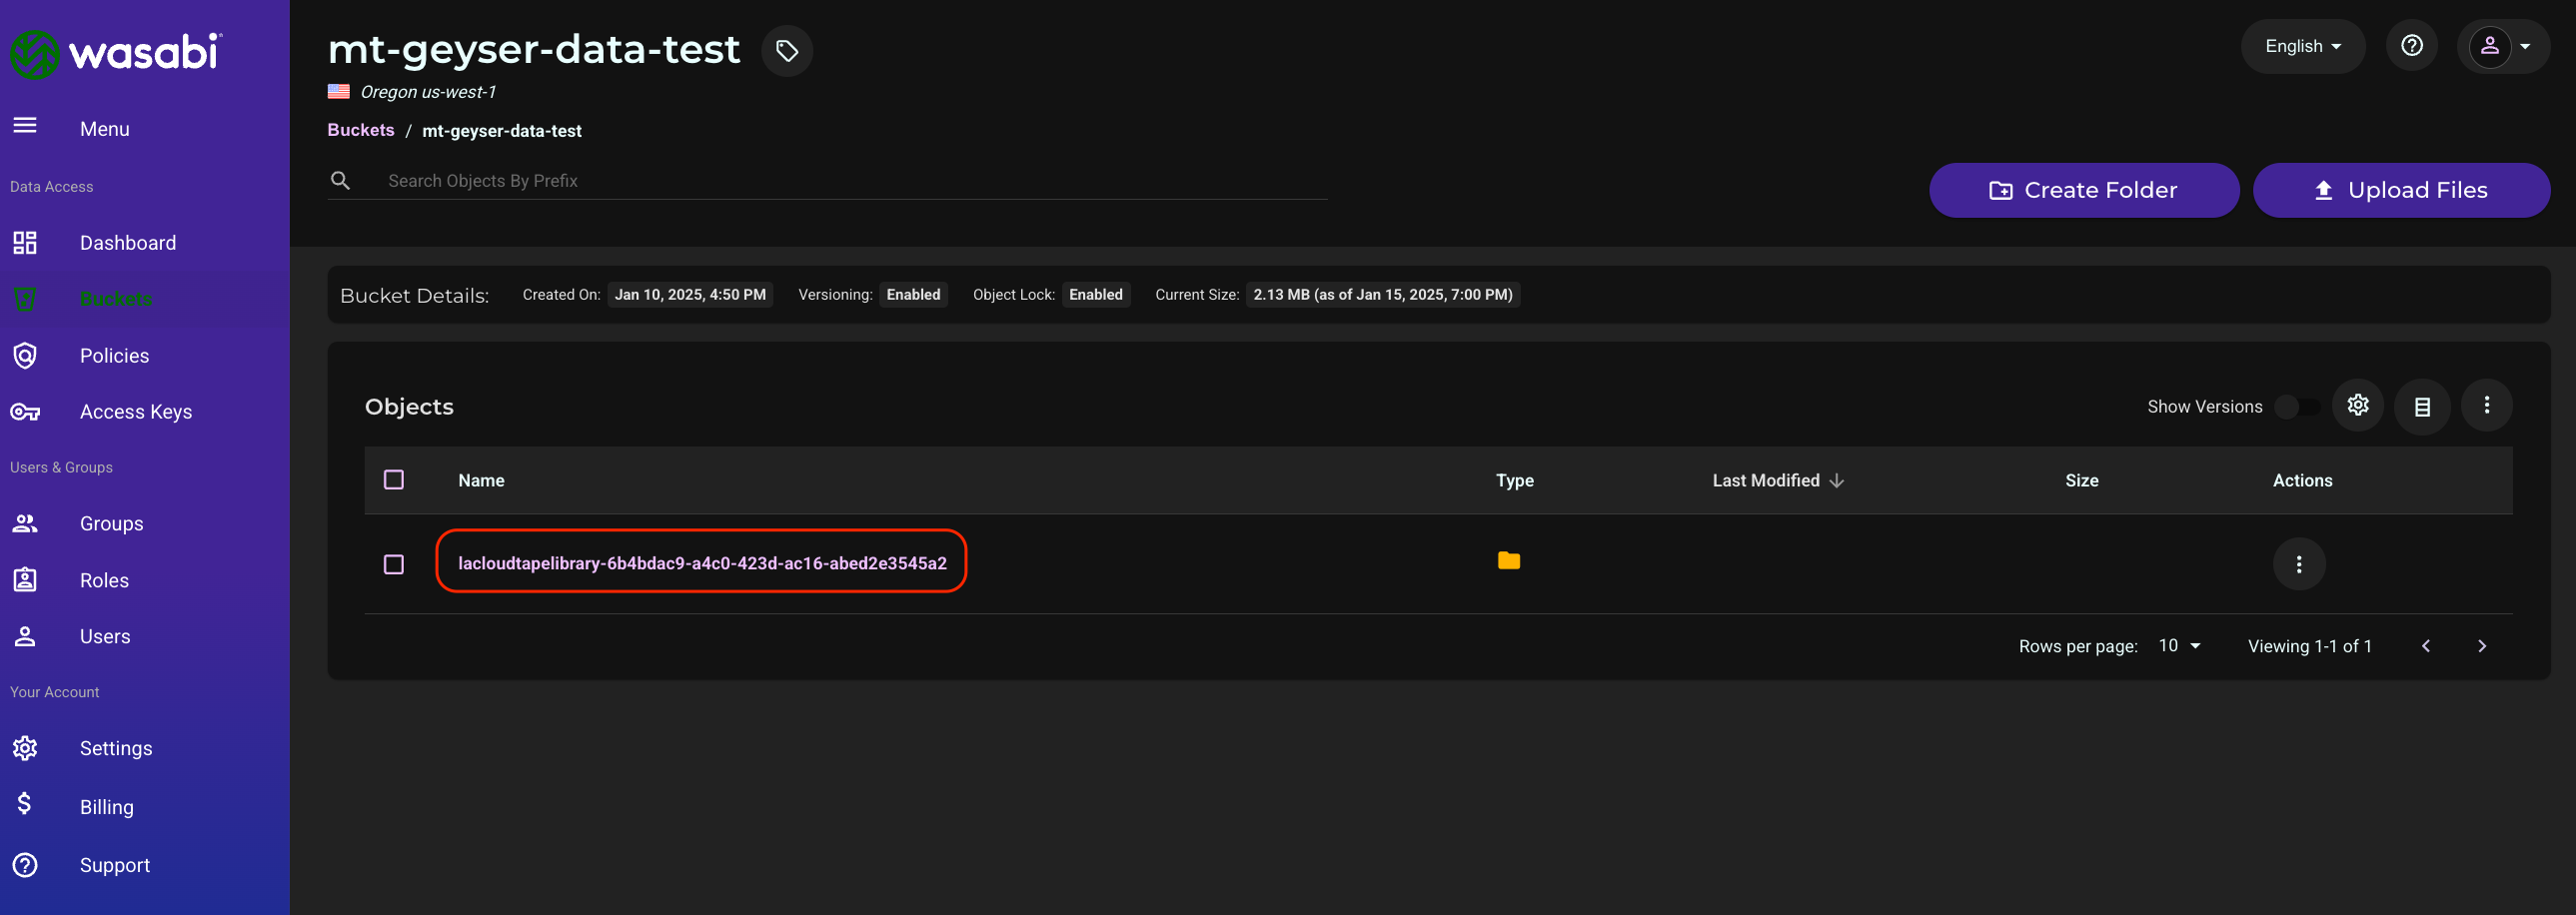
- When the file was copied from Geyser to your Wasabi bucket, a folder beginning with the name of your bucket was created. Click on that folder.
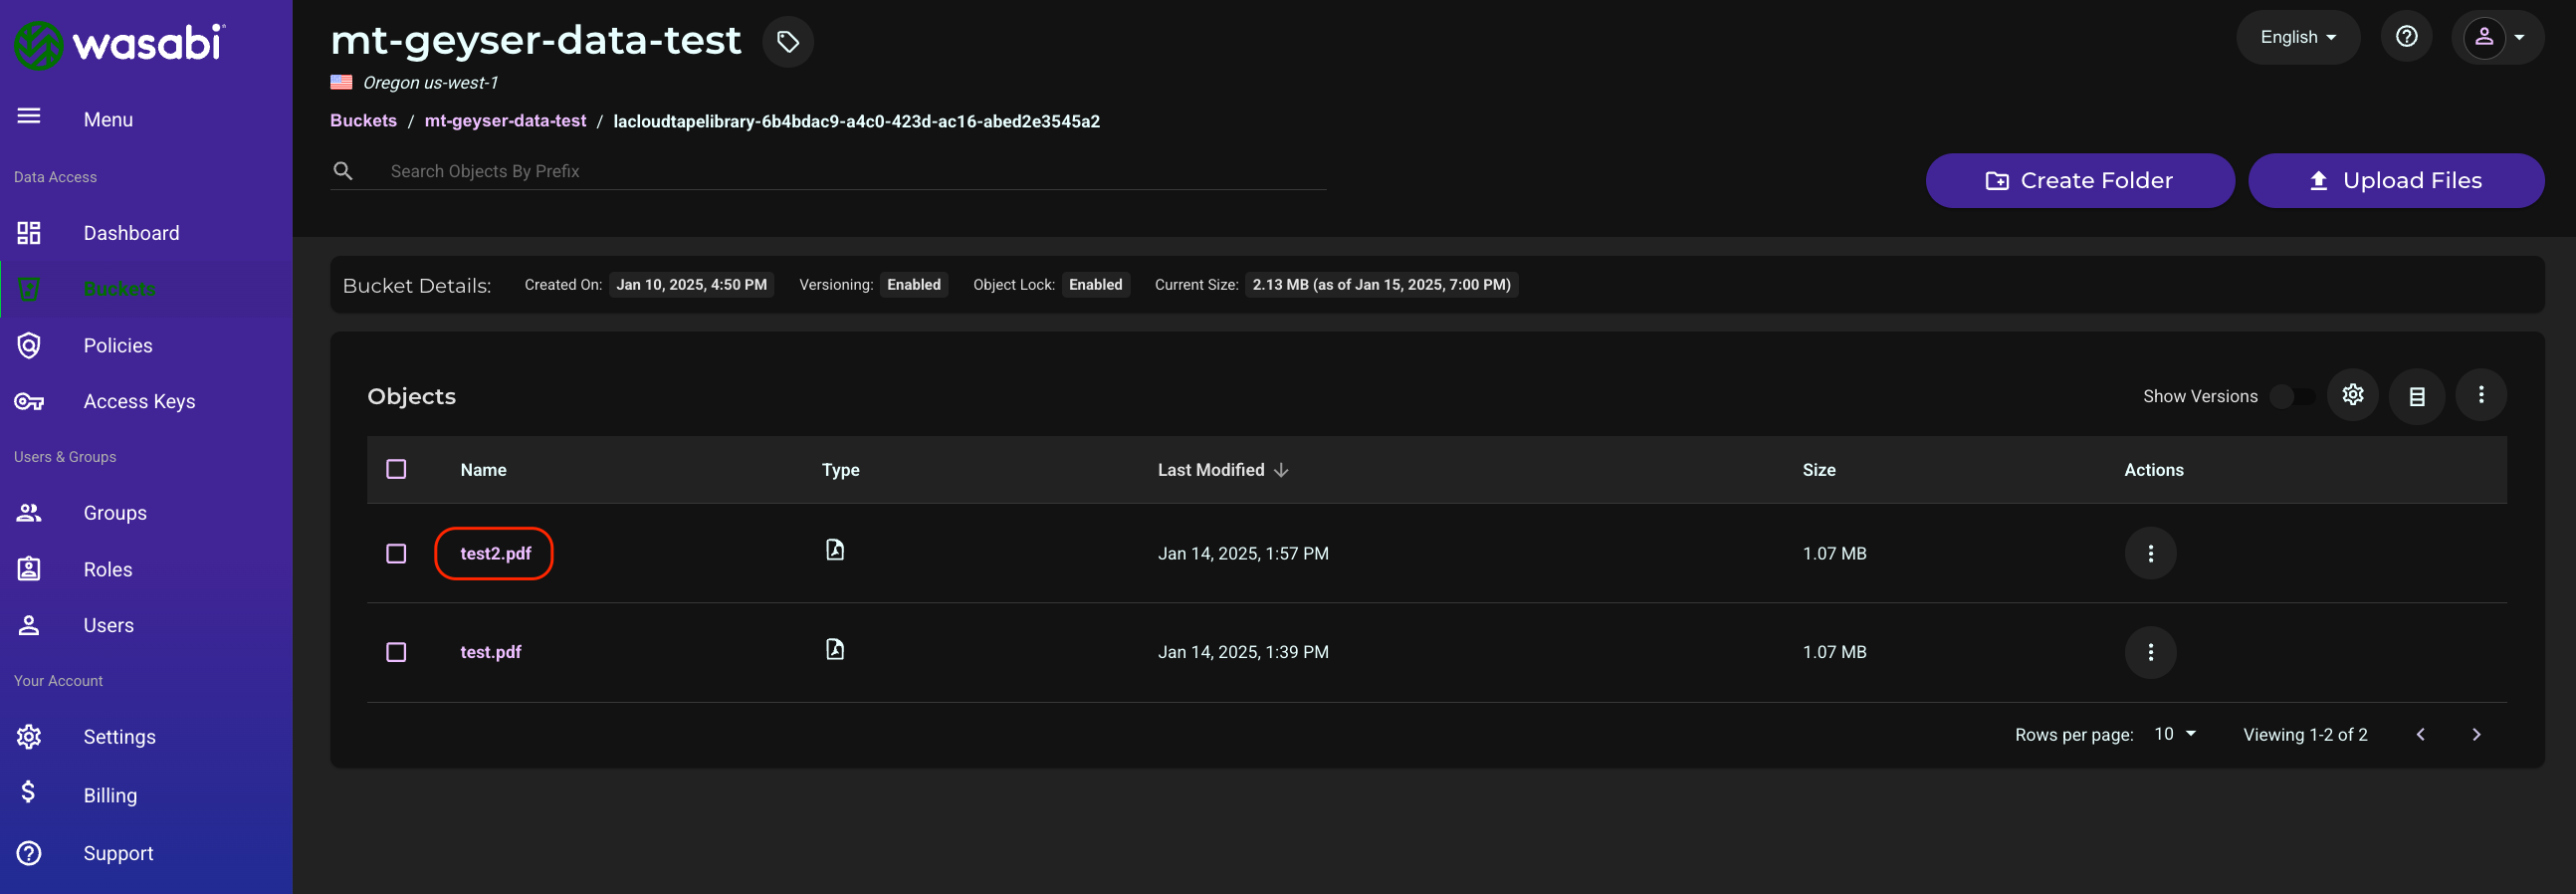
- You will see your file in your bucket. If the file was nested in a folder structure, click on the folder name(s) until you reach your test file.
Support
Please reach out to support@geyserdata.com with any Geyser-related questions, or to support@wasabi.com with any Wasabi-related questions.