How do I use Arcserve ShadowXafe with Wasabi?
Arcserve ShadowXafe is a data recovery and backup software solution that brings comprehensive, SLA-driven management for complete data protection. ShadowXafe has been validated with Wasabi.
Note: Your specific backup software application handles the data restoration process. As there are many potential variables that will affect your unique environment, it is strongly recommended that you seek the guidance of your backup software's technical support team if you encounter difficulty or have application-specific inquiries.
Prerequistes
Active ShadowXafe subscription
Access to OneSystem Management console
An active Wasabi account
Setting Up the Environment in OneSystem
Log in to the OneSystem management interface.
Refer to the ShadowXafe deployment guide to set up the OneSystem.
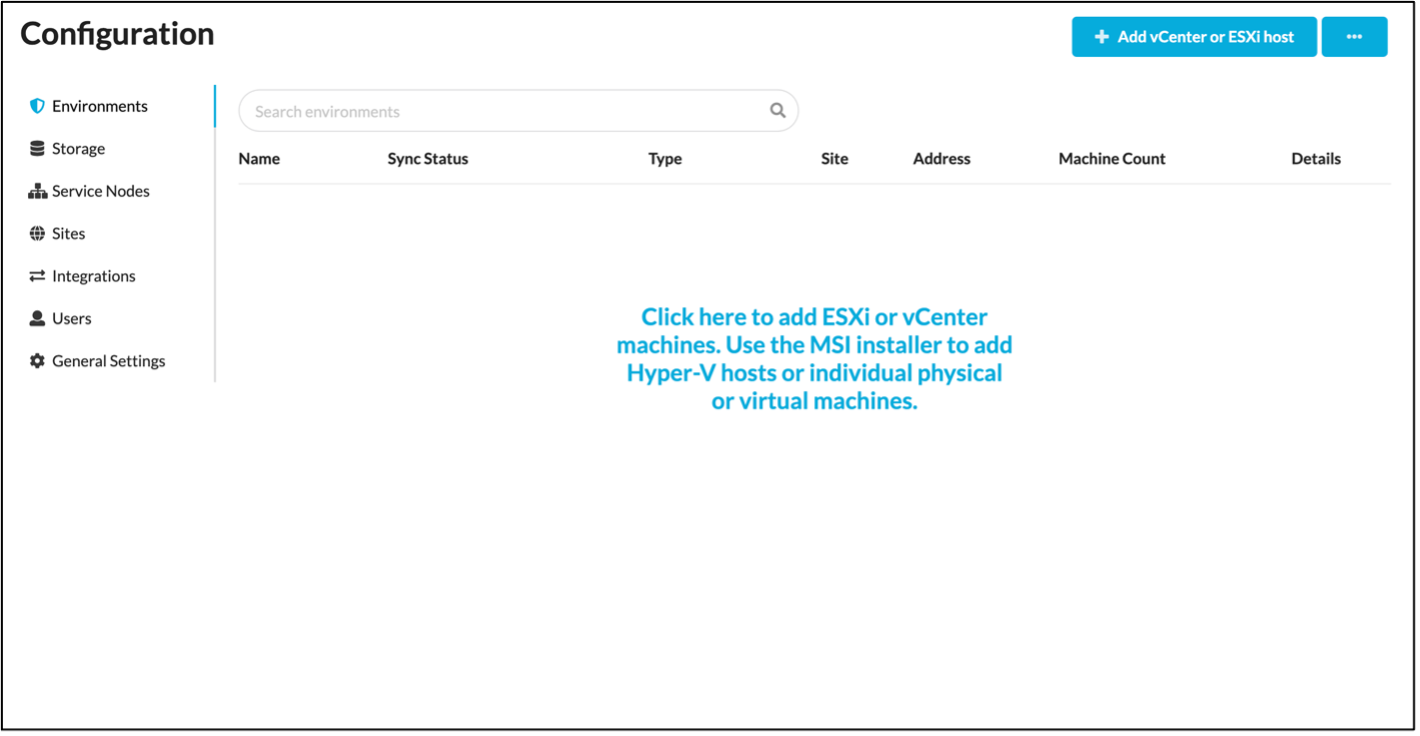
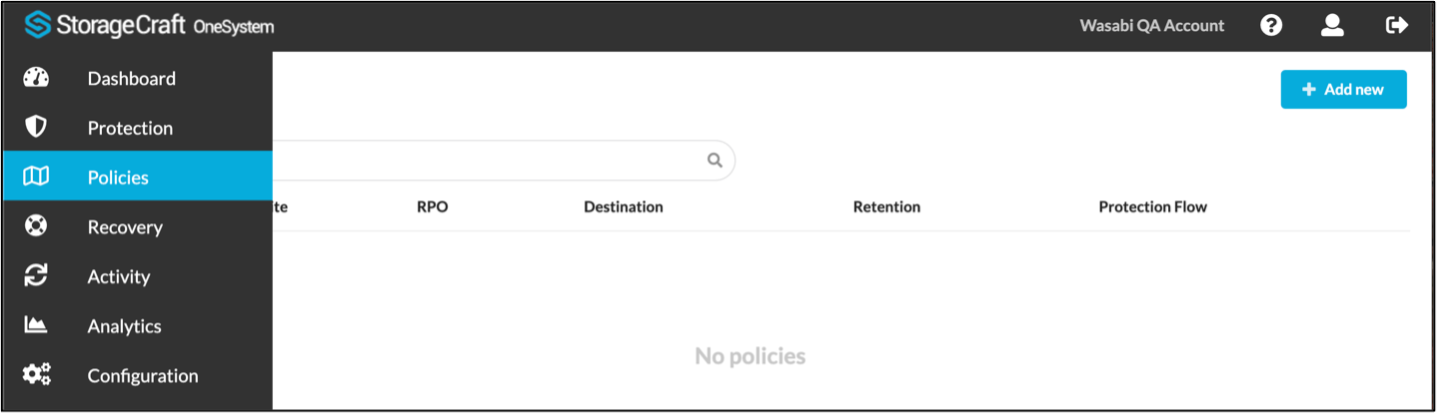
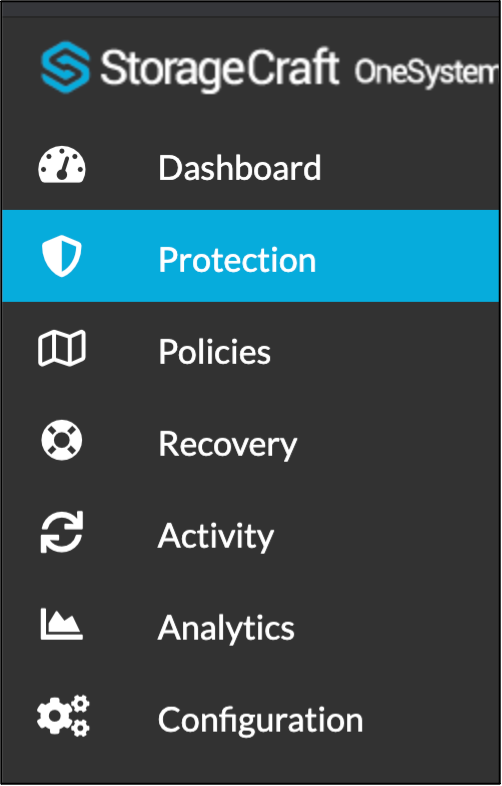
Navigate to the Configuration tab in the menu.
.png)
On the Configuration page, navigate to the Sites tab and click Add Site.
.png)
Provide a Site name and click Save.
.png)
The Sites page will now display the site created above.
.png)
Now you must deploy the service node on the vCenter server.
Download and mount the Deployment tool iso file.
From the Welcome tab, click Next to run the StorageCraft Deployment tool.
.png)
The end-user license agreement (EULA) is displayed.
From the EULA tab, review the EULA, check the "I Agree" check box, and then click Next.
.png)
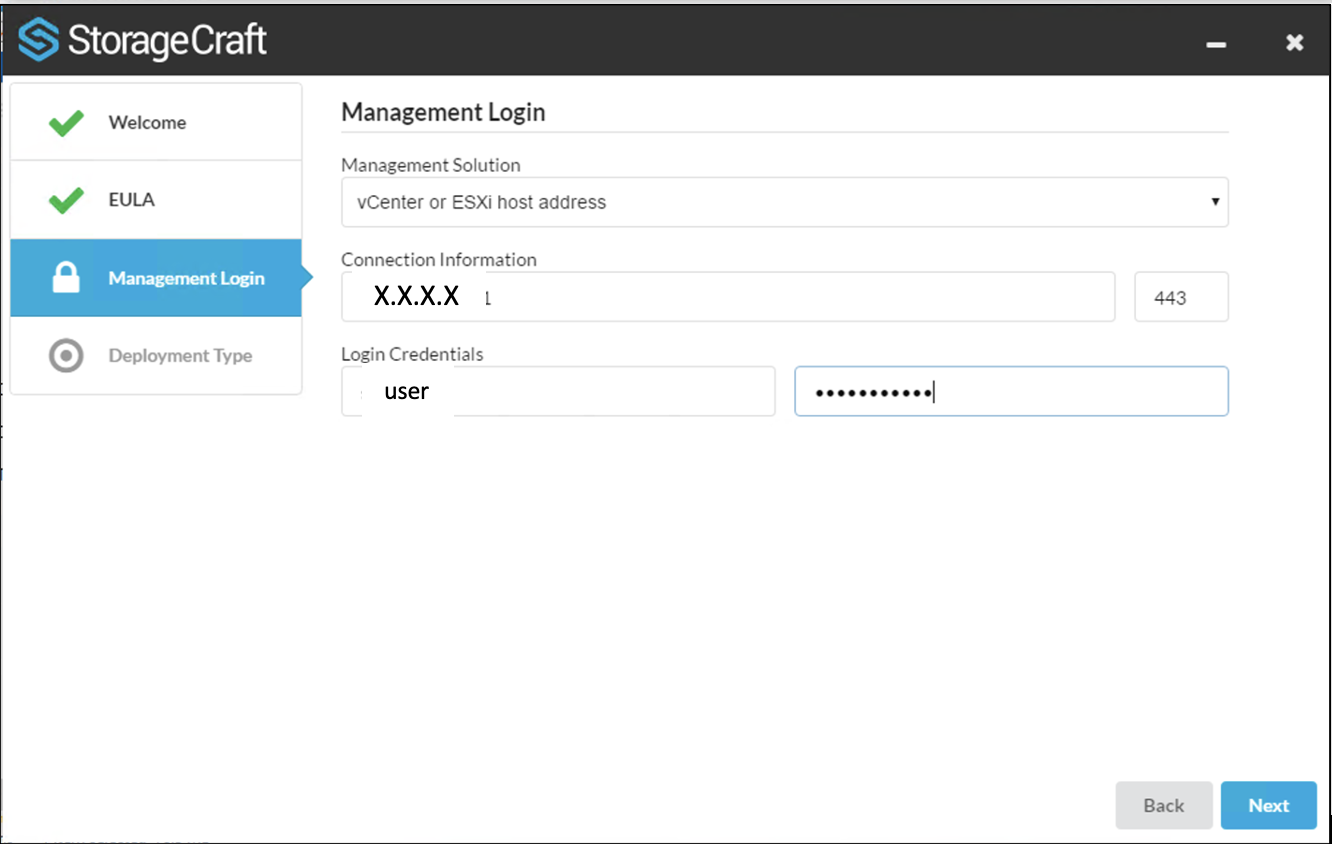
From the Management Login tab, in the Management Login section, select vCenter or ESXi host address from the Management Solution drop-down, then enter the user credentials, and click Next.
From the Deployment Type tab, in the Deployment Type section, select Service Node(s) managed with OneSystem and click then Next.
.png)
For more information on the deployment options, refer to ShadowXafe documentation.
From the Deploy Preparation tab, enter the administrative username and password for the OneSystem Management portal, and then click Next.
.png)
From the Site window, in the Service node site assignment drop-down menu, select your site, and then click Next.
.png)
The Service Node Targets tab displays the Hosts managed by the vCenter Server.
From the Service Node Targets tab, in the Host section, select the host where the service node is to be deployed and provide the required information, then click Next.
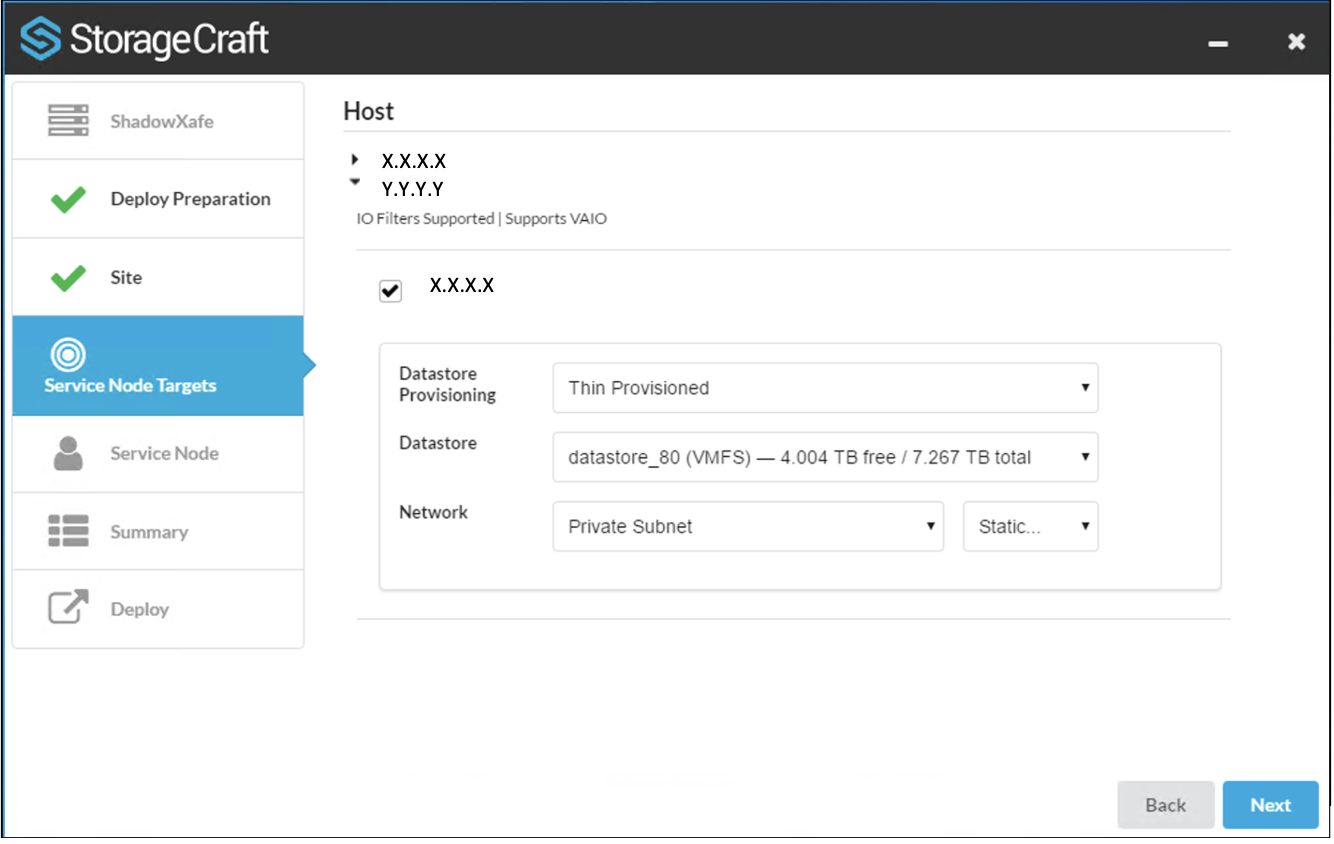
In the Static IP Configuration window, enter the network information for the Service node and click OK.
.png)
From the Service Node tab, in the Service Node section, create an account to administer the service node and then click Next.
.png)
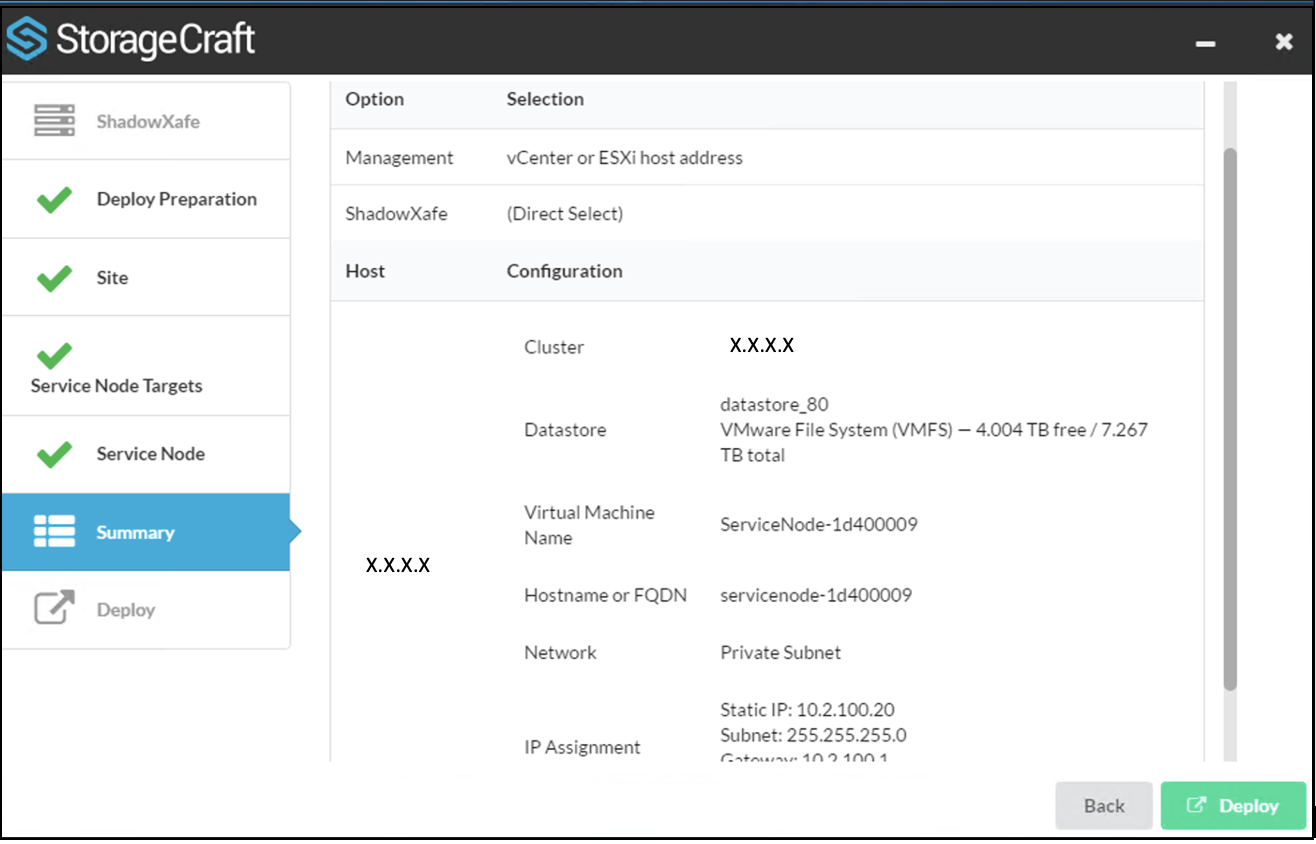
From the Summary tab, review the settings configured for the service node. Click Deploy.
When the deployment is finished, log in to the OneSystem and verify that the Service node is listed in the Service Node tab under Configuration.
.png)
Navigate to the Environments tab and click Add vCenter or ESXi host to add your environment.
Configuring Wasabi as Storage
To add Wasabi cloud storage as a target, navigate to the Storage tab and click Add Storage.
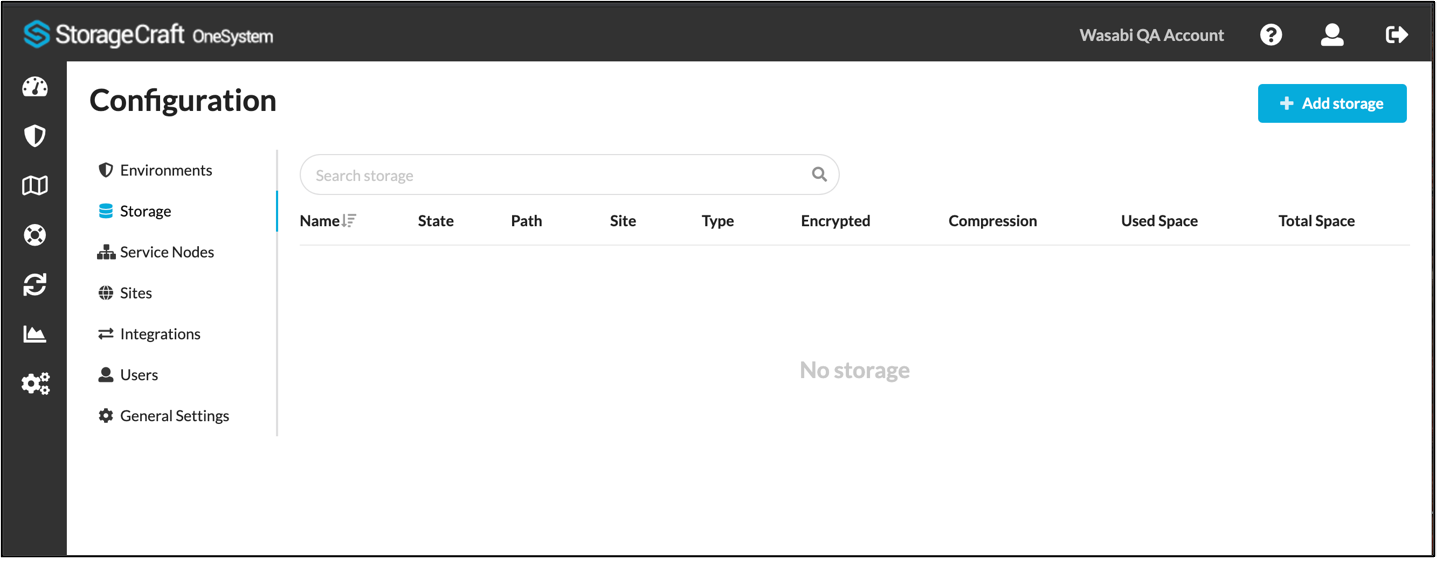
The Add Storage window is displayed.
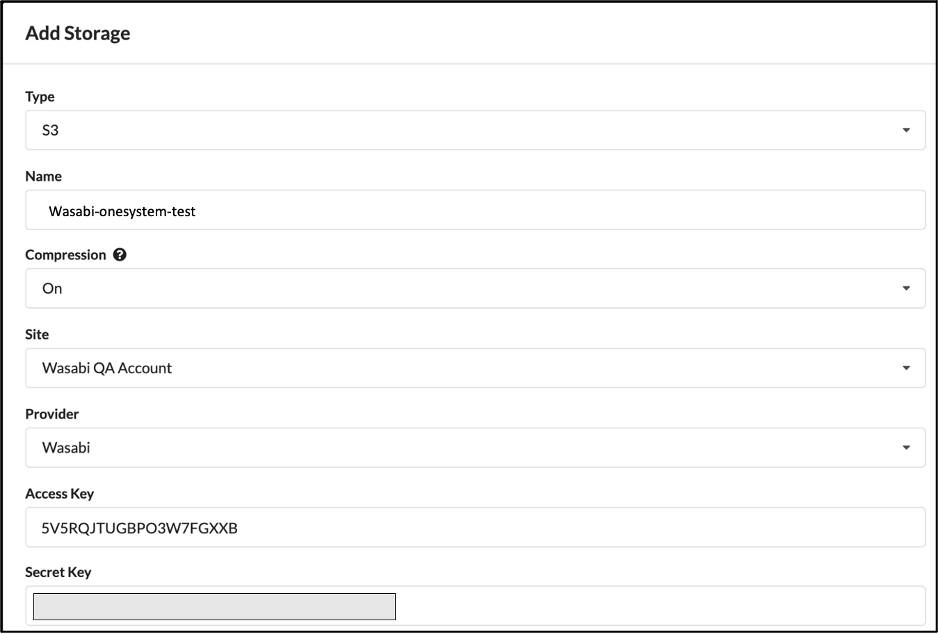
In the Add Storage window, select or provide the following details listed below, then click Save.
Type - S3
Name - provide an appropriate name for the storage
Compression - On
Site - select the appropriate site
Provider - select Wasabi
Access Key
Secret Key
Region Name - region where the bucket is located
Bucket Name
Encryption Password
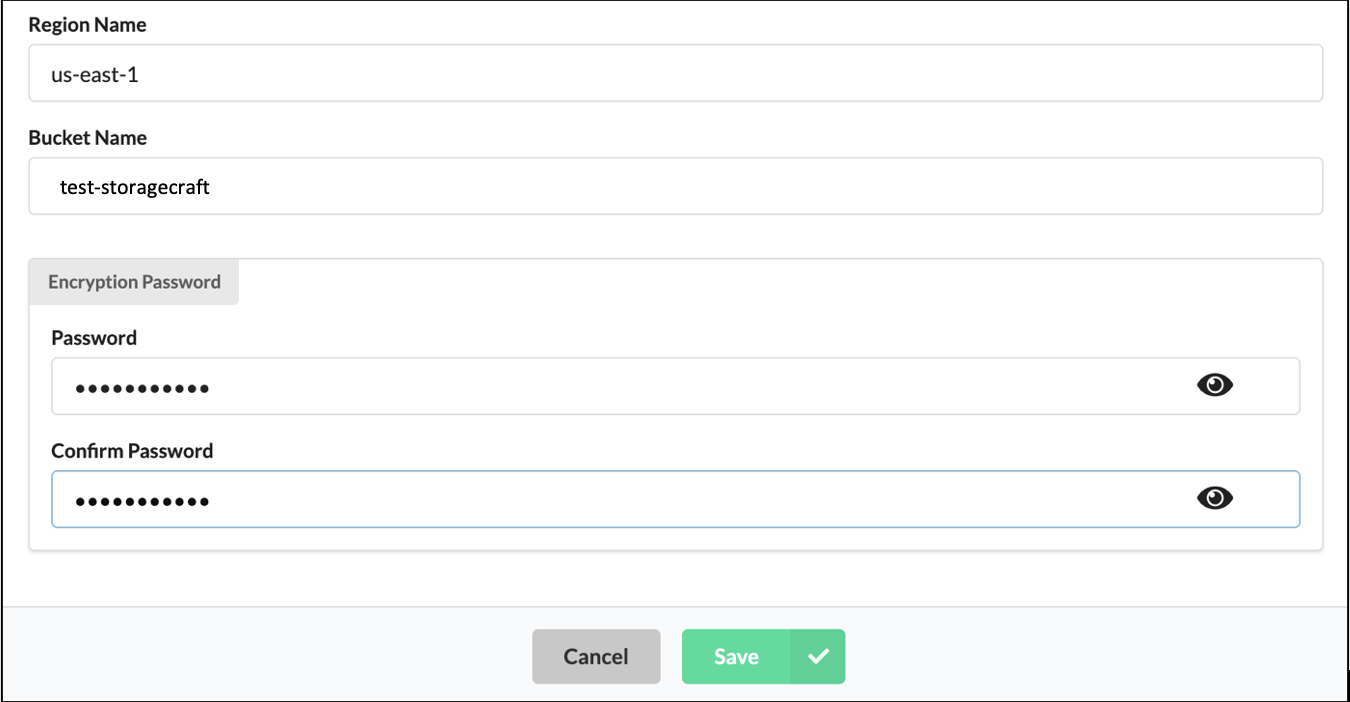
Note: This configuration example covers the use of Wasabi's us-east-1 storage region. To use other Wasabi storage regions, use the appropriate Wasabi region names listed below.
Wasabi US East 1 (N. Virginia): us-east-1Wasabi US East 2 (N. Virginia): us-east-2
Wasabi US Central 1 (Texas): us-central-1
Wasabi US West 1 (Oregon): us-west-1
Wasabi EU Central 1 (Amsterdam): eu-central-1
Wasabi EU West 1 (United Kingdom): s3.eu-west-1
Wasabi EU West 2 (Paris): s3.eu-west-2
Wasabi AP Northeast 1 (Tokyo): s3.ap-northeast-1
Wasabi AP Northeast 2 (Osaka): s3.ap-northeast-2
The Wasabi cloud storage site selected will now be listed on the Storage tab.

Configuring Protection flows using policies
Adding Protection to the VMs involves creating policies and assigning the policies to the required VMs. In this section, three different protection flows can be configured using Wasabi.
Designing a Direct-to-Cloud backup protection flow
The Direct-to-Cloud protection flow uses Wasabi as the primary destination for backups.Navigate to the Policies tab and click Add new to create a new policy.
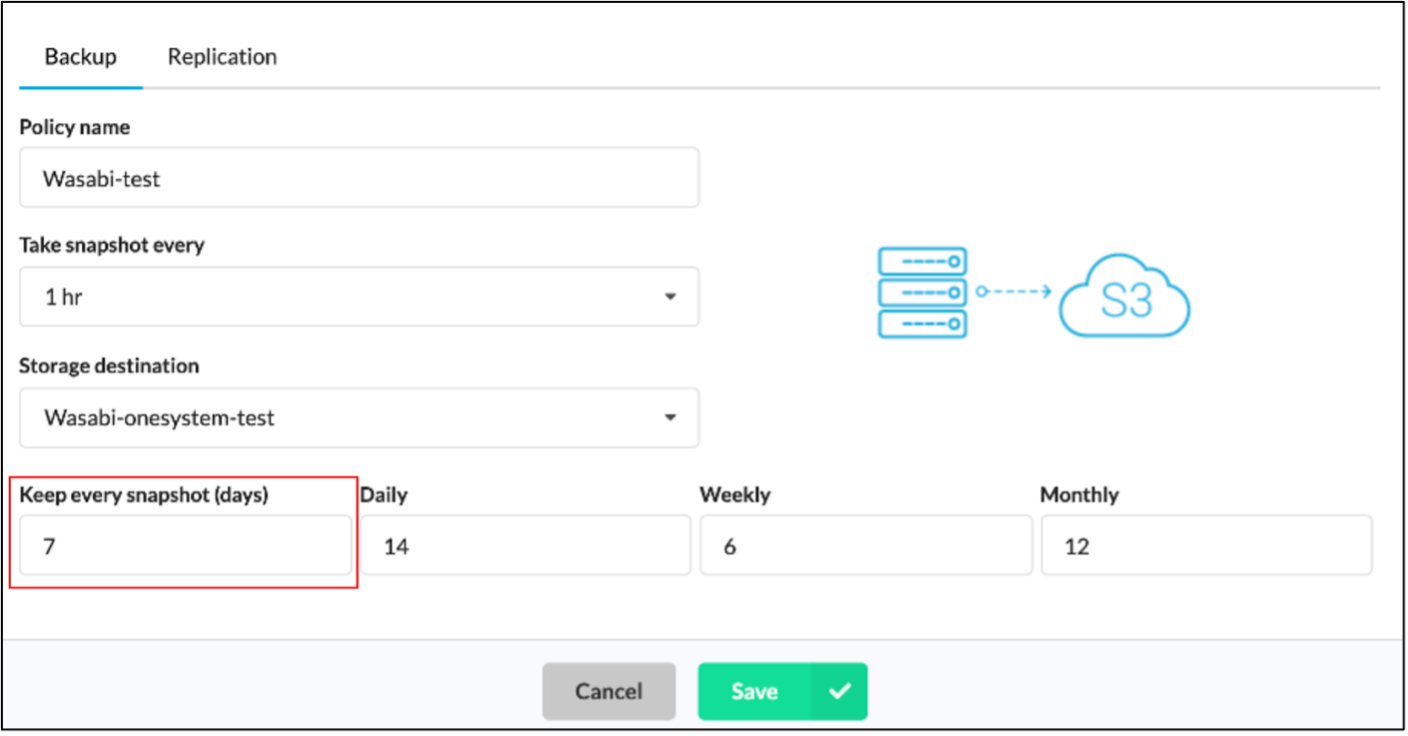
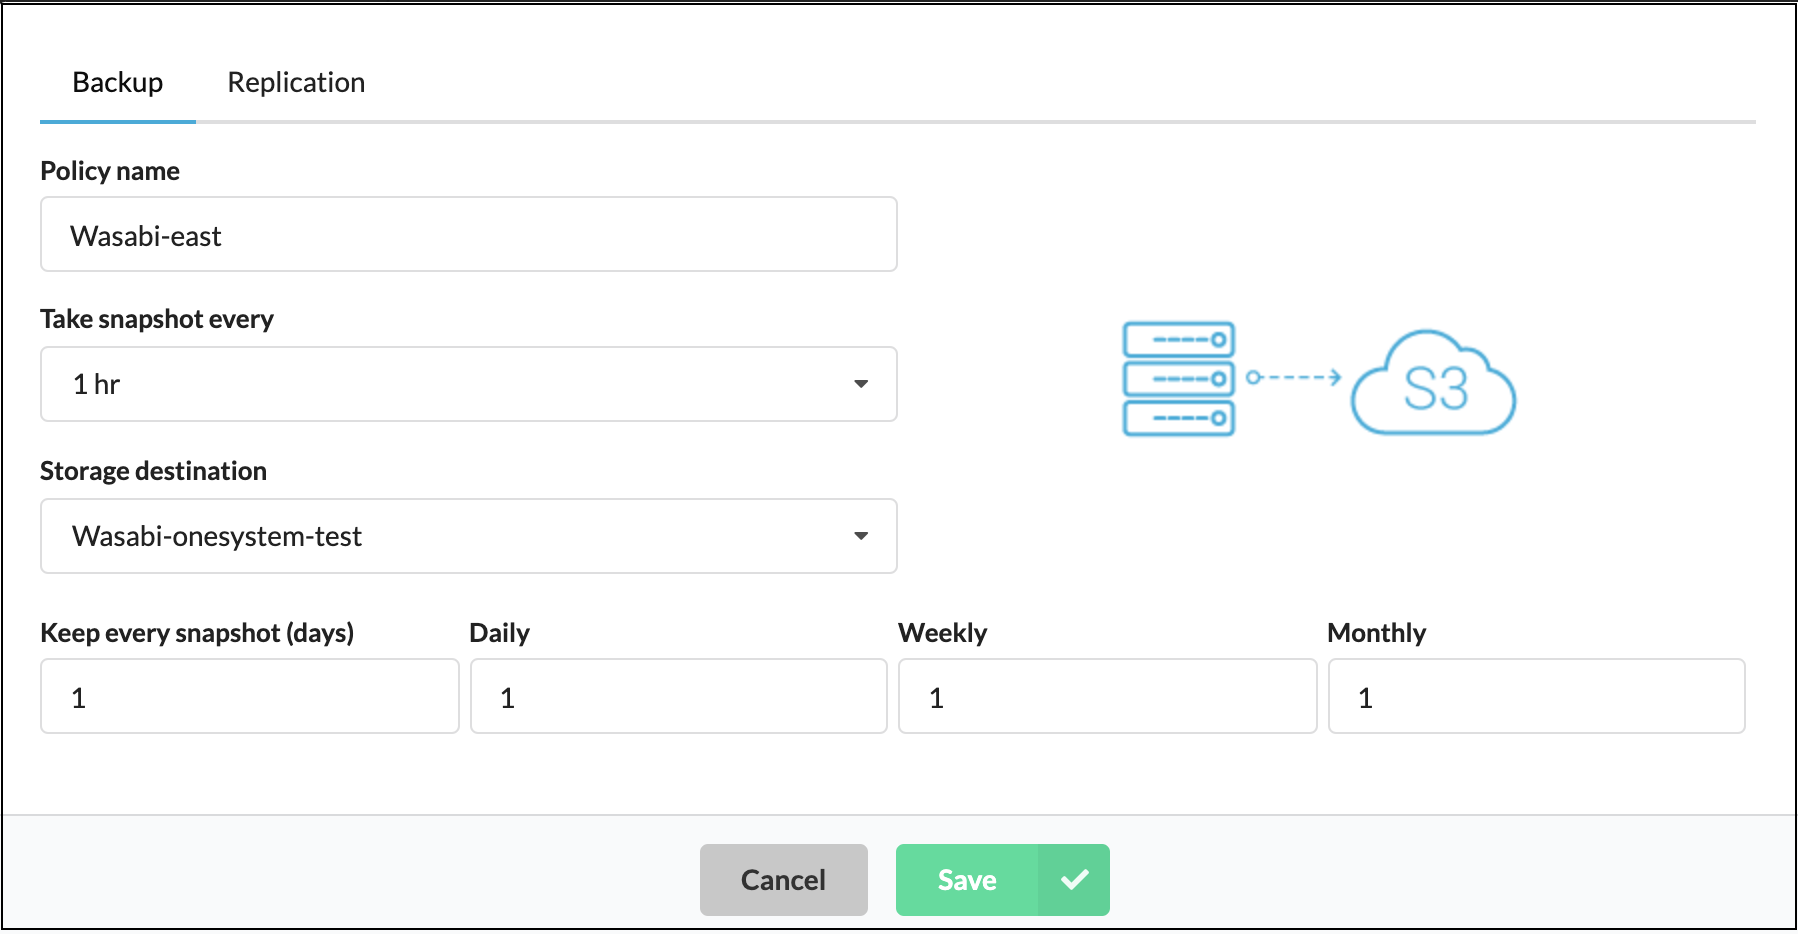
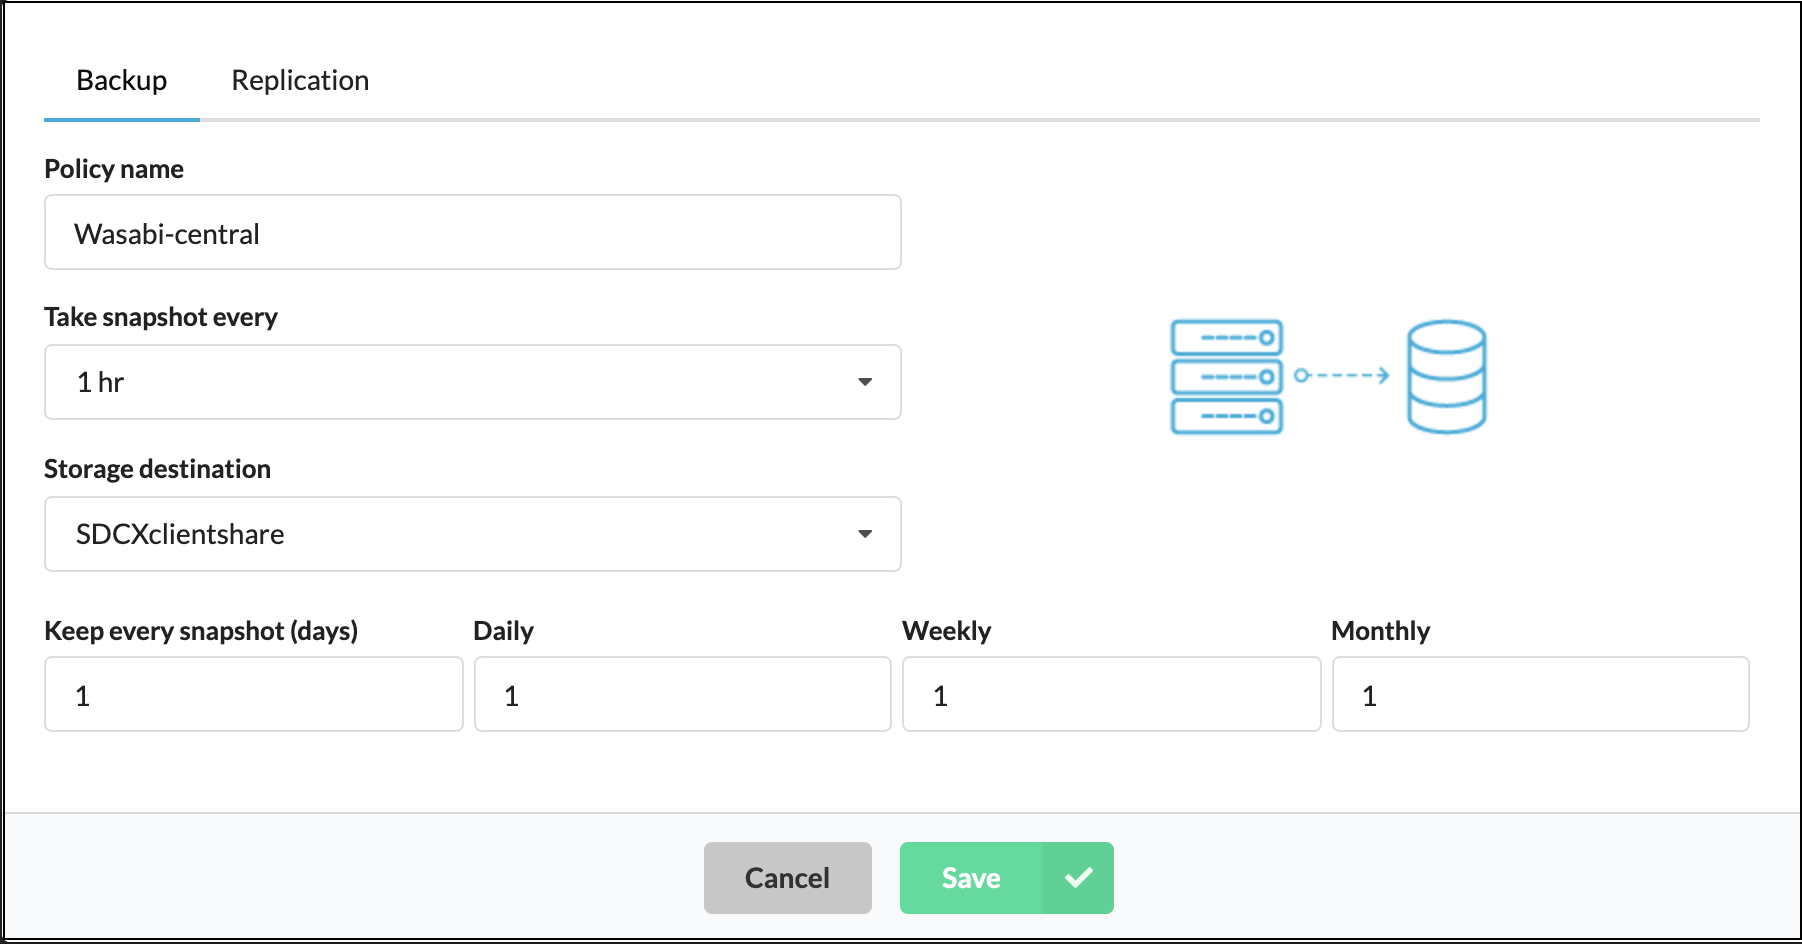
In the Add policy window, provide a policy name and select the above-configured storage as the Storage Destination. Provide the desired frequency for taking snapshots and click Save.
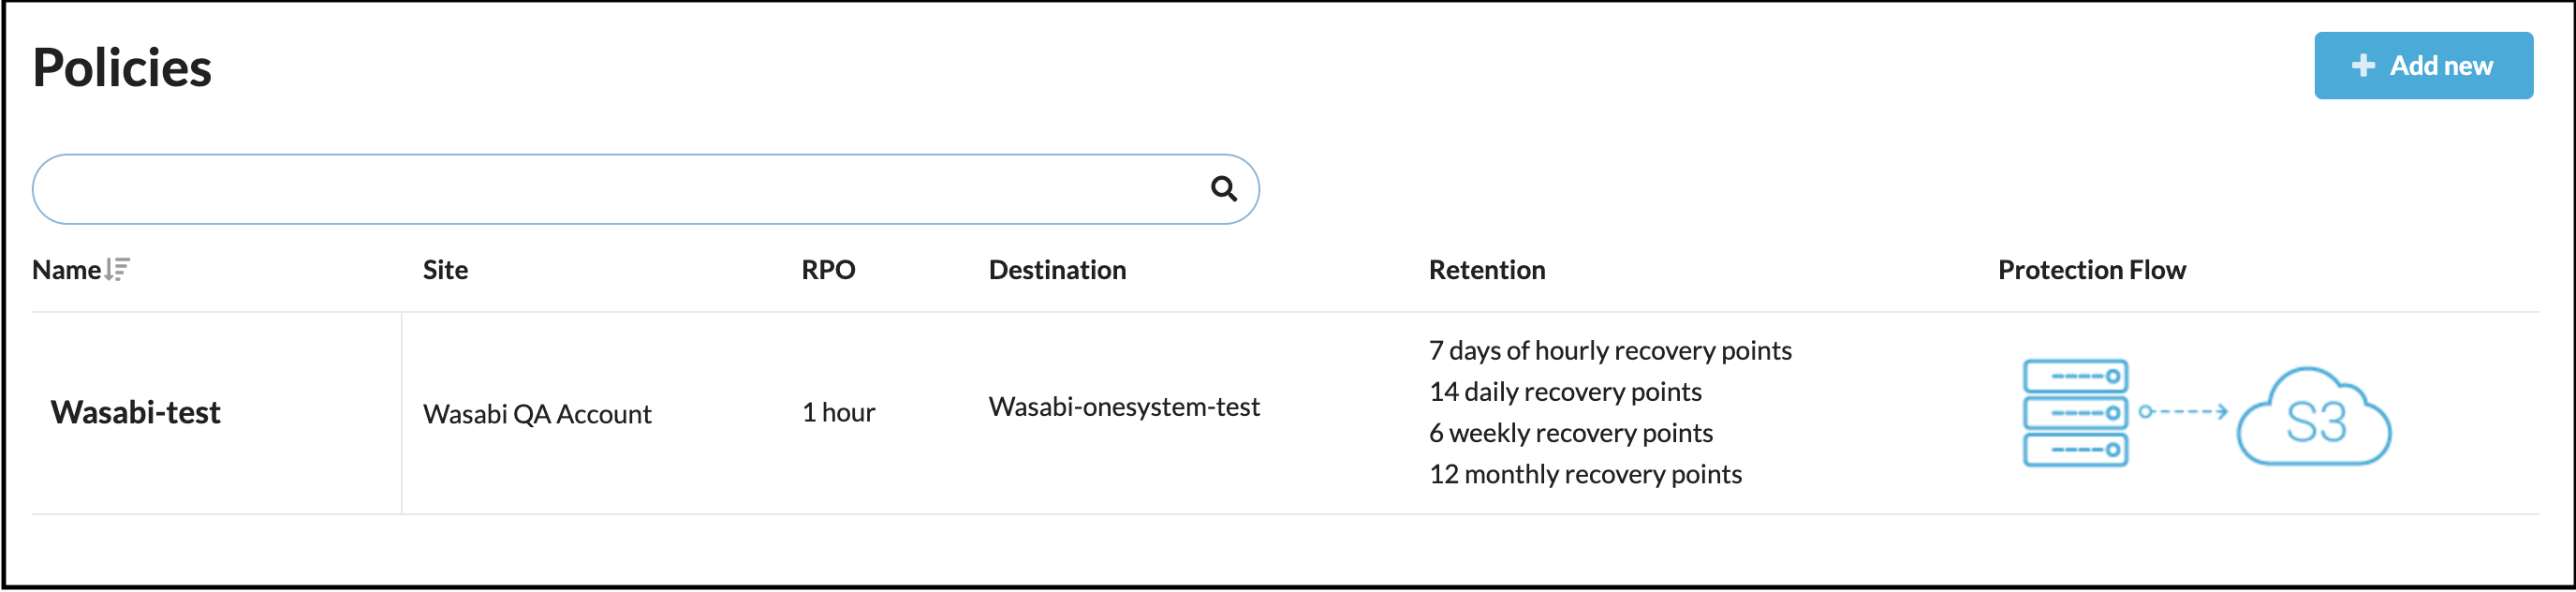
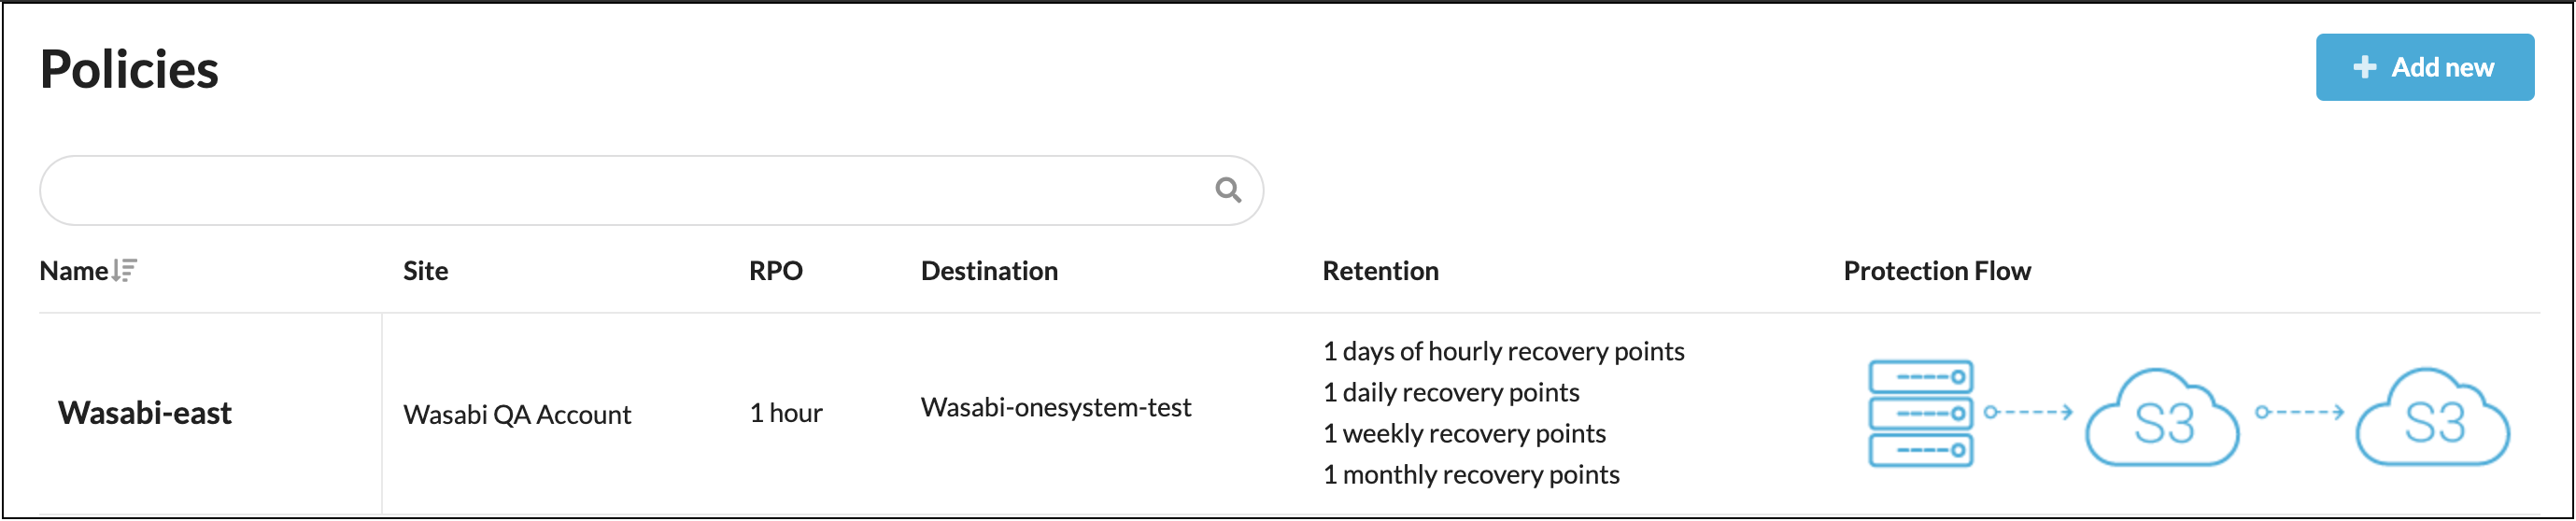
The Policies tab displays the policy created above.
Designing a Direct-to-Cloud backup protection flow with Cloud Replication services
When designing the protection flow for your policy, you have the option to create a replication target if needed. In the example below, we configure a protection flow with a Wasabi bucket as a backup destination and enable replication to replicate the backup data to a different Wasabi region.
The Wasabi bucket used for replication must be added as Storage by following the steps outlined above.
Note that during replication, the data flows from the Backup destination to the Service Node, then to the Replication target.
Navigate to the Policies tab on the left side and click Add new to create a new policy. In the Add policy window, provide a policy name and select the desired storage as the Storage Destination. Provide the desired frequency to take the snapshots.
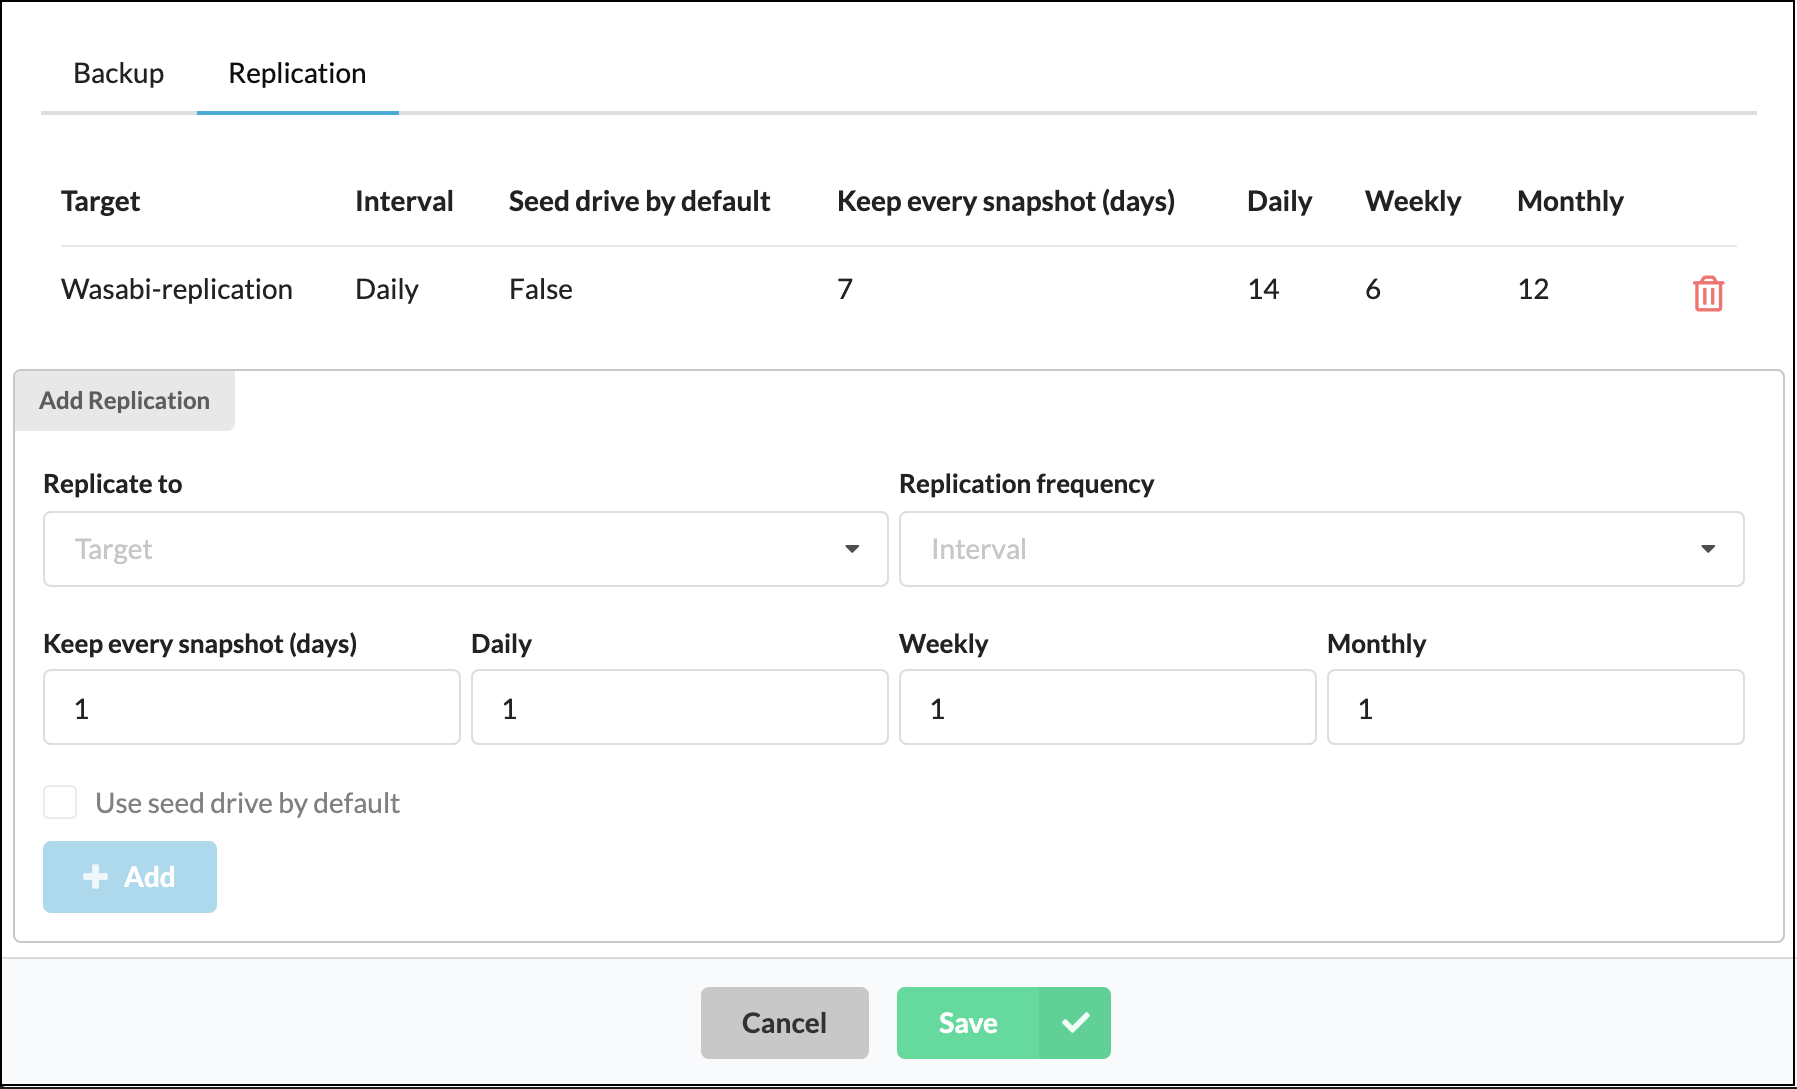
In the Add Replication section, select your Wasabi storage in the Replicate to destination, configure the desired Replication Frequency, and click Add.
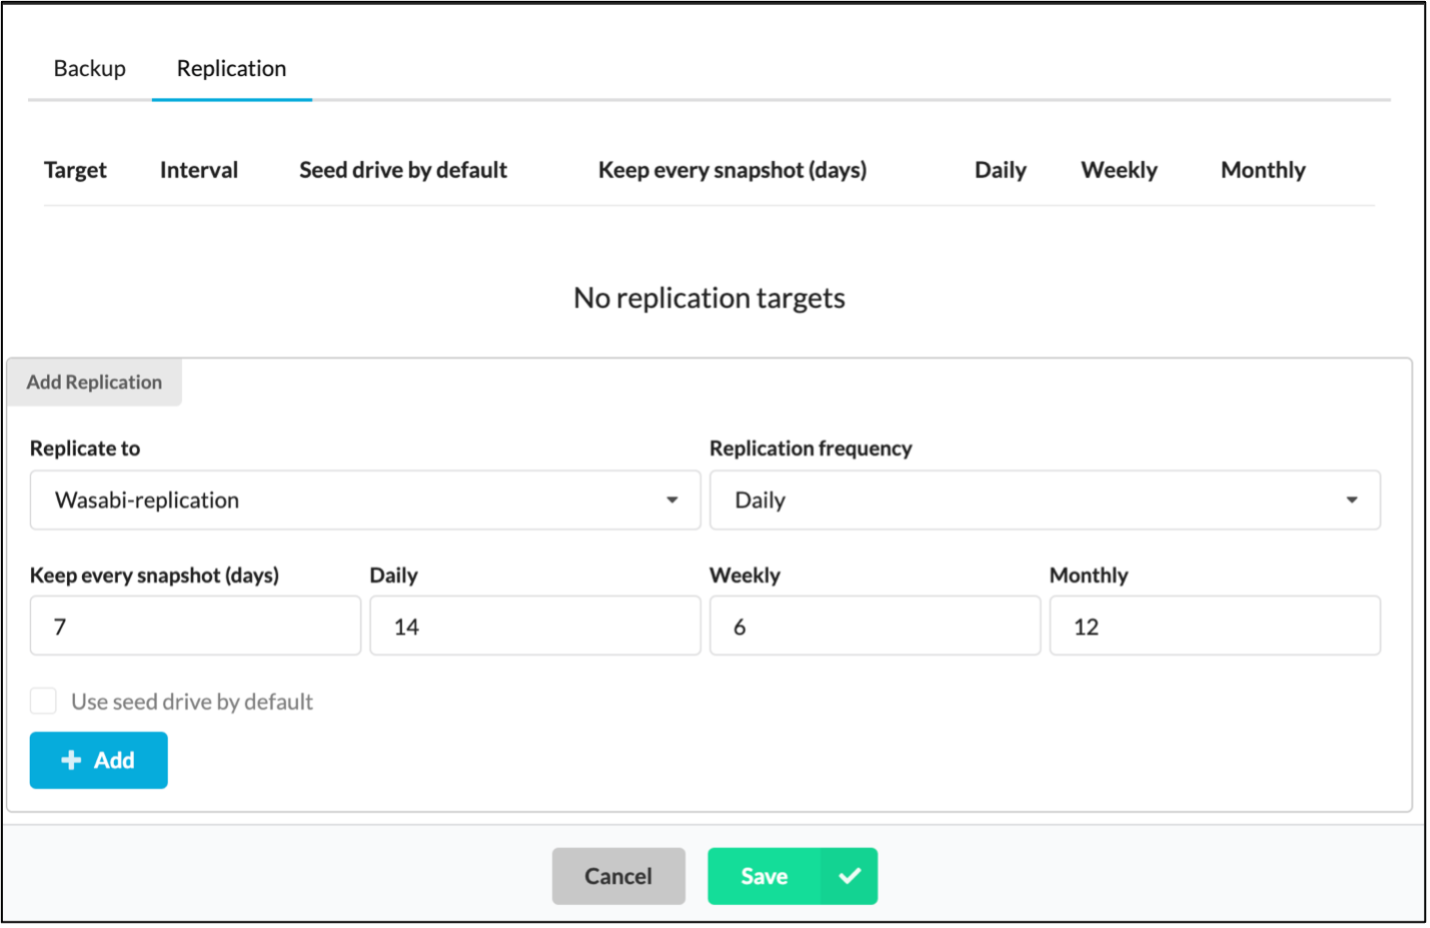
The Wasabi replication storage destination is added to the Replication target.
.png)
Click Save to save the policy.
Designing a local backup protection flow with Cloud Replication services
In the example below, we configure a protection flow with an SMB share as a backup destination and enable replication to replicate the backup data to Wasabi.
The local storage that will be used for replication will need to be added as Storage (select the appropriate Storage Type - NFS/SMB/iSCSI)
Navigate to the Policies tab on the left side and click Add new to create a new policy. In the Add policy window, provide a policy name and select the configured SMB storage as the Storage Destination. Provide the desired frequency to take the snapshots.
In the Add Replication section, select your Wasabi storage as the "Replicate to" destination, configure the desired replication frequency, and click Add.
.png)
The Wasabi-replication storage destination is added to the Replication target.
Click Save to save the policy. The Policies page lists the policies that depict the different protection flows.
.png)
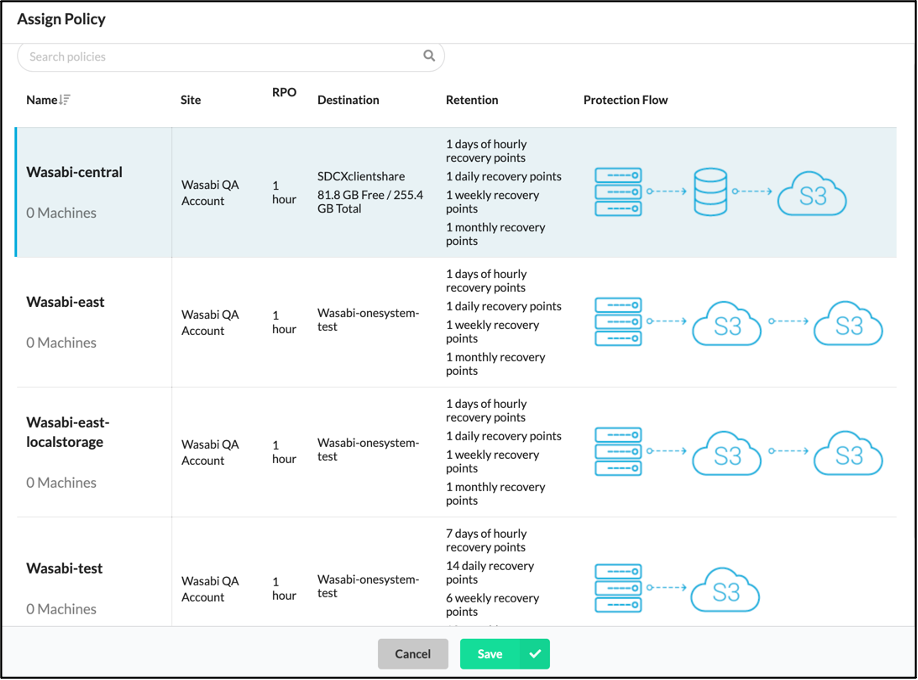
Assigning policies to the VMs
To assign policies to the VMs, navigate to the Protection tab in the left-side menu.
Select the required VMs and click Assign policy.
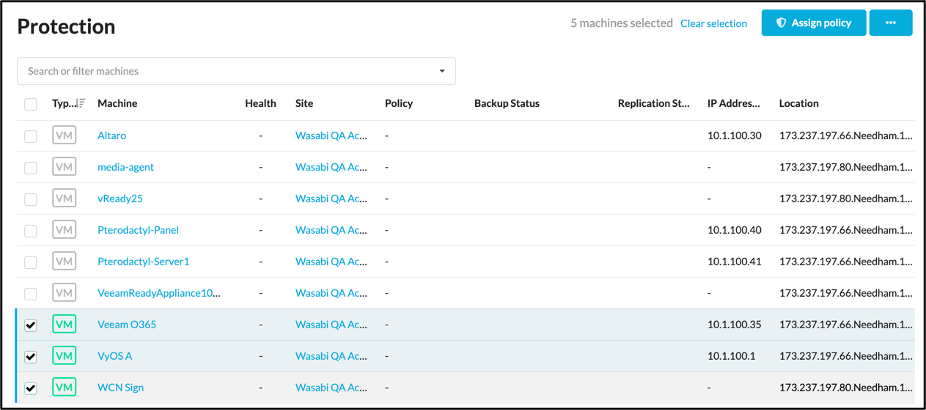
Select the desired policy and click Save.
The backups will now be saved in the bucket specified in the Storage destination configuration.
Enable Wasabi's object lock bucket for ShadowXafe backups
The section below outlines how to configure Wasabi's Immutable object lock feature for ShadowXafe backups. To protect the backups from ransomware events, this implementation utilizes the object lock capabilities offered by Wasabi, which means the Compliance mode setting and the required retention periods will be set ONLY on Wasabi.
Note: ShadowXafe product line DOES NOT support S3 object lock API, Wasabi's object lock feature is leveraged to create an immutable backup.
To configure Wasabi's object lock-enabled bucket for ShadowXafe backups, please follow the instructions below
Create an object lock-enabled bucket. For more information click here.
Configure the Object Lock mode and the required retention period by following Steps 1-4 in the article "How do I set Object Lock Bucket Settings?"
Log in to the Onesystem. Follow the steps in Configuring Wasabi as a Storage (above) to add the object-locked enabled bucket as a storage target.
You are now ready to use this storage target in your Protection flows as outlined in the section for Configuring Wasabi as a Storage (above). Note: To configure the Keep every snapshot (days) value, set it higher than the retention period set in the Wasabi bucket.